The campaign continued to unfolded as the Carthaginians rolled a 2, allowing their forces to advance by 2 squares, followed by a roll of 3, positioning their army just shy of the city of Helios. At this point, a decision had to be made whether the Carthaginian army would venture inland at Helios or continue along the coastal road. The choice was made to proceed along the coast, and a roll of 4 determined their movement. The army token was moved forward by 4 squares but landed on a square labeled "Bridge Damaged," causing it to backtrack by 2 squares, ending up on the city square of Helios. Since the Carthaginian token passed through a city square during its movement, there will be a tabletop battle.
The final campaign activity was to advance the Roman battle readiness token. This is advanced by 3 squares for each Carthaginian dice roll. The readiness table will be used to determine what advantages the Romans will have in the last decisive battle, which will occur when the Carthaginian token reaches the city of Aurelia.
For details of the campaign rules see here
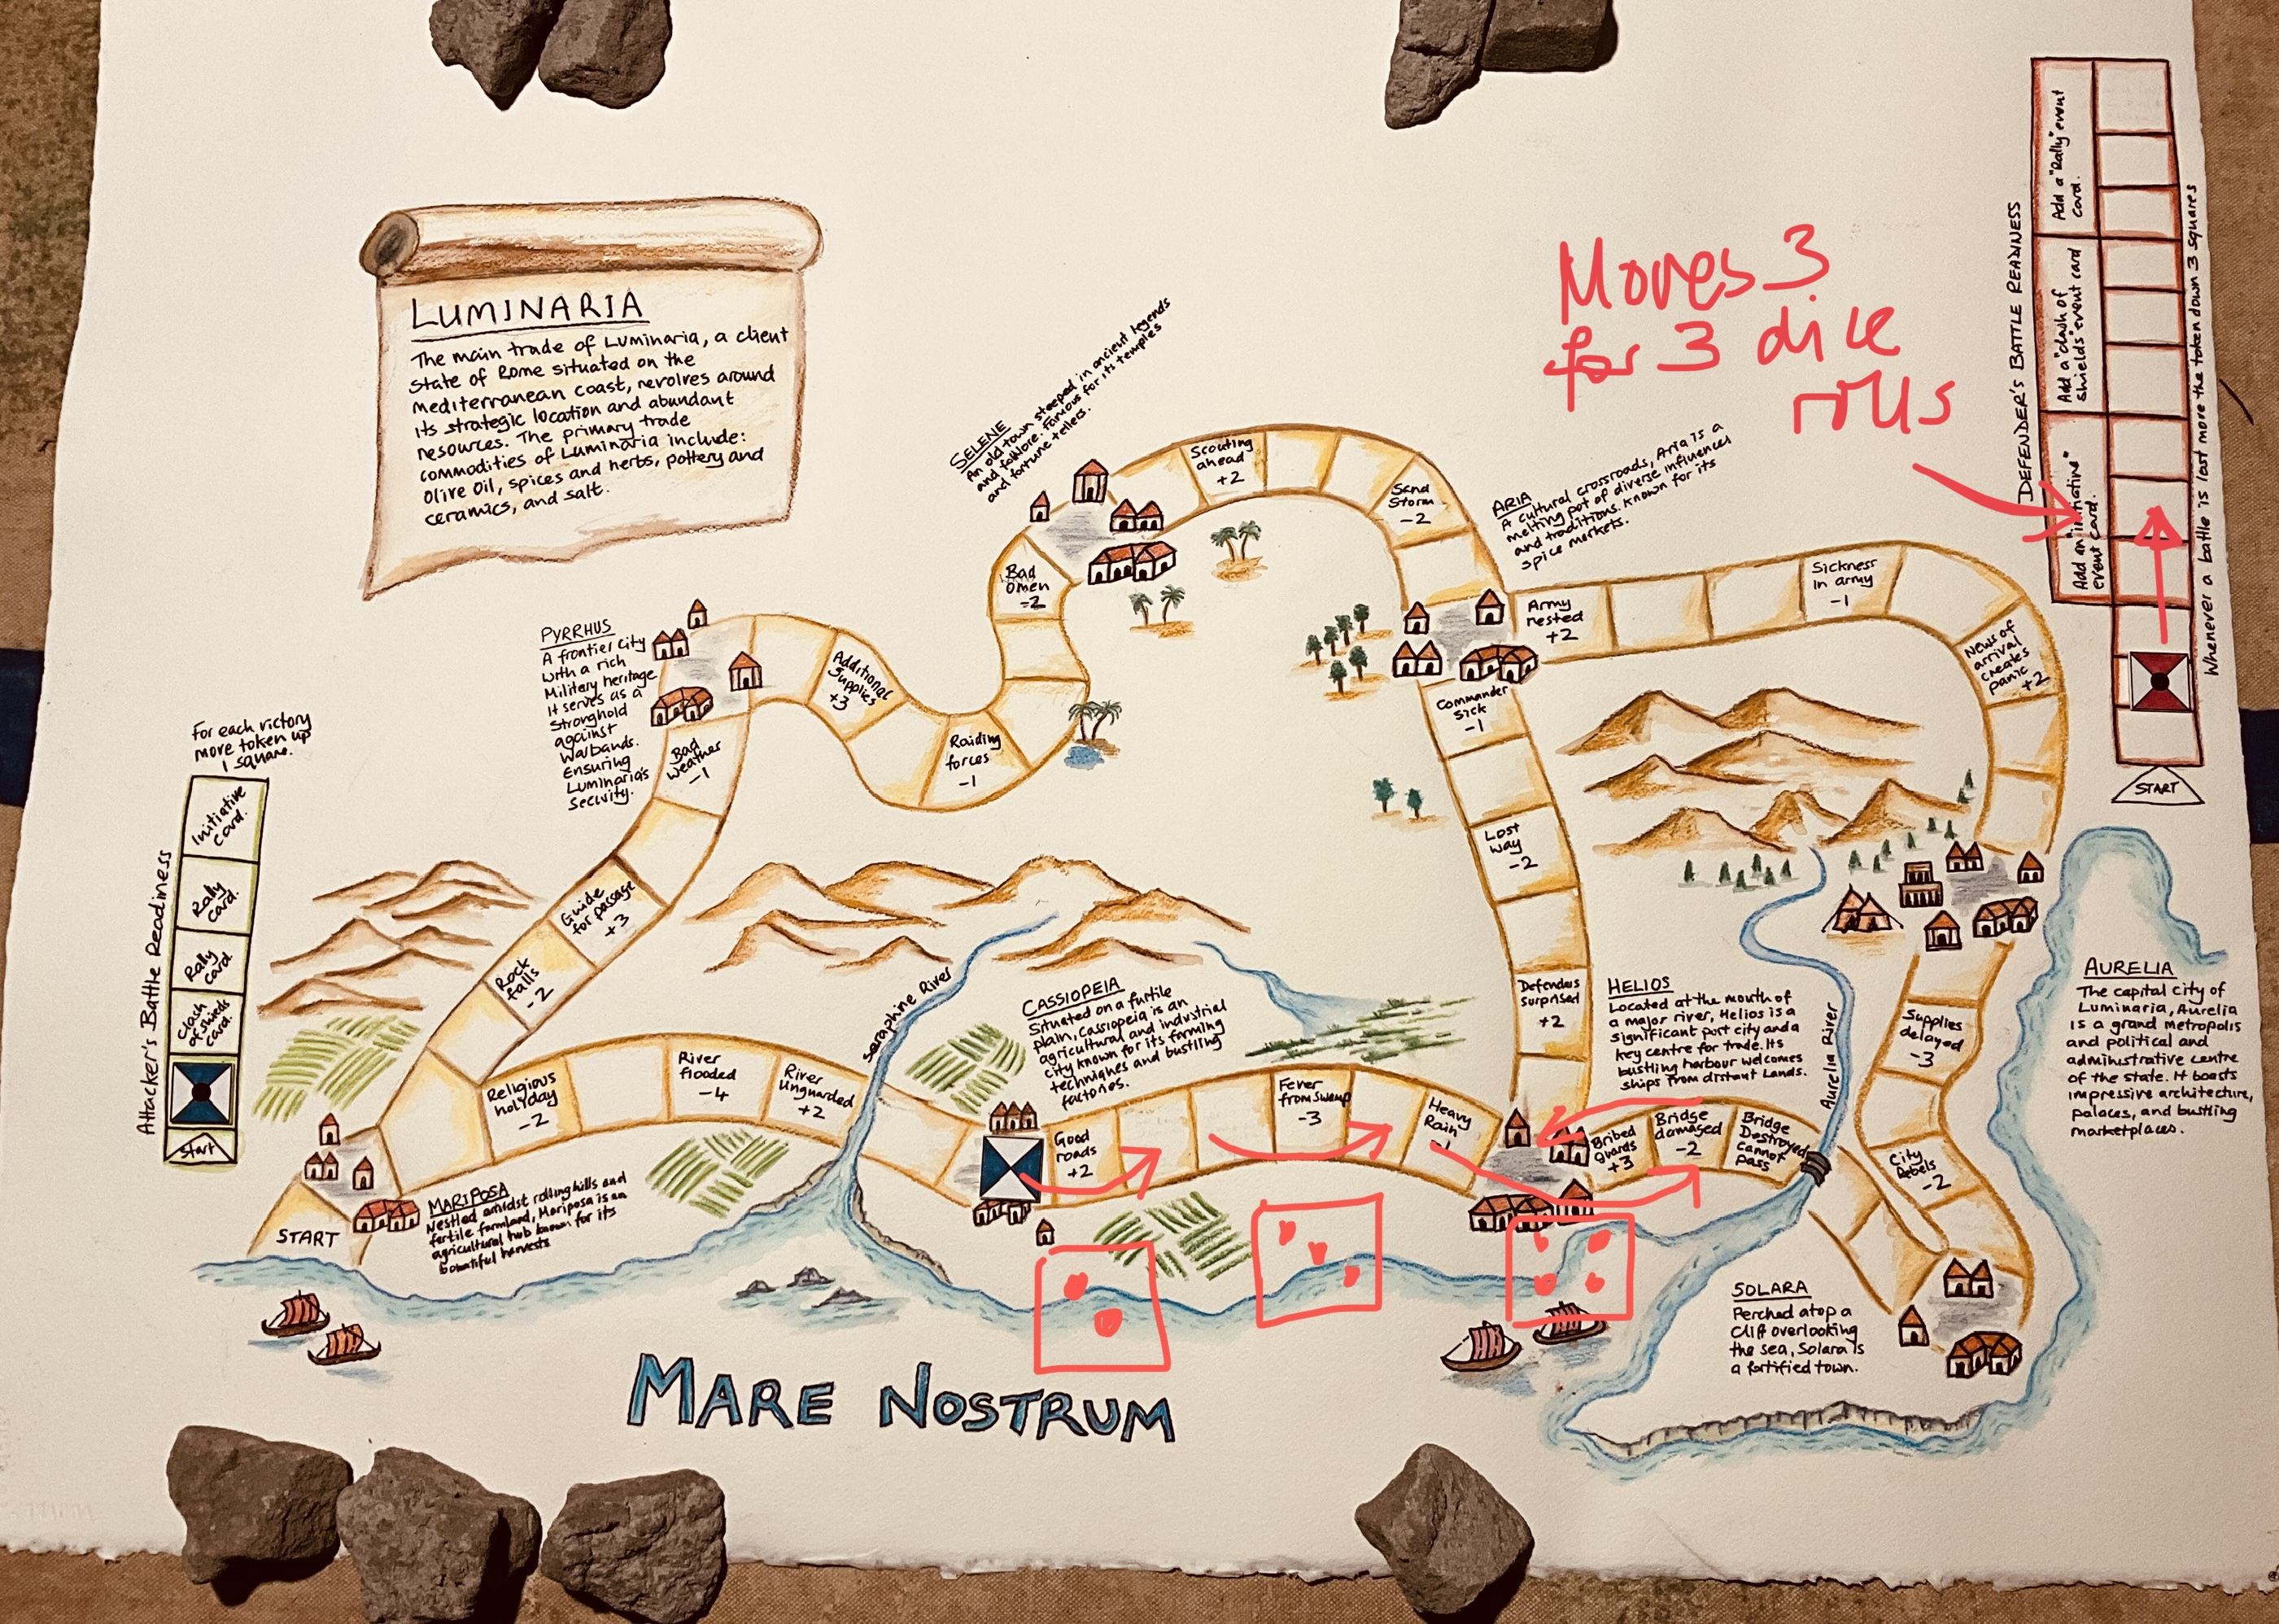 |
| The moves on the campaign map are shown in red. |
 |
| The campaign position as I now prepare for the next tabletop game. |
Campaign Narrative
Pressing forward along the coastal road, Carthaginian commander Mago advanced quickly towards a known crossing over the river Aurelia. Having successfully navigated through the city of Helios, his progress came to a halt as he encountered a damaged bridge across the river. Lacking the necessary resources for repairs, Mago was compelled to retreat to the safety of Helios to camp his army.
Meanwhile, Roman commander Marcus regrouped his forces after their setback at Cassiopeia, positioning them on the plains outside Helios. Mago, recognising his cavalry's advantage on the open plain, accepted the challenge, readying his army for the impending battle.
Orders of battle for the tabletop game…
Rome:
- 6 heavy infantry
- 1 cavalry
- 2 light infantry
- 1 catapult unit
Carthage:
- 4 heavy infantry
- 1 elephant unit
- 2 cavalry
- 2 Gaul warbands
- 1 light infantry
Deployment Rules…
- Players must write down or sketch out their army's deployment plan for their units. Slow-moving units, such as heavy infantry and catapults, must be positioned in the center. All other units have the flexibility to be placed in either the center or on the flanks.
- Players deploy their units according to their written or sketched deployment plans.
- The players roll dice to determine the outcome. The winning player has the option to either redeploy one unit anywhere within their designated deployment area or choose to start the game immediately.
- If the game has not yet started, the losing player can also redeploy one unit within their deployment area or opt to start the game.
- If both players have redeployed their units, the winning player takes the initiative and starts the game.
 |
| Both armies deployed ready for the game. The card decks in the foreground are chance (or event) cards, one beck for each player with advantages, disadvantages, and neutral events. |
Good luck ….. to you both! 🙂
ReplyDeleteThanks Norm.
DeleteI wonder how the play battle will play out?
ReplyDeleteI will have to check with Chronicler and give him a few Denarius.
DeleteThe campaign is gripping. The Carthaginians can't afford to be tardy. Can't wait for the battle report.
ReplyDeleteHi Richard, the game has been played and now needs to be written up. Hopefully not too longer wait.
DeleteLooks like you've decided to not even contest the flanks but launch a deep battering ram of a column straight at the Carthaginean centre - good luck with that!
ReplyDeleteI was able to readjust one unit to a flank as part of the deployment rules, but they are bunched at the start.
DeleteI noticed a potential problem on the map north of Helios. If you move 2 spaces up, you land on a square that advances you 2 additional spaces. That spot that returns you back those 2 spaces. You will be stuck in a loop.
ReplyDeleteThanks. One of the squares now has go back 3 spaces. Hopefully that is the only mistake, I have not picked up any others.
Delete