Thursday 29 December 2022

WW1 Palestine Campaign Turn 4 - Game 2 preparation

The last WW1 Palestine campaign I played was back in early November. The game had the Egyptian Expedition Force (EEF) failing to capture a bridge (see here). The next game sees the EEF making a second attack to gain Jerusalem (section 4 on the map).

Campaign map - October 1917

The rules for setting up the campaign battle can be found here with the choice of scenario and events. The EEF opt to spend another month preparing for the attack and will benefit with an Armoured Car unit and a Bombardment to soften up the defenders in the game. While the Turks have been digging in and will be able to have one unit entrenched.

Of the two remaining scenarios for this stage of the campaign - Melee, One-Hour Wargaming scenarios #2, was selected.

This game will be played remotely with Jon (Palouse Wargaming Journal) in a few days.

Campaign and Battle Background

Having failed to take a key bridge in October 1917 the EEF spent two months regrouping and preparing supplies before making a second attack on Turkish lines. Air reconnaissance identified a lightly defended hill in the defensive lines, and in early December plans were prepared to assault and hold the key hill position.

Orders of Battle

Turkish Forces:

  • 5 x Infantry units (two units have machine guns)
  • 1 x Artillery unit

Egyptian Expeditionary Force:

  • 3 x Infantry units
  • 2 x Artillery units
  • 1 x Mounted infantry unit
  • 1 x Armoured Car unit
  • 1 x Opening off table bombardment

Map

Scenario map - The tabletop is 5x4 foot.

Deployment

The Turks have two units positioned on the hill with limited trenches for one of the units. Reserves are nearby,  two units can arrive on turn 3 and a further two units on turn 6. All reserve units arrive via the road.

The EEF have decided to make an overnight march to avoid alerting the Turks and will arrive in two waves. Three units will arrive supported by an early bombardment on turn 1 and the second wave of four units on turn 4. All units arrive via the road.

Objective

The EEF win by being in exclusive occupation of the hill by turn 15.


Wednesday 28 December 2022

A quick Punic War game and activation approach

After a week’s break for a family Christmas in Wellington, New Zealand, I returned home with a few rules and campaign ideas to try out. The first idea was to apply an army activation approach to my D3 Ancient rules (a variant of One-Hour Wargames). To test them a Punic War game setup. It has been quite a while since my ancients have been out for a game.

Roman forces are lined up on the left and Carthaginian forces on the right behind the fordable river.

I opted for 9 units per side with the orders of battle being:

Rome:
6 x Heavy Infantry units (2 of which are veterans)
2 x Light Infantry
1 x Cavalry

Carthage:
1 x Elephants
3 x Cavalry (1 of which is veteran)
2 x Heavy Infantry (both veteran)
2 x Gauls (Warbands)
1 x Light Infantry

The game report…

Both armies advance. Carthage kept its veteran heavy infantry on the hill.

Carthaginian cavalry push around on the flank quite successfully, but their commander gets caught up in the ensuing melee which will impact the activation check. In the centre the Gauls and elephants are battling heavy infantry with both sides taking casualties.

The Carthaginian commander’s unit is eliminated and they retire from the field of battle. Carthage continues to threaten Rome’s flank while in the centre their veteran heavy infantry advance to replace the Gaul and elephant unit losses. 

Roman units are able to fend off the flanking cavalry with retires. In the centre they advance and use the remaining light infantry to flank Carthage’s heavy infantry.

A poor army activation allows Roman forces to eliminate the Carthage’s  cavalry reducing the army to 2 units. A Roman victory.

A quick and enjoyable game of 12 turns. The army activation provided some unpredictability as unit accrue hits and become less likely to activate. This is something I appreciate as a solo gamer and I have updated the D3 Ancients rules (see tab at the top of the blog page).

Next up I will be returning to my WW1 Palestine campaign. This time I will not be battling solo. Instead I will be playing a remote game with Jon of https://palousewargamingjournal.blogspot.com

Tuesday 20 December 2022

Stringing together a bit of smoke

Over the last week I have been playing a couple of WW2 games which called for the use of smoke. Normally I just put down clumps or a handful of toy stuffing. This approach works well for the most part, but can get fiddly when putting down a set length.

Smoke being laid down.

Anyway, I decided to see if the smoke (stuffing) could be strung together into a set length using a needle and thread. Here is a quick one and a half minute video on the creation.


Smoke being used to cover the Allied advance.

Saturday 17 December 2022

Remote Game - Battle of Auberoche, 1345

This week I was able to host a remote war game with Jon of Palouse Wargaming Journal. This was a great pick up for me, as the previous weekend I had caught Covid-19 and had spent this week recovering. Fortunately the scenario - the Battle or Auberoche, 1345 - had been planned and written up prior to becoming ill.

Background

A French force of 7,000 is besieging the castle of Auberoche held by a small Anglo-Gascon garrison. The French encampment was divided in two, with the majority of the soldiers camped close to the river between the castle and village, while a smaller force was situated to prevent any relief attempts from the north.


Warned of the siege, the Earl of Derby gathered a force of 1,500 and waited near for reinforcements. As no reinforcements had arrived by October 20th Derby called a council of his officers. It was decided that rather than wait and lose the advantage of surprise, the army would attack immediately and attempt to overrun the main French camp.


Map from “Wargaming Ancient and Medieval Periods” by Donald Featherstone

The attack was launched just as the French were having their evening meal. Complete surprise was achieved. The longbowmen shot from the treeline into the tightly packed French camp. While the French were confused and distracted by this attack from the west, Derby made a cavalry charge with his 400 men-at-arms from the south. The French although superior in numbers were struggling to get into their armour and organise a defence.


The castle garrison realised the position of the French troops and sallied forth with all their mounted men and attacked. This unexpected attack on the French rear caused their defence to collapse and they routed.

The Game

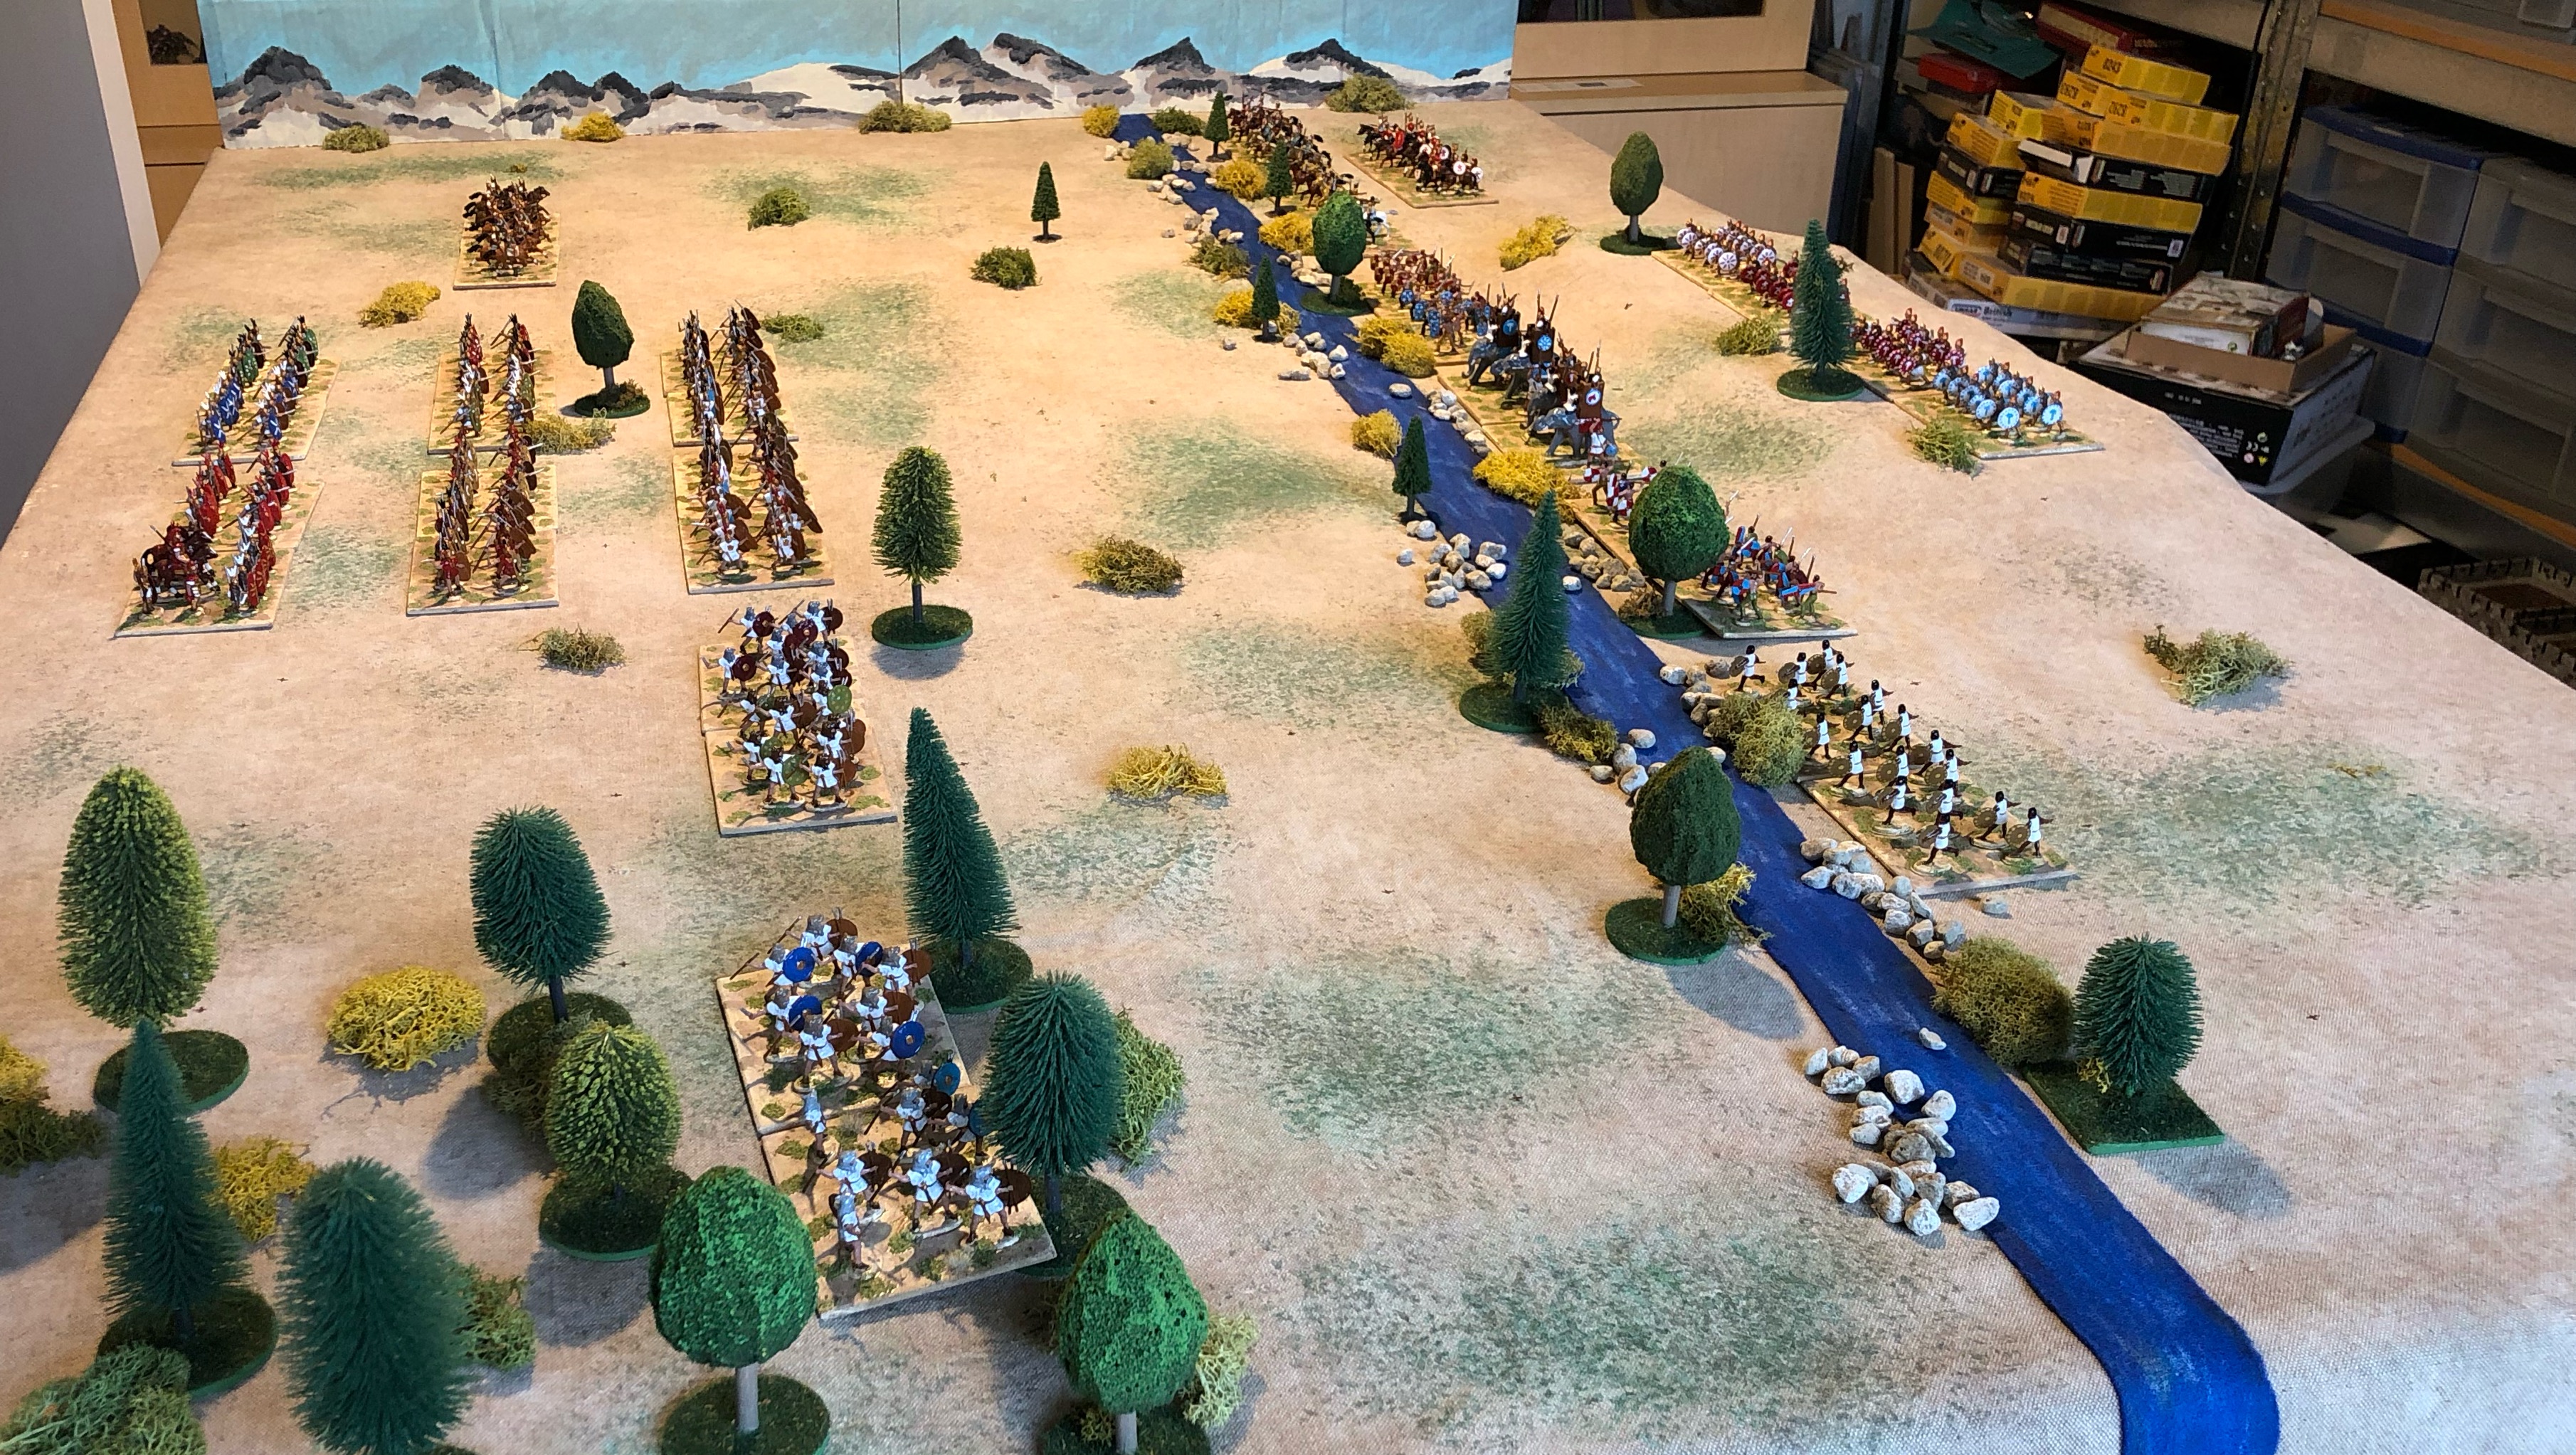
The game is based upon scenario 22 “Ambush” from One-Hours Wargames by Neil Thomas, which is based upon the battle, is played on a 4 by 5 foot area. The tabletop area is dictated by the camera and the amount of tabletop it can cover.


This is the tabletop setup from an earlier game, and if you are now wondering why is he using photos from earlier games? Yes, I forgot to take photos again! Well I took one photo, and improvement on previous games.

Order of Battle…


Deployment

French -  all units must be deployed within 6” of the two tents in a disordered state. 4 units must be positioned within 6” of the west tent.


Anglo-Gascon - One mounted men at arms units is positioned in the castle, while all other units are deployed having just moved out of the woods. The two mounted men at arms with a commander are positioned in the clearing to the south of the woods.


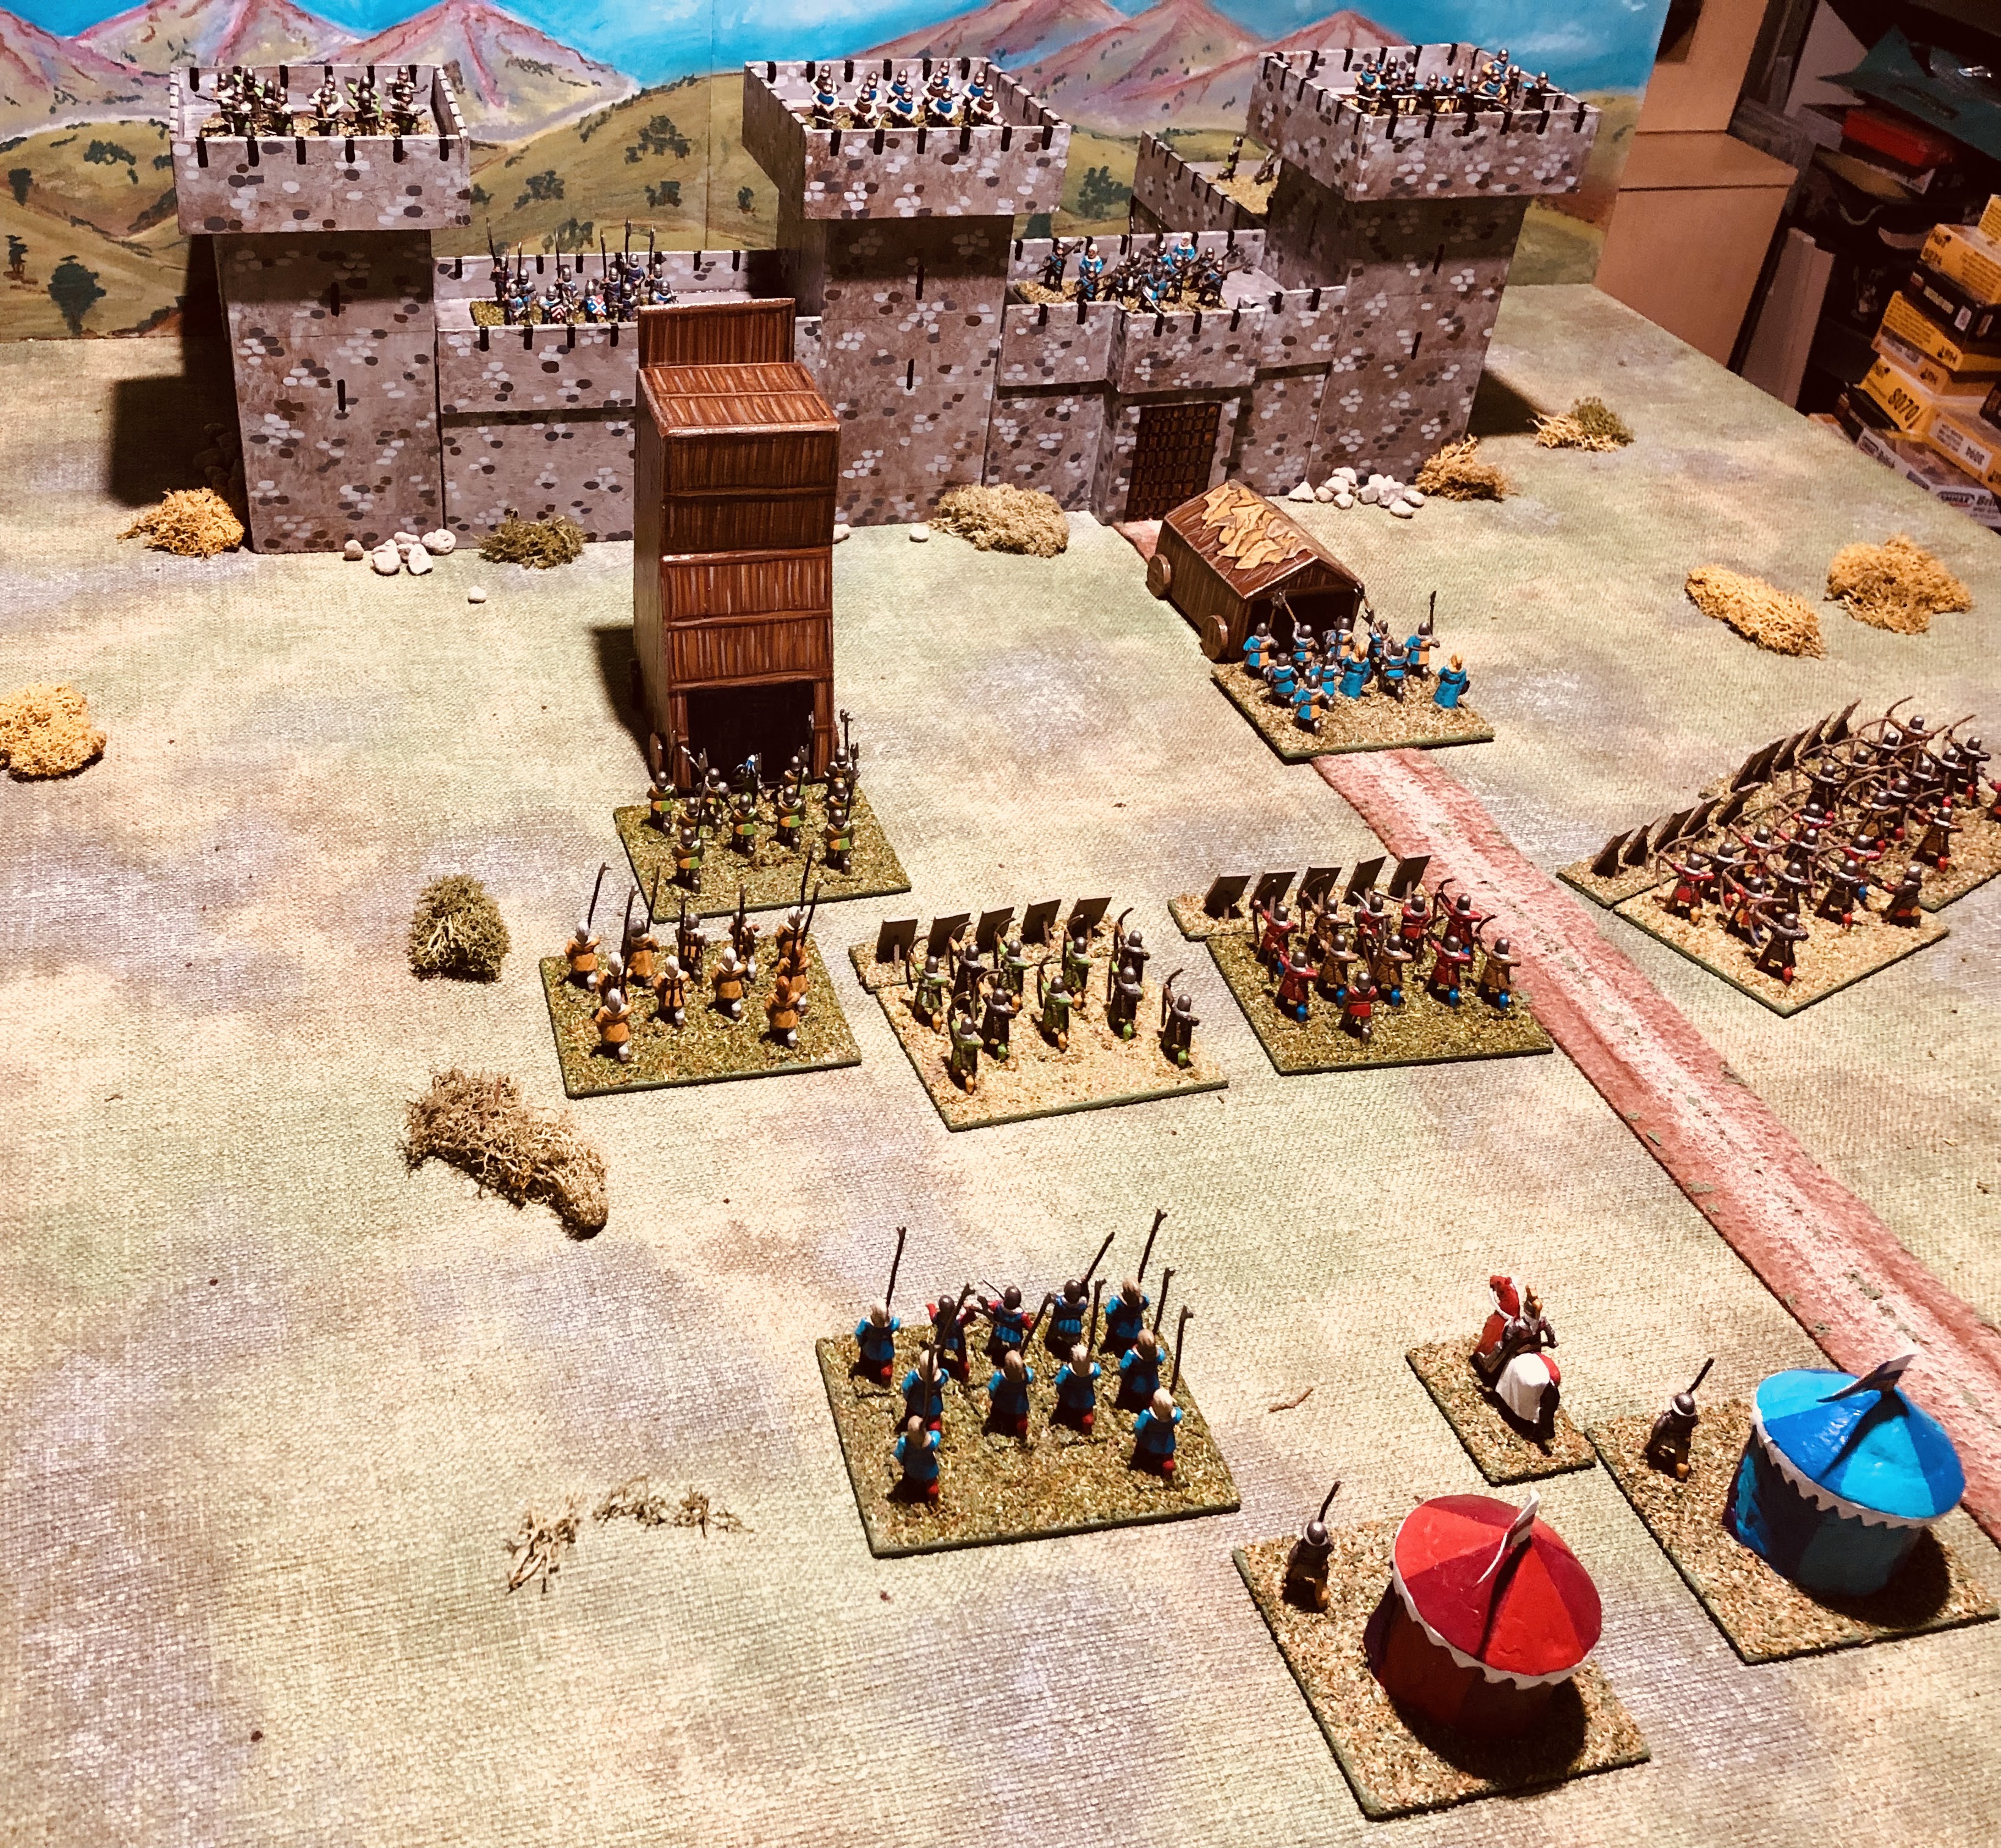
The scenario map showing deployment areas

Special Rules…

Castle - Cannot be attacked and the garrison cannot sally forth until the turn 6.


Surprise - No French unit can activate until turn 3.


Derby’s Charge - The mounted men at arms unit cannot move until turn 3.

Game Length…

15 Turns. The Anglo-Gascon army starts the turn.

Winning

The Anglo-Gascon force must defeat the French by reducing their army to less than 2 units. Failure to do this will constitute a French victory.


The Game Report…

Jon chose the French force and positioned his mounted men at arms furthest away from the woods. While most of the levy units (representing men unable to get their armour) were positioned nearest the woods and castle.

The Anglo-Gascon force having emerged from the woods spent their first 3 turns shooting at the French, quickly eliminating two levy units. Jon started to organise a defensive line of crossbow men and men at arms, while his mounted men at arms moved towards his southern flank.

The Anglo-Gascon bowmen pushed forward and the Earl of Derby’s mounted force charged forward into the hastily gathered French defensive line. The situation for the French was looking rather bleak.


The French position started to stabilise and Jon was able to get his mounted forces engaged in the battle. About the same time a mounted force sallied forth from the castle into the waiting levy. It was around this time the French mounted men at arms started to gain the upper hand and the Earl of Derby fell and was carried from the field of battle.

The castle’s mounted force had by now disposed of the levy, exposing the French rear to attack. The lack of Derby’s command meant the attacking Anglo-Gascon units began to lack motivation (it was harder to activate them after the loss of their commander) not that any French victory was assured. The French defensive line was rather thin and retiring in the face of the bowmen. All their hopes were pinned on their remaining mounted unit which was starting to charge into the bowmen with devastating effect.

The Anglo-Gascon force failed a number of activations and they missed opportunities to follow up on the weak French defensive line. The French seized their opportunity and their mounted unit, lead by their commander, routed the bowmen and the battle was over.

Thoughts

A thoroughly enjoyable game to participate in. One in which I thought I had victory in the bag early on, but Jon was able to muster and steady his troops into a defensive line, then use his mounted units very effectively to turn the game around. A well deserved victory to Jon.

It is an interesting ambush scenario (#22) from One-Hour Wargames. It is a scenario I have overlooked for a long time as I thought it would not be interesting, but having now played it a few times, all medieval mind you, it never ceases to give a good game.


Wednesday 7 December 2022

An improvement in the making of event cards

I often use event cards, or chance cards, in games using One-Hour Wargames rules. For the most part the cards are made from plain card. Anyway, I was asked about what I would like as a Christmas present. I normally struggle with this question, and not wanting socks again this year, I came up with the idea of a laminator and told by wife and explained why, to cover my cards. My wife then said “I think I have one I haven’t used in years”, then disappeared off to rummage around in some cupboards and returned with a pocket laminator most suitable for cards. It had been used in the past for making name cards at conferences. A few test cards were quickly produced and it proved to be most suitable. Well I guess its socks for Christmas.

My new toy - a pocket laminator. The laminator was originally used for making name cards.

Some completed cards. Dimensions are approximately 3.5 x 2.5 inches


Saturday 3 December 2022

A remote game and more medieval siege equipment

Friday morning started with a remote wargame, a Jacobite rebellion game, with Jon of Palouse Wargaming Journal (Jon's time was Thursday afternoon). This was the first time I have tried hosting a remote game. For the game I was using just an iPhone and a tripod. During the game the iPhone was often moved during the game to focus in on areas of action, easily done with the tripod which is both light and stable. Google Meet was used for the video connection and the video quality was good throughout the game.


As I was hosting the game, and as my first remote game, I was rather occupied and totally forgot to take any photographs of the game as it progressed. So no battle report. Jon was in command of the Jacobite forces, his Highlanders after being initially delayed by some cavalry were able to charge into my flank and sweep away my remaining Government forces.

The mobile phone tripod worked well being both light and stable.

All being well I will be trying this remote gaming approach again before Christmas holidays arrive.

On the painting and modelling side some more siege equipment has been completed. As with all the siege equipment and castle, the models are simple shapes cut from wood and painted to give the impression of the siege equipment.

A Bombard and Trebuchet leave the painting table.

A Bombard

A Trebuchet

That is about all the siege models I plan to make and I now need to begin thinking about some siege rules.

Thursday 1 December 2022

Medieval Siege Machines

Over the past few days I have added a siege tower and battering ram for some planned siege games. Here are a few photos. A trebuchet and bombard are next on my list to make.

The siege engines approach the castle walls

As with the castle the siege tower and battering ram are made from blocks of wood simply fashioned with all details painted on.

A simple wooden shape was used for the siege tower

An attack on the walls.

Some animal skins have been added to the roof of the battering ram.

As the siege machines get build I had batter start considering the rules to be used.