Tuesday 28 March 2023

Working through some solo wargaming rules for the ECW

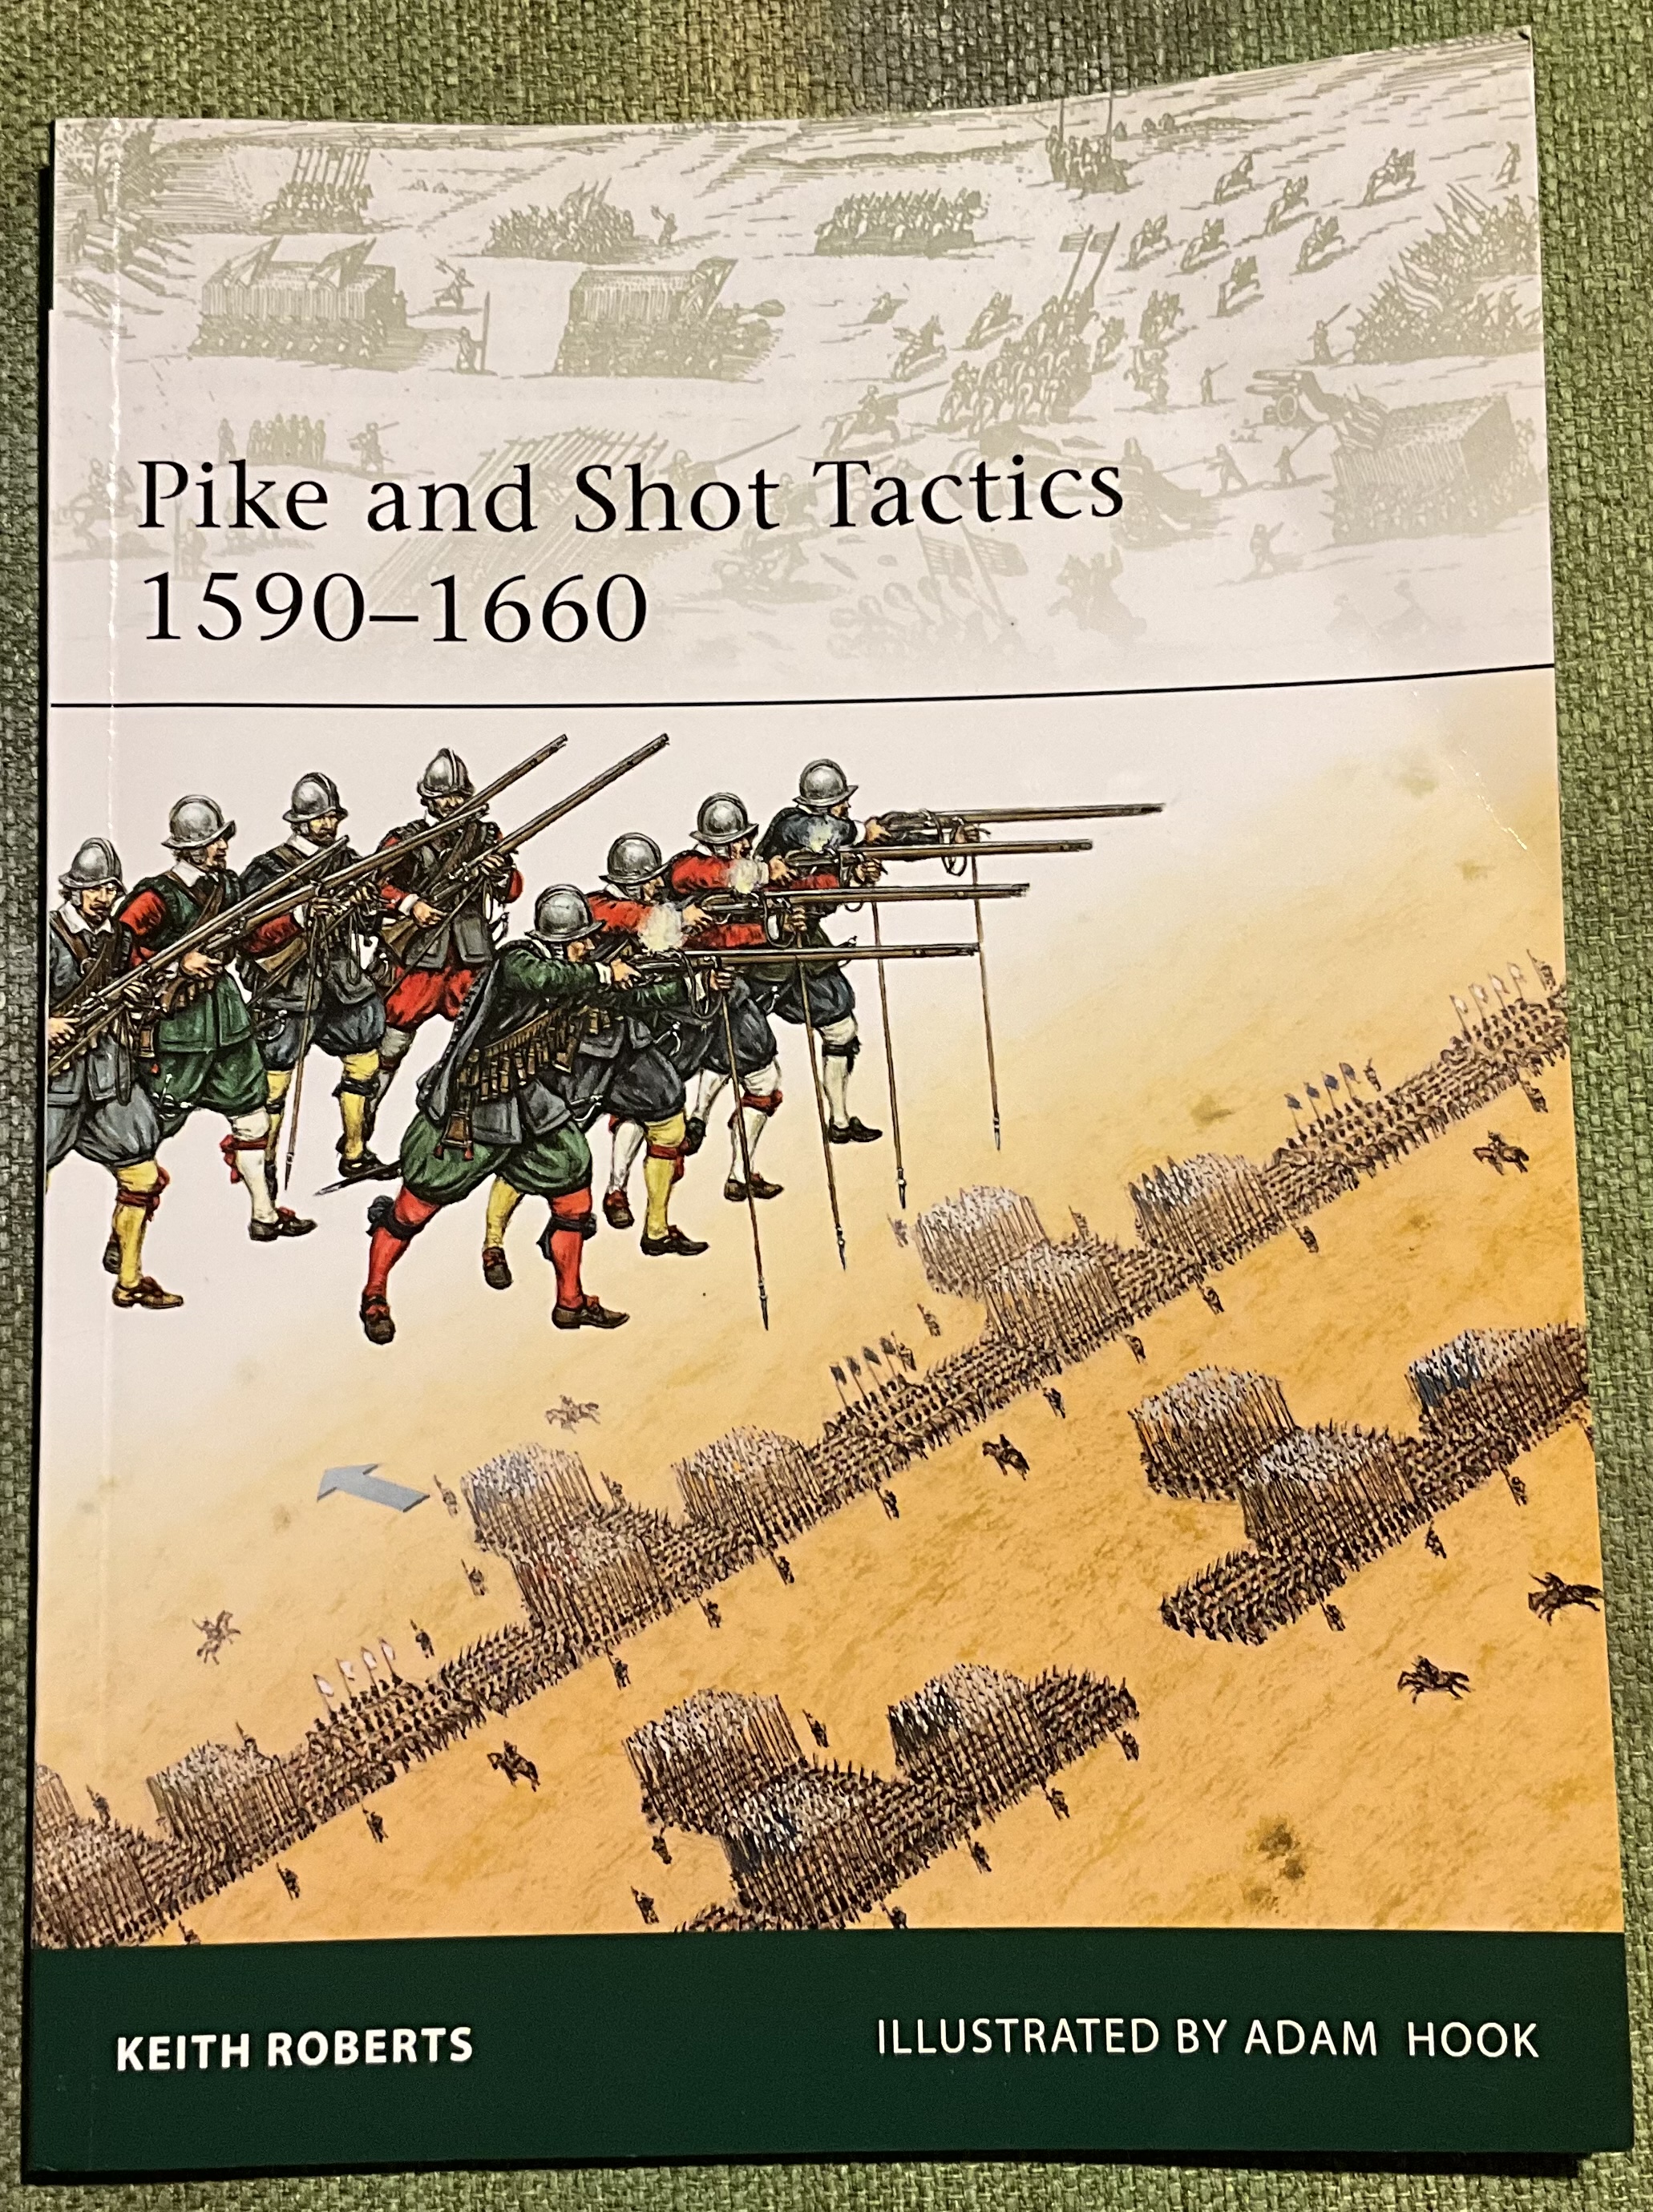
During this past week, I have resumed playing some English Civil War (ECW) games for to two reasons. Firstly, my interest in the period was reignited after reading "Pike and Shot Tactics 1590-1660" by Keith Roberts (refer to an earlier post for my takeaways from this book). Secondly, I am experiencing issues with my left hip which means I need to avoid sitting down too much, but standing at my wargaming table doesn't put any strain on my hip, funny that, and is the one and only upside of this situation.

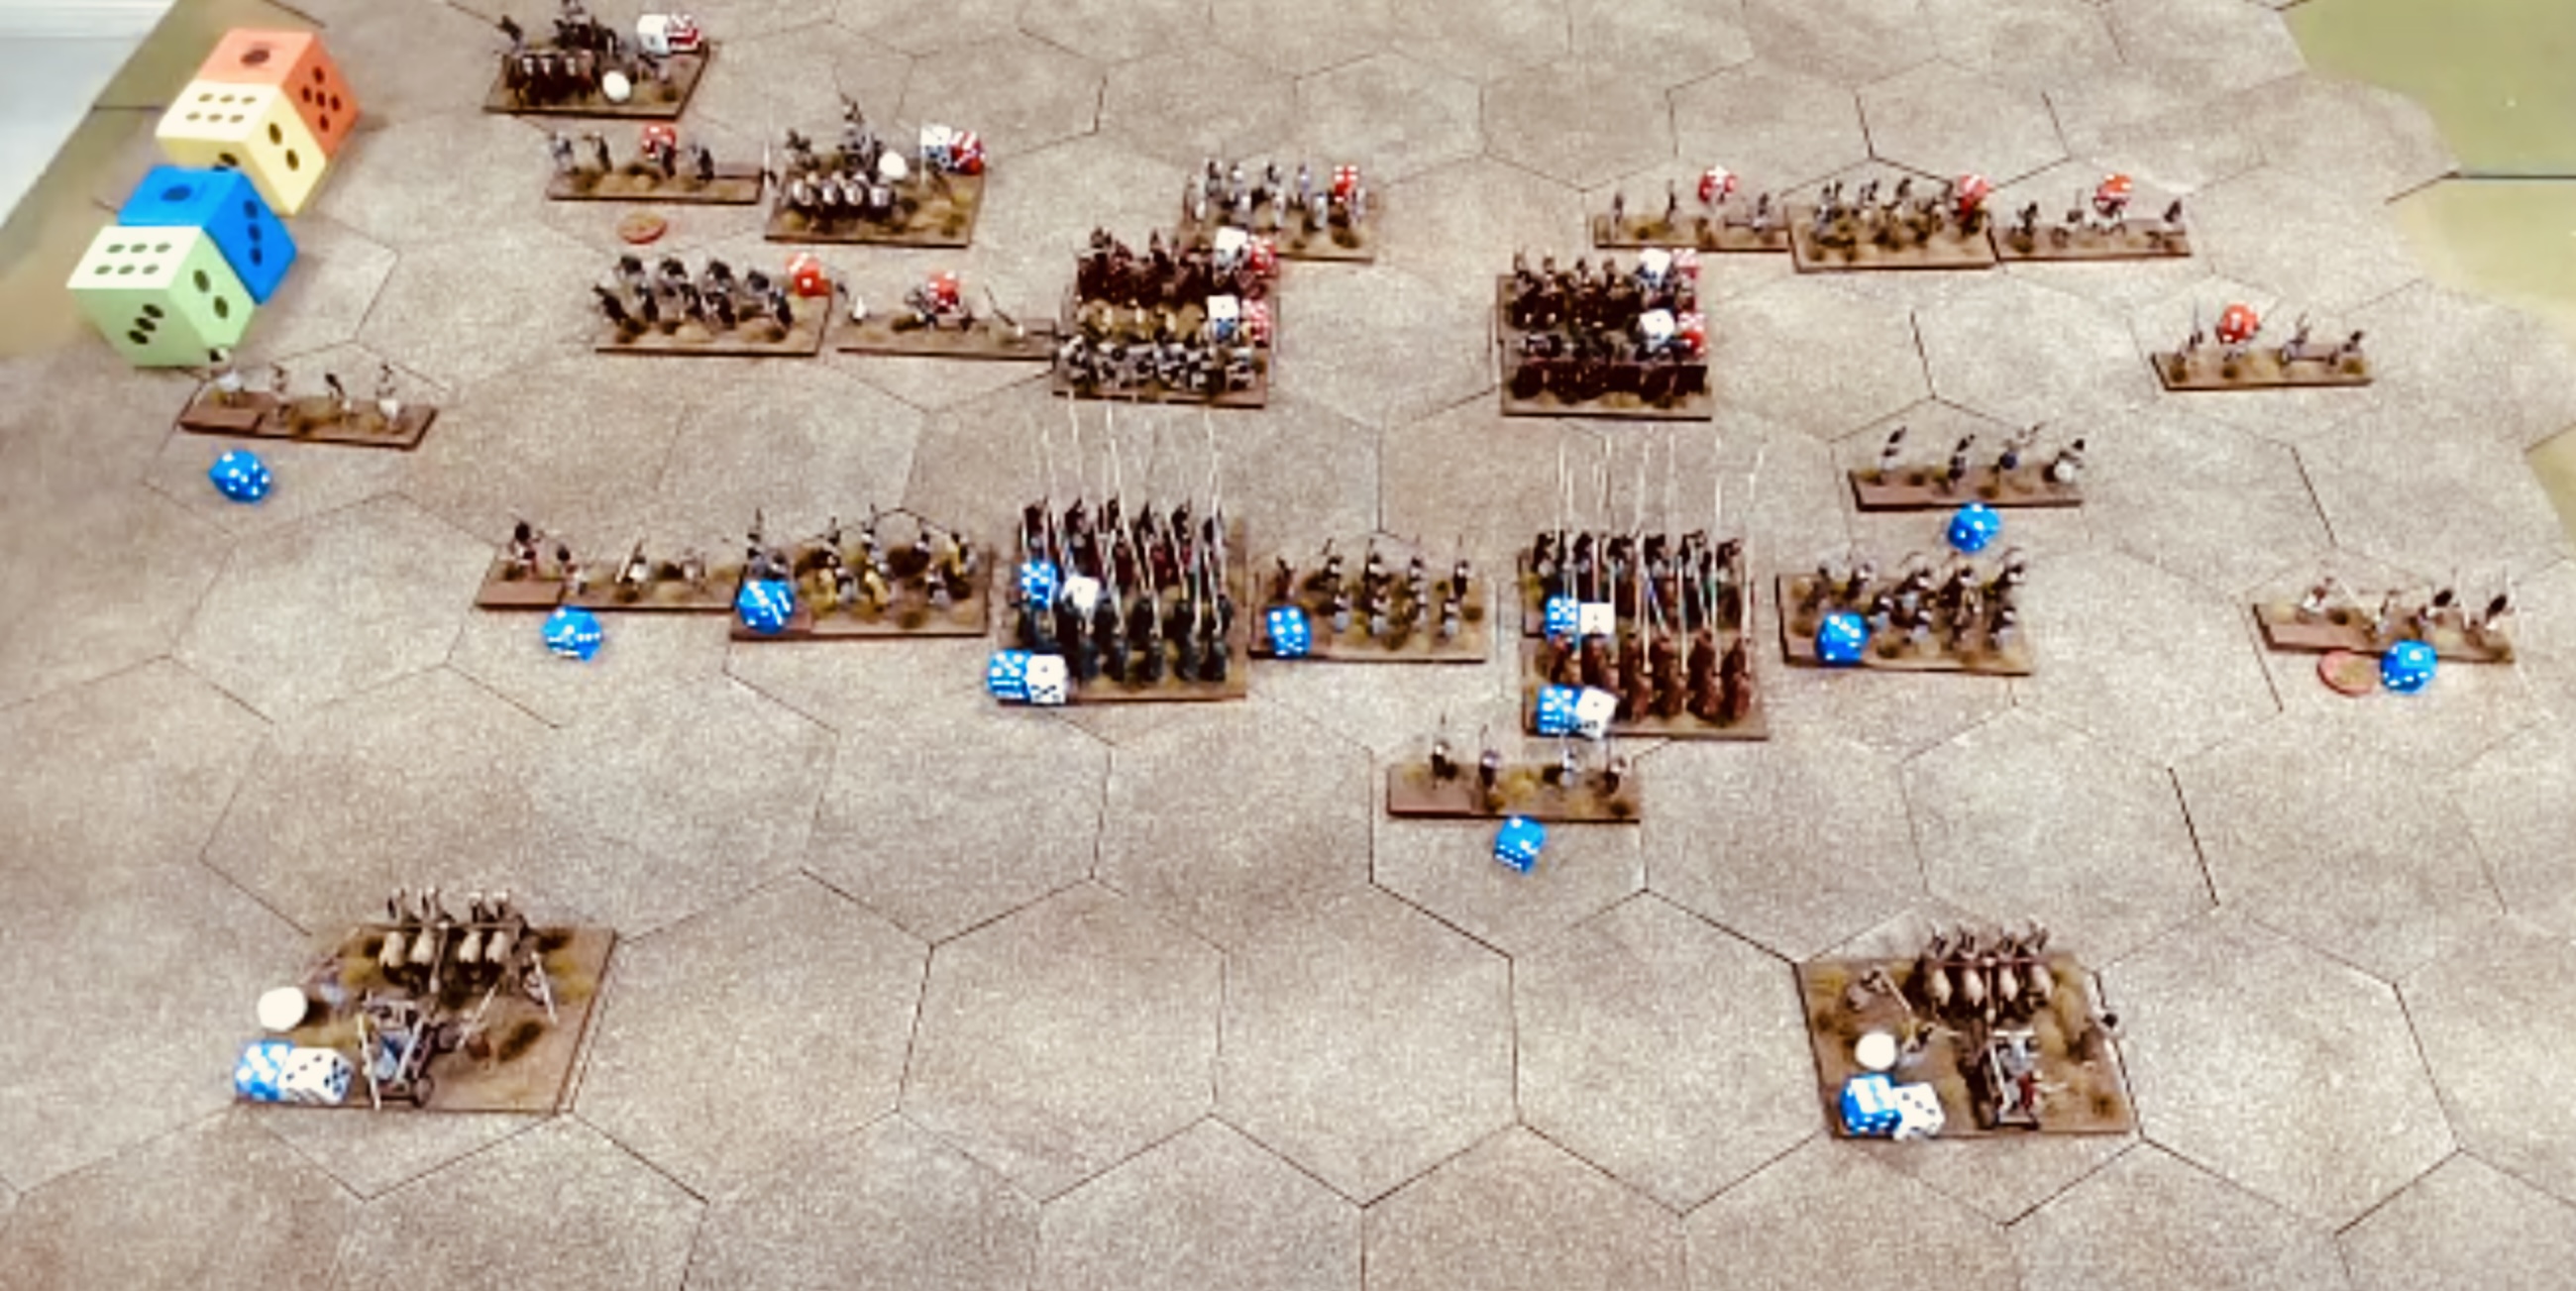
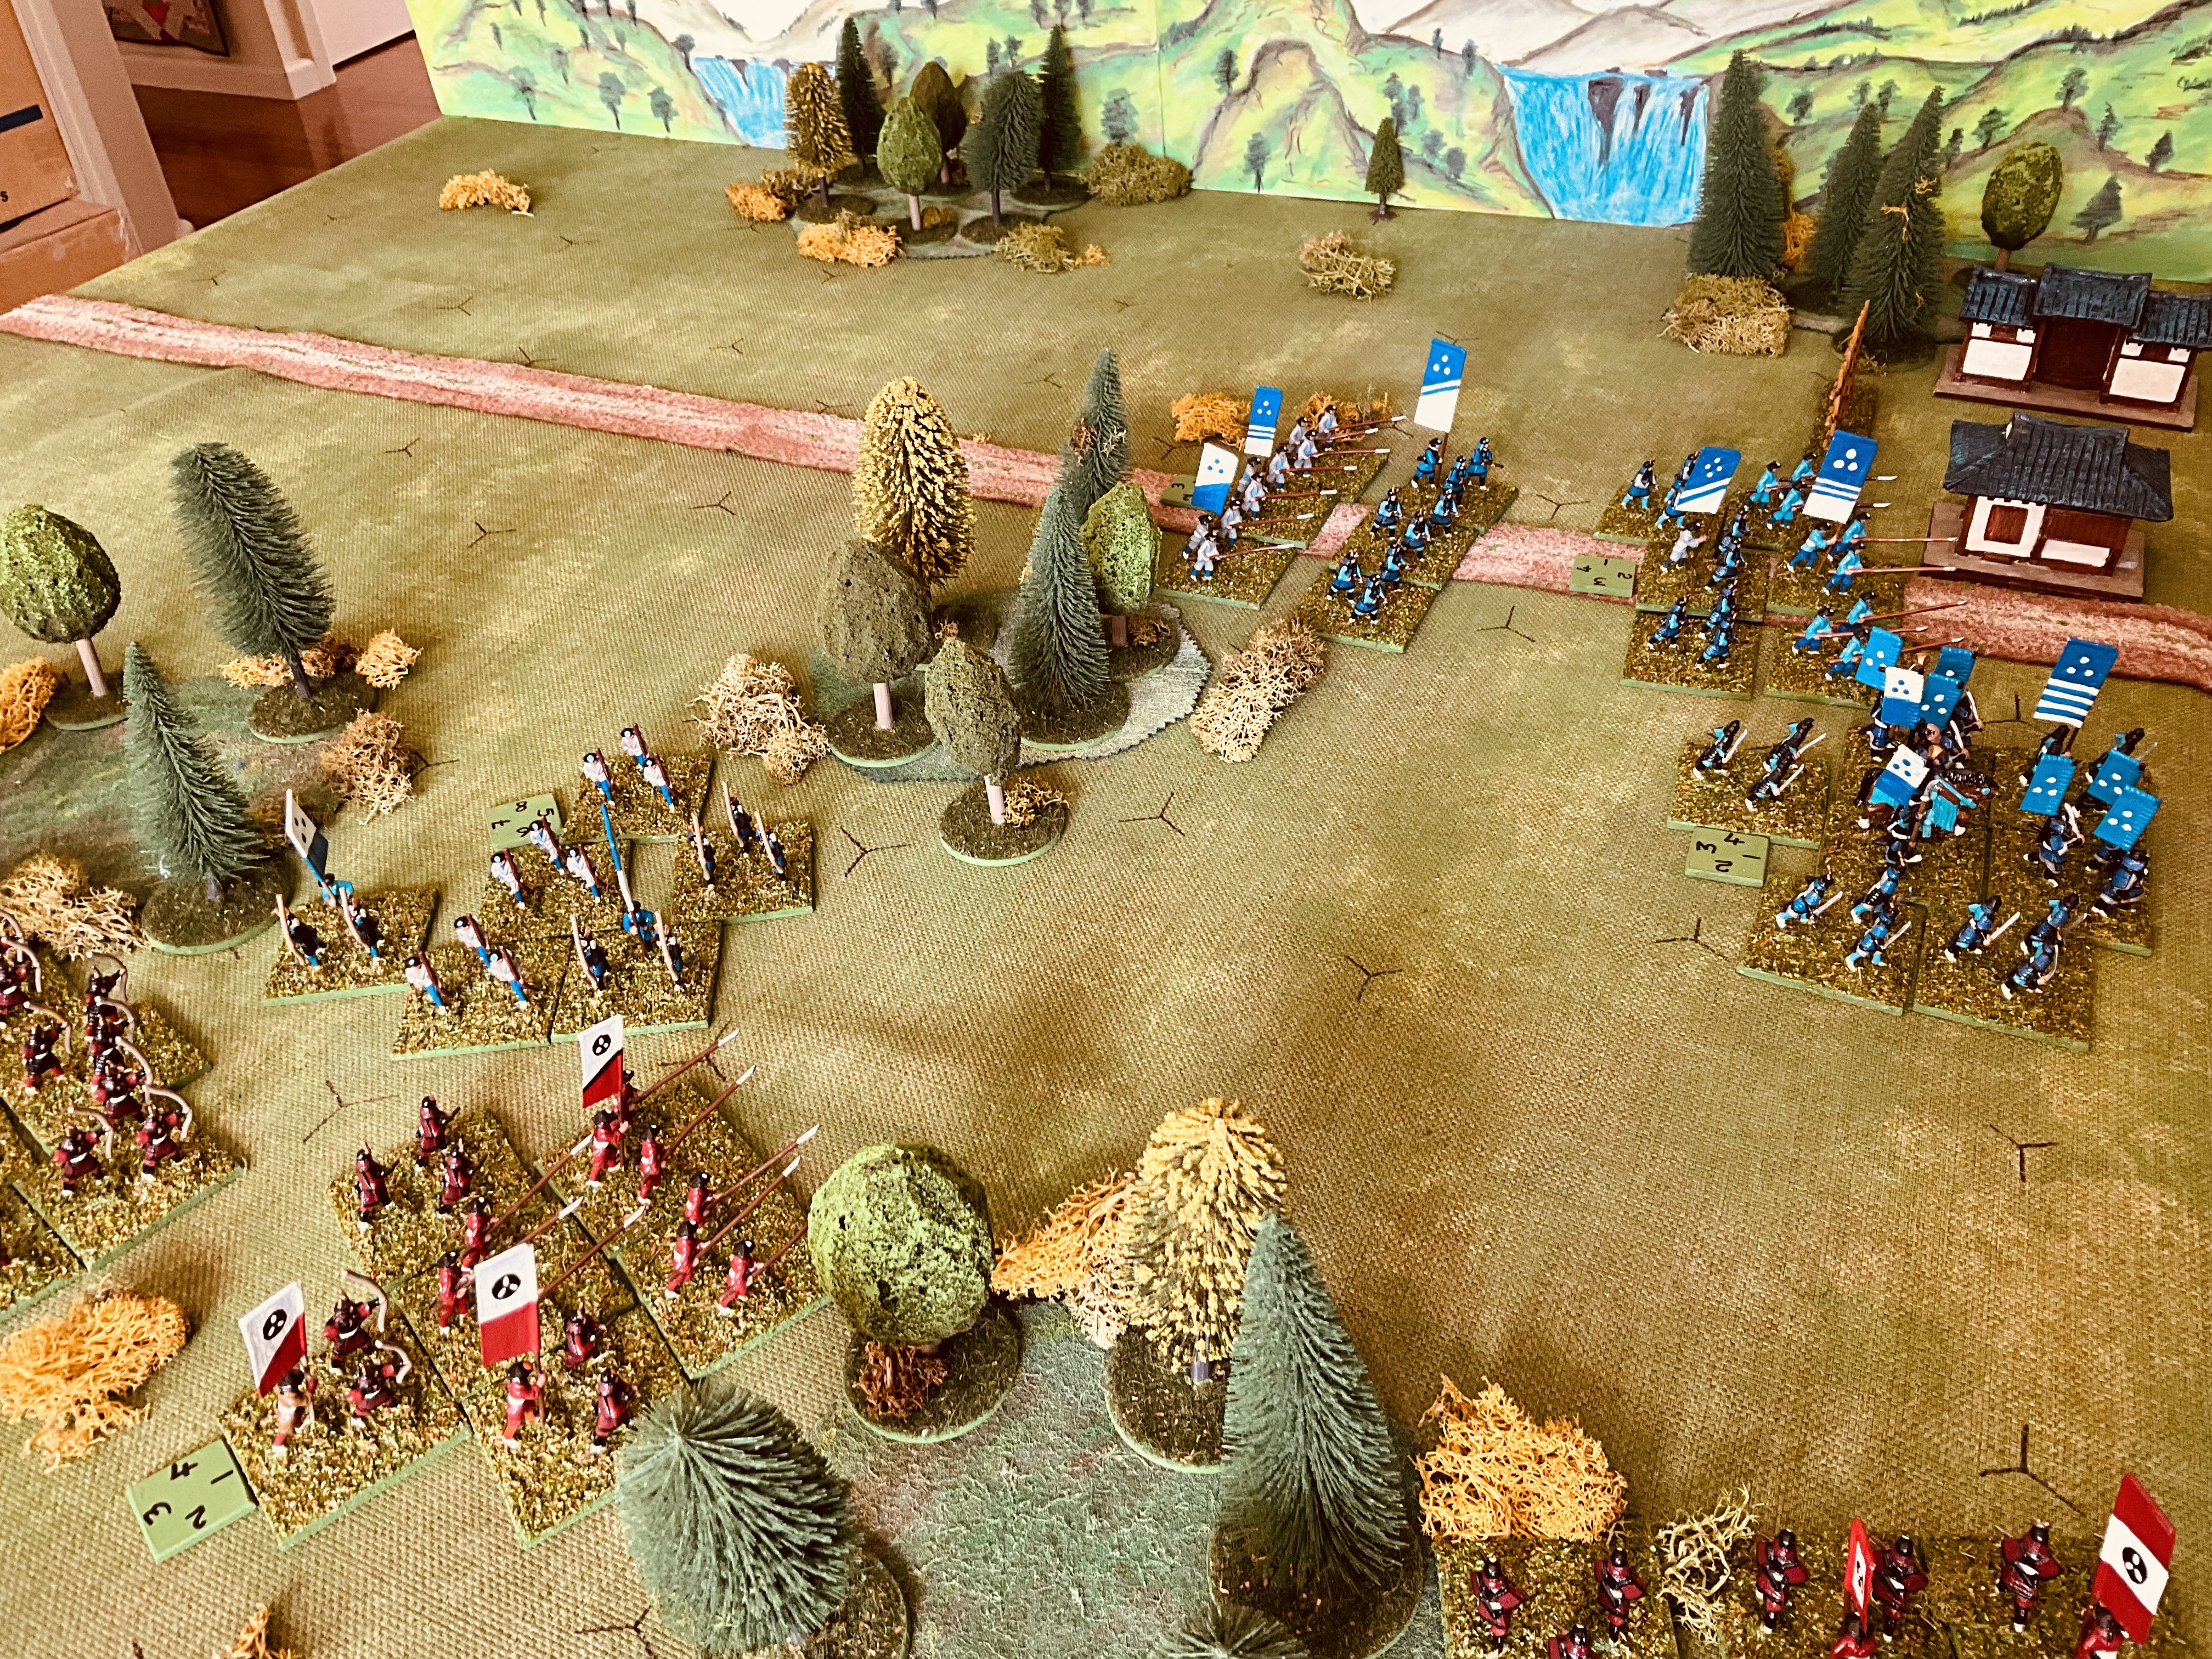
The ECW units see the light of day. These are Hinchliffe models some 50 years old and repainted.

The constraints placed upon the ECW commander with deployment of their armies and the difficulty of manoeuvre of those armies on the battlefield, has got me thinking about the suitability for solo gaming of this period and whether or not I could construct some decision tables to direct the opposing army in a  wargame?

The rest of this post and some following posts will provide more details of my progress, and the pitfalls I encounter, as I work through this. Any comments and advice are most welcome.

However, prior to starting to create the decision trees, I had to modify the rules of the "D3 ECW" game (see tab at top of blog). I opted to use an I Go, You Go, approach as it seems more suitable for utilising decision tables, since the decisions will mainly involve movement such as charges, while shooting is directed at the nearest enemy, and melee automatically takes place between engaged units. Additionally, I reduced the number of infantry and cavalry units to between 5 and 6, along with a few smaller dragoon and artillery units which are eliminated with half the hits of larger infantry and cavalry units. This was to simplify and reduce choices. Finally, I limited the number of units permitted to move to the score of a D3 dice. As I continue with these posts, I will provide the updated rules.

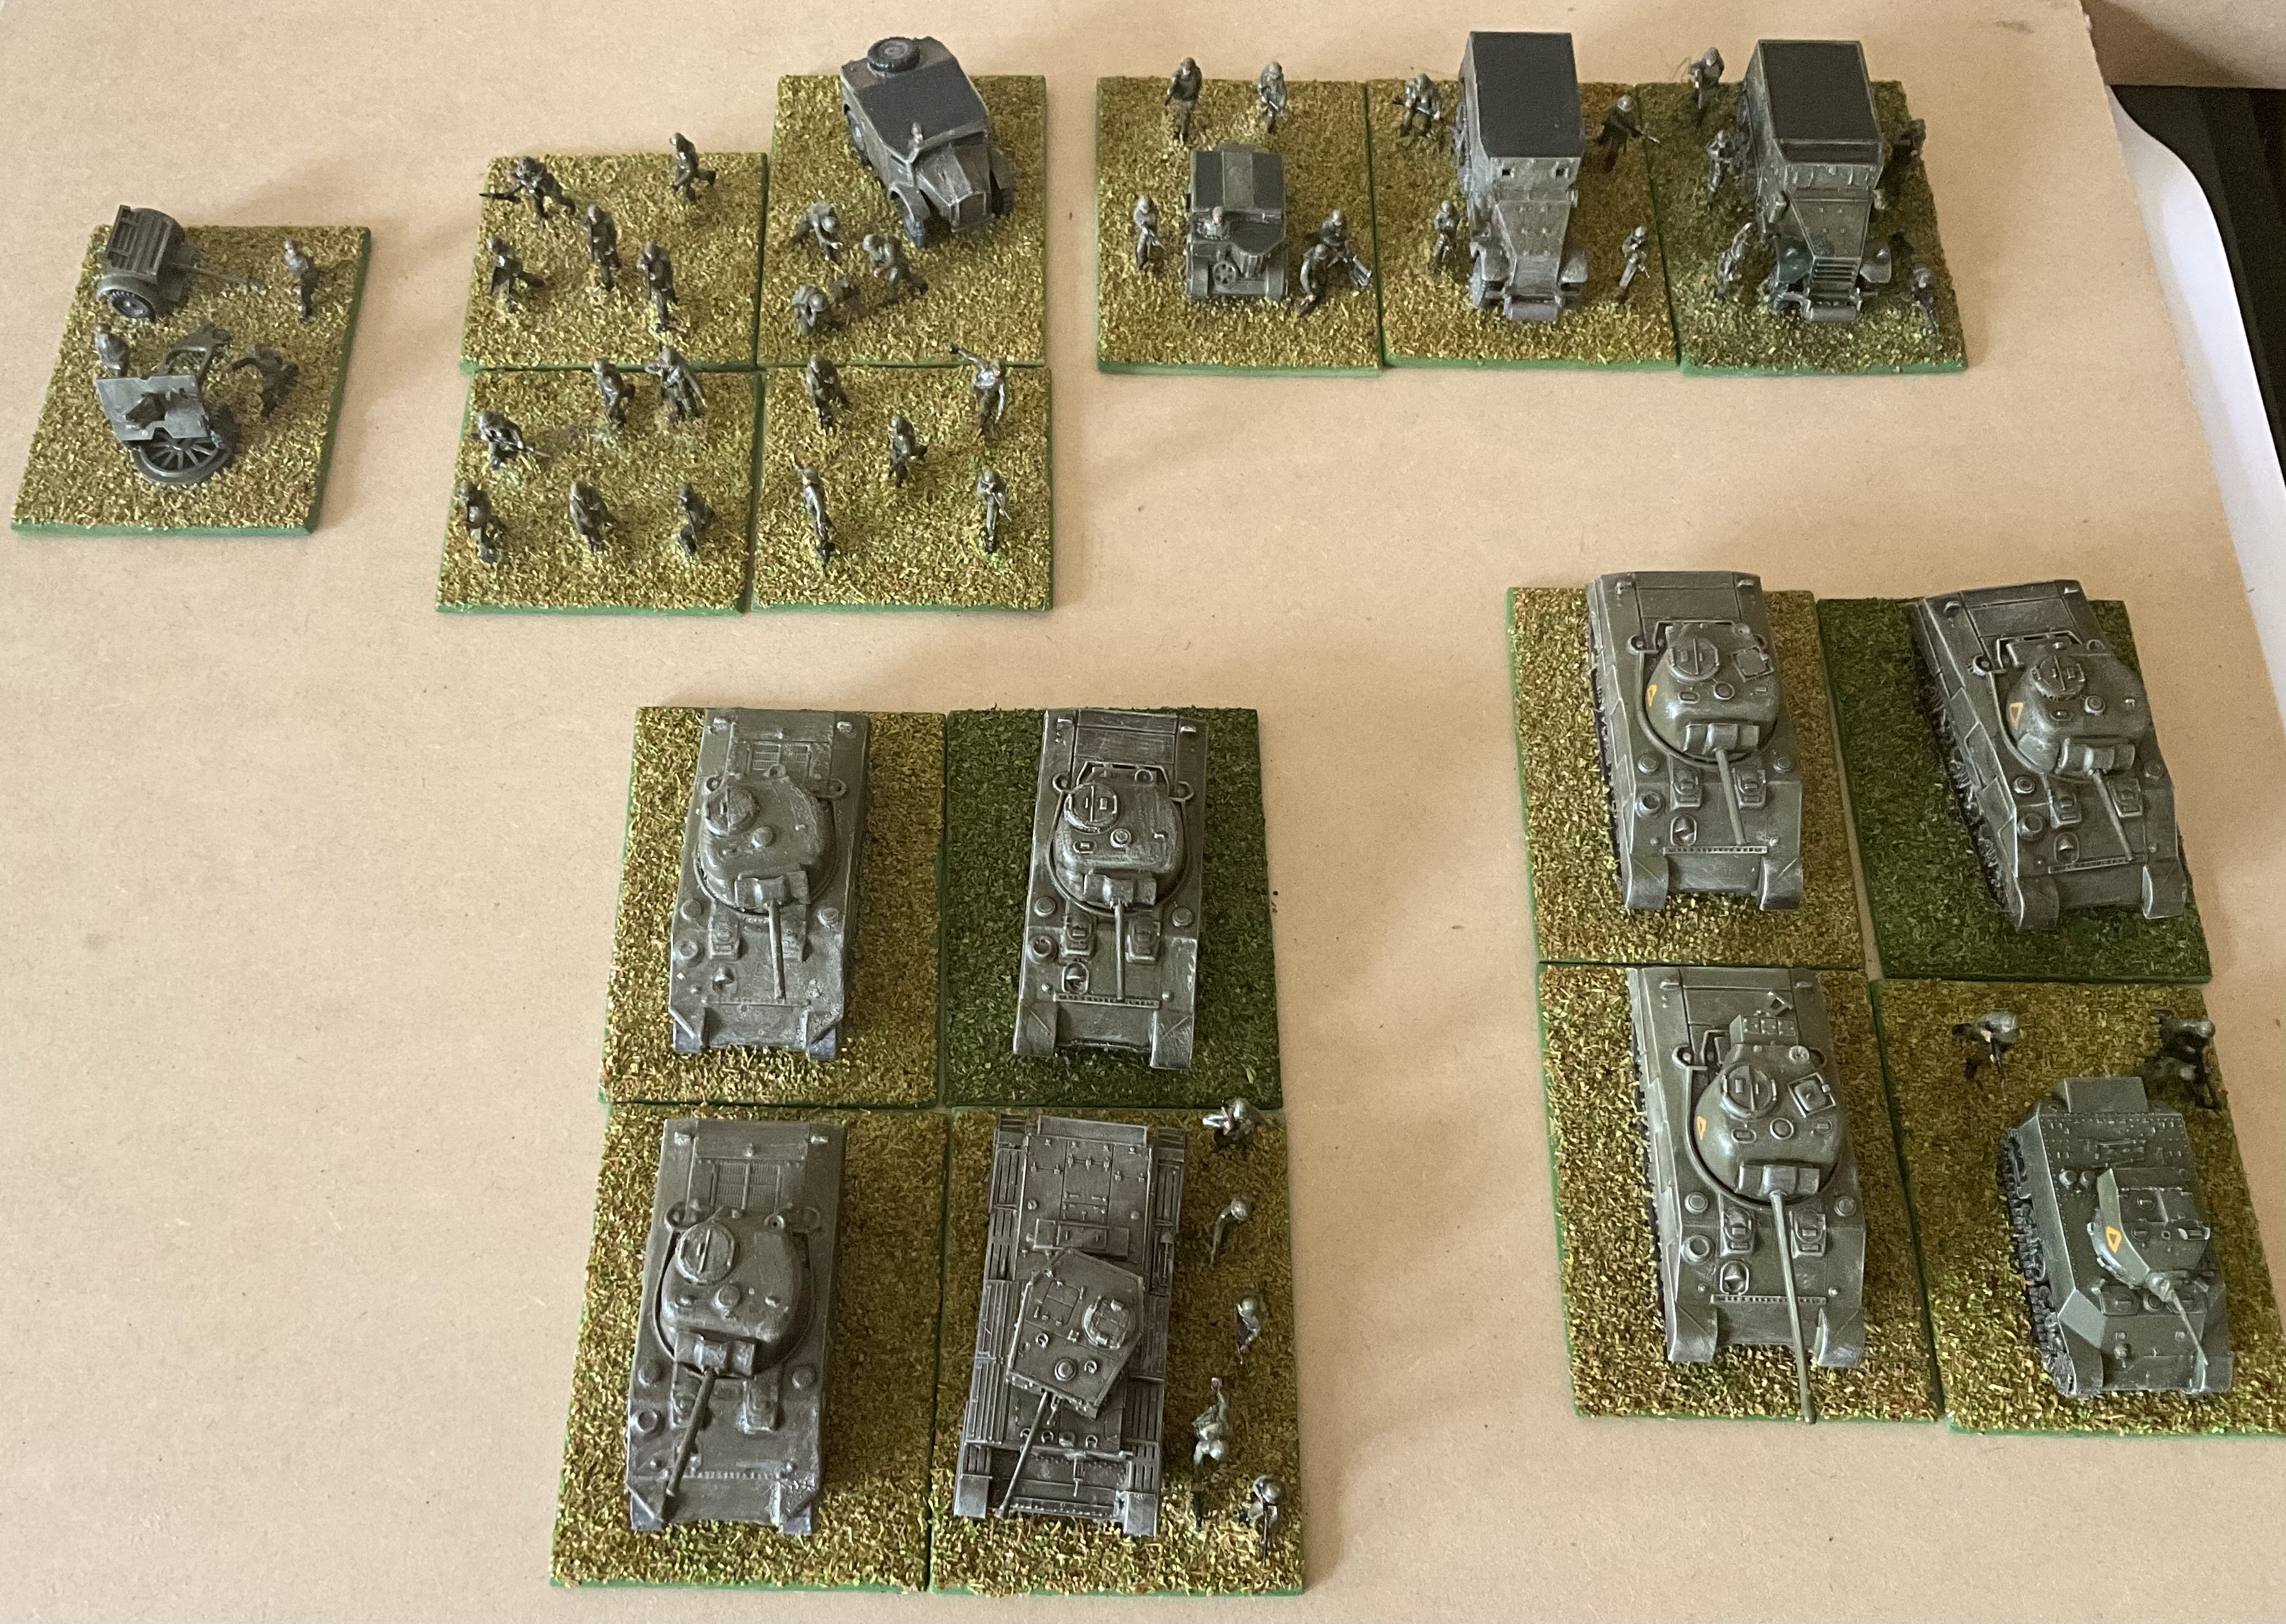
A cavalry unit on the left with two bases, a dragoon unit with one base, and an infantry unit with two bases on the right. The cavalry and infantry represent brigades when the number of units is reduced in the games.

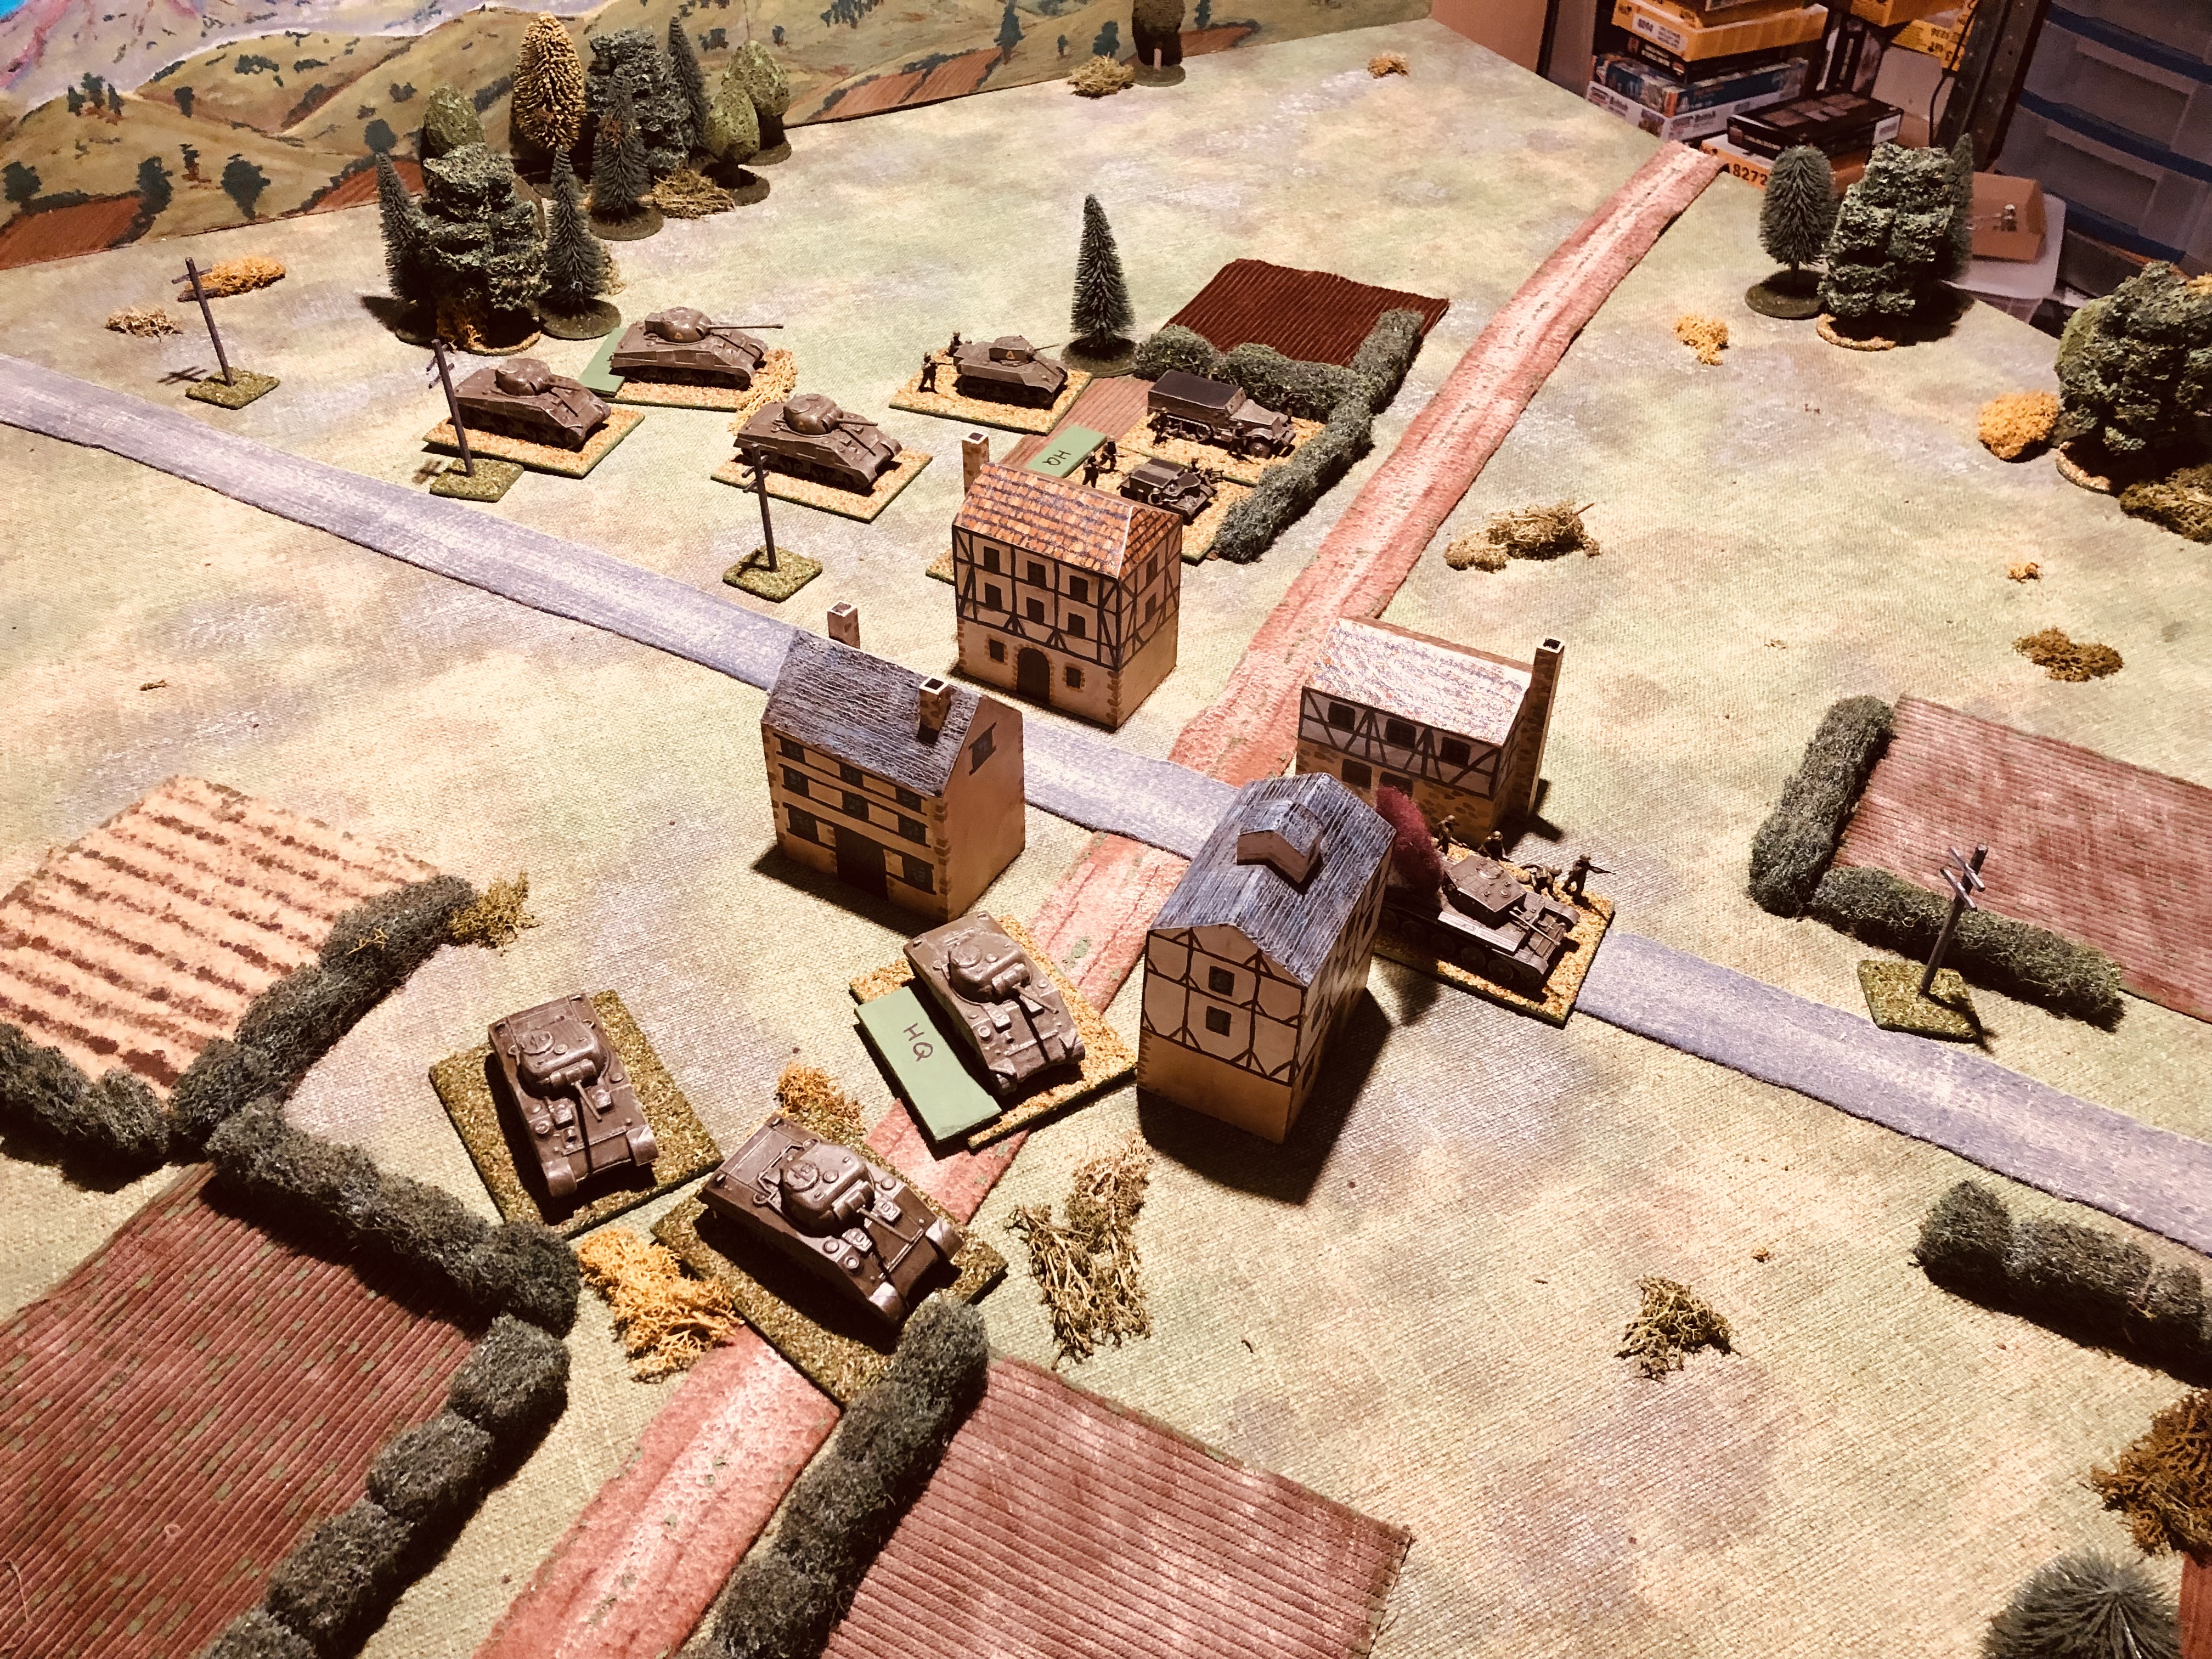
A test game underway

In the process of developing the decision tables, the top level table operates at the army level and establishes whether the army is in an attacking, holding, or retiring position. Once this status is determined, the corresponding decision table for the army's status is used to determine the actions to be taken on the tabletop.

The army level decision table determines which corresponding decision table is used to move troops on the tabletop.

To help in the creation of the second set of decision tables, I have been playing a number of ECW games and noting down my decisions (hopefully the right ones). While taking notes, I discovered that I had more of a prioritised list of actions rather than a decision tree, and these actions quite naturally followed the game's sequence of play. The priorities on each list varied depending on the army's status. Although there are no dice rolls involved in choosing between actions, it may appear somewhat mechanical. However, the variability lies in the number of move actions taken, which is determined by a D3 dice roll.

I am using filing cards to make notes. One card for each decision table (or priority list).

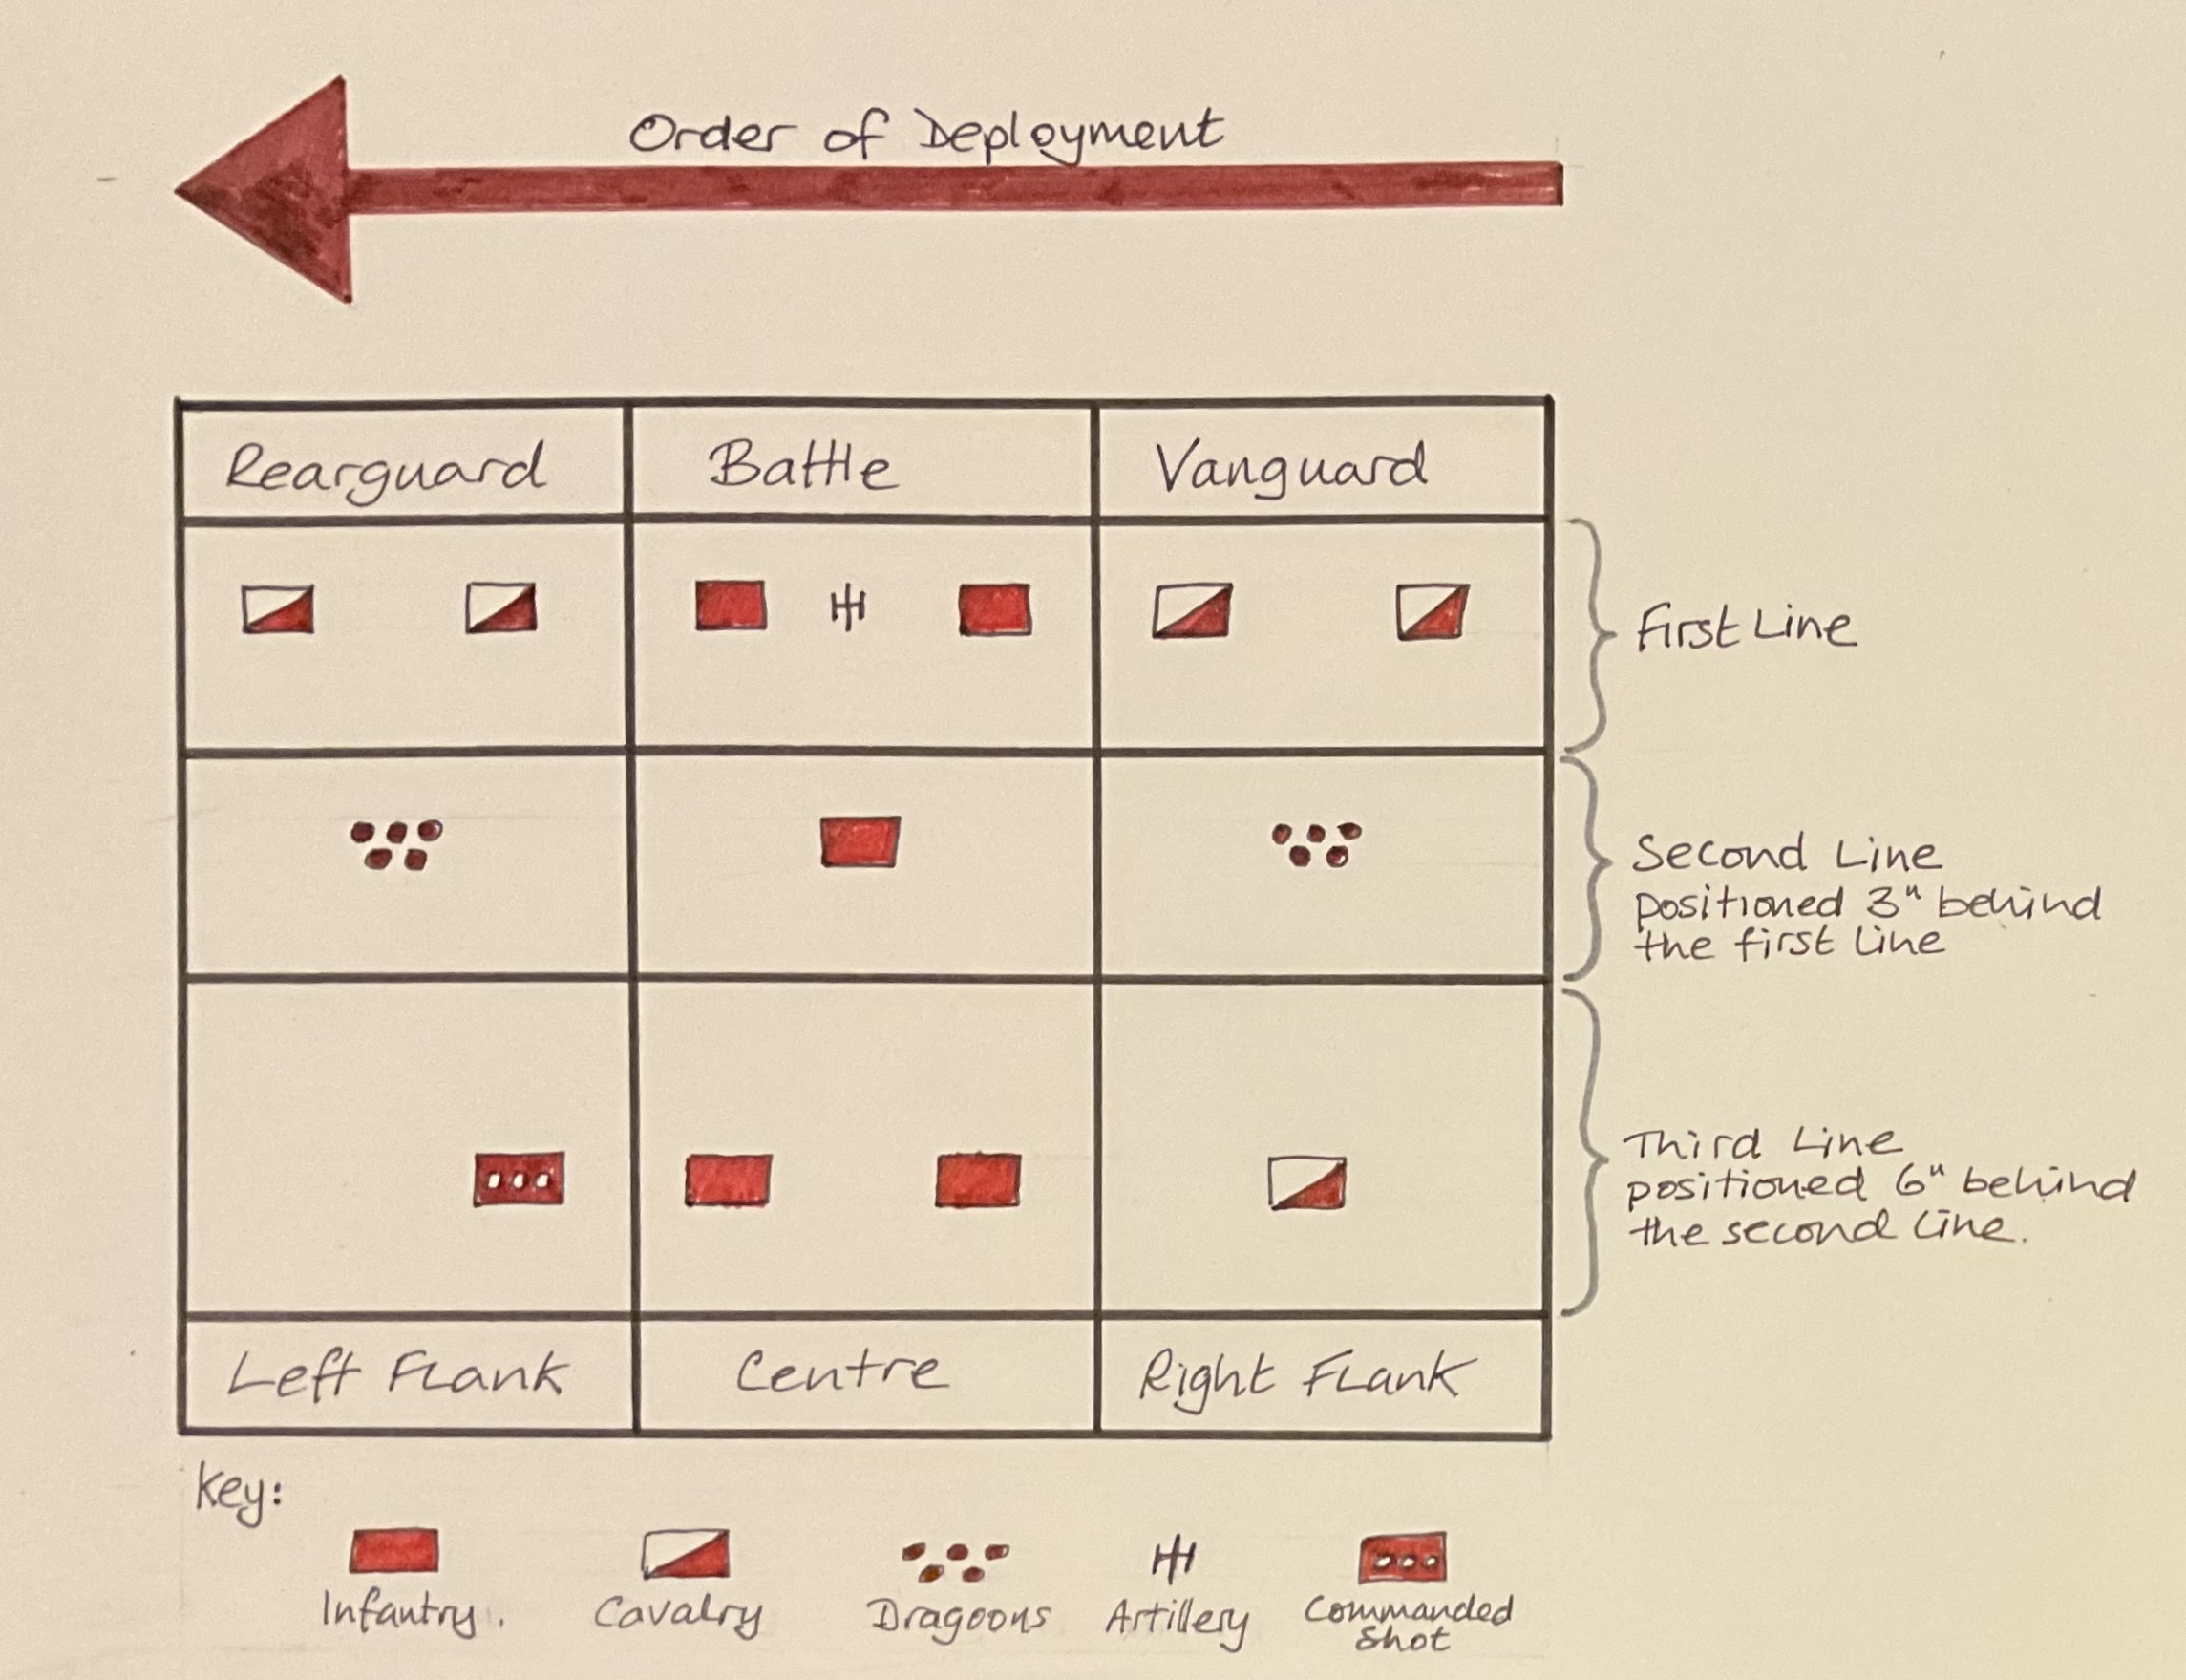
Example of Army Level Decision Table

Here are details of the decision table for army level status as they currently stand. There are sure to be updates, but it is a starting point.

Friday 24 March 2023

Sumerian Remote Wargame

I participated in a remote wargaming session with Jon of Palouse Wargaming Journal today. While it was Friday morning for me, it was Thursday early afternoon for Jon due to the time zone difference. The game was an an Early Bronze Age battle using Jon’s beautiful Sumerian armies which he has been printing over the last couple of years. The rules used were a hex-based variation of the Basic Impetus rules modified by Jon. 

Sumerian War Chariot

Each army had 12 units:

  • 5 skirmish units of javelins, slingers, and bows
  • 3 blocks of bows and spears
  • 2 large blocks of heavy infantry
  • 2 war chariots

Not being familiar with this historical period and their armies I was looking forward to the game, in particular the heavy chariot units which looked impressive but came with manoeuvring challenges.

Since this was my first time using Sumerians and this variation of Basic Impetus rules, the game was played the game on a tabletop with no terrain. Jon had depolyed both armies into three lines. The first line consisted of skirmish units, the second line comprised blocks of bows and spears, and heavy infantry, while the war chariots were positioned in the third line.

The start of the game saw both armies push forward their troops and start to manoeuvring the war chariots into position for later attacks.

Both armies advance with skirmishes harassing and clashing as they closed. Blue army (the ones with the blue dice) split their war chariots. While Red army move both chariots towards their right flank.

Having won the initiative on turn 2 or 3 both Red’s heavy infantry advanced forward into their Red counterparts forcing them to retire in disorder creating a hole in their centre.

On Red’s right flank one of their war chariots trundled forward and was repulsed by an opposing Blue chariot. The run of play had certainly turned against Red.

The second Red chariot is repulsed and was soon after destroyed.

On Blue right flank their war chariot charges forward mopping up the skirmish line.  Red army was in disarray and their exhaustion point had been reached.

Discussing the game afterwards, it was very hard for Red to recover once the two heavy infantry units got a roll on and started to pursue their opponents. The chariots really do make for an interesting and fun game, they are very powerful, but also quite brittle once they lose their impetus and are forced to retire.

The screen shots of the game don’t do justice to Jon’s wonderfully painted armies.

Saturday 18 March 2023

WW2 scenario and game report

This scenario, set in North West Europe, draws inspiration from the events that took place in Villers Bocage during WW2 in 1944. It depicts an Allied effort to break out of the German encirclement, where a British armored group has spotted a weakness between two enemy divisions and is making an attempt to capture a crucial hilltop.

A close up of some of the engagement.

The wargame being played incorporates the "Tank on Tank" board game rules from Lock n Load, but with some adaptations that enable free movement on a tabletop. Additionally, a few new rules have been added for tank destroyers and infantry to enhance the combined arms feel of the game. There are a few more notes on the changes and adaptations at the end of this post.

Scenario

The scenario titled "Action at Birscote - Somewhere in France 1944" depicts a situation where a British armoured group is moving forward through the town of Birscote to capture the hilltop. To counter this advance, the Germans have mobilised a force that will converge on the town from three directions - north, east, and south - denoted as points A, B, and C on the map below.

Map of the scenario. The British are advancing towards the hill and the Germans will converge on the town from points A, B, And C.

The game was played on a 6x4 foot tabletop.

Armies

The British force has:

  • Two Sherman troops (both have reconnaissance tanks a Cromwell and Stuart, and one troop has a Firefly 17 Pdr).
  • An armoured infantry company
  • A infantry company with mortar support
  • A 25 pdr. Artillery section

British Force

The German force has:

  • A troop of two Tiger tanks with two armoured infantry - these will arrive at point A on the map.
  • A armoured company of two armoured infantry, armoured car, Stug III, and Wespe - these will arrive at point B on the map.
  • A troop of three PzIV tanks - these will arrive at point C on the map.

German force converging on the town of Birscote from three directions

Deployment

The British troops start the pre-game actions by deploying as many units as they desire along the road leading into the town of Birscote. Any additional forces that cannot be accommodated at the outset can arrive as reserves at any point in the game, along the same road.

On the other hand, the German forces will commence the game off-table and appear at designated points A, B, and C on the map. They are required to first deploy all their units at point A before beginning to have units arrive at point B. Only after all point B units have arrived can the units begin to arrive a point C. This restriction will require the German player to strike a balance between the arrival of units and attacking the enemy.

Game length and turn order

There is no set game length. The German player goes first arriving along the road at point A on the map.

Victory Conditions

British forces must capture and maintain control over the hilltop, while the German forces must seize and hold the town of Birscote.


The Game Report

At the beginning of the game, a solitary Tiger tank arrived and shortly after, the first British tank was destroyed. In response, the British forces quickly left the road and stationed their armored infantry in the town while their tanks moved to either side of it. Soon after, another Tiger tank arrived, along with supporting armored infantry. At this point, the British tanks had adjusted their aim and were lucky enough to disable one of the Tigers, but at the cost of losing another of their own tanks.

From a deployment perspective, by turn three all German units had arrived on the tabletop at point A. This would allow their other forces to start arriving at point B.

Opening moves as the British respond to the arrival of a couple of Tiger tanks on the hill.

The first British tank brews up.

The British leave the road and reposition their armour, while armoured infantry occupy the town.

A Tiger tank is disabled as after three turns all the German units that were to deploy at point A have arrived.

Flank attack from the south

The attack by the Germans, approaching from the southern direction, caught the British forces off guard. Although a fortunate hit managed to take out the Stug.III tank destroyer early on, the German armoured infantry successfully made their way into Birscote and were only forced out after some intense house-to-house fighting. Realising that any further attempts to attack Birscote directly would likely end in failure, the Germans shifted their focus towards targeting the flank of the British tanks that were still engaged in battle with the solitary Tiger tank situated on the hill.

The Germans launch an attack from the south in an attempt to take Birscote.

Initial units of the southern attacking force arrive. Unfortunately for the Germans a luck shot (double sixes) had destroyed the Stug III.

German armoured infantry press on with the attack in Birscote.

German units briefly enter Birscote.

Having been ejected from Birscote, the attack is directed at the flank of the lead British tanks engaging the lone Tiger tank on the hill.

Attack from the north road

The British forces were not granted any respite after just repelling an assault on the town, when German tanks approached from the northern direction. Fortunately, the British tanks were anticipating a possible attack from that direction and were able to quickly engage the enemy in a tank-to-tank battle, with the Sherman Firefly joining the fray as soon as possible. Through their gunnery, the British gradually gained the upper hand and were able to destroy the German tanks one by one with only few losses themselves.

The tank attack from the north arrives.

An early success by the British give them the upper hand in the tank-on-tank battle.

The tank battle was over quickly allowing the British to regroup for a counter attack.

Counter attack along the south road

The swift elimination of the northern tank attack provided the British forces with the opportunity to reorganise themselves and mount a counterattack against the remaining German units located south of Birscote. Lead by the Sherman Firefly, the British launched an attack that ultimately resulted in the destruction of both the German armoured car and the Wespe mobile artillery.

The removal of the northern threat allows the British to regroup and counterattack in the south.

German forces south of Birscote come under fire as the British launch a counterattack. 

The counterattack is successful.

A last ditch attempt to take the town

The German forces that remained on the hill began to descend with the aim of capturing the town. A single Tiger tank, accompanied by two armored infantry units, slowly advanced towards Birscote. Sensing a chance, the Sherman Firefly involved in the counterattack was able to position itself on the flank of the Tiger and successfully fired, causing the tank to explode in flames. This decisive blow shattered any hopes the Germans had of capturing Birscote and they were forced to retreat. The British units, thereafter, were able to seize control of the hill with the aid of their remaining tanks and reserve foot infantry.

A victory to the British, coming at the cost of half their forces.

Germans make a final attack on Birscote.

A Tiger tank and armoured infantry advance.

The Firefly takes it shot.

This was the third time I have played the scenario and so far it is 2:1 in favour of the British. The outcome of the northern attach appears to be the key to any success or failure.

Modifications to the Tank on Tank rules

To adapt the board game, which uses a hex-grid, to the tabletop rules I used the following adjustments:
  • One hex equated to 8 inches on the tabletop.
  • Any unit located within 1 inch of a terrain feature, such as a hedge, building, or tree, was considered to be in cover.
  • Buildings and trees were obstacles that blocked line of sight, with measurements taken from the center of the unit's base to the entirety of the target base. Hedges did not obstruct line of sight.
  • Units had to move in a straight line unless they were on roads, in which case they could move along the road for their entire movement. Units had to navigate around clumps of trees and buildings. Movement allowances were not reduced when moving into terrain or cover.
  • Destroyed armor units remained on the tabletop and were marked with smoke. Other units could move through them without hindrance, but they blocked line of sight.

Further modifications were implemented in the rules to improve the game's combined arms aspect rather than just focusing on tanks. These changes included:

  • Infantry units, whether on foot or armoured, had a 360-degree firing arc.
  • Tank destroyers (e.g., Stug.III) were treated similarly to tanks, with the exception that they couldn't fire after moving.
  • Foot infantry could move through other units without impediment, whereas other units could not move through one another.

End note

This post contains more text than I typically write, and I generally try to avoid lengthy posts because I find it time-consuming to check my spelling and grammar. English was not my strongest subject in school, and while I received the usual feedback of "tries hard, but could do better" for most subjects, in English, I only received "tries hard" without the "could do better" part. For much of this post I quickly typed what I was trying to say then used ChatGPT, an AI tool to format for me. Copying and pasting my text into the tool and adding "reword -" at the beginning, ChatGPT generated some readable text for me. A little bit of modification was required afterwards, but it was surprisingly effective.


Saturday 11 March 2023

A repeat remote game with roles reversed.

Although this battle report may appear to be a replica of the previous remote game played two weeks ago, it is essentially the same scenario except for a role reversal between Jon (Palouse Wargaming Journal blog) and myself - I took on the attacker's role and Jon became the defender. I opted to adopt a similar strategy as Jon did while attacking, deploying a screening units while the rest of my force charged forward and engaged with the defending units on the road as quickly as possible. The ultimate goal was for the player caught in the ambush, me, to successfully exit three units off the table.

The replayed game - Scenario #6 - Ambush (1) a slight variation from One Hour Wargames Book.

At the start of the game, I only managed to take a single photo and I forgot to document the rest of the action that ensued. Therefore, here is a brief overview of what happened during the game.

The majority of my troops advanced down the road to confront the defending force stationed near the buildings. My aim was to quickly engage the enemy and I utilised all of my available "Initiative" tactic cards. Meanwhile, Jon attempted to maneuver his flanking force into action as swiftly as possible, while also using his "Rally" tactic cards to help his blocking force withstand the attacks. However, my troops were able to deal significant damage early on as I was rolling high with my combat dice. This put Jon's troops under immense pressure.

The opening moves of the game.

As the game progressed to its mid-point, it became clear that the defending force positioned near the buildings would not be able to hold out for much longer, rendering the flanking force's attack less effective. However, there was one noteworthy moment when Jon's samurai unit, led by their commander, managed to eliminate two of my units in a single turn. Nonetheless, shortly after that, we decided to call the game.

After the game, Jon and I had a discussion regarding the tactic cards that we had selected beforehand. As per the game rules, only one card per turn may be played, and we both had chosen the Hoshi "Arrowhead" tactic, which is an attacking set of cards that includes three "Initiative" cards allowing a free action by a unit when played. We deliberated whether having six cards was excessive, and if the rally and resupply cards should be more potent.

An excerpt from the rules on tactic cards.

Apart from discussing the game itself, we also talked about the rules as I was attempting to modify them to make them compatible with a grid-based tabletop. Given my blog is called "Grid-Based Wargames," I sometimes wonder whether I should be trying to get a few more grid-based games happening. As a result, over this weekend, I have spent more time experimenting with these rules on a gridded tabletop. Initially, I tried using squares, but ultimately, I decided to use hexes instead, primarily because they allowed for units to fit neatly within an eight-inch hex, which was already marked up on one of my home-made battle mats. 

Below are some pictures from a game played using the same scenario, in which hopefully you can see the hex grid, I only mark the corners.

The start of the game. The tabletop is 6x9 hexes and quite suitable for OHW scenarios.

As blue advances Reds flanking forces start to engage their flank.

Blue’s skirmishes and mounted samurai provide a screen.

Blue’s foot samurai can be seen breaking through the blocking defenders.

With the defenders eliminated and with only 4 units, Blue hastily makes tracks down the road.

A stubborn defence by Blue’s skirmishes allows time for Blue’s remaining forces to exit the table.

Now I have to try a few more games and update the rules.

Tuesday 7 March 2023

Pike and Shot pre-game activities

I finished off reading “Pike and Shot Tactics 1590-1660” by Keith Roberts. In its 64 pages, which has lots of illustrations, it covers the development of tactics during the period along with the challenges the commanders and armies faced.

Just finished reading 

My interest in the book was more towards the end of the time period covered and the English Civil War. The take outs from this book from a gaming perspective are:

  • The commanders battle plan was very important and the army would undertake training and drills in the required formations prior to the campaign and battle. 
  • The level of experienced officers and troops would influence the choice of formations a commander would use in their battle plan.
  • The commander, when having to engage in battle, would adhere to their battle plan regardless of the ground fought over, adjusting the plan as best they could to suit ground and available forces, but not fundamentally altering the plan.
  • Communications in this period were slow and commanders had few opportunities to exploit the enemy’s weaknesses and had to rely on their army’s deployment to gain an advantage.
  • The importance of unit positioning so units in the first line so they could retire and have space in which to move and not crash into the units behind, or spaces in which other units can advance to bolster lines.

I am now thinking about how to incorporate more decision making into the game’s planning and deployment activities. For example:

  1. Have players in advance of the tabletop game list their units and place them into the marching order: vanguard, battle, and reserve. This would dictate the order of unit placement on the tabletop, right to left.
  2. Players would have to draw their battle plans in advance, positioning the units for the vanguard (right flank), battle (centre), and reserve (left flank) in the first, second, or third lines. Essentially listing units on a 3 by 3 grid (see picture below).
  3. The tabletop terrain becomes known to the players after planning and they can have to divide the tabletop into three sections for the centre and both flanks. The minimum section width must allow two units to comfortable fit side by side. For my unit base size of 4 inches width a minimum of 12 inches would be used. It is at this stage the player gets to adjust their battle plan to fit the terrain by the sectioning the tabletop and deciding the position of the first line. The second and third lines would fall in behind.

Example of a battle plan.

Example of sectioning the tabletop for deployment

I am still thinking about incorporating unit experience into the rules and how best to do that. One thing has been confirmed is I will be keeping my units as a single base, as I had been thinking about reducing the number of units and increasing their size to two bases for a unit. Having more units on the tabletop, 10 to 12 units per army, helps with more detailed battle plans. The tabletop may hopefully have some resemblance to one of the period prints.

I do so like these print of battles

Saturday 4 March 2023

WW2, ACW, and a wargaming discussion

Not a lot to post about this week. In terms of painting a couple of Sherman tanks rolled off the painting table. While searching for something else I can across these and as I was playing some WW2 games I thought I might as well paint them and get them out of the way.

A couple of Sherman tanks painted this week.

The WW2 games have been using the Tank-on-Tank board game rules with free movement on the tabletop. One hex converts to 8 inches on the tabletop. This has given some very enjoyable and quick games. One rule change I have made to the previous ones mentioned in an earlier post (see here) was a suggestion from “Just Jack” to allow non-turreted armour to shoot and move which works very nicely and  differentiates them from tanks which can do either, move and shoot or shoot and move. Thanks Jack!

A WW2 game underway.

On the theme of using board game rules for tabletop games I tried a similar approach with Battlecry, a command and colours game, using the suggested solo rule modifications from their website.

Latest board game rules to be used on the tabletop.

The scenario 1st Bull Run setup on the tabletop

On a different topic, Jon of Palouse Wargaming Journal blog posted an interesting question regarding “double jeopardy” which has raised a really interesting discussion in his blog’s comments. The double jeopardy term comes from Neil Thomas and is an approach he writes about in his 19th Century Wargaming book. Very briefly the position is “If the unit behind cover is still suffering sufficient casualties to endure a morale test, then it is clear that the cover is no longer doing its job – and should not therefore confer any morale bonus.” Jon and I have corresponded on this after one of our remote games, and reading other’s thoughtful comments it is really interesting.

I suspect any free time this weekend will be playing, or messing around, with American Civil War games using my old 15mm Minifigs.

Another ACW game underway.