Showing posts with label Wargaming Rules. Show all posts

Saturday, 12 July 2025

Pre-Battle actions for an English Civil War game

Having recently painted another base of English Civil War (ECW) infantry, it was not long before I wanted to get the miniatures onto the tabletop for a game or two. I often use a variant of the One-Hour Wargames Pike and Shot rules and chance cards for my ECW games. As this was a one-off battle I thought I would try and incorporate a pre-battle game that would influence an army's deployment, composition, and also its readiness.

My initial idea was to create a deck of pre-battle cards that players would draw from, but that approach did not seem to be that interesting and lacked any decision making. So I asked ChatGPT for help in coming up with ideas for a set of rules using pre-battle cards. The rule ideas it suggested were very useful and I only needed to make a few adjustments.

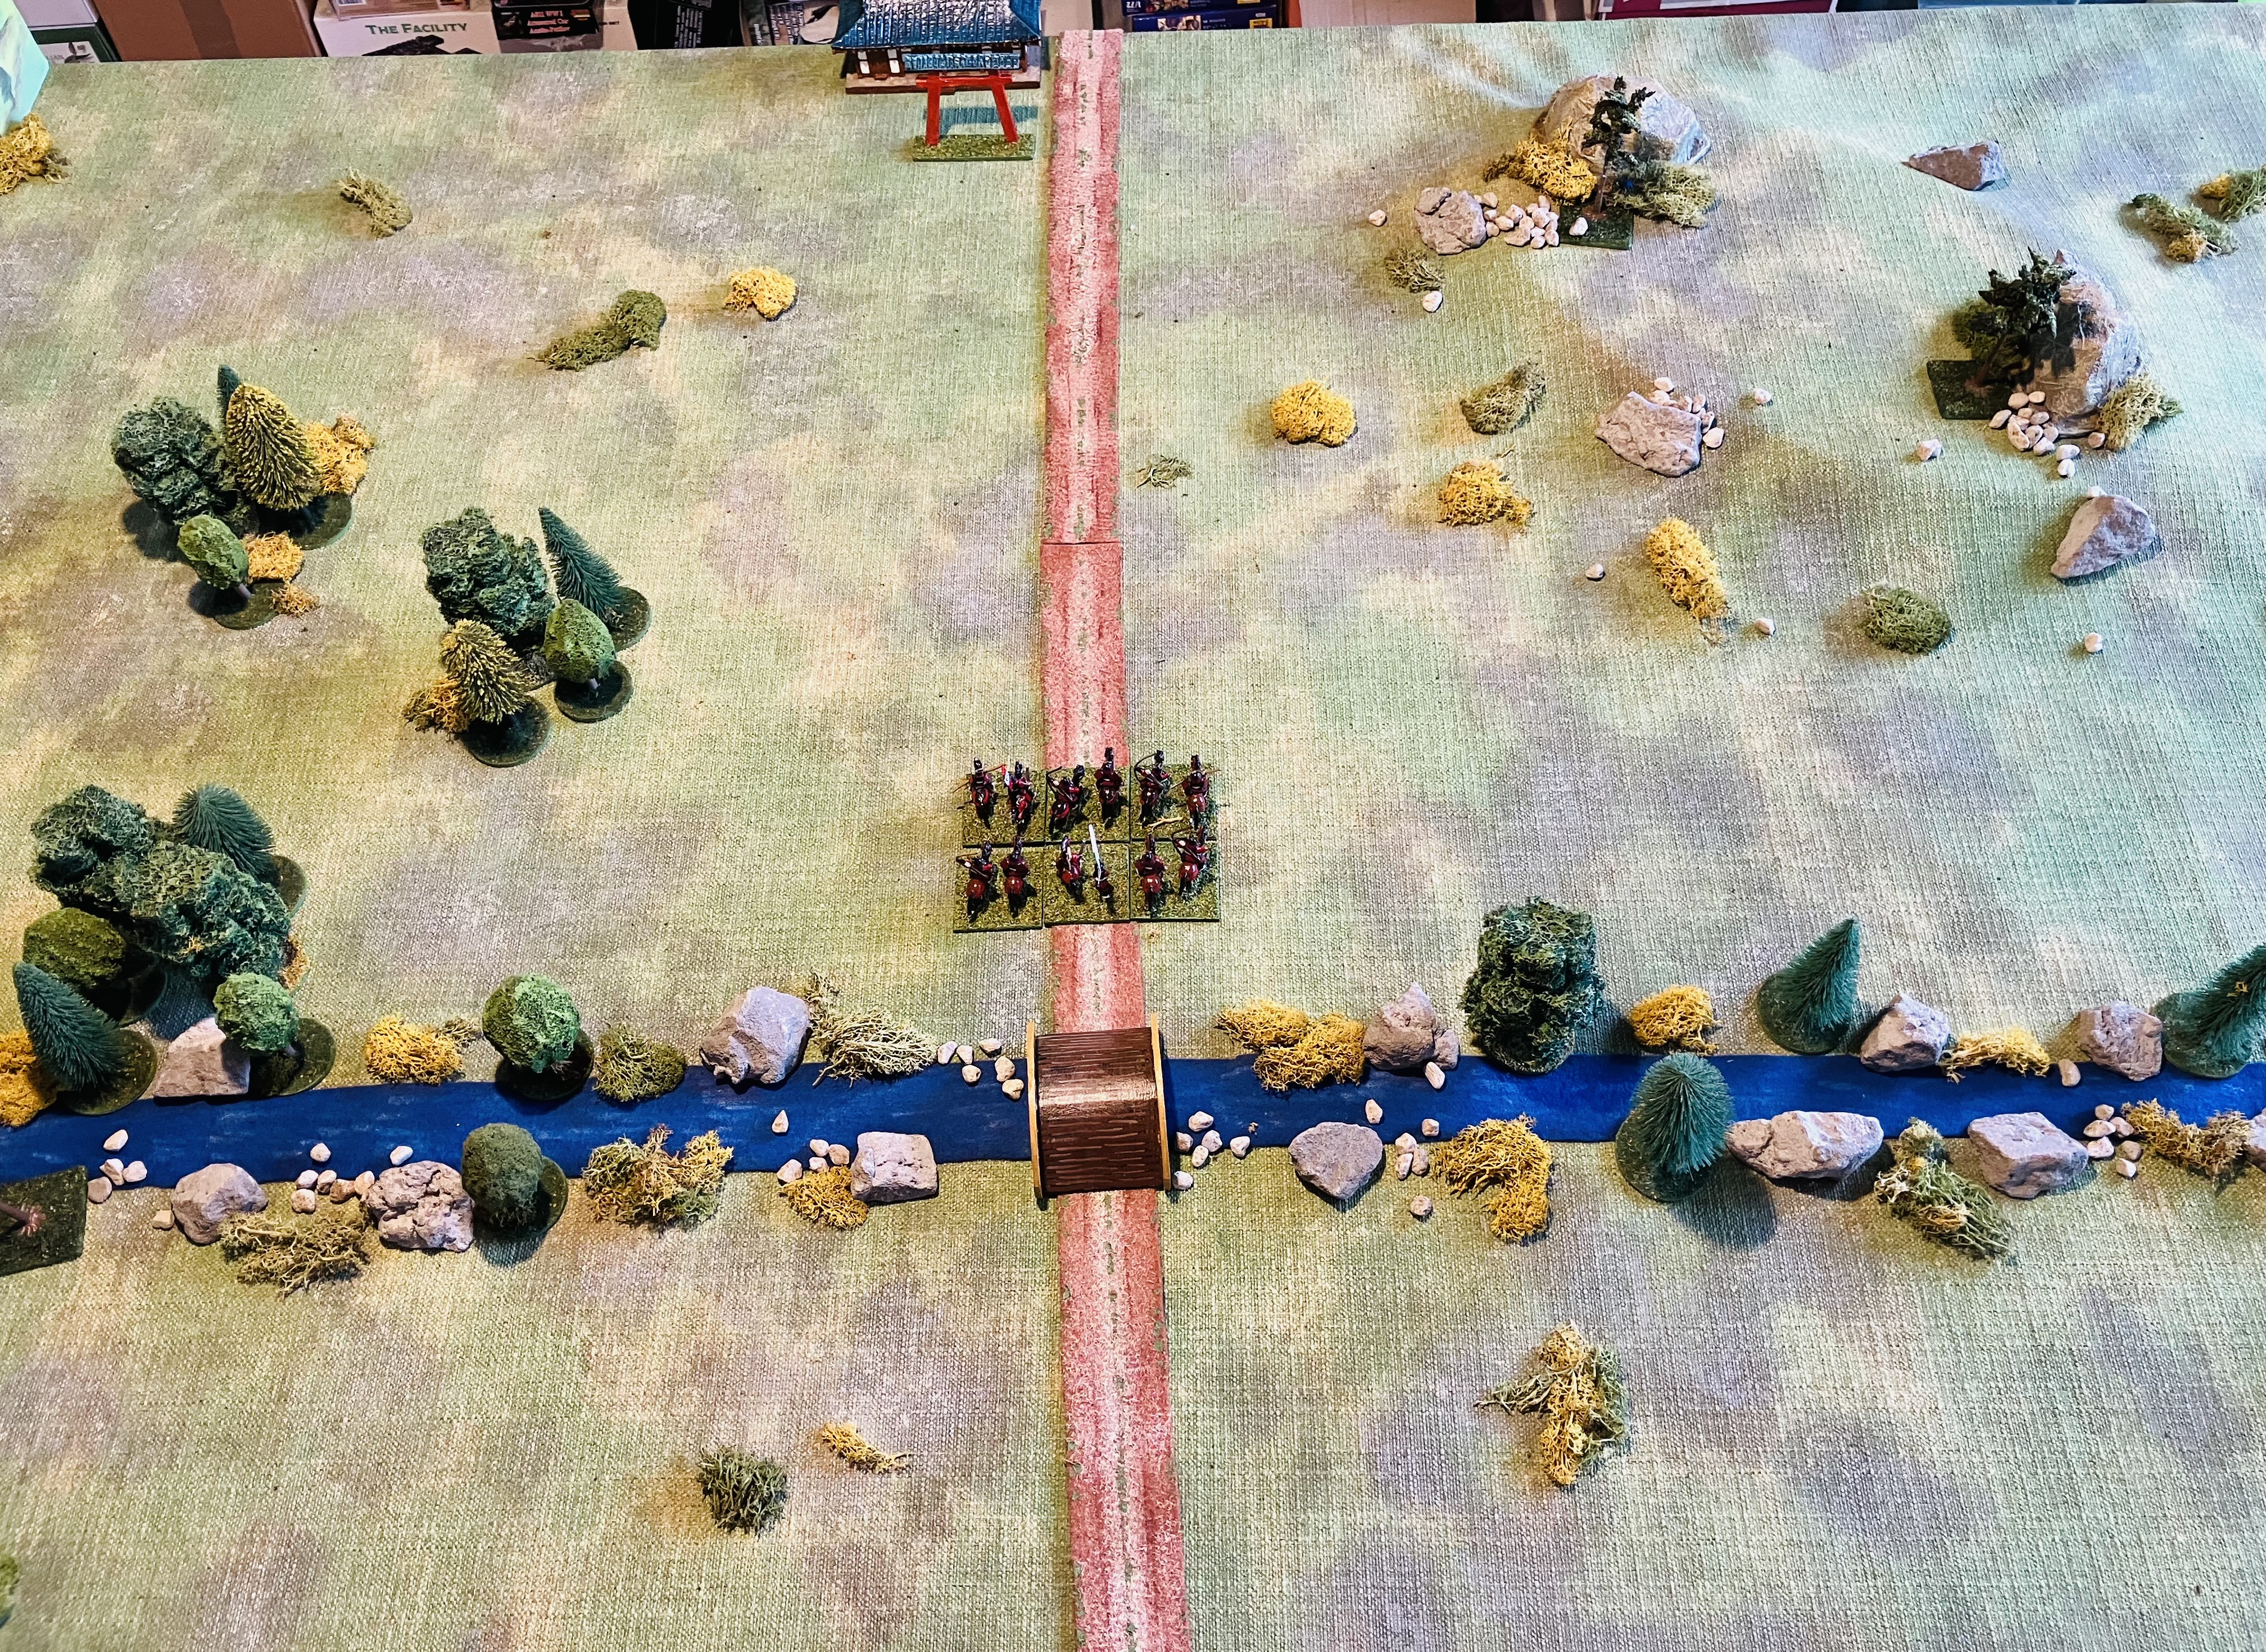
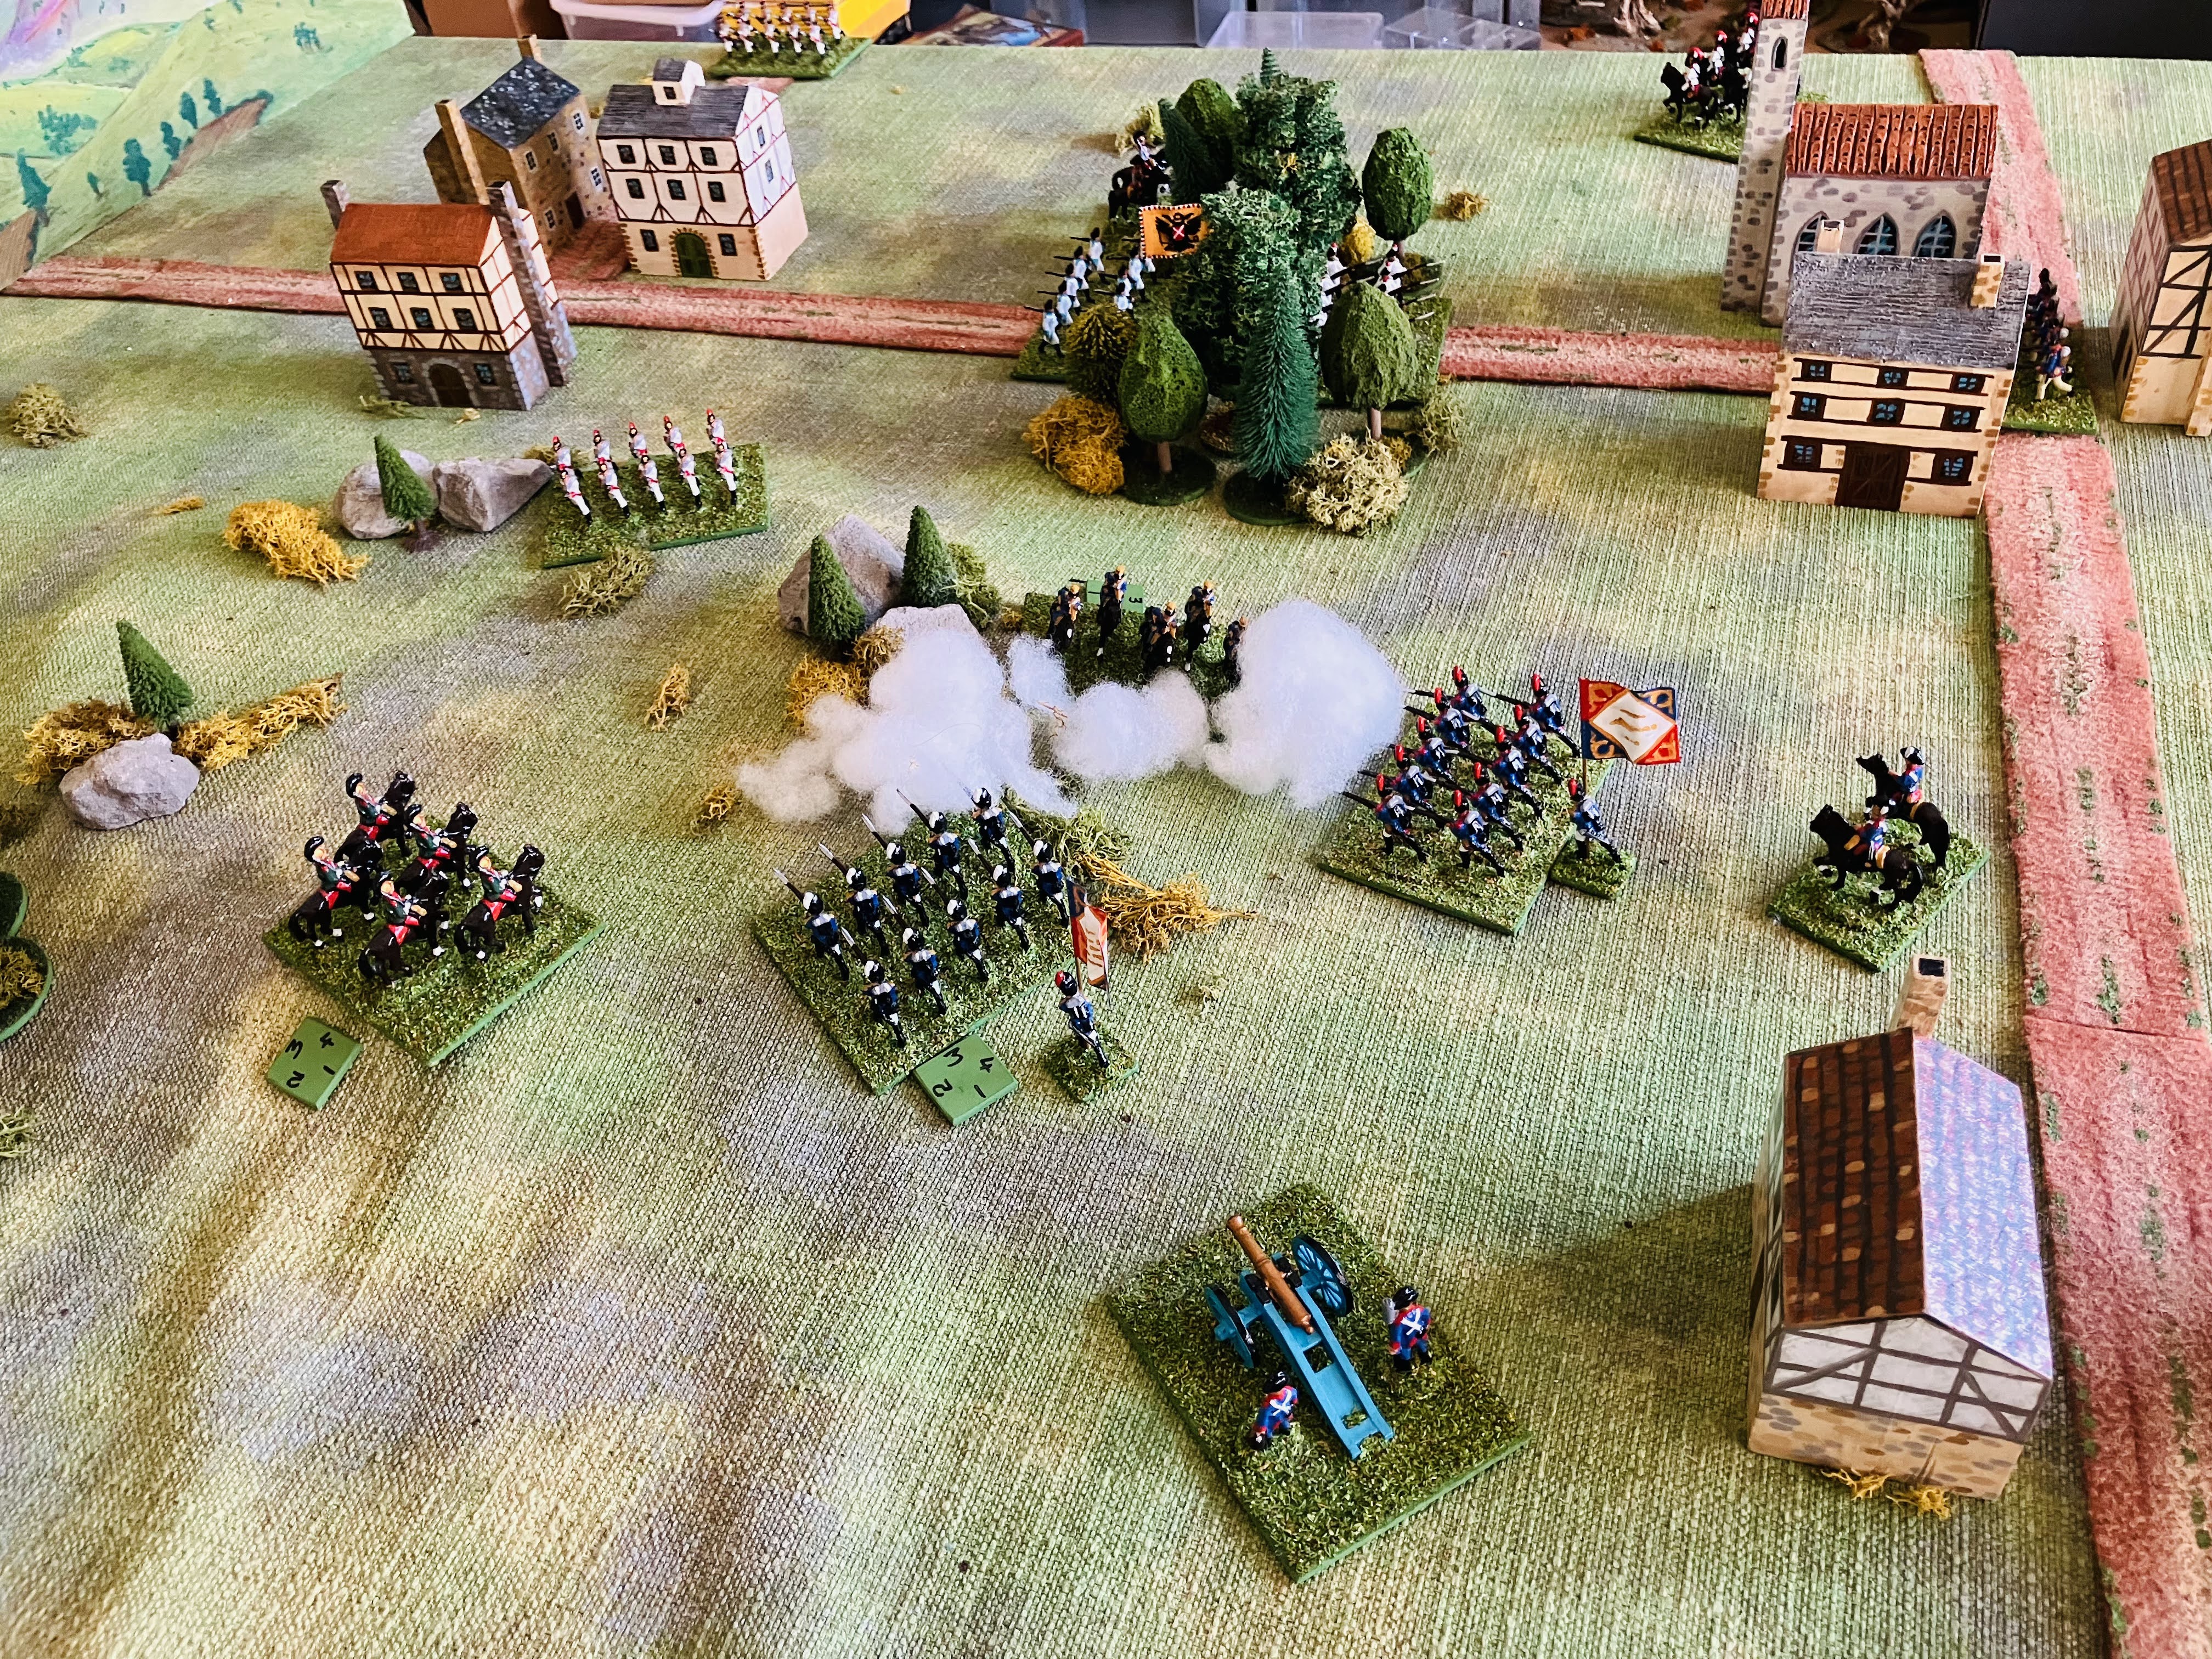
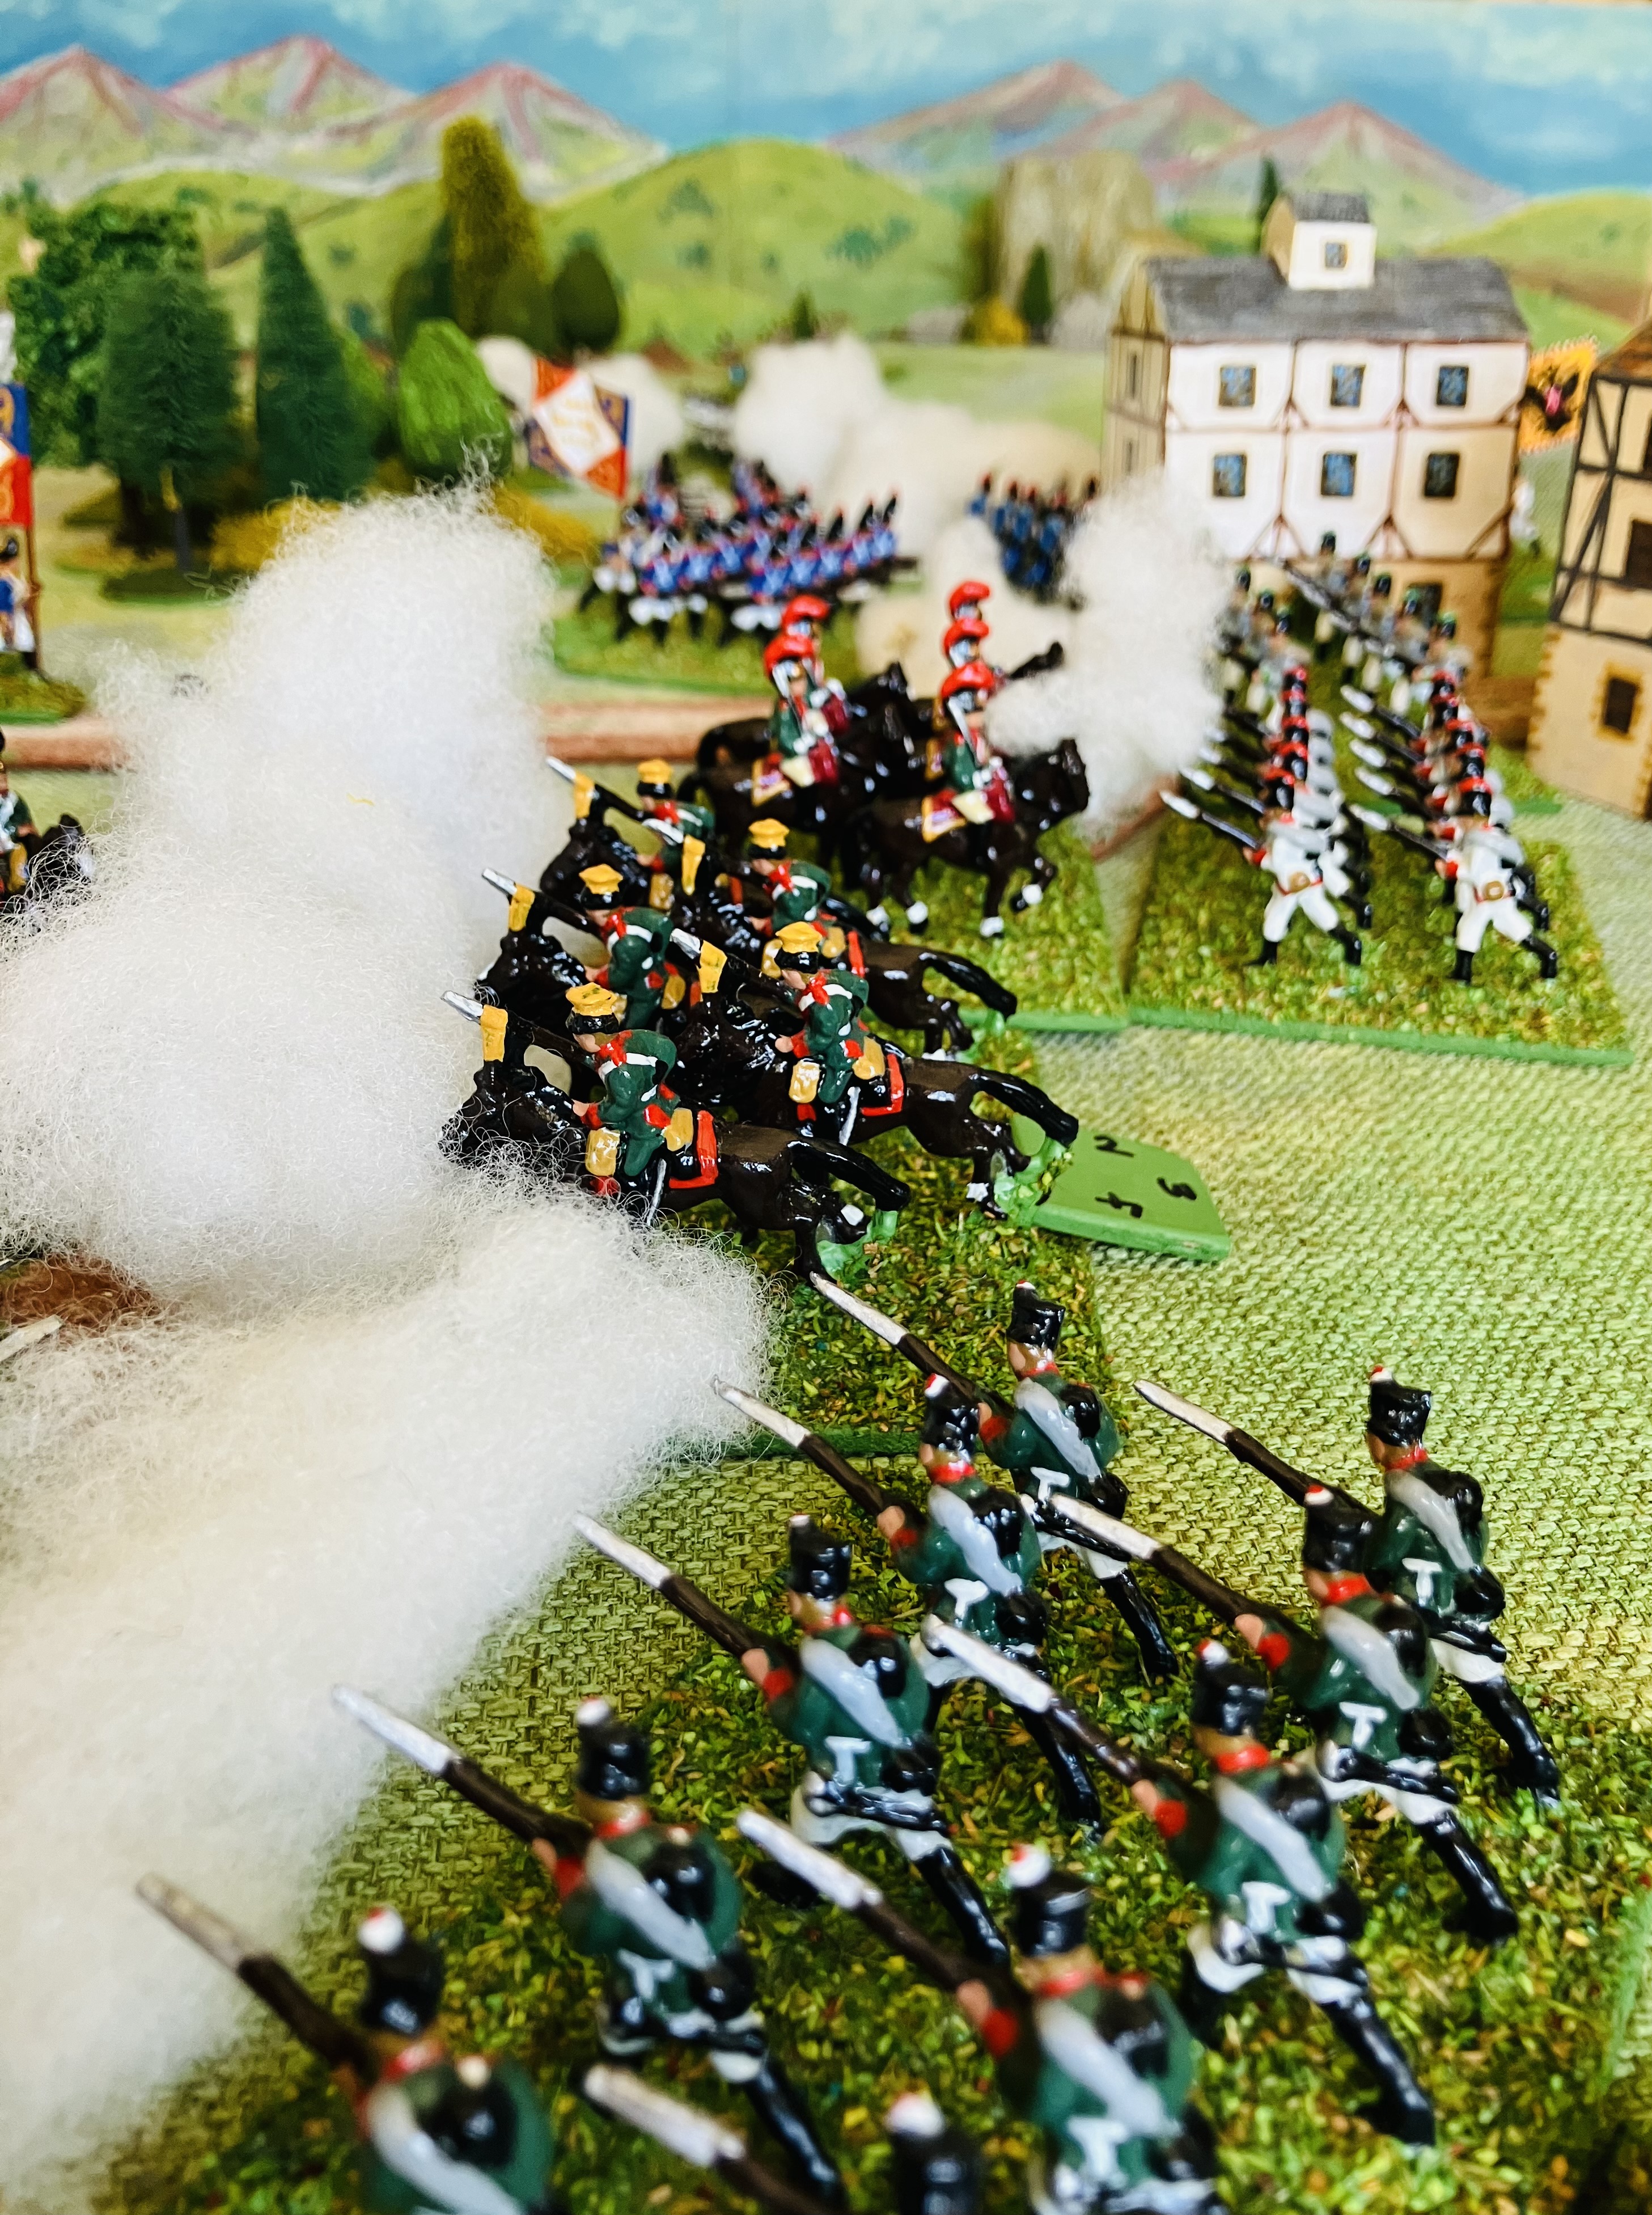
The rest of this post covers the first draft of the pre-battle rules and an example of how they were used to create a narrative. The actual battle report will have to follow in a future post, as this post is already getting rather long.

An ECW game beckons.

The pre-battle rules take 10-15 minutes to play and are written for a tabletop game using One-Hour Wargames (or variant) which incorporate the use of 15 chance cards. The chance cards are important as this is how the army's readiness is represented.

OHW rules using chance cards. Each army has 15 cards and a card is draw at the start of each turn.

Sequence of Play

The pre-battle campaign is played in a series of turns. In each turn:

1) Select Campaign Action. Both players secretly choose one of three campaign actions:
  • Advance Aggressively
  • Consolidate Forces
  • Secure the Region
The same action cannot be selected two turns in a row. For example: A player could choose the Advance Aggressively action in Turn 1, Secure the Region action in Turn 2, then Advance Aggressively again in Turn 3.

2) Reveal the chosen actions. Both players reveal their chosen action and resolve their effects (see next section).

3) Repeat or End. The game continues until 3 turns have been completed, or until a total of two Advance Aggressively actions have been selected in the campaign (regardless of which player selected them).

For solo play I roll a D6 to decide the first action. 1-2 Advance Aggressively, 3-4 Consolidate Forces, and 5-6 Secure the region. After that is a D6 roll 1-3 and 4-6 to decide from the 2 available actions as you cannot select the same action in twice in a row.

Campaign action cards. Alternatively you can just write down the action.

Campaign Actions and Their Effect

Advance Aggressively

  • +2 CP
  • Army composition - Halve the number of artillery units (round down)
  • Draw 1 card

Consolidate Forces

  • +1 CP
  • Army composition - Double the number of dragoon units
  • Draw 1 card

Secure the Region

  • 0 CP
  • Army composition - Halve dragoon units (round down)
  • Draw 1 card, if it’s a disadvantage, discard and draw again (keep the second draw)

What to Track Each Turn

  1. Campaign Points (CP). The player with the most CP at the end will choose the tabletop edge and deploy their army second.
  2. Event Card Draws. Cards drawn during the campaign influence the Chance Card deck used in the battle.
  3. Army Composition. Modified based on the last campaign action taken (e.g., fewer artillery, more dragoons).
  4. Advance Aggressively Tracker. Once two Advance Aggressively actions have occurred in total, the campaign ends.

Ending the Pre-Battle Campaign

When a second Advance Aggressively action is selected or 3 turns completed:
  1. Add up CP totals for each side.
  2. Resolve card effects (as per the drawn Pre-Battle Event cards).
  3. Determine army composition based on each player’s last selected action.
The player with the highest final CP chooses the tabletop edge and gets to deploy second. In the event that the CPs are equal, then roll a D6 to decide a winner. The winner chooses their tabletop edge and must deploy first.

Chance Card Deck (for the Tabletop Game)

As mentioned before I use a modified chance card deck from One-Hour Wargames for my English Civil War games. The composition of the deck can change with the pre-battle event cards drawn. The cards used before and changes are as follows (numbers in brackets are the number of cards):

Initiative (2): One unit may move twice, move & shoot, or shoot twice.
Rally (2): 1–3 units remove 1–3 hits (roll 1D3).
Confusion (2): Units must roll 3+ on a D6 to move. Any failure and no more units may move this turn.
Resupply (2): An infantry, dragoon, or artillery unit that’s out of ammunition is resupplied.
Panic (2): The friendly unit with the most hits takes 1D3 additional hits.
No Effect (5): Nothing happens.

Pre-Battle Event Card Effects (10 Cards)

These cards are drawn during the campaign phase. The cards modify the Chance Card deck used during the tabletop game or CP totals:

Officer Rivalry. Replace 1 No Effect card with a Confusion card.
Captured Supplies. Replace 1 No Effect card with a Resupply card
Poorly Trained Recruits. Replace 1 No Effect card with a Panic card.
Troops Get Paid. Replace 1 No Effect card with a Rally card.
Return of Veterans. Replace 1 Panic card with a No Effect card.
Spy in the Enemy Camp. Gain +2 CP.
Powder Spoiled. Replace 1 Resupply card with a No Effect card.
Rumours of Treachery. Replace 1 Rally card with a No Effect card.
Inspiring General. Replace 1 Confusion card with a No Effect card.
Clubmen - Pillaged the Wrong Village. Lose 1 CP.
 
 
Some Pre-Battle event cards were quickly made.

Playing the Pre-Battle Events

I opted to play the Royalist forces and used dice to drive Parliament's decisions.

Turn 1
  • Royalists chose to Secure the Region. They get zero campaign points (CP) and drew "Clubmen - Pillaged the wrong village" which they discarded and drew "Troops get paid" which will add a rally card to the chance card deck.
  • Parliament chose to Advance Aggressively gaining 2 CP. They drew "Spy in the enemy camp" which gives them another 2 CP.
Turn 2
  • Royalists chose Consolidate Forces. They get 1 CP and drew "Captured Supplies" which will add a resupply card to their chance card deck.
  • Parliament chose to Consolidate Forces. They get +1 CP and drew "Inspiring general". This will remove a confusion card from their chance card deck.
Turn 3
  • Royalists chose advance Aggressively. They get +2 CP and drew "Powder Spoiled". This will negate the captured supply card removing a resupply card from their chance card deck.
  • Parliament chose to advance aggressively. They drew "Poorly trained recruits" that adds a panic card to their chance card deck.
Parliament with a total of 7 CP will have the deployment advantage being able to choose the tabletop side and deploy second. In addition they will remove a confusion chance card and add a panic card to their chance card deck. As they were advancing they will halve their allocated artillery.

Royalists will only add a rally card to their chance card deck, having gained and lost a resupply chance card. As they were advancing they will also halve their allocated artillery.

The game's narrative from a Royalist perspective...

Sir Charles Blackthorne, commanding Royalist forces in the county of Northmarsh, had received word that a Parliamentarian army was advancing to contest his hold upon the region. Cautious by nature and loyal to the Crown, Sir Charles had spent the past weeks sending his troops off to secure the region and getting loans from Royalist sympathisers to keep his troops in pay.

Upon learning that the Parliamentarian force was under the command of Sir Nathaniel Cleve, a seasoned officer with experience from the wars on the Continent, Sir Charles resolved to draw in his scattered troops and prepare for battle.

His scouts reported the capture of several barrels of gunpowder from a local storehouse, yet hopes were dashed when it was later discovered the powder had spoiled, likely owing to prolonged exposure to damp weather.

Determined not to linger indecisively, Sir Charles gave the order to march leaving his artillery train to follow up behind. Yet as his force advanced, it became clear that Cleve had either anticipated his movement or had been warned by a treacherous spy. The Parliamentarian army was already in position barring the road ahead.

A closer view of an ECW game.

All is now set for a game.

Sunday, 14 July 2024

Adding messengers to my samurai games

This weekend I was able to paint up a few more samurai messengers (Tsukai-ban) for my games to replace the tokens I had been using. These messengers played an important part on the Sengoku battlefield, translating the Daimyo’s orders into actions on the battlefield. Over the past couple of weeks I have been trying to incorporate Tsukai-ban into my samurai rules where they can have an influence on the actions a unit may take.

Tsukai-ban and a command tent.

My current rules have an activation approach where units are individually activated by a player during their turn. With each activation a D6 is rolled. The result determines the number of actions the unit can take:

  • On a score of 1, the unit fails to activate.
  • On a score of 2-4, the unit can perform 1 action.
  • On a score of 5 or more, the unit can perform 2 actions.

The unit then performs a number of actions based on the roll. All actions for the unit must be completed before the player activates another unit. Possible actions include:

  • Move (including charge by moving into contact with an enemy unit)
  • Shoot
  • Personal Challenge (with 2 actions)

Units with two actions can perform them in any order, such as: move and shoot, shoot and move, move twice, shoot twice, move and charge, or charge twice. Actions cannot be carried over or saved for later use.

A Tsukai-ban attached to a unit.

Tsukai-ban can be either attached to units or placed in the command tent, ready to receive their next orders. At the start of a player’s turn, before attempting to activate their units, they can move from the command tent to attach to a unit, or detach from a unit and move to the command tent. They cannot move directly from one unit to another; they must first return to the command tent.

A Tsukai-ban adds 1 to their attached unit’s activation D6 rolls, playing a crucial role in activating units and increasing the likelihood of a unit taking multiple actions and avoiding a failure to activate.

If the unit they are attached to is eliminated, then the Tsukai-ban is also eliminated.

If an army does not have a command tent, or the command tent has been eliminated by an enemy unit making contact, Tsukai-ban cannot move between units and must remain with the units they are attached to.

The messengers are the last piece to add to my samurai rules. I am now writing up all my notes after a number of enjoyable test games.

Monday, 1 July 2024

Adding personal challenges to the samurai rules

As I continue to work through my home-brew samurai rules, one of features I want to include are personal challenges (and heroic deeds). Even during the 1550-1650 period, the time period these rules are aimed at, samurai would occasionally issue personal challenges to their opponents. They were often employed as a tactic by retreating samurai units, hoping the time spent issuing, accepting, and fighting the challenge would allow them to either escape or reorganise themselves.

I wanted the rule mechanism to be easy and fun to use, and also provide variable outcomes. I opted for an approach using coins to decide the outcome, where coins are flipped by both participants with heads winning. Whenever the result is two heads or two tails, then another round of combat occurs. After each round of combat, unless killed, players can remove one of their unit’s hits as they reorganise or are inspired by the challenge. While this rule offers little to no benefit to fresh units, it can be advantageous for depleted ones that have accrued a number of hits.

Challenges are issued and accepted.

Below are the draft rules, followed by an example…

Personal Challenges (and Heroic Deeds)

The leader of a samurai unit must spend 2 actions to issue a personal challenge to an enemy samurai unit, whether on foot or mounted, within movement range. Challenges can only be issued between samurai units, foot or mounted.

When a personal challenge is issued, both players move their commanding samurai bases to an equal distance between the units to commence personal combat. The process for combat is as follows:

Combat. Both players flip a coin for their samurai leader, then compare on the table below. Heads will win unless the other player has also flipped a head.

Personal Combat Table

Combat Results. For each round of combat a samurai leader survives, remove 1 hit. When combat concludes, the winning samurai leader returns to their unit with their opponent's head, while the loser is removed from play.

Example of personal challenge combat…

Blue mounted samurai who have taken 7 hits are now facing off against Red’s foot samurai and Ashigaru. Wanting to delay until further reinforcements arrive they successfully roll 2 actions and choose to offer a personal challenge to the foot samurai who currently have 1 hit. 

The leaders of both units are placed equal distance between the two units.

The first round of combat has both flipping tails. So both will be able to remove 1 hit.

Blue flips a heads while red flips tails. Blue wins and can remove another hit, while red loses.

Blue leader returns victorious to their unit which now has 5 hits. Red leader is removed as a reminder they cannot issue a challenge. They have removed 1 hit for surviving the first round of combat.

All being well I hope to try these rules out in a couple of games over the next week. I will also be considering whether to add victory points to the game where personal challenge wins can add victory points.

Thursday, 13 June 2024

A Samurai game using the Bridgehead scenario

Last week, I played a WWII Western Desert game using the One-Hour Wargaming Bridgehead Scenario (number 5). In that game, I replaced the river with a minefield. This time, I decided to replay the scenario with the river back in place and set in a different period. I chose the Samurai period from 1550-1600, as it gave me a chance to test out some activation rule changes. I'm still searching for a set of rules that I'm happy with. For this game, I mashed up the activation system from Songs of Blades and Heroes with many of the combat mechanisms from One-Hour Wargames.

A close-up photo of some Dixon Ashigaru troops. My armies are an eclectic mix of manufacturers and scales, ranging from 20mm to 25mm randomly collected over many years. They're all simply painted with a glossy finish.

In the game, each army has 6 units. At least half the units must be Ashigaru units equipped with spears and a combination of arquebuses and bows units, the remaining units can be a mix of foot samurai used as shock troops or mounted samurai providing mobility.

Game Report

The One-Hour Wargaming scenario has blue army attempting to establish a bridgehead with the red army trying to prevent them. By mistake, I reversed the roles with my red painted samurai army attempting to establish the bridgehead against the blue painted army. To prevent confusion, I use fictional clan names with the Miyamoto army trying to establish the bridgehead and the Takeshita army opposing them.

The Miyamoto army started the game with a unit of mounted samurai positioned across the river.

The first two units of the Takeshita army arrive. While the Miyamoto mounted samurai advance toward the hill.

A unit of Miyamoto Ashigaru arrives and crosses the river to confront the advancing Takeshita forces, while their mounted samurai take up position on the hill and the flank.

The Takeshita army push forward their foot samurai as Miyamoto forces try and move their arriving units across the river as quickly as possible.

As more Takeshita units arrive, their Ashigaru clash in the centre but remain cautious of the Miyamoto's mounted samurai, who have retreated from the hill but still pose a threat on the flank.

Takeshita units mounted samurai successfully launched a charge, forcing Miyamoto's units north of the river to retreat, blocking their reinforcements as they attempt to cross the river.

Miyamoto's units launch a counterattack, regaining the lost ground in the centre and allowing their reserves to cross the bridge.

Both armies attempt to reorganise their formations and deploy recently arrived reserves.

Mounted samurai from both sides are positioned on the flanks, prepared to charge and rout any weakened units.

Takeshita's mounted samurai seize an opportunity to charge into Miyamoto's left flank, routing a unit and impacting their flank.

The position of Miyamoto’s army went from bad to worse as more of their units began to rout.

The game was entertaining and enjoyable with the risk/reward activation mechanism from Song of Blades and Heroes rules providing interesting choices for both armies. When activating a unit, the player can roll one, two, or three dice. A dice score of 3+ is a successful action. However, if two dice fail to achieve a 3+, the player's turn ends. While rolling a single dice minimises the risk of ending a player’s turn early, it also means a unit gets to do very little. Additionally, if any 1s are rolled, the opposing player can react with one of their units for each 1 rolled. A player’s turn ends when all units have attempted activation or if two dice fail to get a 3+.

During the game, there were several instances when a unit of samurai from one army, or the other, charged forward with a couple of moves to surprise the enemy or used their additional actions to improve their combat results to make a decisive assault on an enemy unit. I now need to write up my rule notes, and another samurai game is being set up on the tabletop this weekend to continue testing the rules.

The victorious Takeshita army after the battle


Saturday, 1 June 2024

ECW game Report - The Battle of Blackmore Heath

A couple of weeks ago I posted some English Civil War rules and thought I should post a game report of my last ECW game using the rules.

Background

The Battle of Blackmoor Heath takes place because of the strategic importance of Blackmoor, a town through which Royalist supplies pass through. Royalist forces, led by Sir Percival Ashcroft, aim to secure the town of Blackmoor to ensure the safety of their supply lines. Meanwhile, the Parliamentarians, commanded by Sir Nathaniel Thorne, are determined to prevent this, understanding that control of the town would disrupt Royalist supply lines and bolster his own position in the region.

The Forces

The armies have been organised into the following commands:

  • Right Flank
  • Centre
  • Left Flank
  • Artillery
  • Dragoons
  • Reserve

The rules have a constraint where the flanks, centre, and reserve commands need to consist of either infantry or cavalry. They cannot have a mix of cavalry and infantry units within a single command. While dragoons and artillery have their separate commands of their own. Each force has commanders who are assigned to both flanks, centre, and reserve commands, the commander-generals are assigned to the reserve.

Royalist Orders of Battle

  • Right Flank - 4 cavalry units, commanded by Colonel Edmund Blackwood
  • Centre - 3 infantry units, commanded by Colonel Theobald Hargrave
  • Left Flank - 3 cavalry units, commanded by Captain Reginald Fitzroy
  • Reserve - 2 infantry units, commanded by Sir Percival Ashcroft (commander-general)
  • Artillery - 2 guns positioned left of the centre command
  • Dragoons - 2 units, one positioned on either flank.

Parliamentarian Order of Battle

  • Right Flank - 4 cavalry units, commanded by Colonel Gideon Fairlow
  • Centre - 4 infantry units, commanded by Colonel Ezekiel Marlowe
  • Left Flank - 2 cavalry units, commanded by Captain Josiah Whitlock
  • Reserve - 2 infantry units, commanded by Sir Nathaniel Thorne (commander-general)
  • Artillery - 2 guns positioned on a hilltop left of the centre command
  • Dragoons - 2 units, one positioned on either flank.

The rules have restrictions with an army’s initial deployment. So when deploying commands at the start of the game, all units in a command must be deployed within 12” of their designated commander. However, this restriction does not apply for dragoons and artillery units, which can be deployed independently. It's important to note that this rule applies solely to initial unit deployment and not when moving units during the game turns.

Initial deployment

Both armies have 3 supply bases which are be placed along the army’s tabletop edge. These are spaced out with 12” between them.  If a an enemy cavalry unit reaches a supply base it is removed along with the cavalry unit. The cavalry unit is counted as lost, but the supply marker counts towards victory points. This encourages cavalry to charge off after routing their opponents to capture the enemy baggage and undermine the enemy army’s morale.

The aim for both forces to to eliminate the other and hold the hilltop currently occupied by Parliament’s guns. The game will last for 12 turns and victory will be decided by points which are awarded as follows:
  • Add 1 point for each routed enemy unit.
  • Add 3 points for each enemy supply unit attacked.
  • Subtract 2 points for each commander lost.
  • Subtract 4 points if the commander-general is lost.
  • Add 6 points if the enemy units are reduced by more than half, including any enemy cavalry exiting the tabletop after attacking supplies.
  • Add 6 points if objective, the hilltop, is held.

Battle Report

The opening tactics from both Royalist and Parliamentarian armies were the same, pushing up their dragoons on the flanks and using their artillery to bombard the enemy. The Royalists make the first move, pushing their right flank cavalry forward while continuing to bombard the enemy centre. Parliament’s response was to quickly push forward their left flank cavalry and block the Royalist cavalry who were having to navigate around a small wood and nearby fields. As the cavalry engaged, the Royalist centre advanced. 

Realising his left flank was his weakest the Parliamentarian commander-general, Sir Nathaniel Thorne, moved his reserve infantry to support the left flank.

During each turn, a player can give two orders to their commands. Issuing an order is necessary to move either one unit or all units within a command, or to order an artillery bombardment. However, this restriction only affects unit movement and artillery bombardment. The orders do not limit combat between units that must engage in combat if they are within 3 inches of an enemy unit.

The opening moves had the dragoons advance on either flank and artillery bombard the enemy.

Parliament counters the advancing Royalist right flank cavalry.

The Royalist infantry in the centre advance upon the hill and guns.

As the Royalist cavalry, led by Colonel Edmund Blackwood, gained the upper hand against Parliament's left flank, the Parliamentarian cavalry on the opposite side launched an aggressive charge. They were met by a countercharge from the Royalist left flank. Early in this cavalry clash, the Royalist cavalry commander, Captain Reginald Fitzroy, was killed while leading from the front.

The Royalist infantry in the center managed to advance up the hill and destroy Parliament’s artillery. In response, Parliament's infantry centre and reserve moved forward to engage the Royalist infantry, who were now supported on their right by their cavalry, who had routed their opposition cavalry and commander.

The loss of Captain Reginald Fitzroy was not only a setback for the Royalist left flank, they soon discovered Parliament’s cavalry were both well-trained and equiped by their commander Colonel Gideon Fairlow, and they were beginning to gain the upper hand.

Parliament’s right flank charge forward.

Royalist cavalry counter charge and take the hilltop.

The infantry battle over the hilltop.

The Royalist infantry reserve, held back by a cautious Sir Percival Ashcroft, was prepared when Parliament’s right-wing cavalry advanced after beating the Royalist cavalry. However, this decision left the Royalist centre vulnerable, and under pressure from Parliament's centre and reserve infantry, they were forced back down the hill. Their commander, Colonel Theobald Hargrave, was wounded in the push of pike and had to retire. Support from the Royalist right-flank cavalry was limited as they saw easier targets and plundered Parliament’s supplies and baggage.

As evening closed in, Parliament held the hilltop, having reclaimed it with their infantry. Meanwhile, the Royalist reserve stood firm against Parliament’s cavalry, securing their own supplies.

The fighting is fierce around the hilltop.

Royalist cavalry plunder Parliament’s supplies while their infantry centre are forced off the hilltop.

After 12 game turns the game ends with Parliament holding the hilltop objective.

Who Won?

With the end of the game, it's time to tally the victory points and determine whether the Royalists or Parliamentarians won.

Royalist victory points total 13:

  • 8 Parliamentarian units routed = 8 points
  • 3 supply plundered = 9 points
  • 2 commanders lost = minus 4 points

Parliament victory points total 19::

  • 9 Royalist units routed = 9 points
  • Routed more that half the Royalist force = 6 points
  • Objective held = 6 points
  • 1 commander lost = minus 2 points

It seems like a sound victory for Sir Nathaniel Thorne and Parliament who have disrupted Royalist supply lines and firmed up their own positions in the region. However, a closer look shows it could easily have been a drawn game. One more unit lost for Parliament and the Royalists would have secured a further 6 points for routing more that half the enemy, and increasing their score to 19.

I am now reasonably satisfied with the rules as they stand (found here) and plan only to update them with clarifications from the comments or update the victory points as I play more games. A quick thank you to those who raised a question in the comments, as they help me immensely with clarifying areas of the rules.

Monday, 11 March 2024

Imaginary Napoleonic Scenario for a large battle (part 2) battle report

Here is the after action report of the fictional Napoleonic battle scenario. Additional background information available in the previous post and the game rules outlined here. In the game each unit base corresponds to an estimated force of 4,000 line infantry, 2,000 cavalry, and 30 guns.

A close up of some of the tabletop action with the Spencer-Smith Miniatures battling over some wooded block houses.

The commencement of the battle sees French forces deployed along the stretch of road from Durbach to Gotteral, with the initial Austrian units advancing to engage their line.

Initial deployment of units.

The tabletop and the 3 towns of Durbach, Gotteral, and Weller the French are defending.

Battle Report

Swiftly, the Austrian units advanced and encountered French defenders in the vicinity of Durbach, while simultaneously moving units to secure the high ground behind the French position. In response to the French promptly redeployed their light infantry, positioning them in a strong defensive position on the ridge and anxiously awaited the arrival of reinforcements.

The assault on Durbach begins and the French react to the advancing Austrians.

The French are doing well with their defence.

Reinforcements from the Austrian army joined the battle, launching an assault on the town of Gotteral. The French, had been exhibiting a resolute and robust defence on both the plateau and in Durbach, which allowed them the opportunity to mount a counterattack against the Austrian forces attacking Gotteral. 

Despite the determined efforts of the French, not every aspect of the battle unfolded in their favour. After three intense hours of combat, the Austrians finally managed to make headway on the high ground, pushing back the defending French and ultimately gained control of Durbach.

Arriving reserves are thrown into the assault of Gotteral.

The French counterattack from Gotteral town and throw the Austrians into disorder and nullify the initial threat.

Following their triumph in capturing the town of Durbach, the Austrian forces proceeded to advance across the high ground and their next target, the town of Gotteral. Reacting swiftly, the French hurridly moved their available reserves to the high ground and began fortifying the defences in and around Gotteral. Their earlier counterattack that had effectively repelled the advancing Austrian troops trying to assault the town.

The momentum of battle had shifted towards the French as the arrival of their Guard reinforcements effectively neutralised the Austrian push for the high ground. At this juncture, both armies had seen over half of their units being routed and thrown into disarray, placing constraints on their offensive capabilities. Only the Guard/Grenadier units or those units with fewer more than half their strength remaining were capable of initiating movement into contact with enemy units. This was a concern for the Austrian general who ordered his remaining fresh units to hurry up.

The French eliminate the threat from the high ground.

Fresh Austrian units can be seen rushing along the road to assault Gotteral and salvage something from the day’s battle.

New and fresh Austrian reserves launch an assault on Gotteral just as the French commander tactically shifts his Guard units and artillery to reinforce the valiant defenders of the town. As the evening darkness envelops the battlefield, the last remaining Austrian units mount a desperate final assault on the town, aiming to salvage something from the day's significant casualties. Eventually, the French are compelled to relinquish control of the town. Under the cover of darkness they regroup in the vicinity of Weller and wait to see what developments tomorrow will bring.

A desperate assault on Gotteral begins and the French guard units are repositioned to support the town’s defenders.

Gotteral is finally captured as evening arrives. A drawn game.

After game thoughts

A drawn game and definitely one I shall refight. While the Austrian general is hampered by reinforcements arriving randomly in different positions, did he err by attempting to capture the town of Durbach, instead of bypassing it and assigning the task to later arrivals? 

The defence of Durbach certainly delayed the assault on Gotteral and allowed the French to counterattack and gain momentum for a crucial period during the battle. Seeking to dominate the high ground undoubtedly diverted French reinforcements, and its central position is crucial for launching an assault on the small town of Weller. Getting more units on to the high ground earlier might have proven advantageous, potentially compelling the French to relinquish Durbach without engaging in an assault.

The home-brew rules inspired by SPI's Napoleon at Waterloo game provided an enjoyable and entertaining game. As I continue to use these rules in future games, I may review how light infantry operate, and may consider introducing horse artillery and distinguish between heavy and light cavalry.

Tuesday, 27 February 2024

Rules for larger Napoleonic battles

Not much to post about this week as I have finally been able to write up my “home-Brew” Napoleonic rules which are inspired by SPI's board game "Napoleon at Waterloo". In particular the combat rules and use of a combat results table. These rules are aimed at playing larger scale battles involving a number of corps, where each base generally represents a Brigade, but can represent a Division for a particularly large battle.

A tabletop view of a game in progress.

I have been playing a number of games with these rules over the past few weeks and finally settled on a number of the rule mechanisms. So it was time to write up my notes up, which I have done and added them to the tabs at the top of the blog or just click here to find them.

A closer view of the tabletop actions.

There are quite a few excellent Napoleonic scenarios on various blogs covering various historical battles which I now plan to play.