Showing posts with label WSS. Show all posts

Saturday, 26 March 2022

Some additional movement trays

Back in January I made some movement trays for my 1066 paper soldier armies as the paper units (or the way I have based them) can be quite fiddly to move. This weekend I made a few more trays, smaller trays, for my War or the Spanish Succession cavalry and dragoons units.

A WSS game away underway with movement trays.

The larger movement tray are 8x3 inches and the smaller trays for cavalry are 5x3 inches. They are painted green with a little bit of scatter added. The scatter gives a rough surface so unit bases don't shift about when I move the tray.

The smaller trays are used for cavalry and dragoon unit which have 6 bases. Infantry have 9 bases per unit and fit on the larger trays.

The smaller trays are also suitable for artillery units.

Units also fit on the trays when in column.

Not much painting was done this past week as I have been on a short break. Having time away did allow me to read "The Last Crusade" by Anthony Bruce covering the WW1 Palestine campaign. This had lots of useful background and information on the battles for my current project.

Sunday, 21 November 2021

War of the Spanish Succession Game Report

The game and tabletop setup uses the ideas from the "The Battle of Langensalza", chapter 15 in "Wargame Tactics" by Charles Grant. The original setting was for the Seven Years War, but has been repurposed for the War of the Spanish Succession and also scaled down by half as I have no where near the number of figures described in the chapter.

For the rules I am using the WSS Card home-brew rules mentioned in my previous post, and also found on the blog's header.

Order of battle

France:

  • 2 x Cavalry
  • 3 x Infantry
  • 2 x Dragoons
  • 1 x Artillery
  • 1 x Mortar

Alliance:

  • 3 x Cavalry
  • 4 x Infantry
  • 1 x Artillery

Both sides fielded 3 Commanders and 1 General which are used in the game to rally and reorganise units.

The objectives for both armies are to capture and control the town near an important river crossing.

Deployment of forces. French are depicted in blue and the Alliance in red. The French dragoons can arrive through the woods on their left flank.

A view of the tabletop from behind the Alliance forces. All units are Paper Soldiers standing at 42mm tall because I increase the size when printing. I do this so I can see the art work better and they are less fiddly to cut out.

French dragoons arrive through the woods.

The opening turns had both sides pushing forward. On their right flank the Alliance stopped and deployed in the hill. The French were able to occupy the town first, as the Alliance were mostly deployed and moved at a slower pace. The French dragoons soon appeared on the flank from the woods.

A general advance by both sides for the opening move.

The French dragoons appear from the woods, while artillery from both sides exchange shots.

A large cavalry engagement occurs on the other flank.

The cavalry engagement was a hard fought affair, and with two evenly matched cavalry forces it was going to be touch and go as to who would win. Both sides used their available commanders to rally troops. In the end the Alliance managed to gain the upper hand.

The Alliance cavalry gain the upper hand in a hard fought engagement. Whoever won the engagement would be pretty much nullified as a threat and unable to withstand any serious opposition.

Movement of forces on the battlefield.

The French Dragoons arrived but had not progressed as far through the woods as they expected, and were less of a surprise and easily countered. While they swiftly attacked it was unlikely to be more than a diversion. Even more so when the Alliance reserve cavalry unit arrived.

The dragoons put up a spirited attack, but failure was always on the cards (excuse the pun)

In the centre the French still had some reasonably fresh units, but the threat of cavalry appearing on the flank, and lacking any more reserves, meant they had been reluctant to fully support the town's defence. Eventually, the town changed hands and was occupied by the Alliance.

The Alliance gain access to the town

With a flank exposed, even to a very weak cavalry force, the French line is obliged to retire.

A victory to the Alliance who by securing the river flank where able to do just enough to gain control of the town. The French dragoons who were intended to be the main threat appeared too early from the woods and were easily countered. Had they appeared later and further towards the Allied rear the story could have been different.

How did the rules play? 

There was not a lot of difference from using cards (red/blank) rather than D3 dice (1,1,2,2,3,3) for combat. The slight difference was for the winning unit, which in most cases would not stand up to more than one attack before being routed. Now I quite like this as I am always troubled by units going on to make too much mischief after an engagement, unless they are rallied and reorganised by a commander.


Friday, 19 November 2021

Doing without dice

This past week has been spent converting the D3 War of the Spanish Succession (WSS) rules I use to ones which don't use dice. They used D3 dice (1,1,2,2,3,3) for most combat situations delivering below average, average, and above average outcomes. The aim of updating the rules is to reduce the possible combat outcomes to mostly two using a deck of cards and results based on drawing the red or black suits.

A game in progress using a cards only approach

What prompted this madness to rework the rules not to use dice? 

Every now and again I flick through some of old wargaming books that I have. Last week came across a chapter called "Doing Without Dice" in the book "Advanced War Games" (by Donald Featherstone) which asks the question about having fewer dice and less chance in games. The general idea is that wargamers welcome an element of chance, or luck, but that good strategy and tactics should be rewarded more so than good luck. It is an interesting and short chapter of 5-6 pages which looks at various options of restricting the range of results, and chance, and having more expected results. The variety of approaches mentioned include home made percentage cards, playing cards, and even dominoes. 

French units take up defensive positions

The chapter also reminded me of the book "Rules for Wargaming" by Arthur Taylor, published way back in 1971, where chance had been removed as much as possible from the rules.


The result of this reading eventuated with the reworking of the rules, now called WSS Cards for want of a better title, and they can be found in the above tabs or by just clicking here

Allied units arrive

The next post will cover a game report with these rules.

Wednesday, 10 February 2021

ECW gaming and 3 influential armies

I am playing a few more English Civil War games testing out the use of activation cards to determine the sequence of play (see previous post). I want to say a thankyou to all those that commented and provided additional ideas and thoughts. I am still processing them and I am sure they will improve the end result.

A test game about to begin on a 4x4 foot table and 8 units per side plus artillery piece.

A last month I posted about three wargaming books which were influential on my wargaming (here) which was an idea from Nundanket's blog. This got me thinking about what are the three most influential armies in my collection and why? Well, here they are in no set order:

English Civil War (Mostly Hinchliffe)

English Civil War - Hinchliffe

The first that came to mind were my ECW armies, possibly because they were my first metal figures. I collected a few Hinchliffe miniatures at a time with pocket money and savings over the years, slowly building up Royalist and Parliamentary armies from the ages of 12 to15 years old.

I made two failed attempts at painting these armies. Eventually they were boxed up for decades travelling with me from the UK to Australia, then New Zealand, and back again to Australia. I finally cleaned them up and painted them in my late 50's. Getting these armies on the tabletop for a game always gives me a great deal of pleasure.

Warhammer 40K Tyranid Army (Games Workshop)

A selection from my Tyranid army

After doing no wargaming for some 15 plus years, I started again with a Warhammer 40K entry level box with my Son. I got the Tyranids and he got the Space Marines to paint. Not that I did much gaming, the rules were not for me. However, I did enjoy making, converting and painting the units and overtime have build up quite a few units and collection of armies. While rarely playing a game there was always the fascination of building units with their various armour and weapon combinations.

Of all the 40K armies, I must say those Tyranids remain a favourite and largest army, and are partially the reason for me getting me back into wargaming.

War of the Spanish Succession (Paper Soldiers)


When asked "what is your favourite army?" A perfectly acceptable response could well be "my last one." As is the case with me with my WSS armies, but not because they are the most recent addition. It is the opportunity these paper armies from Peter Dennis offer to go off and explore other periods you may well have never considered doing because of the cost.

I have 3 paper armies: WSS, Jacobite, and 1066. Periods I would not have normally explored were it not for these paper figures. I increase the size of the figures from 28mm to 40mm when making them.

So there you have it my top three influential armies, though not necessarily favourite armies as one of them could be replaced by one of my armies by Peter Laing Miniatures.

Sunday, 3 January 2021

A windmill and War of the Spanish Succession game

I have started the New Year with a small War of the Spanish Succession campaign. With these games hopefully I will finalise the recent set of rules I posted, to which there have already had a couple of minor tweaks and clarifications. 

I am using a campaign called the "Emperor's Balls" created by Old Trousers on his blog (here). It is a simple three game tree campaign with some tongue in cheek narrative which suits me perfectly, and all the games use One-Hour Wargames scenarios.

A WSS paper soldiers game in progress as part of a small campaign

Because I wanted to use 8 units on a 6x4 foot tabletop in the games. I used the OHW table for determining an army make up with the two following amendments:

  • 2 cavalry were always added
  • Dragoons replaced skirmishers

This change always gives armies a good number of cavalry and dragoons in line with the high percentage (30-50%) typical of battles of the time.

One second change to the campaign rules was the winner of the last battle gets to roll 2 D6 when determining the army make up and can select the force composition best suited for the next game.

On the modelling side of the hobby, I am in the process of preparing some cheap 18th century buildings as I am a bit short of buildings for this period. For this I am used my current building approach of using blocks of wood simply cut with major features (eg chimneys) stuck on and painting all other details such as windows and doors. They are very robust models which can be thrown into a plastic tub after a game without any worry of breakages.

Simple wooden blocks are sawn and chimneys added (and sails in the case of the  windmill). They then get an undercoat of light sand or grey depending upon the paint effect being applied.

First off the painting table was the windmill.

Opening battle moves

On to the game report. You will notice the windmill gets to make an appearance along with a small hill I added for it to sit atop.

Alliance order of battle:

  • 3 x Foot
  • 1 x Gun
  • 2 x Horse
  • 2 x Dragoon

French order of battle:

  • 3 x Foot
  • 2 x Guns
  • 3 x Horse

The objective for the Alliance was to control the hill before French reinforcements put a stop to their preemptive attack.

The attack on the hill has begun

The Alliance quickly pushed up their horse on the right flank in an attempt to stall the deployment and advance of French reserves. While on the other left flank, dragoons move around to outflank the defenders of the hill and threaten their rear. In response, French defenders refused the flank on the hill and a detachment of horse speed their way to support the defenders of the hill.

The Alliance attack is progressing well

The Alliance attack on the hill was progressing and their horse on the right flank had the upper hand in a tough engagement with their French counterparts. The French at this stage were still reacting to the Alliance moves and had deployed their reserve foot early expecting a loss on their left flank. On a positive note, their artillery was proving effective and wearing down some of the attacking Alliance units.

Both sides were starting to use their commanders to rally units. One of the rule tweaks was to commanders and rallying.

  • Commanders and generals are able to rally units (except artillery units) which are wavering by attaching themselves to the unit. Upon joining a unit their number of hits is halved (rounding up any fractions). The Commander must remain with the unit for the remainder of the game.
  • Generals are only able to rally a unit once all their commanders have rallied units and are attached to units.
  • Only one commander or general may perform a rally per turn and a unit can only ever be rallied once during the game.
  • Note - units no longer need to be within a command range to move.


French horse see off the Alliance attacks.

The engagement between the horse had become very close and would be decided by the order of activation cards, which went the way of the French who won the engagement by counterattacking first. This turn of events meant the French would no longer be just reacting to the Alliance moves and could take limited offensive actions with some very weakened horse. Meanwhile, the Alliance foot were contesting the hill.

The battle is in the balance as Alliance forces try and take the hill before any meaningful French attacks begin.

The battle was in the balance and almost tipping in the favour of the French. Their foot were now facing the Alliance foot on the hill exposing their rear to an attack from the remaining dragoon unit. The turn of the activation cards would determine whether a nearby French horse would be able to intercept the dragoons before they could mount a charge.

Can the French intercept the dragoons and stop their attack on the hill?

Fortune favoured the French for a second time in this battle and the dragoons were intercepted. Allowing the French foot to rout the attacking Alliance foot. Alliance forces were now too weakened to mount any further attacks and had to retire from the field of battle.

The campaign begins with a French victory.

The dragoons are intercepted.

A victory to the French

The next post will have a WW2 Western Desert campaign game report and also the updated rules.

Edit - The D3 WSS rules have been added to the tabs at the top of page.

Friday, 18 December 2020

Sci-Fi painting and War of the Spanish Succession rules

After deciding to take a short break from my Ancient's painting project to paint some Sci-Fi figures. A couple of figures came off the painting table. They were both test figures as I was trying to workout colour schemes I will use for the remaining figures. 

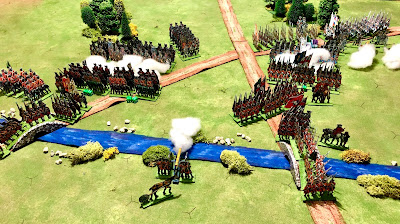
On the gaming side of the hobby I have been playing some War of the Spanish Succession games in the hope of settling on some rules.

A Plague Space Marine given a rusty look

Necromunda gang member soon to join my skirmish games

The first draft of the WSS rules are below. The combat mechanisms are very much based around those from One-Hour Wargames (Neil Thomas) but the artillery shooting rules are based on ideas from Charge! (Brig. P. Young and Lt.Col. J.P. Lawford). I opted for a different approach for artillery: firstly because I like the mechanism, and secondly it makes artillery shots more unpredictable.

The sequence of play uses playing cards to determine the order of phases in a given turn using ideas from the ruleset “The War of the Spanish Succession - Paperboys Rules”. I really like the way the approach works and it gives a clunky feel to the way a turn progresses, which seems to fit the period where armies were organised but still ponderous in their movements.

I do use Commanders and Generals in the game. These determine if units can move based on command radius, and also to rally units who may be wavering. As Commanders are used to rally troops they cease to have a command radius and your plans can get bogged down.


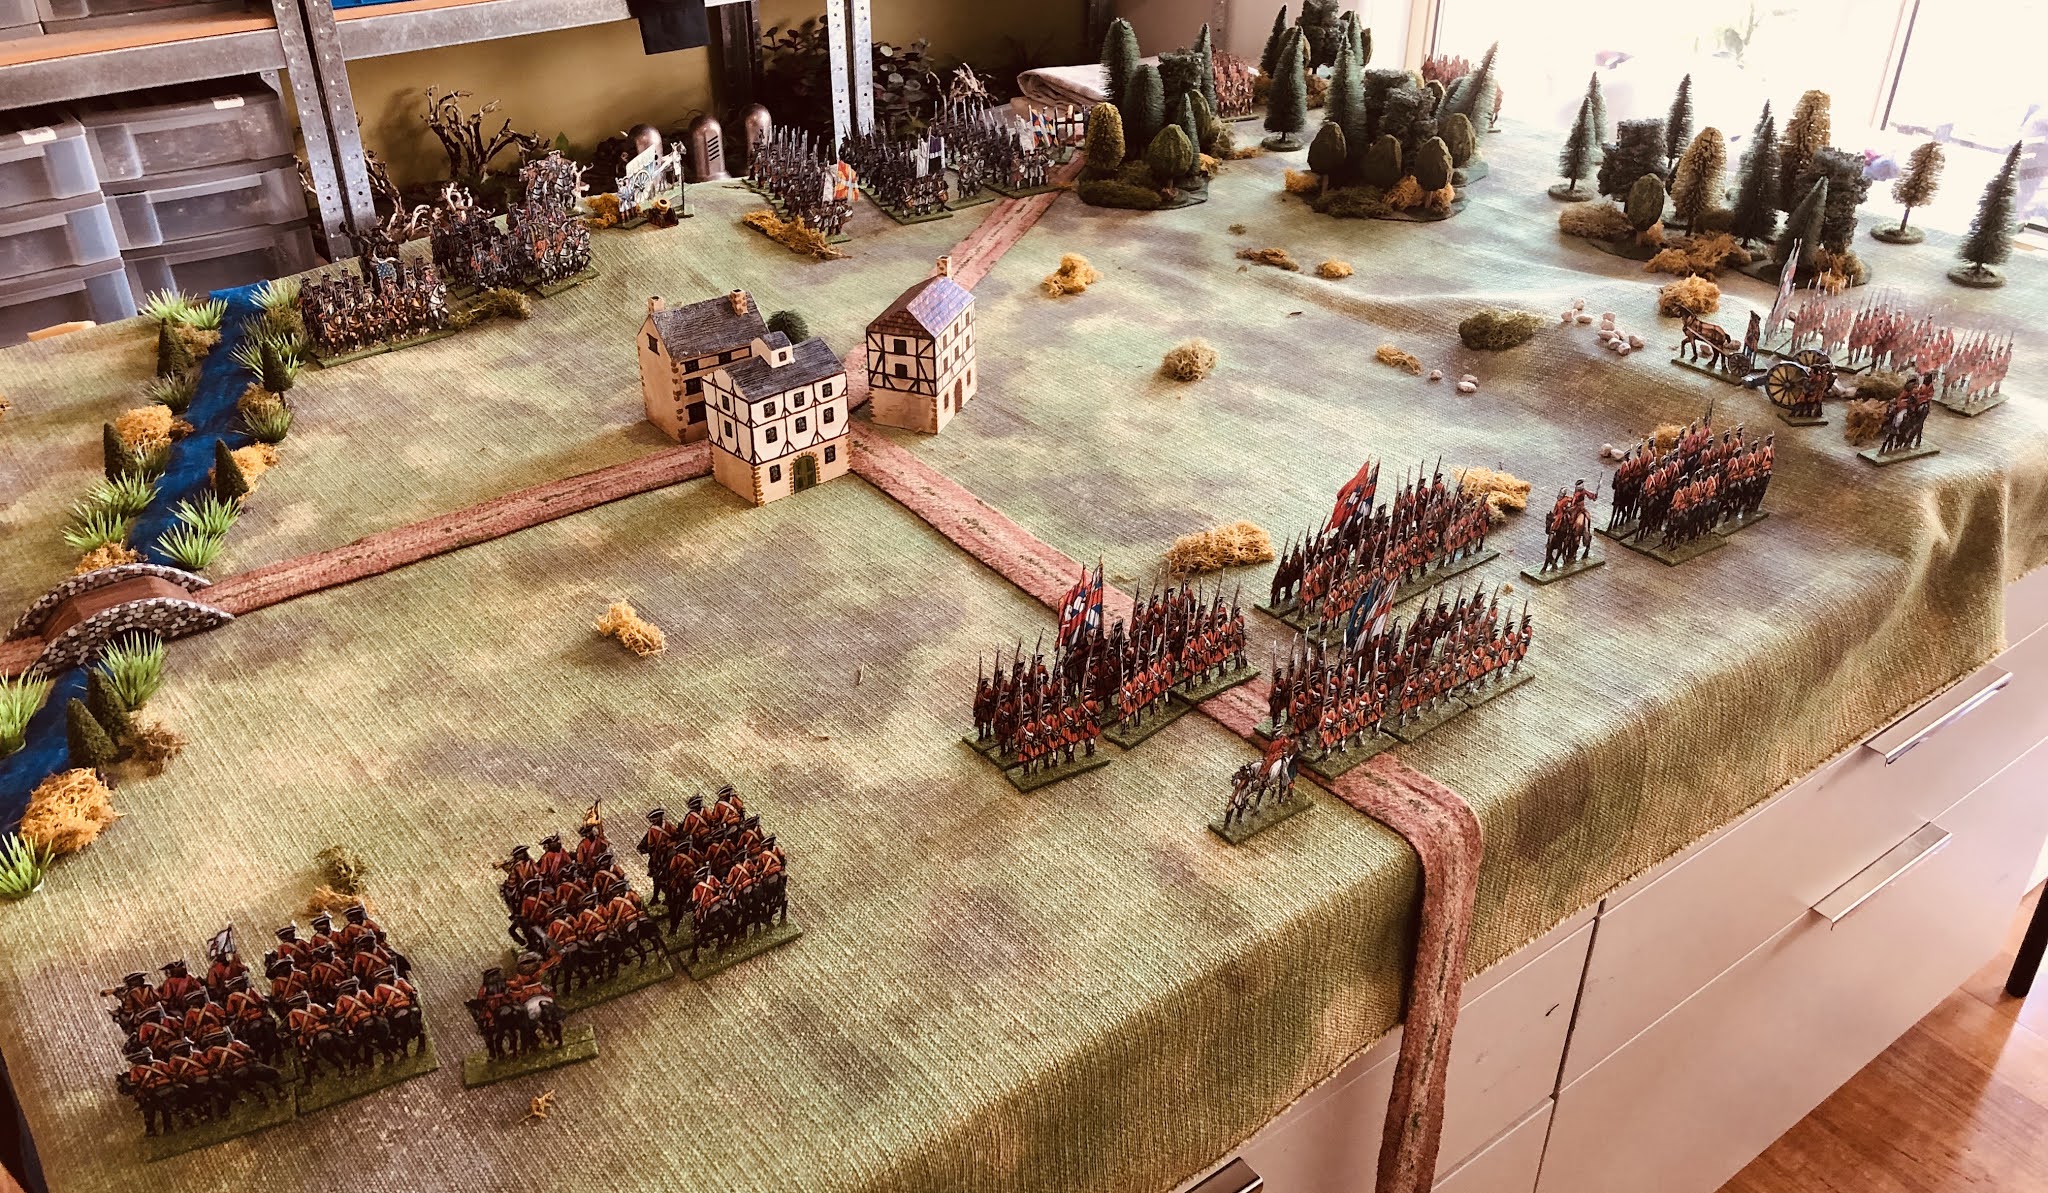
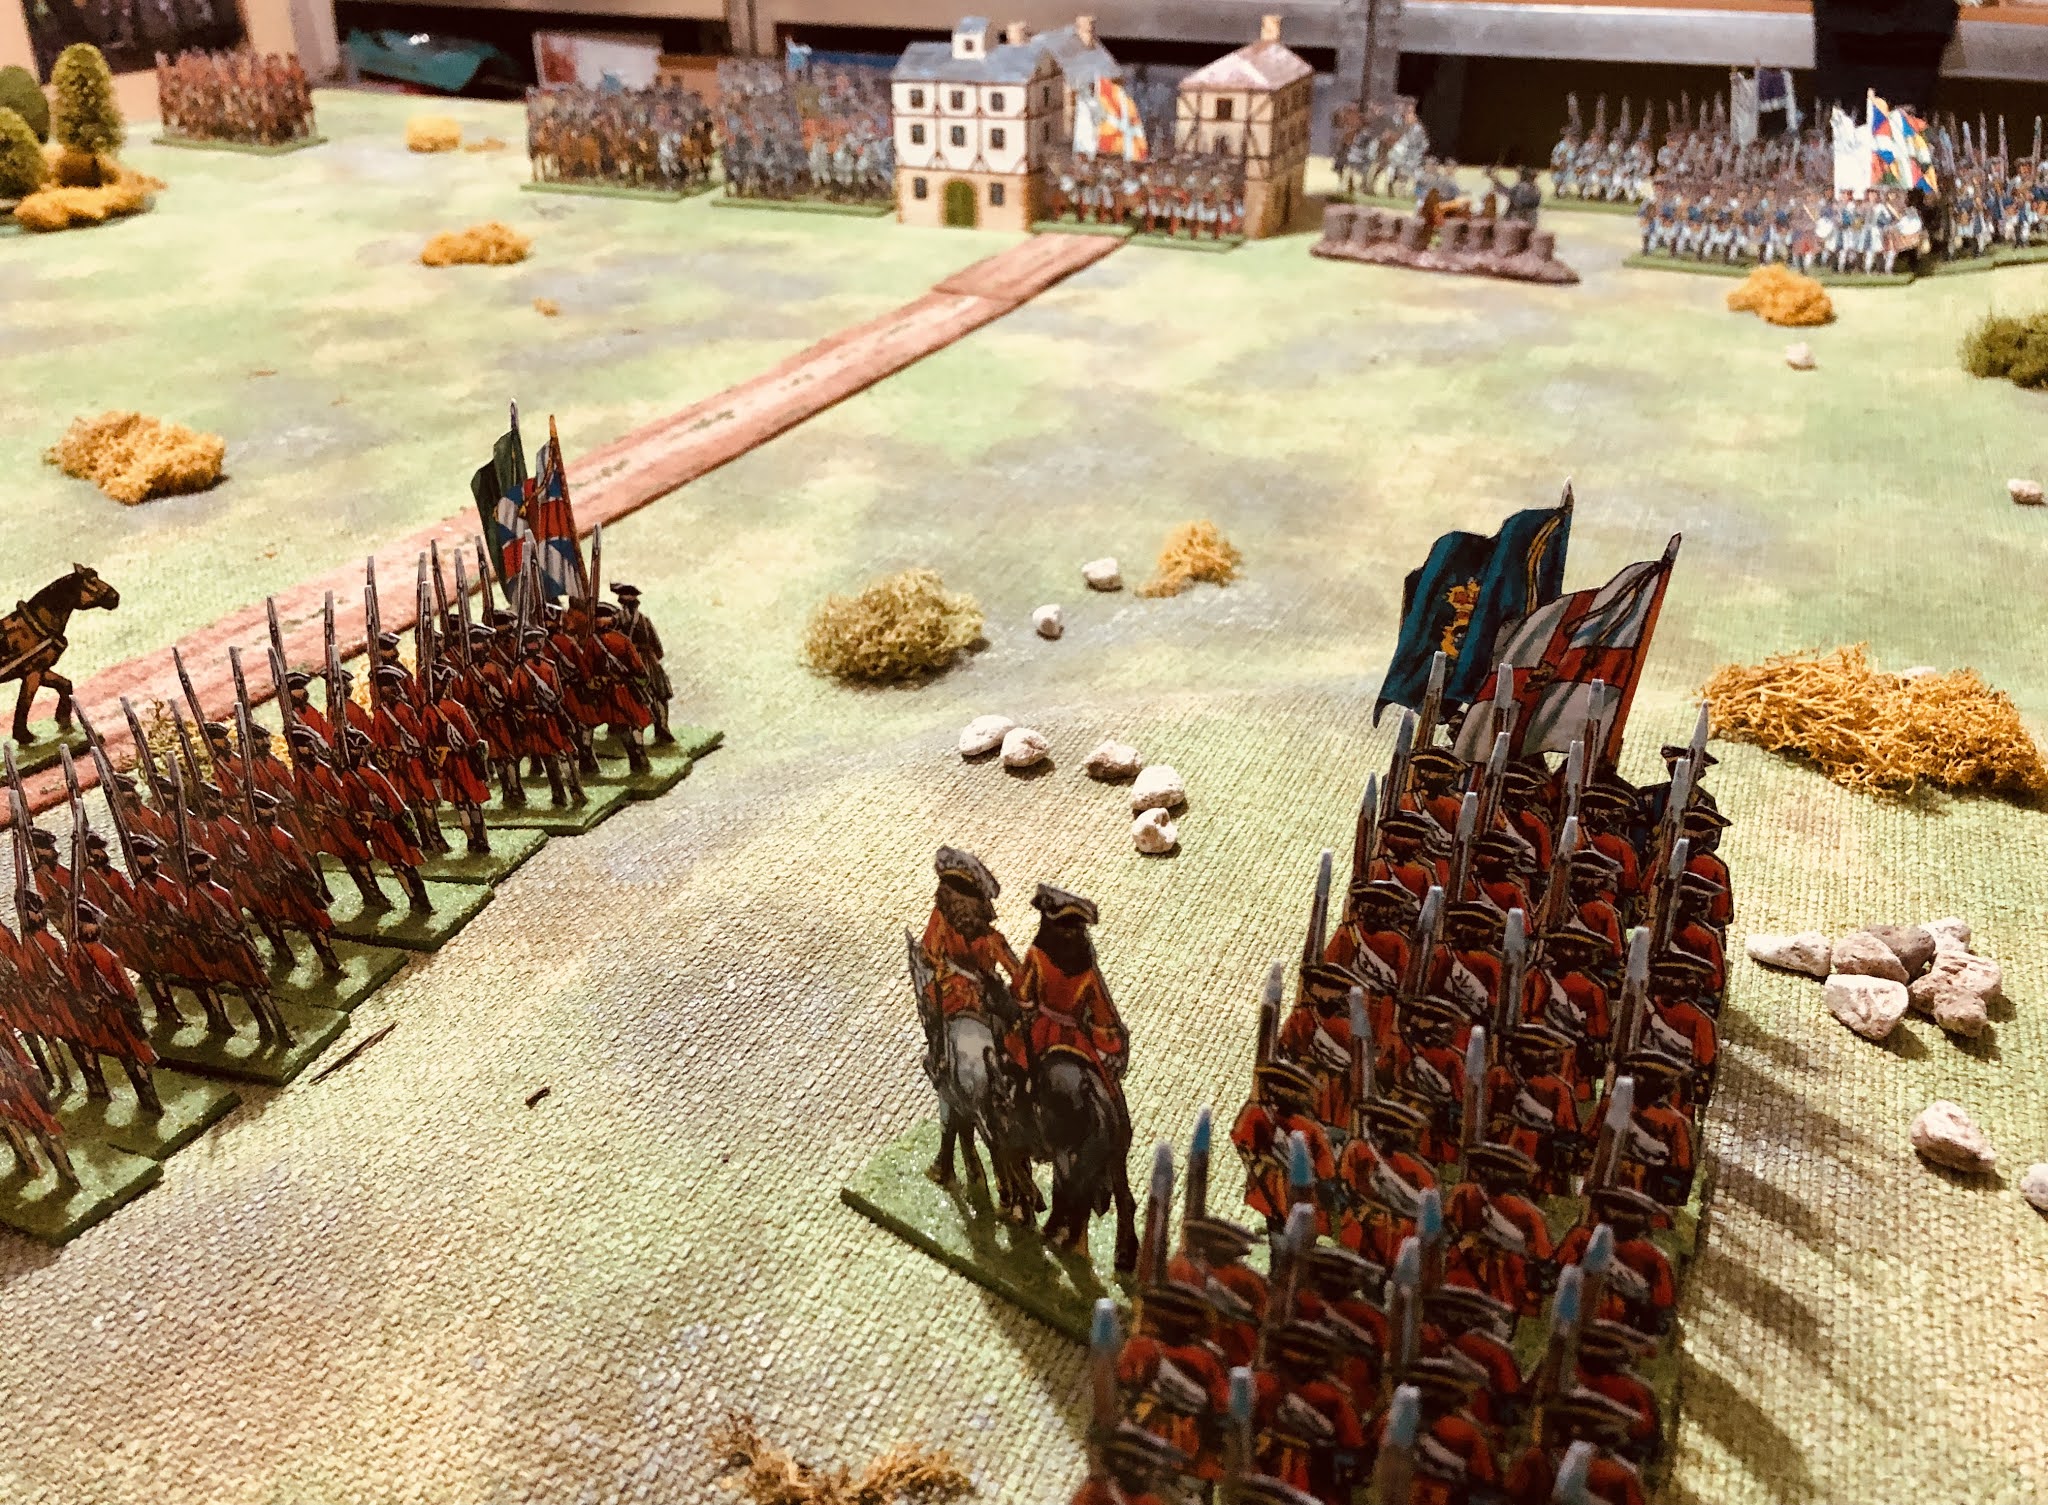
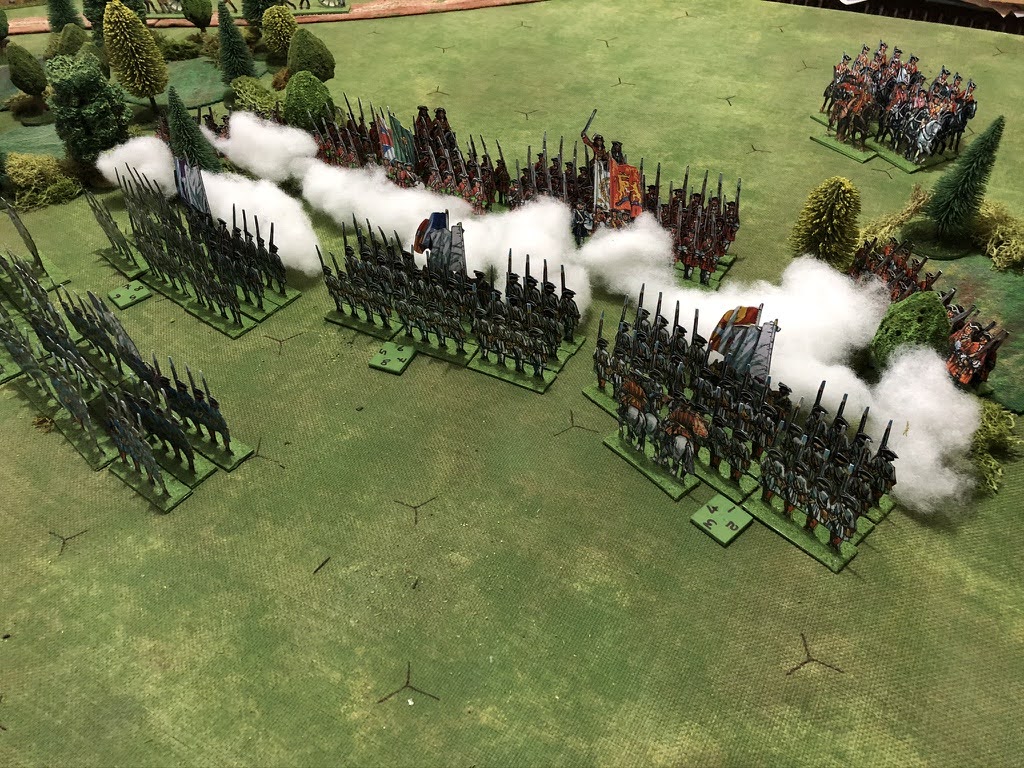
The Paper Soldiers march on the tabletop

Cards are used to determine the order of phases in a given turn.

Another game underway.

Draft War of the Spanish Succession Rules

Units

The armies can have the following unit types and as a general rule are made up of 8-10 units (excluding Commanders and General)...

Infantry - Line infantry in close order who faced each other at about 60 yards and blazed away until the moral of one side failed and they routed.

Dragoons - Dragoons of this period were often used as second rate cavalry mounted on inferior horses. However, they could dismount to hold and secure key battlefield positions, such as buildings, when required.

Cavalry - Heavy cavalry used on the battlefield to engage and defeat enemy cavalry, then fall upon enemy trains, guns and infantry. A combination of Cavalry and Dragoons should make up a good third to fifty percent of the units in a force.

Artillery - Cannon were generally heavy to move and were static once they took up position on the battlefield. They were used to soften up enemy forces and any strong points.

Commanders - Individual bases representing brigade commanders.

General - Individual bases representing the General.

Sequence of Play

The game is played in a series of turns. During a turn there are a series of phases which players perform in order when their colour playing card is revealed. To prepare take six red and six black playing cards and shuffle the deck. Assign a colour to each side, for example, the French are black and the Alliance are red.

The order in which player’s perform their turn phases is determined by taking cards off the top of the card deck. Each time their colour card is revealed a player performs their next phase in the following order:

1) Artillery Shooting - a player resolves all artillery shooting.

2) Musket Shooting - player resolves all musket shooting.

3) Cavalry and Dragoon moves - a player can move all cavalry or dragoon units within a command range. This includes resoling charges where a unit moves into contact.

4) Infantry moves - a player can move all infantry units within a command range.

5) Artillery moves - a player can move any artillery and mortar units within a command range.

6) Commander/General moves and rallying - a player can move any commander and use them to rally units.

Once a player has performed their phase, take the next card from the top of the pack and a player performs another phase. This continues until both players have performed all their phases in order, then shuffle the card deck and start the next turn.

Movement

Units can be either in column or deployed. Once deployed a unit cannot return to column. Units may move up to the distances listed below during their turn.

Infantry in column = 6”

Infantry deployed = 3”

Cavalry and dragoon in column = 12”

Cavalry and dragoons deployed = 9”

Dismounted dragoons = 0”

Artillery limbered = 6”

Artillery deployed (unlimbered) = 0”

Commanders and General = 12”

Units may only move if within 6” radius of a Commander or 12” radius of a General. If outside of the command radius a unit can still turn to face enemy units.

A unit may make one turn at start or end of their move. When turning units pivot on their central point.

Units once they have changed their formation to deployed cannot move back into column formation again. The change in formation must occur before a unit is moved.

Dragoons are able to dismount after moving and it takes a full move to mount again. Once they dismount, they are considered to be in a deployed formation. Dismounted dragoons cannot move and must remount to move.

Artillery units once unlimbered cannot move for the remainder of the game, but are allowed to turn.

Units may never move through other units.

Only cavalry and mounted dragoons can move (charge) into contact with enemy units.

Only deployed infantry units, artillery units or dismounted dragoons can shoot.

Terrain

Woods - Cannot be entered.

Towns - only Infantry & dismounted dragoons may end a move in a town, unless on a road. Towns provide cover to infantry and dismounted dragoons.

Marsh/Lake - impassable.

Rivers - Can be only crossed via bridges & fords. It takes a full move to cross.

Streams - cannot be crossed by artillery. All other units take a full move to cross.

Fields - Infantry & dismounted dragoons can claim cover.

Hills - all units can move onto hills. Provide benefits to those defending hills against charges, and artillery can fire over units.

Cavalry Charges

Only deployed cavalry and deployed mounted dragoons can charge into combat. Charges are resolved by moving the attacking unit into contact with the target unit with the following restrictions:

  • The attacking unit can only pivot up to 45 degrees before charging.
  • The attacking unit can only attack a single unit.

Combat is one sided with only the attacking unit causing casualties. The attacking unit rolls a D6+2 for cavalry and D6 for dragoons to determine the number of hits, which are modified by the following:

  • Half the score if the target is uphill
  • Double the score attacking the flank or rear of the target unit.

After the hits are applied. If the target unit is not eliminated, the attacking cavalry or dragoon unit must retire 6”.

Artillery Shooting

Only unlimbered (deployed) artillery units are able to shoot. The procedure for shooting is as follows:

  • Check field of fire - units can only shoot at a single unit within 45 degree of their frontal facing side.
  • Check the range - to determine the range roll a D6-1 and multiply by 6”. If the target is in cover, deduct a further 2 from the score. Measure to see if the target can be reached.

Assess hits - roll a D6 to determine the hits.

Artillery can shoot over other units if they are positioned on a hill.

Musket Shooting

Only deployed infantry and dismounted dragoons are able to shoot. The procedure for shooting is as follows:

  • Check field of fire - units can only shoot at a single unit within 45 degree of their frontal facing side. Units in towns have a 360 degree field of fire.
  • Check the range - infantry and dragoons have a range of 9”.
  • Assess hits - infantry roll a D6 to and dragoons roll a D6-2

If the target is in cover halve the number of hits rounding up fractions.

Routs and Rallies

Units are routed and removed from the tabletop after taking 15 or more hits. Units can be rallied and D6 hits removed when a commander is attached.

Generals and Commanders

Commanders are used to order units to move and in the case of Commanders rally units.

To order units to move a Commander must be with 6” radius of the unit and 12" for a General.

Commanders are able to rally units which are wavering by attaching themselves to the unit. Upon joining a unit their number of hits is reduced by the score of a D6. The Commander must remain with the unit for the remainder of the game and cannot order other units, except the one they joined.

Generals are not allowed to rally units.

Commanders and Generals cannot be shot at or charged. If they are in the way, then move then 6" out of the way and towards the rear.


Monday, 24 August 2020

A mix of wargaming activities

My original plans this past weekend was to get close to completing the wooden block sci-fi terrain, but this had to be deferred due to continuous rain. As an alternative I began by painting up a few more Necromunda figures and prepared for the next WW2 Western Desert campaign game.

A few Warhammer figures are adapted for a Necromunda game.

In the last campaign game the attacking 21st Panzer division was repulsed by the South African infantry division in defensive positions. Axis forces have a mobile reserve waiting for a breakthrough and now are having to make an attack using one of their Italian infantry divisions. This game will be played later this week once I have finished gaming with my War of the Spanish Succession paper armies, which currently occupy the tabletop.

WW2 Western Desert campaign map

When Sunday continued to be a wash out weather wise. I opted have a War of the Spanish Succession game and give some simple rules I had written a few weeks back another go. For the game I thought I would tryout the Battle of Wynendael, September 1708, from the book "Battle Notes for Wargames" by Donald Featherstone. 

A game prepared guided by Battle Notes for Wargamers

The battle took place during Marlborough's campaigns in the Low Countries. The action was between an allied force protecting a convoy of supplies required for the Siege of Lille and intercepting French forces. 

Allied forces under command of General-Major Webb were 6,000 infantry and 1,500 cavalry. French forces commanded by Count de la Mothe consisted of a mixed force of 24,000 men. Webb was aware of the French and chose a defensive position flanked on both sides by woods.

Plans of the battle

The battle notes suggest French morale should be viewed as poor and their commander considered below average. As the rules being used don't dice for morale, I opted to reduce the effectiveness of French shooting in the game. In addition the French cavalry would not attack unless attacked or any forces came within each of a charge move to represent the below average commander.

Allied forces take up position between the woods with small detachments in the woods on either side. They are bombarded by artillery for two moves before the infantry advanced.

French forces come under fire from infantry detachments positioned in the woods as they advance.

Allied cavalry remain ready in reserve while their infantry lines are engaging in musket fire.

The hits are mounting up on French first line of attack.

The first line of attack is starting to falter and the next line prepares to fill the gaps in the line.

All French and Allied infantry are now committed.

Hits are mounting on Allied infantry and cavalry move up ready to provide support.

The French attack finally ends. The Allied infantry were close to exhausted and required the support of their cavalry to help hold their position. No advance was made on towards the French cavalry.

The game followed the account of the battle. This was mainly due to the reduction in the effectiveness of French musketry. Without this adjustment it would have been a definite French victory. Historically this was an important action which allowed the convoy of supplies to get through to the siege of Lille by Marlborough.