Showing posts with label Samurai. Show all posts

Monday, 4 November 2024

Battle of Sekigahara Boardgame

To take a break from my mech campaign, I decided to try something different and purchased a print-and-play game from Wargame Vault. This was my first time picking up one of these games, and with limited wargaming options on hand until we move into our house, I figured it was worth trying one out.


The game I chose was “Battle of Sekigahara Game” by The Historical Game Company and Blue Panther LLC. I was intrigued by this game because uses event cards to determine the number of moves and attacks each player can make during their turn, along with special events that affect play. The events can range from combat or movement benefits, to major shifts in the battle like an allied clan switching sides.


The rules are straightforward and fit easily onto four pages. The only thing that tripped me up in my first game was remembering the defensive fire phase, where the opponent can shoot with missile units (arquebus and bow) right after movement and before the combat phase. I found the card mechanics with their events work well when playing solo adding a level of uncertainty.


A recent print and play purchase

After purchasing and downloading the game, the next step was printing. Since I don’t have access to a printer and needing the map on A3 paper (approximately 11 x 17 inches) I decided to go with an online printing service. The process proved to be quite simple: I just uploaded the rules, counters, cards, and map, and for each selected the paper size and quality. For example I had the map printed on their highest quality paper so it will be more durable. The printing arrived two business days later, not long to wait.


Once the printouts arrived, I glued the counters onto card stock using a glue stick, then lined up and stuck on the counter backs. Finally once the glue was fully dry I cut them out. As for the cards, they came on one sheet of paper with the faces on one side and the backs on the other which all lined up nicely. These I covered with clear contact plastic, front and back, before cutting them out. This gave the cards some extra thickness along with durability. There are no pictures of this process as it is quite tricky putting the contact plastic on, one mistake and it all turns to custard.


The printed front and back of the counters are glued to a piece of card and cut out.

The completed cards. The printed cards came on one sheet of paper with the faces on one side and the backs on the other which all lined up nicely. These were covered with clear contact plastic, then cut out.

So far, I have managed to play one game, where the Eastern Army under Tokugawa Ieyasu quickly defeated the Western Army under Ishida Mitsunari. Although the game ended up being a one-sided affair, probably due to my erratic tactics, I will definitely be playing some more games in over the next few weeks as a change from my mech games. One feature of the game I liked is each army has two clans on their flanks that are unreliable and may switch allegiances during the game, as directed by the event cards.

The game setup ready to play.

End of the game with an Eastern Army win.

Looking ahead I am curious if parts of the game’s rules might be adapted for my samurai tabletop games. Something I would like to try once the house is finally set up. The ship with our goods has left Melbourne and with travel and customs it is looking like it we will be in around mid-December, which feels like it’s still a ways off. Although things are progressing, yesterday I was preparing and undercoating the room where I will be setting up my table and models.

Saturday, 20 July 2024

Remote Samurai Game

A day or so ago, I had the pleasure of hosting and playing a remote samurai game with Jon from Palouse Wargaming Journal. It had been quite some time since my last remote game, as other non-wargaming activities had been keeping me busy.

Early stages of the game

My remote gaming setup is quite basic, consisting of a mobile phone running the remote meeting and a camera attached to an extendable tripod. Generally, this works well since I limit the tabletop playable area to either 5x4 feet or 4x4 feet. This setup allows the tripod and mobile phone to cover the entire table from a set position, giving the remote player a good view. 

For the samurai game, I used a 6x4 foot area, which required occasionally moving the tripod so Jon, the remote player, could see all the action. As the game progressed and the armies closed in, the need to reposition the tripod was less. However, the tripod is not always stable when the mobile is extended up quite high to get more of a top down view, and there were a couple of times where the tripod toppled over, causing Jon to experience a virtual "face-plant" on the tabletop. Despite these hiccups, the larger table was manageable.

A cheap tripod and mobile are used for hosting remote games.

The game takes place during the Sengoku period, featuring a clash between two hypothetical clans. The Shinku (Crimson) clan had been relentlessly besieging a castle allied with the Ao (Blue) clan. In response, the Ao clan dispatched a relief force, which has secretly marched overnight and used the early morning fog to surprise the Shinku forces. As the fog lifted, both armies found themselves face to face, ready for battle.

The order of battle:

Shinku (Crimson) clan

  • 1 x Mounted Samurai (Hotomoto) with Daimyo
  • 2 x Foot Samurai units
  • 4 x Ashigaru units
  • 3 x Tsukai-ban
  • 1 x Command tent

Ao (Blue) clan

  • 1 x Mounted Samurai (Hotomoto) with Daimyo
  • 1 x Mounted Samurai unit
  • 2 x Foot Samurai units
  • 4 x Ashigaru units
  • 2 x Tsukai-ban

While the Ao clan outnumbers the Shinku clan, the overnight march left them poorly organised for battle. This disarray is reflected in their having fewer Tsukai-ban (messengers) and no command tent, resulting in a reduced chance of their units rolling for multiple actions when activated. Additionally, the absence of a command tent means their Tsukai-ban cannot be reassigned to other units.
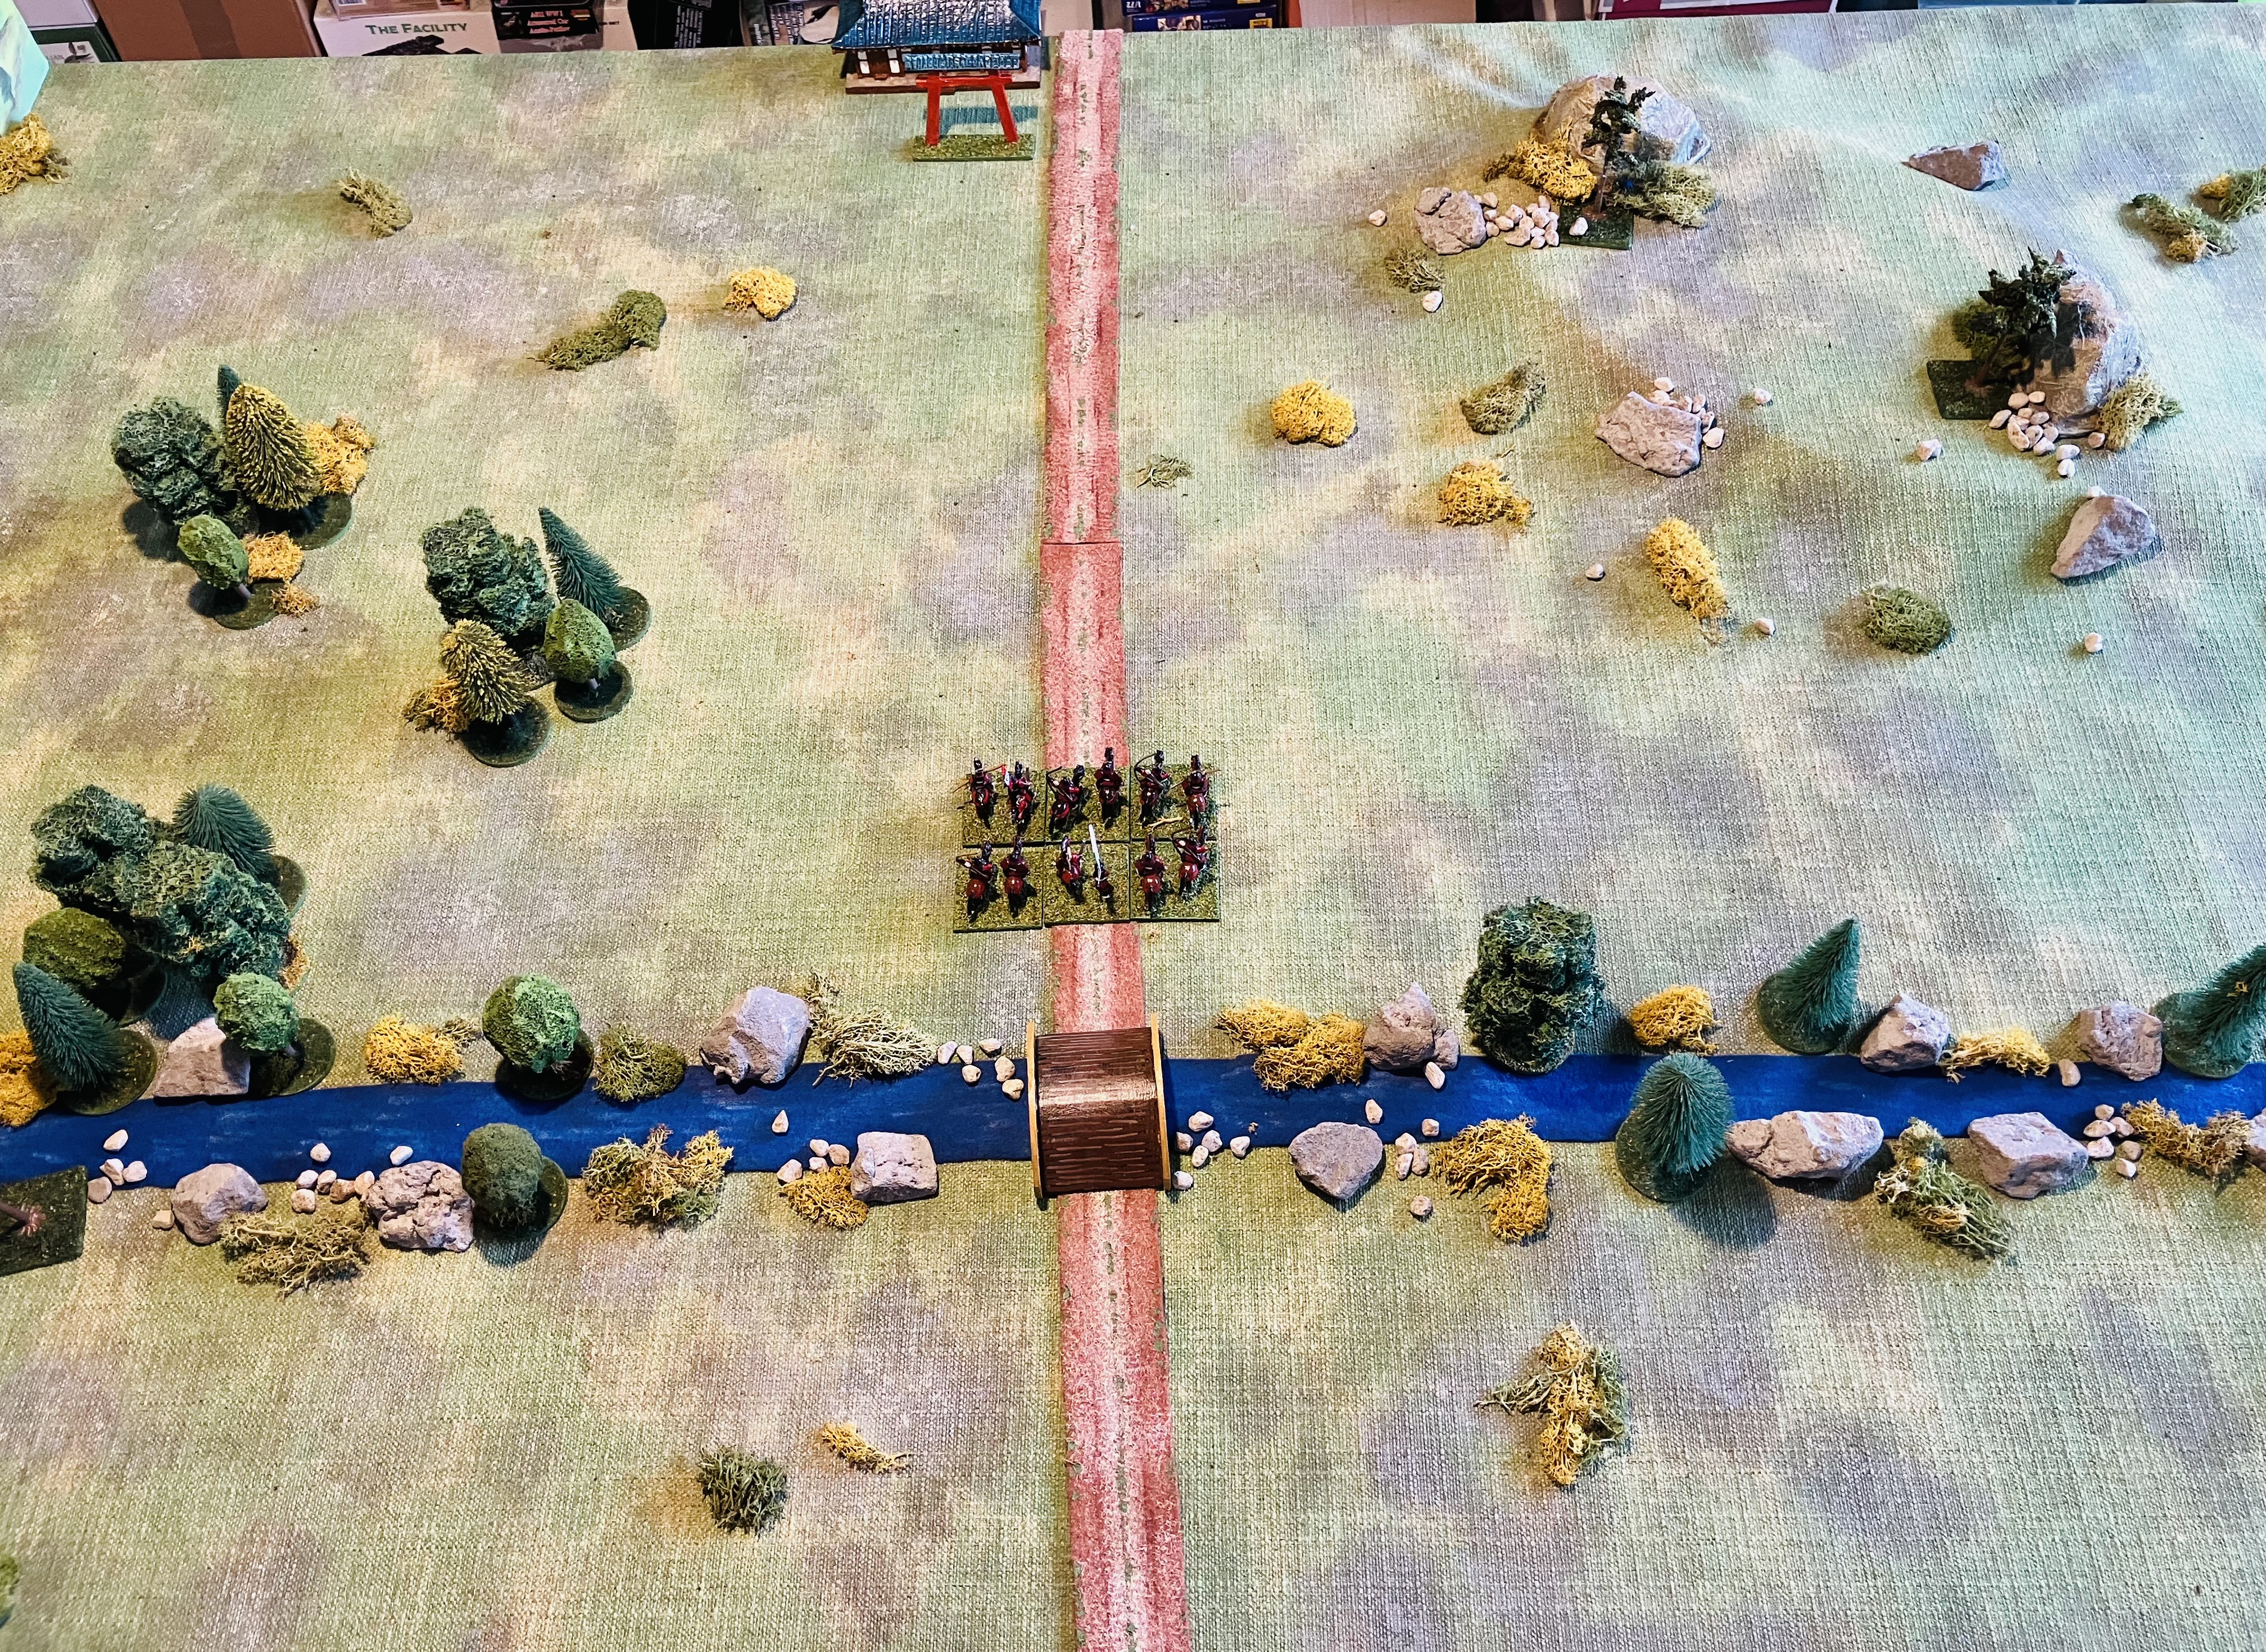
Deployment

The Shinku clan must deploy all their units within the red zone. The Ao clan will deploy after the Shinku clan and can place units anywhere in the blue zone.

Map of the tabletop showing deployment zones.

Game Length and Turn Order

The Ao clan player always goes first in each turn. The game lasts until one army is reduced to two units.

Victory Conditions

Reduce the opposing army to two or less units.

Game Report

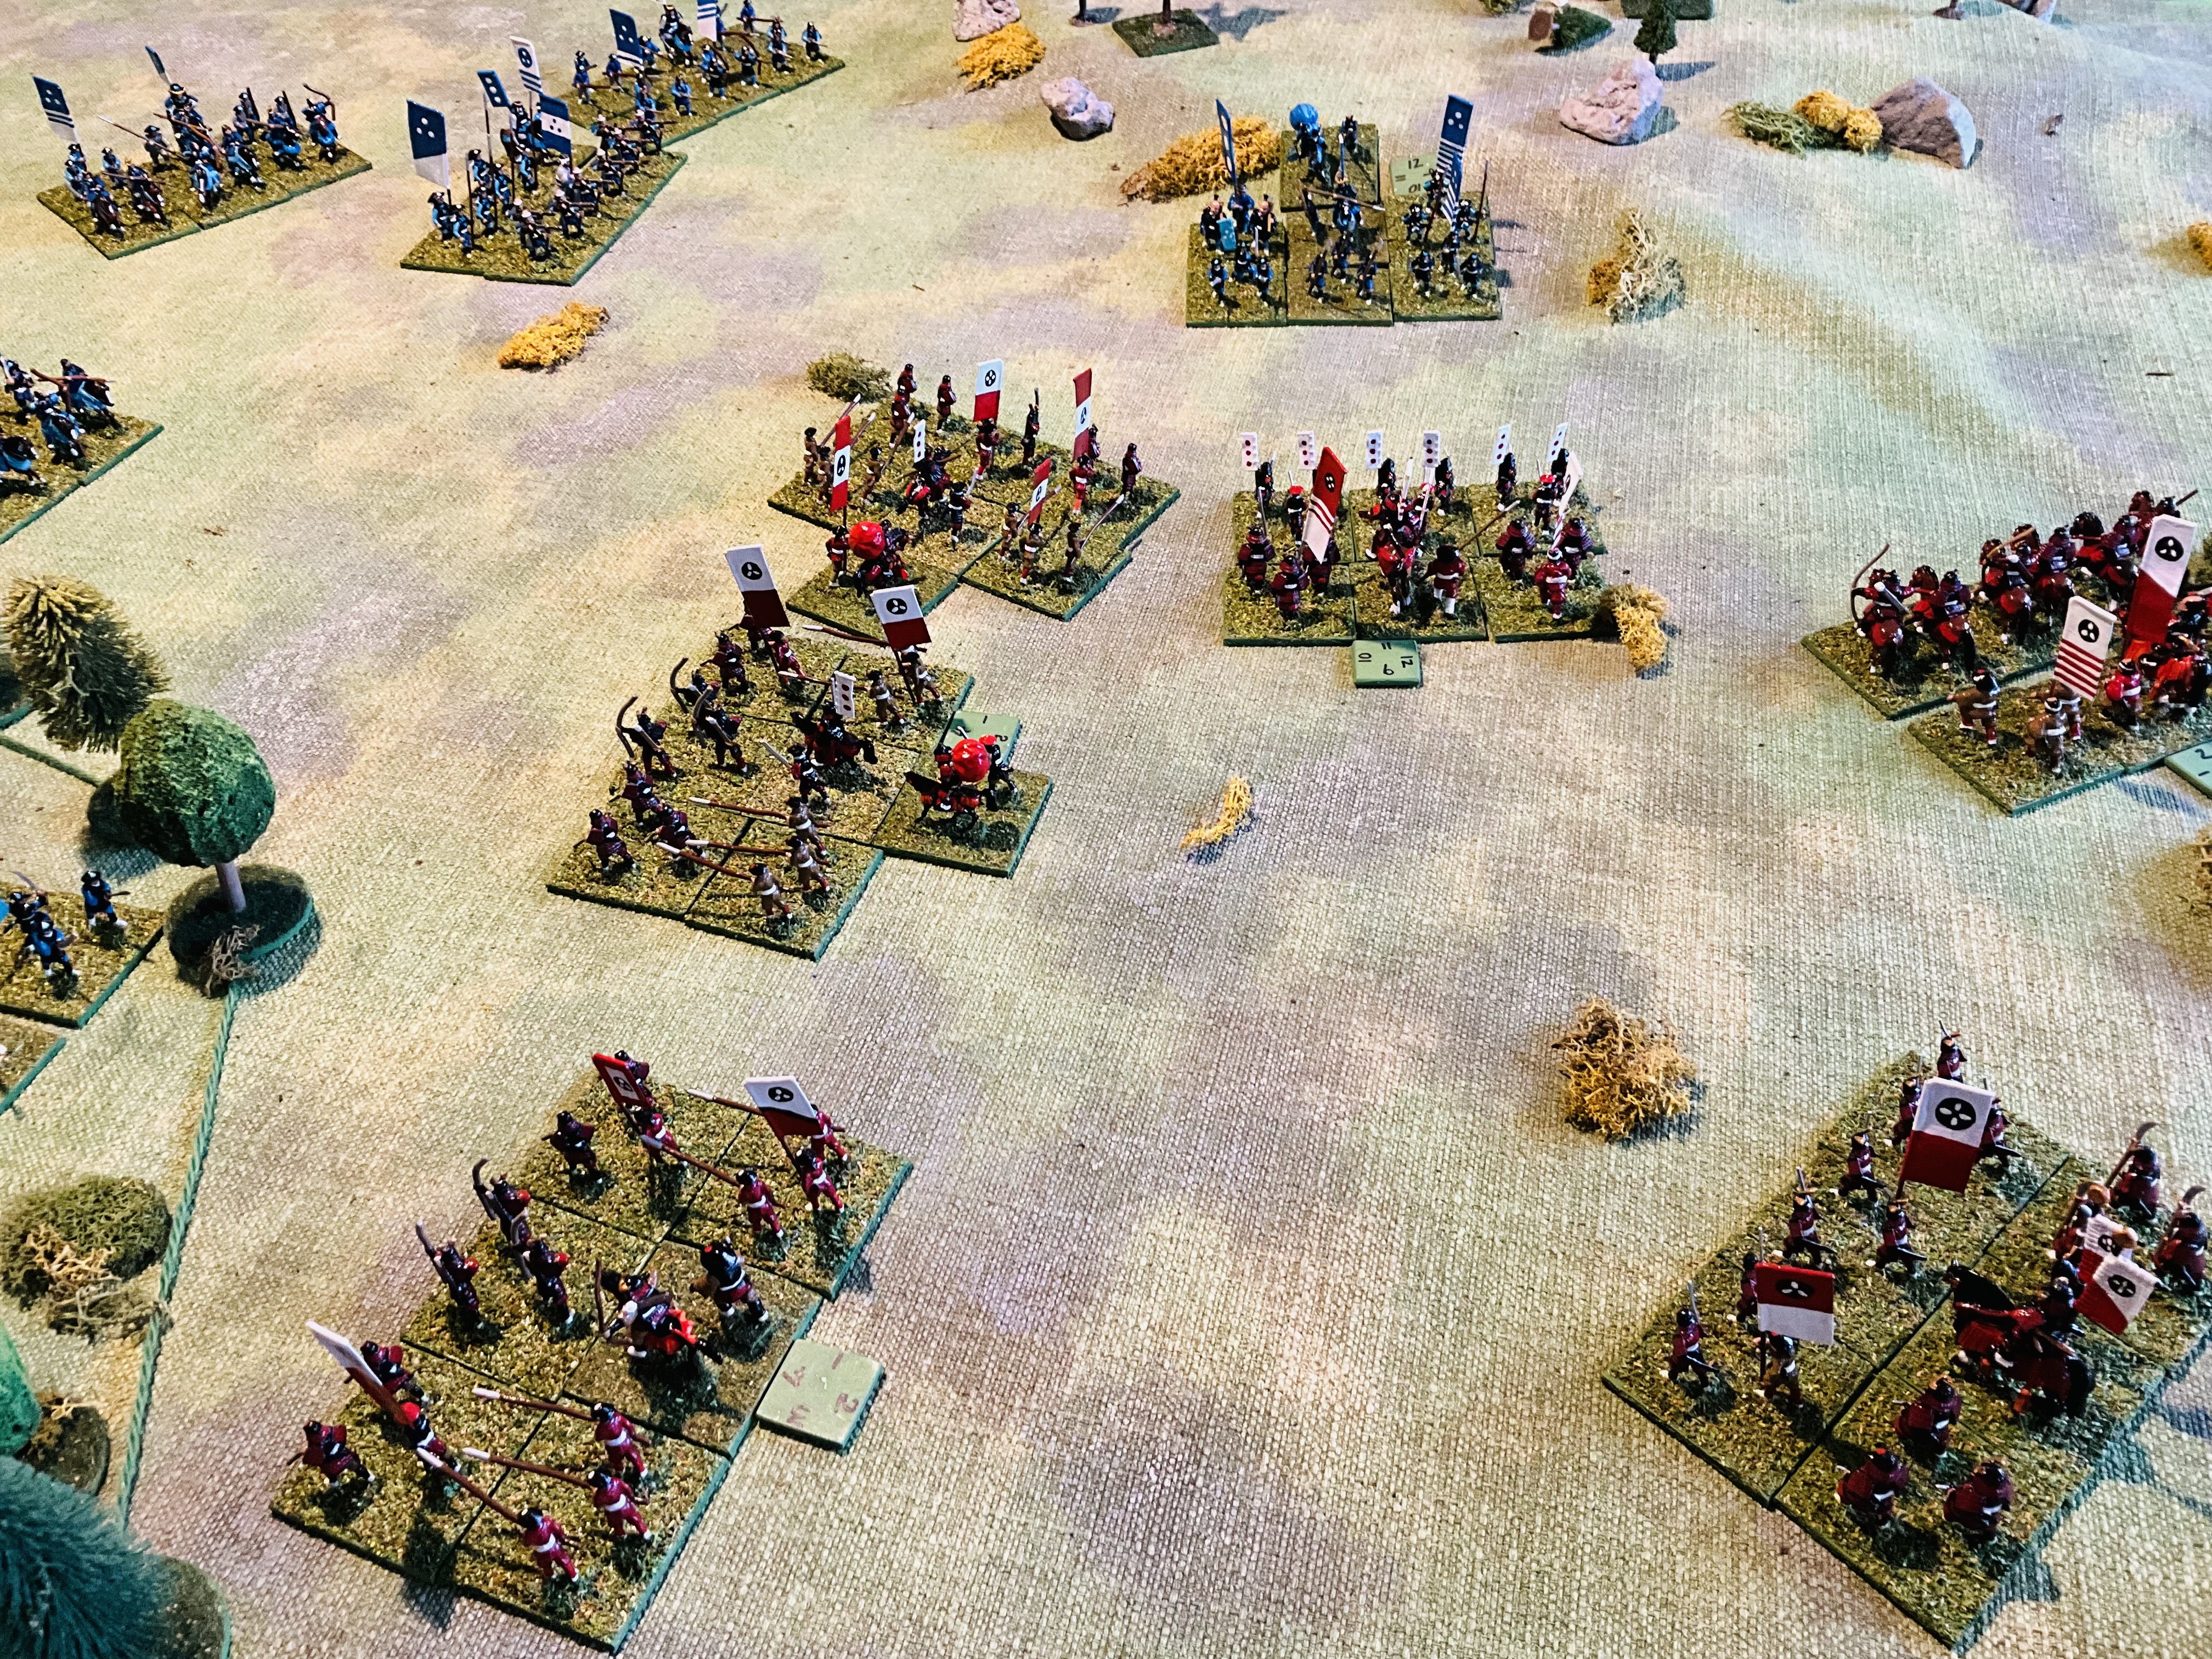
The Ao clan positioned their samurai on each flank, with their Ashigaru in the center and their mounted samurai and Hatamoto held in reserve behind the centre. The Shinku forces, on the other hand, formed two battle lines placed their Ashigaru in the front line and kept their all their samurai and Hatamoto units in a reserve line.

Opening moves of the battle with Ao samurai units advancing on the flanks.

Battle Report

The battle commenced with the Ashigaru units of both armies advancing towards each other. They were soon engaged in an exchange of arquebus fire. While the Ao samurai on the flanks advanced, entering the wooded area on their right and the hills on their left. 

Despite effective shooting by the Shinku forces, the Ao samurai on the flanks proved to be a real handful and threat. Their aggressive advances had disrupted the Shinku battle lines, forcing them on the defensive and causing one of their units to rout.

The Shinku are forced to retreat from the woods.

As the battle progressed, the Ao attack intensified, putting significant pressure on the Shinku army. In response, the Shinku forces advanced their samurai and Hatamoto units to counter the threat from the Ao flanks. Their Ashigaru in the centre continued to performed well, successfully routing part of the Ao centre. This forced the Ao clan to advance their mounted samurai and Hatamoto earlier than planned to maintain pressure on the Shinku centre.

The Shinku respond to the Ao samurai attack from the hill.

The Ao Hatomoto are engaged early plugging the gap in the centre.

The Shinku army having endured the Ao army’s attack, and despite suffering significant casualties, began a counter attack led by their Ashigaru. The Ao army having exhausted its strike force of samurai from their earlier assaults, were forced onto the defensive, and were eventually forced to retire from the field of battle.

A turning point in the battle as the Shinku forces reorganise to counter attack.

The Ao army having been reduced to two units retires from the field of battle.

Summary

Congratulations to Jon for his hard-fought win. The Shinku army did initially struggle with the Ao flank attacks by their samurai units, but were able to withstand them. In the centre their Ashigaru were effective, guided by the Tsukai-ban, and they wore down the Ao units with their shooting. This meant the Ao Ashigaru failed to inflict sufficient damage with their shooting for their mounted samurai and Hatamoto to launch an effective assault in the centre. A most enjoyable game.

For the game, we used my home-brew samurai rules. There are a few areas of wording I need to clarify and tidy up for my next game. The activations and use of Tsukai-ban seemed to function as the rules intended. Alas, there were no personal challenges during the game. I suspect we both forgot about that rule.

Sunday, 14 July 2024

Adding messengers to my samurai games

This weekend I was able to paint up a few more samurai messengers (Tsukai-ban) for my games to replace the tokens I had been using. These messengers played an important part on the Sengoku battlefield, translating the Daimyo’s orders into actions on the battlefield. Over the past couple of weeks I have been trying to incorporate Tsukai-ban into my samurai rules where they can have an influence on the actions a unit may take.

Tsukai-ban and a command tent.

My current rules have an activation approach where units are individually activated by a player during their turn. With each activation a D6 is rolled. The result determines the number of actions the unit can take:

  • On a score of 1, the unit fails to activate.
  • On a score of 2-4, the unit can perform 1 action.
  • On a score of 5 or more, the unit can perform 2 actions.

The unit then performs a number of actions based on the roll. All actions for the unit must be completed before the player activates another unit. Possible actions include:

  • Move (including charge by moving into contact with an enemy unit)
  • Shoot
  • Personal Challenge (with 2 actions)

Units with two actions can perform them in any order, such as: move and shoot, shoot and move, move twice, shoot twice, move and charge, or charge twice. Actions cannot be carried over or saved for later use.

A Tsukai-ban attached to a unit.

Tsukai-ban can be either attached to units or placed in the command tent, ready to receive their next orders. At the start of a player’s turn, before attempting to activate their units, they can move from the command tent to attach to a unit, or detach from a unit and move to the command tent. They cannot move directly from one unit to another; they must first return to the command tent.

A Tsukai-ban adds 1 to their attached unit’s activation D6 rolls, playing a crucial role in activating units and increasing the likelihood of a unit taking multiple actions and avoiding a failure to activate.

If the unit they are attached to is eliminated, then the Tsukai-ban is also eliminated.

If an army does not have a command tent, or the command tent has been eliminated by an enemy unit making contact, Tsukai-ban cannot move between units and must remain with the units they are attached to.

The messengers are the last piece to add to my samurai rules. I am now writing up all my notes after a number of enjoyable test games.

Monday, 1 July 2024

Adding personal challenges to the samurai rules

As I continue to work through my home-brew samurai rules, one of features I want to include are personal challenges (and heroic deeds). Even during the 1550-1650 period, the time period these rules are aimed at, samurai would occasionally issue personal challenges to their opponents. They were often employed as a tactic by retreating samurai units, hoping the time spent issuing, accepting, and fighting the challenge would allow them to either escape or reorganise themselves.

I wanted the rule mechanism to be easy and fun to use, and also provide variable outcomes. I opted for an approach using coins to decide the outcome, where coins are flipped by both participants with heads winning. Whenever the result is two heads or two tails, then another round of combat occurs. After each round of combat, unless killed, players can remove one of their unit’s hits as they reorganise or are inspired by the challenge. While this rule offers little to no benefit to fresh units, it can be advantageous for depleted ones that have accrued a number of hits.

Challenges are issued and accepted.

Below are the draft rules, followed by an example…

Personal Challenges (and Heroic Deeds)

The leader of a samurai unit must spend 2 actions to issue a personal challenge to an enemy samurai unit, whether on foot or mounted, within movement range. Challenges can only be issued between samurai units, foot or mounted.

When a personal challenge is issued, both players move their commanding samurai bases to an equal distance between the units to commence personal combat. The process for combat is as follows:

Combat. Both players flip a coin for their samurai leader, then compare on the table below. Heads will win unless the other player has also flipped a head.

Personal Combat Table

Combat Results. For each round of combat a samurai leader survives, remove 1 hit. When combat concludes, the winning samurai leader returns to their unit with their opponent's head, while the loser is removed from play.

Example of personal challenge combat…

Blue mounted samurai who have taken 7 hits are now facing off against Red’s foot samurai and Ashigaru. Wanting to delay until further reinforcements arrive they successfully roll 2 actions and choose to offer a personal challenge to the foot samurai who currently have 1 hit. 

The leaders of both units are placed equal distance between the two units.

The first round of combat has both flipping tails. So both will be able to remove 1 hit.

Blue flips a heads while red flips tails. Blue wins and can remove another hit, while red loses.

Blue leader returns victorious to their unit which now has 5 hits. Red leader is removed as a reminder they cannot issue a challenge. They have removed 1 hit for surviving the first round of combat.

All being well I hope to try these rules out in a couple of games over the next week. I will also be considering whether to add victory points to the game where personal challenge wins can add victory points.

Saturday, 22 June 2024

A little bit of painting and a new book about rule mechanisms

In between wrapping up things at work for my retirement and preparing for moving house and country, which is now just three months away, I did manage to find time to paint a couple of samurai bases to add to my samurai armies. I may use these bases as messengers, tsuhai-ban, in my Senguko period samurai games as I am currently thinking of adding some messenger rules.

A couple of Houhai-ban for my red samurai army

On the gaming front, the book "Building Blocks of Tabletop Game Design - An Encyclopedia of Mechanisms" arrived in the post. The book is mainly about board game mechanisms, but it includes many rule mechanisms that are applicable to miniature gaming as well. 

The new book. Paperback, 2nd edition, and 560 pages.

The book is divided into 13 sections, each covering the different types of rule mechanisms:

Game Structure - 10

Turn Order and Structure - 17

Actions - 23

Resolution - 26

Game End and Victory - 21

Uncertainty - 14

Economics - 20

Auctions - 18

Worker Placement - 8

Movement - 24

Area Control - 8

Set Collection - 5

Card Mechanisms - 9

The numbers next to each section indicate the number of mechanisms described. Each mechanism is covered over 2-3 pages and includes:

Name: Each mechanism is given a name (e.g., Ratio/Combat Results Table).

Diagram: A diagram visually illustrating how the mechanism works. These are very clever and nicely done, almost a visual summary.

The diagram the Ration/Combat Results Table)

Description: A brief outline of the mechanism.

Discussion: The largest section, which provides more details about the mechanism, including how it functions in a game, examples, occasionally an illustration, and advice for designers.

An example illustration for the discussion on the Die Icons mechanism.

Sample Games: A few examples of games that use the mechanism.

It is not the type of book I will read start to finish, but is one I will pick up and read through a few rule mechanisms I’m interested in, or want to find out more about. The book is 560 pages long and is a really good browsing book if you are interested in rule mechanisms. I plan to use it for ideas when writing home-brew rules and setting up my campaigns. 

The book is a bit on the expensive side for me and I did wonder if I had done the right thing when I clicked to purchase, but I am glad I bought it. I expect to get a lot of enjoyment from reading about new mechanisms, understanding how they work, and picking up new ideas.

A samurai game currently underway on the tabletop.

Saturday, 15 June 2024

A semi-flat samurai castle

I have not done much painting recently, so in an attempt to get back into the swing of things, I decided to create and paint a semi-flat castle for my samurai armies. I thought having a castle in the distance would be useful for the narrative of my samurai games as I test out some rule changes. It seems many battles during the Sengoku period were fought near or around castles, either to relieve the defenders or to besiege them.

The recently finished castle positioned on a tabletop edge.

About a month ago, I created something similar when I made a semi-flat town for my English Civil War games. The steps for making the town can be found here. I use foam board to create the layers and gesso paste to create texture and additional detail.

I position these semi-flat models on a tabletop edge to represent where reserve units arrive or as the reason for whatever scenario is being played. I find it easier to make these semi-flat models than draw and paint a flat model.

The castle was made from three layers of foam board which are covered in gesso-paste used to create texture. 

Units positioned in their defences around the castle.

Here are a few photographs of a game in progress, showing the blue army arriving on the flank of the red army, hoping to relieve a siege. The castle can be seen in the background.

The blue army is attempting to relieve the castle garrison.

Red army reacts to the relieving force arriving on their flank.

Next week, I plan to post more about the draft rules I'm currently using which I mentioned in my last post. Writing up my notes as rules, even in draft form, always seems to take longer than I expect.

Thursday, 13 June 2024

A Samurai game using the Bridgehead scenario

Last week, I played a WWII Western Desert game using the One-Hour Wargaming Bridgehead Scenario (number 5). In that game, I replaced the river with a minefield. This time, I decided to replay the scenario with the river back in place and set in a different period. I chose the Samurai period from 1550-1600, as it gave me a chance to test out some activation rule changes. I'm still searching for a set of rules that I'm happy with. For this game, I mashed up the activation system from Songs of Blades and Heroes with many of the combat mechanisms from One-Hour Wargames.

A close-up photo of some Dixon Ashigaru troops. My armies are an eclectic mix of manufacturers and scales, ranging from 20mm to 25mm randomly collected over many years. They're all simply painted with a glossy finish.

In the game, each army has 6 units. At least half the units must be Ashigaru units equipped with spears and a combination of arquebuses and bows units, the remaining units can be a mix of foot samurai used as shock troops or mounted samurai providing mobility.

Game Report

The One-Hour Wargaming scenario has blue army attempting to establish a bridgehead with the red army trying to prevent them. By mistake, I reversed the roles with my red painted samurai army attempting to establish the bridgehead against the blue painted army. To prevent confusion, I use fictional clan names with the Miyamoto army trying to establish the bridgehead and the Takeshita army opposing them.

The Miyamoto army started the game with a unit of mounted samurai positioned across the river.

The first two units of the Takeshita army arrive. While the Miyamoto mounted samurai advance toward the hill.

A unit of Miyamoto Ashigaru arrives and crosses the river to confront the advancing Takeshita forces, while their mounted samurai take up position on the hill and the flank.

The Takeshita army push forward their foot samurai as Miyamoto forces try and move their arriving units across the river as quickly as possible.

As more Takeshita units arrive, their Ashigaru clash in the centre but remain cautious of the Miyamoto's mounted samurai, who have retreated from the hill but still pose a threat on the flank.

Takeshita units mounted samurai successfully launched a charge, forcing Miyamoto's units north of the river to retreat, blocking their reinforcements as they attempt to cross the river.

Miyamoto's units launch a counterattack, regaining the lost ground in the centre and allowing their reserves to cross the bridge.

Both armies attempt to reorganise their formations and deploy recently arrived reserves.

Mounted samurai from both sides are positioned on the flanks, prepared to charge and rout any weakened units.

Takeshita's mounted samurai seize an opportunity to charge into Miyamoto's left flank, routing a unit and impacting their flank.

The position of Miyamoto’s army went from bad to worse as more of their units began to rout.

The game was entertaining and enjoyable with the risk/reward activation mechanism from Song of Blades and Heroes rules providing interesting choices for both armies. When activating a unit, the player can roll one, two, or three dice. A dice score of 3+ is a successful action. However, if two dice fail to achieve a 3+, the player's turn ends. While rolling a single dice minimises the risk of ending a player’s turn early, it also means a unit gets to do very little. Additionally, if any 1s are rolled, the opposing player can react with one of their units for each 1 rolled. A player’s turn ends when all units have attempted activation or if two dice fail to get a 3+.

During the game, there were several instances when a unit of samurai from one army, or the other, charged forward with a couple of moves to surprise the enemy or used their additional actions to improve their combat results to make a decisive assault on an enemy unit. I now need to write up my rule notes, and another samurai game is being set up on the tabletop this weekend to continue testing the rules.

The victorious Takeshita army after the battle


Friday, 16 February 2024

Remote Samurai game report

Today I had the opportunity to host a remote gaming session with Jon from Palouse Wargaming Journal using One-Hour Wargames scenario 4 - “take the high ground”. The scenario is set in the Sengoku period, where the Raitetsu clan plan to launch a surprise morning assault aiming to seize a crucial hill to ensure the protection of a vital road. In response to the anticipated threat, the Aoi-kage clan have deployed a third of their forces to safeguard the hill and set up camp with their remaining forces to the east of a nearby town.

We used rules heavily inspired by the pike and shot rules from One-Hour Wargames (OHW), with a modification of using D3 dice instead of D6 for combat. Additionally, a different activation system was employed, allowing for interruptions by the opposing player. The activation procedure is:

  1. At the start of a player’s turn place one dice for each unit in play and any reserves due that turn into a dice bag (or tin). Make sure they are all the same colour. Then add one additional die of a different colour to the dice bag or tin.
  2. Shake bag and draw one die. If it is not the odd colour, the player can move or shoot with one of their units. If it is the odd die, then the other player can react by moving, charging, combat, or shooting with one of their units.
  3. The player continues drawing dice until they have activated all the units they want, or until there are no more dice.
  4. Repeat step 1 for the other player.
When using this activation method, if you have successfully activated half of your units without any interruptions, a common dilemma arises regarding whether to conclude your player turn or push your luck. As the chances of drawing an interruption dice increase. Then in the later stages of the game, as armies dwindle in size due to unit losses, the probability of drawing an interruption increases since fewer dice are placed in the bag. This may prompt a player to choose not to draw any dice in specific situations, skipping a turn, and instead rely on interruptions during the opposing player's turn.

The opposing armies clash.

Order of Battle

Aoi-kage clan

  • 4 x Ashigaru
  • 2 x Foot Samurai (1 of the Samurai are the Daimyo’s Hatamoto)

Raitetsu Clan

  • 4 x Ashigaru
  • 1 x Foot Samurai (the Samurai are the Daimyo’s Hatamoto)
  • 1 x Mounted Samurai

Each player was allowed to select 3 stratagems, eg supplies, cannon, extra move, etc.

Deployment

The Raitetsu clan begin the game deployed south of the hill behind the red line.

The Aoi-kage clan may place 2 units on the hill. The remaining forces must be placed east of the town and behind the blue line.

Reinforcements

The Raitetsu clan move on turn 1.

The Aoi-kage clan can move on turn 2 when the alarm is raised.

Game length and turn order

The game length is 15 turns and the Raitetsu clan move first.

A map of the tabletop. I basically stretched the OHW scenario length-wise so all the units begin on the tabletop

Battle Report

The Raitetsu clan arranged their forces in three columns, with the quicker Samurai tactically positioned on the right flank, prepared to swiftly advance down the road, flanking the hill and blocking any advancing Aoi-kage clan reserves. On the other hand, the Aoi-kage clan had placed two Ashigaru units on the hill, each equipped with a cannon.

Initial deployments.

The Raitetsu clan quickly manoeuvred their units down the road, carefully placing their Ashigaru to engage in arquebus fire, specifically with the Ashigaru positioned at the eastern end of the hill. As the defending Ashigaru depleted their ammunition, they were compelled to descend the hill and charge their assailants. The Raitetsu cavalry, having charged ahead, were effectively impeding any swift movement by Aoi-kage clan units along the road.

The Raitetsu forces launch their attack.

Only one of the defending Ashigaru units could engage the carefully positioned attackers.

Out of ammunition the defending Ashigaru charge down the hill, rather than just stay put and be shot at.

As the battle unfolded, momentum started favouring the Aoi-kage clan. A unit of foot samurai successfully reinforced the hilltop position and initiated an assault on the Raitetsu clan centre. Recognising the imperative to regain momentum, the Raitetsu clan Daimyo and his Hatamoto made a formidable attack against the Aoi-kage Daimyo. Realising the threat to their leader, two Aoi-kage clan units hurried to support their Daimyo, but their arrival was too late and their leader was routed. Consequently, all Aoi-kage clan units were demoralised by this turn of events, incurring additional hits.

The hilltop is reinforced by a unit of foot samurai who immediately charge to engage the Raitetsu centre.

The Raitetsu Hatamoto charge. 

With help arriving too late the Aoi-kage Daimyo is routed.

At this juncture in the battle, momentum had indeed shifted back to the Raitetsu clan, but the question remained: was it enough? Despite this shift, the Aoi-kage clan maintained control of the hill, and the Raitetsu Daimyo had made a tactical withdraw. Fate favored the Aoi-kage clan when an interruption allowed them to launch an attack on the Raitetsu Daimyo, transforming his withdrawal into a rout. Similar to the Aoi-kage, losing a Daimyo resulted in hits to their remaining unit. With few game turns left, the remaining Raitetsu units advanced towards the hill. However, the battered Aoi-kage units successfully held the hilltop, securing a victory as they retained control over the crucial hill.

The Raitetsu clan make a tactical retreat to refocus their attack on the hill.

Fate favoured the Aoi-kage clan and they are able to rout the Raitetsu Hatamoto.

The desperate defence of the hill in the final game turns.

The hilltop is held - victory to the Aoi-kage clan.

Summary

The activation method certainly provided a few “do I draw another die” decisions from both Jon and myself. In the final few game turns I actually declined to draw and make any activations, but that was only an option for me due to time running out.

The stratagems added an enjoyable dimension to the game. Each of us had three, enabling our armies to resupply a unit when out of ammunition, have an extra free move at the beginning of a player's turn, and, in my case, providing a couple of cannons that enhanced the shooting capabilities of units. Jon proposed an extra stratagem, which I have tentatively named "feint," which would involve adding another interruption die to the bag on one turn.

Thank to Jon for a most enjoyable game.