Tuesday 27 February 2024

Rules for larger Napoleonic battles

Not much to post about this week as I have finally been able to write up my “home-Brew” Napoleonic rules which are inspired by SPI's board game "Napoleon at Waterloo". In particular the combat rules and use of a combat results table. These rules are aimed at playing larger scale battles involving a number of corps, where each base generally represents a Brigade, but can represent a Division for a particularly large battle.

A tabletop view of a game in progress.

I have been playing a number of games with these rules over the past few weeks and finally settled on a number of the rule mechanisms. So it was time to write up my notes up, which I have done and added them to the tabs at the top of the blog or just click here to find them.

A closer view of the tabletop actions.

There are quite a few excellent Napoleonic scenarios on various blogs covering various historical battles which I now plan to play.

Friday 23 February 2024

Battle of Lake Trasimene - Remote Wargame

Today, I played in a remote wargame featuring the Battle of Lake Trasimene 217 BC, with Jon from Palouse Wargaming Journal as the game’s host. Over the past couple of weeks Jon has been hosting this game with a few other wargamers both as an umpire and player. The outcome so far has favoured Carthage with them winning 3 of the 4 games played.

Jon and I had previously wargamed this battle back in October last year, where I played as the Romans and suffered defeat with many of my units pushed into the lake and lost. Jon offered me the choice or Romans or Carthaginians, and I opted to play the Carthaginians for a change. As usual, Jon provided a game briefing along with a photo depicting the initial positions.

The initial game setup provided by Jon.

In the first turn, the Carthaginian forces moved on to the ridge and advanced to obstruct the leading units of the Roman right wing. Responding promptly, the Roman units moved away from the lake's edge in the direction of the approaching Carthaginian troops. I was wondering at this point whether I should have attempted a charge with the risk of units failing to reach the Romans.

The Carthaginians appear on the ridge and Roman forces organise.

During the next turn, the Gaul units launched a formidable charge into the Roman line with devastating effect. The dice rolls were very kind to me. A number of Roman units were forced into the lake, and the Roman left wing found itself split into two separate sections. Rome’s one success was to repulse the attacking light cavalry.

The Gauls begin their charge after the light cavalry are repulsed.

More Gaul units charge and force Roman units to retreat.

In the third turn, the Roman right wing, remaining unscathed by the Gauls' onslaught, advancing they forcing a unit of Carthaginian heavy infantry to retreat. Simultaneously, their cavalry rushed to support the remnants of the left wing units, catching a Gaul unit unprepared and successfully routing them. Despite this setback, Carthage's medium cavalry joined the assault on the Roman left flank, routing more units, including killing their commander Flaminius.

The Carthaginian attack continues with medium cavalry. While the Roman right flank has some success pushing back the Carthaginian heavy infantry and their cavalry rout one of the Gaul units.

The remnants of Rome's left wing found no respite, facing assaults from heavy infantry under Hannibal's command that drove back their remaining heavy infantry. Subsequently, they were charged by Spanish infantry, resulting in their rout. The Roman army's resolve broke with this final unit loss.

Hannibal with his heavy infantry charge.

Spanish infantry finish off the game with a successful charge.

The gameplay mirrored historical events, with the Roman left being routed and their right wing appearing poised to break through for an escape. It marked another victory for the Carthaginians, bringing the overall scenario score to 4 to 1 in favour of Carthage. 

In the after game discussion we thought for the Romans to win they must roll successfully at crucial moments, especially at the game's start when they are organising themselves, and trying to put space between themselves and the lake to avoid forced retreats into the lake.

A close up of the game and Jon’s wonderfully painted 28mm miniatures.

Thank you to Jon for the game.

Wednesday 21 February 2024

English Civil War supply carts

Looking back at my recent posts, it would seem like I've been focusing at lot of my time on the wargaming table lately. However, I have actually managed to make progress in painting various miniatures and reducing the pile of  plastic and lead miniatures in the process. The latest bunch of painted miniatures are some supply carts for my English Civil War armies. They are mostly Hinchliffe miniatures with a few random figures I had lying around.

Four supply bases completed.

I did enjoy painting the oxen.

A couple of carts. I tried to select one of each type of cart model available to avoid the baggage train having a uniform look to it.

Currently on the tabletop are my glossy Spencer-Smith Napoleonics in a game using some rules inspired by SPI's board game "Napoleon at Waterloo" adapted for tabletop play. Having played quite a few test games with the modified rules before and after the new year, I hope to give them a final read through and post them in a few days.

A game about to start.


Friday 16 February 2024

Remote Samurai game report

Today I had the opportunity to host a remote gaming session with Jon from Palouse Wargaming Journal using One-Hour Wargames scenario 4 - “take the high ground”. The scenario is set in the Sengoku period, where the Raitetsu clan plan to launch a surprise morning assault aiming to seize a crucial hill to ensure the protection of a vital road. In response to the anticipated threat, the Aoi-kage clan have deployed a third of their forces to safeguard the hill and set up camp with their remaining forces to the east of a nearby town.

We used rules heavily inspired by the pike and shot rules from One-Hour Wargames (OHW), with a modification of using D3 dice instead of D6 for combat. Additionally, a different activation system was employed, allowing for interruptions by the opposing player. The activation procedure is:

  1. At the start of a player’s turn place one dice for each unit in play and any reserves due that turn into a dice bag (or tin). Make sure they are all the same colour. Then add one additional die of a different colour to the dice bag or tin.
  2. Shake bag and draw one die. If it is not the odd colour, the player can move or shoot with one of their units. If it is the odd die, then the other player can react by moving, charging, combat, or shooting with one of their units.
  3. The player continues drawing dice until they have activated all the units they want, or until there are no more dice.
  4. Repeat step 1 for the other player.
When using this activation method, if you have successfully activated half of your units without any interruptions, a common dilemma arises regarding whether to conclude your player turn or push your luck. As the chances of drawing an interruption dice increase. Then in the later stages of the game, as armies dwindle in size due to unit losses, the probability of drawing an interruption increases since fewer dice are placed in the bag. This may prompt a player to choose not to draw any dice in specific situations, skipping a turn, and instead rely on interruptions during the opposing player's turn.

The opposing armies clash.

Order of Battle

Aoi-kage clan

  • 4 x Ashigaru
  • 2 x Foot Samurai (1 of the Samurai are the Daimyo’s Hatamoto)

Raitetsu Clan

  • 4 x Ashigaru
  • 1 x Foot Samurai (the Samurai are the Daimyo’s Hatamoto)
  • 1 x Mounted Samurai

Each player was allowed to select 3 stratagems, eg supplies, cannon, extra move, etc.

Deployment

The Raitetsu clan begin the game deployed south of the hill behind the red line.

The Aoi-kage clan may place 2 units on the hill. The remaining forces must be placed east of the town and behind the blue line.

Reinforcements

The Raitetsu clan move on turn 1.

The Aoi-kage clan can move on turn 2 when the alarm is raised.

Game length and turn order

The game length is 15 turns and the Raitetsu clan move first.

A map of the tabletop. I basically stretched the OHW scenario length-wise so all the units begin on the tabletop

Battle Report

The Raitetsu clan arranged their forces in three columns, with the quicker Samurai tactically positioned on the right flank, prepared to swiftly advance down the road, flanking the hill and blocking any advancing Aoi-kage clan reserves. On the other hand, the Aoi-kage clan had placed two Ashigaru units on the hill, each equipped with a cannon.

Initial deployments.

The Raitetsu clan quickly manoeuvred their units down the road, carefully placing their Ashigaru to engage in arquebus fire, specifically with the Ashigaru positioned at the eastern end of the hill. As the defending Ashigaru depleted their ammunition, they were compelled to descend the hill and charge their assailants. The Raitetsu cavalry, having charged ahead, were effectively impeding any swift movement by Aoi-kage clan units along the road.

The Raitetsu forces launch their attack.

Only one of the defending Ashigaru units could engage the carefully positioned attackers.

Out of ammunition the defending Ashigaru charge down the hill, rather than just stay put and be shot at.

As the battle unfolded, momentum started favouring the Aoi-kage clan. A unit of foot samurai successfully reinforced the hilltop position and initiated an assault on the Raitetsu clan centre. Recognising the imperative to regain momentum, the Raitetsu clan Daimyo and his Hatamoto made a formidable attack against the Aoi-kage Daimyo. Realising the threat to their leader, two Aoi-kage clan units hurried to support their Daimyo, but their arrival was too late and their leader was routed. Consequently, all Aoi-kage clan units were demoralised by this turn of events, incurring additional hits.

The hilltop is reinforced by a unit of foot samurai who immediately charge to engage the Raitetsu centre.

The Raitetsu Hatamoto charge. 

With help arriving too late the Aoi-kage Daimyo is routed.

At this juncture in the battle, momentum had indeed shifted back to the Raitetsu clan, but the question remained: was it enough? Despite this shift, the Aoi-kage clan maintained control of the hill, and the Raitetsu Daimyo had made a tactical withdraw. Fate favored the Aoi-kage clan when an interruption allowed them to launch an attack on the Raitetsu Daimyo, transforming his withdrawal into a rout. Similar to the Aoi-kage, losing a Daimyo resulted in hits to their remaining unit. With few game turns left, the remaining Raitetsu units advanced towards the hill. However, the battered Aoi-kage units successfully held the hilltop, securing a victory as they retained control over the crucial hill.

The Raitetsu clan make a tactical retreat to refocus their attack on the hill.

Fate favoured the Aoi-kage clan and they are able to rout the Raitetsu Hatamoto.

The desperate defence of the hill in the final game turns.

The hilltop is held - victory to the Aoi-kage clan.

Summary

The activation method certainly provided a few “do I draw another die” decisions from both Jon and myself. In the final few game turns I actually declined to draw and make any activations, but that was only an option for me due to time running out.

The stratagems added an enjoyable dimension to the game. Each of us had three, enabling our armies to resupply a unit when out of ammunition, have an extra free move at the beginning of a player's turn, and, in my case, providing a couple of cannons that enhanced the shooting capabilities of units. Jon proposed an extra stratagem, which I have tentatively named "feint," which would involve adding another interruption die to the bag on one turn.

Thank to Jon for a most enjoyable game.

Thursday 15 February 2024

Scrabble tiles used for activations

The local craft store was having a sale and I was able to pick up a second bag of scrabble style tiles cheaply. The reason for grabbing a second packet is to test a method of unit activation where identified units are activated one at a time when pulled from a bag.

Cheap wood scrabble tiles from the local craft store.

I utilise a set (or a portion of it) to label individual units on the tabletop. I take the same letters from the second set and place them in a bag. Afterward, I draw the letters one by one from the bag to activate the labeled units. I plan to try out this activation method in a medieval game.

The units are uniquely identified by one set of tiles and the same letter as placed into a bag and drawn.

Anyway, any medieval game will have to wait because tomorrow I'll be hosting a remote samurai game and finalising the write-up for the large-scale Napoleonic battle rules I've been testing and messing around with for the past couple of months.

Preparing the tabletop for a remote samurai game

Monday 12 February 2024

Napoleonic Battle Report

This Napoleonic battle report was played using some “home-brew” wargame rules that were inspired by SPI's board game "Napoleon at Waterloo". The rules incorporate hits into the combat results table, rather than retreats from the original board game, and have free movement. You can find a summary of these preliminary rules in my previous post.

In designing the scenario for this game, I have borrowed heavily on ideas from the "2 by 2 Napoleonic" rules. The game is based on an encounter scenario where half of the army's units begin the game in reserve, they will enter the game piecemeal as the game progresses.

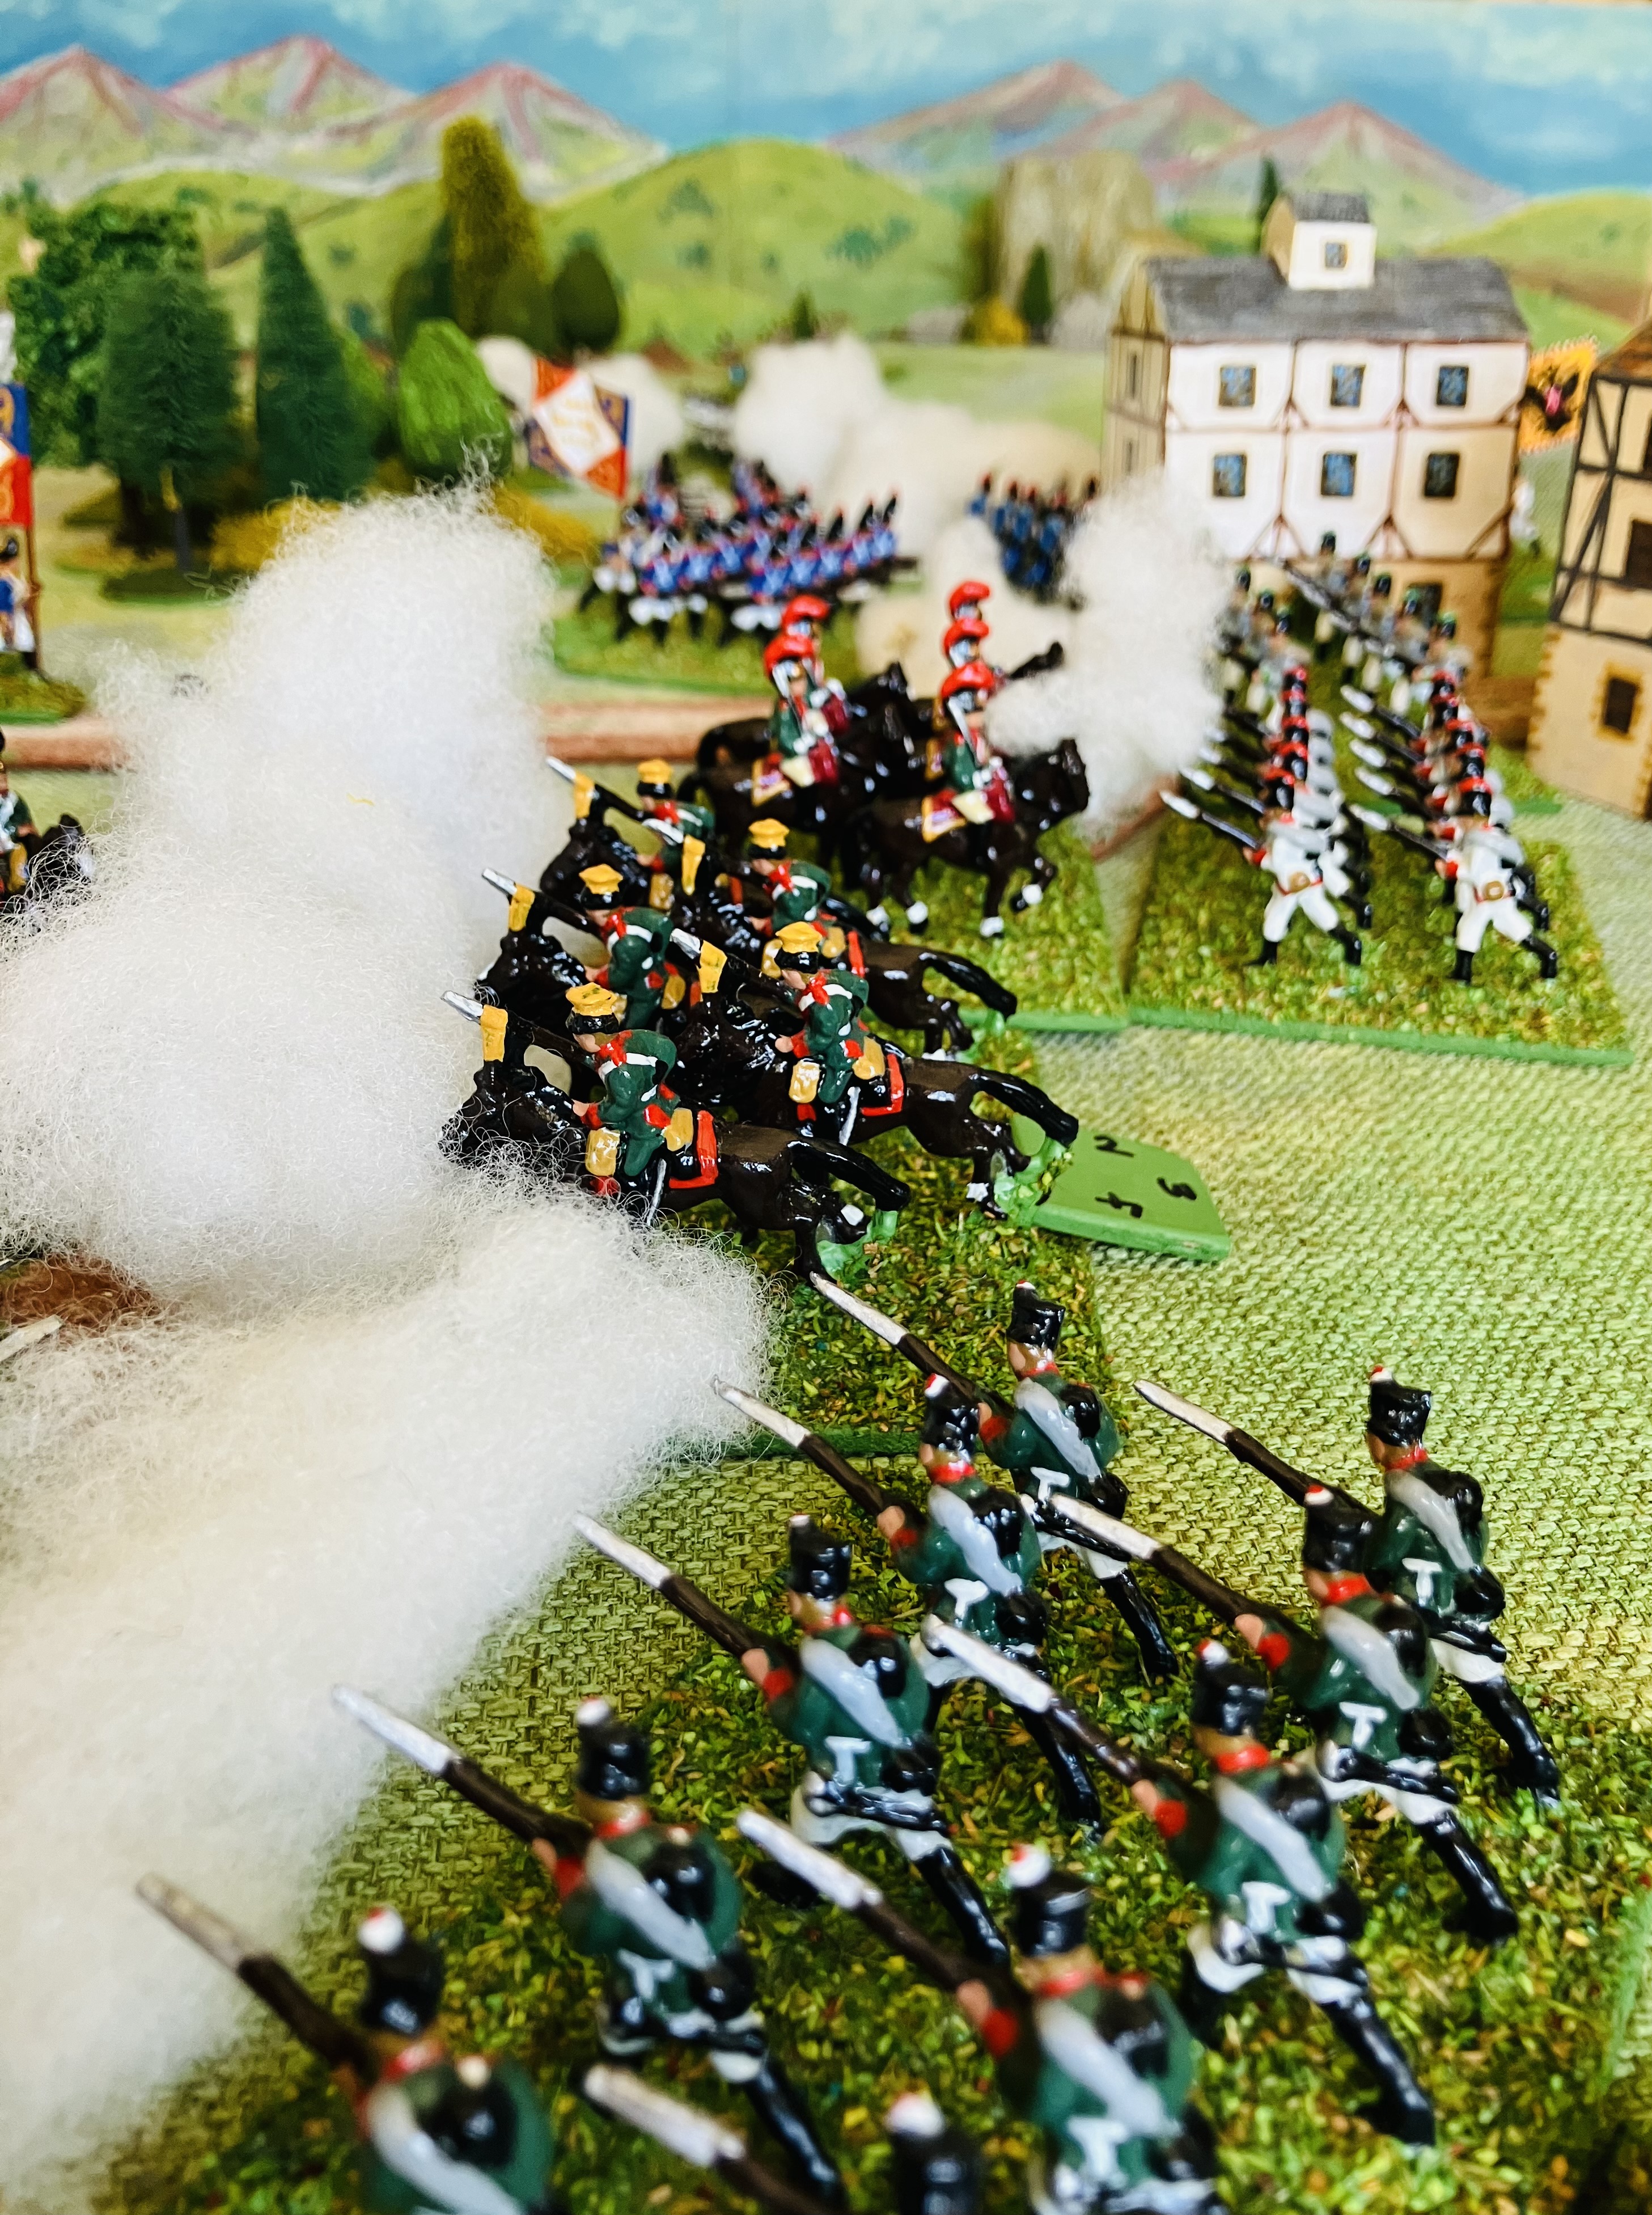
A close up of some Lancers.

Situation

As the forward units of the Austrian army progress northward, they have come across French units advancing southward in the vicinity of the town of Wiessen. Initial forces have been deployed by both armies, with reserve units expected to arrive during the upcoming battle.

Scenario Map

Orders of Battle

At the commencement of the game, the French forces have organised a deployment consisting of 14,000 infantry, 2,000 cavalry, and 20 artillery pieces. These are represented on the tabletop by:

  • 6 Line Infantry (2 units are veteran)
  • 2 Light Infantry
  • 1 Artillery
  • 2 Cavalry

The reserve forces for the French consist of 12,000 infantry, 3,000 cavalry, and 20 artillery pieces. Their arrival is scheduled to take place gradually, starting from turn 2 onward.

  • 6 Line Infantry (1 unit is veteran)
  • 1 Artillery
  • 3 Cavalry

At the beginning of the battle, the Austrian deployment includes 12,000 infantry, 2,000 cavalry, and 40 artillery pieces. These forces are represented on the tabletop as follows:

  • 6 Line Infantry (1 unit is veteran)
  • 2 Artillery
  • 2 Cavalry

As reserves, the Austrians hold 12,000 infantry, 3,000 cavalry, and 20 artillery pieces. Their entry into the battle will be gradual, starting from turn 2 onwards.

  • 6 Line Infantry (2 units are veteran)
  • 1 Artillery
  • 3 Cavalry

Deployment

At the game's start, both players have the option to deploy their units within a 9 inches of their respective edges. The French deploy along the northern edge, while the Austrians deploy along the southern edge.

A view of the initial deployments. Austrians on the left and French on the right.

Reinforcements

Before the game commences, both players arrange their reserves in the desired order of arrival. Starting from game turn 2, each player checks whether their reserves enter the battlefield. Reserves can appear at specified locations on the tabletop from the rear or flank, determined by 2 dice rolls at the start of a turn.

The French player rolls a die for point B, with a 3+ indicating the arrival of the next reserve unit. For point A, a 4+ is required for the next reserve unit in line to enter.

Similarly, the Austrian player rolls a die for point D, and a 3+ results in the next reserve unit arriving. For point C, a 4+ is needed for the subsequent reserve unit in line to join the battle.

Special Rules

All units have the ability to ford the river, except for artillery, which is restricted to crossing only via the bridge.

Victory Conditions

The victory conditions for both armies is to secure and maintain control of the town of Wiessen.

Battle Report

Reconnaissance reports alerted both generals to the enemy's presence as they advanced to control the river crossing near the town of Wiessen. Both armies swiftly deployed and began their advances, gearing up for the impending battle. The French light infantry successfully occupied the town of Wiessen, while the Austrians secured the heights east of the river, effectively blocking the French left wing from advancing. Initial clashes between the two forces proved inconclusive, prompting the generals to send messages for their reserves to march forward and join the battle!

Both forces advance and the French light infantry skirmishing ahead are able to occupy the north part of Wiessen town.

Some initial reserve units arrive. While the French have been able to secure Wiessen, the Austrians are about to secure the eastern hill.

The advancing units soon make contact.

Game Mid-Point

Both generals eagerly anticipated the arrival of their reserve troops that could be employed in the ongoing battle. Following an initial assault on the heights across the river from Wiessen, the French left flank adopted a more defensive posture. Their reserves were arriving slowly, and those that arrived were directed toward the defence of Wiessen.

The Austrian commander's confidence grew as his reserve units arrived to join the battle. He quickly deployed them to reinforce his assault on Wiessen, which had initially experienced a setback in fortune.

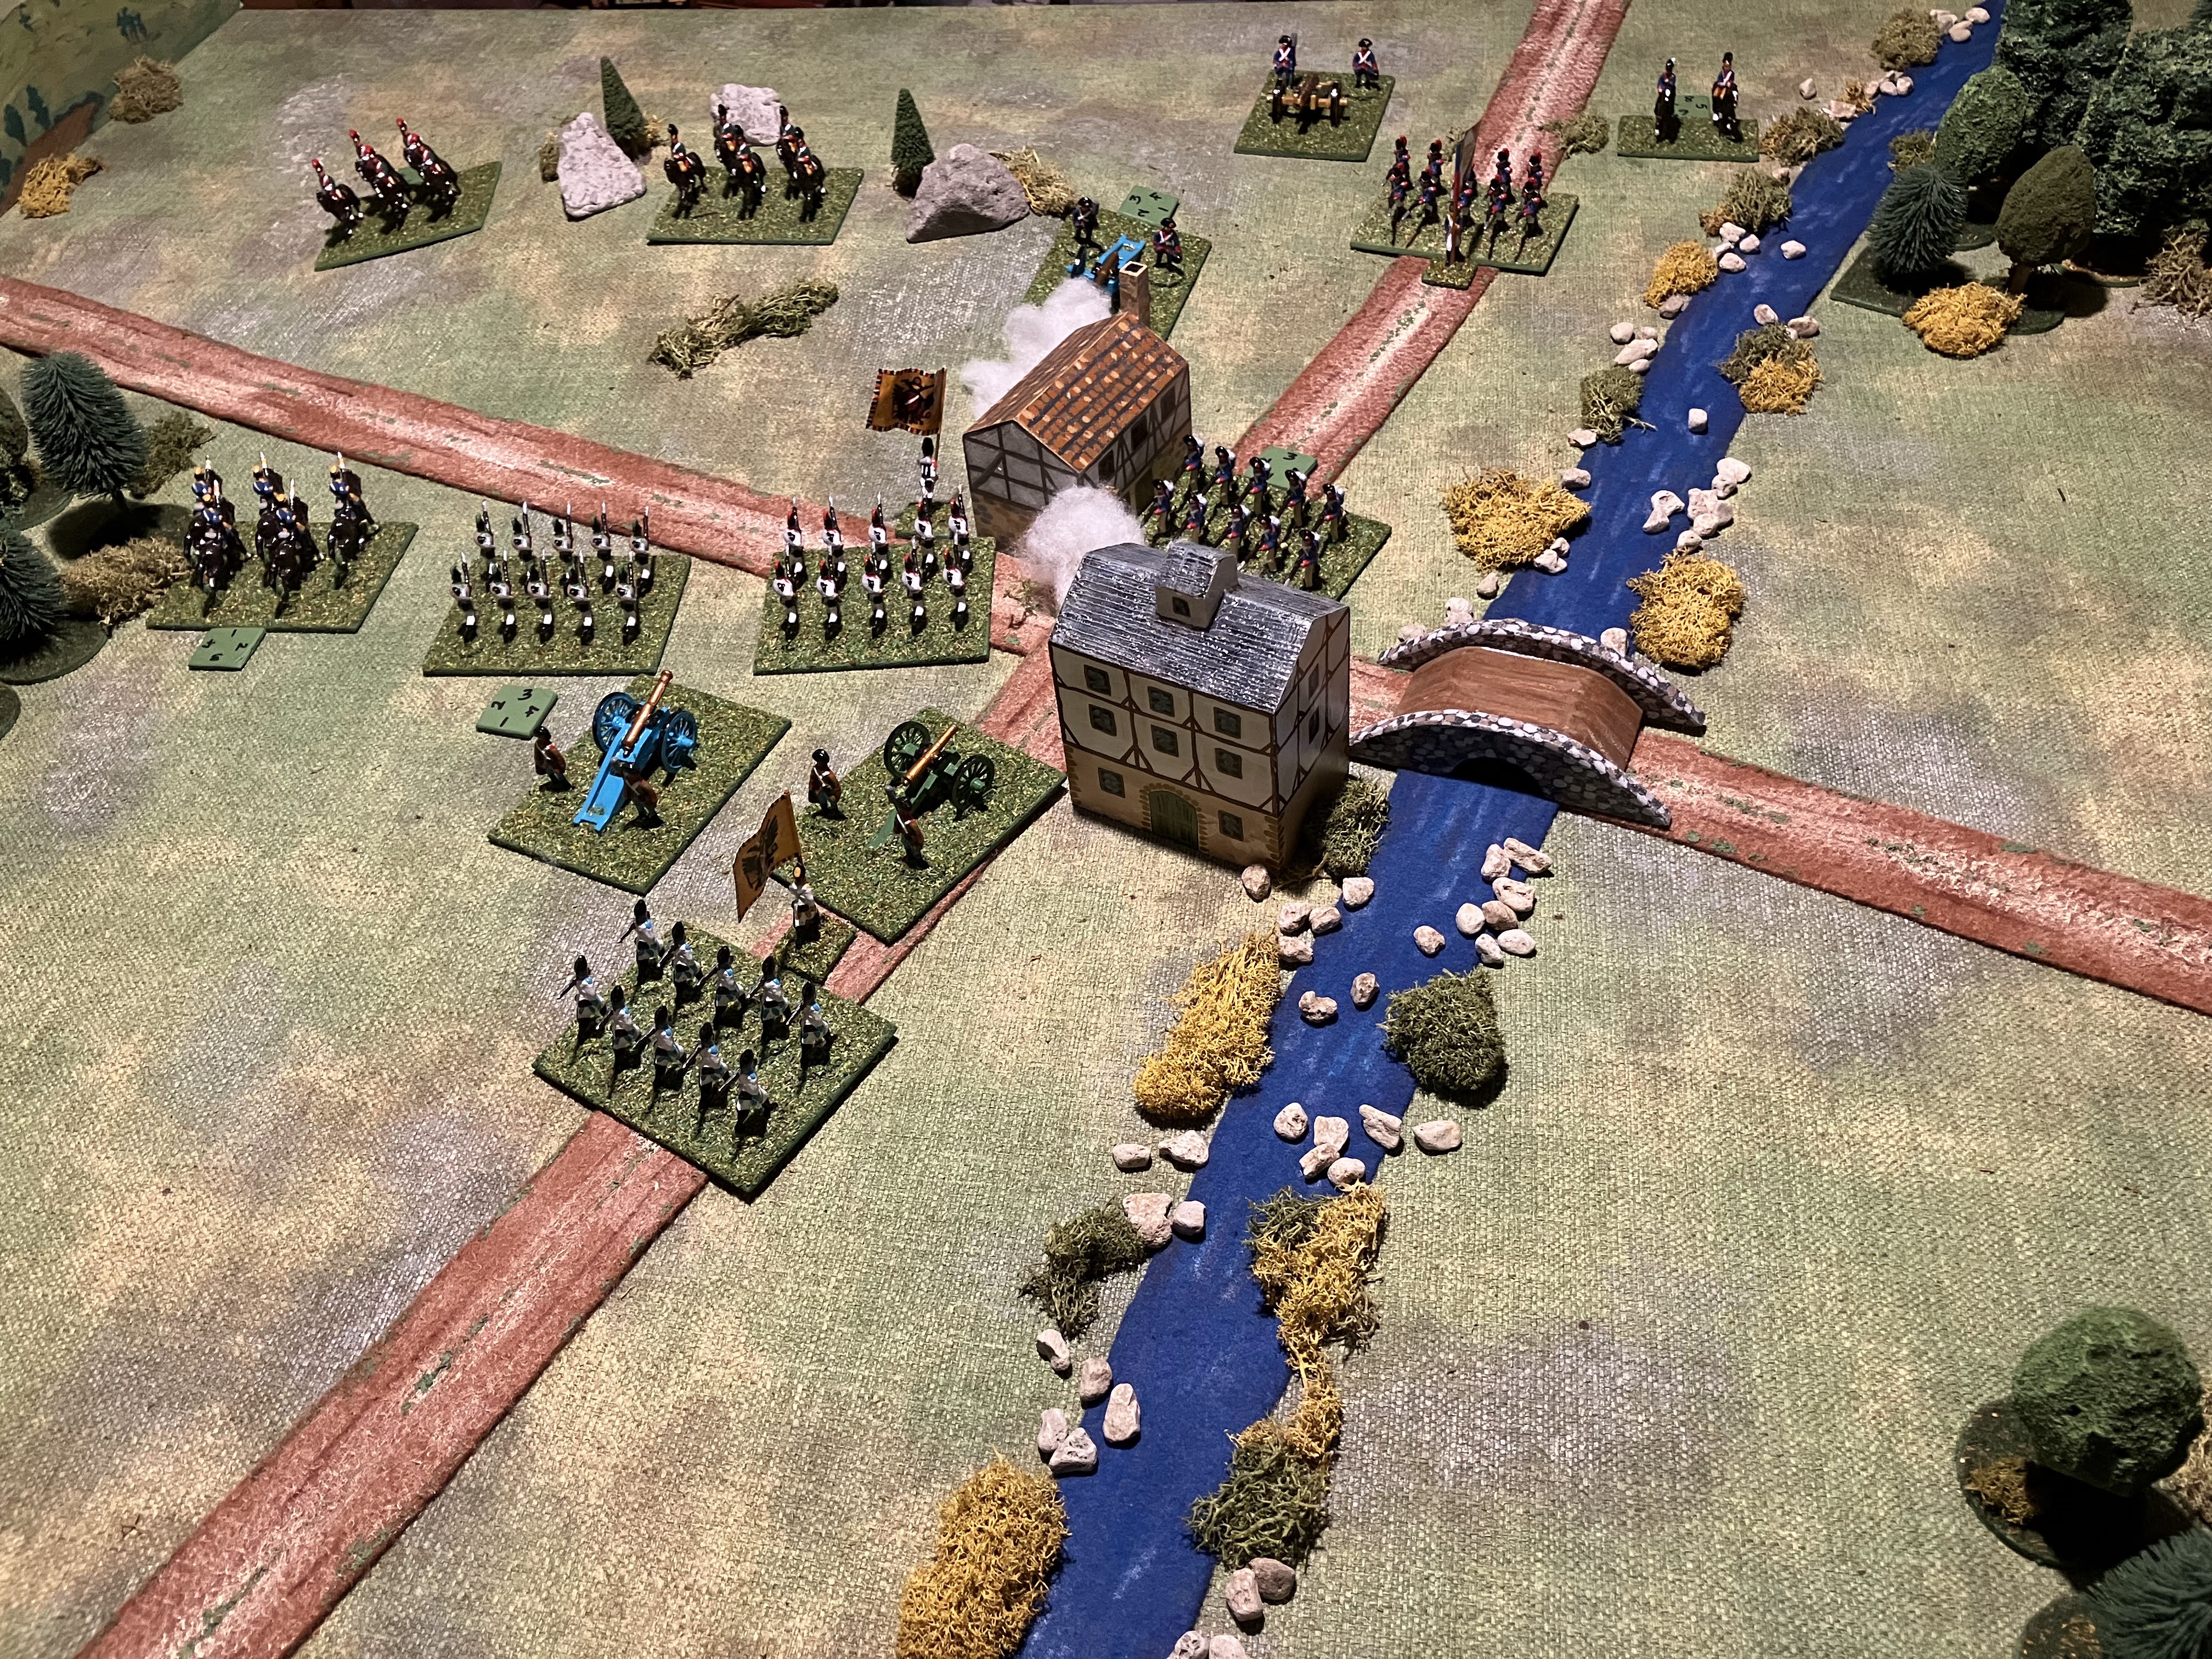
Artillery are bought up to support attacks as more reserve units arrive for the Austrians. The French reserves are arriving at half the rate which does not bode well and the French General is getting concerned.

The French have some success forcing Austrian units to retreat, but the reserve units are ready to fill any gaps and continue to mount pressure in and around the town of Wiessen.

The lack of French reserves is more acute on their left flank as the Austrians look to counterattack taking advantage of their numerical advantage.

The French hold Wiessen but have withdrawn their cavalry to the hill north east of the town waiting for more reserves.

On the French left the French posture is one of defence. At this point all the Austrian reserve units have arrived and only half the French reserves.

End Game

The dwindling supply of French reserves became a pressing concern. The primary objective for the French commanders now shifted to holding of the town of Wiessen and feeding in any arriving reserve units to its defence. With superior numbers on their right flank, the Austrians successfully outflanked the opposition, turning the retreat into a potential rout. In the centre, Austrian artillery played a crucial role as support for their infantry, reclaiming the town in a brutal and bloody engagement.  

Lacking adequate reserves for a counteroffensive, the French general issued a retreat order for his army. The Austrians emerged victorious, securing control of the crucial river crossing.

The Austrians take and occupy Wiessen. A few more French reserves arrive, but they are not in sufficient numbers to counterattack.

The French left has routed and Austrian units move towards the town of Wiessen. The French General retires all his forces. A victory for Austrian forces.

Summary

Despite securing favorable positions for the arrival of reserves, the French encountered a setback with their slow arrival, enabling the Austrians to seize momentum and initiative. The Austrians, leveraging their numerical superiority, gradually wore down the French defenses in Wiessen. When the French opted to retreat, only half of their reserves had arrived, in contrast to the full deployment of Austrian reserves.

Regarding the rules, the only aspect that raises uncertainty for me is the treatment of light infantry in combat. Currently, the rules have light infantry count as defenders and not attackers. I am considering whether to reverse this and have them count as attackers instead of defenders.

Look and feel of the game

It might appear somewhat of a mismatched to have a unit of ten 30mm Spencer Smith miniatures,  representing 2000 troops on the tabletop for infantry and 1000 for cavalry. However, I do try and get the tabletop to look somewhat like some of the battle prints from the period.

A battle print of the period

Action from a previous game.

Next up is a remote Samurai game with Jon of Palouse Wargaming Journal.


Wednesday 7 February 2024

Preparing for some larger Napoleonic games

Over the past week, I opted to step away from gaming with my samurai armies and instead brought out the classic 30mm Spencer Smith Napoleonic plastic miniatures for some tabletop action. Back in November last year, I shared a couple of posts (here and hereabout my attempts to adapt SPI's free board game, Napoleon at Waterloo, to a tabletop setting with free movement rather than hexes.  The reason for wanting to move to this style of rules is so I can game some of the bigger battles of the period.

A game setup with old Spencer-Smith 30mm miniatures

Since last playing the games back in November I have made some rule changes, most of the changes are to the combat resolution table (CRT) which uses the difference in the attacker and defender scores, rather than the combat ratio.

The sequence of play is IGO-UGO with each player taking a turn to move and conduct combat with their units in the following sequence:
  1. Move units
  2. Move HQ (General)
  3. Resolve Combat
  4. Remove units with more than 4 hits.
During the movement phase a player can attempt to move some or all of their units. A unit may move up to the distances listed below in a straight line provided the unit is not within 3 inches of an enemy unit. In which case a unit must remain in contact and cannot move.
  • Line Infantry and Artillery - 6"
  • Light Infantry - 9”
  • Cavalry and HQ - 12"
Units may pass through other friendly units providing they are not within 3 inches of an enemy unit, and all Units must cease movement immediately once they are within 3” of an enemy unit.

Smoke is used to show units in contact with the enemy (with 3 inches)

Note - A unit’s facing does not matter in the game currently. This is something I may add, but was not in the original SPI rule set.

Units may only move into contact with the enemy if they are within 24 inches of an HQ. This is reduced to 12 inches after 50 percent of the army’s units are eliminated.

Combat - Any enemy unit within a 3-inch of a player’s unit must be subjected to an attack, even if it results in one unit confronting two enemy units. All units, excluding artillery, have a range of 3 inches for combat, while artillery have up to a range of 12 inches and can shoot over other units at targets. Artillery when making a ranged attack over 3 inches will ignore any attacking hits.


An example of how using artillery to attack one enemy unit, allows both line infantry to make a +1 attack (2 units - 1 unit with no modifiers)

A combat results table (CRT) is used to determine combat outcomes. Add up the total of attacking units, ignoring any light infantry units, and add the total number of defending units, modifying the scores in the following situations:

  • Add one for any line or light infantry unit in buildings.
  • Add one to the defenders if all the attackers are fighting uphill or across a fordable river.
  • Add one if veteran unit is involved.
  • Add one if the attacking units are a mix of line infantry and cavalry.
Note - Light Infantry are only counted when defending.

Finally, subtract the defending score from the attacking score to determine the CRT column to use. Then roll the die to determine the combat outcome.

Combat results table

CRT Notes:
  • A1, A2, A3, A4 - all attacking units take 1, 2, 3 or 4 hits.
  • D1, D2, D3, D4 - all defending units take 1, 2, 3 or 4 hits.
  • (R) all defending units must retire 6 inches, pushing other friendly units back in the process if necessary.
  • A1/D1 - all defending units and all attacking take 1 hit.
  • Light infantry can opt to retire 6 inches and reduce their hits by 1 unless being already forced to retire.
  • Artillery making a ranged attack over 3 inches ignore any attacking hits.
  • When a unit retires or is eliminated, one of the attacking units can move into the previous enemy position.
Some combat examples below…

A joint attack by cavalry and infantry allows them to make a +2 attack (2 units +1 for a combined attack = 3 - 1 unit with no modifiers)

A joint attack by light infantry and infantry. They only make a 0 attack (+1 -1) as light infantry do not count in attacks.

2 line infantry make a +1 attack. Unfortunately for them they roll a 1 (black die) on the CRT. The result is an A1 so they both take 1 hit.

The next post will be a game report of an engagement battle using deployment ideas from the free 2x2 Napoleonic rules.

A final close up photo.