Having done all the snipping I want to do at this stage for my Jacobite Rebellion armies, and having played one an enjoyable game with the rules provided in the Jacobite '45 book by Peter Dennis. I drafted some house rules for a One-Hour Wargames version for the Rebellion. The One Hour Wargame rules series are very much my go to rules as house rules can be easily added. Having played a couple of small test games, the house rules panned out ok after a couple of modifications. To test these out on a larger game I decided to try the Battle of Falkirk 1746.
(Added note - This post has turned out to be bigger than I expected and also includes the house rules used, which can be found at the end of this post.)
The Battle fought on 17th January 1746, and has the Jacobite army moving to occupy the hill overlooking Falkirk. In response Government forces were then immediately ordered onto the hill. However, due to heavy rain their artillery became bogged and did not take part in the fight.
The battle began with Government cavalry charging the Jacobite right flank. This charge was fought off by some effective musketry and the cavalry routed into their own infantry. The highland centre then charged forward and routed much of the Government's centre. The rain had soaked the musket cartridges so musketry was ineffective for the most part. A complete army rout was avoided by three regiments on Government's right flank which held steady before being forced to retire.
The Game
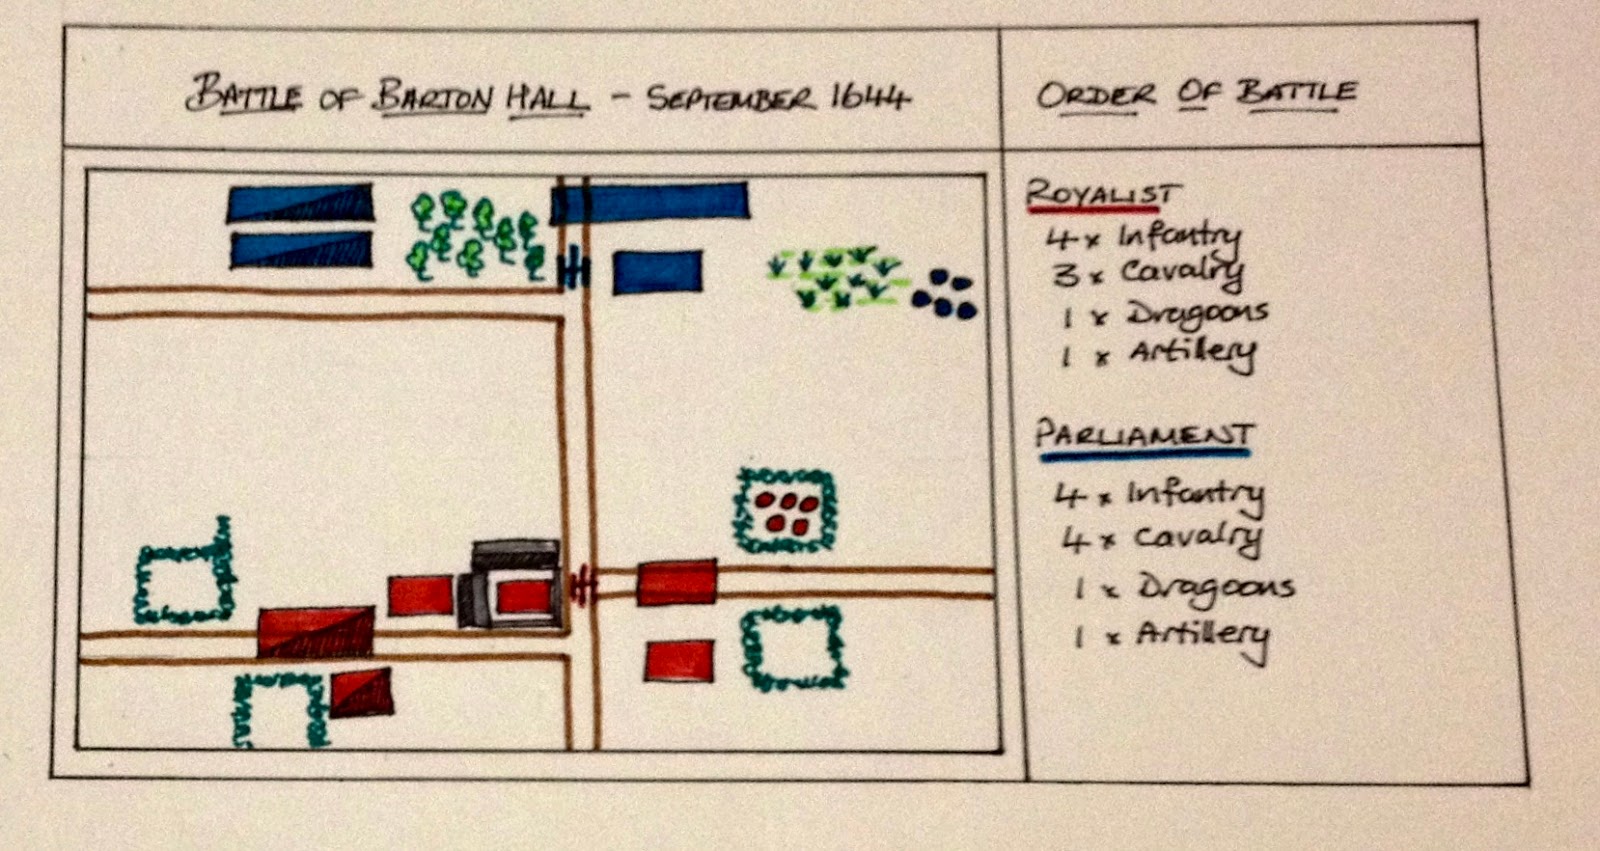
The game has the following order of battle:
Government Forces
- Commander - Lt. Gen. Henry Hawley
- Sub-Commanders - Col. Ligonier and Maj. Gen Cholmondeley
- 3 x Infantry Units (identified on the map by "R")
- 3 x Raw Infantry Units
- 1 x Regular Cavalry Unit
- 1 x Militia Cavalry Unit
Jacobite Forces
- Commander - Prince Charles Edward Stuart
- Sub-Commanders - Lord George Murray and Lord John Drummond
- 3 x Highlender Units (identified on the map by "H")
- 2 x Infantry Units
- 1 x Militia Infantry Unit
- 2 x Militia Cavalry Units
The tabletop has a ravine on one flank and a bog on the other. The game would start with the cavalry charge after which forces were not required to follow the historical moves. But they did, as Highlander units are best used to charge forward.
 |
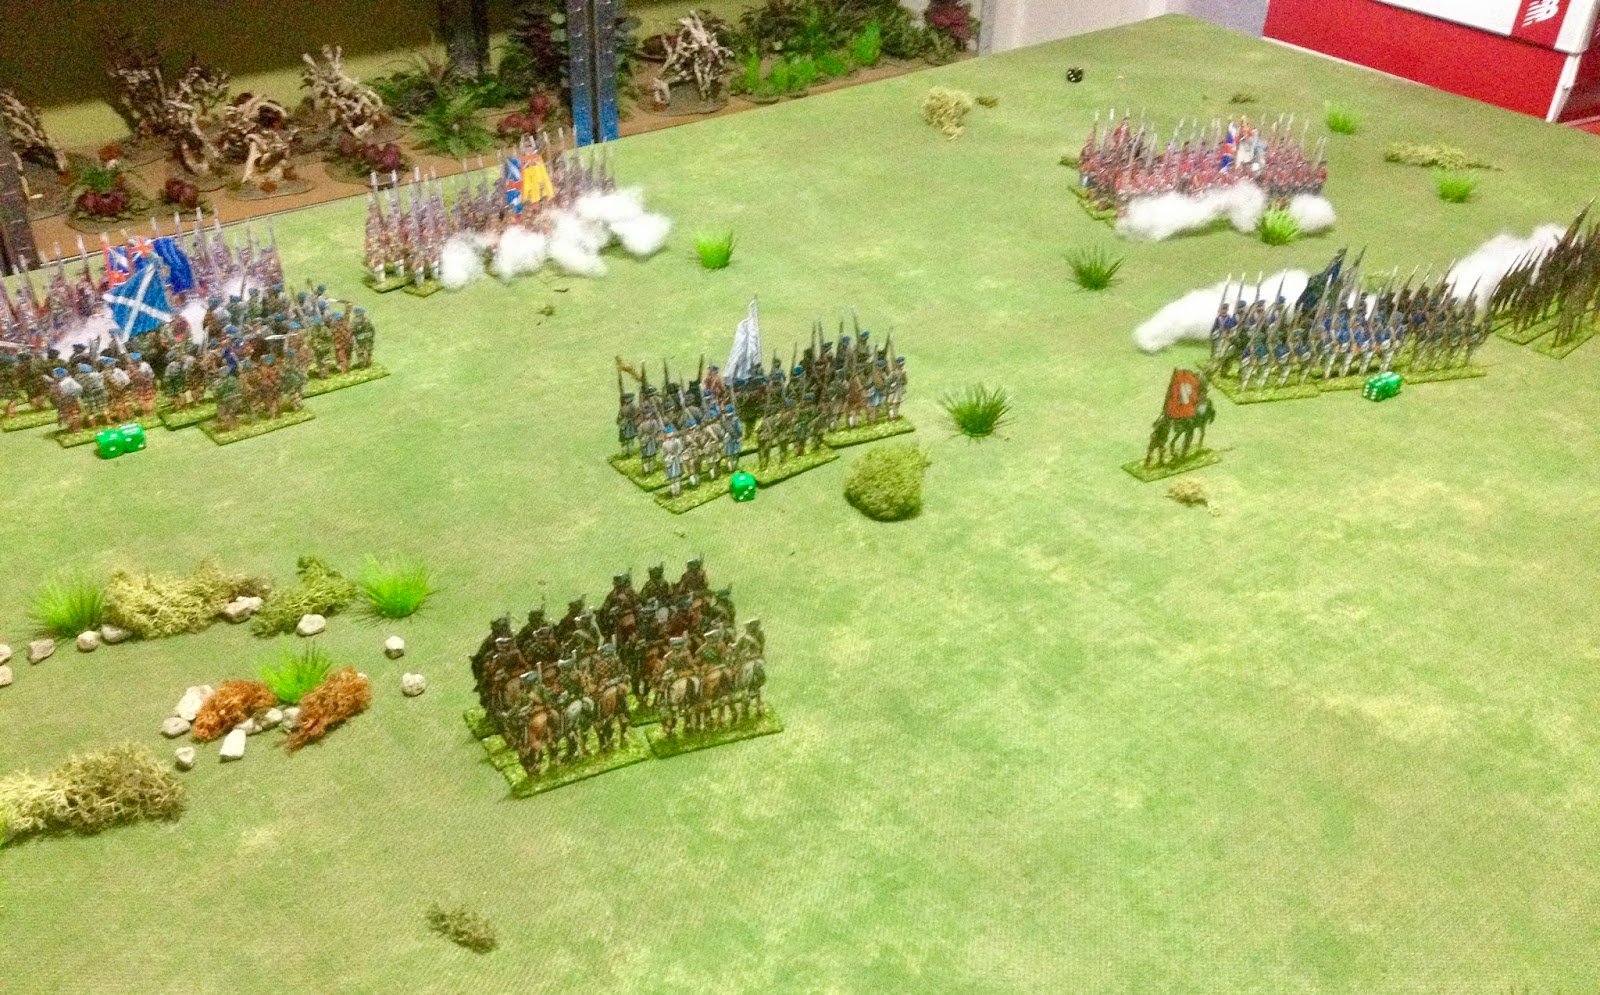
| initial deployments |
 |
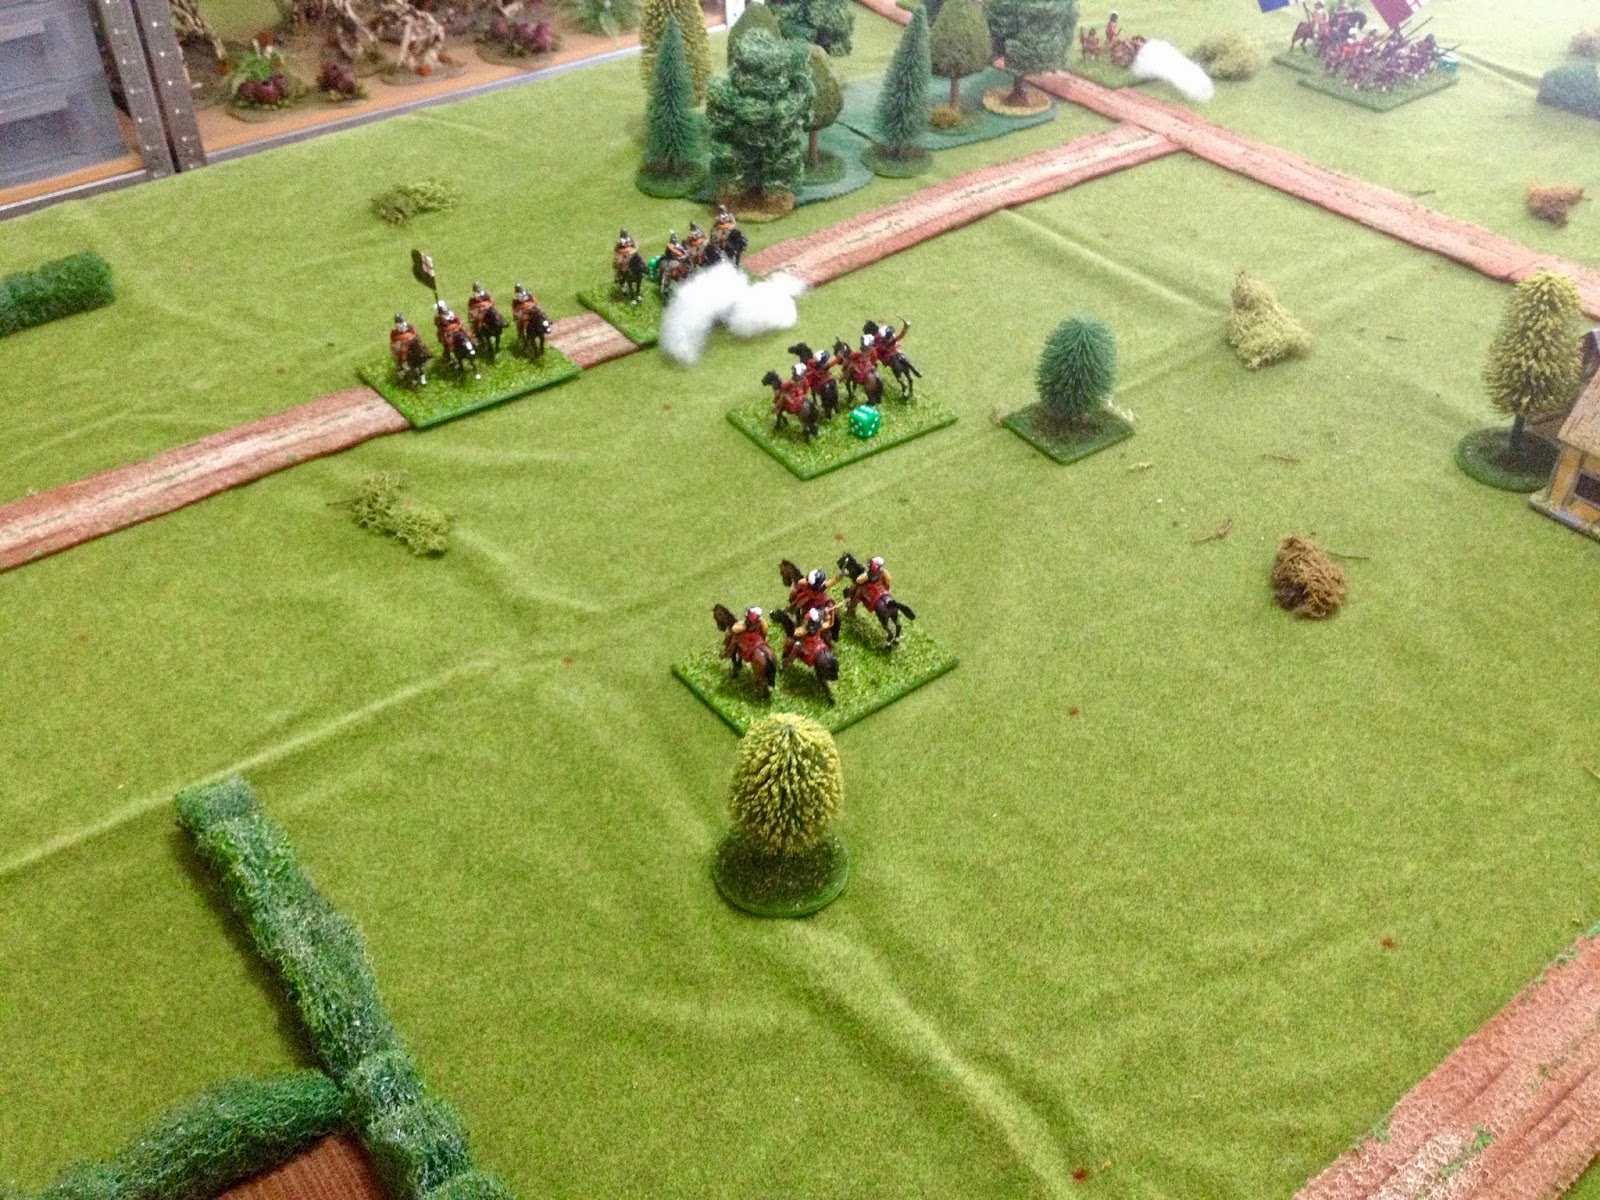
| The initial cavalry charge |
 |
| The game would start with the cavalry charge after which forces were not required to follow the historical moves. But they did, as Highlander units are best used to charge forward. |
 |
| Musketry routs (eliminates) the Militia cavalry which Jacobite cavalry counter charge. |
 |
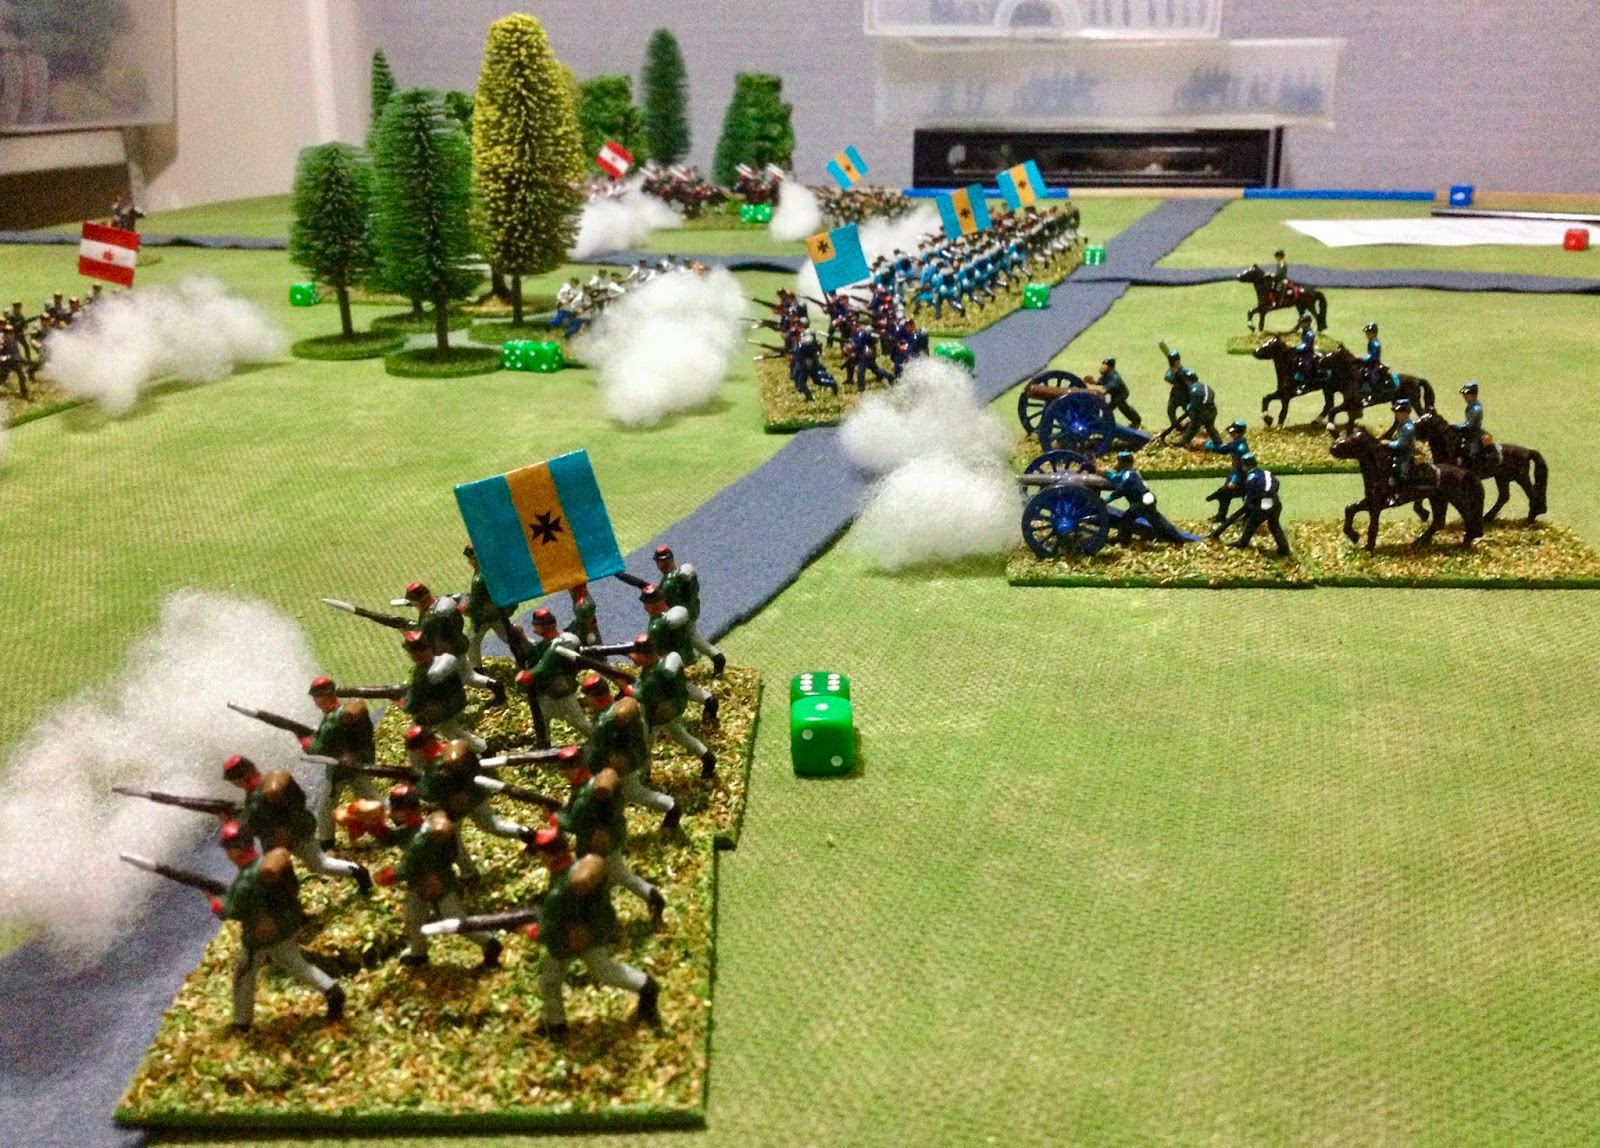
| Having routed the cavalry both lines of Jacobites advance forward with the Highlanders rushing ahead at 9" a move. |
 |
| The first volley. Noting that all musket fire was reduced by 1 hit due to rain. |
 |
| The Government line begins to break as units are routed. Militia and Raw units are eliminated after 13 or more hits, unlike regulars who can sustain up to 18 hits before being eliminated. |
 |
| Unlike history one unit on the Government left flank holds the line longer than expected due to an effective rally by a sub-commander. |
 |
| The last standing Government unit retires off the tabletop. |
Well, the game pretty much followed history.
The rules below are pretty much straight from the One Hour Wargame Horse and Musket rules. The key changes are:
- Highlanders can charge
- Melee is simultaneous to essentially speed up the resolution of a melee.
- Weather effects have been introduced
- Artillery and Mortars cannot move. They remain were deployed.
- Commanders can be used to bolster moral (remove hits) once per commander.
Jacobite Rebellion 1745 One-Hour Wargame House Rules
Unit Types
This game features the units types of:
- Infantry
- Cavalry
- Skirmishers
- Highlanders
- Artillery
- Mortars
- Commanders
Some units are classified as seasoned which has benefits when it comes to the number of hits a unit can take before being eliminated.
Sequence of Play
Players take turns and follow the sequence listed below in their turn:
- Movement
- Shooting
- Melee (is simultaneous involving both sides)
- Elimination
Movement
Units may move up to the following distances when moving forward in a 45 degree arc.
- Infantry - 6”
- Cavalry - 12”
- Skirmishers - 9”
- Highlanders - 9”
- Artillery - stationary and allowed to pivot.
- Mortar - stationary and allowed to pivot.
- Commander 12”
Units turn by pivoting on their central point. They may do so at the start and/or the end of their move.
Terrain
- Units are affected by terrain as follows:
- Woods. Only Skirmishers can enter and provide cover.
- Buildings. Cannot be entered and block line of sight.
- Walls. Provide cover to units within 3” for shooting and melee.
- Lakes. These are impassable to all units.
- Bogs. Only infantry and skirmishers can enter. Any melees in bogs have their hits halved.
- Rivers. These may only be crossed via bridges or fords.
Only Skirmishers may pass through and be passed through by other units.
Charging
Cavalry and Highlander are the only unit allowed to charge into other units. Charges are resolved by moving the attacking unit into contact with the target unit. A charging unit may not turn and must move straight on a 45 degree arc. Combat is resolved during the Melee phase.
Units may not charge artillery if the Artillery unit is in contact with an Infantry or Highlander unit.
Shooting
The procedure for shooting for units (other than Cavalry and Highlander units which melee only) is as follows:
Units may only shoot at a single target within 45 degree arc of their frontal facing side. They may not fire into units in melee.
Infantry and skirmishers have a range of 12”, mortars a range of between 12” to 36”, and artillery has a range of 48”.
To determine casualties, units roll a dice when shooting modified by the following:
- Infantry = D6
- Skirmishers and Artillery = D6-2
- Mortars = D6-3
Cover. Units in cover (eg woods or behind walls) only suffer half the registered number of hits (any fractions are rounded in favour of the unit shooting). Mortars always ignore cover.
Melee
The Melee phase is simultaneous with both sides participating. The procedure is units roll a dice when modified by the following:
- Cavalry and Highlanders = D6+2
- Infantry = D6-1
- Skirmishers = D6-3
- Artillery and Mortars = D6-4
Mortars and Artillery cannot be attacked if they are in contact with a unit of infantry or Highlanders.
Hits are applied to the target unit, which are modified by the following:
- Terrain - a unit occupying a hilltop only suffers half casualties rounding up.
- Skirmishers, Artillery and Mortars suffer double hits
- Flank or Rear Attacks. Units engaged in their flank or rear suffer double hits.
Units not eliminated remain in contact. Units can only disengage from a melee if their movement allowance is greater than that of their opposition.
Elimination
Units are eliminated after taking a certain number of hits which varies depending upon the unit type.
- Infantry and Highlanders 19 hits (deduct 6 hits if unit is classified as raw or militia)
- Cavalry 13 hits (deduct 6 hits if raw or militia)
- Skirmishers 6 hits
- Artillery and Mortars 6 hits
When removing an eliminated unit, check for any unit within 12” and line of sight. These units will take D3 hits.
Commanders
An army may have 1 commander and up to 3 sub-commanders which are allowed to rally units during a game.
Once during a game a commander, or sub-commanders, can move into contact a unit in an attempt to rally it. Roll a D6 for a commander and remove that many hits. Sub-Commanders roll D6-2.
Upon joining and rallying a unit a commander remains with that unit forth remainder of the game. When the unit is eliminated the commander is removed as well.
Commanders not attached to a unit may not be attacked.
Army Resolve
When all the commanders have joined units to rally them, then no unit may advance towards enemy units.
Whenever a unit is eliminated. Any units within 12" and line of sight take D3 hits. If this deduction causes another unit to be eliminated, then another round of deductions can occur for this second eliminated unit. (Note - It is possible for a sizeable portion of an army to be routed if many of the units have taken quite a few hits.)
Weather
Rain can effect units that shoot and the availability of Artillery and Mortars.
- if rain -1 from all shooting, and Artillery and Mortars get bogged and are unavailable on a 4+ roll.
- if heavy rain -1 from all shooting, and all Artillery and Mortars get bogged and are unavailable.
- If foggy all visibility is reduced to 6" in turn 1 and visibility is increased by 3" with each turn.
- If snowing -1 from all shooting, and all visibility is reduced to 6" in turn 1 and visibility is increased by 3" with each turn.