Showing posts with label WW2 North Africa. Show all posts

Saturday, 8 August 2026

Counter-attack at Bir Kalifa - second remote game

This past Friday I played a couple of remote WW2 Western Desert games with Jon from the Palouse Wargaming Journal. The games moved along at a brisk pace, playing both games took just under two hours. We were using the Tank on Tank board game rules from Lock 'n Load Publishing, with a handful of house rules and some updated unit capabilities.

The rules are fast and decisive, if a unit is hit, it is eliminated. However, this cut-throat combat is balanced by the fact that a player is limited to between two and four activations each turn, with the third and fourth activations having to be diced for.

An activation allows a unit (or units) to fire at one enemy unit, move individually, or make a group move using an HQ. For a useful overview of the board game rules and how it plays, see the review posted by Norm of Battlefield and Warriors Blog (here).

Scenario

The scenario has a German counterattack following a successful Commonwealth advance. As the Commonwealth forces look to consolidate their gains near the settlement of Bir Kalifa, elements of the Afrika Korps launch an attack.

Map

The game is played on a hex grid.

Tabletop set up

Order of Battle

Commonwealth Forces

  • 2 × HQs
  • 4 × Grant tanks
  • 2 × A13 Cruiser tanks

These units begin the game deployed behind the red dotted line. The Commonwealth player deploys first and has the first turn.

Beginning on Turn 5, the following reinforcements may arrive:

  • 2 × A13 Cruiser tanks
  • 1 × Bishop self-propelled 25-pounder

Afrika Korps Forces

  • 2 × HQs
  • 2 × Panzer IV (75mm short)
  • 2 × Panzer IV (75mm long)
  • 5 × Panzer III
  • 1 × Wespe (105mm)

The German force begins the game deployed behind the blue dotted line. The Afrika Korps deploy second.

Victory Conditions

The Germans win if, by the end of Turn 9, they either:

  1. Destroy all Commonwealth units, or
  2. Successfully exit three units from the opposite tabletop edge.

If neither objective is achieved, the Commonwealth player is the winner.

House Rules

For those familiar with the Tank on Tank rules, the following house rules were used in the game:

  • Attached HQs – HQs are attached to combat units and may transfer to another unit by spending 1 Action Point.
  • Dust – Any unit that moves or pivots in open terrain raises dust. A marker is placed beside the unit to indicate this, and it adds 1 to its defence value unless it already benefits from cover.
  • Indirect Fire – Only HQs participating in the shooting action may call in indirect artillery fire.
  • Terrain – Hills and buildings are treated as described in the standard rules, while all areas of broken ground provide cover.
  • Use solo activation mechanism from the rules - Where the first two activations are free and a 3+ is required for the third activation and a 4+ for the fourth activation. This was because it was a remote game and the usual method requires a bowl and tokens and not suitable for a remote game.
The above unit values were used.

Battle Report #1

For the first game please read Jon's battle report on his blog here. (We decided to split the battle report writing effort.)

I used small sticky notes to attach labels to the back of each unit to help with unit identification for this remote game.

Dyed soft toy stuffing is used for dust markers where units have moved or pivoted, and black dyed stuffing attached to little wooden blocks to show brewed up vehicles where units have been destroyed. The dust did on occasion hide the unit labels - I did not think about that when setting up.

I had a few key takeaways from this first game:
  • As the attacker, the priority should always be forward movement, with shooting taking second place unless the odds are overwhelmingly in your favour. The nine turns go by very quickly, so there is little time (turns) to waste.
  • The tracks (roads) are important, they provide a useful boost to movement. A blocking unit positioned to on the track can create delays and need to be eliminated.
  • Attack with two groups in the beginning and the limited activations should be used with the group able to make the most progress.
It is always easier to be the defender. There is less to think about once the defensive line has been set. Jon was kind enough to take the attacking role first. This was appreciated as when hosting a remote game being the defender makes things a little easier. There plenty of things to be mindful of when running a game for the first time.

Battle Report #2

The second game opened with my Afrika Korps forces advancing towards the settlement of Bir Kalifa and along the left flank. Jon responded by moving a mix of A13 and Grant tanks into defensive positions in and around the broken ground near the settlement, while a second group pushed up around the opposite side of the town.

To keep the forward momentum, my left-flanking force pushed around the broken ground. Jon responded by withdrawing from the position and forming a new defensive line ready to block my advance, using his reserves to reinforce this new position. Meanwhile, around the settlement, I attacked one of the Grant units and successfully destroyed it. Outnumbered, Jon's left-flank group opted to retire back along the road.

Opening moves.

The Settlement of Bir Kalifa is occupied as Commonwealth forces retire to form a second defensive line with their recently arriving reserves.

Pressing forward with both groups, the Afrika Korps left flank engaged the larger Commonwealth defensive line, while on the right flank my forces moved out of the settlement and advanced along the road. The smaller Commonwealth defensive group defending the road was forced further back as it tried to contain the advance.

With the clock ticking, both sides were beginning to lose units in the fighting. However, the Afrika Korps was gradually working its way around the larger Commonwealth defensive line while, at the same time, continuing to inch further along the track.

The tow groups advance on the left flank and out of the settlement.

Nearing the last turn as the attackers are poised to exit the table.

By the final turn, the situation was on a knife-edge. I had four units in a positioned ready to exit the table, two on the left flank and two on the road. With two activations Jon managed to destroy one of them on my left flank. He then needed a third activation with a 3+ on the dice to move a unit into position to block the road and prevent a third unit from escaping using the track bonus to movement (one unit could already travel off road to exit the table).

Fortunately for me, luck was on my side. Jon rolled a 2, leaving the road open. I was able to exit three units from the table on Turn 9, securing a last gasp victory for the attacking Afrika Korps.

Wrap Up

Winning this scenario as the attacker is no easy task, and I certainly needed a little luck at the end to get a victory. These games played very quickly, with the first taking around an hour and the second just 40 minutes. Remote gaming does slow things down a bit at the start until you get into the swing of things.

One of the reasons for running these remote games was so I could to get back into playing Western Desert games using the Tank on Tank rules, keeping them as close as possible to the original rules while making a few small house rules to better reflect the desert environment, such as the use of dust markers.

I have now finally managed to get my own copy of the game, so the next step will be to work through the various scenarios and try to adapt them to the Western Desert. The scenarios are important as without them the game can descent into a shoot out. I am looking forward to seeing how they work on the tabletop.


The game arrived this past week.

What's Next?

I am also thinking about playing a larger campaign using Avalon Hill's old Afrika Korps board game board and may be the counters, with the battles being fought on the tabletop using the Tank on Tank rules and modified scenarios.

I have not yet worked out best to translate the situation on the campaign map on to a tabletop while keeping the overall number of games to a manageable level. I do not want the campaign to become so large that it stops being enjoyable.

This is not my first attempt at a Western Desert campaign. I previously ran a linear campaign starting in early 2020 that continued well into 2021. It was a lot of fun, but I was getting a bit tired of the games towards the end and was quite glad when it ended. You can read about that earlier campaign it starts here.

A second hand game I picked up a couple of years ago always with the idea of using it for a wargame campaign.


Friday, 7 June 2024

A quick WW2 Western Desert game

The recent gift of Rommel’s command and completing some wadi terrain (see previous posts) motivated me to set up a WWII Western Desert game on my tabletop this past week.

Advancing Allied tanks.

Rommel’s HQ gets to play a part in the game.

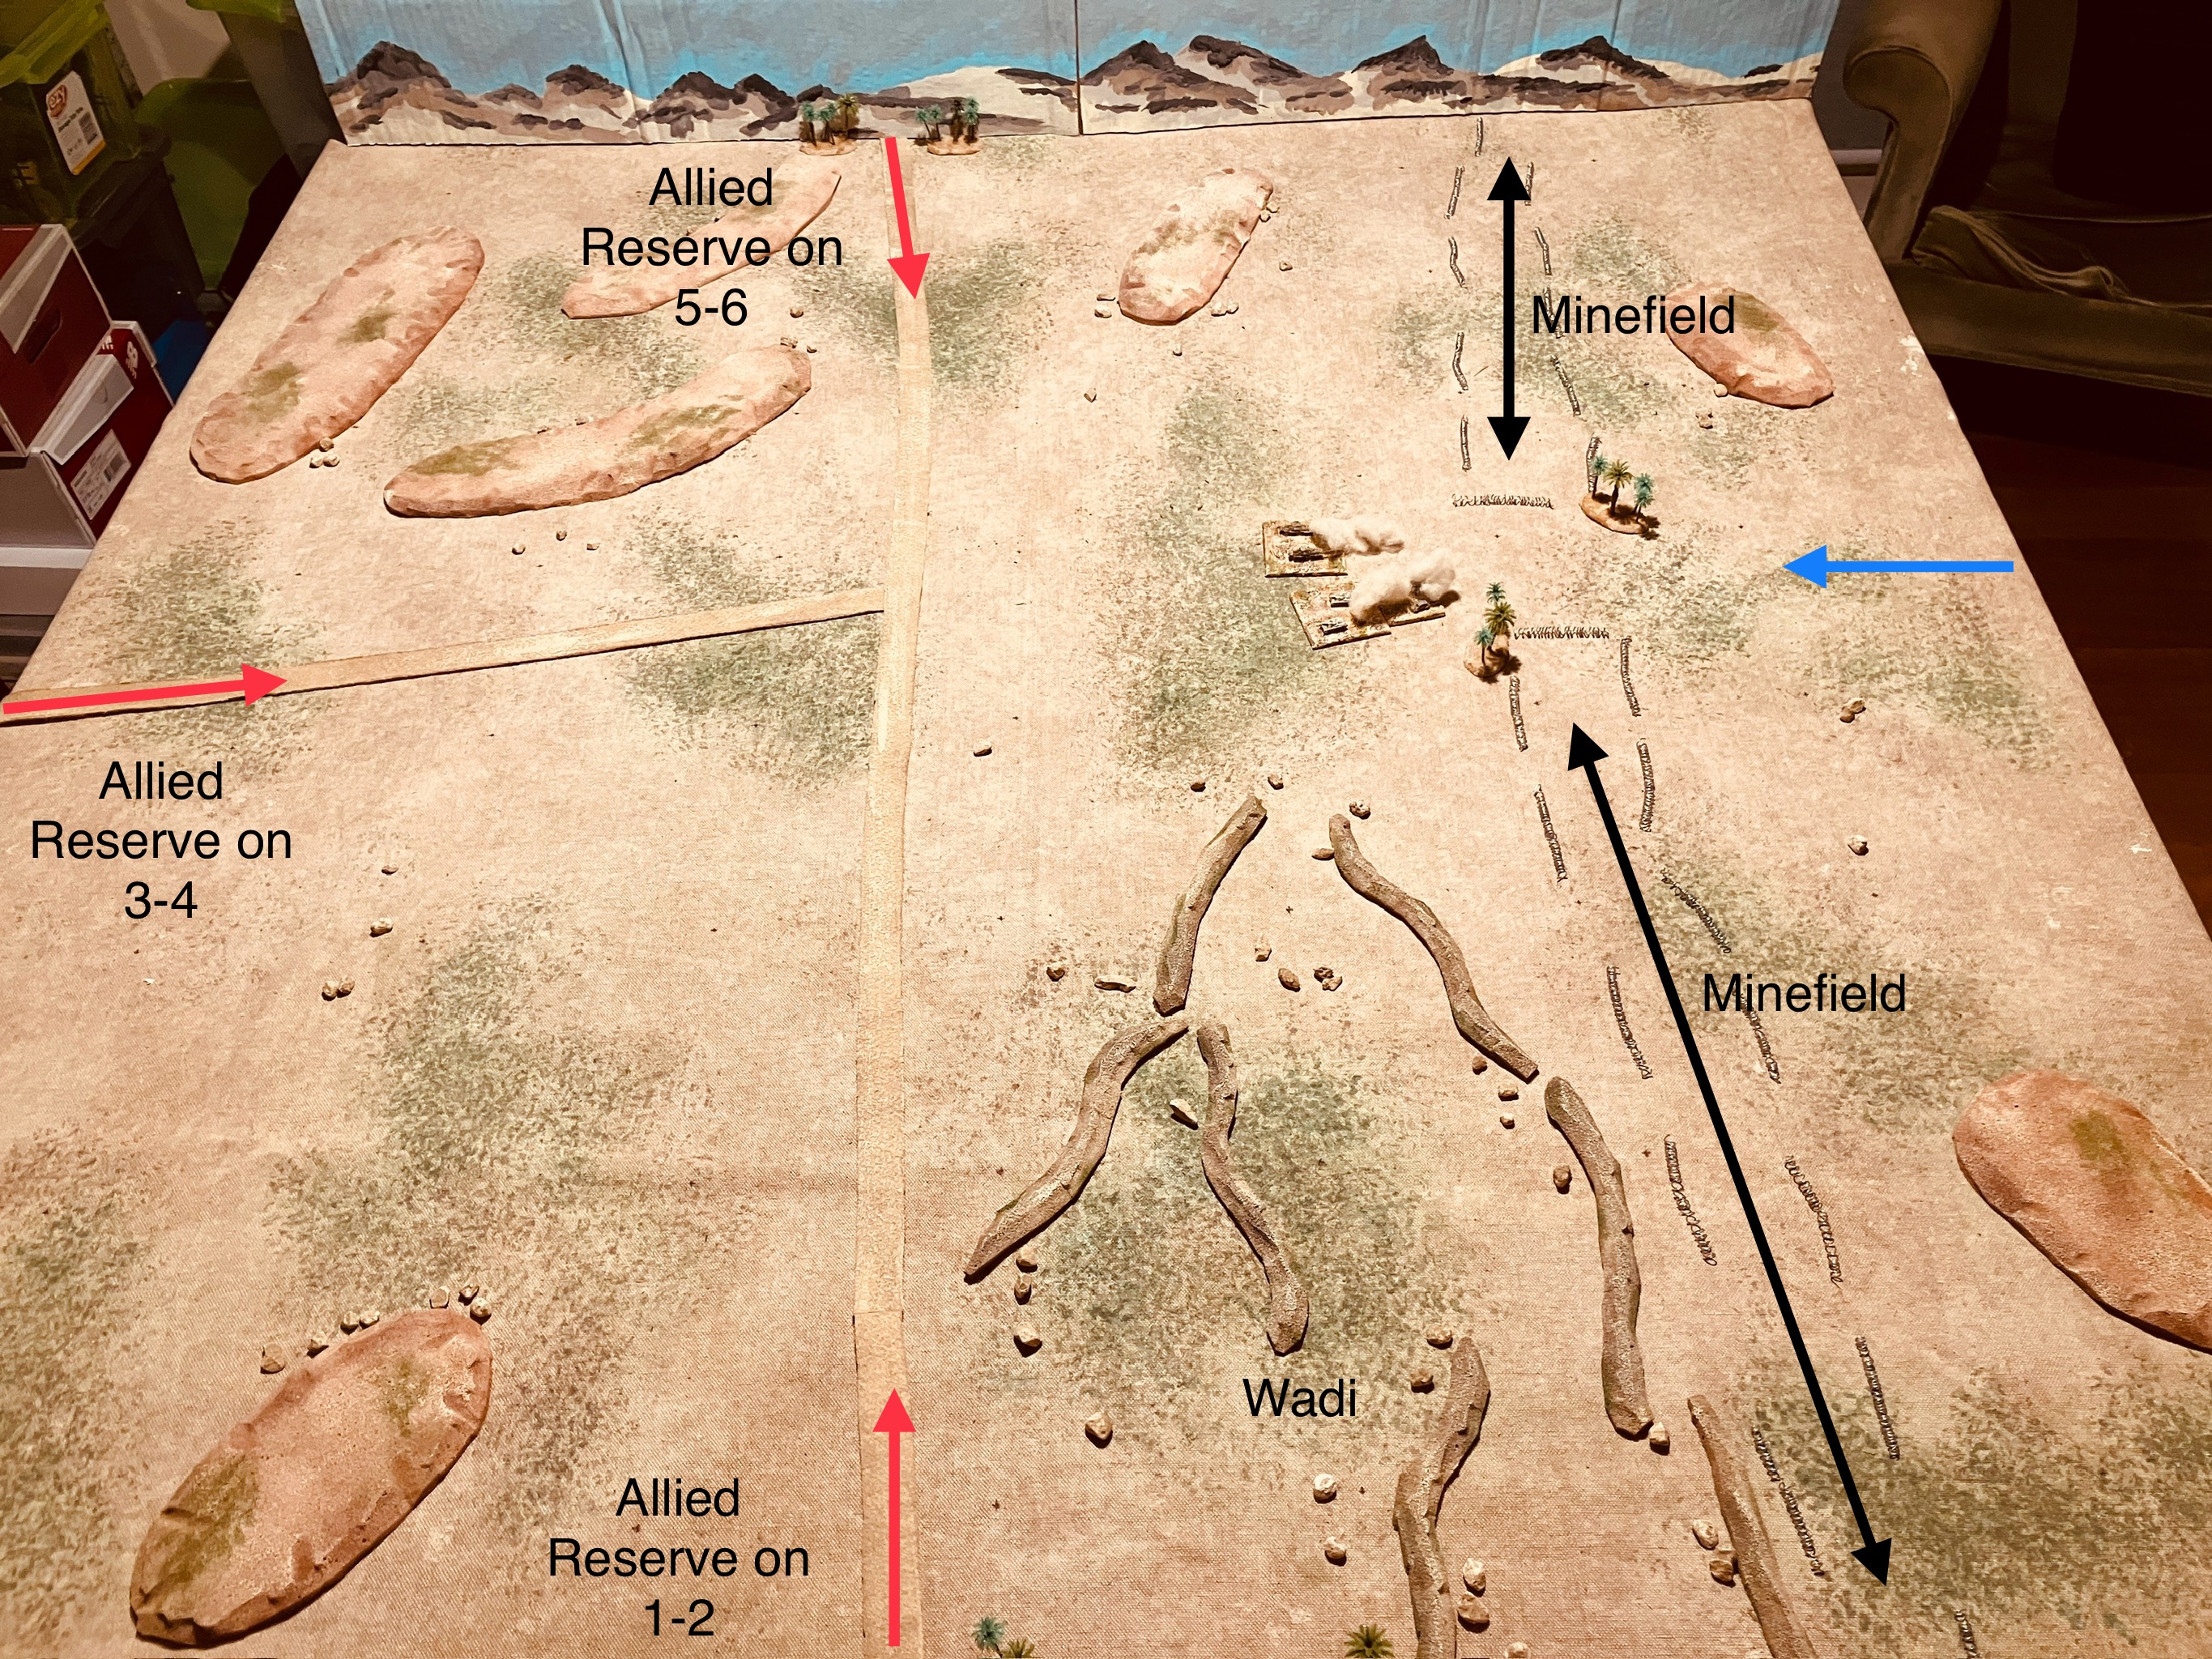
For this game, I used the One-Hour Wargames Bridgehead scenario (number 5). Instead of a river, there is a minefield with a gap cleared by German engineers, who are now trying to secure it and establish a bridgehead. Alerted by a recent reconnaissance flight, the Allies are scrambling to mobilize nearby armored units to prevent the enemy from establishing a bridgehead.

Here's an overview of the battlefield: the minefield runs north to south. The photographs are taken from the northern end of the tabletop. Several hills are scattered around, primarily concentrated in the south, and there is a wadi located in the northern area (bottom of the photo).

The Allies arrive in three groups on turns 1, 3, and 5, with a dice roll determining which of the three possible entry points they will use. Afrika Korps reserves arrive steadily from turns 1 through to 5 from the western edge. For this game, I'm using the Tank on Tank board game rules, adapted for the tabletop with a few additional modifications, such as a -1 penalty on attacking dice rolls for moving units, which is indicated by the use of dust clouds.

Game Report

Here are the photographs of the game as German units try and create a bridgehead. I have drawn on some of the photographs to indicate where the action is occurring as it is not so obvious with 6mm units. 

In the initial phase of the battle, German forces advanced to secure a hill overlooking a potential entry point for the Allied reserves. Meanwhile, other German units pushed through the gap in the minefield, and quickly spot the dust trails of Allied forces arriving from the east.


Additional Allied reserve units arrive, joining the earlier arrivals who have taken positions on higher ground to assess the buildup of German forces.

The Allies launch an initial attack on the hill to the south but are easily repulsed with losses.

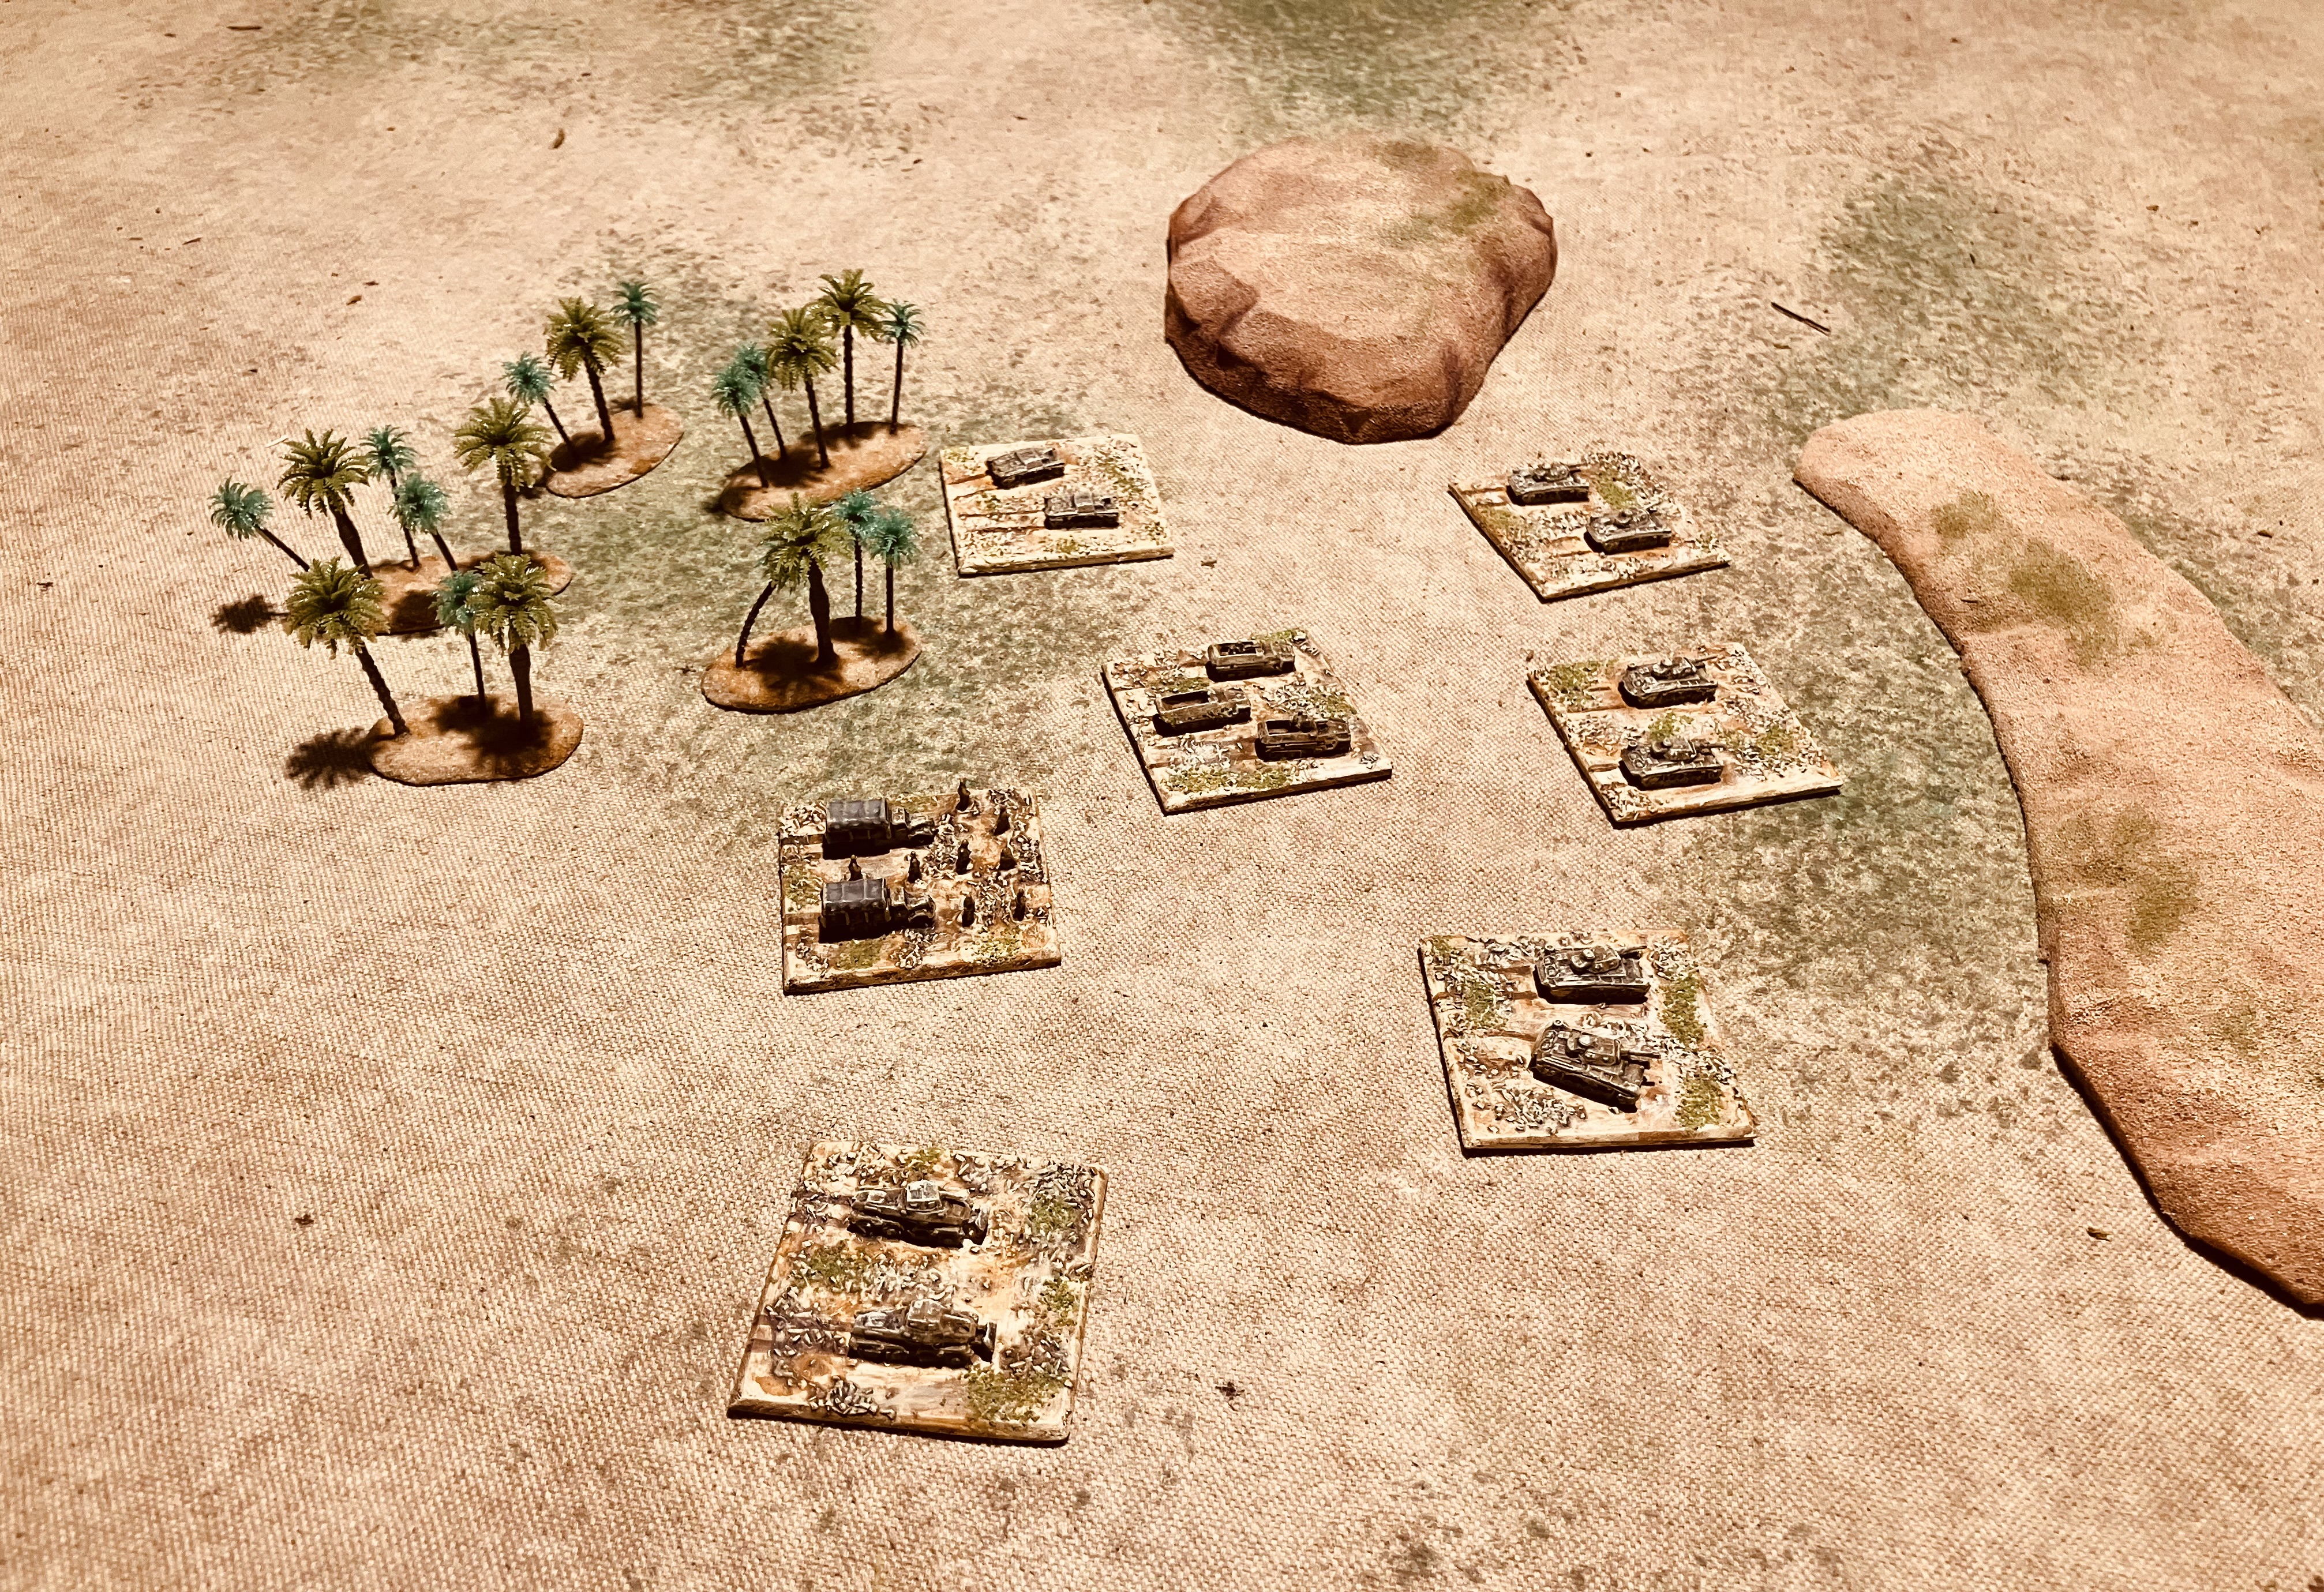
German anti-tank units arrive, with Rommel’s HQ visible in the background. Rommel's presence on the tabletop will enable the Germans to re-roll a couple of their failed activation dice rolls.

In response to the advancing Allies, the Germans launch two attacks to support their units on the hill and block the main Allied advance.

After an initial clash the Allied armour take casualties and choose to retire, while their last expected reserves arrive to launch an attack the hill to the south. The German artillery arrives and is quickly rushed into position to provide support to their troops defending the hill.


A close up on the action. Burning wreaks block line of sight in the amended rules.

The Allied armor initiates an attack from the hill to divert the attention of the German armour while they launch their assault on the hill.

Following a brief yet fierce engagement, the Allies successfully secure the hill to the south. Switching their attention the Germans to use their now superior tank numbers in an attempt to make an outflanking manoeuvre against the Allied armour in the centre.

Following the armor clash in the centre, the Allies have withdrawn to the eastern hills. The German control of the bridgehead remains at risk as long as the Allies maintain their positions.

The Germans attempt to dislodge the Allied units from the southern hill, using their artillery and 88mm gun to support their armoured attack, which has manoeuvred around to the rear of the hill.

After several efforts, the Germans successfully secure the southern hill. Then they use it as a launching point to mount an attack on the eastern hills where the remaining Allied units capable of threatening the bridgehead are positioned.

The final Allied position falls, and the bridgehead is firmly secured.

An entertaining game. The Tank on Tank rules provide quick games which seem very suitable for armoured clashes in the Western Desert.

Thursday, 30 May 2024

Rommel’s command and making a wadi

After several weeks of focussing on the English Civil War period and play testing a draft set of rules, I decided it was time for something different. I do have a half-written ECW game report that I'll post soon, but the change was sparked by the arrival of a parcel from Steven of Sound Officers Call! The contents of which was Rommel’s command set in 6mm. 

Rommel’s command - a recent arrival in the post

The story behind this package goes back to when I was reading Steven’s posts about his preparations for wargaming the Battle of Kasserine Pass. He was facing the same challenge I had encountered with making palm trees, which are very tricky to make, particularly for the smaller miniature scales. In my case I had eventually decided to purchase a couple of bags of palm trees suitable for both 20mm and 6mm scales. I eventually ended up with a surplus of 6mm trees, so instead of letting them gather dust on a shelf, I posted them to Steven.

Knowing that I also game in the WWII North African theatre, Steven emailed me to let me know a surprise package was on its way. Well what a surprise! A very nicely painted and based command set which will be incorporated into by WWII Western Desert armies and be on the gaming table very soon.

A closer view of the detail. The models I believe are Baccus.

So a big thank you to Steven for the gift which will be incorporated into by WW2 Western Desert forces. The reciprocity in the wargaming community is a wonderful thing.

Sticking with the WWII North African theme and the ongoing need for terrain, one terrain feature I was missing on my tabletop was how to represent wadis and depressions. So, this past weekend, I attempted to make some using foam fill. Previously, I had made hills and sand dunes using the same foam fill material (see here). To create the wadis, I cut the foam fill into long, wiggly lines, shaped them just using pair of scissors, applied watered-down paint, and then dry brushed some highlight colours to finish them off. 

British armour are hidden in the wadi ready for a surprise attack.

Foam fill from the local craft shop was used to make the wadi.

To add a bit more to the wadi I used some railway brown course stone scenery as boulders.

Railway scenic 

A closer view of the wadi.

Sunday, 19 May 2024

Planning a future campaign and ECW rules

A recent second-hand purchase arrived this week. I was fortunate enough to be able to buy locally at a reasonable price and avoid the high international postage costs, which seem to cost more than the price of the game itself. The game was in good condition for a used game and came wth all its parts.

Recent purchase - Avalon Hill’s Afrika Korps

Why am I buying this? Later this year, my wargaming will be restricted as we pack up and move house and countries. However, I plan to keep my 6mm Heroics and Ros WW2 Western Desert armies out for a few games and a campaign, as they can be easily packed up last. 

To test the idea of using this board game for the campaign, I will spend the next month, or two, running a mini-campaign of Operation Crusader using the board game pieces and transferring any combat to a small tabletop game. The idea of a mini-campaign came from a link on Boardgame Geek to an article from the  old Avalon Hill General Magazine (November-December 1973 issue).

  • Board Game Geek link - here
  • General Magazine link - here

It's been a while since I've done much gaming with my 6mm Western Desert armies, other than the odd one off game. The last major outing for these armies was when I played a solo ladder campaign over a 15 month period, from March 2020 to May 2021. This campaign included 11 turns and 27 tabletop games. The first game can be found here and the wrap up here.

This past week, and weekend, I have continued with play testing my English Civil War rules and have finally reached a point where I'm satisfied with them, and have stopped making anymore adjustments. The final amendments involved clarifying the routing rules, which now allow both infantry and cavalry to increase their hit count before routing if they're within 3 inches of two other units of the same type. This encourages units to stay together in there commands and in formation. Additionally, I reduced their base hit count by one to prevent combat from dragging on too long.

The other area of the rules I was flipping and flopping on with different rule mechanisms for commanders. I decided I was making things all too complicated and so settled on the simple and often used approach where commanders improve the odds in combat, but this comes with the risk of mishap.


I am hoping to post the full write up of the rules sometime next week.

Friday, 29 September 2023

Wargaming desert palm trees and hill terrain for 6mm scale

A few weeks ago, I purchased several bags of palm trees, which included a variety of sizes. I first based all of the trees that were suitable for my 20mm armies, and over the past week I have now found time to base the smaller palm trees that will be suitable for my 6mm WW2 Western Desert games.

Recently added palm trees suitable for my 6mm WW2 Western Desert armies

While on the desert themed terrain I also wanted to make some sand dunes and steeper hills to go with the palm tree groves. I find placing books and bits of wood under my home-made canvas gaming mat unsatisfactory for 6mm units because when looking down at the tabletop it can be unclear when a unit is on or behind a hill.

The palm trees with a steep hill and sand dune.

To make the hills and sand dunes I used  a pack of four foam fill sheets I found at the local craft store. Each sheet is 12 inches square (300mm) and 3/8 inches (5mm) thick. Using a pair of sharp scissors, and and you do need sharp scissors, I found I could very quickly cut out and shape the hills. To make the steeper hills, I just glued two sheets together with spray adhesive, then cut and shaped them.

Foam fill used for the hills.

Painting the hills was very easy and straight forward. In fact I am not not sure I should call it painting, but rather dipping. 

  1. I added my base sand paint and brown to a clear bucket until I achieved the desired colour. Then, I added water until the mixture was more like a wash than paint. I simply dipped all of the foam hills into the wash to colour them. 
  2. After laying them out to dry, but before they were dry, I used a paintbrush to apply a slightly darker brown wash around the edges to create a mottled look. 
  3. Next, I applied a lighter sand color wash to the top. 
  4. Finally, once the hills were dry, I added some green to represent scrub and dry brushed on some sand to highlight the edges.
On the right is a steep hill of two foam layers stuck together which I can use for escarpments and to the left a lower hill or sand dune. The Panzer III models are 6mm.

The four foam sheets have provided me with enough steep hills, with their escarpment sides and sand dunes, to cover the tabletop. These hills will provide plenty of opportunities for armoured units to surprise the enemy as they appear from behind the sand dunes and hills.

One benefit of the foam hills is they are easy to store, will not get damaged, and if they end up out of shape they can be easily reworded back into shape. They do adhere well to my canvas tabletop mat and do not slide around.

All the palm trees and hills.

With all this new terrain it was time to get a suitable game set up. I through scenario 5 (Bridgehead) from One-Hour Wargames would be good. Instead of a river I have a minefield which has just been breached.

A game in progress using the OHW bridgehead scenario with a minefield replacing the river in the original scenario.

The idea of using foam for hills comes from the book Practical Wargaming by C.F.Wesencraft. See below.


Saturday, 18 September 2021

Western desert game, Horse and Musket rules, and samurai painting

I initially through I would be playing a ancient naval game this weekend to start for the 2nd Punic War campaign, but I still seem to be stuck in the Western desert messing around with One Hour Wargames rules. Or rather a variation of those rules to include gun calibre are armour thickness. I have started to type up the rules as they seem to be giving me an enjoyable game, and I am now only making a few clarification notes.

In the games played I have a unit is represented by two bases. This gives a 4 inch frontage and each base generally contains 2 or so vehicles or guns. A quick reread of the OHW rules and notes reminded me that a unit in this period represents approximately 3 tanks, guns, or 40 infantry. This lines up quite nicely with models on my bases.

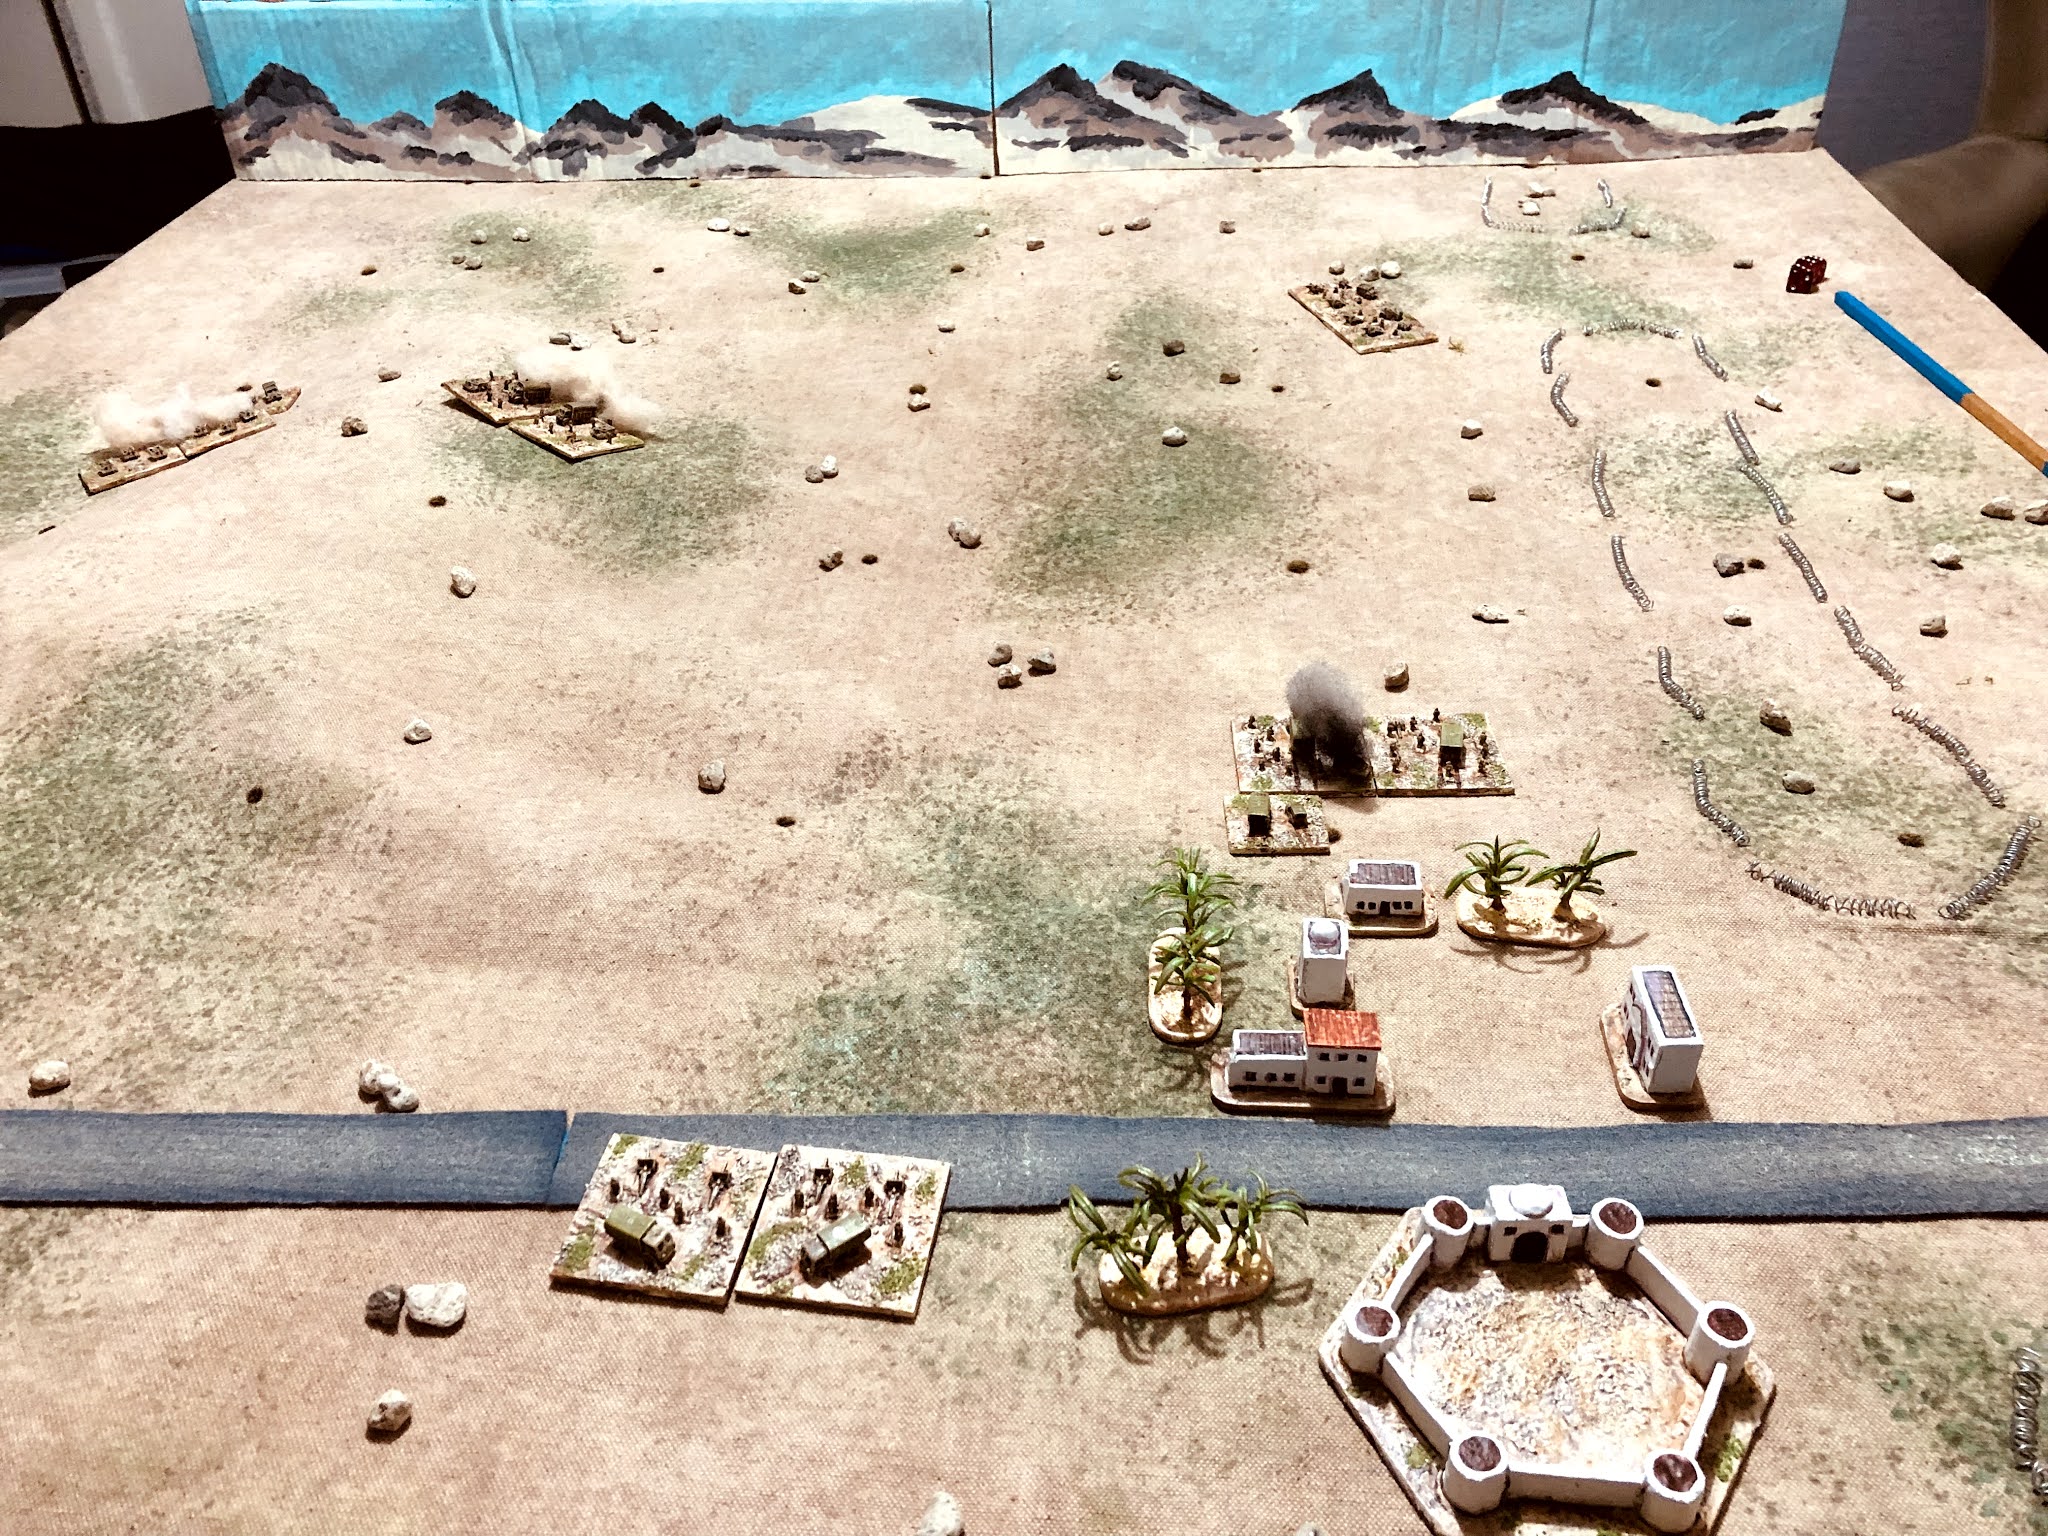
The photographs below are from scenario 12 (an unfortunate oversight). Rather than having a river as described in the scenario I have replaced it with a minefield. The tabletop is 4 by 4 foot.

Italian troops are located around the buildings and old fort unaware the Allies know of another pathway through the minefield.

The Italian react quickly and engage the Allied forces. A tank engagement quickly started and was eventually won by the Allies. The one unit of Grants proved very useful against the lighter armour of the Italian M13's.


A weakened Allied force is able to hold the objective hilltop.

A quick note the D3 Horse and Musket rules I used in an AWI game a couple of posts ago. They are a variant of OHW rules but use D3 dice for hits and have an activation rule. These are now written up as a page (see above). Included on the page is also has a link to a PDF of the rules. I will be revisiting these rules at some point to add rules for regular infantry to charge.

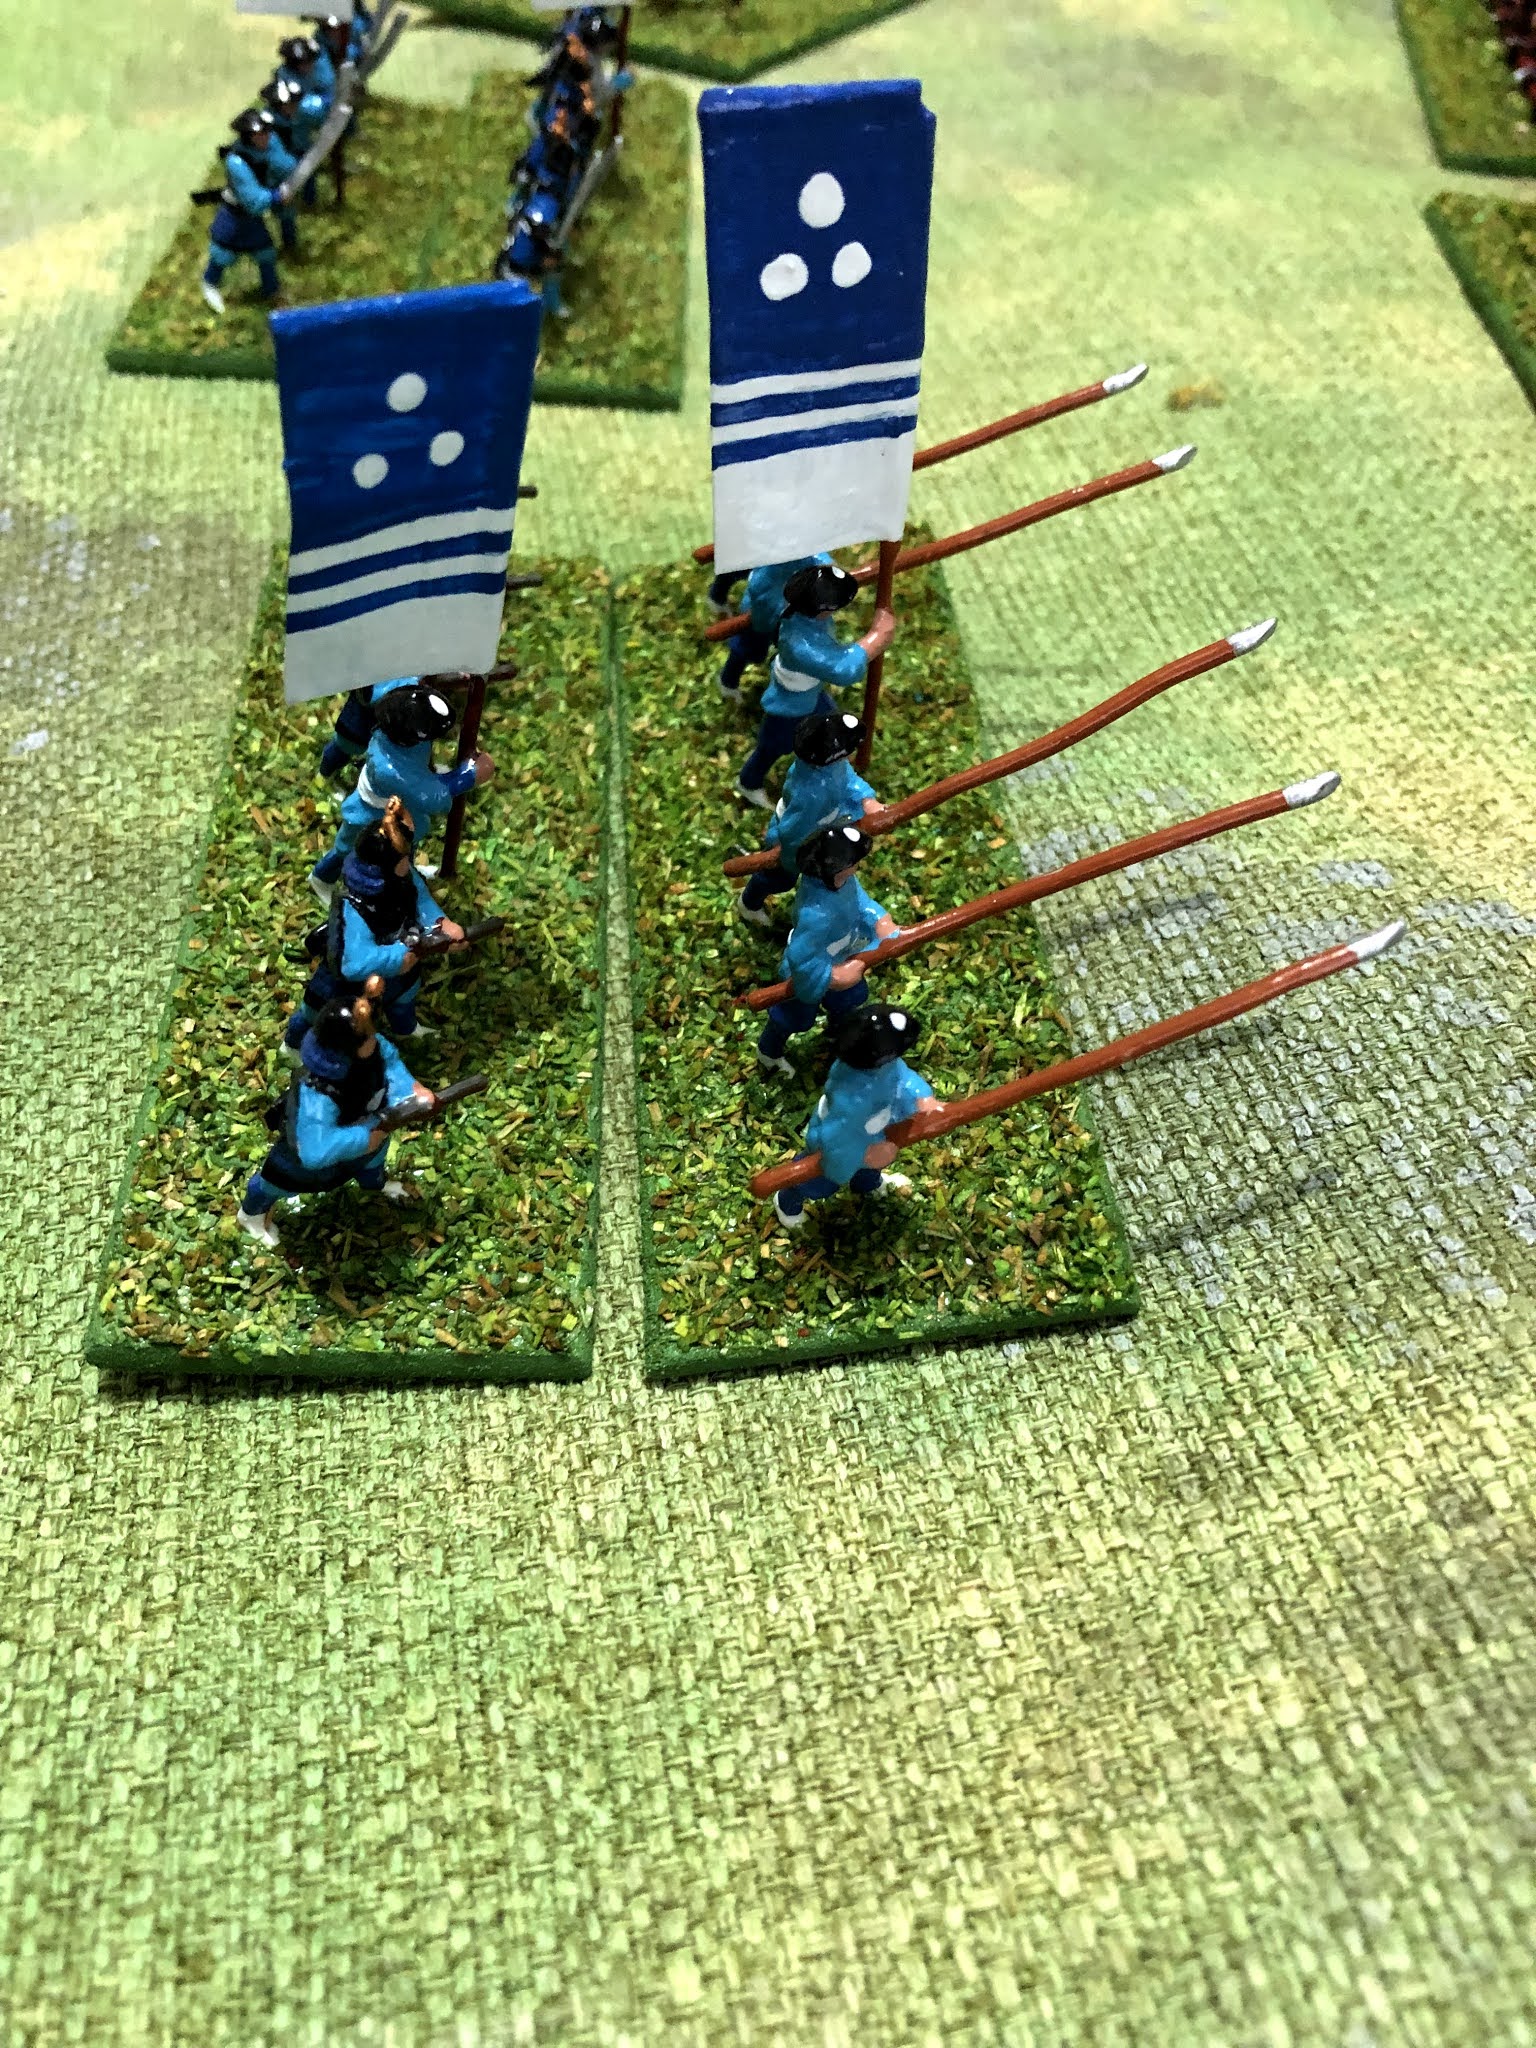
Finally, painting of my samurai armies is progressing at a steady pace. Below are a selection of photographs of the units completed so far. Foot units are made up of two bases so I can mix and match arquebus and pike, bow and pike, or have a unit made up of just bow or arquebus. Mounted units are on a larger base and are treated as a full unit. I look to be about halfway through paining judging by all the available models.

A unit of arquebus and pike

A range of model from Minifigs, Minifigs S-Range, and Dixon.

Bow and pike unit.

All the figures are simply painted with a gloss finish.

Mounted samurai and their retainers following on foot.

Hight wise there is not much difference between the ranges, but some figures are definitely more chunky.