Showing posts with label 6mm. Show all posts

Friday, 7 June 2024

A quick WW2 Western Desert game

The recent gift of Rommel’s command and completing some wadi terrain (see previous posts) motivated me to set up a WWII Western Desert game on my tabletop this past week.

Advancing Allied tanks.

Rommel’s HQ gets to play a part in the game.

For this game, I used the One-Hour Wargames Bridgehead scenario (number 5). Instead of a river, there is a minefield with a gap cleared by German engineers, who are now trying to secure it and establish a bridgehead. Alerted by a recent reconnaissance flight, the Allies are scrambling to mobilize nearby armored units to prevent the enemy from establishing a bridgehead.

Here's an overview of the battlefield: the minefield runs north to south. The photographs are taken from the northern end of the tabletop. Several hills are scattered around, primarily concentrated in the south, and there is a wadi located in the northern area (bottom of the photo).

The Allies arrive in three groups on turns 1, 3, and 5, with a dice roll determining which of the three possible entry points they will use. Afrika Korps reserves arrive steadily from turns 1 through to 5 from the western edge. For this game, I'm using the Tank on Tank board game rules, adapted for the tabletop with a few additional modifications, such as a -1 penalty on attacking dice rolls for moving units, which is indicated by the use of dust clouds.

Game Report

Here are the photographs of the game as German units try and create a bridgehead. I have drawn on some of the photographs to indicate where the action is occurring as it is not so obvious with 6mm units. 

In the initial phase of the battle, German forces advanced to secure a hill overlooking a potential entry point for the Allied reserves. Meanwhile, other German units pushed through the gap in the minefield, and quickly spot the dust trails of Allied forces arriving from the east.


Additional Allied reserve units arrive, joining the earlier arrivals who have taken positions on higher ground to assess the buildup of German forces.

The Allies launch an initial attack on the hill to the south but are easily repulsed with losses.

German anti-tank units arrive, with Rommel’s HQ visible in the background. Rommel's presence on the tabletop will enable the Germans to re-roll a couple of their failed activation dice rolls.

In response to the advancing Allies, the Germans launch two attacks to support their units on the hill and block the main Allied advance.

After an initial clash the Allied armour take casualties and choose to retire, while their last expected reserves arrive to launch an attack the hill to the south. The German artillery arrives and is quickly rushed into position to provide support to their troops defending the hill.


A close up on the action. Burning wreaks block line of sight in the amended rules.

The Allied armor initiates an attack from the hill to divert the attention of the German armour while they launch their assault on the hill.

Following a brief yet fierce engagement, the Allies successfully secure the hill to the south. Switching their attention the Germans to use their now superior tank numbers in an attempt to make an outflanking manoeuvre against the Allied armour in the centre.

Following the armor clash in the centre, the Allies have withdrawn to the eastern hills. The German control of the bridgehead remains at risk as long as the Allies maintain their positions.

The Germans attempt to dislodge the Allied units from the southern hill, using their artillery and 88mm gun to support their armoured attack, which has manoeuvred around to the rear of the hill.

After several efforts, the Germans successfully secure the southern hill. Then they use it as a launching point to mount an attack on the eastern hills where the remaining Allied units capable of threatening the bridgehead are positioned.

The final Allied position falls, and the bridgehead is firmly secured.

An entertaining game. The Tank on Tank rules provide quick games which seem very suitable for armoured clashes in the Western Desert.

Friday, 29 September 2023

Wargaming desert palm trees and hill terrain for 6mm scale

A few weeks ago, I purchased several bags of palm trees, which included a variety of sizes. I first based all of the trees that were suitable for my 20mm armies, and over the past week I have now found time to base the smaller palm trees that will be suitable for my 6mm WW2 Western Desert games.
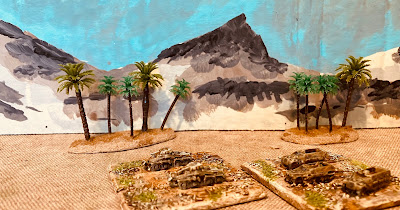
Recently added palm trees suitable for my 6mm WW2 Western Desert armies

While on the desert themed terrain I also wanted to make some sand dunes and steeper hills to go with the palm tree groves. I find placing books and bits of wood under my home-made canvas gaming mat unsatisfactory for 6mm units because when looking down at the tabletop it can be unclear when a unit is on or behind a hill.
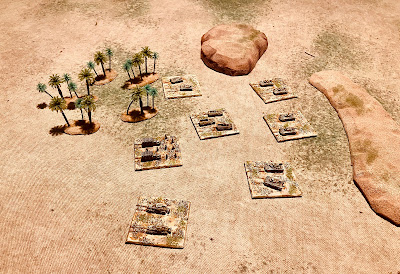
The palm trees with a steep hill and sand dune.

To make the hills and sand dunes I used  a pack of four foam fill sheets I found at the local craft store. Each sheet is 12 inches square (300mm) and 3/8 inches (5mm) thick. Using a pair of sharp scissors, and and you do need sharp scissors, I found I could very quickly cut out and shape the hills. To make the steeper hills, I just glued two sheets together with spray adhesive, then cut and shaped them.

Foam fill used for the hills.

Painting the hills was very easy and straight forward. In fact I am not not sure I should call it painting, but rather dipping. 

  1. I added my base sand paint and brown to a clear bucket until I achieved the desired colour. Then, I added water until the mixture was more like a wash than paint. I simply dipped all of the foam hills into the wash to colour them. 
  2. After laying them out to dry, but before they were dry, I used a paintbrush to apply a slightly darker brown wash around the edges to create a mottled look. 
  3. Next, I applied a lighter sand color wash to the top. 
  4. Finally, once the hills were dry, I added some green to represent scrub and dry brushed on some sand to highlight the edges.
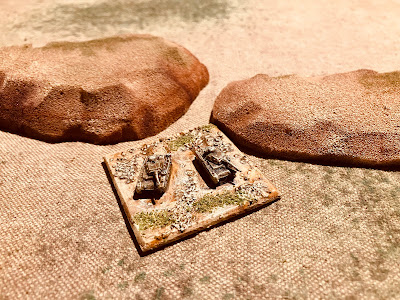
On the right is a steep hill of two foam layers stuck together which I can use for escarpments and to the left a lower hill or sand dune. The Panzer III models are 6mm.

The four foam sheets have provided me with enough steep hills, with their escarpment sides and sand dunes, to cover the tabletop. These hills will provide plenty of opportunities for armoured units to surprise the enemy as they appear from behind the sand dunes and hills.

One benefit of the foam hills is they are easy to store, will not get damaged, and if they end up out of shape they can be easily reworded back into shape. They do adhere well to my canvas tabletop mat and do not slide around.
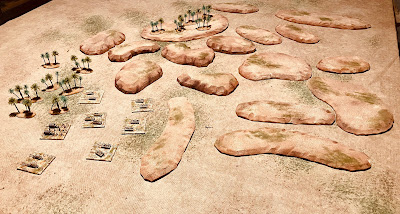
All the palm trees and hills.

With all this new terrain it was time to get a suitable game set up. I through scenario 5 (Bridgehead) from One-Hour Wargames would be good. Instead of a river I have a minefield which has just been breached.
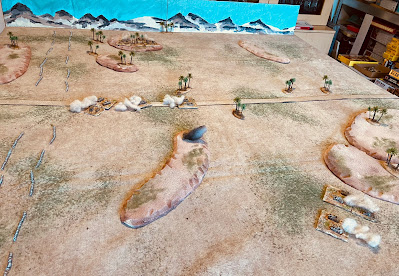
A game in progress using the OHW bridgehead scenario with a minefield replacing the river in the original scenario.

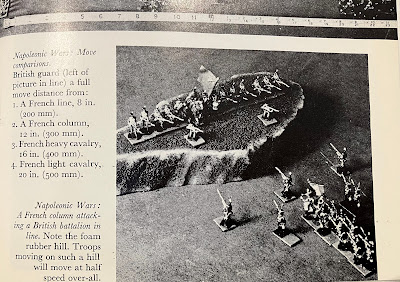
The idea of using foam for hills comes from the book Practical Wargaming by C.F.Wesencraft. See below.


Tuesday, 10 November 2020

WW2 Western Desert Campaign Turn 9 - Game 1

I have finally managed to write up this battle report for the first game of WW2 Western Desert campaign turn nine. In the previous campaign turn an Allied counterattack turned out to be short lived, failing to gain sufficient wins to continue with the advance. This handed back the initiative to the Axis forces with an opportunity to attack. The overall supply situation meant Axis forces had replenished one of their divisions, but their Pavia Infantry Division remains understrength still requiring replacement equipment from supplies. The Allied situation was fairly similar, with their South African infantry division in need of resupply, and some limited supplies had been be directed to provide additional defences to the NZ Infantry division.

Opening moves of campaign turn 9

This turn, the first of 2 to 3 games, begins with the 21st Panzer attacking the Allied 3rd Armoured Division. A roll of the dice decided this game was to involve a surprise attack by the attacking Axis forces. A third of their forces can arrive on one of the tabletop edges during the game. From the defending Allied view any attack was going to be met with a strong defensive position of hills and an escarpment. This terrain arrangement was determined by a terrain card selection process.

Just as a note, I am planning to write up the campaign rules over the next few weeks as there have been a few clarifications and modifications from when I began the campaign.

Starting positions with the three objectives identified.

The Axis plan was to push forward on the right flank while using their flanking force to create a surprise attack on the left flank. The opening moves had the Axis advancing as planned when a sandstorm arrived limiting both movement and visibility.

Visibility is compromised as a sandstorm arrives.

In this game I was using event cards (or chance cards if you prefer) and had included a sandstorm card in each forces card set. The two sandstorm cards came up on turn 2 and turn 4 and as a consequence all moves and visibility were limited early on in the game.

Event cards were used during the game.

Axis flanking forces arrive under cover of the sandstorm.

During the sandstorm the Axis advance continued on their right flank and on the left flank elements of their flanking force began to arrive. As the sandstorm eventually cleared, units found themselves engaged in close quarters on both flanks. The Allied Grant tanks on the Axis left flank had put up a good defence eventually forcing attacking units to retire, then one unit boldly pushing forward into the centre to harass Axis units preparing to push forward.

Attacks occurring on both flanks

An Allied Grant tank pushes forward into the centre.

Axis air support arrived soon after, but made no effect on the Allied forces defending their right flank, shortly thereafter and the left flank surprise attack was called off by the Axis. All their efforts were now to be directed towards making a breakthrough on the other flank.

An ineffective air attack

Progress on the right flank, but Allied units are hanging on grimly.

The left flank attack retires and all efforts are directed to making progress on the other flank.

The Axis made little further progress on the right flank and after some determined defence and a moderately successful Allied air attack. With little progress Axis forces called off their attack. A victory to the Allies which held on to all three objectives and had certainly benefited from this strong defensive position. I am not sure if the sandstorm had a big influence, but it had slowed down the initial advances made by Axis units.

Wednesday, 5 December 2018

Starting WW2 Western Desert Project

I have been able to paint a few test units for my WW2 Western Desert project. The Bases are 2x2 inches. They are photographed on a canvas drop sheet bought cheaply at the local hardware store. The plan is to use a combination of sponging and stippling to get similar colour tones to the bases.


Since completing these tanks a few more 1/300 Heroics and Ros models have left the painting table. I am hoping this will keep me going during the Christmas and New Year holidays.