Showing posts with label French Indian Wars. Show all posts

Monday, 14 April 2025

French and Indian War - Game 3 Report

Following the recent setback at Fort Robert, General Colchester has rallied his defeated troops and pushed inland with the aim of securing a vital river crossing located downstream from Fort Orleans. Securing this crossing would provide a crucial bridgehead for future operations. For more background on the campaign and the scenario setup, check out my previous posts.

This battle uses Scenario 5 (Bridgehead) from One-Hour Wargames book by Neil Thomas. During the game, units from both sides will be gradually arriving on different turns. The British objective is to establish and hold a bridgehead. By the end of Turn 15, they must control the crossing with no French units within 12 inches of the ford crossing to claim victory.

British troops crossing the ford and advancing towards French troops in the distance.

Game Report…

The British advance guard fords the river at an unguarded crossing, pressing on without resistance. Their presence has become known as they spot a band of Indian warriors in the distance. They move to secure the nearby woods as elements of the main British force began to arrive in support. Messages of this incursion has been sent to a nearby French camp. Realising the gravity of the threat, the French began mustering all available forces, marching them with urgency toward the crossing to deny the British from establishing a bridgehead.

The British advance guard at the unguarded river crossing.

The British advance guard take up position in the nearby woods as Indian warriors arrive in the distance.

The main British column cross the ford as more French reserves arrive.

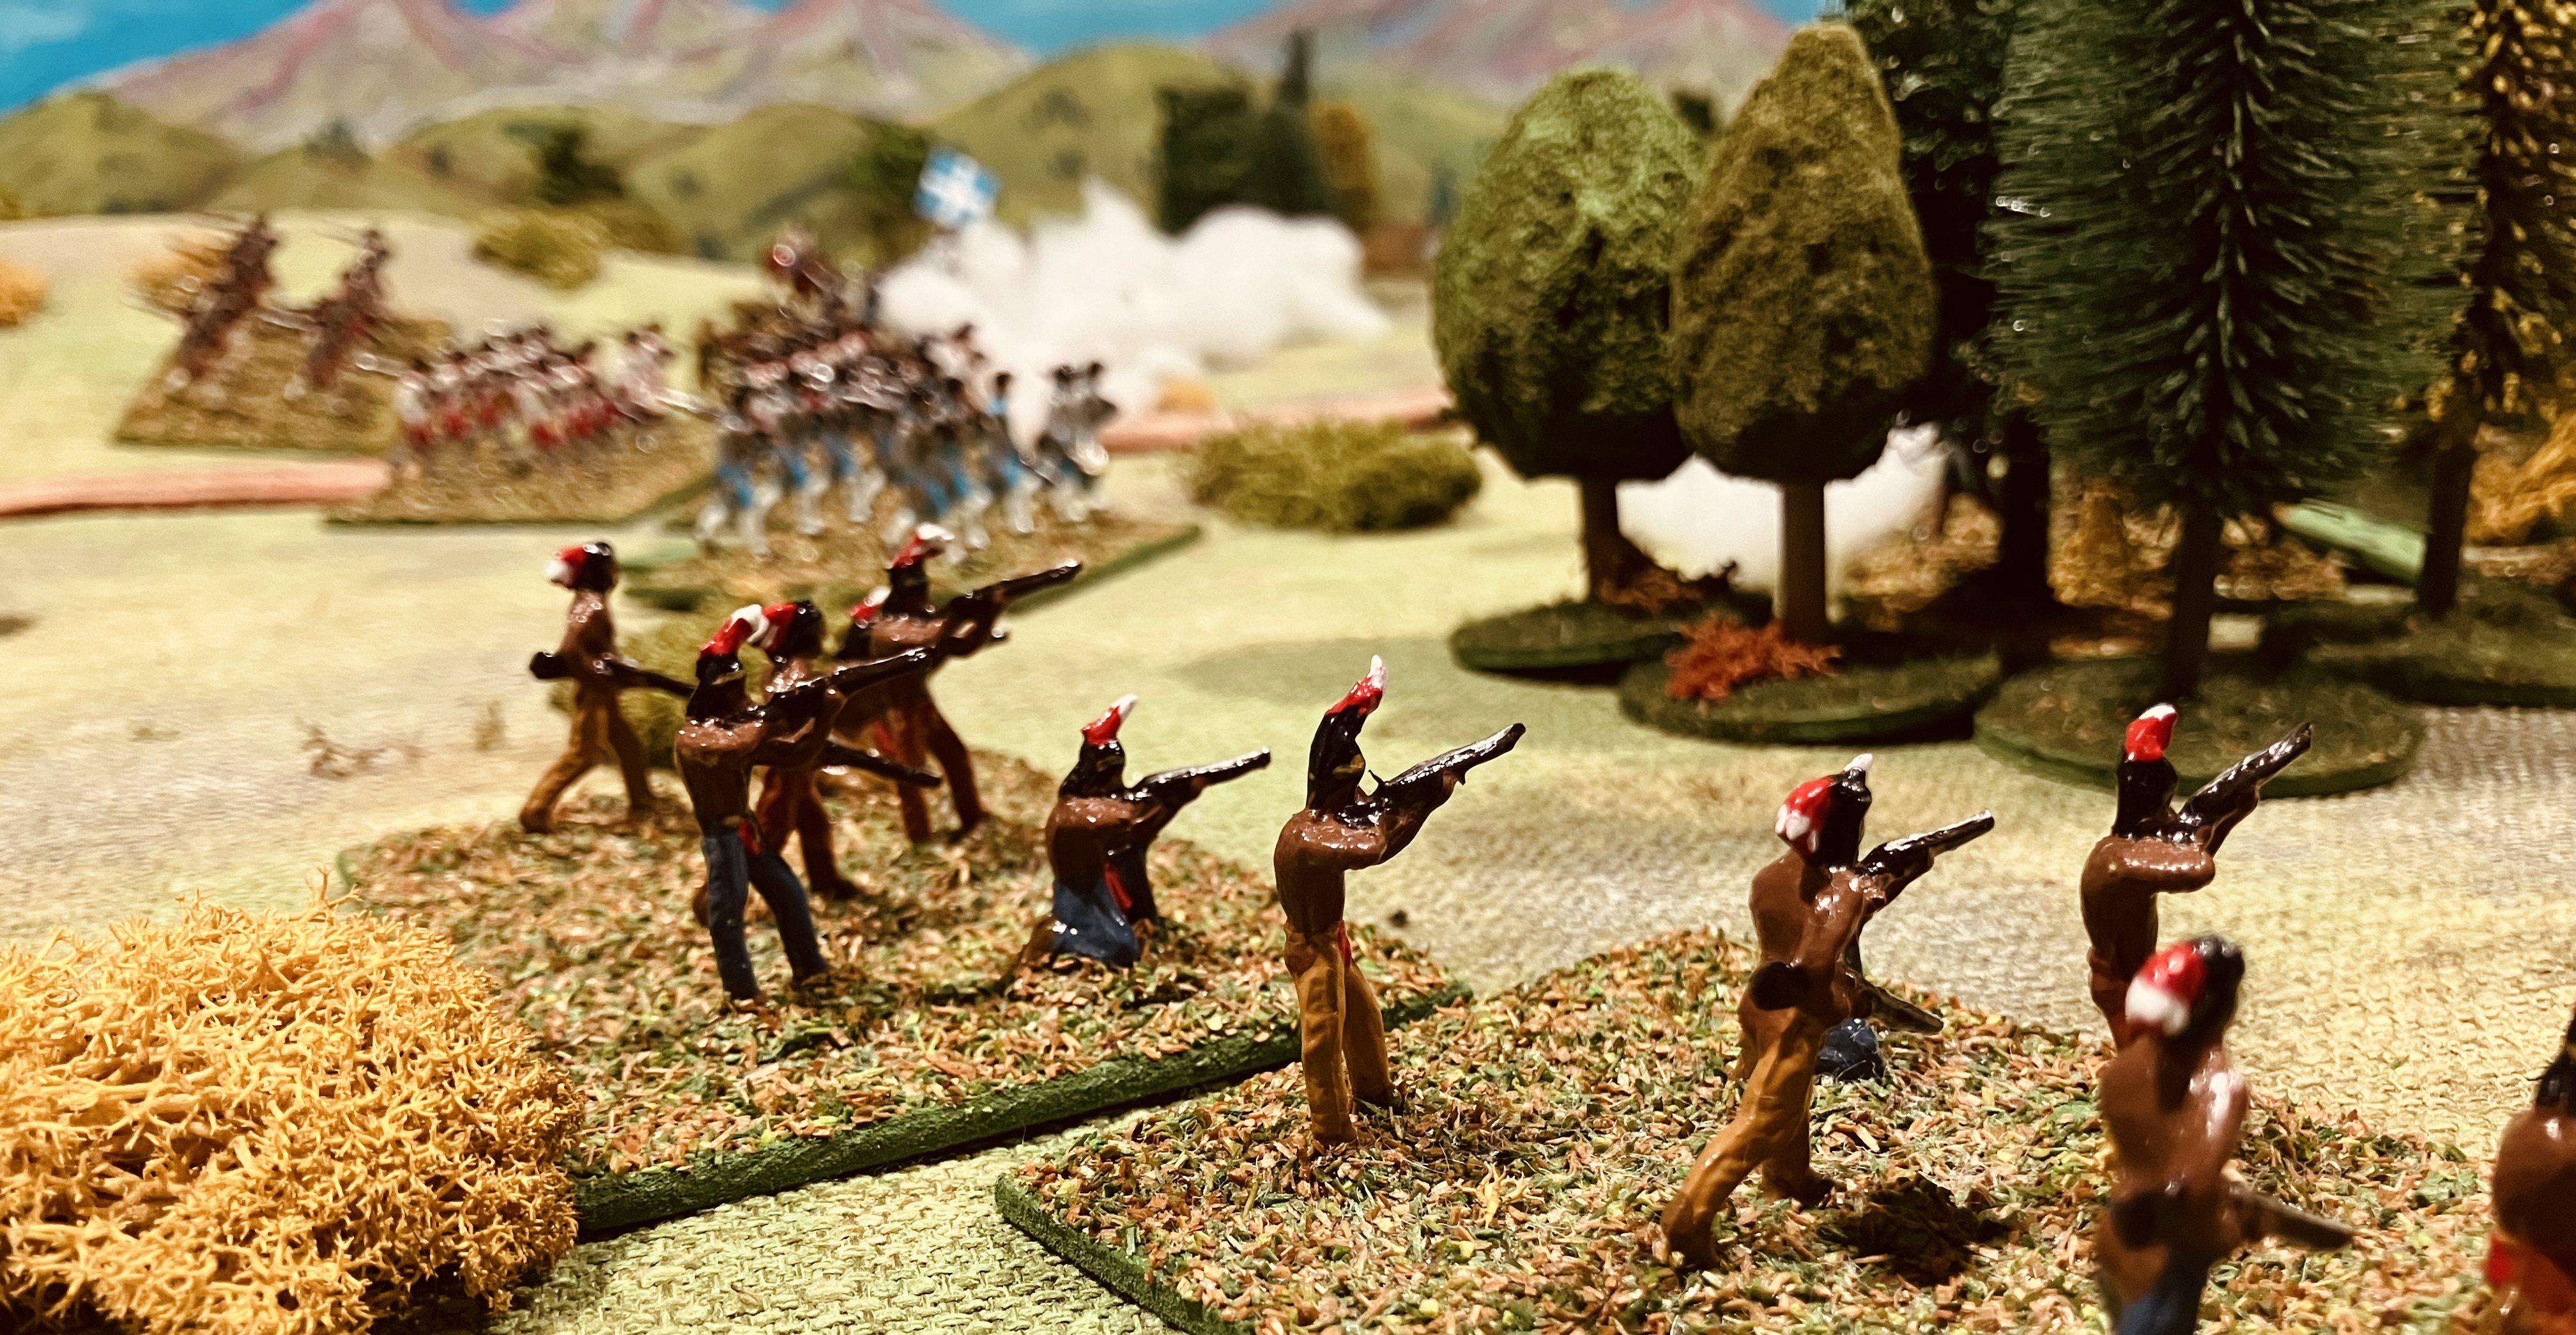
The Indian warriors keep their distance as they move towards the woods, whilst fresh reserves of French regulars advance directly towards the newly arrived British troops. As the French infantry draw near and open fire upon the enemy, several bands of Indian warrriors continue to skirt around the edge of the woods, seeking to turn the British flank.

The British hurry across the ford and begin to deploy.

The British guns arrive.

All the remaining French reserves had taken the field and deployed in a line facing the bridge, ready for the advancing British. Meanwhile, the Indian allies had pressed into the wood, where they were skirmishing fiercely with British militia. At last, the final elements of the British force appeared, their artillery, which was brought up and positioned on the right flank, across the river, to lend their fire in support of the attack.

Indian warriors and militia skirmish in the woods.

All units deployed and the fighting is fierce.

British artillery deployed across the river.

A fierce exchange of musketry ensued between the opposing lines, each side striving to gain the advantage. Over time, the French line began to prevail, whilst the British artillery proved to be rather poor shots. Seeking to gain the initiative, a British unit made a bold charge from the woods, crashing into the French line. For a fleeting moment, it seemed the French might falter, but the French were able to rally and hold fast.

It was within the tangled woods that the fate of the battle was sealed. There, the British militia, sorely pressed, finally gave way before a series of Indian warrior charges. Routed and in disarray, they fled, leaving the British flank exposed. The warriors, seizing the moment, surged forward, threatening to sever the British force from the river crossing. Stricken with panic and fearing encirclement, the British were compelled to make a hasty and disordered withdrawal.

The British make a bold charge from the woods.

The Indians take the woods, threatening to cut off the British retreat.

The Indian attack on the woods was to be key to French success.

A French victory! And with this final battle, the mini-campaign draws to a close. The French achieve a marginal campaign victory having two victories against the one British victory.

A map of the campaign. The circles show the battles, blue for French victories and red for British victories.

The campaign ends…

The British plan had been bold from the outset, General William Colchester was to march his forces along the coast and seize Fort Orleans. The campaign started favourably, with the British securing the river crossing and the settlement of St. Paul, aided greatly by the Royal Navy, who landed troops behind the French lines.

With momentum on his side, General Colchester pressed onward toward Fort Robert. The French, under the able command of General Lucien Duvall, had not been idle. The intervening time had been well spent repairing the fortifications and reinforcing the garrison. When the British arrived, they were met with staunch resistance. Fort Robert held firm, delivering the first setback to the British advance.

Thwarted on the coast, Colchester turned inland, seeking to secure an upriver crossing that might open a new path toward Fort Orleans. Had he succeeded, it would have been judged a marginal British victory. But fortune did not favour the British and the French triumphed forcing the retirement of General Colchester and his British force.

Details of the mini-campaign setup can be found here.

Monday, 7 April 2025

French and Indian War - Game 3 Setup

This week, I will be playing out the third and final game in my French and Indian War mini-campaign, which I began a few weeks ago. Details about the campaign and its progress can be found in my previous posts.

British units crossing the bridge.

The campaign had began with promise for General William Colchester, commander of the British forces in the region. With a surprise advance, his troops with naval support had secured the vital river crossing near the settlement of St. Paul, enabling British forces to march along the coast toward Fort Robert.

However, French General Lucien Duvall had used the available time wisely. Fort Robert had long fallen into disrepair, so the general had organised his men and oversaw the repairs and building of additional fortifications. When the British assault came, the French were ready and the attack which was repulsed. General Colchester was forced to withdraw.

Faced by this unexpected setback, General Colchester regrouped his battered forces. His original plan to march on Fort Orleans and lay siege to it was no longer feasible. Instead, he turned his attention inland, aiming to seize a strategic river crossing downstream from Fort Orleans, one that could serve as a foothold for future operations.

The campaign map show progress so far.

The game will be using scenario 5 (Bridgehead) from the book One-Hour Wargames (OHW) by Neil Thomas. During the game units from both armies will arrive on various game turns. The British from the south and the French from various points which are decided by the dice.

A close up of the campaign map.


The tabletop setup. French units will arrive in three groups at points A, B, or C depending upon a dice roll. The British units will arrive at point D.

Order of Battle...

British Forces:

  • 6 x Regular Infantry Units
  • 4 x Militia Units
  • 2 x Artillery Units

French Forces:

  • 6 x Regular Units
  • 2 x Militia Units
  • 4 x Indian Warrior Units

For the game I am using a modified version of the One-Hour Wargames horse and musket rules. Each side is has a trusted captain and a general, both of whom provide special re-roll abilities. The trusted captain is assigned to a single unit for the entire game and allows that unit to re-roll any combat dice. However, if a 1 is rolled on the re-roll, the captain is wounded in the action and takes no further part in the battle. The general is free to move between units and can force the opposing player to re-roll their combat dice if they are attacking a unit he has attached himself to. If a 6 is rolled on this re-roll, then the general suffers a mishap and must retire from the field.

Victory Conditions...

By the end of turn 15, the British can claim victory if there are no French units within 12 inches of the crossing. If there are any French forces are within that distance, then the victory goes to the French.

The game begins with two British units across the ford.

Everything is now ready for the deciding game of this mini-campaign.

Saturday, 29 March 2025

French Indian War Campaign - Game 2 Report

The French and Indian War mini-campaign continues with the battle of Fort Robert. General William Colchester, commanding the British forces, has swiftly advanced his troops along the coastal road and is now poised to launch an assault on the fort. Meanwhile, the French forces, led by General Lucien Duvall, have been urgently reinforcing its defences. Among their preparations is the fortification of a nearby hill, recognising that its capture would grant a commanding vantage point over the fort, rendering any defence nearly impossible.

You can find the campaign setup details here.

Tabletop Setup.

A quick reminder of the forces involved:

French

  • 6 x Regular Infantry
  • 4 x Militia
  • 2 x Guns

The French defensive plans require them to have 4 units with 12 inches of the fort and another 4 units within 12 inches of the hill. The remaining 4 units are a mobile reserve and available to move around the table freely.

British

  • 7 x Regular Infantry
  • 4 x Militia
  • 1 x Gun

All the British units arrive from the south on game turn 1.


The Plan…

General Colchester’s plan is to occupy the wooded area in the centre with his Militia units, hopefully tie up any of the French reserves, while the bulk of the regular infantry will assault the hill supported by their single gun. 

Fort Robert. Some of the reserve regular infantry can be seen marching off to support the Militia in the centre.

Opening Moves…

The British forces pressed forward as their artillery start to bombard the hilltop. Meanwhile, the Militia advanced into the wooded area, only to come under immediate musket fire from French Militia already positioned there, supported by two units of regular infantry.

The Militia engage in the woods. The remaining French reserve of two regular infantry units are positioned behind the woods.

The Assault…

The main British assault pressed forward toward the hill, but as they advanced, volleys of flanking fire erupted from French infantry positioned behind the woods. The unexpected attack forced several British units to break formation and return fire, momentarily stalling their advance. The remaining troops reorganised to push on, bracing themselves as they move into muskets range with the entrenched French defenders on the hill.

The British assault receives flanking fire as it advances.

The assault pushes on.

The assault comes under withering fire from the hilltop defenders.

Assaulting the Hill…

The British were steadily gaining the upper hand in the woods, forcing the French to call upon the fort’s garrison for long-range support with musket fire.  

However, the assault on the hill was faltering. The determined French defenders, poured disciplined volleys into the advancing British units, and their accurate fire steadily whittling down the attackers.

Long range musketry from the fort garrison.

The British make a final effort to take the hill.

For a moment, it seemed as though the British might be able to seize the hill, their troops pressing forward despite mounting losses. However, the French defenders, bolstered by a few well-timed rallies, repulsed the exhausted attackers back down the slopes, securing the hill. A hard-fought French victory.

The assault is called off.

Summary

The assault had a two-to-one advantage, but this was not enough for the British to seize the hill. The French effectively disrupted the assault with flanking fire from their two regular infantry units positioned behind the woods, drawing away part of the attacking force. 

This defeat forces the British to abandon their coastal advance, compelling them to move inland instead. Now, their hopes will rest on securing a river crossing downstream from Fort Orleans, which could serve as a launching point for a future attack later in the campaign season.

The campaign map.


Saturday, 22 March 2025

French and Indian War campaign - Game 2 set up

This weekend I will be playing the next game in my French and Indian War mini-campaign. I started planning this campaign a few weeks ago. The details on how the campaign was set up can be found here.

The French preparing Fort Robert.

Campaign Background

General William Colchester, commanding the British forces, has orders to attack on Fort Orleans. His plan involves advancing along the coast, using naval support for amphibious landings whenever possible.

French General Lucien Duvall quickly learned of the British intentions after his forces suffered a defeat at the settlement of St. Paul, where the British launched an amphibious assault to strike the French defenders from the rear. This setback has left the French with little time to fortify Fort Robert, which has fallen into disrepair over the years.

Campaign map showing progress

A closer view of Fort Robert. The campaign map is using Scenario 14 - Static Defence - from the book "One-Hour Wargames" which will be set up on a 5 x 4 foot tabletop.

Game Background

Fort Robert is situated on a rocky stretch of coastline. The Royal Navy have informed General William Colchester that amphibious landings will not be possible. With limited time before the British forces arrive, General Lucien Duvall has ordered the garrison to strengthen the fort’s defences. This includes establishing some prepared positions on a nearby hill, as its capture would allow the British to deploy their artillery on an elevated position overlooking the fort, allowing them to bombard the fort and cut off any supplies or reinforcements.

The tabletop setup.

Order of Battle

French

  • 6 x Regular Infantry
  • 4 x Militia
  • 2 x Guns

The French defensive plans require them to have 4 units with 12 inches of the fort and another 4 units within 12 inches of the hill. The remaining 4 units are a mobile reserve and available to move around the table freely.

Prepared positions on the hill.

British Forces

  • 7 x Regular Infantry
  • 4 x Militia
  • 1 x Gun

All the British units arrive from the south on game turn 1.

A view of the British arrival. I realised after this photo that they were one unit short and quickly rectified that. I am obviously struggling to count to more than 10 when I run out of fingers!

Victory Conditions

To secure victory the British must capture and control either Fort Robert or the hill.

Off the painting desk

This week's painting has two units completed to add to my Napoleonic collection. A Hussar unit (Spencer Smith miniatures) and a unit of light infantry (HaT 28mm miniatures). All very simply painted and glossed.

I am slowly replacing my existing light infantry which are Spencer Smith miniatures with HaT miniatures, so a can rebase the Spencer Smiths with their uniform pose as line infantry.

Hussar Unit

Light Infantry


Wednesday, 12 March 2025

French and Indian War Campaign - Game 1

This is a report on the first game of my French and Indian War (FIW) campaign. The scenario is based on One-Hour Wargames (OHW) book scenario number 19 (A Blow from the Rear) modified to include an amphibious landing.

All the figures are used in the game are old plastic Spencer Smith miniatures. Some have been converted to wear round felt hats and bonnets, and there are also a few of their American Civil War miniatures converted. They are all simply painted with a gloss finish. 

The rules used are a variation of the OHW Horse and Musket rules and the chance cards.

Some of the troops in action.

Background

General William Colchester has been tasked with leading an attack on Fort Orleans. His forces have been recently reinforced and he also has the support of a Royal Navy ship. He plans to advance up the coast, using naval support to conduct amphibious landings where possible and lay siege to Fort Orleans.

French General Lucien Duvall is aware of the British troop buildup to the south, but unaware of their naval support. He has positioned part of his army near the settlement of St. Paul in the hope to delay any British advance along the coast. His goal is to buy time so he can prepare Fort Robert which has fallen into disrepair.

Details on how the campaign was set up can be found here.

The campaign map showing the British plan.

A close up of scenario from the campaign map.

The British intend to launch their campaign by attempting to cross the river near the settlement of St. Paul. With naval support, they plan to land half their force on the French left. Their objective is to secure and control both river crossings. This will allow them to continue their quick advance along the coast and get to Fort Robert before the French can fully reinforce and prepare the fort. Failure to do so will force them to march inland, exposing them to the risk of a French counterattack with their Indian allies.

Order of Battle

French

Positioned at the settlement of St. Paul:

  • 1 x Gun
  • 3 x Indian Warriors

Positioned along the river at the two crossings:

  • 5 x Line Infantry
  • 3 x Militia
  • 1 x Trusted Officer
  • 1 x Commander

British

Landing Party:

  • 1 x Gun
  • 5 x Line Infantry
  • 1 x Trusted Officer

Main Force:

  • 2 x Line Infantry
  • 4 x Militia
  • 1 x Commander

Special Rules

  1. French reserves positioned at the settlement cannot be activated until turn 7.
  2. French units may not cross the river.
  3. British land party arrives on turn 6 and can only land 3 units per turn.

Other Notes

  • A trusted officer is assigned to a unit and must remain with them for the duration of the game. They improve the unit's combat capability. 
  • A commander can join and leave units. When attached to a unit the unit reduces the number of hits from combat.
  • When attached to a unit, any enemy combat dice rolls that have a natural 6 will remove the trusted officer or commander.

Victory Conditions

The British must control both river crossings with no French within 6 inches of them at the end of the game.

The tabletop setup. The two river crossings are circled and the red arrows shows where the British advance and land.

Game Report

The British main force, led by their commander, advanced toward the left-hand bridge, where they soon encountered French militia and a unit of regulars under the command of a trusted officer. Musket fire quickly erupts across the river. The French militia are holding their ground, refusing to be easily driven back.

The main British force arrives and is soon engaged by the French defenders.

Soon a British naval ship appeared off the coast, and its landing party quickly came ashore. This caught the French by surprise as a British force has a beachhead to the French rear. Meanwhile, the main British force was beginning to gain the upper hand against the French militia at the other upstream river crossing.

The British begin their landings.

The main British force is starting to get the upper hand.

In response to the British landing, the French forces stationed near the second river crossing downstream swiftly turned to face the new threat. At the river crossing upstream, the French had suffered heavy casualties, with some units routing. Despite this, the regular infantry, led by their trusted officer, continued to hold the main British force at bay, refusing to give ground.

The French have about faced and move to engage the British landing party.

The French gallantly hold on at the river crossing.

The landing party is soon engaged.

Somewhat belatedly the French reserves began to move towards the action, and their artillery was quickly positioned to target the British landing party. The gallant French unit was still holding back the main British advance at the river crossing, hoping desperately their reserves would arrive. With their primary force stalled, the British seized the opportunity to send a militia unit toward the downstream crossing in an attempt to outflank the French defenders.

French reinforcements start to arrive.

The landing party is engaged.

A unit of British militia can be seen moving to the river crossing downstream. 

The British landing party, supported by their gun, began to gain the upper hand against the French defenders. A series of musket volleys and canister fire had struck with deadly accuracy, forcing the beleaguered French units to break and retreat into the woods for safety.

The French defenders are struggling under some withering British volleys.

The lone militia units is almost at the second and undefended river crossing.

The French reinforcements, primarily composed of Indian warriors, arrived too late to turn the tide of the battle. Despite making several brave charges and routing a few British units, the battle was lost and the remaining French units were forced to retire, leaving both river crossings firmly in British hands.

British forces gain the upper hand at both river crossings.

Summary

A British victory. From a campaign perspective, this will allow them to continue their march along the coast towards Fort Robert.

While the British victory was no walkover, I could have made things much more difficult for them had I concentrated the majority of the French forces on the river crossing furthest from the coastline. This approach would have delayed the British landing force involvement fas they marched to the upstream crossing, and their flank would have exposed to the French reinforcements coming from the settlement.

This game provided the opportunity to use my scratch built ship and landing boats. It is always fun getting newly completed models into a game.