Saturday, 11 July 2020

Rivers and a snakes and ladders campaign battle report

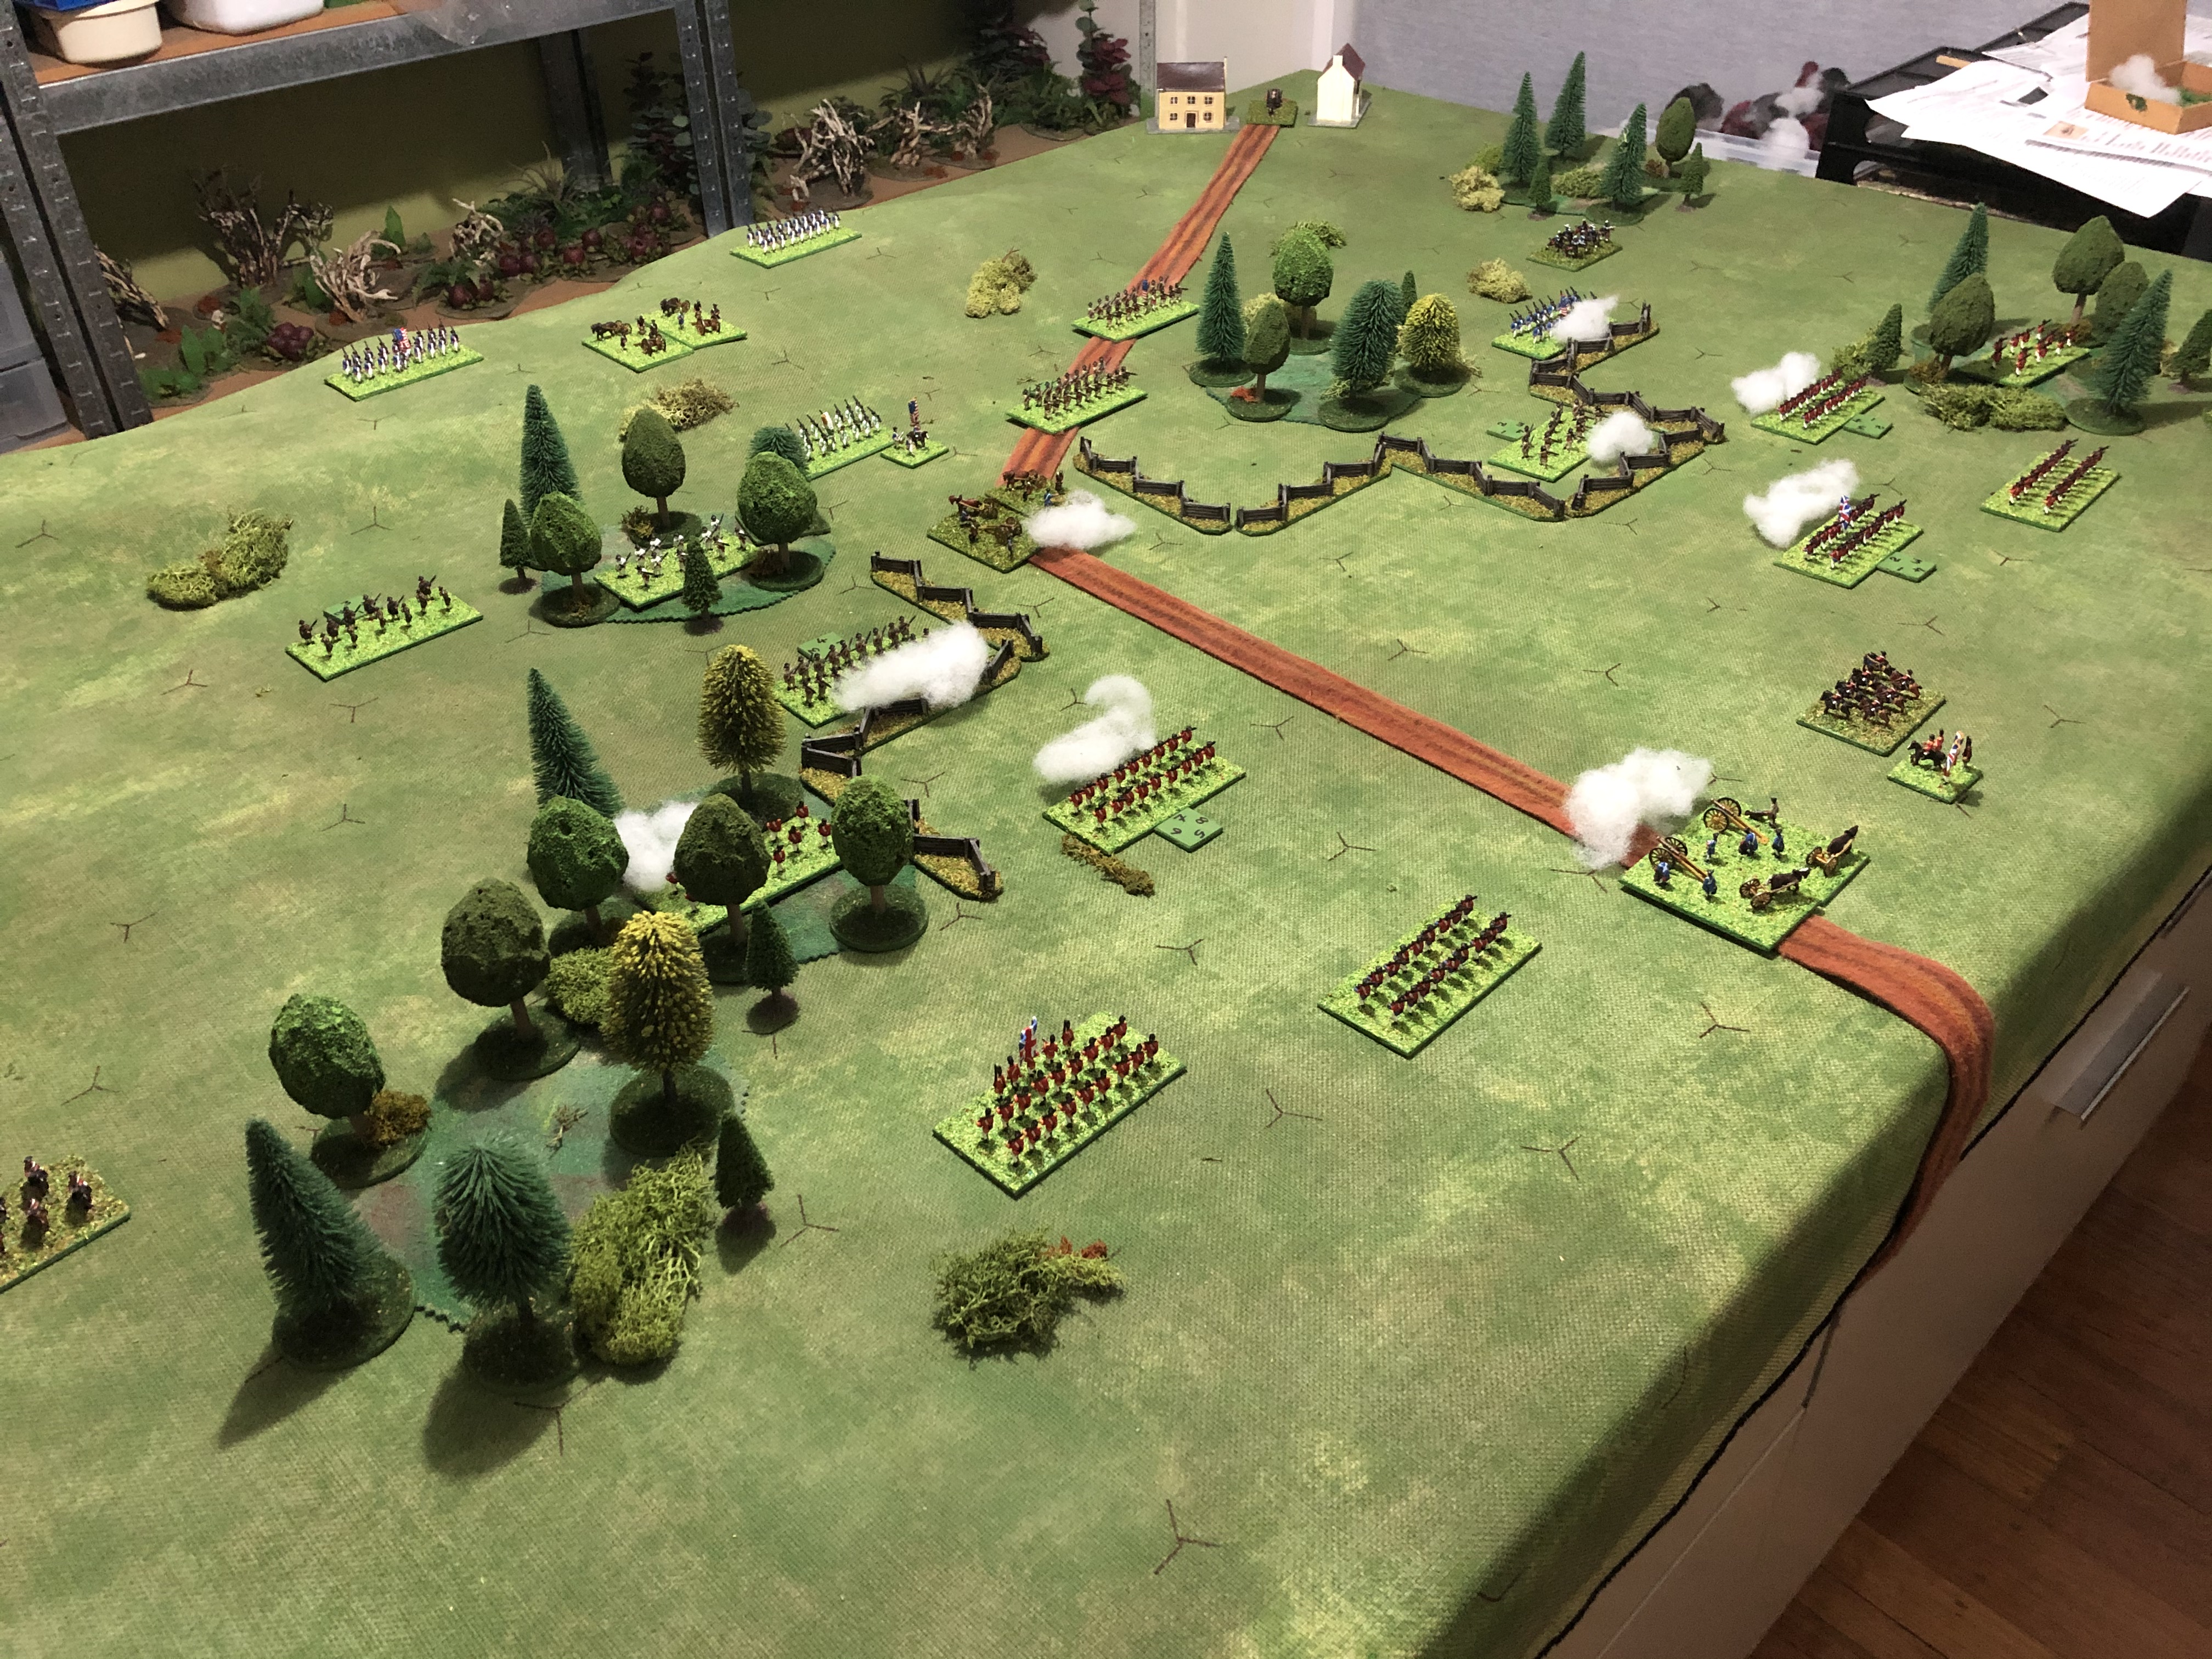
In the campaign Jacobites forces have stolen a march on Government forces who have hastily pulled together units to defend a river crossing (triple line scenario 26 from One-Hour Wargames). They are confused and surprised at the arrival of the Jacobite force, and under the scenario rules cannot move until enemy forces come within an adjacent hex. They are setup in three defensive lines:
  • Artillery positioned on the hill at the back
  • Infantry and cavalry in the second line in front of the hill
  • A forward unit at the bridge.
The arriving Jacobite force consists of:
  • 1 cavalry
  • 1 skirmisher
  • 1 highlander
  • infantry
The Jacobite general quickly pushes forward his infantry and skirmishers to engage the defenders of the bridge, the only river crossing point. Both sides engage in musketry while Government artillery provided support from its vantage point on the hill.

A view from the defending Government position

Defenders holding the bridge are quickly involved in battle

After suffering casualties the Jacobites were able to rout the bridge defenders and gain access to the other side of the river. Their skirmishers having crossed quickly made for the nearby woods away for the cavalry.

Jacobite units cross the river to face the second line of defenders

At some cost the second defensive line is broken.

As with the bridge, the defenders held firm and more Jacobite infantry were pushed forward to fill the gap of any routed unit. Eventually though, numbers made the difference and the second defensive line yielded with the defending cavalry retiring to the hill.

The second line of defence is defeated.

After a brief standoff a short cavalry engagement occurred which went the way of the Jacobites. Having only their artillery unit functioning, Government forces chose to withdraw. Yet another victory to the Jacobite cause.

After a cavalry engagement is lost. Government forces retire.

In this game I used a straight piece of blue felt for the river. It worked well enough, but I figured a slightly more meandering piece of blue felt might work better with the hex grid, and many of the One-Hour War-game scenarios have rivers in them. So this Saturday morning I made some more lengths of river.

A paper template was first created and pinned to the felt to help in the cutting of consistent river sections. Once cut out I use some oil pastel crayons to indicate flowing water. A light spray of varnish will keep the colours in place.

All river sections completed.

A river meanders its way across the tabletop

A little bit of scenery is added for effect.

With the river created. I figured I might as well get one more Jacobite campaign game in before returning to the WW2 Western Desert campaign. Dicing for the scenario to use threw up a scenario without a river. So wouldn't you know it, I will have to wait to get to use the new river sections in a game.

Thursday, 9 July 2020

Snakes and Ladders Jacobite Campaign

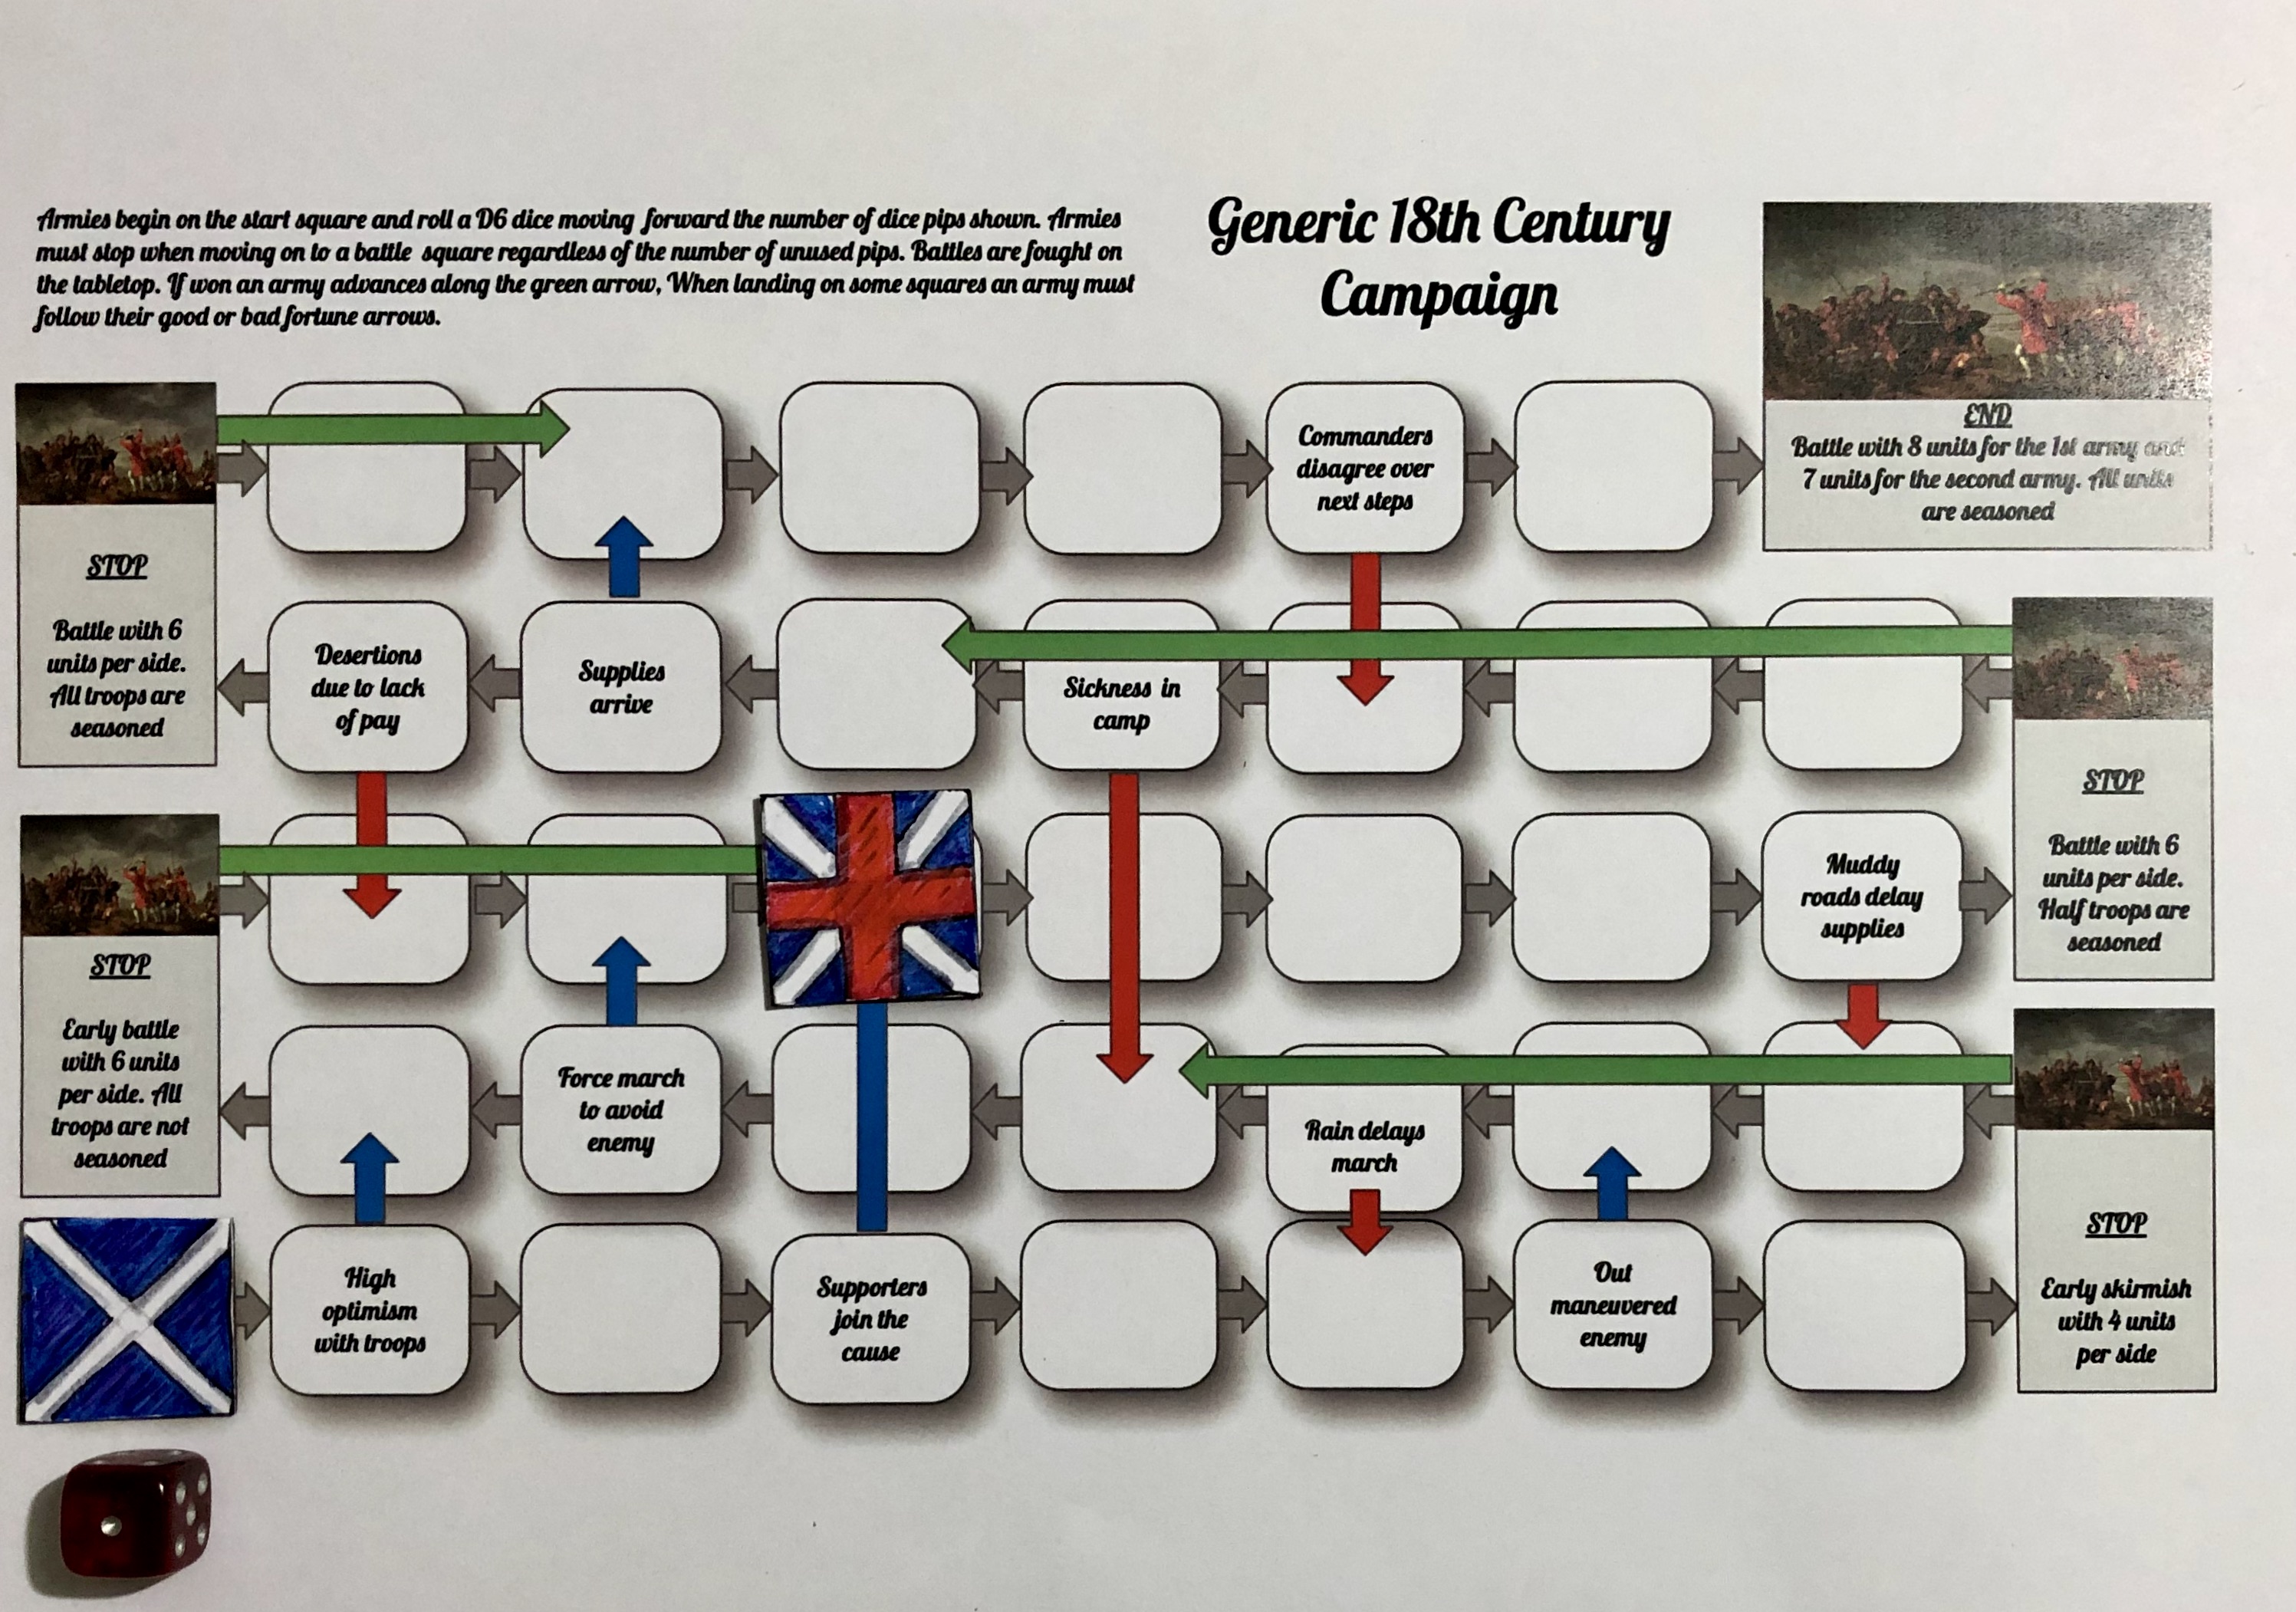
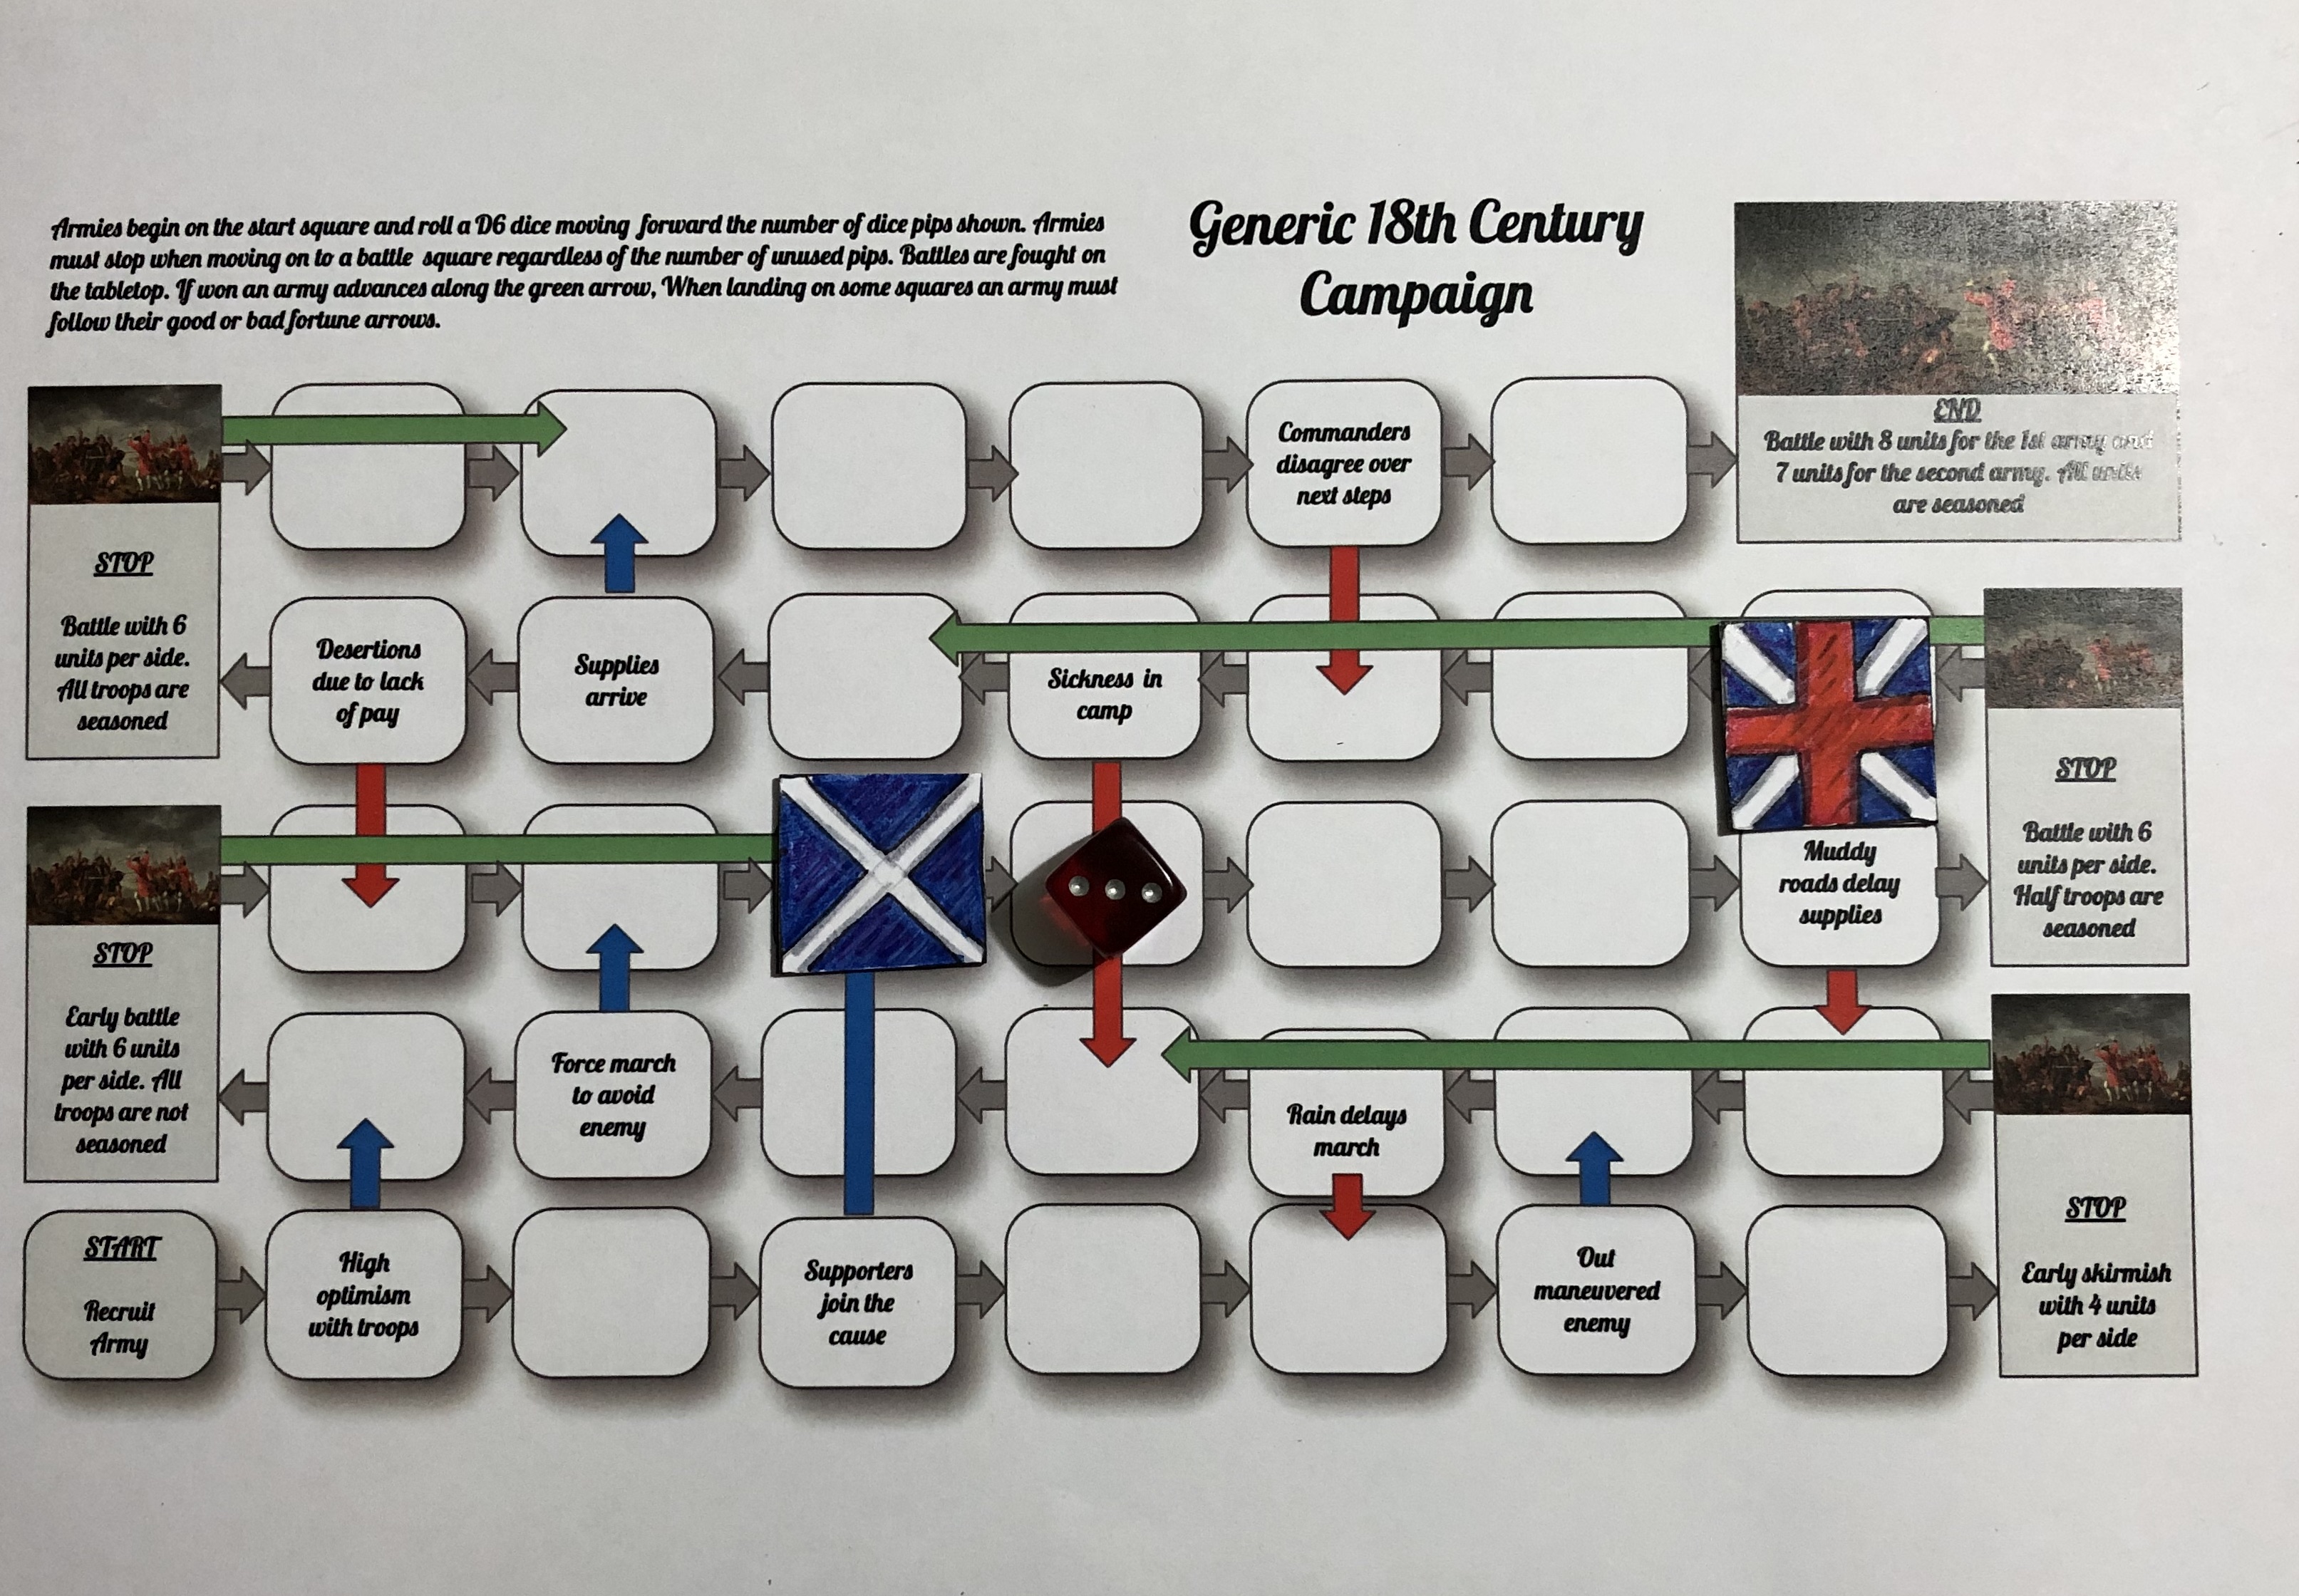
I am returning to the snakes and ladders campaign to setup a Jacobite game for this weekend. In the last campaign battle the Jacobites won a victory so have advance along the green arrow some 5 squares. The next couple of dice rolls had Government forces advance and Jacobite forces advance into battle.

The situation on the campaign board after the last battle and Jacobite win.

Government forces score a 6 and advance forward

Jacobites score 3, just sufficient to reach a battle square.

For the up coming battle the dice determined triple line scenario (number 26 from One-Hour Wargames). The Jacobites have stolen a march on the Government forces who have to quickly assembled an ad-hoc force to meet the threat.

The AWI game on the tabletop will have to be tidied up first. I am trying out the hex grid with a few different periods.

AWI game using a hex grid.

Tuesday, 7 July 2020

WW2 Western Desert Campaign Turn 6 game 1 Report

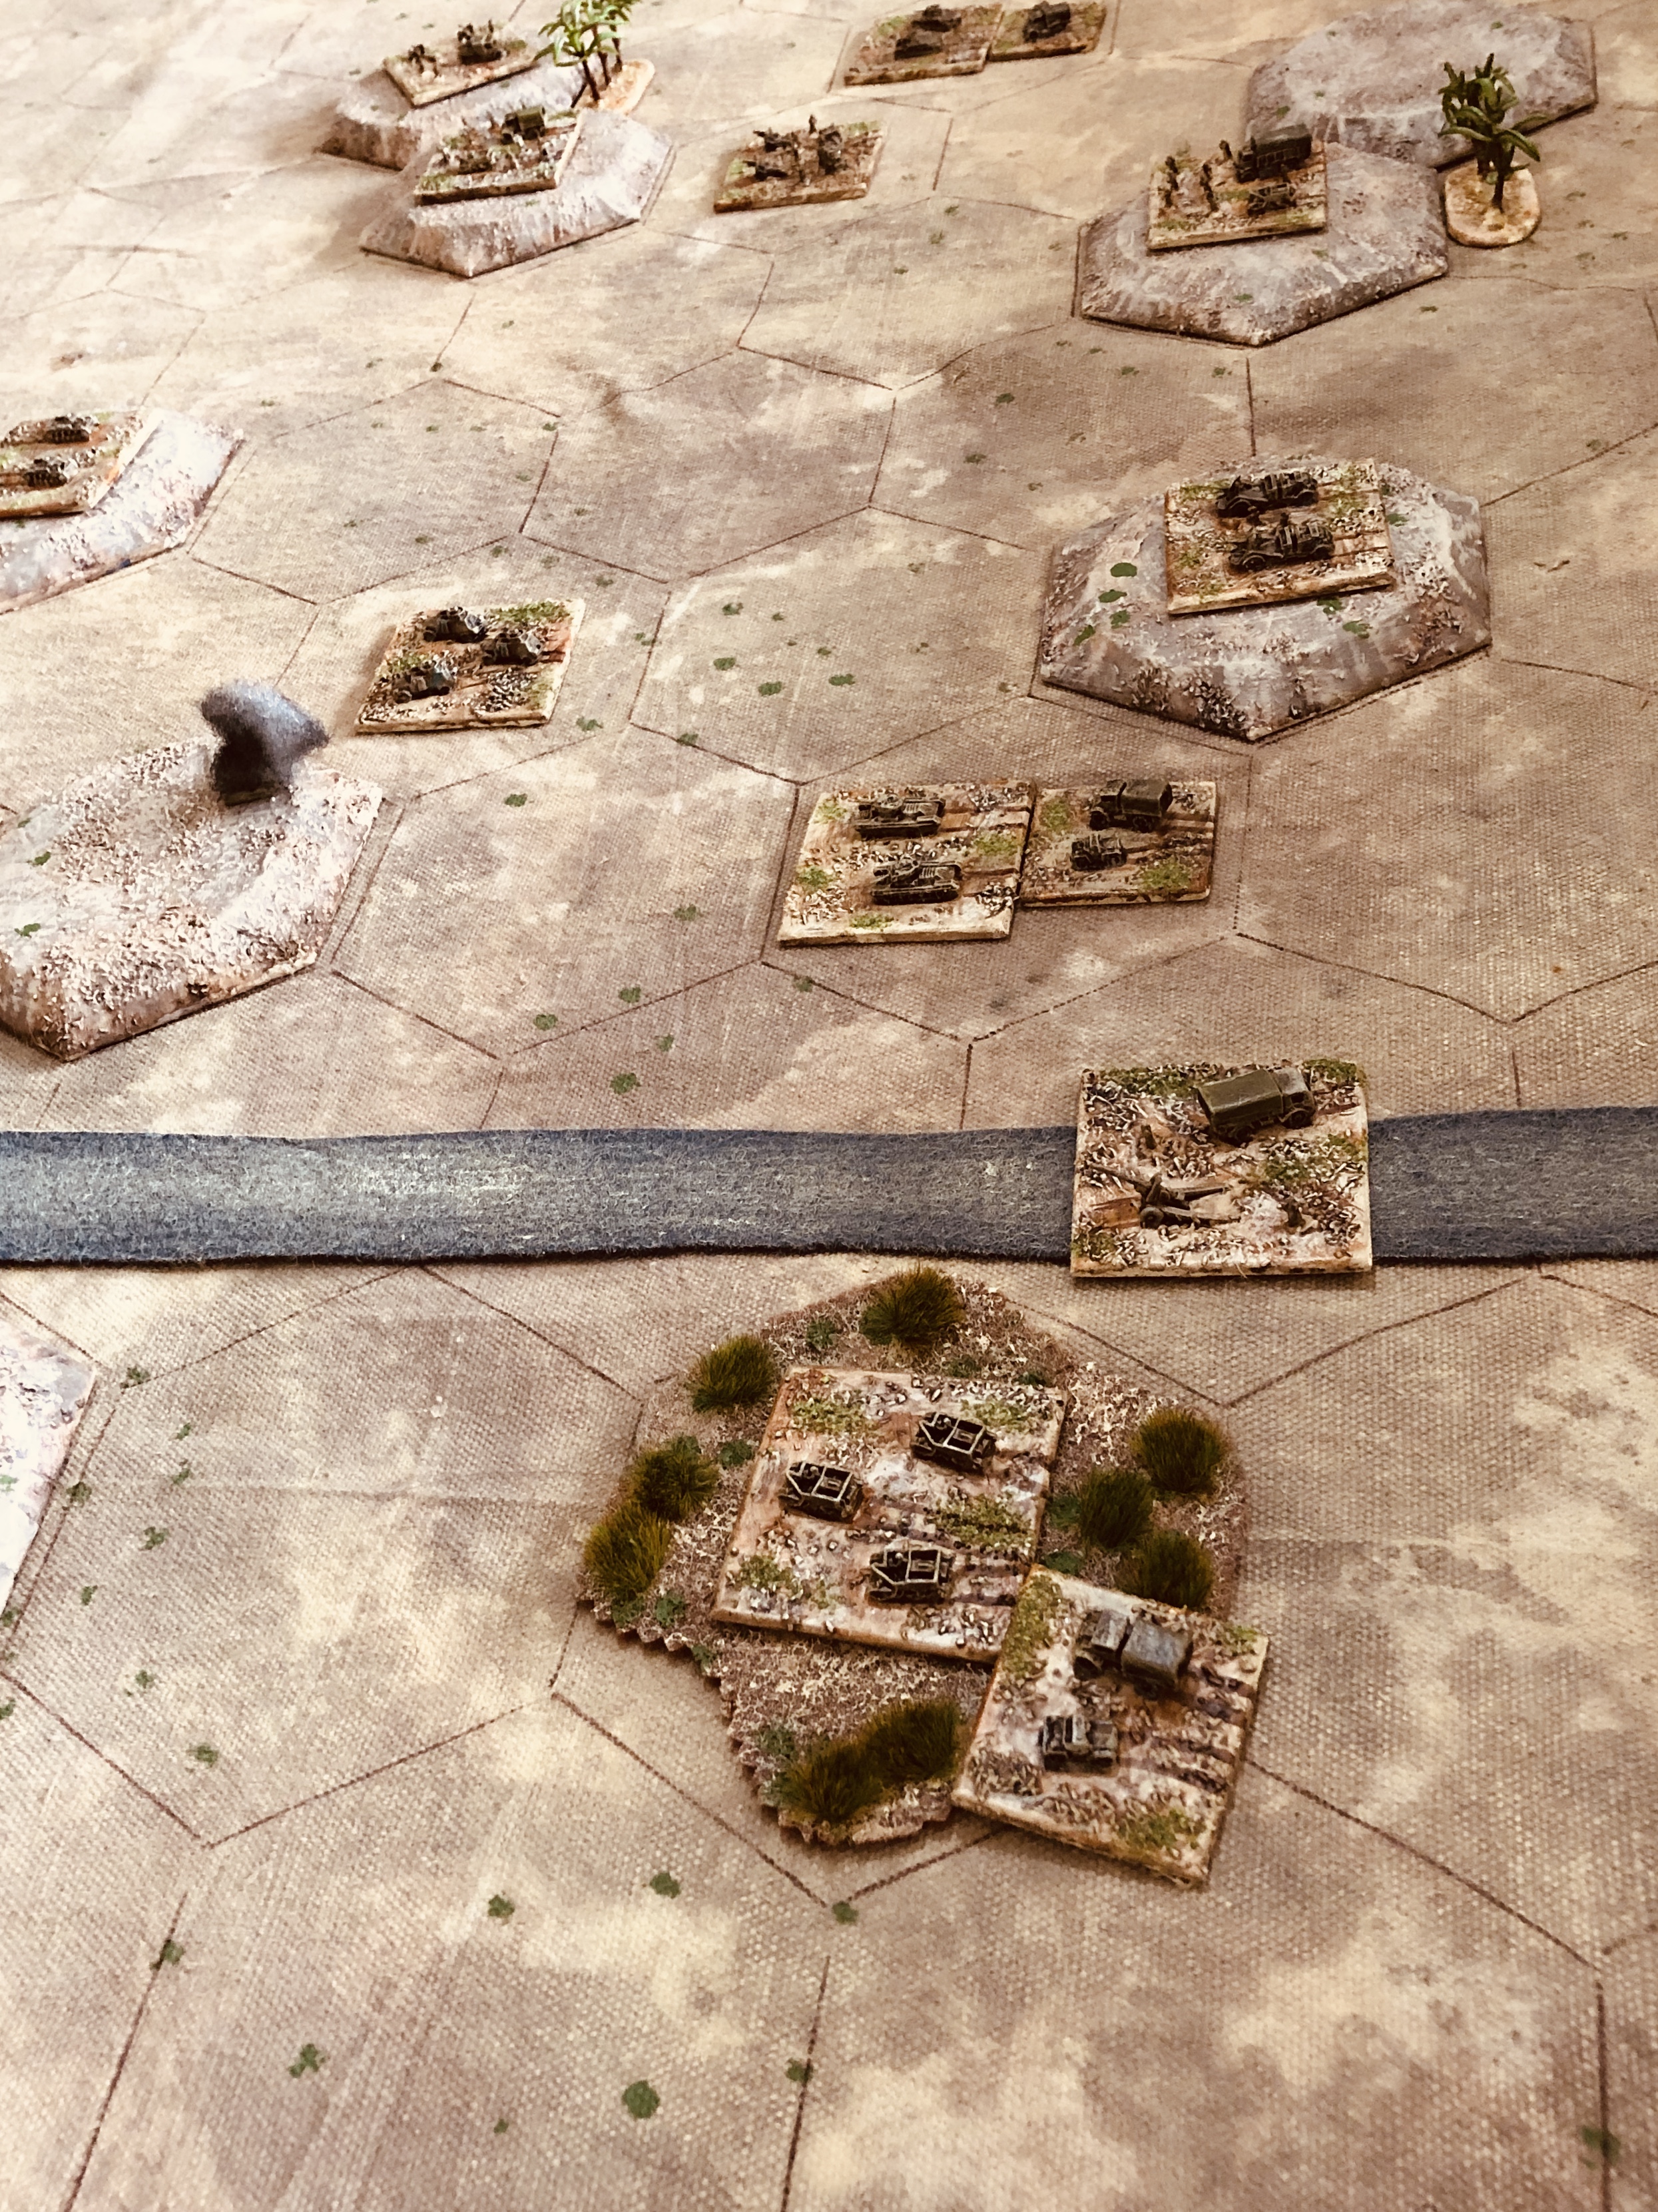
Tabletop setup and attack plan

The first battle of turn 6 has elements of the 21st Panzer Division attacking the South African division. The situational dice determined:
  • Axis and Allied forces would both sides would have 30 percent of units in reserve off table
  • Axis forces have an additional 30 percent of their force to arrive on the left flank
  • Air support is available to both sides
Three objectives were identified on the tabletop (see above photo). The objectives all were hills and  reasonable close together on the tabletop. This will be of benefit to the defenders as they can concentrate their forces and also quickly support their defence lines with arriving reserve units. 

Allied Forces (South African Infantry Division):
  • Armoured car unit
  • Carrier unit
  • 3 Infantry units
  • 2 2pdr AT Portee units
  • 6pdr AT unit
  • Matilda unut
  • 2 Valantine units
  • 25pdr gun unit
  • 5.5" gun unit
  • Air support
Axis Forces (21st Panzer Division):
  • Motorcycle unit
  • Panzer II unit
  • 4 Panzer III units
  • Panzer IV unit
  • 2 Armoured Infantry units
  • Stug III 50mm
  • AT 50mm gun
  • 88mm gun
  • Air support
Both forces had suffered an average level of wear and tear losing 3 units a piece. Importantly for the attacking Axis forces they would be without their artillery to support their assaults.

Advance forces from the 21st Panzer division arrive.

The plan for the attacking Axis forces was to attack the few hills between the two forward objectives to delay or attract any Allied reserves. Then assault the flank hill and use their flanking forces to attack either the centre hill objective or rear hill objective, depending which seemed the easier target.

The start of the game saw Axis units push forward to the few hills between the two forward objectives and both sides brought forward their reserves as quickly as possible. The advantage after the initial few turns was definitely with the defending Allies after their air support eliminated two units.

An early sortie by the RAF produced good results with two units destroyed as their reserves started to arrive.

Axis assault begins on in the centre and their right flank

The middle stage of the battle saw some fierce fighting around the hills as Allied reserves began to counterattack the advancing Axis units. On either flank the Axis advance continued as they assaulted the flank hills to gain a tenuous foothold, and their flanking units arrived. The situation still favoured the South African defending units. Who while taking losses had not given up any of the objectives and still had a few reserve units available to mount a counterattack.

Allied reserves are moved up

Flanking forces arrive

Flanking forces move swiftly with casualties on both sides.

Finally, panzer units are able to gain a foothold on one of the objectives

The final stage of the battle moved very quickly. A combination of AT guns and 25 pounders acting in a AT role proved very effective at stopping the Axis flank attack. So much so, that all reserve units could be directed at an counterattack on the other flank.

Having gained a foothold on the flank hills, Axis units were unable to hold off the Allied counterattack which regained control of the objective. This saw the end of the Axis advance and they retired.

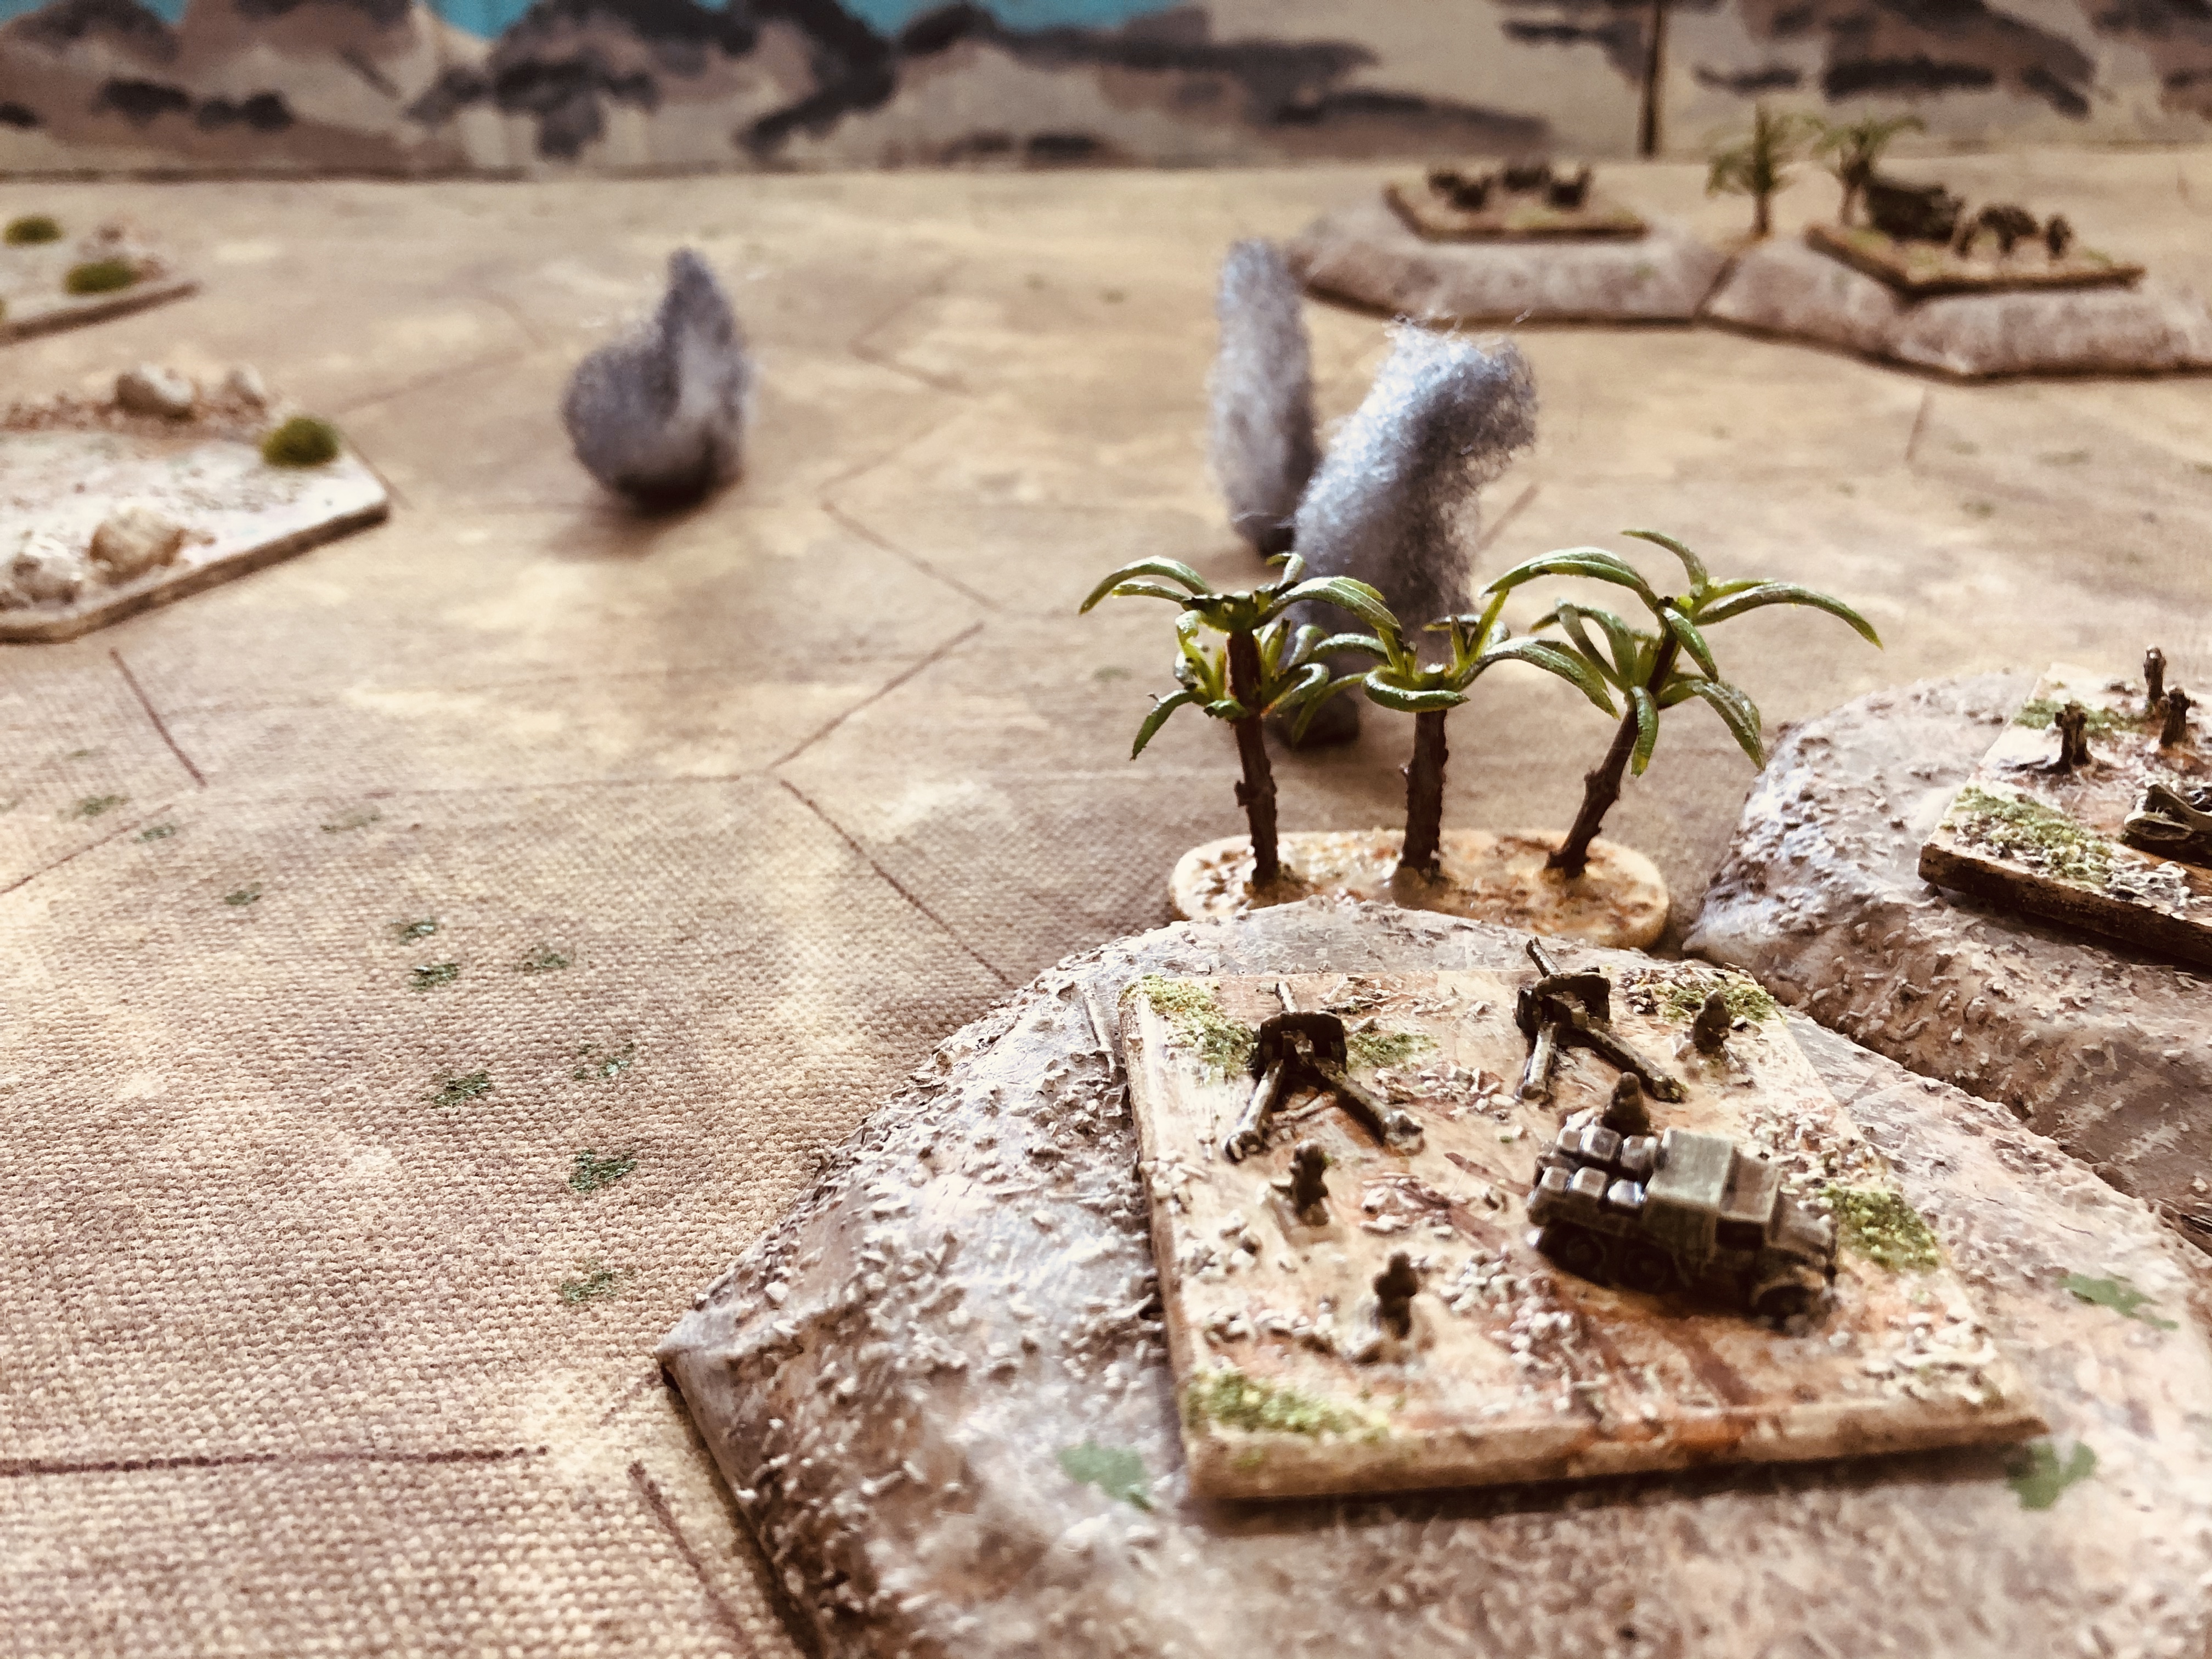
AT fire with support from 25 Pdrs. proved deadly to the Axis flank attack.

Allied forces were able to regain control of the flank hill

A victory to the Allied defenders who held on to all three objectives. The early successes of their air sortie diluted the Axis assault on the flank hill and they were able to feed in reserves at a steady rate. On the other flank combined anti-tank and 25 pounder guns proved very effective the against the flank attack which came to nothing.

Having finished this game I was going to launch into the next game the following day, Sunday, but some recent suggestions and questions along with previous blog comments have got me thinking about slightly modifying how the opposing forces line up and capture of supply dumps. The next post on this campaign will cover these changes in the lead up the next game. 

Saturday, 4 July 2020

WW2 Western Desert Campaign Turn 6

Beginning of campaign turn 6

Having spent most of my available wargaming time during the week messing around with my hex based tabletop. It was time to return to the WW2 Western Desert campaign. At the end of turn 5 Axis forces were successful in winning two out of a possible 3 games. As they were the attacking force in turn 5, they move forward one zone on the campaign map and remain the attacking force. They remain the attacking force until they don't win 2 out of the 3 games to lose a campaign turn. At which point the Allies take their turn to be the attacking force and regain lost ground.

Supply tracker being used in the campaign

Supplies for the campaign turn were diced for. I am changing the way I do supples, while not unhappy with the existing approach it lacked variability in the supplies, you either got supplies of you did not. Moving forward each side gets to roll a D3 dice, the attacking side always deducts one from their score. Players can then with their available points:
  • resupply units (1 pont per unit)
  • add defences to a unit (1 point per unit)
  • add additional air support to 1 of the best of 3 games
The Allies scored 3 supply points and chose to resupply two of their armoured divisions, so they are at full strength baring any wear and tear from the desert. Their third point went on adding defences to their New Zealand infantry division.

The Axis scored 1 supply point and deducted 1 as they are the attacking force. They were unable to resupply any units and will carry on without change. For the first battle they are attacking with the 21st Panzer division, who will face the South African infantry division.

First attacking move

Terrain cards decided the tabletop layout. The Allied position (red arrow) will benefit from an advance defensive line and will be able to use the hills for defence. Thirty percent of their forces will start the game in reserve off-table.

Terrain cards used to decide the tabletop.

Axis forces will benefit from a flanking move on one of the flanks using a third of their force. Another third will start the game on the tabletop, and the final third will start in reserve off-table.

So everything is set to play the next game, and hopefully with all the WW2 Desert forces out, a second game will be played.

Monday, 29 June 2020

Tabletop hex grid and snakes and ladders campaign continues

I used to play many of my games using a 6 inch square grid on my 6 by 4 foot tabletop when I started this blog (hence the title blog). However, I have over the last 12-18 months been increasingly using free movement. Recently I have moved back to using a grid with my WW2 Western Desert campaign, which uses a hex grid and I am thoroughly enjoying. Over the last few weeks now I have been considering using hexes for my other games. 

Prompting my thinking was a number of posts by Old Trousers on using One-Hour Wargaming scenarios and Simplicity in Practice rules (both by Neil Thomas) and more recently posts from projects and Procrastination. Anyway, after re-reading chapter "Grids: Hexes and Squares" from The Portable Wargame by Bob Cordrey I decided it was timely to setup my tabletop to have a hex grid.

My first step was to determine a suitable hex size which would fit the unit basing and terrain. My paper soldier units have a frontage of 7 inches and most other periods have units with a 4 inch base frontage. Using a compass (probably last used for a school project) a few templates were drawn on paper to determine a suitable size. A few tests found the best size hex was 7.5 inches from one side to the opposite side. This is quite a large size, but has the advantage that they can easily accommodate my units and terrain.

Those of you who use hexes will note I have the unit facing a side rather than one of the angles which seems quite common. I may change this approach, for the present though the side approach suits my rules which don't differentiate between flank and rear attacks, treating them as all the same. I also have a personal preference to having a unit facing a side (not sure why).

My 42mm scaled paper soldier unit with an 8 inch base frontage

ECW unit with a 4 inch base frontage and plenty of room for terrain

On my 6 by 4 foot table top this size hex grid would give me a board of 5 to 6 hexes by 10 hexes. I did think this 5 to 6 hex width might be a tad small, but the more I thought about it the less convinced I am that it will be too small. I tend to think of the hexes as zones with units deciding to make clear advances into an adjacent zone, and too many zones unnecessarily delay contact with opposing units. I will know for sure over the next few weeks as I try out the grid.

With all that decided my next step was to make a template was made out of MDF and start marking out the tabletop cloth. Rather than draw the whole hex I chose to just mark out the hexes just at the corner, hopefully making the hex less obvious.

MDF template and brown pen to mark out the grid

Grid with only the hex corners marked

One of my existing hills which fits two hexes quite nicely when placed under the gaming cloth.

The hill placed under the gaming cloth (not very noticeable in the picture)

A 6x6 inch field fits nicely into the hex

I will be able to reuse most of my terrain without modification, but will have to cut some more blue felt for rivers which will run along the hex sides (and is why there are no photographs of rivers).

The first game to be tested was the next game in the Jacobite snakes and ladders campaign

Tabletop setup for a Jacobite campaign game

Having made the hex grid the next step is to try it out with the next Jacobite snakes and ladders campaign game. It took a few rolls of the dice before the next battle occurred. The campaign has the Jacobite cause well advanced compared to the Government forces who had been delayed by muddy roads, while a Jacobite victory saw them progress a number of squares along one of the green arrows.

Luck is a fickle thing and soon after their victory the Jacobite cause was suffering from desertions due to a lack of pay. Meanwhile, Government forces conducted a force march to avoid battle and seemed to have the upper hand only to be frustrated again by muddy roads delaying their supplies. Seizing the opportunity Jacobite forces were able to catch a column of Government troops on the march. 

Random dice produced One Hour-Wargames scenario 13 - escape. The Jacobite side having landed on a battle event square got to choose which scenario force they would act as (Blue or Red). They chose to be the attacking force which catch the opposition on the march.

Snakes and ladders campaign has 

Action from the game

The game using hexes was a victory to Jacobites. So did the hexes work? For the most part yes. I do need to make a few tweaks to the rules to suit the hex grid and am looking forward to replaying the game (although the last game result will stand for the campaign).

Wednesday, 24 June 2020

War of the Spanish Succession project continues

Not much of a post this week as most of my free time has been absorbed with testing out some simple rules to use for my recently completed War of the Spanish Succession (WSS) units.

The rules themselves started out as a One-Hour Wargames (OHW) variant. Then veered towards something that looked a lot more like the Charge! elementary game as I wanted to have different mechanisms for musketry, artillery and mortars, and charges (melees). Having played through a few games I feel like the rules have reached a point which I an happy with (well for the present anyway). I now need to update the original rules I started with all the additional scribbles they have accumulated through play testing.
 
For the test games. Rather than just throwing some terrain on the tabletop with units aligned on either side of the table. I sourced a scenario from "Scenarios for Wargamers" by CS Grant - Positional Defence (1). Not having quite the same sized tabletop and number of units the scenario was scaled down.

Test game underway

Over the weekend I did manage to squeeze in some time to add a few commanders and mortars to the armies. I will be continuing with the WSS project in the next few weeks. My original goal was to have sufficient units for the OHW scenarios, with that achieved I have decided to increase the number of units for each army. Adding to each: 
  • one extra infantry bringing to 5 the total available, 
  • along with two extra cavalry units bringing a total of 4 available (along with the 2 existing dragoon units).

British commanders and along with a mortar and crew

French commanders and along with a mortar and crew


Wednesday, 17 June 2020

Beginning the snakes and ladders campaign

I began my snakes and ladder Jacobite campaign last week and have fought the first battle of this abstract campaign. The distraction of completing the first phase of my War of the Spanish Succession project delayed the writing of this post. 

A quick reminder the objective of this campaign is to create a series of battles with the purpose of getting advantages for one final battle, and hopefully not more than a handful of battles will be generated. Other than the campaign board and some initial thoughts (see here) there is a bit of making this up as I go along.

Each time a force lands on a battle rectangle a random scenario is selected from the One-Hour Wargames book. The force landing on the rectangle is the attacking side in the scenario. If they win they advance along the green arrow taking them closer the end battle. The other force has nothing to gain, other than denying the advancement of the other force. Although I am thinking of changing this to allow some benefit in the last battle, for example, an additional commander for each victory by a defending force.

Government forces won began the game with a 4 and land on a square which provides them with supporters in the regions which speeds up their march.

The Jacobite cause gets off to a slow start with a 1.

The low score continues with Government forces scoring a 1.

A score of 3 sees supports flocking to the Jacobite cause.

The march of Government forces is delayed as muddy roads hold up their supplies.

As score of 5 sees Jacobite forces make the first aggressive move and the battle is setup. 

A random selection using a D3 for 10's and a D10 for 1's came up with a 1 and an 8 for scenario 18, counter attack, from One-Hour Wargames. There is no battle report for the game other than to say the Highlanders proved unstoppable as they charged forward and captured the bridge before a flanking force of Government troops could create any threat.

Game in action

The win will benefit the Jacobite forces who will advance 5 squares on the campaign board.