Sunday, 25 May 2025

Star Wars makes it to the tabletop

A few weeks ago I had a test Star Wars Legion game with my son using the miniatures from the Star Wars Legion Core Box set. Since then, I've been busy collecting and painting additional miniatures, and it was  time to get all these newly painted miniatures on to the tabletop for a solo game. The rules that come with the Box set use a unit activation system that is not ideal for solo play, and I was looking for something fast and simple. So, I decided to try Squad Hammer Core – An Introductory Miniatures Game by Nordic Weasel Games. I've had the PDF for quite some while but have never got around to playing them. Today was the perfect opportunity.

Stormtroopers guarding the deep-space communication array.

For the terrain, I used what I had on hand, as I have yet to make any building that would be suited to a Star Wars setting. The rocky areas were made from leftover cement, which I spread out, let dry, then broke into pieces and painted with a clear sealer. I added some smaller model rocks from the hobby store for extra detail. The towers were once old downlight fittings from before the LED era which I pulled apart, while the smaller conical structures are painted-up old LED lights.

Local Drebacks are used by the Empire.

An Officer makes his rounds.

Scenario Background

In the scenario, the Rebel Alliance are attempting to disrupt a deep space communications array guarded by Galactic Empire forces. To succeed, the Rebels must access at least two of the three communication towers and have the droid R2-D2 deploy a virus into the tower computer systems. The Rebel forces can enter the battlefield from any table edge at the start of turn one.

Tabletop setup.

Order of battle

Empire:

  • 2 x Stormtroopers units
  • 1 x Evil Empire Officer and drone (treated as a unit)
  • 1 x Heavy Blaster
  • 1 x Speeder
  • 1 x Dewback Rider

Rebels:

  • 1 x Luke Skywalker, R2-D2, C-3PO (treated as a unit)
  • 1 x Han Solo and Chewbacca (treated as a unit)
  • 1 x Swoop Bike unit
  • 1 x Tauntaun Rider unit
  • 1 x Fleet Trooper unit
  • 1 x Rebel Trooper unit

Game Report

Amid the chaos of the opening turns, as speeders zipped across the battlefield, the Rebels exploited a gap in the Empire’s defenses. Luke, accompanied by R2-D2, advanced quickly and reached the first communications tower and begun the virus upload. In the confusion Rebel swoop bikes roared into action, catching a unit of Stormtroopers off guard and wiping them out. As they sped around for another pass, they found a retreating Dewback rider in their gun sights and eliminated that threat as well.

With their forces reeling, the Empire found themselves on the back-foot. Their heavy blaster unit providing some much-needed resistance, scoring critical hits that brought down the Rebel swoop bikes responsible for much of the early damage. But the situation remained dire. Luke and R2-D2 had already reached the second communications tower and were preparing to complete a second virus upload. In a last-ditch effort, the Imperial officer rushed to stop them but was cut down by covering fire from Han Solo and Chewbacca.

With two communication towers successfully infected with the virus, reaching the third would have been a tough challenge. It was well-defended by a heavy blaster team and a unit of Stormtroopers. Weighing the risks, the Rebels chose to withdraw, claiming a marginal victory.

Here are a few photos from the game.

The Rebels arrive quickly and in the confusion get Luke and the R2-D2 unit to the first communication tower.

Rebel swoop bikes swing around to fire upon some unsuspecting Stromtroopers.

The swoop bikes now successfully engage a Dewback.

Luck runs out for the Rebel swoop bikes as they come unstuck from the Heavy Blaster.

Luke and R2-D2 infect the second communication tower.

I really enjoyed playing the game with the Squad Hammer Core rules. They gave a free flowing type of game that I was looking for. For those familiar with them, I made a few modifications: speeders were given a free half-move action at the start or each player’s turn, and if activated during the turn, they could make an additional half move. This kept them moving around the tabletop in a very cinematic way. All heroes and villains were treated as veterans and were particularly resilient when determining hits taken, though they were not allowed to regroup to remove hits like other units. I have now set up the tabletop for second game using these rules with my modifications. This time Darth Vader will be making an entrance.

Sunday, 18 May 2025

Making room and measuring sticks

The English Civil War armies returned to the tabletop this past week, along with some newly made measuring sticks. These were needed because I have been messing around with the movement and weapon ranges, reducing them by a third. 

Newly made measuring sticks for the reduced ranges.

The reason for reducing the movement and weapon ranges is to create more deployment space on my 6x4 foot tabletop for placing camps, supply wagons, or holding reserves behind the battle lines. Previously, when deploying armies, most units were typically placed within 12 inches of their own table edge, with dragoons sometimes pushed out slightly further, up to 18 inches from the edge. This ensured that no unit started the game within musket range of the enemy.

A typical setup before reduction in ranges.

As I was playing around with reducing the ranges, I was reminded of the advice in Featherstone’s Complete Wargaming, which notes that “move distances and weapon ranges must be formulated to suit the size of the wargames table, remembering that too-short move distances slow the game up.”

With the range reduction, army deployment zones are shift forward a fraction, but the battle lines are closer together which allows space to be freed up. So now advanced units (eg. dragoons and artillery) start 2 inches closer to the centre, the first battle line now begins 16 inches from their base edge instead of 12 inches, and the second line is 12 inches from the base edge where previously it was 6 inches from its own tabletop edge. These adjustments free up space at the rear for generals, reserves, and supply wagons.

The photos below illustrate how the lines compress and open room at the back.

Setup with the reduction in ranges.

So far, I have only reduced the ranges for my English Civil War games, and it seems to be working ok. The closer deployment areas mean the armies still can quickly engage the opposition, and the compressed deployment lines now make manoeuvring more challenging, which seems to reflect the period well. I still need to play a few more games, but I plan to try the same approach with my Roman and Carthaginian battles soon to see how they will play.

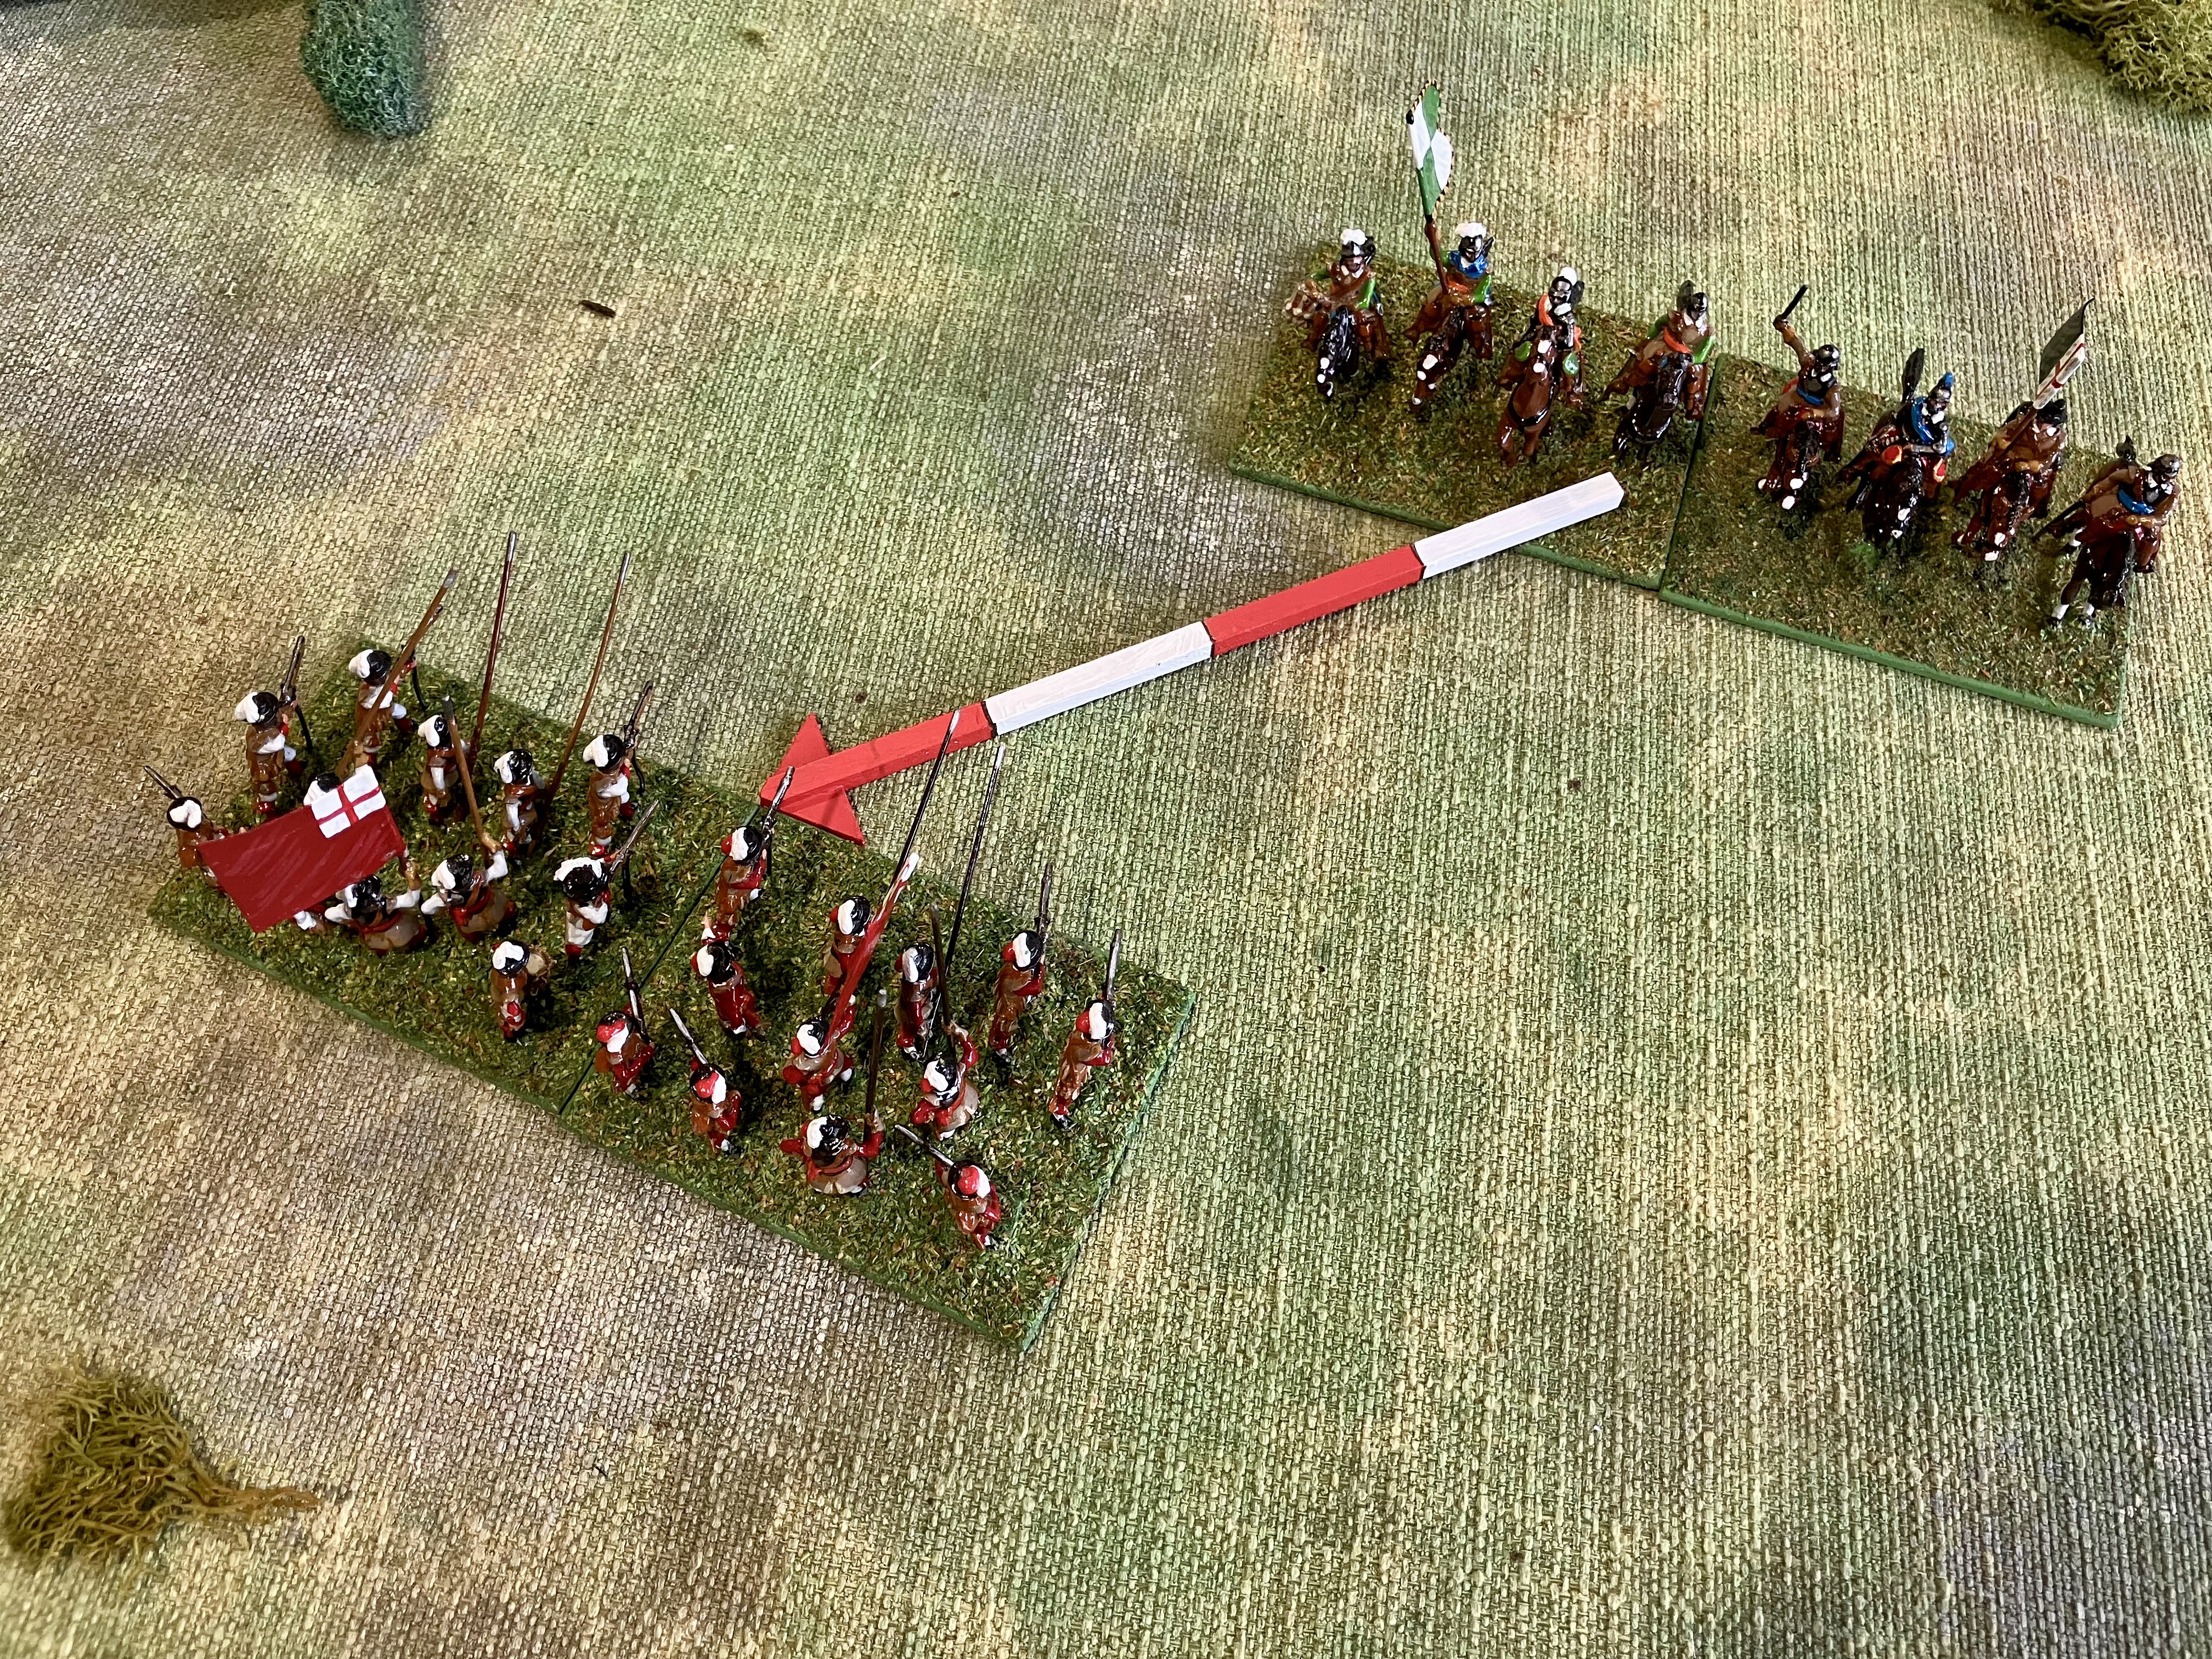
Returning to the measuring sticks, this time, when making one, I added a 90-degree triangle at one end to make it easier to determine whether units are moving or shooting within their 45-degree arc.

A unit makes a forward movement with the new measuring stick.

Infantry are able to open fire on some approaching cavalry within their arc of fire.

Saturday, 10 May 2025

Star Wars Legion project update

Since March, when my son and I each bought a Star Wars Legion Core Set (I chose the standard version based on the original films with Luke Skywalker and Darth Vader, while he went for the Clone Wars set) I have been steadily working through my miniatures. 

“How did we get into this mess?”

I quickly painted up the core set, but soon got sucked into the Star Wars universe and began expanding my collection with additional characters and units. Fortunately, I was able to find most of the extra models at discounted prices which for the most part are now painted. So I only have a few more units left to paint, mainly Rebel forces, and that should be it for now (or until I see the next discount). The next stage in this project is to make some terrain, where the focus will be on buildings and rocky landscapes.

All the models completed so far. Only a couple more units to add.

The Rebel forces

Imperial forces.

I have been keeping my painting style pretty straightforward, mainly just blocking in the colours. Sometimes I will add a bit of dry brushing or a highlight to break up areas that look too flat. For example, the C-3PO model looked like a solid gold blob, so I dry brushed it with a touch of silver to bring out the details. All the models get finished with a gloss coat to make their colours pop. I am definitely not doing a grim-dark future or realistic look and am instead aiming for something that feels more like a comic book look.

Rebel Characters.

A closer view of the Imperial miniatures.

The Emperor is displeased by your apparent lack of terrain progress.”

Most of the terrain will be built using off-cuts from our recent home extension, along with MDF board and whatever useful bits I can find at the local hardware store.

Wednesday, 30 April 2025

A couple of face-to face games and a remote game

Most of my wargames are played solo, but over the past month I have had the chance to play a couple of face-to-face games with my son and daughter, as well as a remote game. The most recent was a remote session hosted by Jon from the Palouse Wargaming Journal, using his wonderful War of the Roses figures.

A close up of the action courtesy of Jon.

We used a set of rules currently being developed by Jon. This was my second time playing with them. One particularly interesting aspect of the rules are the commander traits, which affect how easily a commander is to change their Ward’s orders to Engage, Defend, or Manoeuvre. In this most recent game, Jon had added a new twist to the commander’s traits by introducing personal objectives for each commander to achieve during the game. It was an engrossing battle, and after a closely fought contest, my Yorkist army managed to snatch victory. Jon has written an excellent game report, which can be found here.

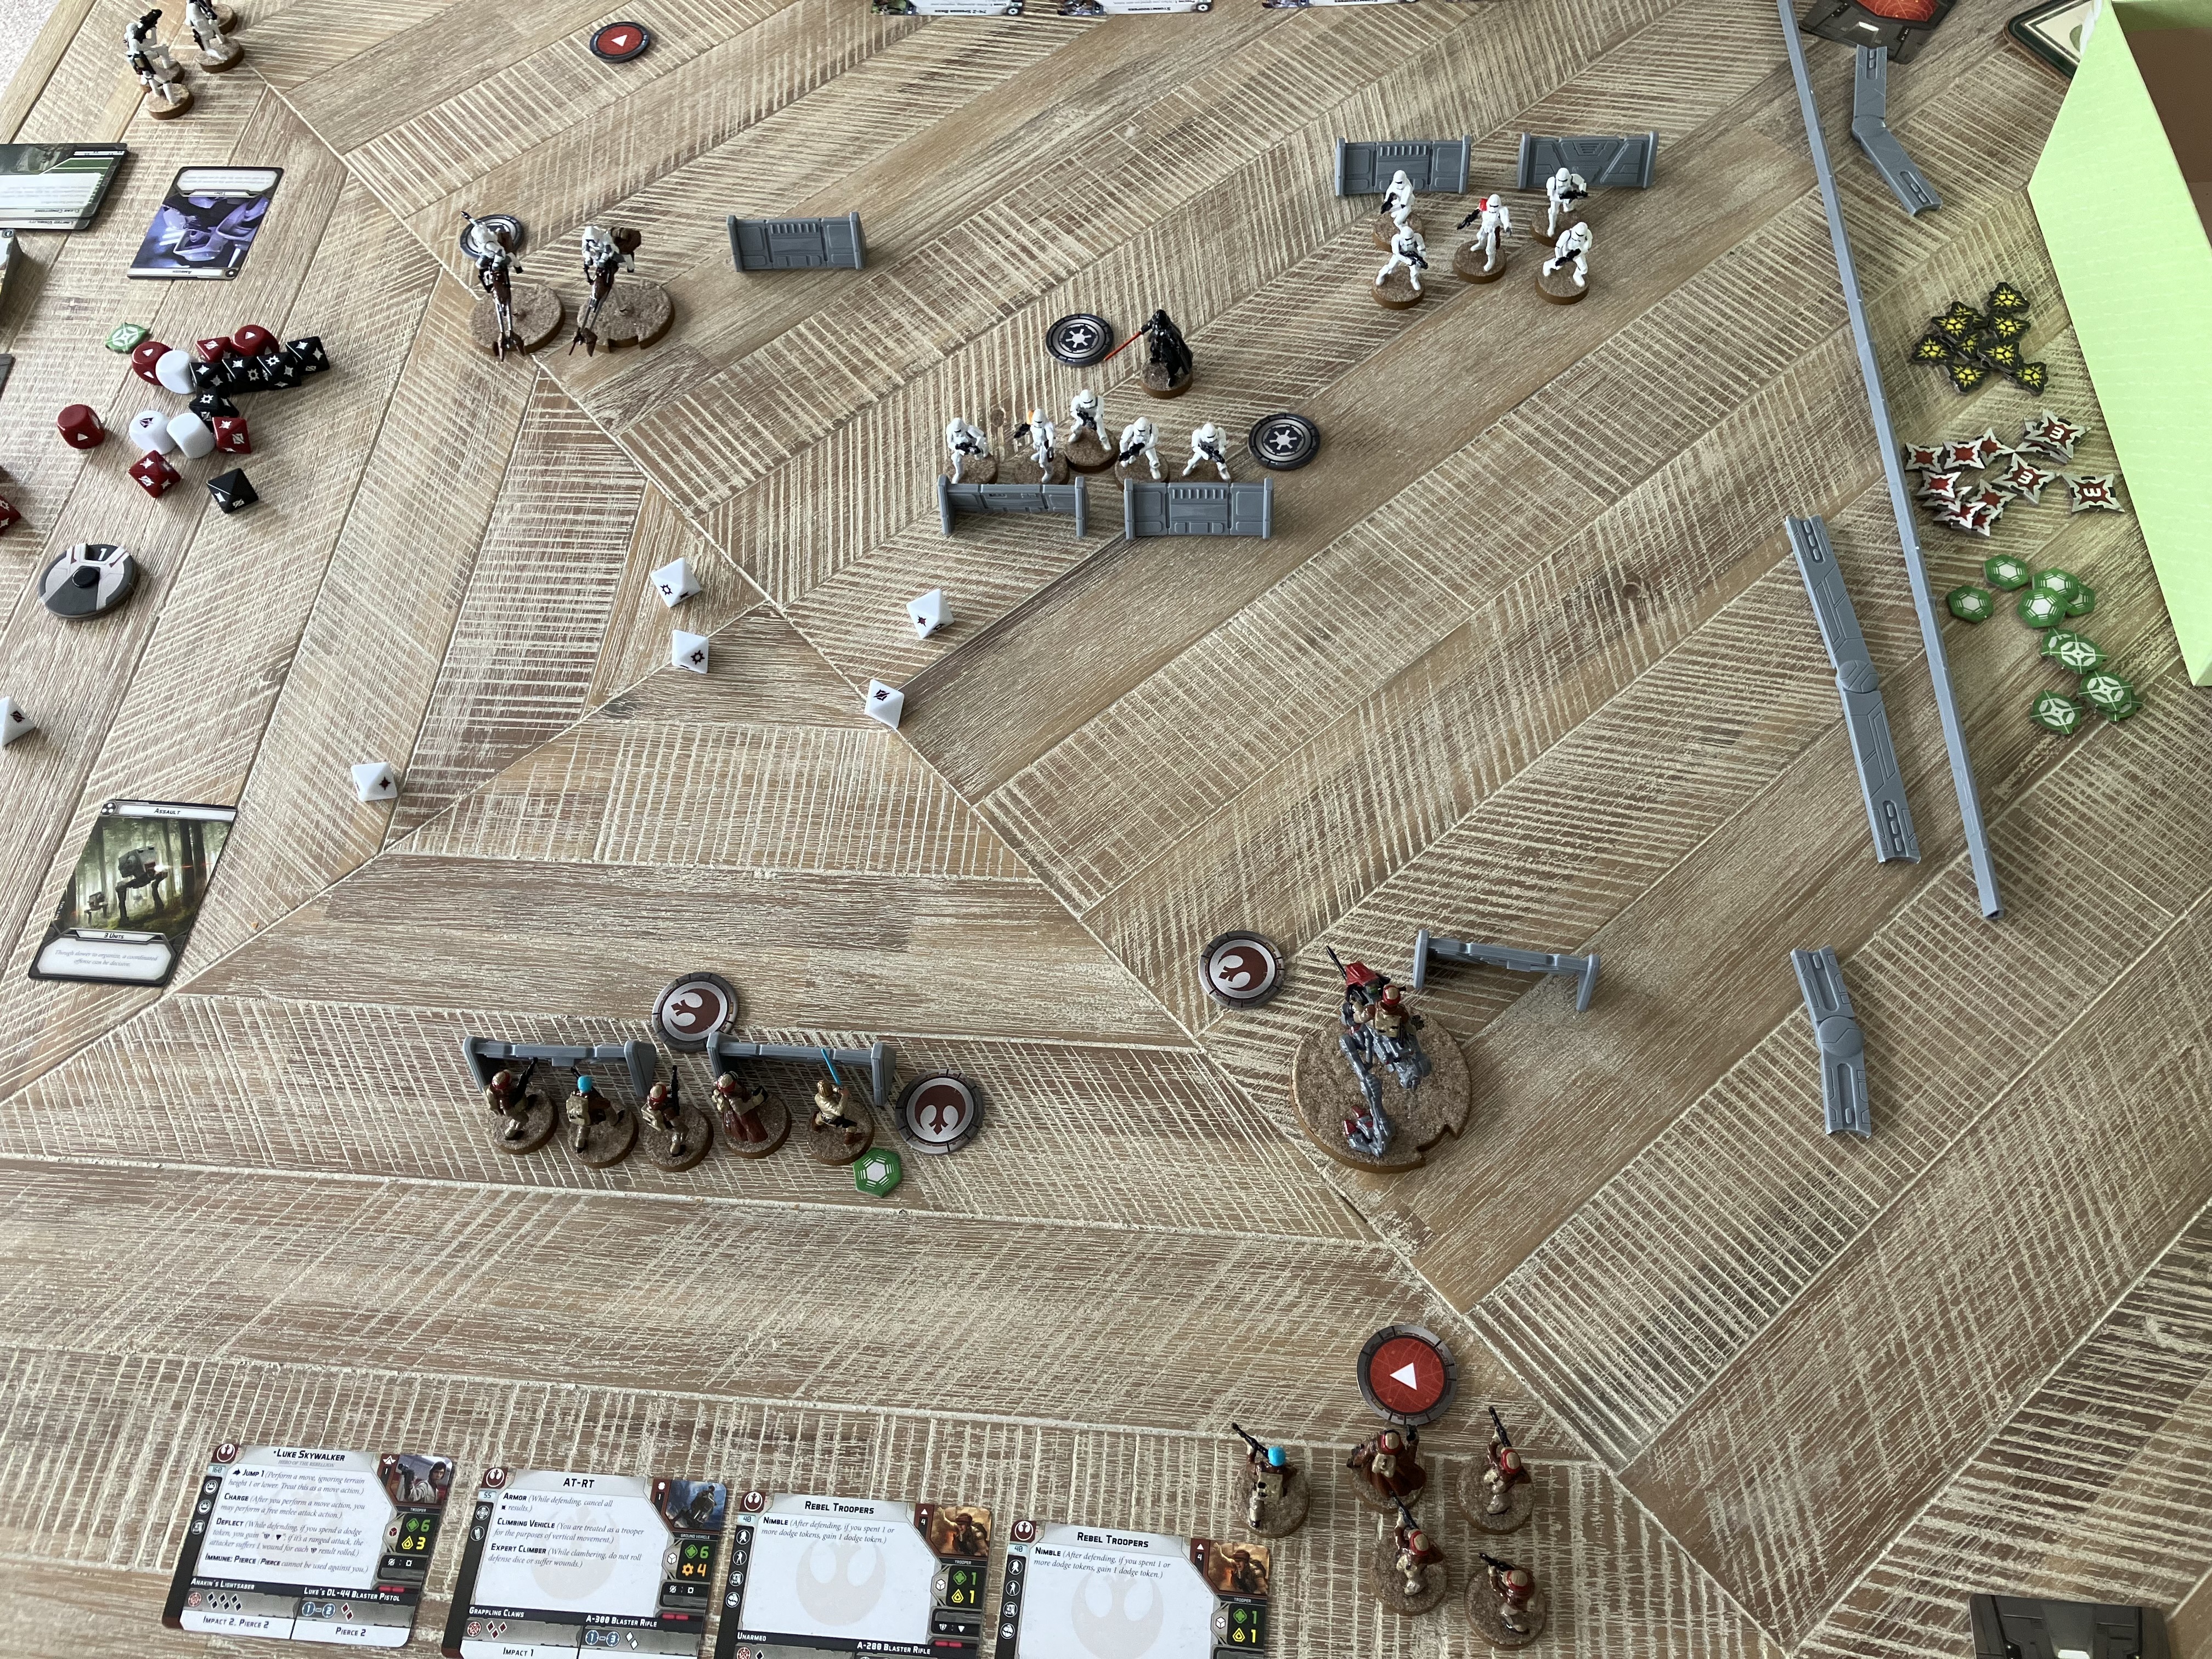
One of the face-to-face games was with my son, using Star Wars Legion figures and rules. We have both picked up a one of the starter boxed sets. As I had managed to get my starter miniatures painted, we played a game using my set. It was our first time playing, so we were both getting to grips with the rules. In the end, the game turned into a bit of a mass brawl, with all units piling in, out of which my son emerged victorious, led by his Darth Vader.

A Star War game underway.

I have added to my forces with a few more kits, which I have yet to build and paint. I also need to start thinking about creating some terrain for the game.

The other face-to-face game was with my daughter, who popped over for the day. We started in the morning with a couple of quick One-Hour Skirmish Wargame battles. Then after lunch spent the afternoon playing Zombicide, a cooperative game where we both took on the roles of survivors in the zombie apocalypse. In the scenario, we had to scavenge for supplies while avoiding being overwhelmed by the undead.

Zombicide - I have painted all the miniatures that come with the game.

Sunday, 20 April 2025

Trying a different approach to woods on the tabletop

Having recently completed my French and Indian War mini-campaign and not yet having set up a new campaign, I thought I would post about how in some recent games I have been trying out a different approach to visually representing woods on the tabletop and the house rules I needed to apply.

My usual go-to method has been to use cut-out felt cloth to mark the area of the woods, with a few model trees added for visual effect. However, this often turns into a balancing act between placing enough trees to give the impression of a wooded area which is visually appealing, without adding so many trees that they interfered with unit placement and require constant repositioning of trees as units moved through the terrain.

My usual go-to approach of using felt cloth to show the wooded areas with a few trees added for visual effect.

Trees getting moved around to accommodate units in the woods.

Sometimes, instead of using felt cloth, I will use green wool to define the boundaries of the woods, especially when there are large areas of woodland in a game. However, this can become problematic, as unit bases have a tendency to catch on the wool when they are being moved.

Green wool being used to define the boundaries of a wooded area.

There are times when the rules I am using do not permit units to enter woods (One-Hour Wargames Medieval rules being one such ruleset) and in these cases, I will clump the trees together as I find this to be more visually appealing on the tabletop.

In my medieval games no units can enter woods so I can clump trees together, my preferred way to visually represent wooded areas.

This got me thinking about how I could continue to represent wooded areas as clumps of trees, while using some house rules for units that are allowed to take cover in woods. 

The house rules I started to use treat any unit with a base touching one of the trees in the wood as being in cover. While the clump of trees itself blocks line of sight, so any units positioned behind it are out of view and cannot be targeted. My reasoning is that woods are generally denser toward their centre with understory and ground vegetation. While the edges, where troops typically operate, are more open with less undergrowth, but still suitable for providing cover.

British troops and 6 Pounder in cover at the edges of the wood.

The infantry and 6 pounder are both in cover, but can be observed by the advancing German tank. The Bren Gun carrier remains out of sight.

Where the rules allow certain units, such as light infantry, to move through the woods. These types of units can move through a clump of trees and emerge on the far side, provided they have sufficient movement allowance. If not, then they are unable to pass through. This can create interesting opportunities for ambushes where troops can suddenly appear along the edge of a wood.

German infantry in hiding behind the woods.

German infantry emerge at the edge of the woods and can still claim cover.

Where there is a need for a larger wooded area or forest, this can be represented by multiple clumps of trees, with the spaces between them suggesting paths or areas of lighter vegetation that troops can move through more easily.

A column march through the woods.

So far in my recent games this approach seems to be working out. Giving the visual appeal I am looking for without hindering the games. In my WW2 games I have extended this approach to buildings and towns.

German units take cover in the town.

My search online did not show many alternative options, mostly the results were about how to make more realistic trees. If you know of any other options, feel free to share them in the comments.


Monday, 14 April 2025

French and Indian War - Game 3 Report

Following the recent setback at Fort Robert, General Colchester has rallied his defeated troops and pushed inland with the aim of securing a vital river crossing located downstream from Fort Orleans. Securing this crossing would provide a crucial bridgehead for future operations. For more background on the campaign and the scenario setup, check out my previous posts.

This battle uses Scenario 5 (Bridgehead) from One-Hour Wargames book by Neil Thomas. During the game, units from both sides will be gradually arriving on different turns. The British objective is to establish and hold a bridgehead. By the end of Turn 15, they must control the crossing with no French units within 12 inches of the ford crossing to claim victory.

British troops crossing the ford and advancing towards French troops in the distance.

Game Report…

The British advance guard fords the river at an unguarded crossing, pressing on without resistance. Their presence has become known as they spot a band of Indian warriors in the distance. They move to secure the nearby woods as elements of the main British force began to arrive in support. Messages of this incursion has been sent to a nearby French camp. Realising the gravity of the threat, the French began mustering all available forces, marching them with urgency toward the crossing to deny the British from establishing a bridgehead.
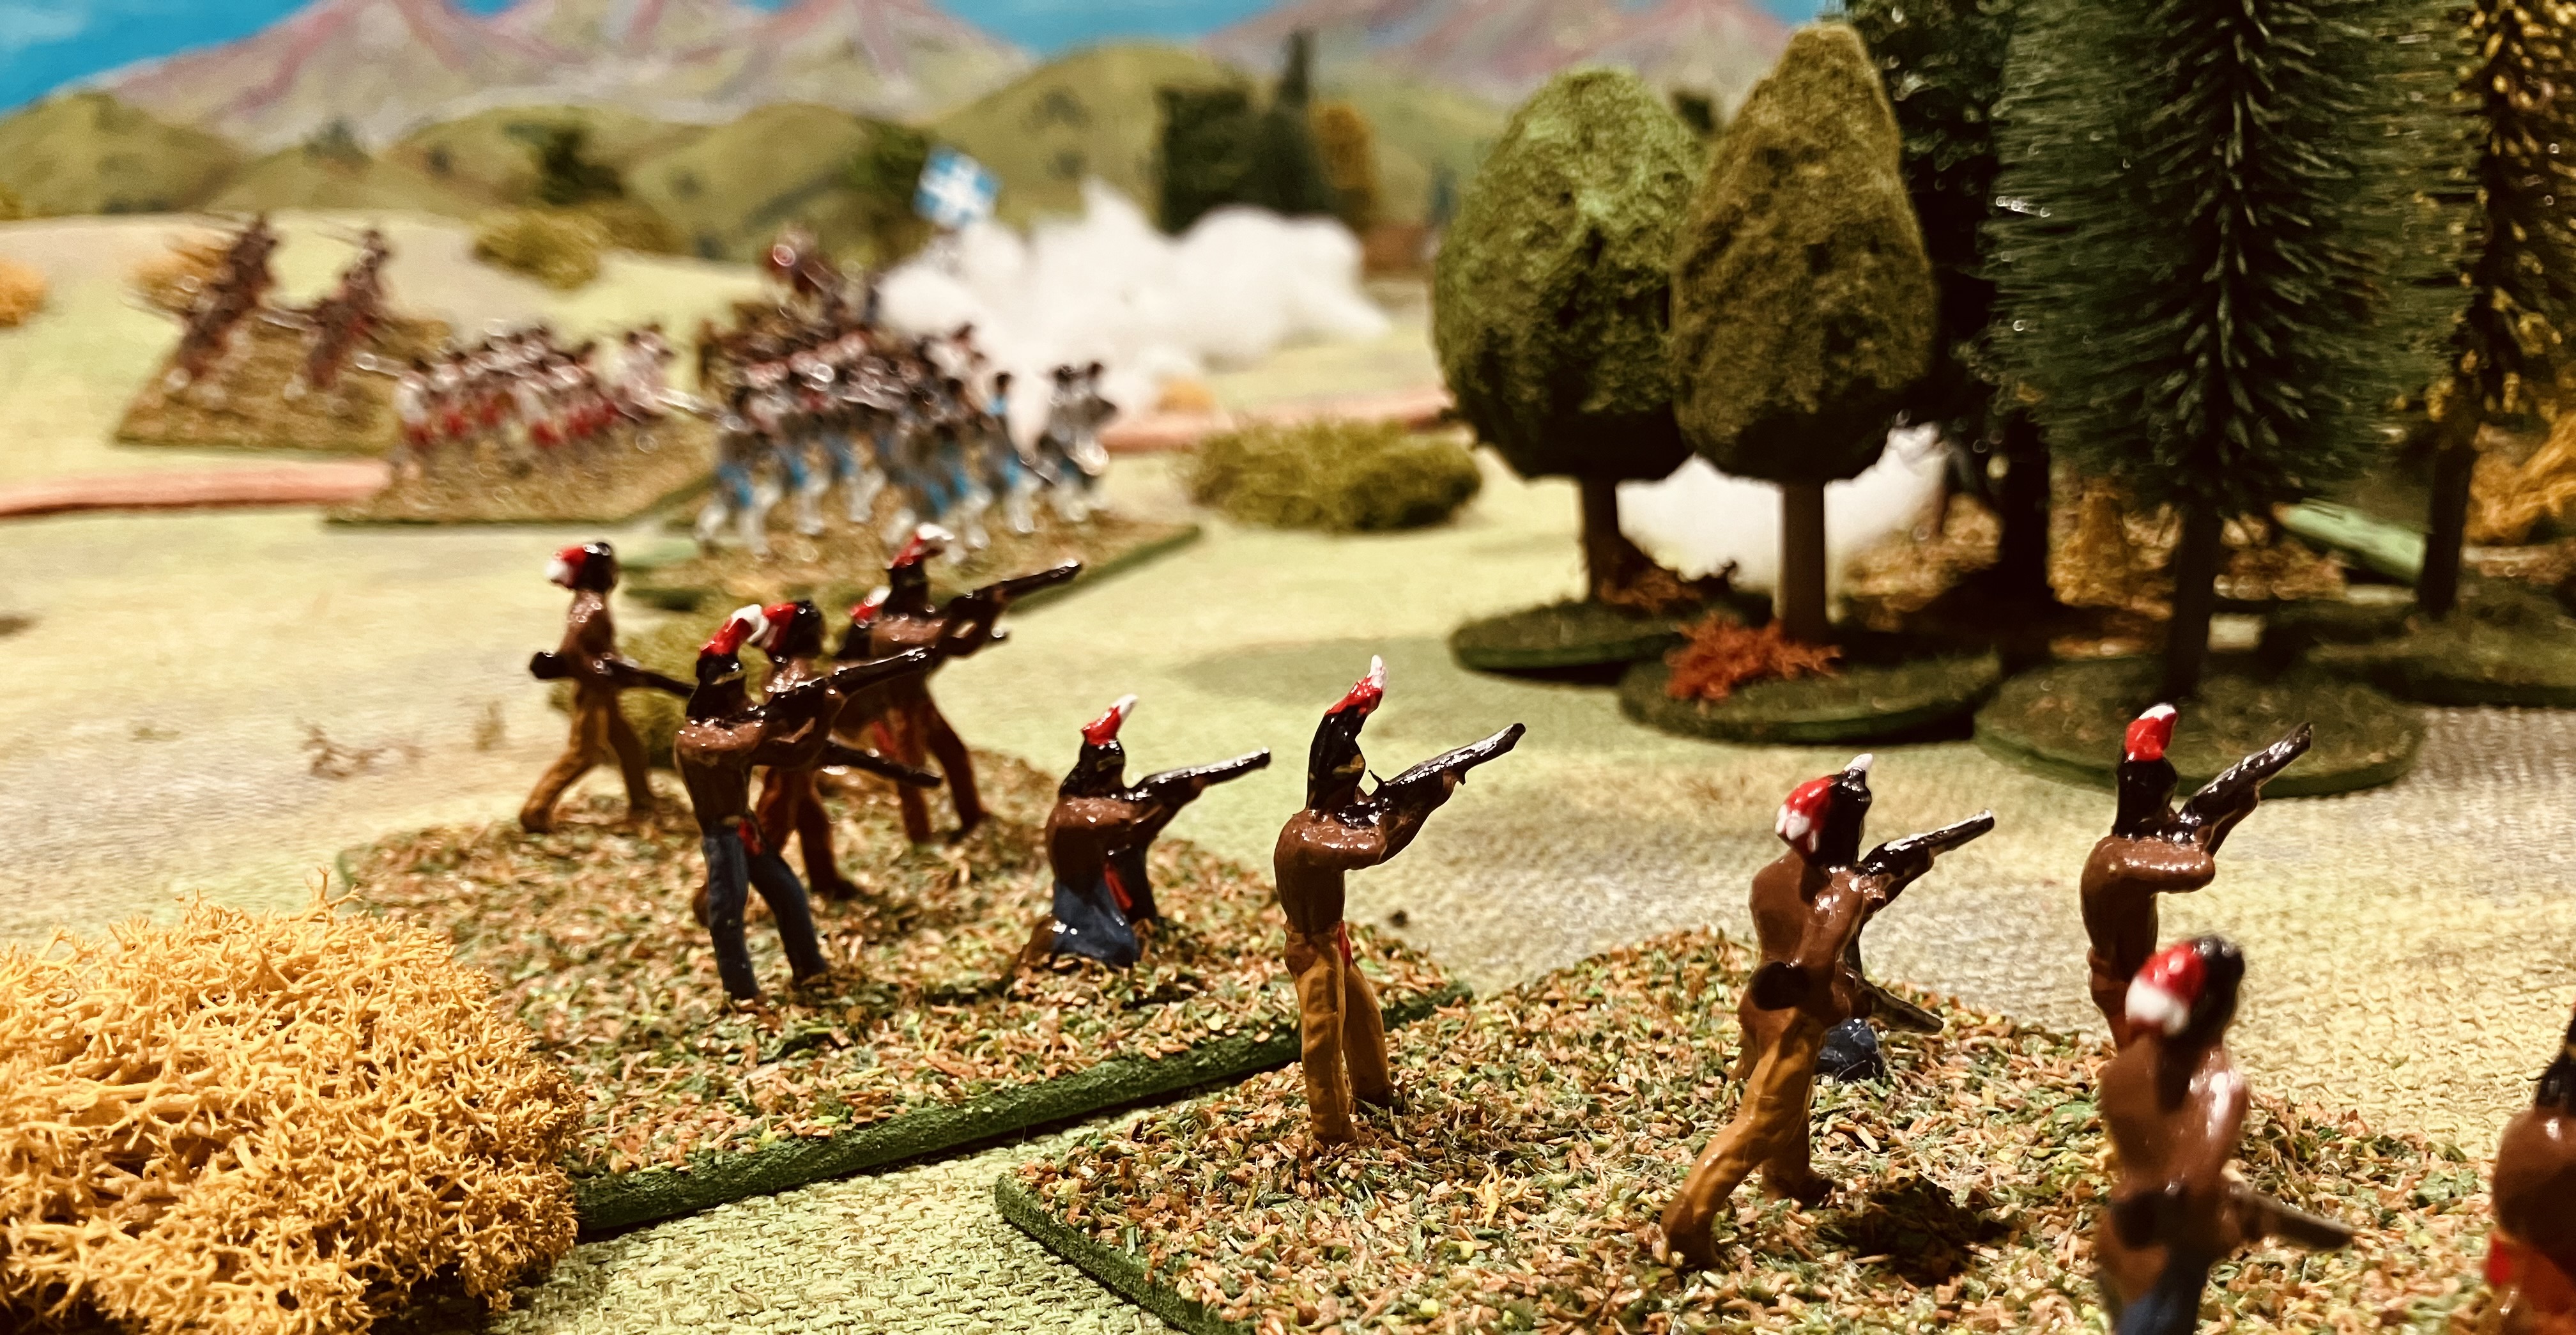
The British advance guard at the unguarded river crossing.

The British advance guard take up position in the nearby woods as Indian warriors arrive in the distance.

The main British column cross the ford as more French reserves arrive.

The Indian warriors keep their distance as they move towards the woods, whilst fresh reserves of French regulars advance directly towards the newly arrived British troops. As the French infantry draw near and open fire upon the enemy, several bands of Indian warrriors continue to skirt around the edge of the woods, seeking to turn the British flank.

The British hurry across the ford and begin to deploy.

The British guns arrive.

All the remaining French reserves had taken the field and deployed in a line facing the bridge, ready for the advancing British. Meanwhile, the Indian allies had pressed into the wood, where they were skirmishing fiercely with British militia. At last, the final elements of the British force appeared, their artillery, which was brought up and positioned on the right flank, across the river, to lend their fire in support of the attack.

Indian warriors and militia skirmish in the woods.

All units deployed and the fighting is fierce.

British artillery deployed across the river.

A fierce exchange of musketry ensued between the opposing lines, each side striving to gain the advantage. Over time, the French line began to prevail, whilst the British artillery proved to be rather poor shots. Seeking to gain the initiative, a British unit made a bold charge from the woods, crashing into the French line. For a fleeting moment, it seemed the French might falter, but the French were able to rally and hold fast.

It was within the tangled woods that the fate of the battle was sealed. There, the British militia, sorely pressed, finally gave way before a series of Indian warrior charges. Routed and in disarray, they fled, leaving the British flank exposed. The warriors, seizing the moment, surged forward, threatening to sever the British force from the river crossing. Stricken with panic and fearing encirclement, the British were compelled to make a hasty and disordered withdrawal.

The British make a bold charge from the woods.

The Indians take the woods, threatening to cut off the British retreat.

The Indian attack on the woods was to be key to French success.

A French victory! And with this final battle, the mini-campaign draws to a close. The French achieve a marginal campaign victory having two victories against the one British victory.

A map of the campaign. The circles show the battles, blue for French victories and red for British victories.

The campaign ends…

The British plan had been bold from the outset, General William Colchester was to march his forces along the coast and seize Fort Orleans. The campaign started favourably, with the British securing the river crossing and the settlement of St. Paul, aided greatly by the Royal Navy, who landed troops behind the French lines.

With momentum on his side, General Colchester pressed onward toward Fort Robert. The French, under the able command of General Lucien Duvall, had not been idle. The intervening time had been well spent repairing the fortifications and reinforcing the garrison. When the British arrived, they were met with staunch resistance. Fort Robert held firm, delivering the first setback to the British advance.

Thwarted on the coast, Colchester turned inland, seeking to secure an upriver crossing that might open a new path toward Fort Orleans. Had he succeeded, it would have been judged a marginal British victory. But fortune did not favour the British and the French triumphed forcing the retirement of General Colchester and his British force.

Details of the mini-campaign setup can be found here.

Monday, 7 April 2025

French and Indian War - Game 3 Setup

This week, I will be playing out the third and final game in my French and Indian War mini-campaign, which I began a few weeks ago. Details about the campaign and its progress can be found in my previous posts.

British units crossing the bridge.

The campaign had began with promise for General William Colchester, commander of the British forces in the region. With a surprise advance, his troops with naval support had secured the vital river crossing near the settlement of St. Paul, enabling British forces to march along the coast toward Fort Robert.

However, French General Lucien Duvall had used the available time wisely. Fort Robert had long fallen into disrepair, so the general had organised his men and oversaw the repairs and building of additional fortifications. When the British assault came, the French were ready and the attack which was repulsed. General Colchester was forced to withdraw.

Faced by this unexpected setback, General Colchester regrouped his battered forces. His original plan to march on Fort Orleans and lay siege to it was no longer feasible. Instead, he turned his attention inland, aiming to seize a strategic river crossing downstream from Fort Orleans, one that could serve as a foothold for future operations.

The campaign map show progress so far.

The game will be using scenario 5 (Bridgehead) from the book One-Hour Wargames (OHW) by Neil Thomas. During the game units from both armies will arrive on various game turns. The British from the south and the French from various points which are decided by the dice.

A close up of the campaign map.


The tabletop setup. French units will arrive in three groups at points A, B, or C depending upon a dice roll. The British units will arrive at point D.

Order of Battle...

British Forces:

  • 6 x Regular Infantry Units
  • 4 x Militia Units
  • 2 x Artillery Units

French Forces:

  • 6 x Regular Units
  • 2 x Militia Units
  • 4 x Indian Warrior Units

For the game I am using a modified version of the One-Hour Wargames horse and musket rules. Each side is has a trusted captain and a general, both of whom provide special re-roll abilities. The trusted captain is assigned to a single unit for the entire game and allows that unit to re-roll any combat dice. However, if a 1 is rolled on the re-roll, the captain is wounded in the action and takes no further part in the battle. The general is free to move between units and can force the opposing player to re-roll their combat dice if they are attacking a unit he has attached himself to. If a 6 is rolled on this re-roll, then the general suffers a mishap and must retire from the field.

Victory Conditions...

By the end of turn 15, the British can claim victory if there are no French units within 12 inches of the crossing. If there are any French forces are within that distance, then the victory goes to the French.

The game begins with two British units across the ford.

Everything is now ready for the deciding game of this mini-campaign.