Having completed a wooden block windmill a started painting a couple more of the buildings I had undercoated.
 |
| A 17th Century House Completed |
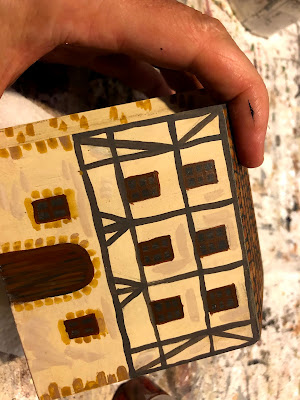
As I went through the painting steps of these very simple wooden block buildings, I took photographs of the process for those of you who may be interested.
 |
| The building features are pencilled in and the roof painted a dark grey with some brown added |
 |
| A very light brown wash is applied |
 |
| Doors and windows are painted a dark grey |
 |
| Wood timbers are painted dark grey again. I mixed up enough for the roof, windows and timbers. |
 |
| A red-brown is dabbed on the roof, keeping them in rows as much as possible. |
 |
| The cream colour was added to lighten the red-brown and most, but not all the gaps, are filled in. |
 |
| A yellow-orange dab is added. Making sure not to over do it with this colour. |
 |
| Corner stone and stonework around the lower doors are added. Again these are just dabbed on. |
 |
| Windows and door are painted on with slightly watered down colours and over painted again where necessary. |
 |
| Addition details are added to areas with flat colour just to give some colour texture. |
 |
| The completed buildings |
They're great Peter, I once made some similar ones from a 3x2 length of wood, they were not as good as yours though. I gave them to my son when he was little to go with his Thomas trains and toy cars.
ReplyDeleteI use a mitre saw which sets the angles and holds the wood in place while I saw. This enables me to get the angles cut cleanly and accurately.
DeleteHi Peter- Your certainly very Artistic and Talented shown by the results of your Wooden Buildings- superb going there. Regards. KEV.
ReplyDeleteHi KEV, I do enjoy working with wood. Thanks, Peter
DeleteTerrific terrain!
ReplyDeleteThank you, a few more to paint and I should have all the 18th century buildings I will need.
DeleteThey look great.
ReplyDeleteThe final coat of PVC glue to protect the paintwork also brings out all the colours. Thanks.
DeleteVery effective once again Peter and nice to see how you went about painting them.
ReplyDeleteThanks. It quite surprised me the number of steps involved when I was uploading the photos.
DeleteFantastic buildings Peter!
ReplyDeleteThanks. It took a couple of goes to figure out the best approach.
DeleteThose paint dabs on the roof are hugely effective. Top job.
ReplyDeleteIt is surprising how it all comes together at the end as the layers of dabs builds up. Thanks.
DeleteThese look charming and very effective!
ReplyDeleteSimon
Hi Simon, thanks. Only a few more to complete.
DeleteTell me, do you have a design background Peter? I ask because all your projects seem to have a cohesiveness about them. Each of the elements (buildings, terrain, figures) fit together well in terms of look and feel, and all have a certain robust functionality. A well considered scheme, worn lightly.
ReplyDeleteNot from a career perspective, just a few evening art classes a while back and also I find it interesting to scratch build wargaming stuff. Thank you kindly.
DeleteCool, and cheap. My style of gaming to a t! :-)
ReplyDeleteRegards, Chris
There is always something inherently pleasing about making something both practical and cheap. Thanks.
DeleteLovely! Very effective.
ReplyDeleteThank you kindly.
DeleteLook excellent.
ReplyDeleteThey also suit the look (I'm sure my artsy daughter would say the 'aesthetic') of the table and battle layout.
Excellent stuff - I may be copying some of your tips :)
Painting them in groups helps with keeping a constant look. Thanks.
DeleteInspired work! I made a whole set of Balsa buildings when I first started in the hobby 40+ years ago. and they still look pretty decent!
ReplyDeleteThose balsa wood building were very practicable and useful.
Delete