Wednesday 31 August 2022

Two tomes arrive and two medieval units painted

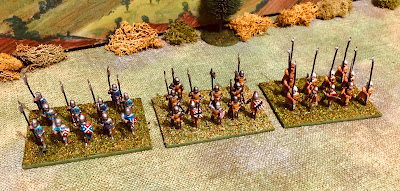
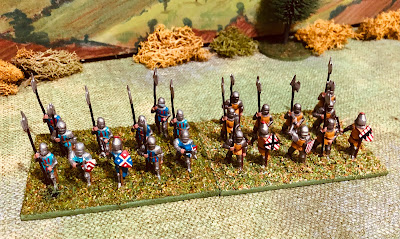
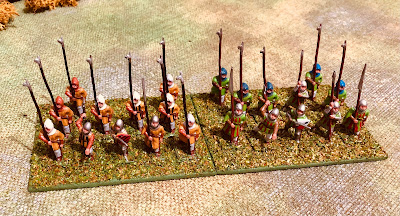
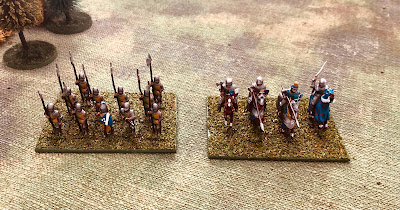
Steady progress with the medieval units with another two leaving the painting table. They are all old secondhand Minifigs which I have repainted with colours took my fancy.

Latest units to leave the painting table.

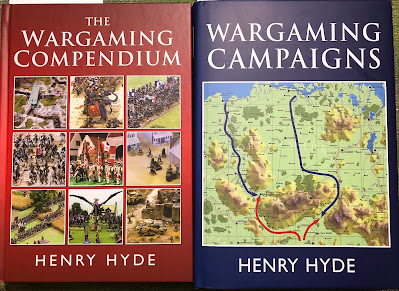
Two tomes of arrived in the post today, a total of 4 kilograms of wargaming goodness. The compendium was discounted and I could not resist buying it when I purchased Wargaming Campaigns.

Recent arrivals to join the wargaming library

Wargaming Campaign Contents

I doubt I will read the books from cover to cover, but will select and read the individual chapters overtime. Two chapters of immediate interest from Wargaming Campaigns are:

  • With or without umpires - or opponents
  • War at sea

Saturday 27 August 2022

WW1 Palestine Campaign - Turn 3 - Game 2

This is the second game of campaign turn 3. It follows on from the Egyptian Expeditionary Force's (EEF) first campaign setback where they failed to achieve their objectives. This game is based on One-Hour Wargames scenario #21 "Twin Objective" which has the EEF in February 1917 trying to breach Turkish defences somewhere between Gaza and Beersheba line. 

The Plans...

Turkish plans are to simply defend and hold the hilltop and town. They have dug some trenches next to the town and plan to use their available aircraft sorties to disrupt attacks on the hill.

The EEF plan is to start with a bombardment on the hilltop and attack this with an infantry unit and supporting machine gun. All other units are to assault the town along with any available aircraft sorties. Both the town and hill objectives need to be captured for victory within 15 turns for a successful breakthrough.

Egyptian Expeditionary Force planned advances on the town and hill objectives.

The Battle...

The opening bombardment by the EEF turned out to be limited due to supply issues and only the hill was bombarded. This misfortune was soon compounded by a Turkish aircraft sortie as their infantry began their advance towards their objectives.

An early bombardment of the hilltop position.

A Turkish aircraft disrupts the advancing EEF infantry.

The attack on the town began with a bold cavalry charge on the trenches. While the cavalry were being repulsed the infantry took up their positions to begin their assault. They were supported by aerial attacks and while the Turks put up a good defence the town eventually fell to the EEF (on turn 12).

The assault on the town begins with a cavalry charge.

Infantry move into position and the cavalry retire after being repulsed.

An aircraft supports the attack.

The town is taken by EEF forces.

The attack on the hilltop did not progress well. Multiple Turkish aircraft sorties caused the attack to stall. Support did eventually come from the depleted cavalry who dismounted to join the attack. Other units from those assaulting the town were also redirected, but arrived too late to make a difference and the Turkish defenders held on for their second victory.

Dismounted cavalry join the attack on the hilltop.

Additional EEF infantry join the attack but time runs out to take the hill.

After this Turkish victory campaign turn 3 will now progress to a third game. 

Sunday 21 August 2022

WW1 Palestine Campaign Turn 3 Game 2 Setup

In game 1 of the campaign's third turn the Egyptian Expeditionary Force (EEF) failed to achieve the objective in their first battle against a fortified defence. Until the EEF win a battle they cannot progress to the next step of the campaign. The second game in this current step selected is One-Hour Wargames scenario #21 - Twin Objective. (Details of the campaign rules can be found here.)

Campaign Map - Having failed to win the first battle in step 3, the EEF will have to fight a second battle.

The EEF choose to spend another month preparing for this battle which will allow them to randomly select a second event. This will progress the campaign calendar to February 1917. The Turks already benefit from having one unit in trenches for all battles at this step of the campaign due to the extensive defences they establish between Gaza and Beersheba.

Tabletop map - showing the Turkish defences. The hilltop is rocky and is considered cover for this game.

The Turkish order of battle:
  • 2 x Infantry units
  • 1 x Artillery unit
  • 1 x Mounted Infantry unit
The Turks will benefit from one unit being in trenches and also an aircraft from the event table. 

Turkish Forces

The EEF order of battle:
  • 4 x Infantry units
  • 1 x Infantry units with supporting machine gun
  • 1 x Cavalry unit
The two events benefiting the EEF are a pre-battle bombardment and also an aircraft.

EEF forces (they are missing one infantry unit in this photo).

The tabletop was setup with the two EEF objectives the have to hold, the town and hilltop.

Tabletop setup

EEF forces deployed.

Turkish mounted infantry hold the hilltop one of the EEF objectives. Units on the hilltop are able to claim cover

Turkish forces in and around the town, the EEF second objective.

All is ready to play the game.

Friday 19 August 2022

A Remote Wargame - The Battle of Bassignana 1745

This Friday I played a remote game, the Battle of Bassignana, hosted by Jon of https://palousewargamingjournal.blogspot.com. From memory this is the fourth remote game I have played with Jon who has an excellent setup with cameras and he is well practiced in hosting these games. The last game we played was some 6 months ago - time certainly flies.

Initial positions with the French-Spanish attacking forces at the bottom and the Austrian-Piedmontese defending forces scattered across the hills. (Photo and labels by Jon as part of the briefing notes.)

The briefing notes from Jon (including the setup photograph above) has the battle beginning with the Austrian-Piedmontese army thinly positioned strewn along the high ground on the banks of the Tanaro River. The French-Spanish are lined up and ready to attack from the south. 

Historically, the French-Spanish force, commanded by Maillebois, were victorious. They attacked the Austrian-Piedmontese centre positioned on the hill and after some tenacious defence the Austrian-Piedmontese position was split and forced to retire to avoid being trapped.

No game photographs, but the red arrows show the advances made by the attacking French-Spanish forces.

Playing the French-Spanish I opted for the historical approach of attacking the centre hill.  The left side of the attack was halted by Piedmontese guard and grenadier units, but elsewhere the right side of the attack made early and steady progress assaulting the centre hill and Bassignana. By game turn 7 the French-Spanish had secured the centre hill and Bassignana town. The remaining Austrian-Piedmontese forces were mostly in disarray.

The position at game's end

After game discussions...

The defending Austrian-Piedmontese are always in a difficult position with no obvious defence other than hold on and hope. Their best guard and grenadier troops are on their right flank rather than the centre and a little way off from the main attack.

The rules used were Jon's variation of "Fields of Honor" wargame rule which dice to determine the order of play and tokens are drawn for activation. When you side's token is drawn you can activate any one of your commands. At the game's mid-point Jon mentioned grabbing the initiative can be quite key. This was quite prophetic as I was to gain the initiative in the next two turns and was also able to move multiple commands in succession. This allowed for some very successful French-Spanish assaults which finally broke through in the centre and left wing and was the game's turning point.

One thing I have noticed in the handful of remote games I have played. Is I tend to be more decisive than with face-to-face games. I think this may be due to not always being able to distinguish the tabletop units, other than artillery, cavalry, and infantry. You just see the block of troops and when attacking a position you get all units to pile in, no finessing here.

A thank you to Jon for hosting such an enjoyable game. Three hours went by very quickly.

Next up...

The next post will return to the WW1 Palestine campaign where the Egyptian Expedition Force recently lost its first battle trying to breakthrough the Gaza defensive line and are now regrouping for a second go.


Sunday 14 August 2022

A busy weekend painting

Three bases of generic Medieval troops left the painting table this weekend. Most of the miniatures are old Minifigs I picked up secondhand a few months ago and recently popped into the paint-stripper to clean up. They are all block painted which is increasingly my style of painting. This way they get painted quickly  and on to the tabletop where they look fine. One of the reasons for painting up these additional bases is I am treating two bases as a unit. I prefer the look of a larger block of figures.

Three units painted this weekend

A closer view

This weeks yeomen bases added to last week's painted yeomen.


Saturday 13 August 2022

The Battle of Auberoche 1345 and some medieval rule changes

Over recent weeks I have been gradually painting a few more additional units for my generic Medieval armies. Additionally, I have been messing around with activation modifications to the One-Hour Wargames (OHW) Medieval rules. The draft of these can be found at the end of this post. So the time seemed right to consider another scenario for the tabletop. Searching through "Wargaming Ancient and Medieval Period" by Donald Featherston the Battle of Auberoche looked quite interesting, and also a bit of a challenge to wargame given the disparity between the force numbers on each side. 

Set during the Hundred Years war, the Battle of Auberoche was fought on 21 October 1345 between an Anglo-Gascon raiding force of 1,200 men commanded by Henry, Earl of Derby, and a French army of some 7,000 commanded by Louis of Poitiers whose forces were besieging Auberoche.

Tabletop with initial unit deployments

Wargaming Ancient and Medieval Period

The Earl of Derby gathered together a force of 400 men-at-arms and 800 archers to raid the french positions, catching the unsuspecting french while in camp early evening. The Anglo-Gascon archers emerge from the woods and fired into the camp while the Earl of Derby and his men-at-arms charged the French who were desperately trying to prepare for battle. The beleaguered garrison see the attack charged out to join the battle with every available mounted men-at-arms. French were never able to recover from the initial surprise and had to flee the battle.

The French camp

Anglo-Gascon forces appear from the woods

Having read the chapter about the battle I remembered there was a scenario in One-Hours Wargames (by Neil Thomas) roughly based upon the battle (#22) called Ambush. It is one of the scenarios from the book I have yet to play, so I setup the tabletop. To win the Earl of Derby's force of 4 units must eliminate all 6 French units by turn 15.

I opted to choose the order of battle rather than have it randomly created:

Anglo-Gascon Force

  • 2 x Bowmen
  • 2 x Mounted men-at-arms
One mounted men at arms units is positioned in the castle as the besieged garrison which cannot be attacked. They can leave the castle on turn 6.

French Force

  • 1 x Mounted Men-at-Arms
  • 1 x Foot Men-at-Arms
  • 2 x Bowmen
  • 2 x Yeomen/Levy

To factor in the element of surprise French units cannot move or shoot until turn 3, and keep to a minimum the number of men at arms units using yeomen units as many French units were unable to put on their armour.

The Game...

The raiding Anglo-Gascon force under the command of Earl of Derby moved quickly to take advantage of the delayed reaction of French forces until turn 3. Their archers eliminated one unit of yeomen and inflicted many hits on another yeomen unit. The Earl of Derby charged towards their unorganised counterparts.

With all French units facing the castle, the bowmen and mounted men at arms appear.

On turn 3 the French command were reorganising their lines and quickly realised they were on the verge of having half their force dead or routed. The biggest threat was the mounted men at arms who were making short work of their counterparts. To counter this man at arms on foot were positioned to continue the melee.

The French begin to organise their defensive lines after being surprised.

Men at arms on foot prepare for the upcoming melee.

Just as the French had stabilised their position, their foot man at arms had forced the Earl or Derby to retire and their crossbowmen had eliminated one of the Anglo-Gascon bowmen units, mounted men at arms charged out from the castle to join the fray. They charged into the French men at arms who turned to receive them. The Earl of Derby was able to regroup and charge back into the melee, which turned the tide  in favour of the earl's forces.

Just when the French think they have seen off the raid, the castle garrison charge out.

The French men at arms stand their ground, but they will soon be assailed on all sides.

Having lost their men at arms and attached commander the remaining French crossbow unit began to retire from the field of battle harried by two exhausted mounted units.

History repeated itself and a victory to the Earl of Derby and his Anglo-Gascon raiding force.

Draft rules used...

The game used a variant of Neil Thomas’ One-Hour Wargames Medieval rules which include the use of an activation mechanism for movement, shooting, and combat. In combat any failed activation in forces a unit's retreat. As the game progresses and unit hits mount, the chances of activation decrease, and can be further compounded if a commander is lost.


Another change was to the movement and shooting allowances, which were increased from 6" to 8" and 12" to 16". The One-Hour Wargame scenarios are set for a 3x3 foot tabletop and I tend to use a 5x4 foot tabletop so the increased allowances reflect the larger playing area. Additionally all my units have two bases with a combined width of 8".

Units Types

The game uses the following units types:

  • Yeomen
  • Mounted Men at Arms
  • Men at Arms
  • Bowmen (longbow and crossbow)
  • Commanders (attached to a mounted or foot Men at Arms)

All units need to be consistently based with the exception of Commanders who can be an individual figure.

Sequence of play

Players take turns trying to activate their units. Once they have attempted to activate all their units the other player has their turn to activate.


Activated units can perform one of the following:

  • Move
  • Shoot
  • Melee (Hand-to-hand combat)

To activate a unit roll a D6 and multiply the score by 4. If the score is greater than the hits taken by the unit being activated, the unit performs the action. Units that fail an activation test are in disarray and cannot move, shoot or engage in combat. 


The activation D6 score is reduced by 1 when the army’s General is lost.


The game ends after 15 turns.

Movement

Movement Allowances. Units may move up to the distances listed below during their turn:


Foot units - 8”

Mounted units - 16”


Turning. Units turn by pivoting on their central point. They may do so at the start and/or end of their move.


Terrain. Units are affected by terrain as follows:


Woods. These are impassable to all units

Towns. Mounted units may not end their moves in a town.

Marshland and lakes. These are impassable to all units

Rivers - These may only be crossed via bridges and fords

Roads - Units moving by road increase their movement distance by 4” if their entire move is spent on the road. This bonus may not be received if charging.


Interpenetration. Only Skirmishers may pass through other units (and vice versa).


Charge Moves. Charges are resolved by moving the attacking unit into contact with its target. They are subject to the following restrictions:


Turning. A charging unit may turn once, at the start of its move. This evolution may not exceed 45 degrees.

Limited Engagement. Only one attacking unit may contact each face of the target (these being Front, Left Flank, Right Flank, and Rear).

Fighting. Combat is resolved during the Melee Combat phase.

Covering Fire. A unit cannot be charged if it has been fired upon by another unit during a turn.

Shooting

Only Bowmen may shoot, the procedure for which is as follows:


Adjudge Field of Fire. Units may only shoot at a single target within 45 degrees of their frontal facing.


Measure Range. Bowmen have a range of 16”.


Assess Casualties. Bowmen roll a D6. The final score gives the number of hits the target acquires, which is modified as follows:


Cover. Units in woods or towns only suffer half the registered number of hits (any fractions are rounded in favour of the unit shooting).


Armour. Men at Arms on foot acquire half the number of hits ((any fractions are rounded in favour of the unit shooting).

Melee

The procedure for Hand-to-Hand Combat is as follows:


One sided combat. Units only inflict casualties during their own player turn.


Assess Casualties. Units roll a D6. Men at Arms on foot and Yeomen use the unmodified score, Mounted Men at Arms add 2 to the result, and Bowmen subtract 2. The final score gives the number of hits the target acquires, which is modified as follows:


Terrain Advantage. Defenders in woods, towns, on a hill, or defending a river crossing, only suffer half the indicated number of hits (rounding any fractions in favour of the attacking unit).


Armour. Men at Arms on foot acquire half the number of mandated hits (rounding any fractions in favour of the attacking unit).


Flank of Rear Attacks. Units engaging the enemy flank or rear +2 to the registered number of hits.


Movement Within Combat. Hand-to-Hand Combat only concludes with the elimination of one of the contesting sides or a forced retirement due to a failed activation. Units may however turn to face an attack upon their flank or rear, but only if they are not simultaneously being frontally engaged.


Failed Activation Within Combat. Any unit already in combat failing an activation test, must retire a 12" and face away from the enemy. Any blocking friendly units are pushed back with the retiring unit. If retirement is blocked by impassable terrain or enemy units, then an additional 2 hits are taken for every 4" they cannot retire.

Elimination

Units are eliminated upon the acquisition of more than 16 hits.

Commanders

Commanders must be attached to a mounted or foot Man at Arms unit, and remain attached throughout the game. If the unit is eliminated, then they are eliminated too. Units with an attached Commander are able to re-roll their activation and combat dice, but must accept the scone score.


The loss of a commander reduces all activation dice roll scores by 1.

Monday 8 August 2022

WW1 Palestine Campaign - Turn 3 Game 1

This game report is from my ongoing WW1 Palestine campaign turn 3. The setup steps for this game can be found on the previous post.

Background

Having successfully pushed Turkish forces out of the Sinai the Egyptian Expeditionary Force (EEF) paused for three months to extend their supply infrastructure and prepare for the move into Palestine. Air reconnaissance confirmed that the Turks had not been idle and that they had developed defensive positions along the Gaza to Beersheba line. In December 1916 EEF Headquarters plan for an attack around the Gaza end of the defensive line on two fortified positions.

Reconnaissance Flight

The plan

The attack would be delivered in two waves. The first attacking wave, supported by an early morning barrage, would be directed at the redoubt and to remove the threat of a counter attack posed by Turkish troops between the redoubt and town. The second attacking wave would then consolidate and hold the redoubt and assault the fortified town. Taking both objectives are required to breach the defensive line and for victory.

A sketch of the tabletop with the planned wave 1 moves in red and wave 2 in blue.

Each EEF Wave would consist of:

  • 5 x Infantry units (2 with supporting machine guns)
  • 1 x Artillery unit
The first wave will retire in good order before the second wave advanced. (This follows the approach of the selected One-Hour Wargames Scenario - "Fortified Defence").

The Turkish forces defending this region of the Gaza-Beersheba line consist of:

  • 4 x Infantry units (one of which can benefit from being dug in)
  • 1 x Cavalry unit
  • 1 x Artillery unit
  • 1 x Armoured Car (added with campaign chance event)

Aircraft from both sides are operating in the area (game chance cards are in use) and will strafe enemy units in the open.

Wave 1

Following the initial barrage wave 1 advanced on the first objective, the redoubt, which has laying down very effective fire and providing stubborn resistance. Additional EEF units joined the assault and the redoubt finally succumbed. A late counterattack by Turkish infantry supported by an armoured car was repulsed before the first wave retired at noon before the second wave began their advance.

Wave 1 begins its assault on the redoubt.

The redoubt is taken and Turkish infantry counter attack.

The redoubt safely in EEF hands.

Wave 2

As the second EEF wave advance Turkish aircraft appear, strafing and bombing the advancing infantry. Momentum in the centre was slowed as Turkish artillery added to the disarray caused by the air attack. On the wings EEF infantry successfully advanced to occupy the Redoubt and attack the fortified town from an area of broken ground.

In the centre an artillery duel commences while the infantry try to make up for lost time, but they were delayed further as Turkish cavalry posed a threat. Finally, the Turkish artillery are suppressed, but not before evening descends and time runs out for the EEF to take the fortified town.

Wave 2 readies for its advance.

The advance is hindered by Turkish aircraft sorties.

Turkish cavalry present a threat in the centre.

EEF fail to take the fortified town.

Summary

A Turkish victory! This was always going to be a tough ask for the EEF, taking two fortified positions. Wave 2 progress suffered from not suppressing the Turkish artillery during Wave 1. In addition some very timely Turkish air sorties created stumbling blocks for the advancing infantry.

EEF infantry holding the redoubt, the only objective taken.


Friday 5 August 2022

WW1 Palestine Campaign - Turn 3 setup

So far the Egyptian Expedition Force (EEF) over 6 months have advanced across the Sinai (steps 1 and 2 on the campaign map) and are now ready for the next stage of the campaign - the move into Palestine. The Turks have defensive lines prepared (shown by the red squiggly line on the campaign map) between Gaza and Beersheba. This will means they will benefit by having one of their units dug in with trenches for all their games.

Full details of the campaign rules can be found here.

Campaign map and time line.

The EEF need to win a battle in each step of the campaign to allow them to progress to the next step. Three scenarios from One-Hour Wargames (OHW) have been selected for each campaign step which try and reflect the stage of the campaign. 

For the first game of this step the dice decided scenario #14 - Fortified Defence. An interesting scenario, and one that I have not yet played. The EEF will be attacking the Turks in fortified positions and will be able to refresh all their units once during the game. Essentially they get two attacking waves and have to capture both fortified positions for victory. I am looking forward to this game as it should be quite challenging, especially as the Turks will also get additional trenches for one of their units.

Campaign steps and their associated OHW scenarios

Both forces determine their campaign chance event. The EEF will benefit from an initial bombardment and the Turks will have the support of an armoured car.

Campaign chance events

The 5x4 foot tabletop is prepared and the Turks deployed. The Turkish order of battle diced from the OHW army composition table:

  • 4 x Infantry units (one of which can benefit from being dug in)
  • 1 x Cavalry unit
  • 1 x Artillery unit
  • 1 x Armoured Car (added with campaign chance event)
The fortified positions will get an additional attack until they are lost. To remind myself of this I have added a machine gun base to each position.

The tabletop is prepared and Turkish units depolyed.

A view from the redoubt which I places on a hill.

The fortified town with additional trenches to defend against attack from the broken ground.

The EEF order of battle for the attacking waves:

  • 5 x Infantry units (2 with supporting machine guns)
  • 1 x Artillery unit
At the start of the game the EEF can bombard Turkish positions with 3 artillery attacks because of the bombard campaign chance event. At any point in the game the scenario allows them to withdraw (remove) all their units from the tabletop and start again with their order or battle refreshed for the second wave of the attack.

Egyptian Expeditionary Force units

So everything is ready for the game to begin! I am continuing to use a a variation of One-Hour Wargames Machine Age rules by Neil Thomas modified in include a unit activation rule and to have cavalry charges (details of rules).