Showing posts with label Medieval. Show all posts

Thursday, 3 April 2025

A Wars of the Roses remote game

Last week, I was able to play a remote wargame with Jon from Palouse Wargaming Journal, where we tested some rules he has been developing for his War of the Roses (WotR) collection. It was a real treat, especially after spending the previous few days under the weather with a cold. Fortunately, I was on the mend in time for the game. Jon has written up a full game report, which you can find here. Below are a couple of close-up photos showcasing his wonderful WotR collection.  

A Battle prepares to engage…

The archers retire and in go the men at arms.

While we did not use all of Jon’s rule ideas in this session, he seems to be gradually incorporating them as he plays more games, and this was also the first time for me with these rules and the WotR. From my perspective the rules effectively conveyed the tactical limitations of the period. For instance, one rule mechanism which I really liked was to do with the changing of a Battle’s orders which is influenced by the aggressiveness and quality of its leader. This can, and did in the game, result in a Battle holding its ground defensively when you really want it to advance and engage the enemy, and another occasion where a Battle remained on the attack when it would be much wiser to pull back and reorganise the troops.   

The current distraction.

It is tempting to explore how the rules, especially the order mechanism, would work in a Hundred Years’ War game using my old Minifigs. However, I have already been sidetracked this week with some Sci-Fi gaming, using the same One-Hour Wargames scenario (#19: Static Defence) as my last French and Indian War (FIW) game. As for the FIW campaign, my plan is to return to it this weekend for the third and final, decisive game in the mini-campaign.

Saturday, 30 March 2024

A brief review of Arrowstorm rules and battle report

I recently purchase the Arrowstorm medieval rules written by Daniel Mersey, better known for his work on the Lion Rampant rules. These rules are available at a reasonable price ($9.47) on Wargame Vault under the publisher "Daniel’s Game Emporium". You just have to download and print. The design notes which are many, tabletop setup, rules, army lists, and quick reference take up 34 pages.

What caught my interest in these rules was the activation system which uses a tactics chart, and they are intended for a fast play game. Interestingly, the rules themselves were based upon some rules used for recreating the Battle of Evesham, 1265, and published previously in Military Wargames magazine (issue 387). These are also included in the 34 pages.

The tabletop prepared and the armies deployed.

The rules downloaded and printed. There was only one colour page, the rest being black and white and not heavy on the use of ink. 34 Pages in all.

The rules use an offset grid, with each square needing to accommodate up to 6 units (3 friendly and 3 enemy units). Initially, this posed a challenge for me as my units were based on two 4-inch by 3-inch stands and I play on a 6-foot by 4-foot tabletop. After experimenting with various approaches and square sizes, including halving my units to a single stand within the grid, I ultimately decided to adopt a free movement system. This meant that units needed to operate in a cohesive block with other units, so 3 units operating together were placed one behind each other. On the tabletop this gave the impression of the armies being organised into battles, provided a medieval look to the game.

The game uses an offset square grid. But I was able to adjust the rules to use free movement as my unit basing was too large to really accommodate up to 6 units in a square.

The deployed armies into blocks (or battles). Most of the blocks have 2 or 3 units.

The main reason behind my purchase of this Arrowstorm was its activation system, which revolves around a tactics chart. This chart comprises 12 tactical options, such as movement, battling, shooting, etc., with players taking turns to select their preferred tactic. Additionally, the inclusion of a couple of special tactics unique to each army list adds some characteristics to the armies; for instance, "arrowstorm" is a special tactic for the English Hundred Years War armies giving a bowmen unit extra benefits when shooting. 

Players are limited to choosing a maximum of 4 tactics in most cases. I found the whole tactical chart mechanism most enjoyable and intriguing, for example:

  • Selecting the “seize the initiative” tactic, allowing you to activate a unit or group of units first, but at the expense of an activation. 
  • Choose a tactic that might not directly benefit your army but by selecting it will hinder your opponent's choices.

The other feature of note are that activations apply to the square containing the units, not the individual unit, although you can just activate one unit if you choose to do so. For my game the activation is applied to groups of units. Units or groups of units can be activated more than once during a game turn, so units may end up shoot or moving twice.

Tactics being selected on the tactical chart. Generally 4 tactical are selected, but this can be reduced or increased in certain situations.

The combat mechanics are straight-forward, each unit type has an assigned a battle rating which dictates the number of combat dice rolled. Battle rates are reduced as units accrue hits. Typically, groups of units in a square engage in combat rather than individual units. In most cases players are allowed to allocate any hits among their units as they see fit. Moreover, special tactics and commanders have the ability to increase or decrease the number of dice rolled in combat. 

A Battle report…

Arrowstorm provides rules and army lists with a unit point system for a player to select their army and setup the tabletop. For this test game the following order of battle was used.

French:

  • 2 x Mounted Knights
  • 2 x Mounted Sergeants
  • 3 x Crossbows
  • 1 x Foot Knights
  • 2 x Spears

English:

  • 1 x Mounted Sergeants
  • 3 x Longbows
  • 3 x Foot Knights
  • 2 x Spears

The French were formed into 4 battles with cavalry positioned on each flank and the English into 3 main battles with a single units of mounted sergeants on their left flank.
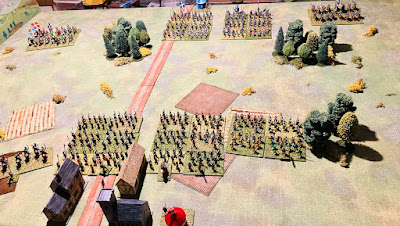
The initial deployment. The English army is deployed in front of a town.

Turn 1 - The French seize the initiative, pushing forward their mounted knights along with one of their central battles containing two crossbow units. Volleys of arrows are exchanged, resulting in a hits allocated across the units within each battle. (Note - the English seized the initiative for the next game turn.)

Turn 1 - both sides advance.

Turn 2 - After seizing the initiative, the English unleash an arrowstorm upon the French mounted knights, inflicting casualties, although the knights persist in their charge. Nevertheless, significantly weakened, they are eventually eliminated at some cost by the English battle comprising archers, spearmen, and foot knights. On the opposite flank, the French commander leads his troops forward, resulting in a swift clash with the opposing English battle, with casualties being sustained on both sides.

Turn 2 - The French mounted knights are eliminated while two battles engage in melee.

Turn 3 - The French commander leading his troops successfully eliminated the opposing English battle in melee, all the while both armies continuously showering their opposition with arrows. The English make no manoeuvres, opting instead to focus on rallying their troops.

Turn 3 - The French right battle eliminates an English battle.

Turn 4 - The English army was happy to persist in shooting with their remaining bowmen, while the French, somewhat belatedly, advanced their mounted sergeants and engage in some rallying efforts.

Turn 4 - The French try an reorganise and bring up their mounted sergeants while under constant shooting by the English bowmen.

Turn 5 - Observing the battle's momentum was favouring the English and their defensive strategy, the French commander initiates an assault with his significantly diminished battle. However, the opposing English battle, under the leadership of their commander, easily repels the impulsive attack. Witnessing their commander's downfall, the French forces withdraw, conceding victory to the English.

Turn 5 - A final assault by the French is not successful and the English triumph this day.

A most enjoyable first game and all completed after 30-40 minutes.

Thoughts on the first game…

I found the tactical system to be most enjoyable as it introduces a planning aspect to the start of each game turn.

Following a single play through, referring to the rules became minimal, aside from checking on the  special tactics.

The use of free movement and unit groups appeared to work. One restriction I implemented was that when a group of units is in contact with another group (similar to opposing units occupying the same square in the rules), you can only add to your group if it comprises fewer than 3 units, and flanking or rear attacks are not permitted. Similar to squares, this requires careful consideration of the unit composition within your groups (battles).

The combat mechanics, both shooting and melee, are straightforward and abstracted (as stated in the game’s design notes). However, they tend to result in rather bloody and decisive encounters with few prolonged engagements. This can give a significant advantage to units striking first. Although, if so desired, the rules could be easily be tweaked to provide less decisive outcomes.

The tactics chart, particularly its restriction of activations, compels players to maintain their units grouped into cohesive battles. Dividing units too thinly can result in a significant portion of the army remaining inactive in the game, and if attacked they would put up little resistance. 

I found these to be a very interesting set of rules, particularly the tactic chart rule mechanism, all in all very clever. The set of rules is part of the “You Command” series of rule by Daniel’s Game Emporium which offers other period Dark Ages and WW2 using similar tactical chart approaches.

It is very tempting to get some 6mm or 10mm medieval figures and create a small footprint game for the dining room table. Says me reaching for the credit card.

Saturday, 2 December 2023

A surprise dice bag

In my recent medieval wargames I've been using a dice-pull approach for activation of units organised into “Battles”, and have been using a repurposed bag to store and draw the dice from.

A medieval game underway.

Anyway I am no longer lacking a dice bag. My wife has stitched together a very handy, and themed, dice bag for me. The bag also includes a toggle to hold the draw-strings fast so the dice don’t escape when they are not being used.

A new dice bag themed with numbers kindly made by my wife.

Over the past week I have been trying some of the suggestions and ideas made in the comments of the last post (thank you for your insights). In the games played, I have been using single base units, rather than the two base units I often use for the games, allowing me to field double the number of units which are eliminated after taking three hits. This low number of hits allows me to use my homemade cardboard casualty markers to track hits. They are a much better aesthetic than using dice or markers to track hits.

Hits are tracked by cardboard casualties.

Details of how I made the markers are made can be found here.

After quite a few Medieval games I now have an English Civil War game setup for a change of period.

Monday, 27 November 2023

Minifig Medieval Mayhem

This weekend I decided it was time to have a medieval wargame with my old collection of MiniFigs. It seems like it has been a while since these miniatures have graced the tabletop.


A flank attack scenario from One-Hours Wargames is set up.

Minifig cavalry on the charge pay no heed to their hypothetical colour schemes.

Over the past year or so, I've tried various activation systems with my medieval games, where units roll dice to determine if they can activate. The required score varied depending on the number of hits they have taken. This system has worked well using a variation of One-Hour Wargames rules where the games have 6 to 8 units per side. However, this weekend, I wanted to organise the armies into 3-4 commanded groups or "battles” made up of different troop types, which would require a different activation approach.


My usual army organisation based on troop types with each unit consisting or two bases.

The army organised into “battles” with mixed infantry types. Each base is a separate unit.

In recent remote games with Jon of Palouse Wargaming Journal, he uses rules that will often use a dice pull activation system. Where each commander and their associated units are activated when their army's coloured die is drawn from a bag. The turn ends when all dice are drawn. At the start of each turn, the number of colored dice placed in the bag corresponds to the number of commanders in an army. The number of dice used are reduced as commanded groups are eliminated during the game. I enjoyed this activation approach because it creates a level of suspense and encourages decision-making as players try to determine which units to activate first to gain an advantage or hopefully momentum if they successfully drawn twice.


A dice bag was found.

When applying the dice draw activation method in my medieval game, for example, an English army consisting of three "battles" and a commanded group of bowmen would have four red dice placed in the dice bag. While a French army with three "battles" only would only have three white dice placed in the dice bag.

Over the weekend, I tested this activation method in one game and for the following game introduced a variation by incorporating a single green die. When drawn, this green die immediately concluded the game turn. To accommodate the possibility of an early turn end, I modified the combat rules from one-sided melees to simultaneous melees, otherwise some units in melee would not have to opportunity to fight back.


A second game is set up.

Out of the two activation methods, I am favouring the approach that allows all units to activate. One reason for my preference is the scenario where a group of knights initiate a charge towards the enemy army but are forced to abruptly halt due to the green die being drawn in the next turn, leaving them paused mid-charge. I find there are enough challenges with the dice draw allowing the opposing army to a cause interruptions to the best laid plans.


Another close up of a the 1970’s painting style - one figure seems to be wearing a kaftan!


Over this week I will be hopefully playing a few more test games in the evenings before updating my home brew rules with my scribbled notes.

Friday, 4 August 2023

Miserly Medieval Marker Madness

Building on the markers' theme from last week's post about English Civil War out of ammunition markers. This week my focus has shifted to medieval markers as I am try out some medieval rules that involve recording only 2 hits. With such few hits to record provided a perfect opportunity to see what sort of themed medieval marker I could come up with.

To avoid any costs I opted to create some paper markers. I sourced images of some painted casualty markers from the internet, resized and printed them on paper. Then, I stuck the paper to cardboard, cut them out, and shaped them to give them some depth. I am pretty sure I have seen this done before somewhere, I suspect it was in one of Peter Dennis’s Paper Wargaming books or blog, but my searches did not turn up anything. 

An overhead photo of the casualty markers in use

A closer look at the markers after being shaped, The shaping has two benefits, one they do not look so flat, and second they are easier to pick up.

So here is a quick run through on how the casualty markers were made.

The resized and printed images were stuck to cardboard.

Using a grey-green wash I quickly painted around the images. Any excess paint was wiped off. By doing this I do not have to be too precise when cutting out the figures.

The figures are cut out.

I found an old modelling tool with a rounded end to be best for shaping the casualty figures.

Using a surface with a little bit of give, I place the figure face down and use the modelling tool to push down and shape the figure.

The after and before shaping.

The collection of casualties

A couple more photos of the casualty markers in use.

A unit with two hits

The look on the tabletop with the markers.

The cost of this experiment is $1 or $2 for the colour printing as I already had the glue and the cardboard was from food packaging.


Saturday, 17 December 2022

Remote Game - Battle of Auberoche, 1345

This week I was able to host a remote war game with Jon of Palouse Wargaming Journal. This was a great pick up for me, as the previous weekend I had caught Covid-19 and had spent this week recovering. Fortunately the scenario - the Battle or Auberoche, 1345 - had been planned and written up prior to becoming ill.

Background

A French force of 7,000 is besieging the castle of Auberoche held by a small Anglo-Gascon garrison. The French encampment was divided in two, with the majority of the soldiers camped close to the river between the castle and village, while a smaller force was situated to prevent any relief attempts from the north.


Warned of the siege, the Earl of Derby gathered a force of 1,500 and waited near for reinforcements. As no reinforcements had arrived by October 20th Derby called a council of his officers. It was decided that rather than wait and lose the advantage of surprise, the army would attack immediately and attempt to overrun the main French camp.


Map from “Wargaming Ancient and Medieval Periods” by Donald Featherstone

The attack was launched just as the French were having their evening meal. Complete surprise was achieved. The longbowmen shot from the treeline into the tightly packed French camp. While the French were confused and distracted by this attack from the west, Derby made a cavalry charge with his 400 men-at-arms from the south. The French although superior in numbers were struggling to get into their armour and organise a defence.


The castle garrison realised the position of the French troops and sallied forth with all their mounted men and attacked. This unexpected attack on the French rear caused their defence to collapse and they routed.

The Game

The game is based upon scenario 22 “Ambush” from One-Hours Wargames by Neil Thomas, which is based upon the battle, is played on a 4 by 5 foot area. The tabletop area is dictated by the camera and the amount of tabletop it can cover.


This is the tabletop setup from an earlier game, and if you are now wondering why is he using photos from earlier games? Yes, I forgot to take photos again! Well I took one photo, and improvement on previous games.

Order of Battle…


Deployment

French -  all units must be deployed within 6” of the two tents in a disordered state. 4 units must be positioned within 6” of the west tent.


Anglo-Gascon - One mounted men at arms units is positioned in the castle, while all other units are deployed having just moved out of the woods. The two mounted men at arms with a commander are positioned in the clearing to the south of the woods.


The scenario map showing deployment areas

Special Rules…

Castle - Cannot be attacked and the garrison cannot sally forth until the turn 6.


Surprise - No French unit can activate until turn 3.


Derby’s Charge - The mounted men at arms unit cannot move until turn 3.

Game Length…

15 Turns. The Anglo-Gascon army starts the turn.

Winning

The Anglo-Gascon force must defeat the French by reducing their army to less than 2 units. Failure to do this will constitute a French victory.


The Game Report…

Jon chose the French force and positioned his mounted men at arms furthest away from the woods. While most of the levy units (representing men unable to get their armour) were positioned nearest the woods and castle.

The Anglo-Gascon force having emerged from the woods spent their first 3 turns shooting at the French, quickly eliminating two levy units. Jon started to organise a defensive line of crossbow men and men at arms, while his mounted men at arms moved towards his southern flank.

The Anglo-Gascon bowmen pushed forward and the Earl of Derby’s mounted force charged forward into the hastily gathered French defensive line. The situation for the French was looking rather bleak.


The French position started to stabilise and Jon was able to get his mounted forces engaged in the battle. About the same time a mounted force sallied forth from the castle into the waiting levy. It was around this time the French mounted men at arms started to gain the upper hand and the Earl of Derby fell and was carried from the field of battle.

The castle’s mounted force had by now disposed of the levy, exposing the French rear to attack. The lack of Derby’s command meant the attacking Anglo-Gascon units began to lack motivation (it was harder to activate them after the loss of their commander) not that any French victory was assured. The French defensive line was rather thin and retiring in the face of the bowmen. All their hopes were pinned on their remaining mounted unit which was starting to charge into the bowmen with devastating effect.

The Anglo-Gascon force failed a number of activations and they missed opportunities to follow up on the weak French defensive line. The French seized their opportunity and their mounted unit, lead by their commander, routed the bowmen and the battle was over.

Thoughts

A thoroughly enjoyable game to participate in. One in which I thought I had victory in the bag early on, but Jon was able to muster and steady his troops into a defensive line, then use his mounted units very effectively to turn the game around. A well deserved victory to Jon.

It is an interesting ambush scenario (#22) from One-Hour Wargames. It is a scenario I have overlooked for a long time as I thought it would not be interesting, but having now played it a few times, all medieval mind you, it never ceases to give a good game.


Saturday, 3 December 2022

A remote game and more medieval siege equipment

Friday morning started with a remote wargame, a Jacobite rebellion game, with Jon of Palouse Wargaming Journal (Jon's time was Thursday afternoon). This was the first time I have tried hosting a remote game. For the game I was using just an iPhone and a tripod. During the game the iPhone was often moved during the game to focus in on areas of action, easily done with the tripod which is both light and stable. Google Meet was used for the video connection and the video quality was good throughout the game.


As I was hosting the game, and as my first remote game, I was rather occupied and totally forgot to take any photographs of the game as it progressed. So no battle report. Jon was in command of the Jacobite forces, his Highlanders after being initially delayed by some cavalry were able to charge into my flank and sweep away my remaining Government forces.

The mobile phone tripod worked well being both light and stable.

All being well I will be trying this remote gaming approach again before Christmas holidays arrive.

On the painting and modelling side some more siege equipment has been completed. As with all the siege equipment and castle, the models are simple shapes cut from wood and painted to give the impression of the siege equipment.

A Bombard and Trebuchet leave the painting table.

A Bombard

A Trebuchet

That is about all the siege models I plan to make and I now need to begin thinking about some siege rules.

Thursday, 1 December 2022

Medieval Siege Machines

Over the past few days I have added a siege tower and battering ram for some planned siege games. Here are a few photos. A trebuchet and bombard are next on my list to make.

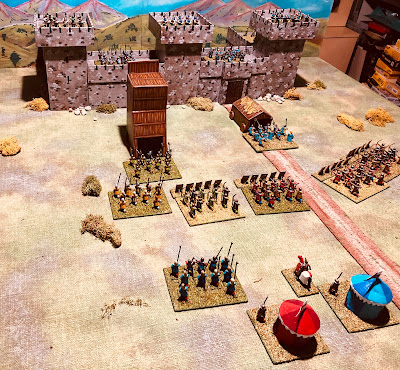
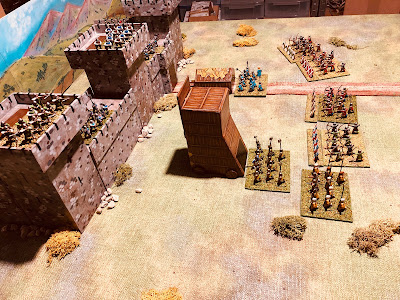
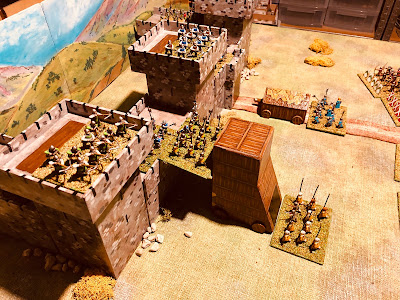
The siege engines approach the castle walls

As with the castle the siege tower and battering ram are made from blocks of wood simply fashioned with all details painted on.

A simple wooden shape was used for the siege tower

An attack on the walls.

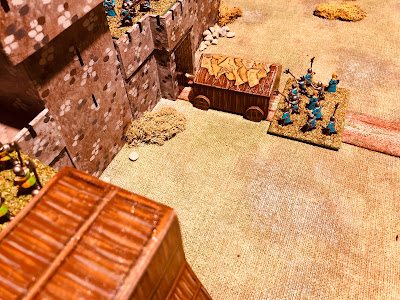
Some animal skins have been added to the roof of the battering ram.

As the siege machines get build I had batter start considering the rules to be used.

Sunday, 20 November 2022

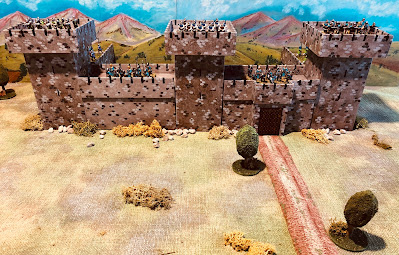
Medieval Castle for some siege games

This has been a very productive weekend of scratch building a Medieval castle. In the back of my mind I have been thinking about playing some siege games and including them into a planned campaign. Lacking a castle and not wanting to spend any money meant scratch building was the only option. Fortunately, I had all the materials I required on hand:

  • 90mm x 90mm wooden post cut into 180mm lengths
  • MDF for the battlements
  • 10mm x 20mm wooden strip for extending the parapet on the bastions
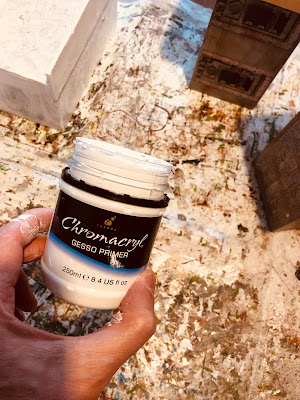
  • Gesso Primer (to disguise failings in woodwork)
  • Grey Paint
I am preparing for some Medieval sieges in the near future.

Most of my terrain is home made and my buildings tend to be blocks of wood with their detail painted on. The advantage of this is approach is I can throw them into a container without worrying about breakages. Some previous examples can be seen here:

Samurai buildings and castle keep.

Saxon and Norman Buildings

General 18th Century Buildings

St Nazaire Raid Buildings

The following photographs show the process used to create the castle.

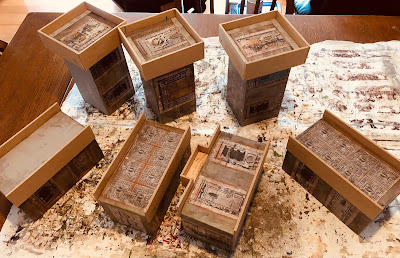
The walls and bastions are made from 90mm x 90mm wood for posts. I had some from a previous and defunct  project already cut. The bastions needed to be a bit wider for my unit's to fit, so to increase the size I added some 10mm x 20mm strips of wood around the top. Finally MDF is added for the battlements.

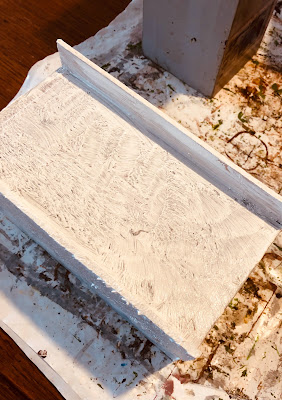
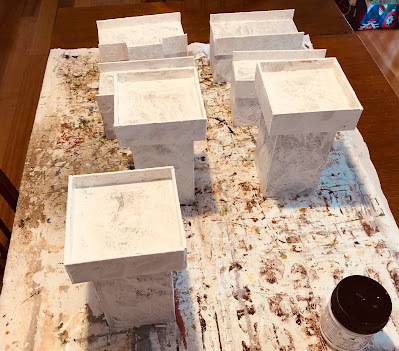
Some of my sawing is not always that precise. To help fill in any gaps and give the walls some texture, Gesso Primer is painted on.

The texture the Gesso provides can be seen here.

All three bastions and four walls are primed with Gesso.

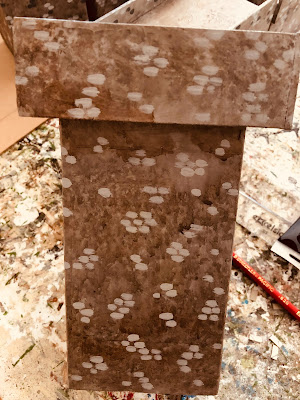
The base painting is done with a grey which is later sponged over with a black wash and brown wash. This breaks up the flat looking grey.

The grey is used again to dab on dots randomly. This is to give the impression of stone blocks.

The process of random dots continues with a darker grey and dark brown. This all adds to the impression of stonework.

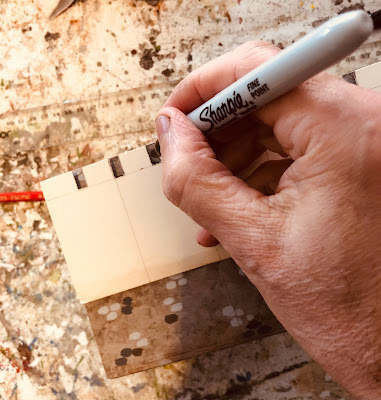
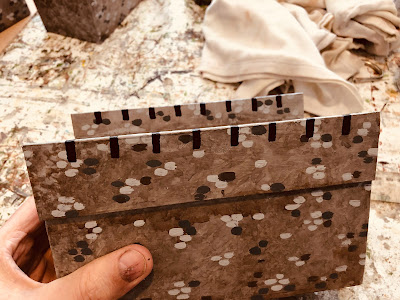
At this point you maybe wondering about the battlements and where are their indentations or openings (embrasures or crenelles) which give them their saw-tooth look. Rather than cutting them out I cheat a bit, or is that a lot, and paint the openings. I start first by creating a cardboard stencil which I will use to mark out the openings. I them paint over the marking with black or a very dark grey.

A stencil is used to make the openings regular and consistent.

All marked up and ready for painting.

The openings all painted on.

Additional features like the gate are painted on.

The castle pieces can be setup in a couple of configurations on the corner of the tabletop, either 3 by 1 or 2 x 2 (see below). I am hoping the different configurations will help mix up the types of siege wargames and provide some variety.

The castle can be setup on the corner of the tabletop on a 3 by 1 wall configuration.

A corner setup with a 2 by 1 wall configuration.

The next step is to build some siege engines. All being well I should be able to make them next weekend. As I progress with this project I will be referring to my trusty copy of Military Modelling's "A Guide to Siege Waragming" by Stuart Asquith.

My old copy