Wednesday 28 July 2021

Ancients Campaign - Turn 2 opening moves

Ancients campaign turn two began with the usual naval wargame to decide which side, Rome or Carthage, will move their armies first on the campaign map. The winner of the naval engagement will move second which is an advantage.

Unusually for me this game was played against an opponent, my daughter, who is visiting from New Zealand. The rules for the game can be found here and are played on a hex-grid. They are simple rules and the trick to them is to keep the fleet together as one or as groups where all ships begin their move adjacent to a friendly ship.  As ships cannot make any attacks unless they begin their turn in an adjacent hex to a friendly ship. Isolated ships have to rejoin other ships from the fleet, and to make matter worse, when the fleet has lost more that half its ships these isolated ships leave the battle and are removed from play. Commanding ships in this age at sea was a struggle.

The Roman fleet approaches from the top against the waiting Carthaginian fleet in the foreground.

Ships first clash on the flanks.

All ships are now engaged in a giant brawl at sea.

The Romans get the upper hand with a few Carthaginian ships isolated due to losses or entangled ships which are treated as losses.

A last gasp attempt by Carthage to regain the upper hand in the struggle fails. Their fleet has become too split up.

The remaining Carthaginian ships quickly flee the battle as Roman ships mop up any final resistance.

A sound victory to the Roman fleet and my daughter. The win will allow the Romans to move second on the campaign map. Prior to any movement both Carthage and Rome recruit additional armies in regions where they have more armies than their opponent, and they do not exceed the limit of three armies in a regions. Noting that commanders, such as Hannibal do not count to the stacking limit. 

Carthage recruits two new armies in Africa and Northern Italy. While Rome recruits a single army in Southern Italy, there home base. These recruited armies are shown with a "R".

With recruiting finished Carthaginian armies move first. Rome moving second did not move any armies.

Carthage made three moves. One army moved from Spain to Northern Italy, while Hannibal and one army moved to from Northern Italy to Southern Italy and was joined by an army from Africa.

Now the campaign moves are complete, three two games will be played. The first one will be in Spain.

Saturday 24 July 2021

Ancients campaign turn 1 - Game 3 battle report

Here is the battle report for the campaign battle of Mascula 217 BC in Africa. The previous post described the tabletop setup and army deployment for this game.

The chance card decks were prepared for each army. The standard decks for each army are fairly similar. The difference being Romans have three rally cards and two initiative cards, whereas the Carthaginians have two rally cards and three initiative cards. 

Campaign map of Africa. The Carthaginians had recruited and have 3 armies. A single Roman army is present as only one army can be moved between regions separated by the sea.

Because in this campaign turn the Carthaginians have three armies in Africa, two more than the single Roman army, they get to replace two no event cards with rally cards. This way I can keep the games to 7 units and represent the campaign situation where one side has more recruited armies.

Army chance cards. Red for Roman armies and blue for Carthage.

Carthage's deck is adjusted for having additional armies available in the region. Two additional rally cards replace no event cards.

Battle Report

With the chance cards shuffled everything is prepared. Now for the game...

The Romans begin the first turn with an initiative card and were quick to charge their heavy cavalry into the Carthaginian light cavalry on the right flank. In the centre they pushed forward towards their opponents who where deployed well back. Some of the centre units are positioned along the fordable river in preparation for the likely flanking attack from the Carthaginians, who had stacked their right flank on the opposite side fo the river.

On the left flank Roman light infantry swiftly entered the buildings. Not much happening here during the game on this flank.

It will take quite a few moves to reach the Carthaginian centre, and some of the Roman centre are engaged along the river before they reach the Carthaginians.

Finally, the Roman centre finally reached the Carthaginian centre. The Roman heavy infantry are doing well but this is offset by a couple of timely Carthaginian rally cards. 

The Romans press in the centre and in the foreground the fight for the buildings continues.

A tad over half way through the game and it is the battle is now very much between the heavy infantry. The Carthaginian heavy cavalry having eliminated their opposition can finally move around the flank.

The Roman heavy infantry had given good account of themselves, but the arrival of heavy cavalry on their flank is the game's tipping point and delivers victory to Carthage. 

This battle sees the end of the first campaign turn. Carthage did particularly well winning all three battles fought in Spain, Northern Italy, and Africa during 218-217 BC. In campaign turn two Rome will have to regather and defend only being able to recruit in Southern Italy. Scipio the Younger does not appear until turn 5.

Campaign map with losses removed at the end of turn 1,


Sunday 18 July 2021

Ancients Campaign Turn 1 - Game 3 Mascula 217 BC

The third campaign battle will take place in Africa where one Roman army has landed. When setting up these battles both sides are still limited to seven units. To reflect the situation were one side has additional forces, such as in this case where Carthage has two additional armies, they will get for each additional army a rally card to replace no effect cards in their chance card deck (notes on chance cards here). If both sides are evenly matched then there would be no additional rally cards.

Campaign map

The order of battle will be...

Rome:

  • 4 x heavy infantry
  • 2 x light infantry
  • 1 x heavy cavalry
Carthage:
  • 3 x heavy infantry
  • 2 x light infantry
  • 1 x light cavalry
  • 1 x heavy cavalry

The terrain set up was decided by terrain cards and the tabletop prepared. Dice decided the Roman army would deploy on the side with the rocky terrain. Then both sides then diced to see who would begin their deployment. The highest score deciding to go first of second. Carthage won and decided to go second. See here for deployment rules.

The Roman forces deploy their first line, two heavy infantry in the centre front line with light infantry on either side and cavalry on the left. The rocky terrain in the centre constrains the number of units they could deploy in the centre forcing their heavy infantry to be in the first line.

Carthage deploy their light infantry and light cavalry in first line on the flanks.

Rome deploys their second line and remaining heavy infantry in the centre.

Carthage deploys a unit of Gauls and heavy cavalry on the right flank.

With all Roman units deployed the Carthaginian remaining units, both heavy infantry units, in the centre third line. The plan is to attack the right flank and wait for the Roman centre to advance.
 
All deployments are finished

All is ready for a game and to finish the campaign's first turn.

Friday 16 July 2021

Ancient Campaign Turn 1 - Game 2 - Ticinus 218 BC

The second battle of the campaign has Hannibal and his army battling a Roman army along the banks of the river Ticinus. 

The tabletop was decided by terrain cards and set up with a river down one edge and hilly ground on the other flank.

Both armies deployed

The order of battle...

Rome:
  • 5 x heavy infantry (1 unit of veterans)
  • 1 x light infantry
  • 1 x light cavalry
Rome as normal replaced one initiative chance card with a rally card.

Carthage:
  • 4 x heavy infantry (1 unit of veterans)
  • 1 x light infantry
  • 1 x elephants
  • 1 x heavy cavalry

Because the army is commanded by Hannibal the Carthaginian army replaces a no effect chance card with an extra initiative card. (If not commanded by Hannibal they would have just replaced a rally card for an initiative card.)

Deployment rules...

The units were deployed using a set of rules I am still playing around with. They have been influenced from reading Solo Battles. Essentially my 6 by 4 foot tabletop is divided into three parts of 2 foot along the army's base edge, so there is a centre area and two flanks.

Deployment notes

Players dice to see who goes first, then they deploy alternatively their first, second, and final lines of units.

In their first round, players deploy their first line of units up to 18” from their baseline. Only cavalry, light infantry, and warbands (which move greater than 6” normally) can be placed on flanks. There are no restrictions on units deployed in the centre.

In the second round, players deploy their next line of units up to 12” from their base edge. The same unit restrictions apply for the flanks.

In the third, and final round, players deploy their final line of units up to 6” from their base edge. Heavy infantry can be rushed into position and placed on the flanks but sustain 2 hits if used on the flank.

When placing another line of units, they must be placed behind the previously deployed line of units. So, if for the first line of units was placed short at 12" due to terrain constraints, then the second line must be placed behind them. This will create crowded lines which cannot manoeuvre their units.

When deploying two units in an area (eg flank) they must be deployed together in a line. They cannot be staggered or have one placed behind the other.

Having the first line being able to deploy 18 inches from the base edge means the first lines of the armies are in most cases within 2 moves of each other and will be engaged in combat or shooting without delay. So getting your deployment right is important as there will be little opportunity to adjust your lines.

On to the game...

Hannibal takes the initiative and pushes all his forces forward. Importantly his light infantry were able to control the hilly ground on the left flank, gaining the uphill advantage against the advancing Roman heavy infantry.

The Roman heavy infantry are holding against the pressing Carthaginians.

The elephants push ahead in the centre while on the flanks the Romans are facing problems. Their cavalry have fled the field and the Carthaginian light infantry are stubbornly defending the hilly ground. 

Roman heavy infantry shore up the left flank and the cavalry withdraw but remain a threat.

The elephants are finally eliminated and go berserk inflicting one final blow on their attackers. The Carthaginians push forward with the second line of heavy infantry. On the hilly ground Roman heavy infantry finally eliminate the defending light infantry only find themselves faced by veteran Carthaginian heavy infantry unit.

In the centre it was a grind with each army's heavy infantry trying to wear down their opponents.
 
Having won the engagement in the hills the Carthaginian heavy infantry (with Hannibal attached) join the fray from the flank and decide the battle.

A second victory for Carthage, but one that was not easily won. Without their advantages of moving first and additional initiative chance card it could have been a different story.

Tuesday 13 July 2021

Ancients Campaign turn 1 game 1 - Tamaca 218 BC

This after action report is of the first of three land games to be played this first campaign turn. This first battle takes place in Spain 218 BC and is fought along the Tamaca River. The terrain was decided by  drawing terrain cards, the river ending up having to be angled across the table to avoid other terrain features.

The terrain layout determined by cards.

Order of battle was decided by a table very similar to the approach taken by One Hour Wargames but allowing seven units to be selected rather than six units. I scribbled these notes down and will hopefully refine them over a few games.

Some quick notes on randomly generated orders of battle. The tables generate armies of 7 units. (HI=heavy infantry, LI=light infantry, HC=heavy cavalry, LC=light cavalry, CAT=catapults, EL=elephants)

Rome rolled a 6...

  • 5 x Heavy Infantry (1 unit joined by commander and treated as veteran)
  • 1 x Light Infantry
  • 1 x Catapults

Carthage rolled a 3...

  • 3 x Heavy Infantry
  • 2 x Heavy Cavalry (1 unit joined by commander and treated as veteran)
  • 1 x Light Infantry
  • 1 x Elephants

I tried out some deployment rules which meant Roman units were concentrated in the centre. I will post more on this deployment approach after playing a few more games.

Deployment resulted in Roman forces having a congested centre.

Chance cards were used as “a means of interjecting a degree of uncertainty into the control of the game, leaving the wargamer to react as required” to use a quote from Stuart Asquith from his “Military Modelling - Guide to Solo Wargaming” book.

I particularly like using them as to add a rally element which is missing in One Hour Wargames rules and I can add characteristics to the armies. For example, Romans exchange an initiative card for a rally card to represent their well discipled troops and average leadership during the 2nd Punic War period until Scipio the Younger arrived. While Carthaginian armies gain an initiative card for their experienced troops and commanders and lose a rally card.

The game used rules very similar to One Hour Wargames but using D3 dice. So for example instead of D6-2, D3-1 is used. Units are eliminated after taking more than 8 hits. I will post the rules and chance cards after a few more games have been played.

Roman forces pushed forward to defend the river and moved their centre to counter the treat of the Carthaginian cavalry massed on one flank. Chance cards allowed the Carthaginian heavy cavalry to push forward quickly and strike the flank of the Roman heavy infantry before other units were in position to support.

Roman heavy infantry defending the fordable river succumbed to the elephants. Other heavy infantry units moved up in support were able to give good account of themselves seeing off the first line of Carthaginian cavalry with heavy losses, but their flank remained vulnerable. Carthage forces were now rolling forward lead by the Gauls who charged froward and overrun the catapults.

The pressure from the elephants and flanking heavy cavalry continued and Roman heavy infantry having been out manoeuvred were unable to mount any effective counterattacks.

There was no respite for the Roman heavy infantry who having eliminated the Gauls in the centre were faced by the second Carthaginian line. Their left flank were grimly hanging on against cavalry and elephant attacks.

The Roman defences collapse and they quickly retire from the field of battle. The game ended after turn 8.

The chance cards worked out well. The first initiative card for Carthage certainly put them on the front foot and they were able to maintain sufficient momentum to carry them to victory even when chance started to go the way of Rome.

Chance cards were used during the game. They are also very useful to help track the turns which I am prone to forgetting.

With the first land game over and a victory to Carthage the campaign map now looks like this. The circle with "X" representing a Roman army will be removed at the end of this campaign turn. The second battle to be fought will be in Northern Italy and will see the appearance of Hannibal.

Campaign turn 1 after the first battle. Rome will lose one army from Spain.


Sunday 11 July 2021

Ancients Campaign - Turn 1

A week ago the Punic Campaign began with a naval battle game. The loser of the game would have to make the first campaign moves. The winner having the advantage of moving second after see their opponents moves. The campaign rules can be found here.

The opening game was a naval battle would determine Rome as the losing side would make the first campaign turn moves.

The campaign starts with Carthaginians having armies in Spain and Africa and the Romans with armies in Northern and Southern Italy. The armies are shown as circles, green for Carthage and red for Rome. The green square is for Hannibal and there will be a red square for Scipio the Younger. These are exceptional leaders who can influence battles.

Opening campaign positions

Armies move between the regions. Any number can move between regions joined by red arrows. When moving across seas between regions, shown by blue arrows, only one army can move across. The stacking limits are 3 armies.

The opening moves

The Romans decided to recruit in Northern Italy, shown with an "R", and have two armies march into Spain. While another army was shipped to Africa. Carthage's response was to recruit in Africa and have Hannibal and one army march to Northern Italy.

There will be three battles fought in this first campaign turn. They will be fought clock-wise, the first land battle game will be fought in Spain, followed by Norther Italy, and finally Africa.

Saturday 10 July 2021

A quick ancients game using OHW scenario

I thought I would be fun to have a quick Punic War ancients game as a quick reminder of the rules using One Hour Wargames (OHW) scenario 21 (twin objectives). I opted to use six units per side as per the scenario but selected the units myself rather than have them generated. This is so I could use a unit of elephants.

OHW scenarios are normally for a tabletop size of 3 by 3 foot, and I would normally have slightly increased the size and played the game on a 4 by 4 foot tabletop. However, I though it would be interesting to try and stretch the scenario to fit a 6 by 4 foot tabletop. While at the same time increasing unit base sizes from the OHW suggested 4-6 inch width to a width of 12 inches. 

The rules remained the same when it came to movement with 6, 9 ad 12 inches for heavy infantry, light infantry, and cavalry.

Order of battle...

Romans:

  • 1 x Light infantry
  • 3 x Heavy infantry

Carthaginians:

  • 1 x Light infantry
  • 1 x Elephants
  • 1 x Light cavalry
  • 3 x Heavy infantry
In terms of rules for elephants and light cavalry as OHW does not have specific rules for them:

Light Cavalry - operate like light infantry (Skirmishers) moving 12 inches and are allowed to exit combat with enemy foot units. They cannot pass through through other friendly units unlike light infantry.
Elephants - move 9 inches, hits equal a D6 with no reductions for armour. When eliminated roll D6:
  • 1-2 they go berserk and attack nearest friendly unit within 9 inches and are then removed from play.
  • 3-4 they are removed from play immediately.
  • 5-6 they go berserk and attack nearest enemy unit within 9 inches and are then removed from play.
Generals - I also had one general in each army assigned to a heavy infantry unit. These represented the veteran part of the army. Units with an assigned general were able to re-roll they hit D6, but had to accept the second value.

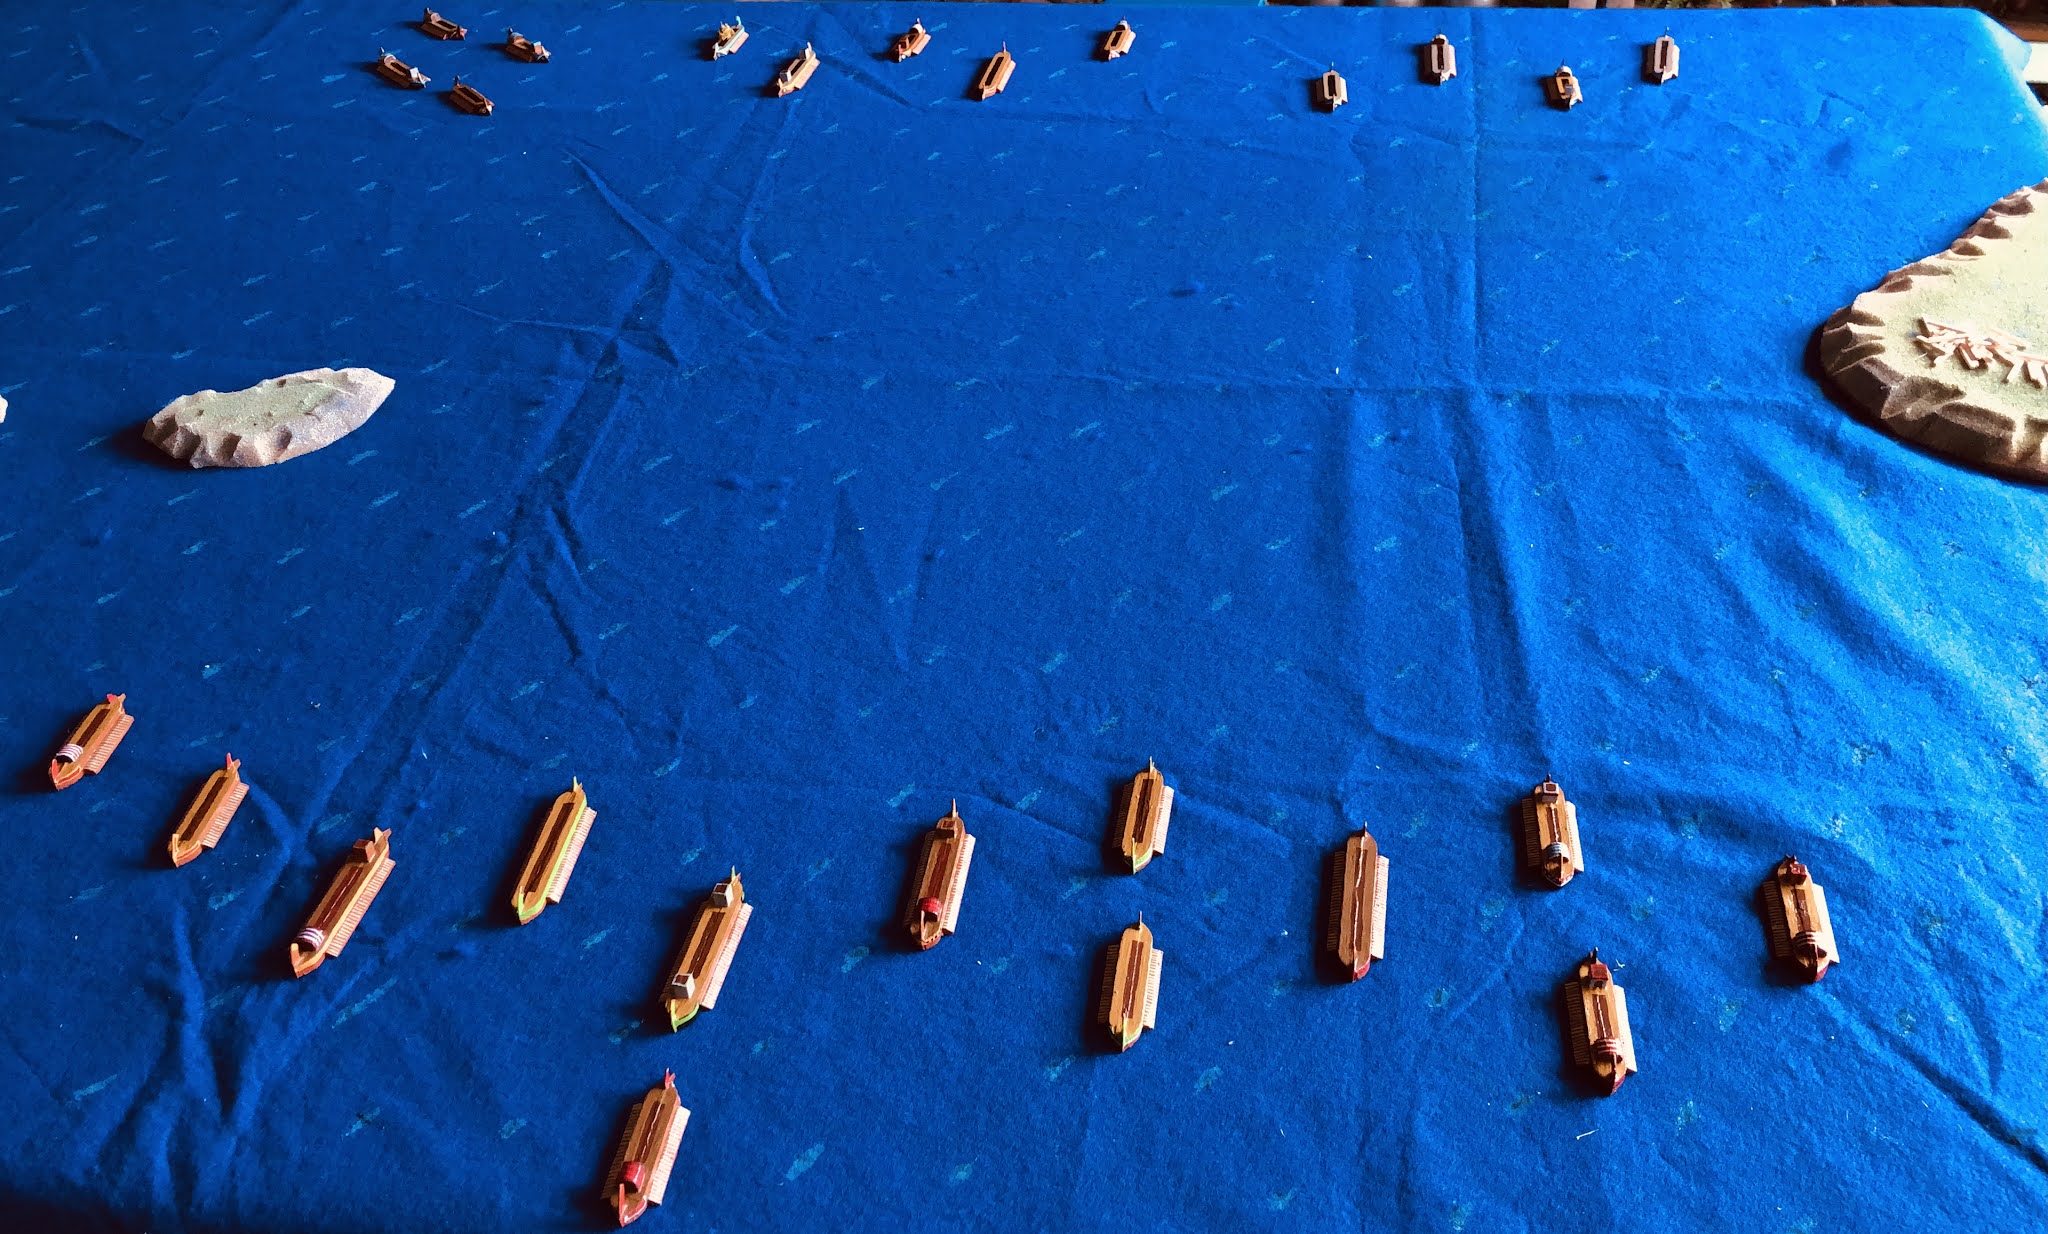
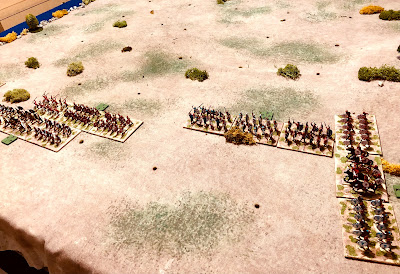
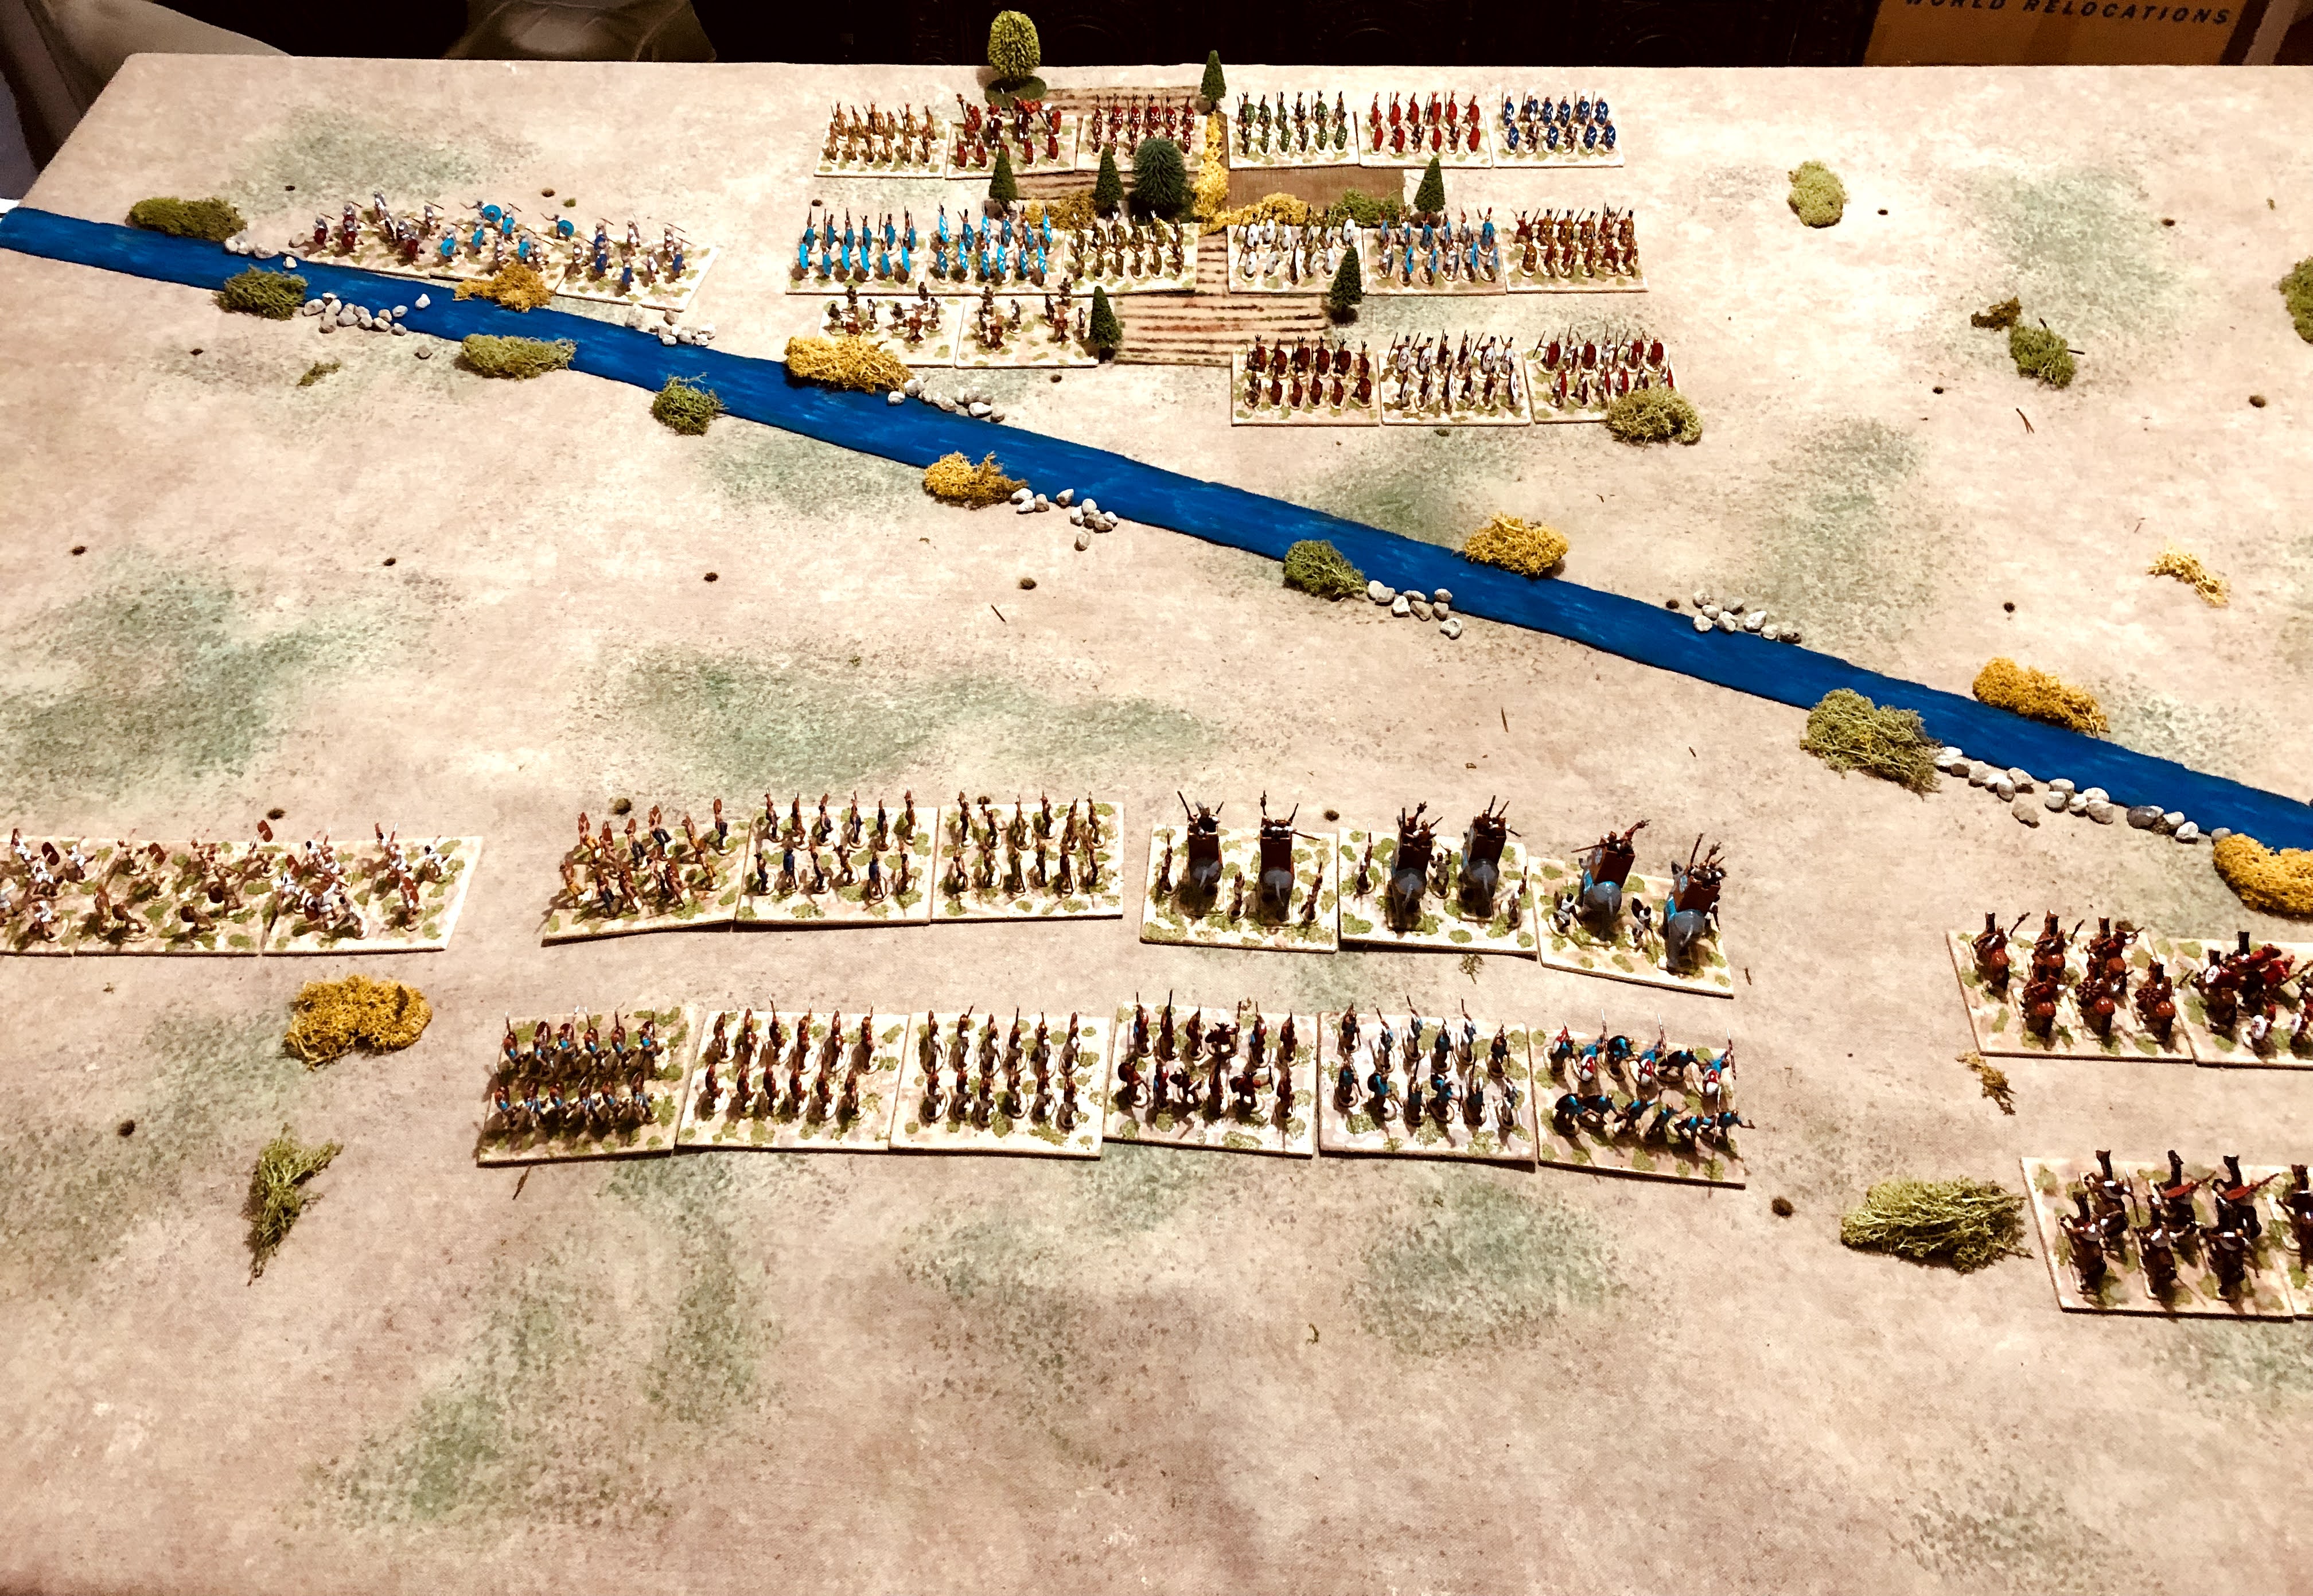
Opening moves of the game with Roman forces defending the town and wooded hill and Carthaginian forces having to wheel around to engage.

My figures are based on 4 by 3 inch bases. I used three of them to make a unit with a 12 inch width. This made for some largish looking units and also helped with the tracking of hits. For each 5 hits one based was removed.

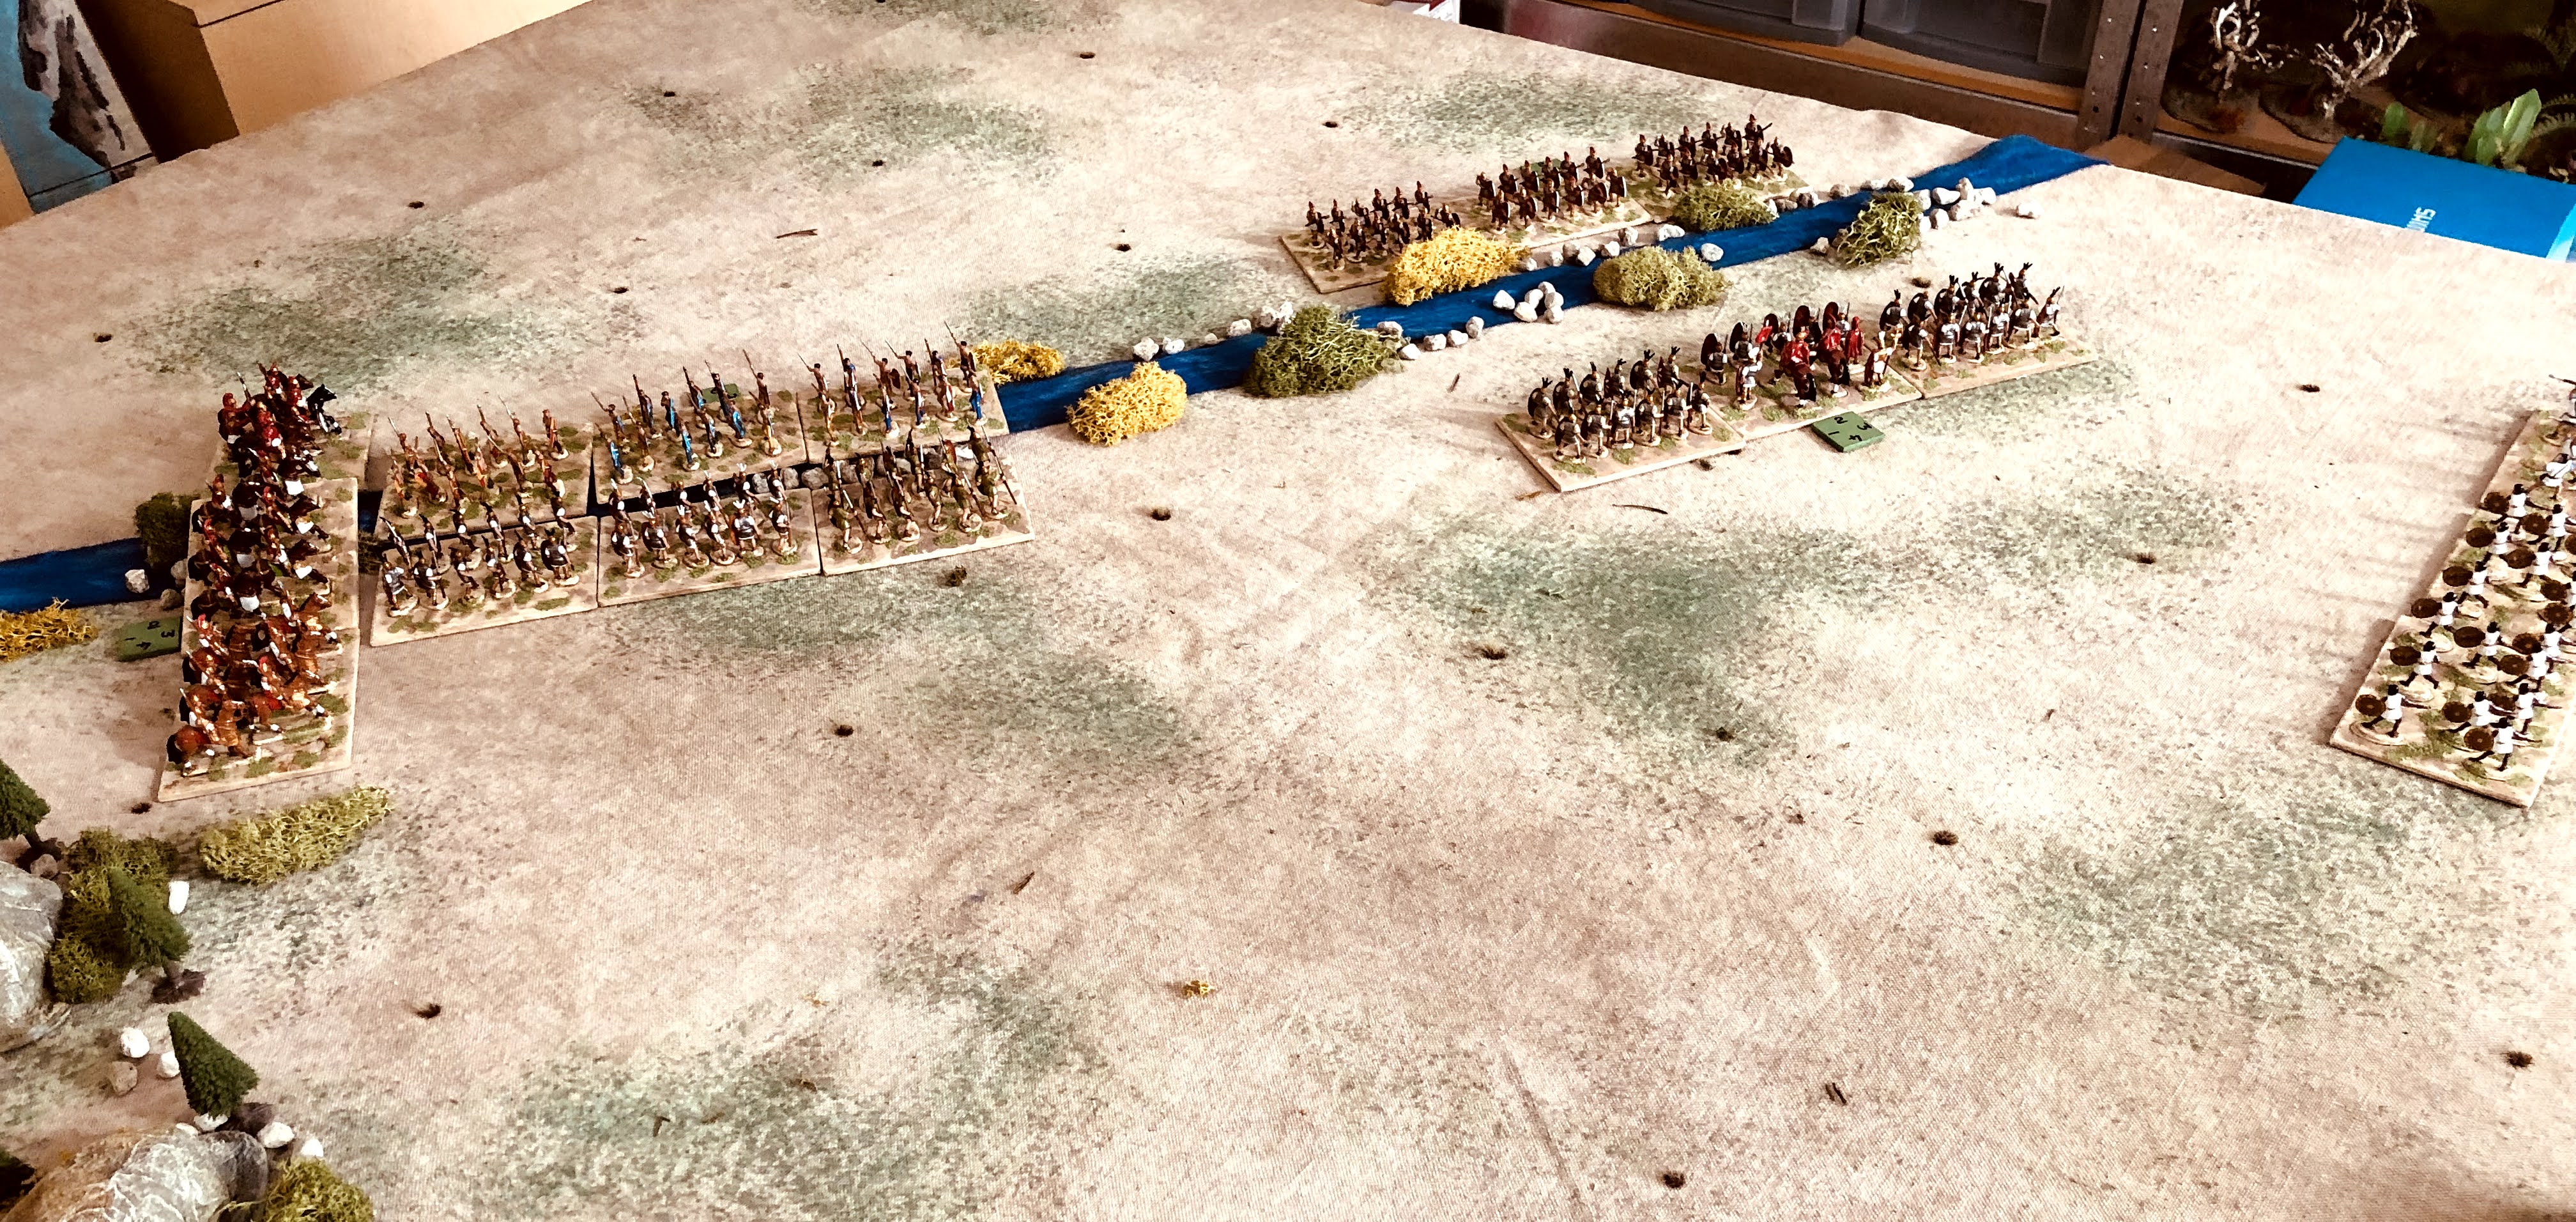
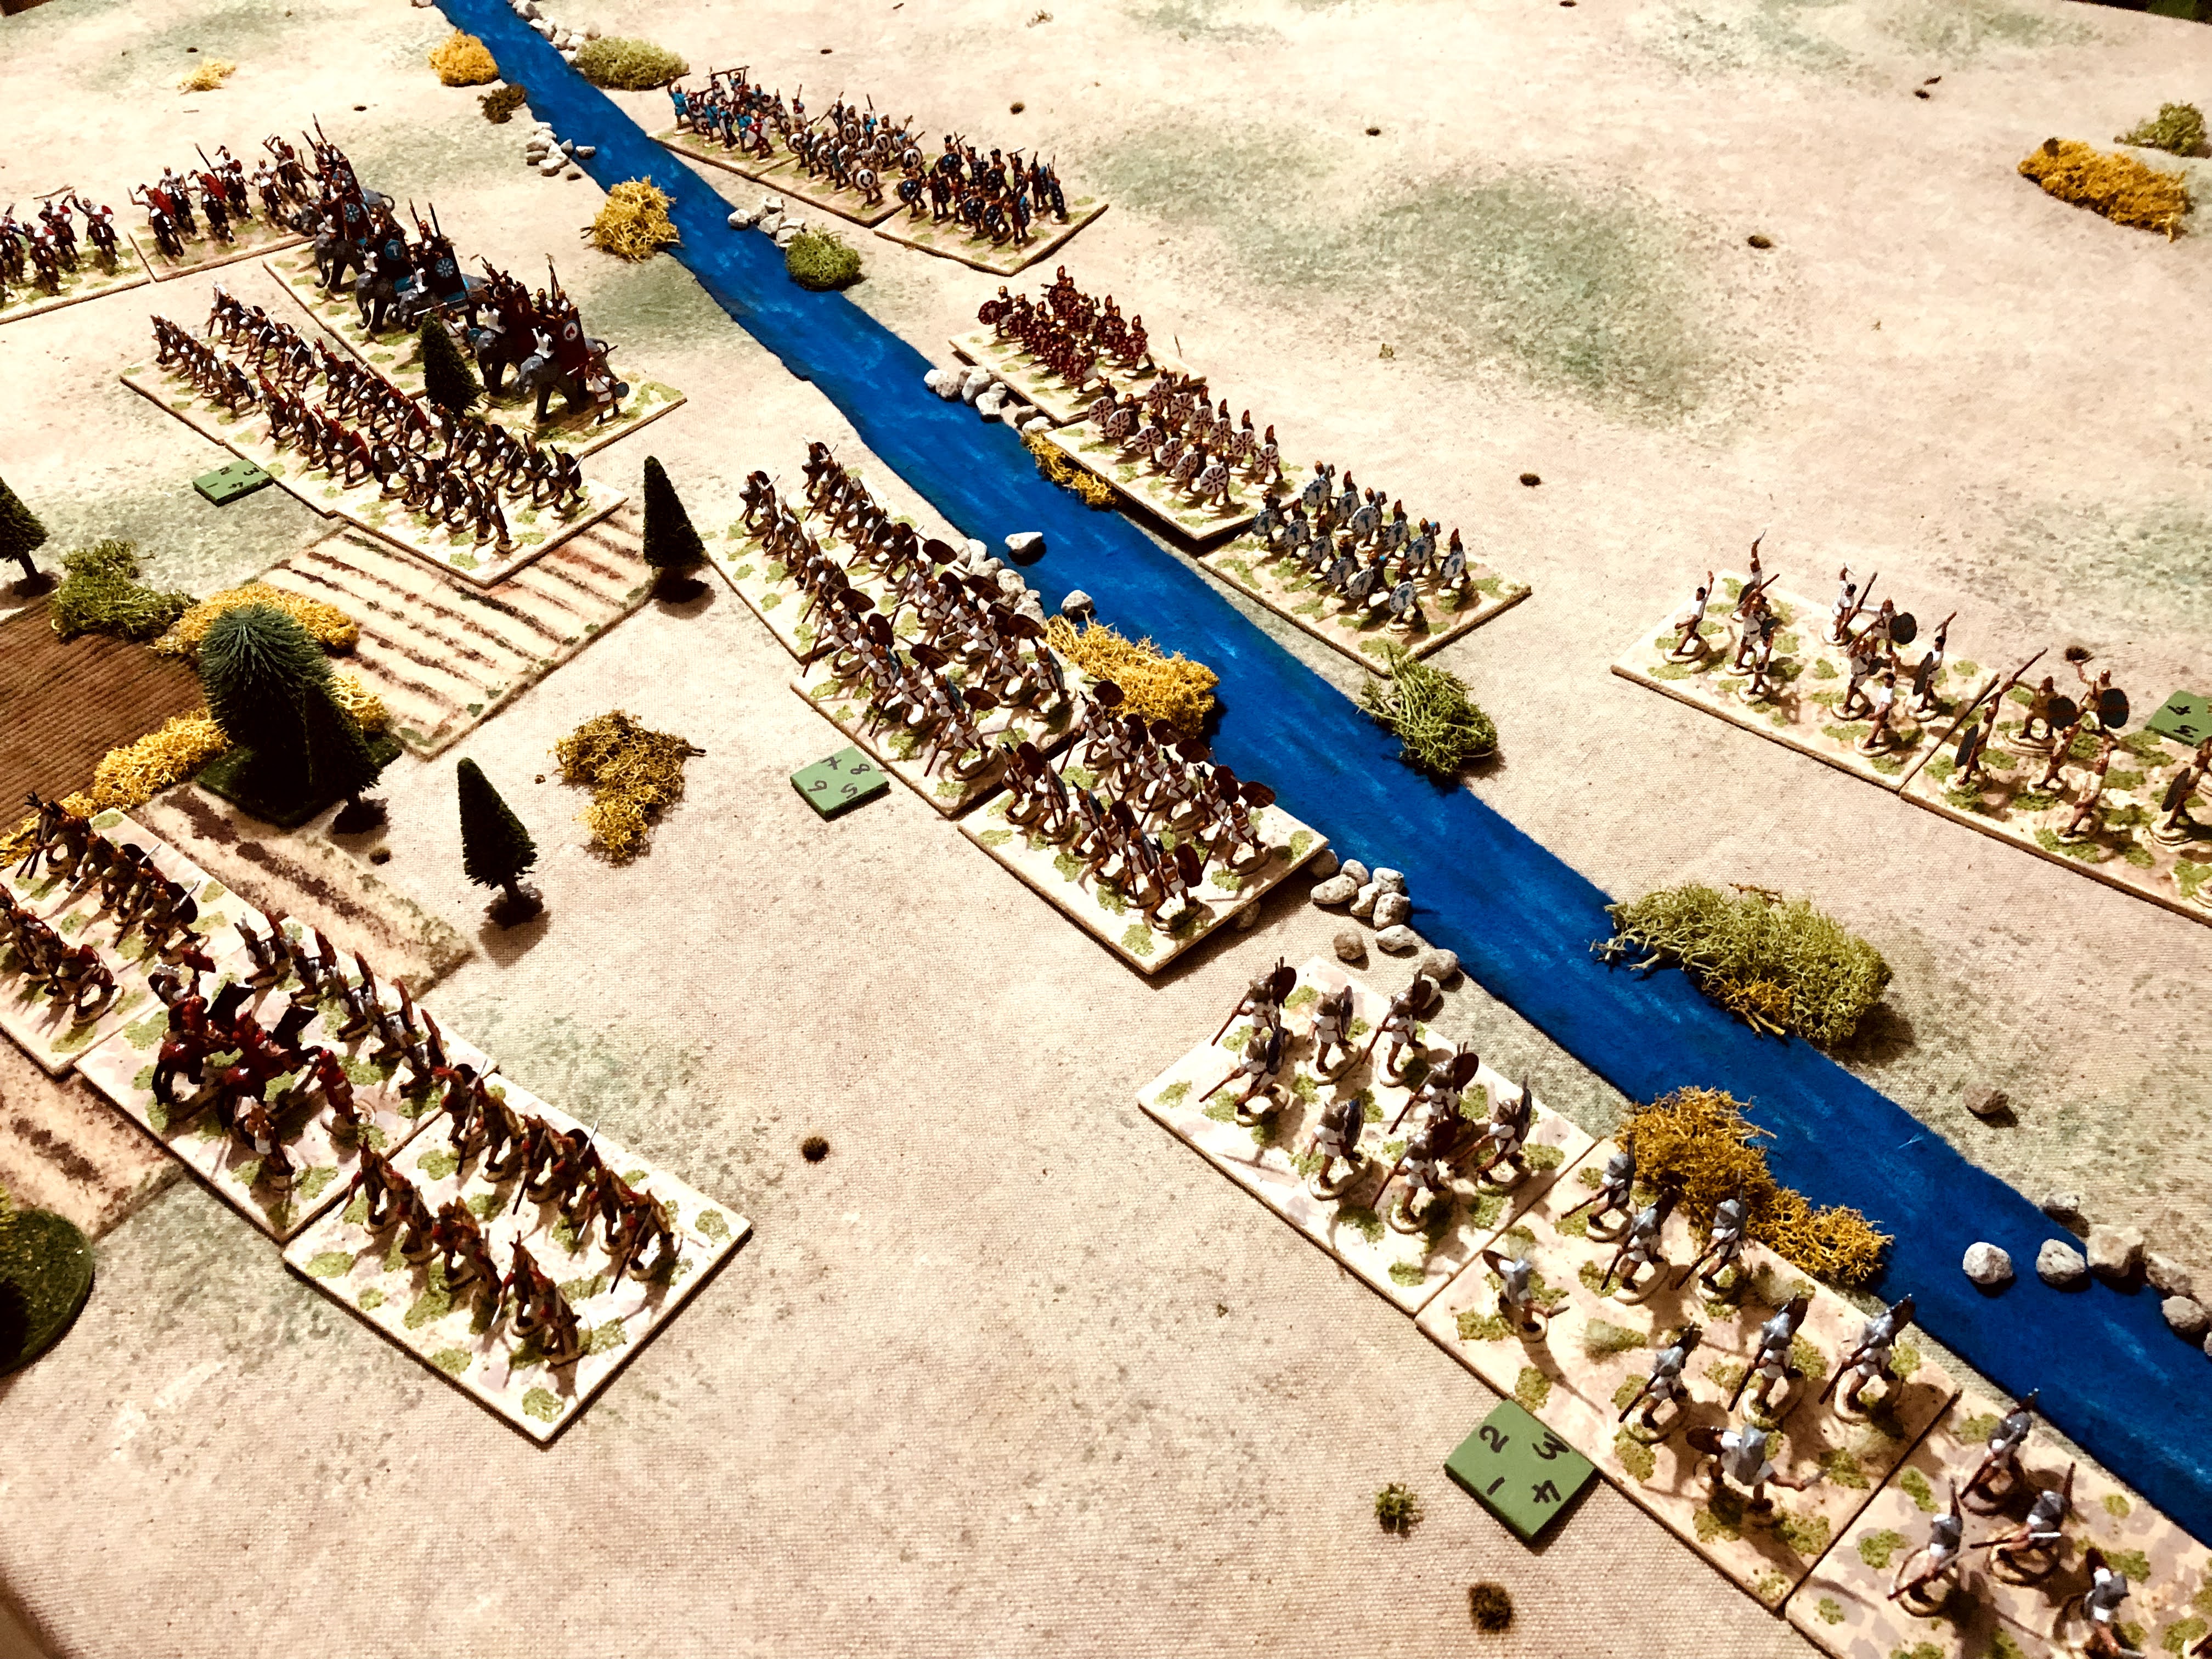
Carthaginians split their attack while the elephants engage the Roman centre.

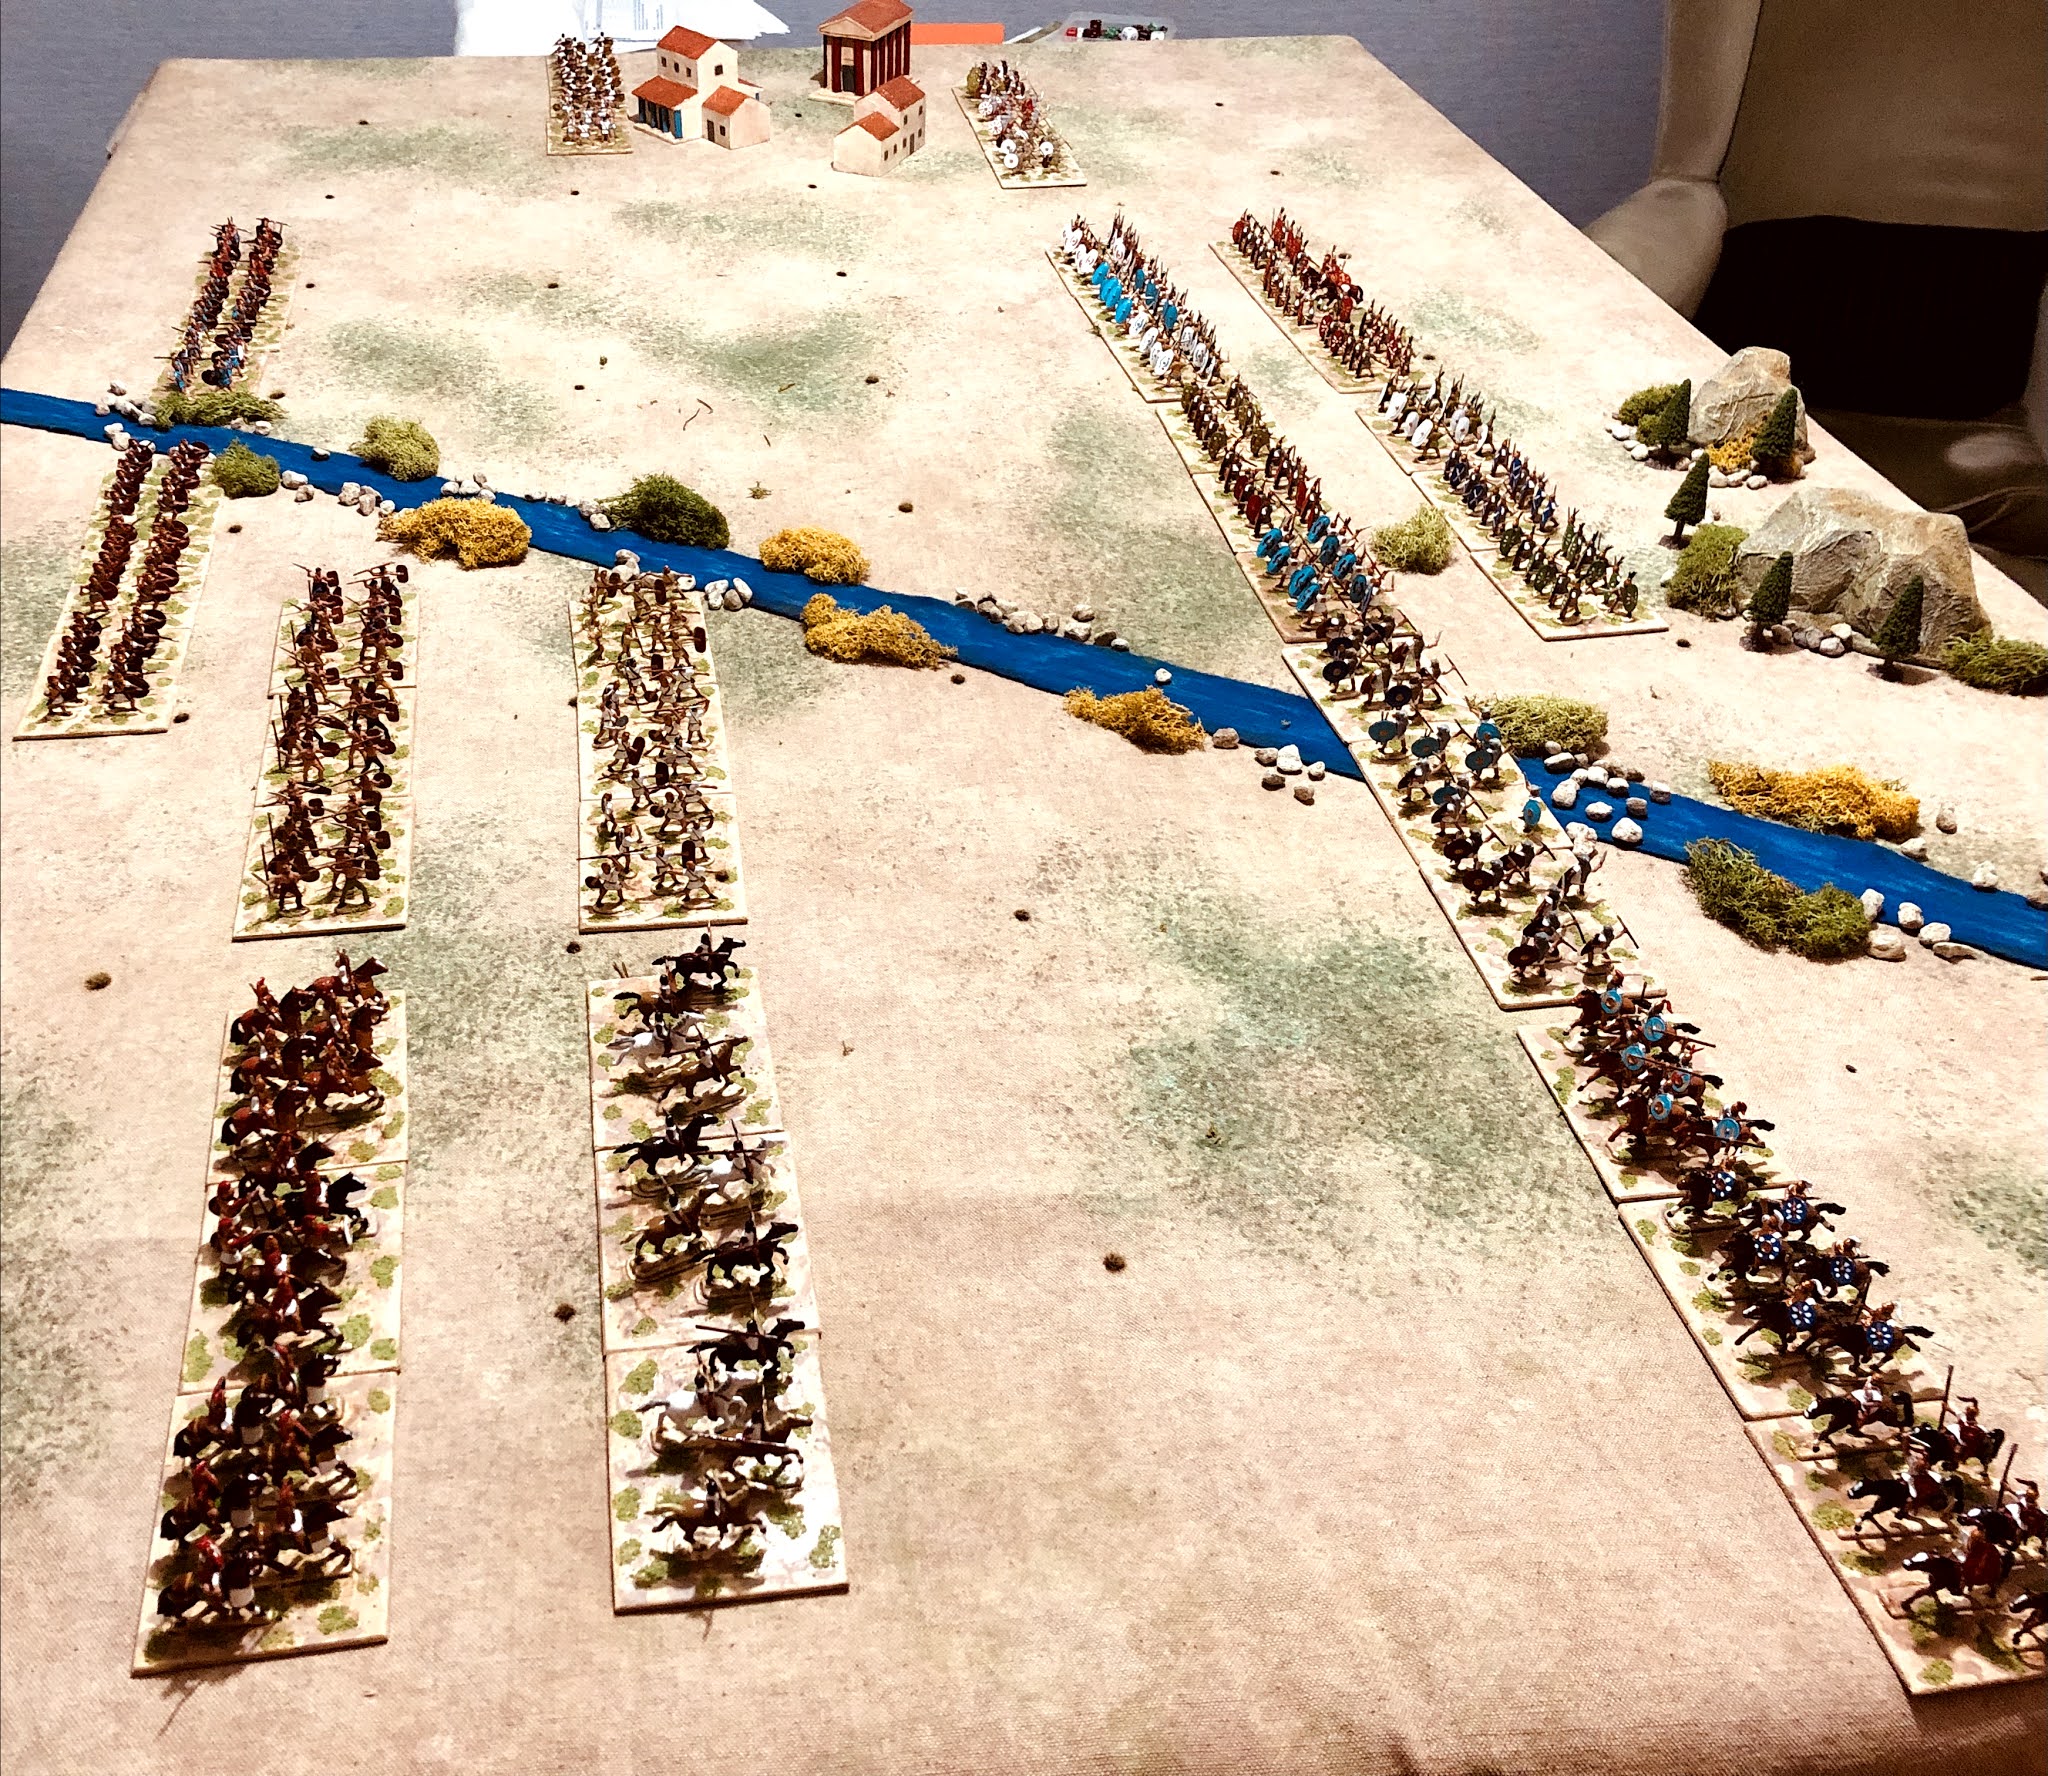
The town defenders are drawn out to support the defence against the elephants. The Carthaginian light cavalry were now unable to join any attack and waited in reserve for an opportunity.

The Roman centre collapses and the remnants are able to escape and hold up in the town. Time is now against the Carthaginians who need to control one of the town or hill objectives to salvage the game and get a draw.

Romans did enough in the end to win by holding the town and denying control of the hill. One more turn and the Carthaginians would have controlled the hill and gained a draw.

I enjoyed playing the scenario and using the larger unit sizes. As for the reasons I liked the larger units, they are:

  1. They are visually more appealing and I get to see more of the figures I have spent time and effort painting, which is always a good thing.
  2. The ability to manoeuvre units is restricted as they can easily get the way of each other. I definitely started to think more in terms of my army's centre and flanks, and what was in my first line and second line for support. 
  3. The benefits of a front line of light infantry who can pass through the lines behind heavy infantry became a lot more apparent to me. The larger units stopped light infantry from moving sideways out of any trouble.
  4. The constraints of movement places more importance on how an army is deployed. As any deployment mistakes are not easily undone with some quick manoeuvres before engaging the enemy.

Further thoughts:

  1. I am really tempted to increase the size of units for my Punic War campaign and reduce to number of units to 6-8 rather than the intended 10-12 units.
  2. Rather than removing one base from a unit for every 5 hits, have one base removed after 7 hits. A unit would then be eliminated upon taking 14 hits (one less than OHW's 15 hits for elimination). That way units will always have a minimum of 2 bases.
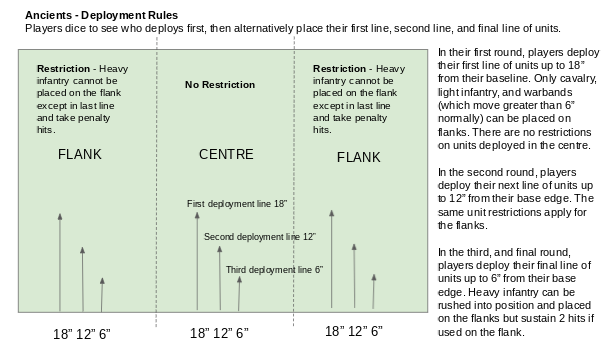
  3. Having read Lost Battles by P. Sabin I definitely want to see what deployment rules can be added.
As for my Punic War campaign, the opening campaign moves are to be made this weekend.