In some recent and past comments I was asked about the house rules I apply to Lock 'n' Load's Tank on Tank rules which are available for download here. The Tank on Tank board games and Online "Steam" games are geared towards gaming tank combat the later years of WW2. Hence the need for some house rules to use these quick and enjoyable rules in a Western Desert setting. Anyway this is a longer than normal post and has my house rules written up. Quite a useful thing for me to do as they were all on scribbled notes and would have been easily forgotten by me at a later date.
The house rules relate mainly to:
So here are the rules and some photos. Hopefully without too many typos, proof reading is not my strength. I hope they make sense...
Units
Each unit has three values for range, defence, and movement. Where a value has two numbers split by a “/“ special rules apply to the second number used. Here are the general rules and some examples listed afterwards.
Tanks and Armoured Cars
Can move and fire during a turn.
Self-Propelled Guns
Can move or fire, but not both during a turn.
The aim of this rule is to differentiate within the game between SPGs and the mobility of tanks.
Towed Guns
Can move or fire, but not both during a turn.
Can move the higher value if moved as part of an HQ move.
The aim of this rule is to limit the movement flexibility of towed AT and artillery units, while at the same time allow them to keep pace with other advancing units if with an HQ.
Armoured Infantry
Can move or fire, but not both during a turn. As per rules.
Motorised Infantry
Can move or fire, but not both during a turn.
Can move the higher value if moved as part of an HQ move.
The aim of this rule is to have a simple way to limit the movement flexibility of motorised infantry which have to unload to move into combat, and differentiate them from Armoured infantry units.
Defence Value Examples
8/10 = Motorised Infantry (soft-skinned vehicles), towed guns, and 2pdr Portees
9/10 = Armoured Infantry and AT (eg, Sdkfz 250 and Bren Gun Carriers)
9 = Armoured Cars, Self-Propelled Guns, and Tankettes (eg, Sdkfz 222, Wespe, Pz1)
10 = Light Tanks (eg, Stuart, PzII, Cruiser, M13/40, Crusader)
11 = Medium Tanks (eg, PzIII, StugIII, Crusader III, PzIV, Sherman, and Valentine)
12 = Heavy Tanks (eg, Matilda)
Range Values Examples
88mm = 4 hexes
75mm*, 6pdr = 3 hexes
47mm, 50mm, 37mm, 2pdr, = 2 hexes
20mm and small arms** = 1 hex
* Grant 75mm can only be used if not moved during turn.
** Infantry (motorised and armoured) range remains 1 hex even when on hill
Movement Values Examples
Slow = 1 hex (eg, Towed guns*, motorised infantry*, Matilda tank)
Medium = 2 hex (eg, PzIII, Grant, Valentine, Cruiser Tank, and Armoured Infantry
Fast = 3 hex (eg, Stuart, Crusader, Armoured Cars)
* move 2 hexes if moved by HQ move.
Markers
Exceptional Unit Commander marker - Used to indicate an exceptionally led unit. Can re-roll failed hits.
Head Quarters (HQ) marker - Used to indicate a commander is attached to a unit. Place it with the unit as a reminder of the presence of an HQ. If the unit is eliminated, remove the unit and set aside the commander marker which can return to the game (for exception see Army Resolve house rule)
Dust cloud marker - Used to show units which moved during their turn.
Brewed up marker - Used to show where units have been destroyed.
Smoke marker - Used to show where smoke has been laid down.
Game Setup
Agree the start time on the game clock and which table side is East and which table edge is West. These become important for visibility during the game (see visibility house rule) and for when reserves arrive at set times. The game clock progress 5 minutes after each action (e.g., if a players makes 3 actions turning a turn, then the clock would progress 15 minutes).
Terrain
The tabletop consists of hexes which represent the following terrain types:
Clear - no effects
Roads - as per rules, increases movement by one hex.
Town - provides cover, firing unit’s facing is 360 degree, and a unit in town cannot be flanked.
Hill or Sand Dune - Add one to ranges except infantry (as per rules) and provide cover unless the unit is flanked. It is assumed a unit will take advantage of the crest of a hill for cover which is negated if enemy units flank them.
Wadi or Depression - as per rules, unit’s must be adjacent for LOS.
Salt Marsh - impassable
Escarpment - as per hill, adds one to the range, and provides cover from the escarpment side which cannot be crossed.
Rough Terrain - provides cover

Minefields - movement ceases upon entry.
Stacking Limit
As per rules.
Only one unit in a hex and they may not move through hexes containing units.
Aircraft no not count towards stacking.
Markers do not count towards stacking limits.
Facing
Units always face a hex-side and have a 180-degree front arc.
The exception is units in a town which have a 360-degree frontage.
Turns
I use the solo rules.
Players take turns.
During a turn a player performs 2 actions, then roll D6. On 1-2, stop, else perform another action. Roll again, 1-3 stop. Else perform another action and stop.
After each action performed, progress the game clock forward by 5 minutes.
Action Points
As per rules. Action Points are expended to move, fire, and promote units. It costs one AP to:
As per rules with HQ group moves and promotions. Additional rules:
Only HQs can call in indirect fire from Artillery units without LOS.
Field promotions are not permitted once 50% of unit are lost.
An HQ can be attached to any unit type.
Exceptional Leader
As per Ace rules, but can be assigned to any type of unit.
Movement
Similar to the rules. Units move a number of hexes equal to their movement value. Noting units must cease movement for the turn when:
Combat
To shoot:
Then roll 2D6 and:
If total Attack equal or greater than the defence value unit is eliminated.
Artillery Support
An artillery unit does not require LOS to the target if a unit with an attached HQ has a valid LOS. The artillery must still be within range of the target.
Anti-Tank Gun Bonus
Same as rules, but includes self-propelled AT guns where AT guns can fire at an armoured target at no action point cost.
Towed Artillery and Motorised Infantry
Towed artillery and motorised infantry have two movement points when moved as part of an HQ move. This rule limits the movement flexibility of these units which have to unlimber/limber or unload/load while not having to record the state of individual units.
Improved Positions
As per rules. Units treated as being in cover providing they do not move.
Aircraft
To call in an airstrike, a player must select a hex within LOS of one of their HQs and spend 2 actions.
During an airstrike the aircraft makes 3 attack runs.
Place the aircraft on the hex to be attacked. To fire roll the dice and add 2.
After the first attack on the second attack run, roll a dice, on a 4-6 the player can attack any adjacent hex. On a score of 1-3, the defending player places the airstrike on any adjacent hex on their choice.
This is process is repeated for the third attack run.
Minefields
Placed by defender at start of game.
They can only be placed in clear hexes.
Units end their movement for the turn upon entering a minefield hex.
+1 to combat rolls when the target is in a minefield hex.
Visibility
Visibility is problematic at sunrise (6:30am to 8:00am) when looking into the rising sun. So any target which is positioned East from all firing units and not adjacent is treated as being in cover.
Likewise for the glare during sunset (5:30pm - 7:30pm) where any target position West of all firing units and not adjacent is treated as being in cover.
Midday heat haze (12:00pm to 1:30pm) effects visibility. So any target not adjacent to a firing unit is treated as being in cover.
Prior to the game starting agree which table edges are East and West and the game clock's start time.
Brewed Up Vehicles
Replace destroyed units with a brewed up marker. A hex with a brewed up marker can be seen into but blocks LOS through it.
Brewed up markers remain for the game's duration.
I use brewed up markers to help track units lost. At the start of the game I set aside three groups of markers. One group for each side with markers for half the forces rounded up, and a common group for when all markers used by one side. Once a side's markers are all used it is a good reminder that an army has 50% casualties.
Dust Cloud Markers
When a unit moves place a dust cloud on the hex. A hex with a dust cloud can be seen into but blocks LOS through it.
A player removes all dust clouds from their units at the start of their turn.
Army Resolve
When 50% units are lost no more HQ promotions can occur.
Sand Storm
If sand storms are predicted during the game, then roll dice at the end of each player's turn. On a score of 4-6 a sand storm is in effect and a score of 1-3 ends any sand storm in effect from a previous turn.
When a sand storm is in effect: all units move 1 hex, and any target not adjacent to a firing unit is treated as being in cover.
Smoke Screen
Artillery units can lay down smoke in a hex on a score or 6+. If successful, a player can place a smoke marker in a hex. The hex must be within range and a HQ must have LOS.
Smoke blocks LOS for all sides.
At the start of a player’s turn remove all a player’s smoke from their previous turn.

So these are all the house rules I have been using I hope they make sense if you know the game Tank on Tank. Many of the ideas for these house rules came from reading "Tank Battles in Miniature: 1 A wargamers' guide to the Western Desert Campaign 1940-1942" by Donald Featherstone. I hope to to a game report in the near future and highlight the various rules.
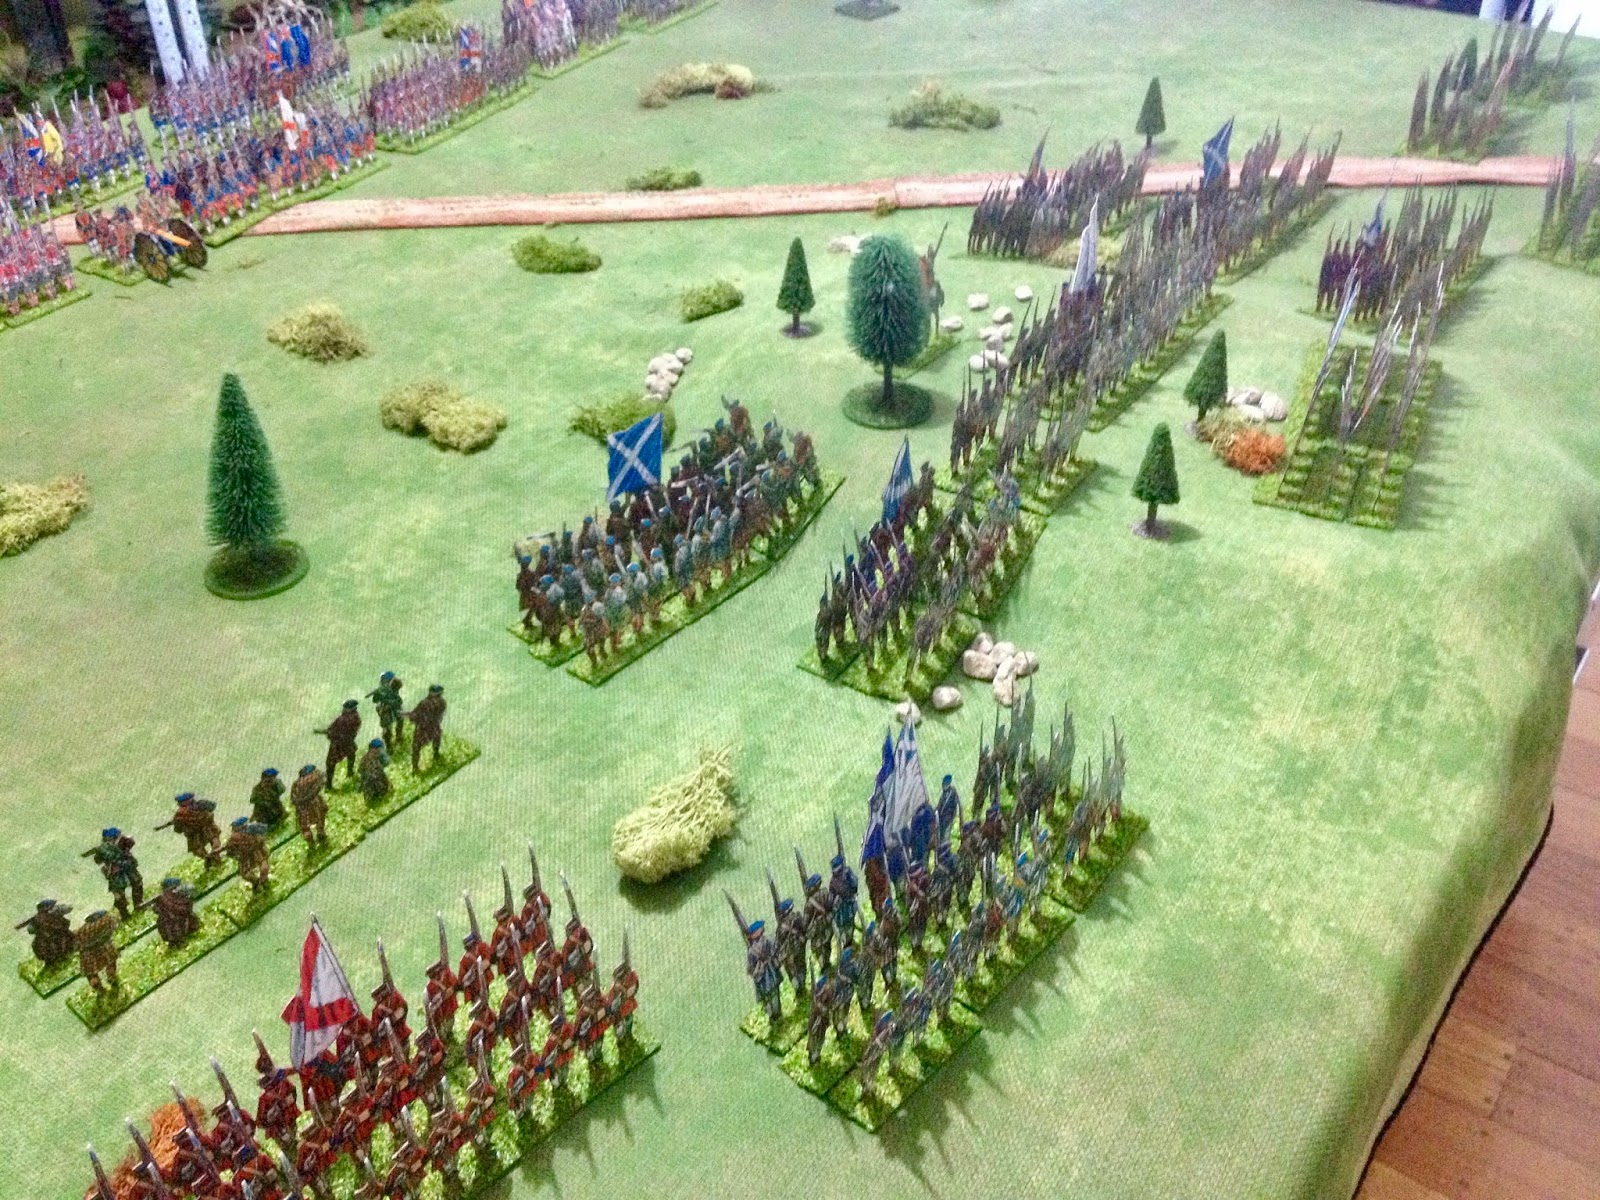
 |
| A past game |
- Adjusting ranges and defence values for earlier WW2 equipment
- Differentiating self-propelled guns vs. tanks
- Limiting artillery support to HQs
- Western Desert terrain features and effects on combat
- Minefields
- LOS impacts by brewed up vehicles, dust thrown up by moving vehicles, and visibility with midday heat hazes
- Smoke screens
- Introducing a game clock
So here are the rules and some photos. Hopefully without too many typos, proof reading is not my strength. I hope they make sense...
Units
Each unit has three values for range, defence, and movement. Where a value has two numbers split by a “/“ special rules apply to the second number used. Here are the general rules and some examples listed afterwards.
Tanks and Armoured Cars
Can move and fire during a turn.
 |
| Tanks and Armoured Cars |
Can move or fire, but not both during a turn.
The aim of this rule is to differentiate within the game between SPGs and the mobility of tanks.
 |
| Self-Propelled Artillery and AT Guns |
Can move or fire, but not both during a turn.
Can move the higher value if moved as part of an HQ move.
The aim of this rule is to limit the movement flexibility of towed AT and artillery units, while at the same time allow them to keep pace with other advancing units if with an HQ.
 |
| Towed artillery |
Armoured Infantry
Can move or fire, but not both during a turn. As per rules.
 |
| Armoured infantry on the move |
Can move or fire, but not both during a turn.
Can move the higher value if moved as part of an HQ move.
 |
| Motorised infantry |
Defence Value Examples
8/10 = Motorised Infantry (soft-skinned vehicles), towed guns, and 2pdr Portees
9/10 = Armoured Infantry and AT (eg, Sdkfz 250 and Bren Gun Carriers)
9 = Armoured Cars, Self-Propelled Guns, and Tankettes (eg, Sdkfz 222, Wespe, Pz1)
10 = Light Tanks (eg, Stuart, PzII, Cruiser, M13/40, Crusader)
11 = Medium Tanks (eg, PzIII, StugIII, Crusader III, PzIV, Sherman, and Valentine)
12 = Heavy Tanks (eg, Matilda)
Range Values Examples
88mm = 4 hexes
75mm*, 6pdr = 3 hexes
47mm, 50mm, 37mm, 2pdr, = 2 hexes
20mm and small arms** = 1 hex
* Grant 75mm can only be used if not moved during turn.
** Infantry (motorised and armoured) range remains 1 hex even when on hill
Movement Values Examples
Slow = 1 hex (eg, Towed guns*, motorised infantry*, Matilda tank)
Medium = 2 hex (eg, PzIII, Grant, Valentine, Cruiser Tank, and Armoured Infantry
Fast = 3 hex (eg, Stuart, Crusader, Armoured Cars)
* move 2 hexes if moved by HQ move.
Head Quarters (HQ) marker - Used to indicate a commander is attached to a unit. Place it with the unit as a reminder of the presence of an HQ. If the unit is eliminated, remove the unit and set aside the commander marker which can return to the game (for exception see Army Resolve house rule)
Dust cloud marker - Used to show units which moved during their turn.
Brewed up marker - Used to show where units have been destroyed.
Smoke marker - Used to show where smoke has been laid down.
 |
| A unit with attached HQ. All units are mounted on a 2x2 inch base and HQ markers are on a 1.5x1.5 inch base. |
 |
| A unit with an experienced commander. Experienced commander markers are on a 1x1 inch base. |
 |
| Brewed up markers |
 |
| Two moving units with dust cloud markers |
 |
| Smoke screen blocks LOS for two tank units as they advance towards an 88mm Gun. |
Agree the start time on the game clock and which table side is East and which table edge is West. These become important for visibility during the game (see visibility house rule) and for when reserves arrive at set times. The game clock progress 5 minutes after each action (e.g., if a players makes 3 actions turning a turn, then the clock would progress 15 minutes).
 |
| Game clock which moves forward 5 minutes with each action taken |
The tabletop consists of hexes which represent the following terrain types:
Clear - no effects
Roads - as per rules, increases movement by one hex.
Town - provides cover, firing unit’s facing is 360 degree, and a unit in town cannot be flanked.
Hill or Sand Dune - Add one to ranges except infantry (as per rules) and provide cover unless the unit is flanked. It is assumed a unit will take advantage of the crest of a hill for cover which is negated if enemy units flank them.
 |
| Infantry units have taken cover on the hill and town. |
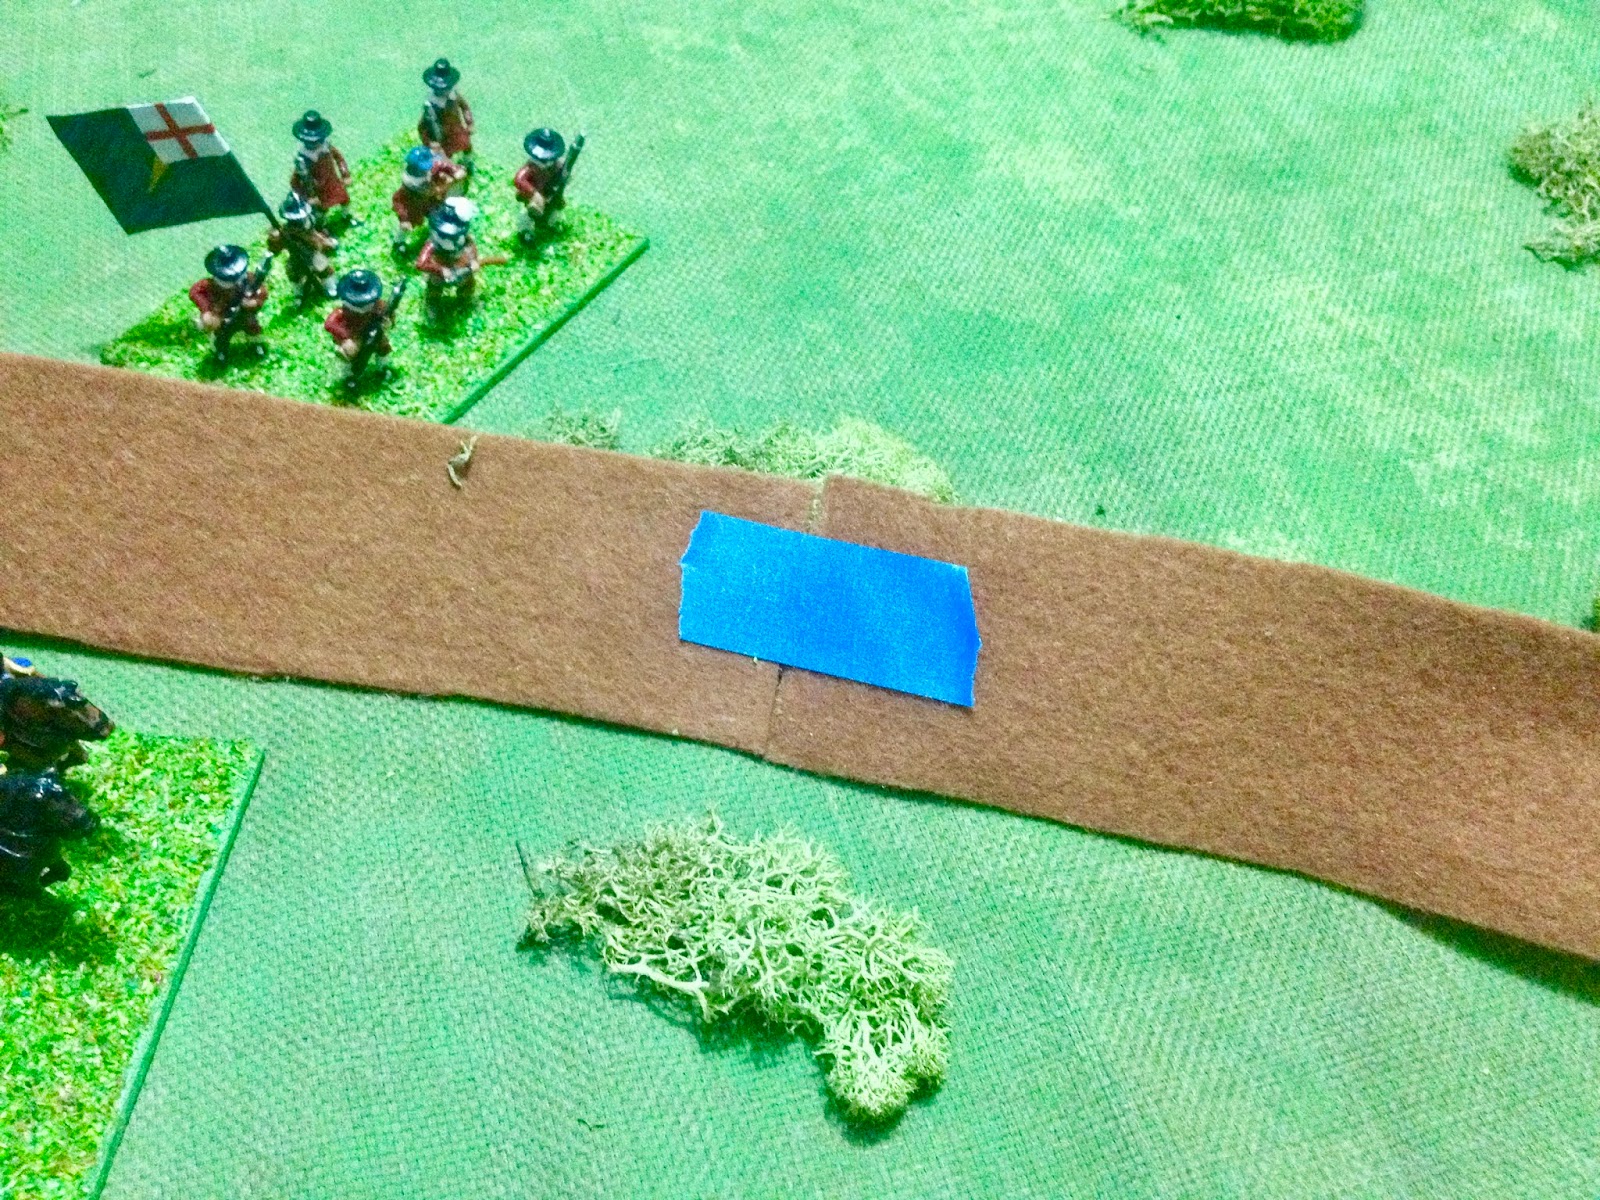
 |
| A couple of infantry units are about to be surprised by an enemy tank unit hidden out of sight in a wide (depression) |
 |
| Salt marsh (painted felt - quick and easy) |
Rough Terrain - provides cover

Minefields - movement ceases upon entry.
 |
| A minefield adds to the danger for the advancing tank unit. An AT gun waits in its improved position. |
As per rules.
Only one unit in a hex and they may not move through hexes containing units.
Aircraft no not count towards stacking.
Markers do not count towards stacking limits.
Facing
Units always face a hex-side and have a 180-degree front arc.
The exception is units in a town which have a 360-degree frontage.
Turns
I use the solo rules.
Players take turns.
During a turn a player performs 2 actions, then roll D6. On 1-2, stop, else perform another action. Roll again, 1-3 stop. Else perform another action and stop.
After each action performed, progress the game clock forward by 5 minutes.
Action Points
As per rules. Action Points are expended to move, fire, and promote units. It costs one AP to:
- Pivot and/or move one unit
- Fire any/all units at one target
- Promote one unit to an HQ
As per rules with HQ group moves and promotions. Additional rules:
Only HQs can call in indirect fire from Artillery units without LOS.
Field promotions are not permitted once 50% of unit are lost.
An HQ can be attached to any unit type.
Exceptional Leader
As per Ace rules, but can be assigned to any type of unit.
Movement
Similar to the rules. Units move a number of hexes equal to their movement value. Noting units must cease movement for the turn when:
- Moving into a hex which is adjacent to an enemy unit.
- Moving into terrain.
- Moving into a minefield.
Combat
To shoot:
- Target in firing unit’s front arc
- Within range (add 1 hex if on hill)
- Have LOS.
Then roll 2D6 and:
- Add +1 for each firing unit
- Add +1 for attacking the flank
- Subtract 1 if defender in cover.
If total Attack equal or greater than the defence value unit is eliminated.
Artillery Support
An artillery unit does not require LOS to the target if a unit with an attached HQ has a valid LOS. The artillery must still be within range of the target.
 |
| Armoured infantry with an attached HQ call upon artillery positioned behind the hill,. |
Same as rules, but includes self-propelled AT guns where AT guns can fire at an armoured target at no action point cost.
Towed Artillery and Motorised Infantry
Towed artillery and motorised infantry have two movement points when moved as part of an HQ move. This rule limits the movement flexibility of these units which have to unlimber/limber or unload/load while not having to record the state of individual units.
Improved Positions
As per rules. Units treated as being in cover providing they do not move.
Aircraft
To call in an airstrike, a player must select a hex within LOS of one of their HQs and spend 2 actions.
During an airstrike the aircraft makes 3 attack runs.
Place the aircraft on the hex to be attacked. To fire roll the dice and add 2.
After the first attack on the second attack run, roll a dice, on a 4-6 the player can attack any adjacent hex. On a score of 1-3, the defending player places the airstrike on any adjacent hex on their choice.
This is process is repeated for the third attack run.
Minefields
Placed by defender at start of game.
They can only be placed in clear hexes.
Units end their movement for the turn upon entering a minefield hex.
+1 to combat rolls when the target is in a minefield hex.
Visibility
Visibility is problematic at sunrise (6:30am to 8:00am) when looking into the rising sun. So any target which is positioned East from all firing units and not adjacent is treated as being in cover.
Likewise for the glare during sunset (5:30pm - 7:30pm) where any target position West of all firing units and not adjacent is treated as being in cover.
Midday heat haze (12:00pm to 1:30pm) effects visibility. So any target not adjacent to a firing unit is treated as being in cover.
Prior to the game starting agree which table edges are East and West and the game clock's start time.
Brewed Up Vehicles
Replace destroyed units with a brewed up marker. A hex with a brewed up marker can be seen into but blocks LOS through it.
Brewed up markers remain for the game's duration.
I use brewed up markers to help track units lost. At the start of the game I set aside three groups of markers. One group for each side with markers for half the forces rounded up, and a common group for when all markers used by one side. Once a side's markers are all used it is a good reminder that an army has 50% casualties.
Dust Cloud Markers
When a unit moves place a dust cloud on the hex. A hex with a dust cloud can be seen into but blocks LOS through it.
A player removes all dust clouds from their units at the start of their turn.
Army Resolve
When 50% units are lost no more HQ promotions can occur.
Sand Storm
If sand storms are predicted during the game, then roll dice at the end of each player's turn. On a score of 4-6 a sand storm is in effect and a score of 1-3 ends any sand storm in effect from a previous turn.
When a sand storm is in effect: all units move 1 hex, and any target not adjacent to a firing unit is treated as being in cover.
Smoke Screen
Artillery units can lay down smoke in a hex on a score or 6+. If successful, a player can place a smoke marker in a hex. The hex must be within range and a HQ must have LOS.
Smoke blocks LOS for all sides.
At the start of a player’s turn remove all a player’s smoke from their previous turn.

So these are all the house rules I have been using I hope they make sense if you know the game Tank on Tank. Many of the ideas for these house rules came from reading "Tank Battles in Miniature: 1 A wargamers' guide to the Western Desert Campaign 1940-1942" by Donald Featherstone. I hope to to a game report in the near future and highlight the various rules.


