Wednesday 29 January 2020

Landing craft production in full swing

Having recently completed a commando raid game of St. Nazaire. It got me thinking about a D-Day style game and this idea was soon reenforced after re-reading Chapter 28 "Landing in Force" from War Game Campaigns (Donald Featherstone) and Chapter 8 "Disaster at D-Day - and other big games" from Operation Warboard (Gavin Lyall). However, I lacked any landing craft to undertake a game of this sort, and decided to take a similar approach to the St. Nazaire game by using bits of wood and MDF board to create some very basic landing craft.

The landing craft themselves are constructed by cutting a 42mm x 30mm wood to shape with one end angled, adding MDF board on top and for the ramp, and finally adding a pilot house made from some 10mm x 20mm wooden dowel.

The models are painted grey and receive a light sanding to remove any obvious rough areas of wood grain.
Once all the bits were cut out (and I included a gun emplacement) they were such together using PVC wood glue. The wooded models were given a coat of grey and lightly sanded once dry. Then the major details were painted. As you can see from the photos the cargo bays are painted black to give the impression of a cargo area when the models have none to simplify their construction.

Rather than building models with a cargo bay. The bay area is represented by painting them black.
Using the same chalk pastel approach I did with the St. Nazaire models. A light shading of black and blue was drawn over the grey paint before using a light grey pastel to blur and blend in some of the blues and blacks. A white pastel was used to highlight the landing craft edges and corners. Finally, a light shading of dark brown and dark green was used to soften the black representing the cargo bay.

A coat of PVA glue is applied to seal the pastel colours
The finished product made from 4 bits (2 bits of MDF board and 2 bits of wood)
I now need to plan a series of games with some paratroopers capturing a bridge to delay reinforcements, a beach landing, a counter attack, and maybe a final breakout game assuming the landings are successful.

Here are a few photos of the landing craft on the tabletop to show off the models and how the beach landing game may look.


Monday 27 January 2020

Some desert scrub terrain

During the week I played a couple of WW2 North Africa games. I have terrain to represent hills, broken rocky terrain, and wadis, but lack any terrain for desert scrub. So this weekend I cut some sand coloured felt to fit the home made gridded hex tabletop cover. Then set about adding paint and glued some cut lichen around the edges so not to interfere with the placement of units in the hex.

Desert scrub terrain features for my grid based North Africa WW2 games
A close up view of the features.
I also tried another version to place pieces around the hex edges. Out of the version I preferred full hex of scrub version.

An alternative attempt to have the scrub around the hex edges.
Desert scrub in use during a game
The finished desert scrub was soon put into action on the wargame tabletop.

Thursday 23 January 2020

St. Nazaire Raid Game report

I finally managed to write up a game report of a commando raid game based upon a British commando attack on the St. Nazaire dock in the early hours of 28th March 1942.


Commandos start their assault.
The objective of the raid was to put out of action a dry dock which could be used to repair German warships. An old destroyer, HMS Campbeltown, was converted to resemble a German destroyer and with 18 smaller motor launches left Falmouth for the raid. The plan was to ram the dock and with the Campbeltown which had been packed with delayed-action explosives. Additionally, a force of commandos was landed with the objective of destroying machinery and other structures.

This game is focused on the commandos and their actions in destroying their targets, and starts with the successful ramming of the dock and landing of the commandos.


Dock layout on a 6x4 foot tabletop
The raiding commandos are organised into:

  • 3 demolition parties with no limit on the number of attempts at demolition.
  • 9 assault parties used to form a bridgehead and put out of action: searchlights, gun emplacements, and pillboxes.

During a number of test games I have reduced the number of demolition parties to just three. trying to get the balance right between forming a protective parameter and running around blowing things up.


Targets for demolition
German defenders arrive at one of three entry points during the game based upon a dice throw. For the most part they are infantry units, but there are a maximum of two armoured car units which can arrive instead if a second dice roll scores a 6.


A series of pillboxes, gun emplacements, and searchlights which can be put out of action by any commando unit.
The reduction in the number of demolition parties, change in arrival of armoured cars, and determining the casualties from coastal gun batteries, where the only changes to the test rules posted previously (here).

The game assumes the naval component follows history. Where the attacking force is able to move down the estuary unobserved and passed the main gun batteries before the final run in lasting few minutes under fire from lighter gun batteries. 

The game preparation begins with determining casualties to the commando landing forces from those lighter gun batteries. One dice is rolled for each motor launch and HMS Campbeltown. On a score of 6 one of the commando parties is lost (players choice).


Commando units and ships lined up.
Two hits causing the loss of two assault units.
On the first turn 3 German units are placed at their entry points and move towards the closest commando units. On all other turns 1 German unit arrives at one of the three entry points determined by a dice roll.


German troops arrive
HMS Campbeltown rams the dock gates and commandos quickly disembark from the destroyer and  motor launches, heading for their targets and to setup a bridgehead.


Commandos attack a pillbox as they attempt to secure the Old Mole.
Landed commando parties fan out through the docks.

The commandos were able to quickly blow up their initial targets: the pump house, outer winding house and caisson. All close to the dock entrance. Progress was slow against the pillboxes defending the oil tanks and Old Mole. Meanwhile German units were starting to appear in greater numbers at the top of the dock.
Initial successes with the inner gate winding house and pump house destroyed.
Defenders start to arrive and head towards the commando parties
Assault parties move into the warehouses to set up a beach head.
For a few turns after their initial successes the commando's progress appeared to stymied by the pillboxes, and defending forces arriving in the dock area. In the centre dock area assault parties were able to move with reasonable freedom with fewer defenders around.

At the main target area the outer set of caisson and dock gates are demolished. With time against them, demolition parties dashed down the length of the dock towards the second set of caisson and dock gates. Nearby assault parties are engaged in combat with defending units in and amongst the warehouses.
The outer Caisson and lock gate is blown up.
Demolition parties scurry past the fighting amongst the warehouses as they head towards the far end of the dock. In the foreground the pillbox is proving to be a real impediment.
Having successfully demolished the outer gates the next major target for the demolition parties was the inner gates, before finally heading towards the Old Mole to re-embark on waiting boats and escape. Any re-embarking could take place if the assault parties had to put out of action the gun emplacements and searchlights, and these efforts were being hampered by the pillboxes.


The Old Mole pillbox is finally put out of action.
Demolition parties start preparing to demolish the inner gates and winding house, and in the background the other pillbox is put out of action. The arrival of an armoured car may make things a bit sticky for the commando parties.
Another armoured car arrives. The continual arrival of defending units is starting to take its toll.
Once the pillboxes were put out of action the commandos quickly set about dealing with the gun emplacements and searchlights. While demolition parties placed their explosives at the inner dock gates and nearby oil tanks. Assault parties held off the defenders, destroying the armoured car and charging into close combat to buy time.


Searchlights are put out of action.
Commandos in close combat as the explosives go off destroying the inner caisson and gates.
With key targets demolished the commandos attempt to make their escape, but the commandos around the Old Mole were getting pushed back by the defenders and the route for them was closed. The final gun emplacement was put out of action and a couple of commando parties were able to re-embark and escape.


Defenders pressure the defenders around the Old Mole.
A few commando parties are able to re-embark and make their escape.
So this was the end of the St. Nazaire Raid project. A fun game to play wth a few tense moments trying to overcome pillboxes and setting explosives at the inner dock gates. All bar one of two of targets were successfully destroyed. It is assumed history is repeated and HMS Campbeltown explodes putting out of action the dry dock for the remainder of the war.

Overall the game played well with simple rules and set moves by the defenders. One change I made was to the defender movement rules to allow for the situation when other defending units are blocking the way, then they would move around to attempt a flanking move.

This will not be the last we see of the commando units. I will be building some landing craft for some further attacks on costal defences.

Saturday 18 January 2020

Considering the next project

As the St. Nazaire project comes towards an end I need to decide upon my next project. The choice I have:

  1. Painting my remaining plastic Seven Years War Spencer Smith figures with the aim of playing a few games from the book "Scenarios for Wargames".
  2. Painting my old Minifig Samurai figures and recent secondhand Minifig purchases (S Range I believe, but not sure).

The advantage of the SYW project is I will be adding to existing units from my French Indian War units and the troops will get to the tabletop quicker for a game. My aim is to create units with two stands of 10 figures and a command stand with a mounted officer, foot officer and flag bearer (something like the photo below). The existing French Indian War units are single bases of 10 figures.


Before painting my old Minifig Samurai I will have to strip off the old paint first and clean them up. I also have to figure out how to deal with the slight difference in the Minifig ranges. Both are 25mm, but one has a much more bulkier look.

Old figures and recent second hand purchase.
Both ranges are 25mm
One figure is much more bulky

Right now on the painting table are a couple of Hinchliffe ECW hand-drawn powder carts.


Tuesday 14 January 2020

St. Nazaire Raid - deciding the rules

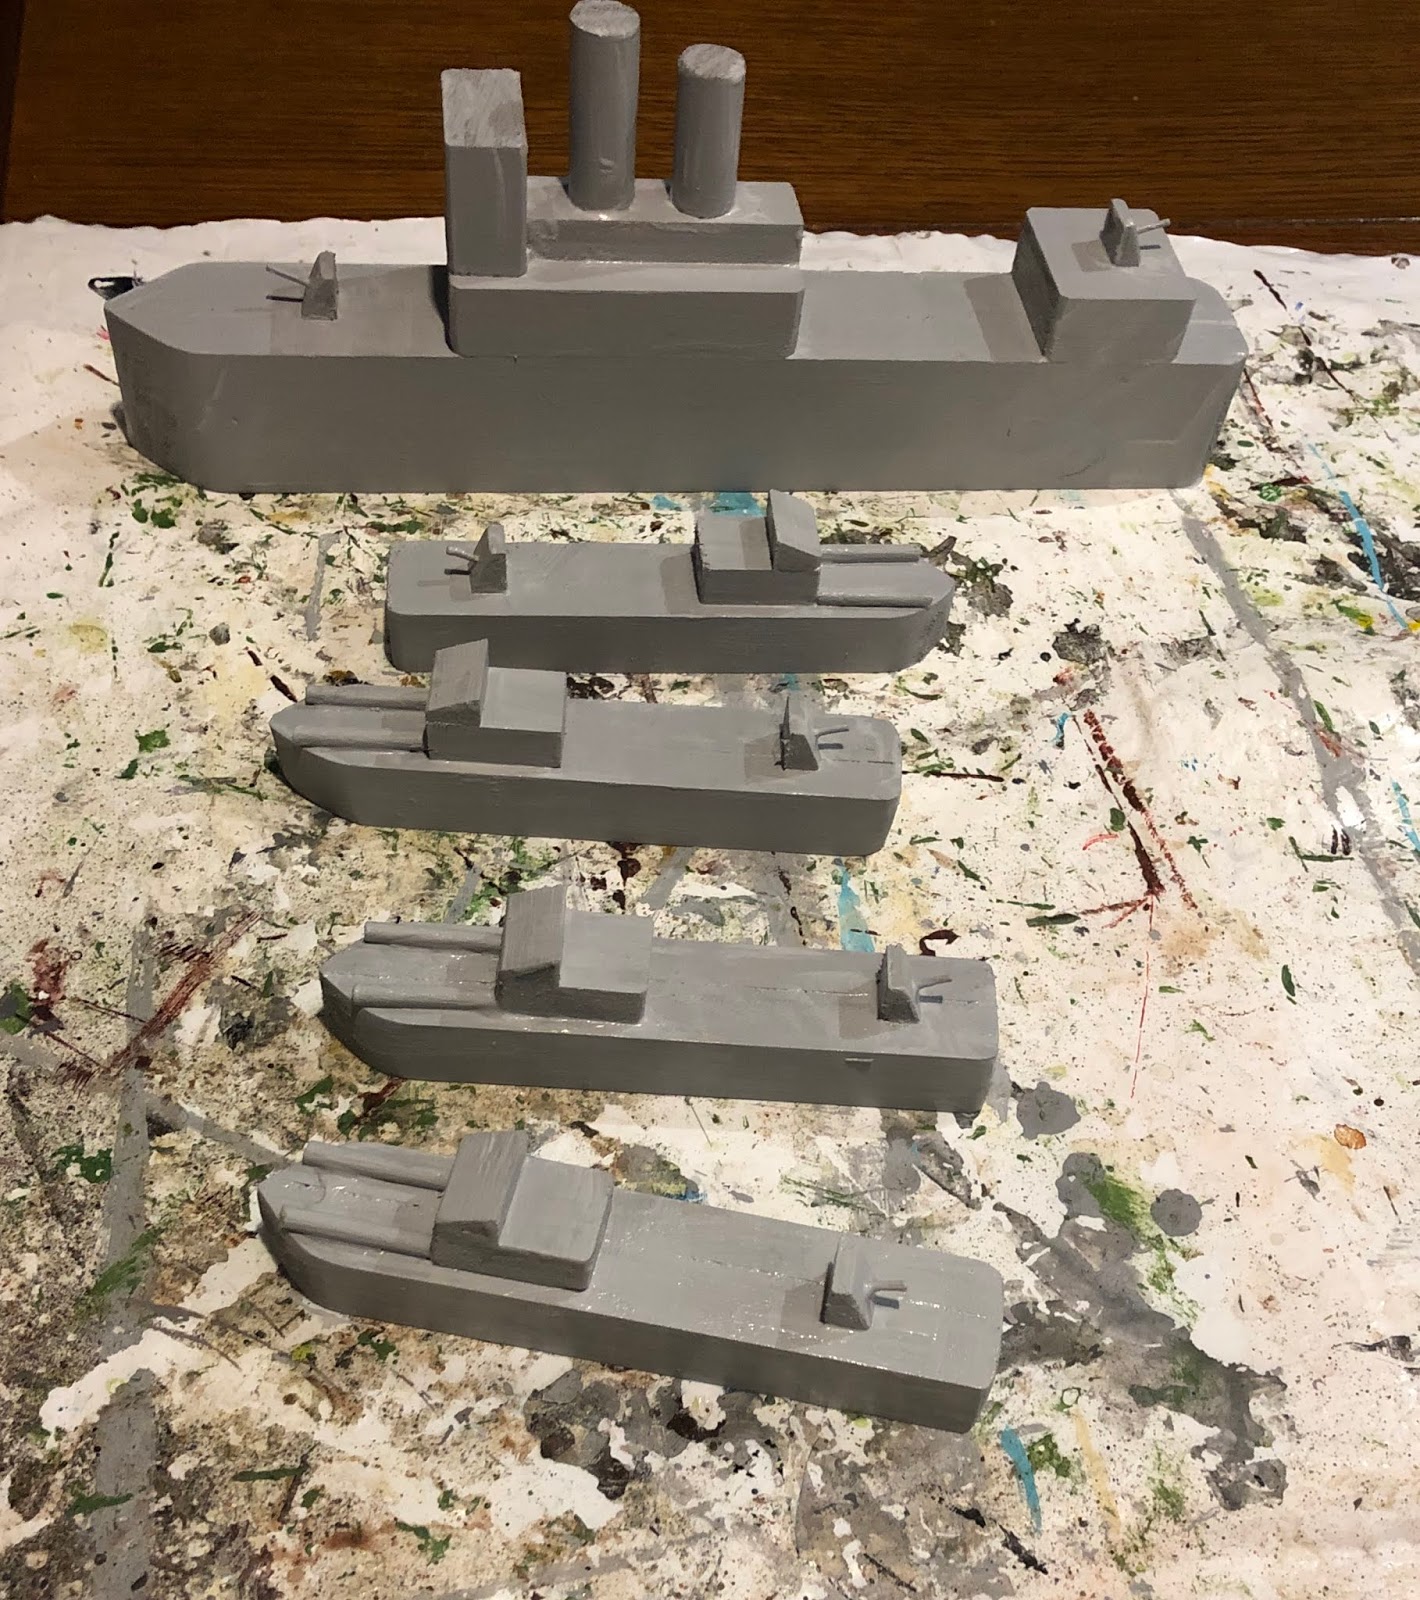
Having completed the terrain, ships and a few commando units it was time to consider the rules to be used. Once upon a time I owned the boardgame Raid on St. Nazaire by Avalon Hill. This was a solo boardgame which had the German defenders moving to a set of rules. This is an approach I want to include in the rules.

The rules have been kept very simple to make the action swift, and I have called them "Attack on the Iron Coast" after the film which was loosely based on the St. Nazaire raid. As an aside, I do remember going to see this film at the cinema and enjoying it when I was young and still wearing shorts. So I had a quick look at the trailers for the film on Youtube. My memory and the trailers viewed 50 years on don't quite match, but I do like the film's dynamic poster.


Anyway, back to the game rules as they currently stand after a couple of test games...

The game starts with the landing of the commando parties and the ramming of the dock gates by HMS Campbeltown. The game's challenge is focussed on the commandos running amok and demolishing all their targets before re-embarking on ships from the Old Mole to escape. While the Germans continually feed in more and more reserves making the commando's task increasingly difficult as the turns go by.

A map of the 6x4 foot tabletop showing the German reserve entry points and commando landing areas. The map is a slightly cut down version from "Battle Notes for Wargamers" by Donald Featherstone.

Units

Units represent commando raiding parties and German patrols. On the raid commandos were organised into demolition parties, protection parties or assault parties. For the purpose of the game I have combined the protection and demolition parties into single units. Only the four demolition units can blow things up, and are is no limit on the number of attempts at demolition. The remaining eight commando assault units are used to form a bridgehead and put out of action: searchlights, gun emplacements, and pillboxes.

I am using ten German patrol units and two armoured cars. The infantry unit get reused as they are eliminated returning as reserve units at one of the reenforcement points on the map. At the start of the game a German patrol is placed at each reenforcement point.

Sequence of Play

The game is played in turns with the commando player attempting to activate each commando unit first. Then followed by the German unit activation and re-enforcements.

Each unit gets to make a variable number of actions, including no action (more on that later).

During the German turn the following rules are applied to each unit:

  • Any deployed German unit must move towards the closest commando unit until within shooting range. As soon as they are within shooting range they must shoot. 
  • If they begin an activation within shooting range, they must only shoot at the closest commando unit. Until all enemy unit within range are eliminated they cannot move.
  • Pillboxes only get one action, and must shoot at the closest commando unit.

A single German reenforcing unit arrives each turn after all German units have attempted activation. Roll a D6 to determine which of the three re-enforcements points their unit arrives (see map). If a unit is arriving from second point (dice roll 3 or 4) then roll a second D6 and if a 6 is rolled, change the infantry unit to an armoured car. This only occurs twice during a game, otherwise it is just infantry units arriving. Any eliminated German unit is reused, so reserves are endless.

Commando landings in the first turn:

  • Move the ships to their target landing areas
  • To represent the ships not making their landing areas due to sinking and casualties sustained from German fire. Roll 1D6 for each of the four motor launches and HMS Campbeltown. If a 6 is rolled one commando unit is eliminated, player’s choice.
  • Start activating commando units to exit the ships.

German starting positions first turn:

  • Three German units start the game on the tabletop. One is place at each reenforcement point (see map).

Unit Activation

Each unit in a player's force is activated once during the player's turn. Assuming a successful activation a unit can move, shoot, attempt a demolition of a target*, or engage in hand to hand combat**.

Roll a D6 and adjust the score:
-1 for German forces to represent the confusion
-1 if a unit has sustained a hit

If the adjusted score is:
  • Less than 1 = no action allowed
  • 1-2 = one action allowed
  • 3-4 = two actions allowed
  • 5-6 = three actions allowed
Pillboxes always have one shooting action until they are destroyed.

* Commando demolition units only
** Commando assault units only

Movement

A move costs one action and units when moving must move in a straight line. If a unit is moving it must perform all its move actions together, a unit cannot move, shoot, and move again.

Commando units and German infantry units move 6” for each move action. There are no deductions for moving in built up areas.

Armoured cars move 12 for each move action, but cannot move into built up areas.

Units may pass through friendly units without penalty.

Shooting

To shoot costs one action. As with the moving all shooting actions must occur together. With each  shooting action all units roll a D6. A unit with two shooting actions would roll twice, once for each attack.

  • A score of 5 or 6 causes a hit on infantry units in the open, and gun emplacements/searchlights.
  • A score of 6 causes a hit on units in cover, armoured cars, and pillboxes

All units, pillboxes, gun emplacements/searchlights are eliminated on taking a second hit.

To attack a pillbox, gun emplacement, or searchlight the attacking unit must be within 3”. Otherwise all ranges are 12".

Gun emplacements cannot fire at ground units and for the purpose of the game they are targets for being put out of action.

Demolition

A demolition attempt takes two actions and can only be carried out by a commando demolition unit. The unit must be touching or on the target to attempt a demolition. 

Roll a D6, if a 5 or 6 is scored the explosives were successfully set, then the unit moves 3 inches away. Yell bang! And place an explosive looking marker to show the target has been successfully destroyed. If the explosives were not successfully set and the unit remains in place (and you don't get to yell).

Hand to hand combat

Hand to hand combat can only be initiated by commando assault units. A unit must first move into contact with an enemy unit. It then costs one action to engage in hand to hand combat.

To determine the outcome commandos roll a 2D6 selecting the highest score. German units roll 1D6. Compare scores the highest score eliminates the opposing units. Re-roll any draws. A bit risky, but a very effective way for commando assault units armed to the teeth to quickly clear out enemy units in cover.

Commando re-embarkment (escape)

A secondary objective for the commando player is to re-embark any surviving commando units off the Old Mole. Extraction can only take place if the 3 gun emplacements and 2 searchlights are destroyed. If this has occurred, commando units are re-embarked as soon as they are able to move on to the Old Mole.

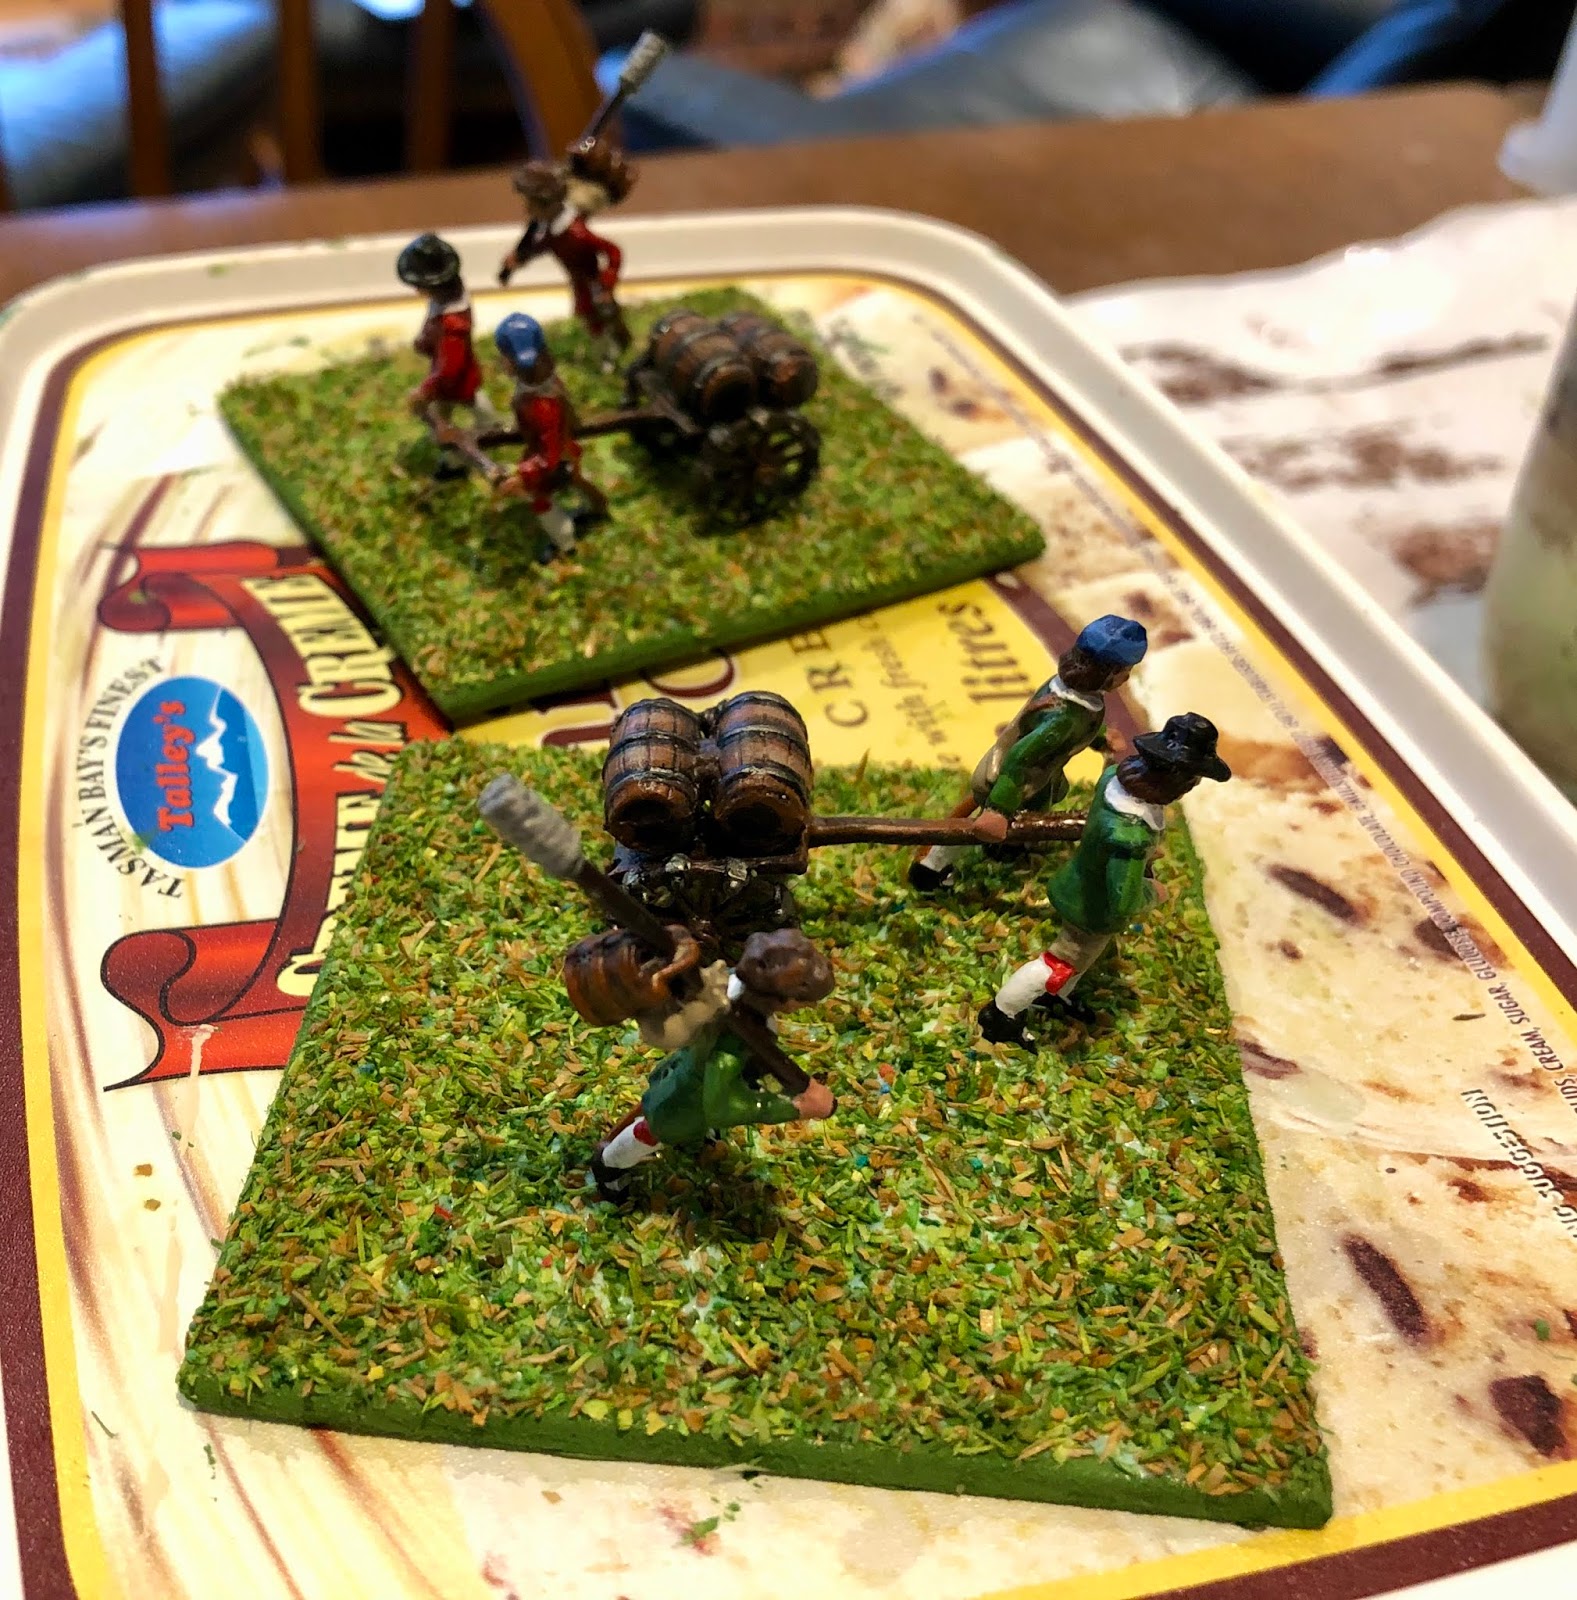
A test game in progress. The green flocked bases are at odds with the dockyard terrain.
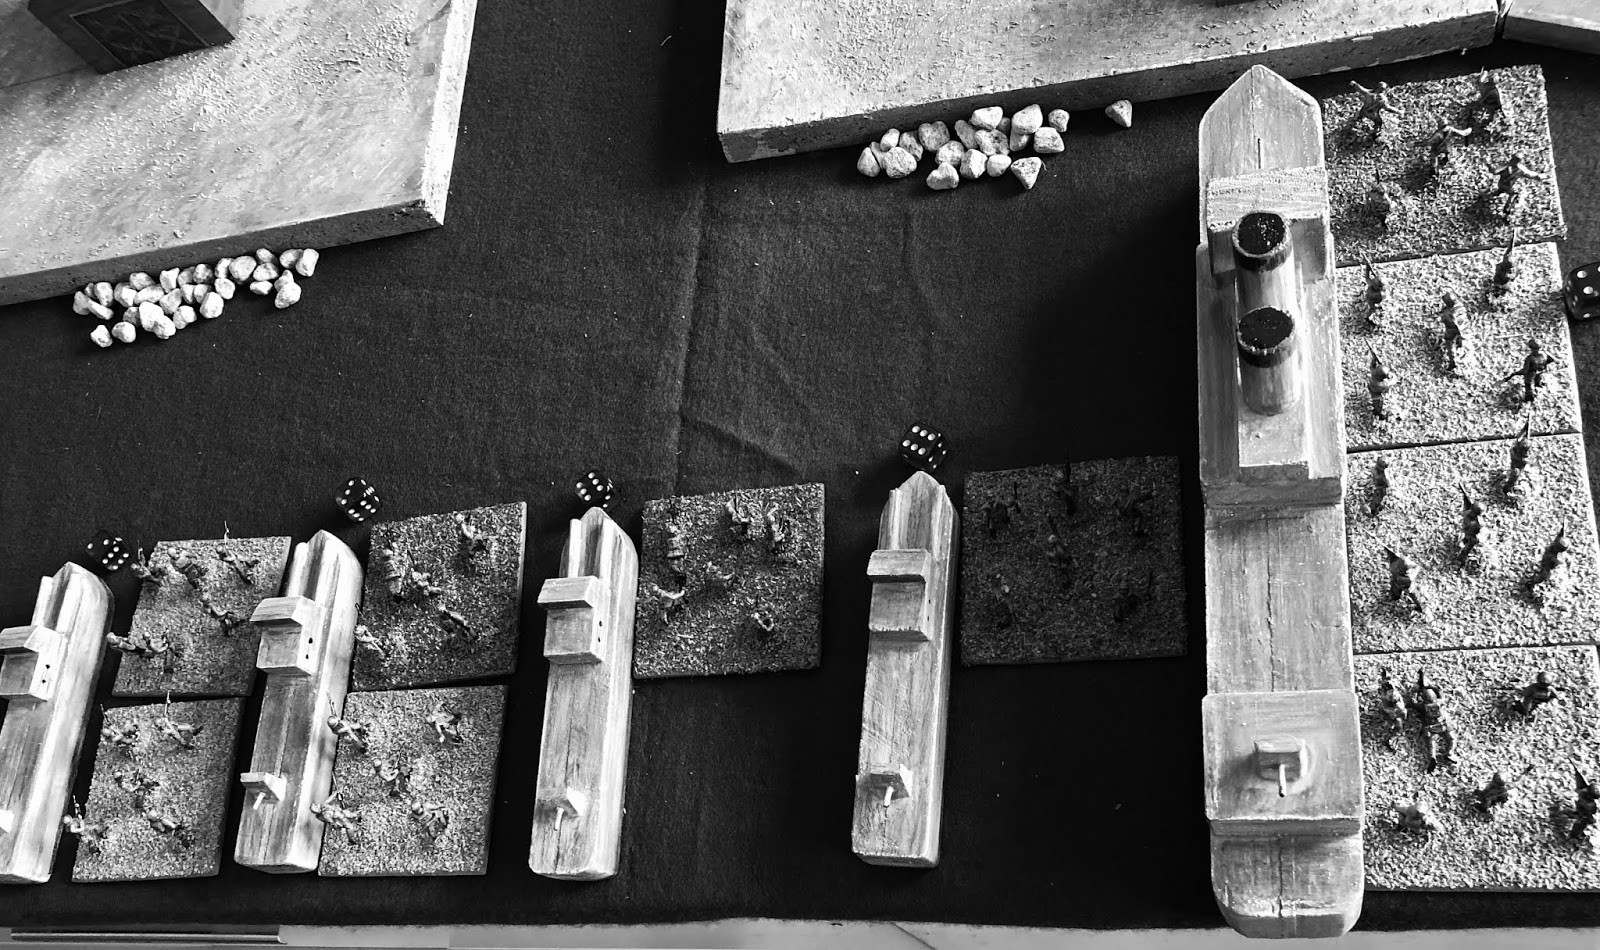
B&W photos disguise the flocked bases and look more atmospheric.
A few more test games to play before a game report. So far the rule mechanisms are working for me and have delivered some fun games. Just need to finalise victory points.


Sunday 12 January 2020

St. Nazaire Raid terrain ready for a game

Last week and this weekend I was able to complete a few units of commandos mainly using Airfix commandos with a few other figures mixed in and scratch build a few ships for a St. Nazaire game.

Commando units
Using wood offcuts HMS Campbeltown and four Motor Launches (which ended up looking more like Motor Torpedo boats) were constructed in a simple block fashion. These were undercoated grey before adding colour with pastel crayons and a bit of paint for details such as portholes.

HMS Campbeltown and four motor launches built and undercoated. In terms of size the ship is 12 inches and launches 6 inches.
HMS Campeltown heads towards the dock.
The ships were them finished using pastels and paint for details before being sealed with PVA glue.
A closer photo of HMS Campeltown.
With terrain, figures, and ships completed it is time to consider some rules for the game.

Saturday 11 January 2020

ECW Campaign Game - Battle of Dunnington - June 1646

In June 1646 Parliament marched with an army on Lincolnshire and were confronted by a Royalist army at Dunninghurst (link to campaign moves and battle setup). The Royalist commander had taken up a strong defensive position around some central buildings and behind a line of hedges.

ECW game in progress
Map of deployment - Royalists are red and Parliament are blue.
The battle began with Parliamentarian forces pushing forward. On their left flank commanded shot moved into the town and were soon faced by Royalist commanded shot who had taken up position in nearby woods. Musket fire was exchanged between the two units.

In the centre the Parliamentarian infantry engaged Royalist infantry position around the centre buildings.

Tabletop setup and ready for the game.
Parliament advances in the centre
With the centre engaged Parliamentarian cavalry pushed forward on the right flank, but were unable to make headway against Royalist infantry defending along the hedges. The attack soon fell into a series of small actions.
On their right flank Parliamentarian cavalry push forward
Parliament cavalry are halted at the hedges
In the centre the pressure was beginning to tell and Royalist reserves moved up to replace losses. In an attempt to reduce the pressure Royalist cavalry charged forward and were met by Parliamentarian cavalry.
Royalist cavalry launch an attack in an attempt to disrupt the Parliamentarian centre attack.
As the battle progressed Parliament was unable to gain any advantage and their attacks began to falter and casualties mounted. Royalist forces held their defensive positions and the Parliamentarian commander decided enough was enough and retired from the battlefield.

Parliament's attack begins to falter.
Battle movements
A marginal victory to Royalists who were able to outlast Parliamentarian forces who failed to gain control of Lincolnshire. The campaign situation in 1646 does not look good for Parliament as they have been unable to increase the regions they control.