Saturday 30 May 2020

WSS paper soldier dragoon unit completed

During the week I was able to complete a paper soldier dragoon unit. Actually two units were cut out and based, one of mounted dragoons and a second of dismounted dragoons. While designed for the War of Spanish Succession, I will be putting them to use as Government dragoons for some Jacobite Rebellion games.
Mounted dragoons
Dragoons on dismounted
The current project has completed so far:

  • French - 4 infantry and 2 cavalry
  • Dutch/British - 4 infantry, 2 cavalry, and 1 dragoon

As much as I try to line up both sides of the cut out paper soldiers there are occasions where the front and back can be out of line. This is particularly so for mounted units. One trick I use is to colour in with a felt-tipped pen the out of line area. While not perfect it certainly helps to disguise these areas.

Out of line after cutting.
Touched up with felt-tipped pen.
Effect once all based up and finished.
Looping back on the Jacobite Rebellion paper armies, which I completed about a year ago (May 2019) with a one or two later unit additions. I have had a number of games with them to develop and tryout different rules and these seem to be reasonably settled for the present. So I was thinking it is time to use these armies in a campaign.

The rules created in a zine style.
The layout of the zine.
While my main campaign focus is the WW2 Western Desert currently underway. It is always fun to sneak in a small campaign of a few battles or smaller engagements. Having recently completed a area based campaign with my English Civil War and the WW2 Western Desert being a linear style campaign, I though a different style of campaign would be good to do.

The campaign approach I am planning is going to use ideas from the children's snakes and ladders game. The snakes and ladders will be replaced with red and blue arrows and represent the success and tribulations of campaigning. For example: muddy roads, supporters join the cause, desertions, no pay, intelligence arrives from spy in enemy camp, etc.)

Snakes and ladders game example
The arrival at the finish by one side or the other will result in a final and decisive battle. Obviously, getting to the finish first will be beneficial in terms of troops and/or terrain placement on the tabletop. Along the way there will be engagement squares which will unlike the original game will have both a snake (tribulation) and ladder (success). When landing on these squares a battle occurs and the campaign moves to the tabletop. Win and you ascend towards the finish, lose and you descend back towards the start.


Wednesday 27 May 2020

WW2 Western Desert Turn 5

The Western Desert campaign turn 4 ended when the Allies called off their counter offensive having drawn and lost their two engagements. Turn 5 begins with the dicing for supplies, Axis forces require a 3+ to receive supplies and get a 3, and Allied forces require a 2+ and get a 2.

The supplies were gratefully required by the Allies having missed out last turn. All their divisions will be able to refit and reequip. Axis forces with the exception of one Italian infantry division are in a good state and will take the offensive in this turn.

Supply Tracker prior to supplies arriving.
The attacking units are positioned on the map and the defending division mixed up and placed face down. Then the attacking division is selected to attack and their opposing division is revealed. The terrain will be determined and the game setup for this coming weekend.
Campaign map
First engagement for turn 5 decided.
Earlier this week I felt like something different and opted for a quick Crossfire game set in WW2 Burma. On the tabletop there are three of Allied platoons seeking out two Japanese platoons as the advance on either side of the track.

Tabletop setup for WW2 Burma
Close combat in the jungle.
Allied infantry

Saturday 23 May 2020

WW2 Campaign Turn 4 and WSS Paper Soldiers

The Western Desert WW2 Campaign turn 4 has not gone well for the Allies offensive. In their first attack (game 1) they failed to gain ground and ended in a stalemate. While their second attack was thrown back.

Campaign position in turn 4
The Allies now have a choice of pushing ahead with a third attack or calling off their offensive. Their divisions, particularly their armoured divisions, are all in need of supplies to refit and reequip. While most Axis divisions are in good shape after being resupplied at the start of campaign turn 4.

Supply status
The options are to launch an attack using one of their depleted armoured divisions or have an infantry division lead an attack. Neither option seems palatable, especially to win turn 4 will require winning the next two games due to the drawn game. So the Allied offensive is called off after successfully pushing the Axis back one zone during campaign turn 3. They will resupply and await the Axis response.

French cavalry
During the week I was able to complete two cavalry units for my WSS project. All being well I will complete another 2 cavalry units this weekend and can move on to some dragoons. My first goal of this project is to create enough units to play some of the scenarios from One-Hour Wargames.

British cavalry
No games so far this weekend with the weeding offensive currently dragging out in the back garden.

Thursday 21 May 2020

WW2 Western Desert Turn 4 Game 2

Campaign turn 4 game 2 has the Allied 1st Armoured division advancing against the Italian Ariete armoured division. This attack follows on from an earlier campaign attack, which saw an Allied armoured brigade failing to achieve sufficient objectives and ending in a stalemate.

Tabletop setup
The Allied lead up to this attack has been hampered by Axis air interdiction and problems maintaining and repairing equipment (possibly due to the variety of equipment their engineers have to maintain). They have a somewhat depleted force of 8 units, which still contains a good contingent of Grant tanks and air support is available.

Objectives marked with triangles
The Italian Ariete division is in good condition with 13 units. However 4 of their tank units have been delayed and will start the game off table. The objectives are all reasonable close together on the Italian left flank and will enable them to defend in depth.

Initial unit deployments and planned moves
Fielding fewer units than expected the Allied plan is to focus on the centre hills, on of the objectives, and push a blocking force along the road to stop any advance by the Italians while also providing flanking attacks on the hills.

Allied tanks advance.
The Allies quickly moved forward into their attacking positions. Their ill fortune continued as Italian shooting was accurate and they suffered losses. One bright spot however came with air support inflicting a number of hits, ended any threat from the town and armoured car units.

Allied air support proved very successful.
The Allies were making slow progress, due to poor shooting, and Italian armour remained in control of the central hills. This delay allowed time for an Italian armoured reserve to prepare.

Italian armoured reserve join the defence of the central hills.
When the Italian reserve armour joined the action it was all over for the Allies and they quickly withdrew. Not a good result for the Allies. Who now stand with a draw and loss in this campaign turn and have used their best attacking divisions. For the next game they will have a choice of: 1) attacking with a weakened armoured division or 2) full strength infantry division with supporting armour.

Allies retire after failing the take the hills.
Final positions


Sunday 17 May 2020

WSS project with paper soldiers and WW2 campaign

Not much wargaming this weekend as the weather was half decent and I have spent a lot more time in the garden weeding. All being well I may get another WW2 Western Desert campaign game in this Sunday late afternoon or evening.

British and French paper soldier units
On the modelling side I have been able to complete another two infantry units for my War of the Spanish Succession project. I now have four infantry units completed for both the French and Dutch/British forces. I will add to these units, but my initial goal is to have sufficient units for some One-Hour Wargaming scenarios. I will be moving on to the cavalry units next.

A couple of months ago a subscribed to Wargames Illustrated prime which gives access to old copies of the magazine. I have been reading through these older copies and searching out various Marlburian rules and articles. The period seemed to be written about reasonably frequently in issues from the 1990's.

A very useful resource for searching out articles has been the blog Tiny Tin Men which has an index of all articles over the years for a number of magazines. http://snv-ttm.blogspot.com/p/wargames-magazine-database.html

The next WW2 campaign game has been determined (campaign turn 4 game 2). After the first Allied armoured assault failed to secure a victory. The next game has the 2nd Armoured division attacking the Italian Ariete armoured division. This should be an interesting game with both divisions fully equipped.

Campaign Map showingteh drawn game and next attack.
As per usual, terrain cards are used to determine the tabletop layout. Both sides can switch two adjacent cards in an attempt to reconfigure the tabletop to their advantage. In this game there will be three objectives.

Terrain cards decide the battlefield features.

Time to setup the tabletop...

Thursday 14 May 2020

WW2 Desert Campaign Turn 4 Game 1

This first game of campaign turn 4 and has elements of Allied armoured brigades attacking forces from the Italian Trieste infantry division. The terrain was determined using terrain cards as normal and after both sides had made their one terrain card switch, the tabletop was setup with two objectives.

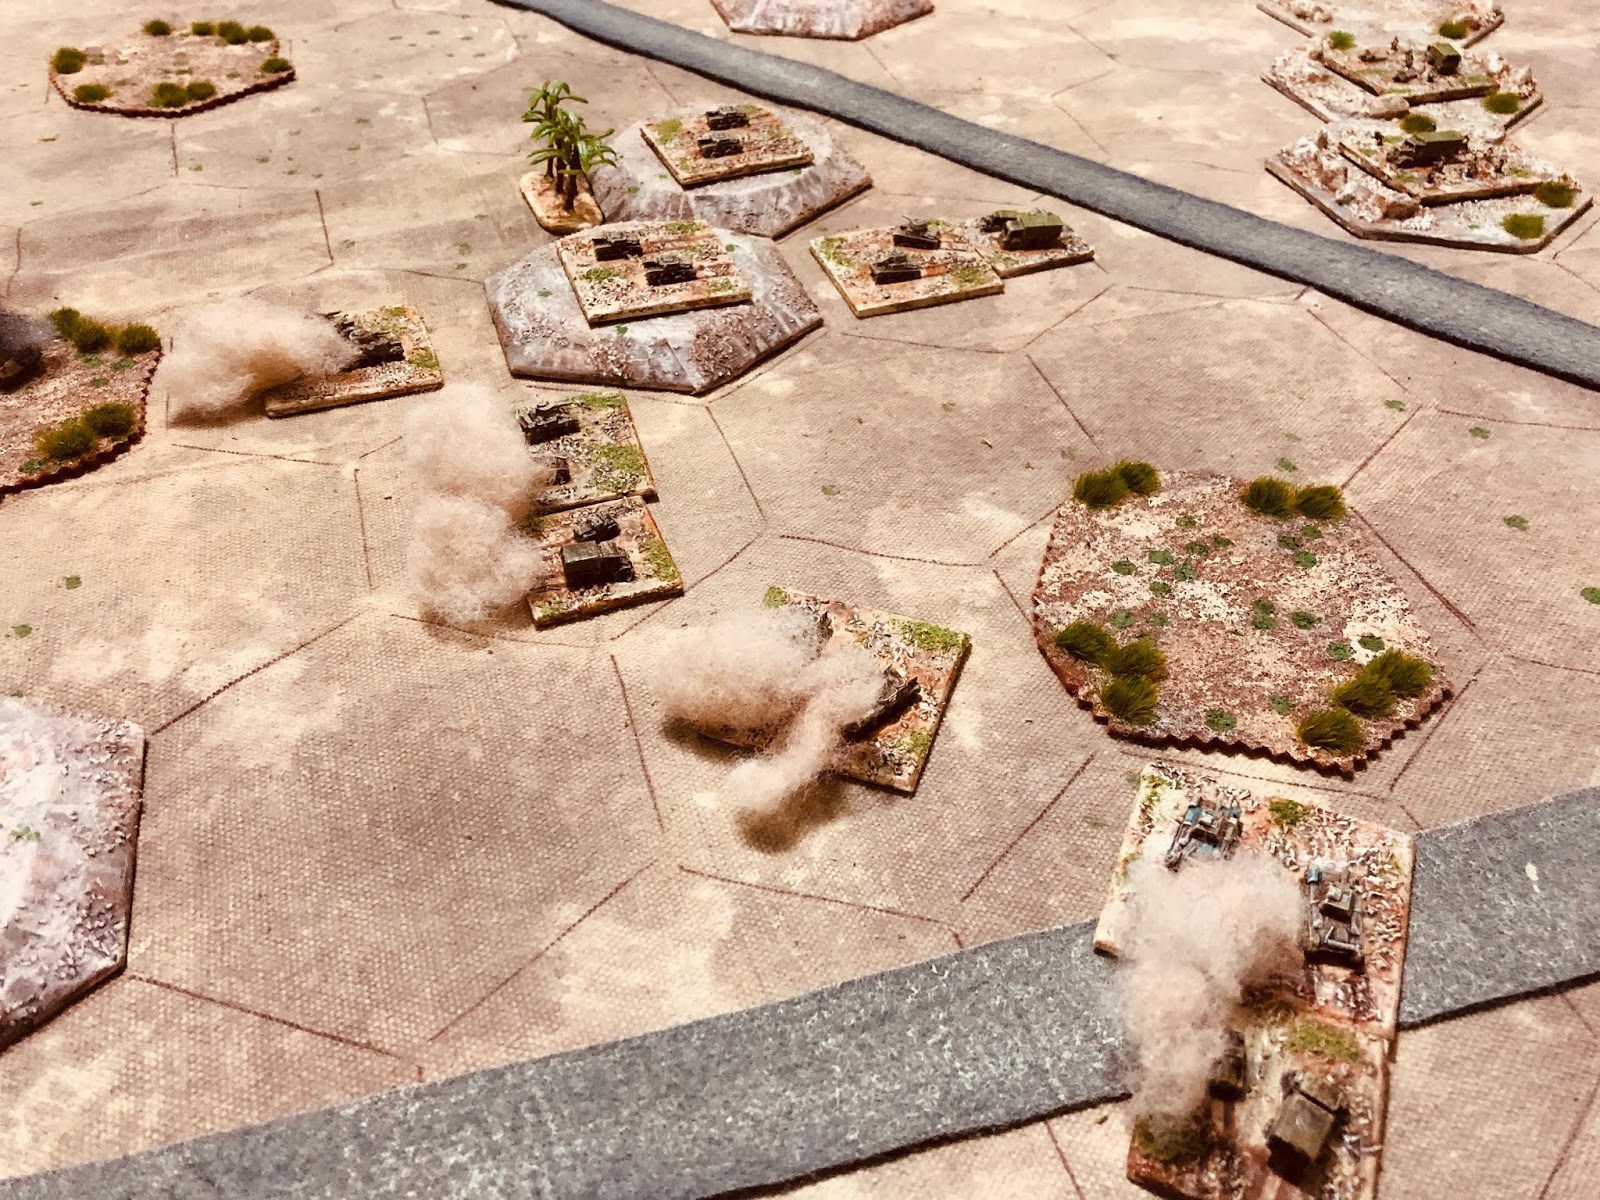
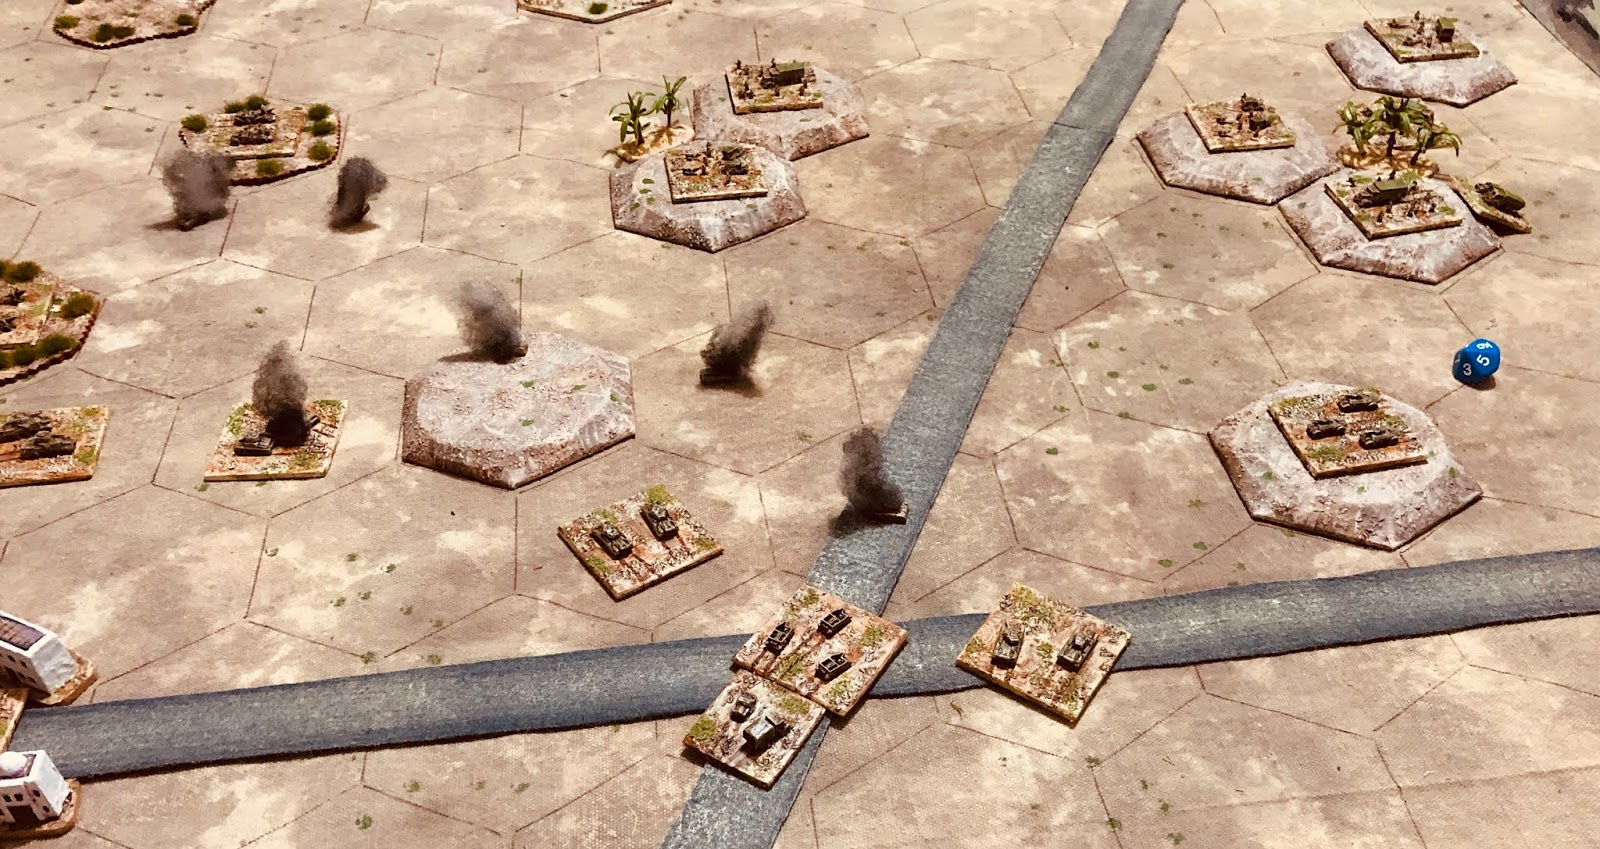
The game in progress
Both forces had to dice to see how many unit are lost due to the wear and tear of operating in the desert. The Italians did not fare well and would arrive minus three units. The Allies rolled well without any losses.

The sides then diced for their battle events. Both forces were impacted by interdiction which meant the loss of a further two units and no air support. So the order of battle is...

Italians:
1 x A/C unit
1 x Artillery unit
3 x Tank units (M13/40)
2 x Infantry units
2 x Towed AT units
1 x Self-propelled AT unit.

Allies:
1 x Stuart
1 x Carrier unit
3 x A13 tank units
3 x Grant tank units
2 x Infantry units
1 x 2 Pdr Portee unit
2 x 25 Pdr artillery units


The Italians will be defending the top half of the map with Allied units arriving at the bottom.
Terrain and objectives marked with palm trees
The Allies pushed forward with their tanks leading the advances on both flanks. Italian armour was positioned in the centre ready to react to any Allied armoured thrusts.

Opening deployment and Allied advances.
A view from the Allied starting positions
In the centre an armoured engagement was soon underway while on the Allied right flank Grant tanks made a swift advance towards the hills and first objective.

Armour clash in the centre.
Allies attack the hills while in the background tanks clash.
The hills were quickly overrun by Grant tanks, while in the centre the A13 tank units were not faring as well.
Allied capture the first objective.
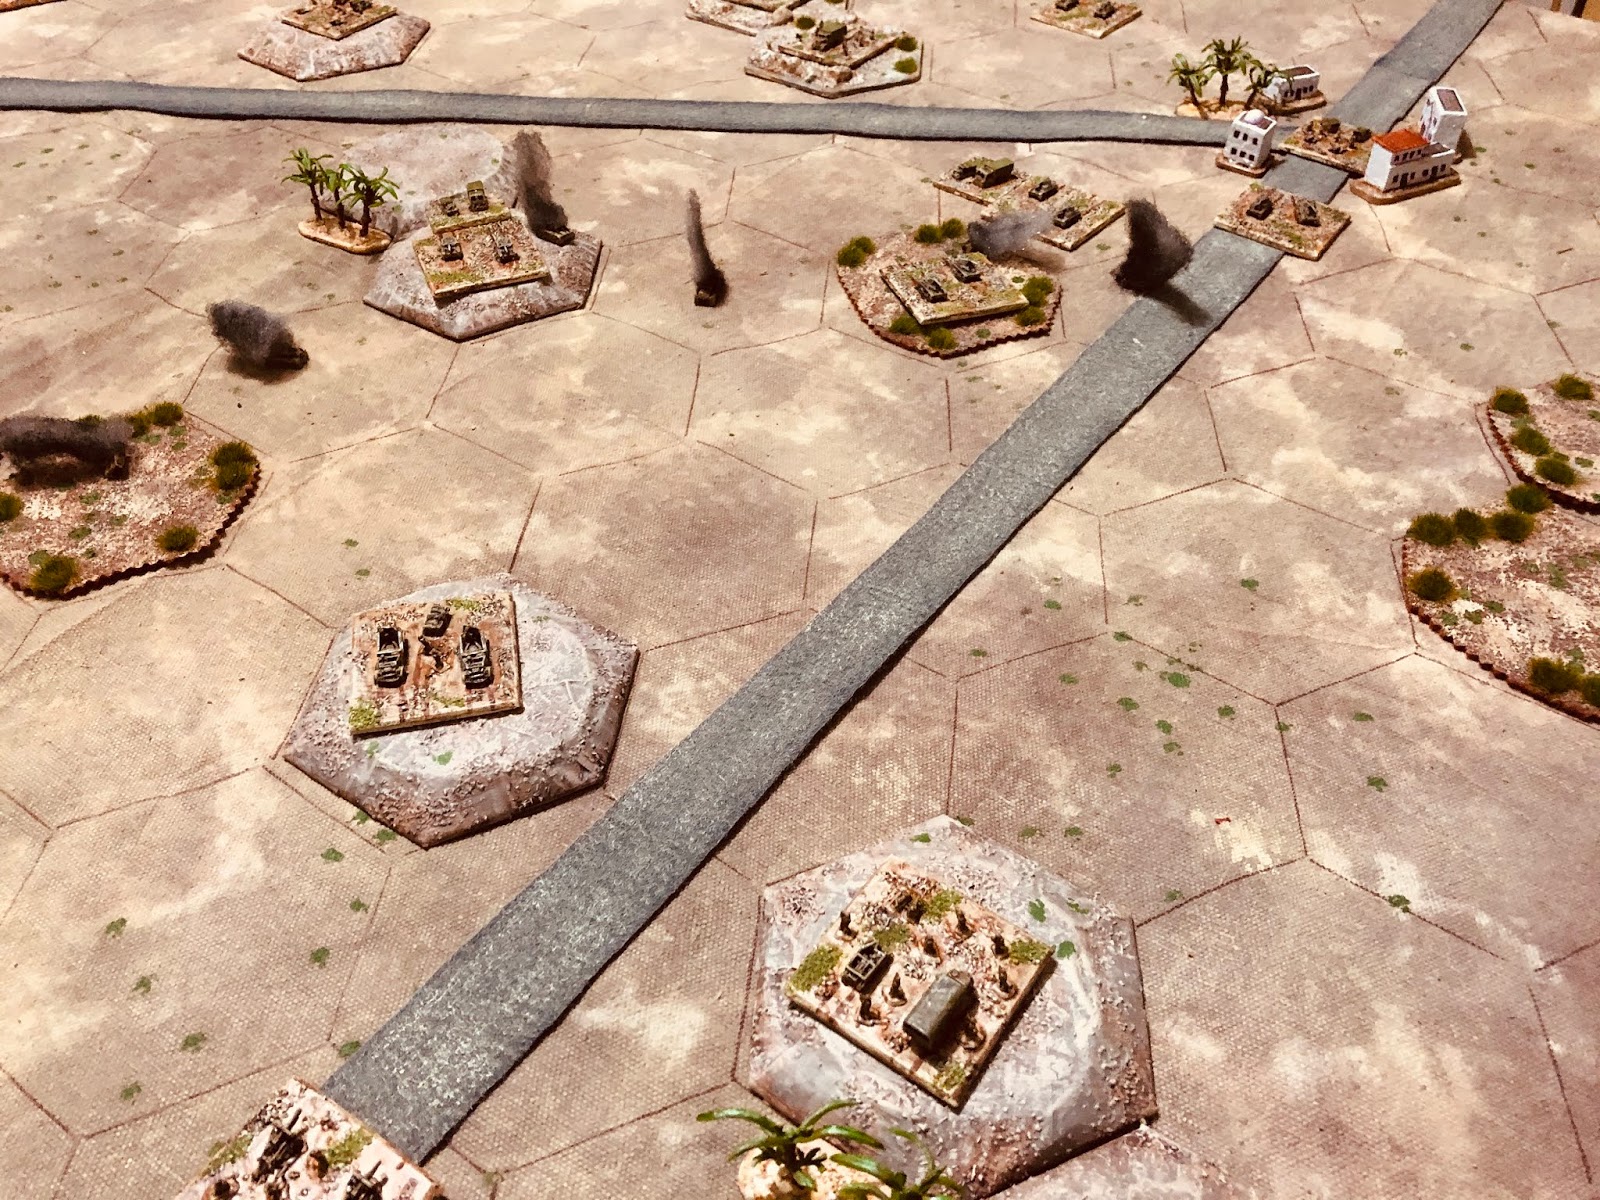
Allied tank units push ahead to attack the escarpment.
With the first objective taken, Allied tank units pushed on towards the escarpment and the second objective. Italian armour relinquished their hold on the town and moved to retake the hills and hinder the flank advance. With artillery support this proved an effective move and the armour briefly got a foothold on the hill, delayed forces moving up to support the attack on the escarpment.

Italian armour retires and counterattacks.
Counterattacking Italian armour hampers the Allied advance.
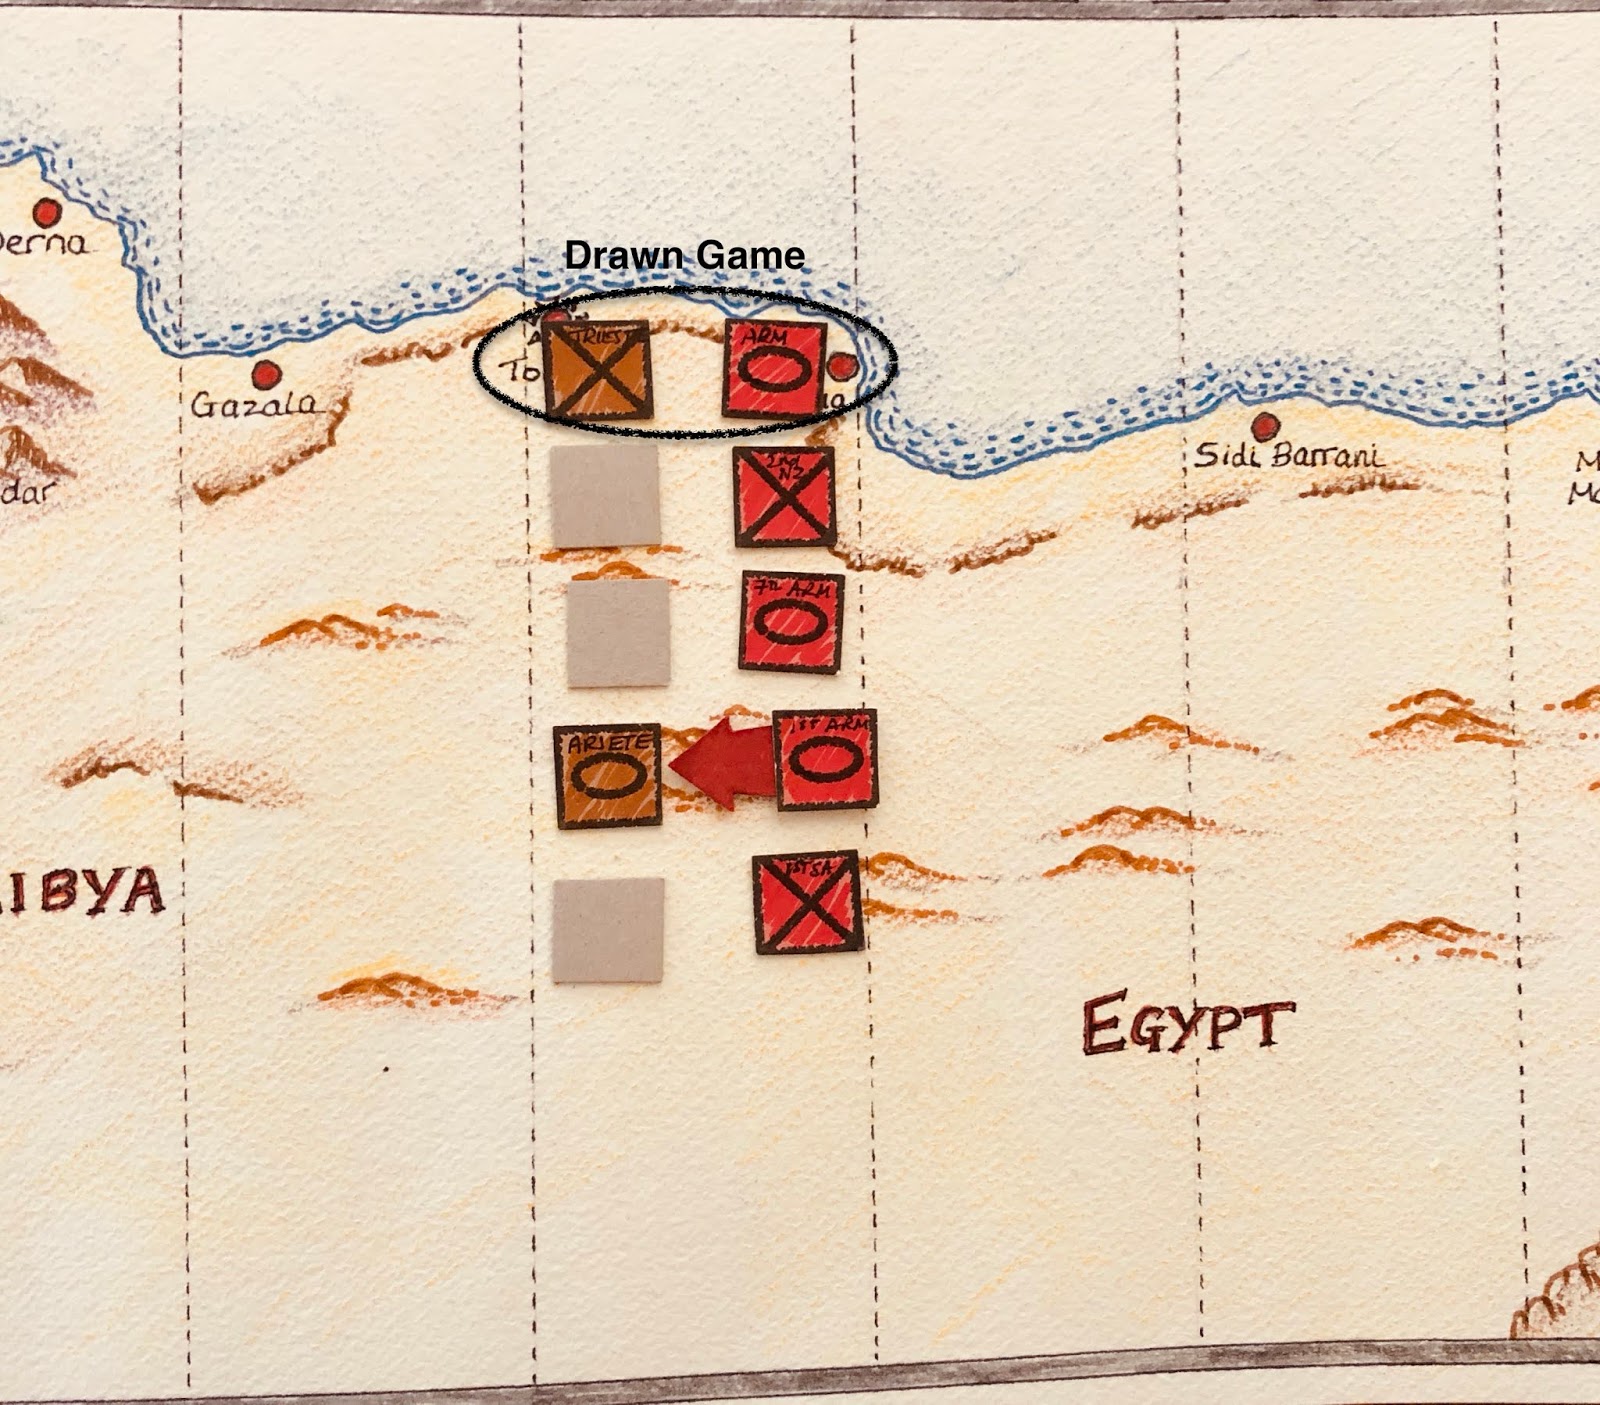
Allied units were able to see off the attacking Italian tanks, but without supporting units their attack on the escapement and second objective failed.  At this point in the game neither side was in a position to make further attacks. So with both sides holding one objective the game is a draw.

Final positions
Italian forces are able to hold the second objective for a draw.
I had not anticipated a draw in the campaign and will have to see how the remaining two games progress. Then decide whet to do if the campaign turn ends in a draw.

Sunday 10 May 2020

WW2 Western Desert Campaign Turn 4

Campaign turn three saw a victory to Allied forces with two wins. Each campaign turn is the best of three games on the tabletop. Because the Allies were attacking this turn, Axis forces are pushed back one zone on the campaign map.

Allied forces are able to advance after they successfully counterattacked.
The start of another campaign turn sees Axis and Allied forces determine their supply status. The Allies receive supplies on 2+ and Axis on 3+. Axis forces desperately require supplies having survived with no supplies last turn and with only one fully equiped division (15th Panzer division).

Supply chart at the end of campaign turn 3.
Unfortunately for the Allies they rolled a 1. While Axis forces will receive supplies with a 4 rolled.
The decision for the allies will be whether to continue with their attack or pause and consolidate their position, avoiding the risk of over stretching. This pause approach assumes Axis forces re-equip and with neither force attacking the campaign turn will roll on to turn 5.

The Axis decision is pretty straight forward. They choose to resupply so all their divisions will be at full complement. The Allies choose to continue their attack hoping that should it stall their flow of supplies returns.

Axis units are shuffled and placed face down. The Allies select their attacking division and will be facing the Italian Pavia division again. A fortunate choice of attack avoiding a reequipped Panzer division.

Allies continue their attack.
The first attack of turn 4 avoids a clash with the reequipped Panzer divisions.
All set for the next game.


Friday 8 May 2020

War of the Spanish Succession project

The War of the Spanish Succession project is coming along at a steady pace and I completing units at the rate of two a week. My initial goal is to create enough units for some One-Hour Wargaming gaming using the scenarios, which will mean each army will require:

  • 4 Infantry
  • 2 Dragoons
  • 2 Artillery
  • 2 Cavalry

A command stand will also be included, possibly just for completeness and the look.

Units completed so far.
I have a been reading a few books on the armies and their tactics.

Current reading
So far in my reading I have gleaned:

  • Cavalry has two types - horse and dragoons
  • Cavalry make up about 30% of armies on average
  • Dragoons reconnoitred ahead and protected flanks
  • Brigades were ad-hoc formations
  • Cavalry were to engage and defeat enemy cavalry, then fall upon enemy trains, guns and infantry
  • Infantry faced each other at about 60 yards and blazed away until the nerve of one side failed
  • Guns slow rate of movement
  • Guns used to support the destruction of strong points
This weekend's task waiting for the scissors to snip out two more units

Wednesday 6 May 2020

WW2 Western Desert Turn 3 - Game 2

This game, the second battle of campaign turn 3, has the elements of the 1st Armoured Division continuing the Allied counterattack against forces from the Trieste infantry division. There are three objectives, to win the game two or more objectives must be occupied. The hills in the centre of the map will be a key objective and a focus for the fighting.

Map of key terrain features and objectives. The Allies will enter on the bottom.
Both sides diced for battle events, and both rolled a flank attach and aggressive defence setup (setup guide here). The Italians being the defenders positioned their units on their half of the tabletop, and after the Allies have deployed up to 30% of Italian units can be reposition forward (outside of Allied unit ranges).

70% of Allied forces are positioned on their base edge, the remaining 30% will arrive on one of the flanks which is determined by a dice roll.

Starting positions.
The game began with the Italians positioning units on the central hills. Allied forces occupied the town and prepared for their advance on the central hills.

Opening moves.
The central area is secured by Italian forces who also score an early win by putting out of action a unit of Grant tanks.
Very quickly an armoured engagement began as both sides vied to control the hills.
Allied forces began to arrive on their left flank as the assault on the hills hotted up. The effect of the flanking units was immediately felt and momentum swung to the Allies.

Allied units arrive on the flank.
Allied units can be seen arriving the the flank.
Having gained the momentum Allied units pushed ahead with their assault to control the hills, but they were suffering casualties from Italian artillery and air support.

Force positions mid way through the game.
Allied units trying to clear the hills of stubborn Italian defenders.
The Allied assault began to struggle as losses from artillery took their toll.  This resulted in the need to call off the attack until additional units and artillery support moved forward for a second assault. Additionally air support was called in to attack Italian artillery.

Supporting units and artillery are moved up for a second assault on the hills.
Allied forces get a toe hold on the hills.
Air support attacks Italian artillery positions.
The second assault finally clear the hills of Italian defenders. A brave counter attack by Italian infantry under the cover of smoke regained control of part of the hill for a short while, but proved to be short lived.

Final postions.
Allied units occupy the hill.
An Italian counter attack under the cover of smoke was a surprising success.
For a brief moment the counterattack retook part of the hill.
The second assault is finally successful.
A hard won victory to the 1st Armoured Division and an important one as it secured an Allied success in campaign turn 3. If they had lost there would have been a 3rd and deciding game, and the Allies had only one remaining armoured division, the 7th Armoured, which was in need of reequipping having been involved in a losing game. They would have most like had to launch an attack with one of their infantry devisions. This would have proved to be difficult proposition.