Showing posts with label Battle Report. Show all posts

Tuesday, 9 September 2025

ECW game report - The investment of Stonemarch town

The siege of Stonemarch begins with a small game on a 4x4 foot tabletop. The game represents the investment of the fortified town. Details of the game setup can be found in my previous post here. If the Royalists succeed in getting their supplies through, it will provide a morale boost for the garrison in the up coming siege game.

Rules for the game use a variation of the One-Hour Wargames Pike and Shot rules. The rule changes include:

  • Dragoons and artillery are treated as half-units. They shoot with D3 and are eliminated after taking 8 or more hits. Both must also check for ammunition after shooting.
  • All cavalry are treated as gallopers.
  • The first two “out of ammunition” results for an army can be resupplied.
  • Movement tests are required for all unit moves. A roll 2+ on a D6 is required for the unit to move. If a roll fails, no further units may move that turn, and play proceeds to the shooting phase.

Parliamentarian outpost guarding the road.

One of Colonel Ezekiel Hartwell’s first actions, as the Parliamentarian commander tasked with capturing Stonemarch, was to invest the town. His forces established outposts and pickets along the roads to cut off any supplies reaching the defenders. In response, a Royalist force is now attempting to break through the blockade and deliver supplies to the town in readiness for the up coming siege.

Battle Report…

On sighting the Parliamentarian outpost guarding the road, the Royalist force began to deploy and advance. However, they remained wary of additional Parliamentarian units arriving to reinforce the defence. As the Royalists moved forward, Parliamentarian artillery opened fire, while a detachment of their dragoons appeared on the hill, soon followed by a supporting a unit of cavalry.

Royalist force arrives and begins to deploy.

Parliamentarian reinforcements appear on the hilltop.

The arrival of another small unit of Parliamentarian dragoons south of the wood, along with those already positioned on the hill, was disrupting the Royalist deployment as they adjusted to these threats. Royalist cavalry charged the dragoons near the wood and quickly routed them, but their success was short lived as Parliamentarian cavalry arrived south of the wood and counter-charged.

In the centre Royalist dragoons and infantry advanced along the road to engage the outpost. While on their right flank a unit of dragoons, supported by cavalry, pushed forward towards the occupied hill.

The engagement heats up as Parliamentarian reserves arrive and take up position.

The supply carts and their guards hurry up down the road, while a cavalry melee to the left is underway.

The cavalry melee near the woods was dragging on while the supply carts and their guards hurried down the road. As the Parliamentarian cavalry began to gain the upper hand, and the Royalists feared they might break through to harass the wagons. However, the Parliamentarian cavalry were left disorganised after routing their opponents, and a timely volley from some nearby Royalist dragoons was enough to put them to flight.

Elsewhere, the infantry engaged the outpost, to their relief the artillery had exhausted its ammunition. While Parliamentary dragoons continued to hold and defend their position on the hilltop. Their remaining cavalry moved in behind the outpost, ready to lend support.

The cavalry engagement on the left sees the Parliamentarian cavalry gain the upper hand. Elsewhere the dragoons on the hilltop are engaged.

The supply carts push forward as a unit of dragoons puts to flight the exhausted Parliamentarian cavalry after their cavalry engagement.

With the threat from the woods dealt with, the Royalists turned their attention to the outpost. They routed the Parliamentarian infantry blocking the road, only to be counter-charged by the reserve cavalry. Time was now an issue for the Royalists, who needed to clear the road quickly for their supply carts. Meanwhile, the Parliamentarian dragoons on the hilltop were holding firm and continued to harass the Royalist right flank.

The road is cleared of infantry, but Parliamentary cavalry are in reserve.

The cavalry charge.

With the support of a nearby infantry unit, the supply carts and their guards manage to drive off the last of the Parliamentarian cavalry. Finally, the road was clear, and the carts move swiftly along the road and towards Stonemarch.

The road is cleared.

The supply carts move towards Stonemarch.

A Royalist victory. The supplies have successfully reached Stonemarch. This success will boost the garrison’s morale in the next game, which will be a siege of the fortified town. For this game I will be using the Siege-Works pen-and-paper game rules, adapted for play on the tabletop.

Wednesday, 27 August 2025

English Civil War game report - assault on fortifications

Last week, I finished a second earthwork for my English Civil War games. These foam earthworks (click here for the steps on how to make them) can be used either as standalone forts or as bastions in a siege setup. With two forts now complete, it seemed like the perfect opportunity to try out the One-Hour Wargames (OHW) Scenario 15: Fortified Defence.

Fortified defence

Scenario and rule notes…

The game was played using a variation of the One-Hour Wargames Pike and Shot rules. It begins with the Parliamentarian forces defending two fortified earthworks. Each fortification is garrisoned by musketeers and a small gun, boosting their shooting value of D6+2. The forts are also well-stocked with ammunition, so the “out of ammunition” rule does not apply to the garrisons.

Some of the other rule changes:

  • Dragoons and artillery are treated as half-units. They shoot with D3 and are eliminated after taking 8 or more hits. Both must also check for ammunition after shooting.
  • The first two “out of ammunition” results for an army can be resupplied.
  • Movement tests are required for all unit moves: roll 2+ on a D6 to succeed. If a roll fails, no further units may move that turn, and play proceeds to the shooting phase.

Parliaments forces:

  • 2 x Fort with musketeers and gun.
  • 2 x Infantry (mixed muskets and pikes)
  • 2 x Dragoons
  • 1 x Cavalry
The two dragoon half-units are stationed near the woods on the left flank. The two infantry units are positioned close to the forts, ready to provide support if needed, while the cavalry remain in reserve on the right flank.

Parliament waits and prepares for a Royalist attack.

The attacking Royalists are allowed to regroup at the end of any turn. When they choose to do this all their  units are removed from play and can re-enter in the next game turn with all hits removed. Both forces can resupply any unit out of ammunition. Parliamentarian units do not remove any hits.

To win the Royalist forces must seize and occupy both forts by the end of game turn 15, otherwise Parliament wins.

Royalist forces:

  • 3 x Infantry (mixed muskets and pikes)
  • 2 x Artillery units
  • 2 x Cavalry units

Background…

Parliamentarian commander Colonel John Haversham, having successfully besieged and captured the town of Greyford (see here for the siege game report), received orders to prepare for a Royalist attack. Greyford is located in the Harrow Valley, the main north–south route used for supply convoys, messenger riders, and troop movements.

Acting on his orders, Haversham directed his troops and the townsfolk of Greyford to construct two earthwork forts along the Harrow Valley road, intending to halt or at least delay any Royalist advance through the valley.

Royalist attack plan…

After assessing the situation, the Royalist commander decided to concentrate the first attack on the left fort, leading with his infantry. His artillery was ordered to take up positions to bombard the right fort, softening it up for a later assault. The cavalry’s role was to screen and protect the infantry and guns against any Parliamentarian cavalry or dragoons that might advance. Once the left fort was captured, the plan was to retire, regroup, resupply, and then launch a second attack against the right fort.

Game report…

The Royalists advanced their infantry, but delays hindered the arrival of their artillery and cavalry. After a few rebukes from the Royalist commander, the remaining forces finally arrived and took up their positions as the assault on the left fort commenced.

Only two Royalist infantry units arrived on the first turn.

The Royalist assault begins as their remaining troops and artillery take up position.

With the assault on the left fort was quickly in full swing, Royalist artillery bombarded the right fort to soften it up for a later attack. Although the Royalists suffered losses from the defenders’ fire, they managed to drive out the garrison, only to see fresh Parliamentarian troops to take their place. After a few more assaults ammunition was low and the Royalist commander withdrew his forces to reorganise and resupply in preparation for a second attack.

The assault on the left fort is in full, while artillery bombard the right fort.

The Royalist forces break off their first attack to reorganise and resupply.

During the lull in the fighting, both sides resupplied their troops. The Royalist second assault began in a rather disjointed and piecemeal fashion. Precious time was lost, but eventually the attack on the left fort resumed. Meanwhile, the artillery’s bombardment of the right fort continued with some accurate shooting.

Before long, the defenders of the left fort broke and fled, allowing the Royalists to shift their focus to the right fort. Their bombardment had been effective, and its defenders were routed. Yet, the Royalists failed to advance quickly enough to seize the opportunity, and the Parliamentarian infantry began preparing to reoccupy the fort. As evening fell, the Royalist commander ordered a withdrawal.

Royalist troops were slow to take up their position for the second attack.

The left fort is cleared.

The right fort is cleared by artillery fire, but a slow advance by Royalists were unable to take advantage. 

Summary...

A Parliamentarian victory, the Royalists just ran out of time and failed to occupy the forts. During the first assault, the Royalists failed to use their cavalry effectively to block or tie down Parliament’s reserves, allowing them to reoccupy the fort. Poor luck with movement rolls (several early rolls of 1) further hampered the Royalist advance, so their units were slow to take up their positions and begin the attacks.

Saturday, 2 August 2025

A solo Napoleonic siege - Battle report

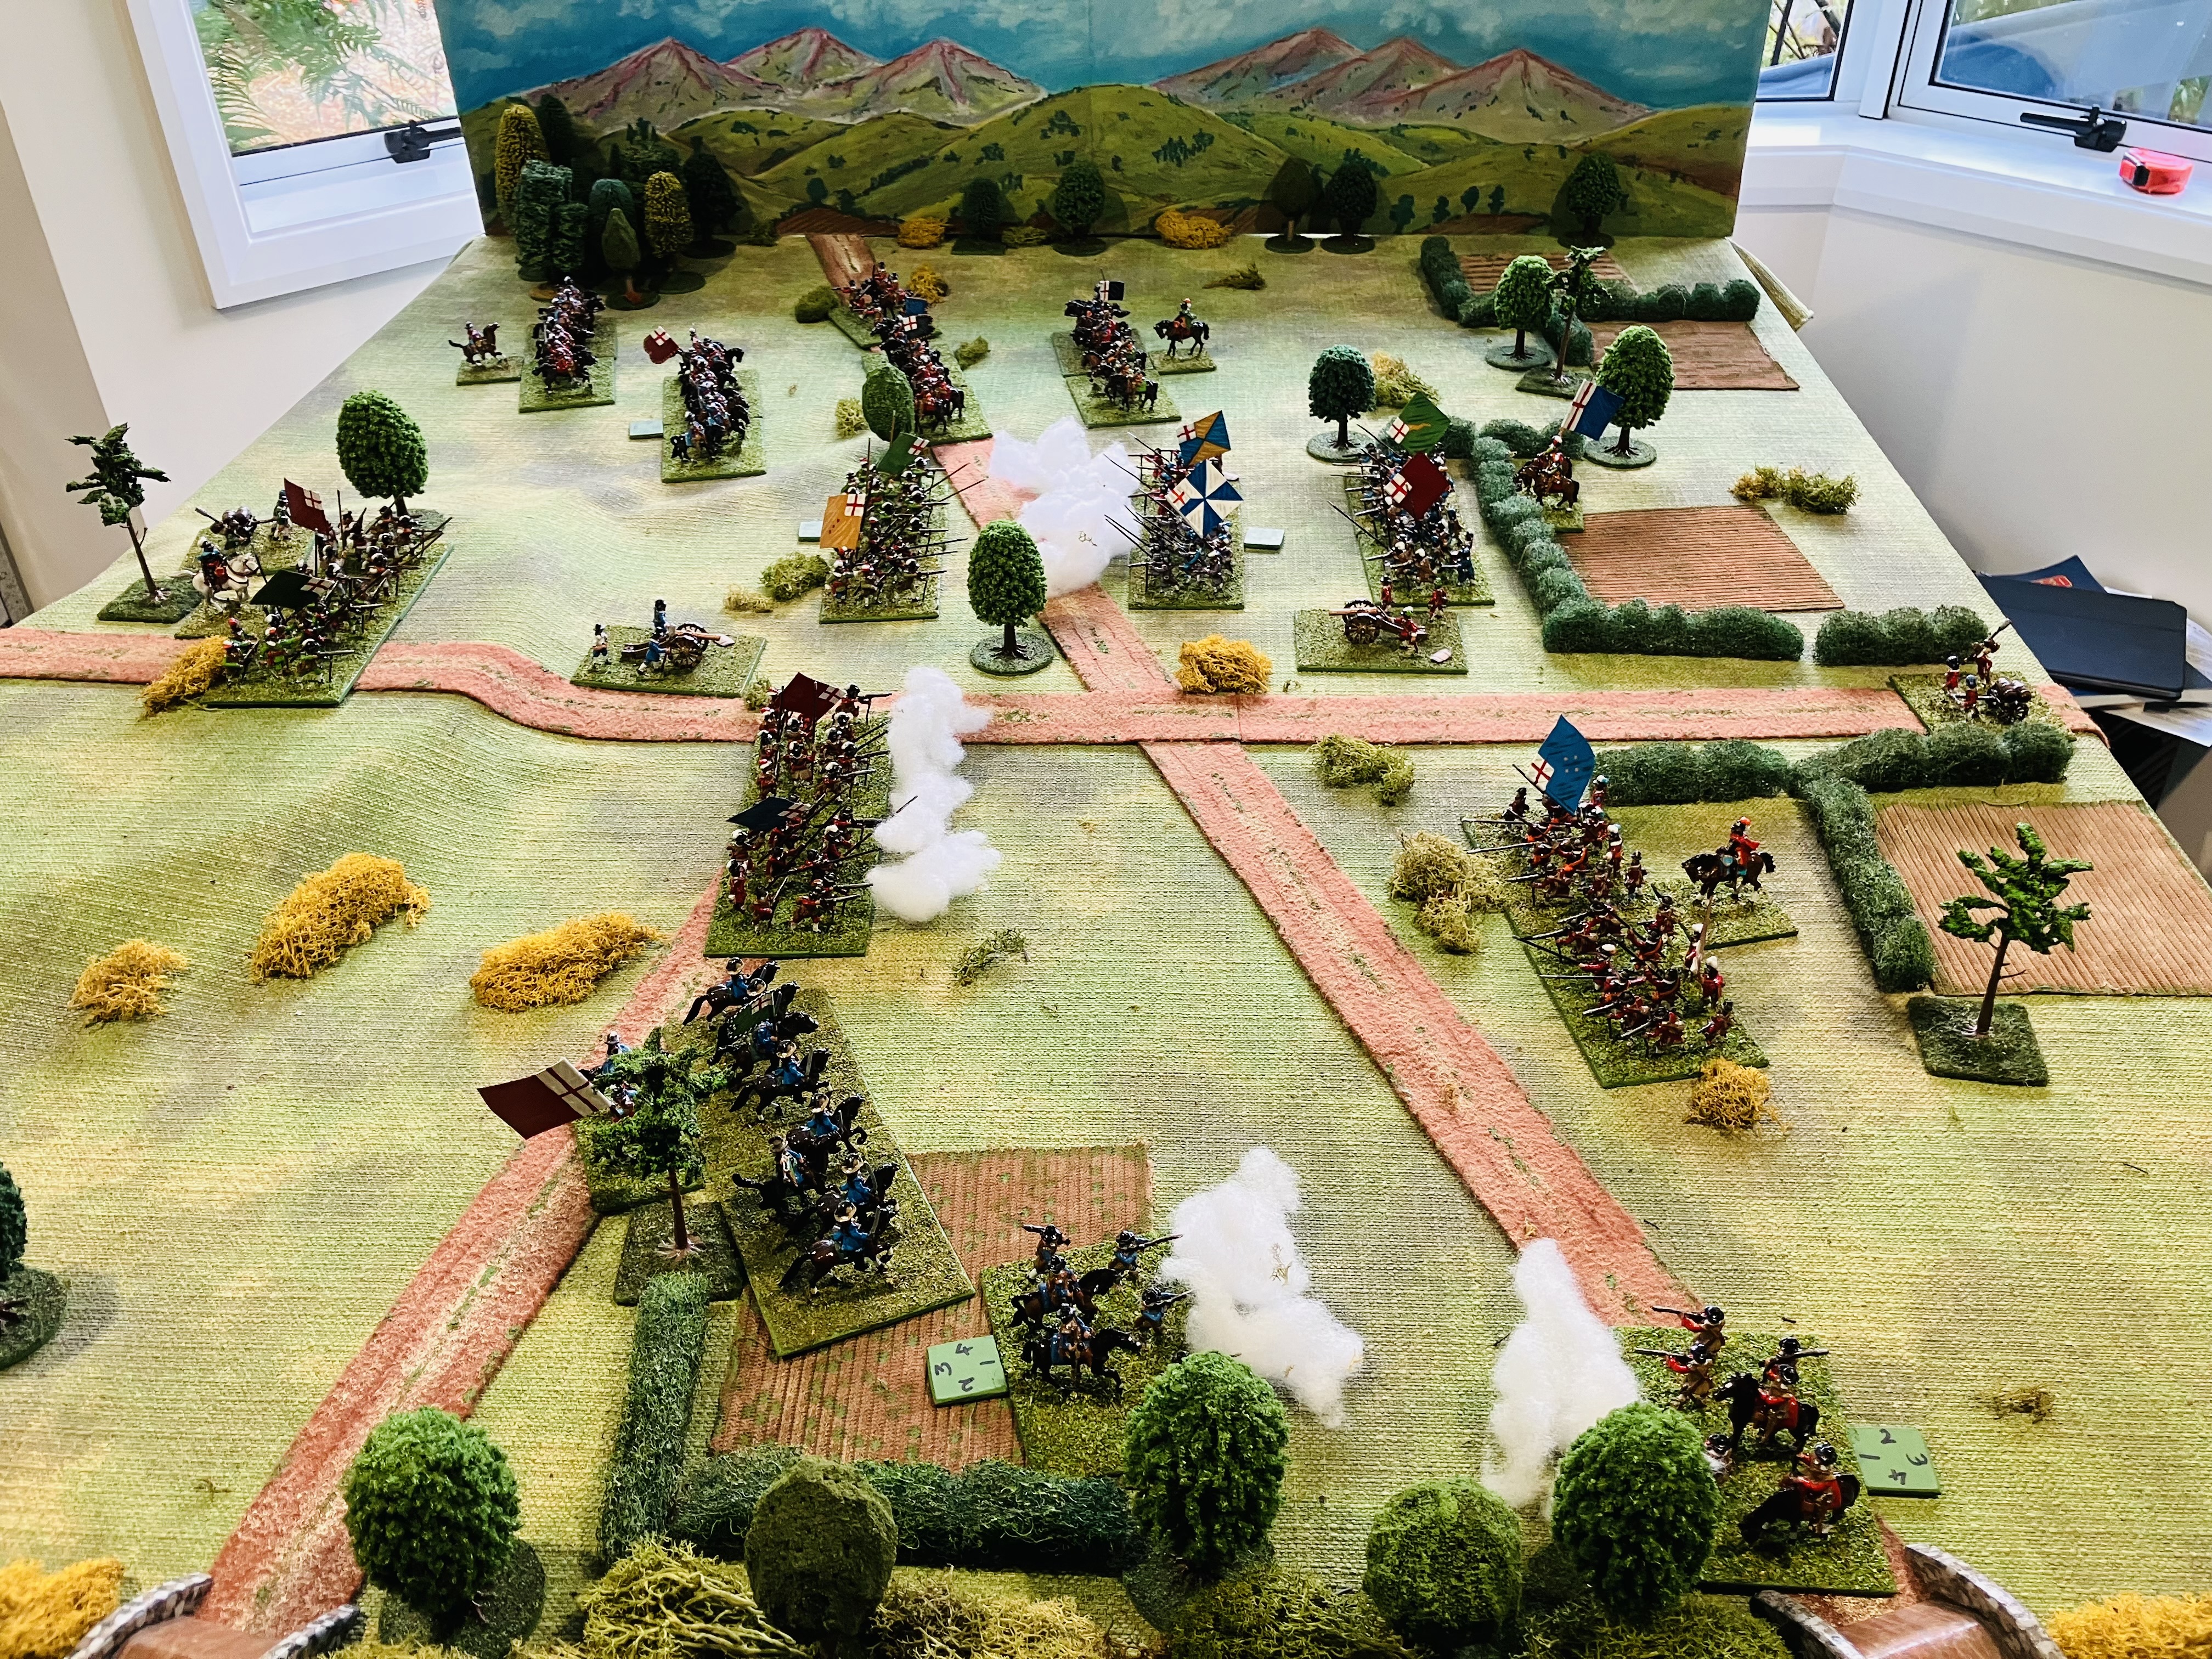
This post turns out to be my 1000 blog post and what better way to mark this milestone than with a battle report of a Napoleonic siege wargame.

Austrians returning with supplies from nearby farms in preparation for a siege.

The town of San Mariano guards a vital supply route.

Siege Background

French General Delacroix, commanding a corps of seasoned veterans, has been ordered to seize and hold the key crossing at the fortified town of San Mariano. The town is a strategic stronghold guarding a vital supply route trough the mountains.

The town is encircled by an old, but well-maintained, bastions and walls. An Austrian garrison having dispatched messengers for a relief force and have been gathering supplies from nearby farms in preparation for the siege.

Battle Report

Turns 1 and 2

The siege begins with the construction of the first parallel. The besieging French assign a portion of their troops to guard against any potential Austrian sorties. Although no sorties were launched, accurate Austrian cannon fire harassed the French engineers and delayed the establishment of French gun batteries.

The first parallel is prepared as the Austrian guns open up.

Accurate fire from the Austrian guns delays the building a French batteries.

Turns 3 and 4

The French pressed on with their trench works, completing the first parallel and finally establishing their first gun battery. Zig-zag trenches advanced steadily forward from the first parallel, though progress remained slower than General Delacroix had hoped. The Austrian defenders launched a sortie, but the French, maintaining vigilant guard posts and successfully repelled them.

As the first parallel is completed 

The Austrians launch a sortie.

Turns 5 and 6

An Austrian messenger successfully slipped through the French lines, carrying urgent pleas to the relief force to hurry up, tightening the timeframe for the besiegers. The garrison continued to launch sorties as the French dug forward and caught the French off guard, inflicting casualties and reducing their resources to build trenches.

The French dig forward and begin to establish their second parallel.

A successful Austrian sortie forces the French to divert soldiers from the trench works.

Turns 7 and 8

Trench digging continued as a priority, and three gun batteries were soon in position. The zig-zag approach trenches were now within assault range of the town walls, creating two potential sites for assaults. Meanwhile, the Austrians managed to get further messages through the lines, keeping the approaching relief column informed of their situation. Time was now becoming a worry for General Delacroix.

The Austrians continued with their sorties and forced the French to divert troops from the trench works to reinforce their guard lines. this slowed down the establishment of the fourth and last gun battery as they took precautions against further attacks.

The trenches are now within assault range of the town.

Turns 9 and 10

The Austrians prepared countermine charges beneath the most vulnerable sections of the walls, ready to detonate them during any French assault. At the same time, they continued launching sorties in a final effort to disrupt and delay the inevitable attack. By this stage, the French had established four artillery batteries and had successfully breached the town’s walls. They had also completed the digging and preparing their own mine, ready to support the final assault on the fortress.

The French begin the work to breach the walls.

Turns 11 and 12

The French detonated their mine beneath the walls and launched an assault. Although the attack was repulsed, the Austrian defenders suffered casualties, and their morale was beginning to falter.

The first attack is supported by a mine detonated just before the assault.

Meanwhile, French scouts reported that a relief force was only a few days march away. In response, General Delacroix ordered a series of assaults in a final effort to seize the town before reinforcements could disrupt and end the siege. But the news was not all bad for the general, engineers informed him they had made a second breech.

The French prepared counter mines two assaults.

The French planned two successive assaults. The first was repulsed with heavy casualties, as the Austrians successfully detonated a mine beneath the breach. However, the second assault proved to be more effective, Austrian troops had been drawn away from the walls to reinforce the earlier defence, leaving the second breach under-manned. French forces surged through, and with sections of the town’s walls now in French hands and Austrian morale collapsing, the defenders were overwhelmed. The fortified town fell to the French.

French troops assault the breaches.

French troops surge forward into the second breach.

A French victory! Just in the nick of time before the Austrian relief force could lift the siege.

Summary

Had the second French assault failed, the approaching Austrian relief force would have forced the French to abandon the siege. It was a very exciting game. Early on, it seemed unlikely the French would take the fortified town, as their progress on the gun battery positions was slow and hampered by accurate artillery shooting from the town. However, once all four batteries were in place, they quickly created breaches in the walls and were able to widened them to prepare for the final assaults.

A resource based game that can be adapted to the tabletop.

The rules used were from the pen-and-paper game “Siege Works” by Solo Wargame, which I recently purchased from Wargame Vault. It’s a resource-based game in which you, as the besieger, must manage limited resources to progress of trench construction, establishment of gun positions, dig mines, and post guards against sorties which is all marked off in pencil on a game map. All while you have to make sure you have enough troops available to launch a successful assault before your time runs out. Meanwhile, the defenders will attempt to disrupt your efforts through actions determined by a dice-driven event table. 

The game includes four scenario maps to play through of varying complexity.

All my parallel and zig-zag trenches advanced in 6-inch increments, so I pre-measured the starting position of the French attackers to ensure the number of trench sections matched the progression in the game.

It was pretty straightforward to adapt the game to the tabletop using the simplest  scenario map as a guide. Instead of marking progress on a paper map, I placed the parallel trenches, zig-zag trenches and gun positions on the tabletop, building and advancing them in 6-inch increments. This required some initial measuring to determine where the French attackers would begin placing their first parallel trenches so the layout aligned with the original map in terms of the number of trenches and batteries required to build.  

Resource management and breach tracking were handled using markers and small bits of paper with written notes (hidden under troop bases). All in all the game played out in just under an hour as I worked my way through the rules for the first time. Some rereading and checking of the 7-page rules was required, but I was soon in the swing of things and the game progressed smoothly.

Transferred to the tabletop, these rules provided an enjoyable and challenging solo siege games with the added benefit of getting my siege terrain, forts, and troops on to the tabletop. There is no movement of units in the game, just the placement of terrain and troops to indicate progress and for the look of the tabletop. I may well have to invest in some engineering troops or make some conversions which can be used as markers for mines. In the meantime I am looking through a couple of Military Modelling books by Stuart Asquith, which cover both solo wargaming and siege warfare for ideas.

A source of ideas.

For my next siege game, I plan to use the rules in an English Civil War setting. I will also be introducing forts, as some of the other scenario maps in the game feature outlying forts which must be taken before assaults on the main fortifications can begin.

Friday, 25 July 2025

A remote Star War game

Today I hosted a remote Star Wars game with Jon of Palouse Wargaming Journal using the Squad Hammer Core rules from Nordic Weasel Games. The rules were adapted for use with a 6-inch square grid, which makes gameplay much easier for remote games. 

These skirmish games are relatively quick to play, so we managed to fit in two games, giving each of us the chance to be both attacker and defender.

74-Z Speeder Bikes crash and burn after being surprised by a Rebel unit.

Scenario Background

On the desolate frontier world of Kholaris situated on the outer-rim, lies the mining settlement of Dusthaven. Built around the richest vein of Virelium Crystals in the sector, they are used for stabilizing and extending hyperdrive jumps.

But the people of Dusthaven have had enough of the empire. Overworked, underpaid, and brutalized by the mining corporations, the miners have staged an open revolt. A force of Rebels has joined their cause led by Luke Skywalker, Han Solo, Chewbacca, R2-D2, and C-3PO.

The Empire has responded with force. Darth Vader has been dispatched by the Emperor to crush the rebellion and ensure the crystal mines return to full production. 

Will the spirit of rebellion ignite across Kholaris or be crushed under the heel of the Empire?

Map

The game is played on a tabletop using a 6-inch square grid. While the mat includes dots to mark the corners of each square, these are not easily visible to the remote player. To assist with unit positioning and overall setup, a gridded map was provided, and terrain features such as vegetation and rocks were carefully placed at square corners to make the grid more apparent for the remote player.

A map with the grid was provided to help with positioning of units.

A regimented layout of rocks and vegetation helps to define the squares. 

Built-up and rocky squares provide cover to any units occupying them, while units on hill squares are able to extend shooting ranges. Up to two units may be "stacked" in a single square. 

All movement and shooting ranges can be measured diagonally.

Order of Battle

Rebels
All Rebel units begin the game positioned on the tabletop. They must be positioned in a building or hill squares.
  • Han Solo and Chewbacca (Hero unit)
  • Luke Skywalker, R2-D2 and C-3PO (Hero unit)
  • Swoop Bikers
  • 1.4 FD Laser Cannon Team
  • 2 x Rebel Troopers
  • Rebel Sleeper Cell
Empire
All Empire units begin the game along the southernmost row of squares on the tabletop.
  • 2 x Stormtroopers
  • Dewback Rider
  • AT-RT walker
  • 74-Z Speeder Bikes
  • Riot Control Squad
  • Darth Vader (Villain unit)
I also had provided a list of all units and their stats for movement, combat, and shooting to help keep things running smoothly.

Victory conditions

Reducing the opposition to 2 or less units.

Game Reports

These games tend to move along at a quick pace, and between hosting and the fast gameplay, I did not manage to take many photos. So instead, I have written up a report of the game and included any photos that were available after the report.

Game 1 - Peter as the Empire and Jon as the Rebels

As the first Imperial units appeared on the southern approaches to Dushaven,  the Rebels had already taken up strong positions. A squad equipped with a Z-6 rotary blaster manned the high ground west of the town, while the 1.4 FD laser cannon team was dug in on the eastern ridge. The remaining Rebel troops were scattered in prepared positions behind makeshift barricades throughout Dusthaven.

Imperial forces opened fire from a distance. An AT-RT walker and a pair of 74-Z speeder bikes strafed the hills in an attempt to dislodge the Rebel positions. But the Rebels held firm, both well-prepared and well-positioned. The walker was destroyed by some precise shooting from the FD laser cannon, and the speeder bikes took minor damage from the Z-6 rotary blaster before disengaging.

Rather than wasting time on the flanks, the Imperials pushed directly towards Dusthaven. Under cover of suppressive fire, Stormtroopers advanced and eliminated the Rebel sleeper cell. However, the Rebels quickly responded and brought down the speeder bikes, which crashed in a fiery explosion.

The Imperial assault intensified. Darth Vader, supported by a riot control squad of Stormtroopers, charged the barricades. But the defenders were ready. Luke Skywalker, Han Solo, and Chewbacca emerged to meet the attack head-on. The clash was fierce, blaster shots flew and lightsabers clashed. Long-range fire from the hills continued to pour in and Darth Vader fell wounded, forced to withdraw from the battlefield. The riot troopers were not so lucky, they were cut down in a storm of blaster fire.

In a final desperate effort, a Dewback rider crashed through the barricades, scattering Han, Chewbacca, and a Rebel squad deeper into the town. But Luke stood firm. Supported again by covering fire from the hills, he confronted the beast and brought it down in close combat.

With their commander gone and losses mounting, the last two Stormtrooper squads pulled back from the ruins of Dusthaven.

A Rebel victory!

The first assault on Dusthaven.

The speeder bikes are destroyed as the Rebels respond.

The final assault by the Dewback rider just before it was cutdown by Luke.

Game 2 - Jon as the Empire and Peter as the Rebels

After their earlier victory, the Rebels knew it was only a matter of time before the Empire returned.

Darth Vader, recovered from his wounds and determined to crush the uprising, led a renewed assault on the mining town of Dushaven. This time the Empire would not underestimate the Rebels again.

Anticipating the attack, the Rebels maintained their defensive positions. A squad armed with a Z-6 rotary blaster held the high ground west of the town, while the 1.4 FD laser cannon team was once again deployed on the eastern ridge.

The Empire struck first, concentrating their initial attack on the eastern ridge. The 1.4 FD laser cannon and its crew were swiftly eliminated with some precise shooting, clearing a key threat to the Empire advance. With the eastern flank neutralized, Stormtroopers unleashed suppressive fire across the town’s defenses.

Then came the main assault led by Darth Vader himself, supported by the Riot Control squad and the Dewback, The defenders at the barricades fought hard, but the assaults were unrelenting. One by one, the Rebels were pushed back from the barricades.

The AT-RT walker, now occupying the eastern ridge, provided steady covering fire that continued to sap the defenders' strength. In the chaos of battle, Han Solo and Chewbacca were cut down in a withering hail of blaster fire, vanishing into smoke and flame. Only Luke Skywalker remained.

With the barricades breached, Luke stood alone against the Empire's attack. Lightsaber in hand, he fought valiantly to hold the line. But with the last supporting unit eliminated he was forced to retire, and with that the defence of Dusthaven collapsed.

Victory to the Empire!

Setup for the second game.

The AT-RT destroys the laser cannon in the initial strike by the Empire.

The assaults begin on the town.

Wrap Up

Well done to Jon on securing two victories, the Force was definitely with him! Overall, the rules worked well converted to a square grid. However, one area that did not seem to flow as smoothly compared to games using free movement was close combat. When a unit attacks a square occupied by two enemy units. If the attacker wins, they are unable to advance if the square still contains another enemy unit. I will have look into seeing if there is a better way of dealing with assaults.

Tuesday, 15 July 2025

ECW Game report - The Battle of Raventon Crossing

This is an English Civil War battle report following on from the previous post where some pre-game actions were tested to influence an army's deployment, composition, and also its readiness. While also helping develop the game’s narrative.

Infantry engage in the centre.

The tabletop layout was decided by terrain cards drawn from deck. A little bit more on using terrain cards can be found here. The Royalists had to deploy first followed by the Parliamentarians. I should have allowed Parliament to select the tabletop side, and only realised later in the game that I had forgotten.

Terrain cards are used to determine the tabletop layout.

The tabletop is setup and armies deployed.

The pre-battle actions had influenced the make up of the chance cards for each army. The Royalists having one extra rally card, while the Parliamentarians force had replaced a confusion card with a panic card. See the previous post for details about the cards.

Chance cards for the Royalists. One card is drawn and actioned at the start of the Royalist player’s turn.

Parliament’s chance cards. The cards are just cut out from a sheet of cardboard from the local craft store.

Order of Battle

There is little difference in the armies. The Royalists has an additional cavalry unit, while Parliament has an additional infantry unit.

Royalists:
  • 4 x Cavalry
  • 3 x Infantry
  • 1 x Artillery
  • 2 x Dragoons
Parliament:
  • 3 x Cavalry
  • 4 x Infantry
  • 1 x Artillery
  • 2 x Dragoons

Opening moves along the river

The Royalist forces, led by Sir Charles Blackthorne, began by advancing on their right flank beside the river, committing both their cavalry and dragoons to the attack. In response, Sir Nathaniel Cleve, commanding the Parliamentarian army, countered by pushing forward his left flank cavalry and advancing his infantry in the centre where he had an advantage in numbers.

After an intense struggle, the Parliamentarian cavalry gained the upper hand, routing their Royalist counterparts. However, their success was short-lived as they were caught in a withering volley from the nearby Royalist dragoons and scattered in disorder.

The opening action was along river.

Parliament’s first success with their cavalry was short-lived as their cavalry, disorganised after the clash with Royalist cavalry, were scattered by accurate musketry from dragoons.

The centres clash

Sir Nathaniel Cleve continued to advance his centre, pushing the leading infantry line forward while repositioning his second line to cover the gap left by the routed cavalry near the river. Both centres engaged in a short exchange of musketry before running out of ammunition. Meanwhile, Parliament’s right-wing cavalry began a cautious advance.

Fortune favoured the Royalists. Their centre-right successfully broke the opposing Parliamentarian infantry after a panic in the ranks, leaving Cleve’s left flank dangerously exposed. Sensing an opportunity, the Royalists committed their reserve cavalry, moving them up on the right to exploit the situation.

Meanwhile, on the opposite flank, the cavalry of both sides were locked in a fierce struggle with neither side able to gain the upper hand.

The infantry centres advance.

Royalist reserve cavalry move along the river as Parliament reposition their second line of infantry.

The flanks

After a prolonged and hard-fought melee on the Royalist left flank, their cavalry at last gained the upper hand, routing the Parliamentarian horse. After regrouping they wheeled inward, threatening the exposed flank of Parliament's centre.

Seeing the futility of continued resistance with Royalist cavalry now pressing both flanks. Sir Nathaniel Cleve ordered a general retreat.

Victory at the Battle of Raventon Crossing belonged to Sir Charles Blackthorne and the Royalist cause.


A hard fought cavalry action on the other flank sees the Royalists about to prevail.

Cavalry threaten both flanks of Parliaments centre, forcing them to retire.

Wrap up…

Parliament had a few moments of success during the game but was unable to capitalise on them. In contrast, the Royalist successes aligned well with the drawing of chance cards, as Parliamentarian units faltered in panic or Royalist units seized the initiative with well-timed free actions.

The pre-battle activity provided some variation to the game and helped with the narrative context. I plan to use it again, though I feel it could benefit from a little further work, for example, could tabletop objectives be added into the mix?

OHW Rules Variations

I used a variation of the One-Hour Wargames (OHW) rules for this game. Some of the changes include:

Dragoons and artillery are represented by single bases and are eliminated after taking 8 or more hits, half the threshold of the two base infantry and cavalry units, which are removed after 15 hits.

Dragoons and artillery musket fire uses a D6-2 and must test for running out of ammunition. 

All shooting units test for Out of Ammunition. Instead of rolling a separate D6 to test for out of ammunition, I check their shooting roll. If a 5 or 6 is rolled, the unit is considered out of ammunition. (Trotter cavalry cannot be resupplied with ammunition if the resupply chance cards is drawn.)

Movement is subject to friction. At the start of the movement phase, a die is rolled. On a result of 1, the movement phase ends immediately for that side. Units can still shoot.

Armies have 1 to 3 commanders assigned to the centre and wings, as well as a general. Each is attached to an infantry or cavalry unit and they have benefits in hand-to-hand combat.

In hand-to-hand combat, a unit with an attached commander rolls two dice and selects the higher result. If a double is rolled, the commander is wounded or killed and removed from play; the unit then reverts to rolling a single die in future combat.

All musketry and charge moves are limited to a range/distance of 6 inches.

Next up

The tabletop is returning to a sci-fi theme and is being prepared for a remote game using a square grid.

Preparing for a sci-fi game.