Saturday 28 October 2023

Chariots left, right, and centre

Yesterday, I played a remote wargame with Jon from Palouse Wargaming Journal. We played the a scenario, Battle of Tel Nebi Mend 1274 BCE, devised by Jon and a game between the Hatti and Egyptians. The scenario interestingly had terrain in the center of the tabletop that gave the army holding it an advantage to their army resolve. 

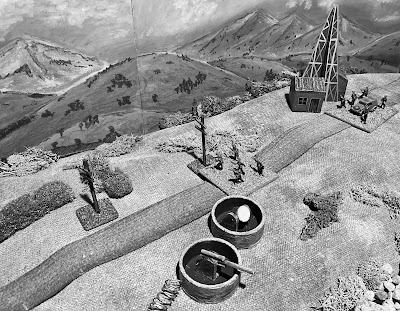
A close up of the game taken by Jon. The rest of the photos are screen shots and don’t do the painted figures justice. 

We used a variation of the Basic Impetus rules, modified by Jon to use a hex grid. Jon may have made some additional modifications to the rules for chariots, but I'm not sure.

Jon had sent me a QRS and an overview of the scenario with the orders of battle earlier in the week. I chose to play the Hatti because their starting position was closer to the heights. I haven't read much or know much about the biblical period, the only other game I've played in this period was another remote game with Jon, where I used the Assyrians and some heavy chariots.

The opening turn of the game.

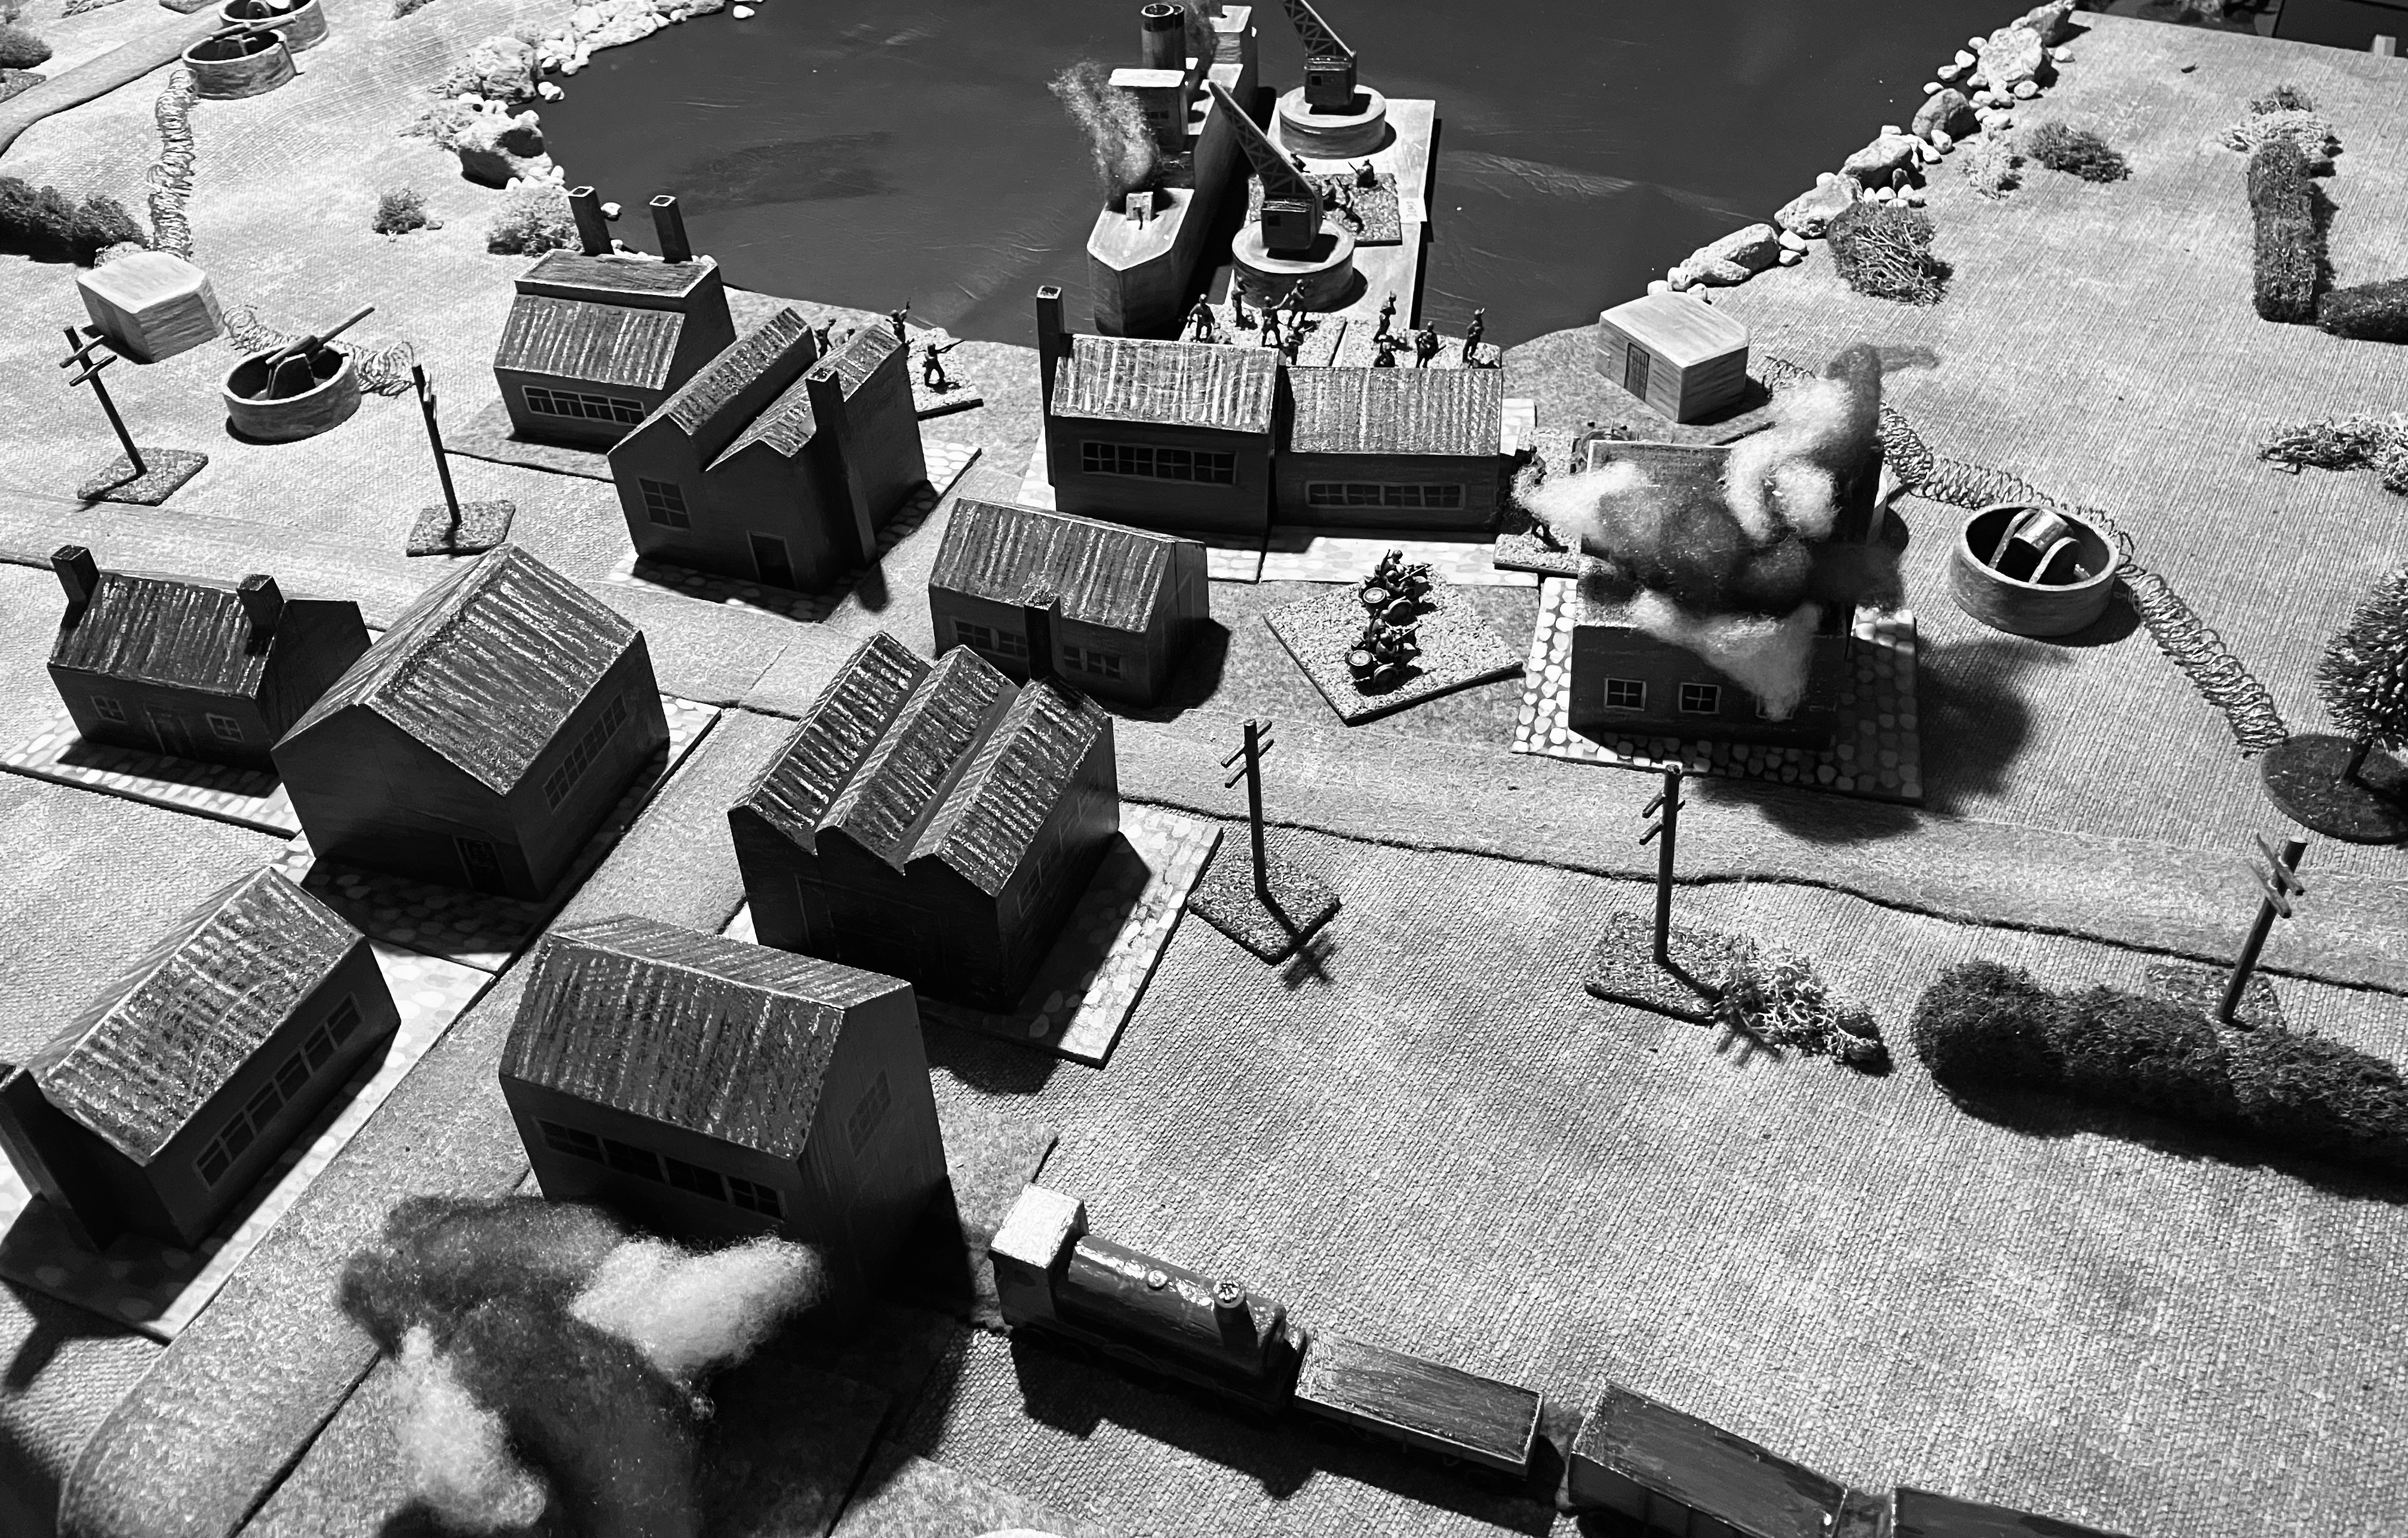
I took some screen shots of the game as it progressed, but the units are hard to see and tracking the actions of the fast moving chariots is difficult. The photos don't really capture the to and fro action of the game. After the game, Jon and I talked about how there aren't many records from this time period and that the ones we have were written by the victors with much hyperbole and symbolism to make themselves look good. So, with that idea in may head, here is a game report written with full on exaggeration and symbolism to reflect the period.

Game Report (of sorts)…

In the the hills of Tel Nebi Mend situated not far from the mighty lake Homs, the fate of two empires hung in the balance. On one side, the Egyptians, led by their pharaoh Jonses II, marched forth like a lion leading his pride. On the other side, the Hatti army, led by their cunning king Peteratalli II, massed his forces like a swarm of locusts.

The battle began with the Hatti taking the central high ground followed by a clash of chariots, their wheels churning up the dust like a whirlwind on the flanks. The Egyptians charged with the fury of a storm, their arrows flying like a swarm of bees. The Hatti met them head-on, their chariots clashing like thunderbolts.

A view are the initial chariot encounters and the Hatti infantry have control of the heights.

For hours the battle raged, with neither side able to gain an advantage. The Egyptians fought with the strength of lions, but the Hatti were as cunning as serpents. The ground was soaked with blood, and the air was filled with the cries of the dying.

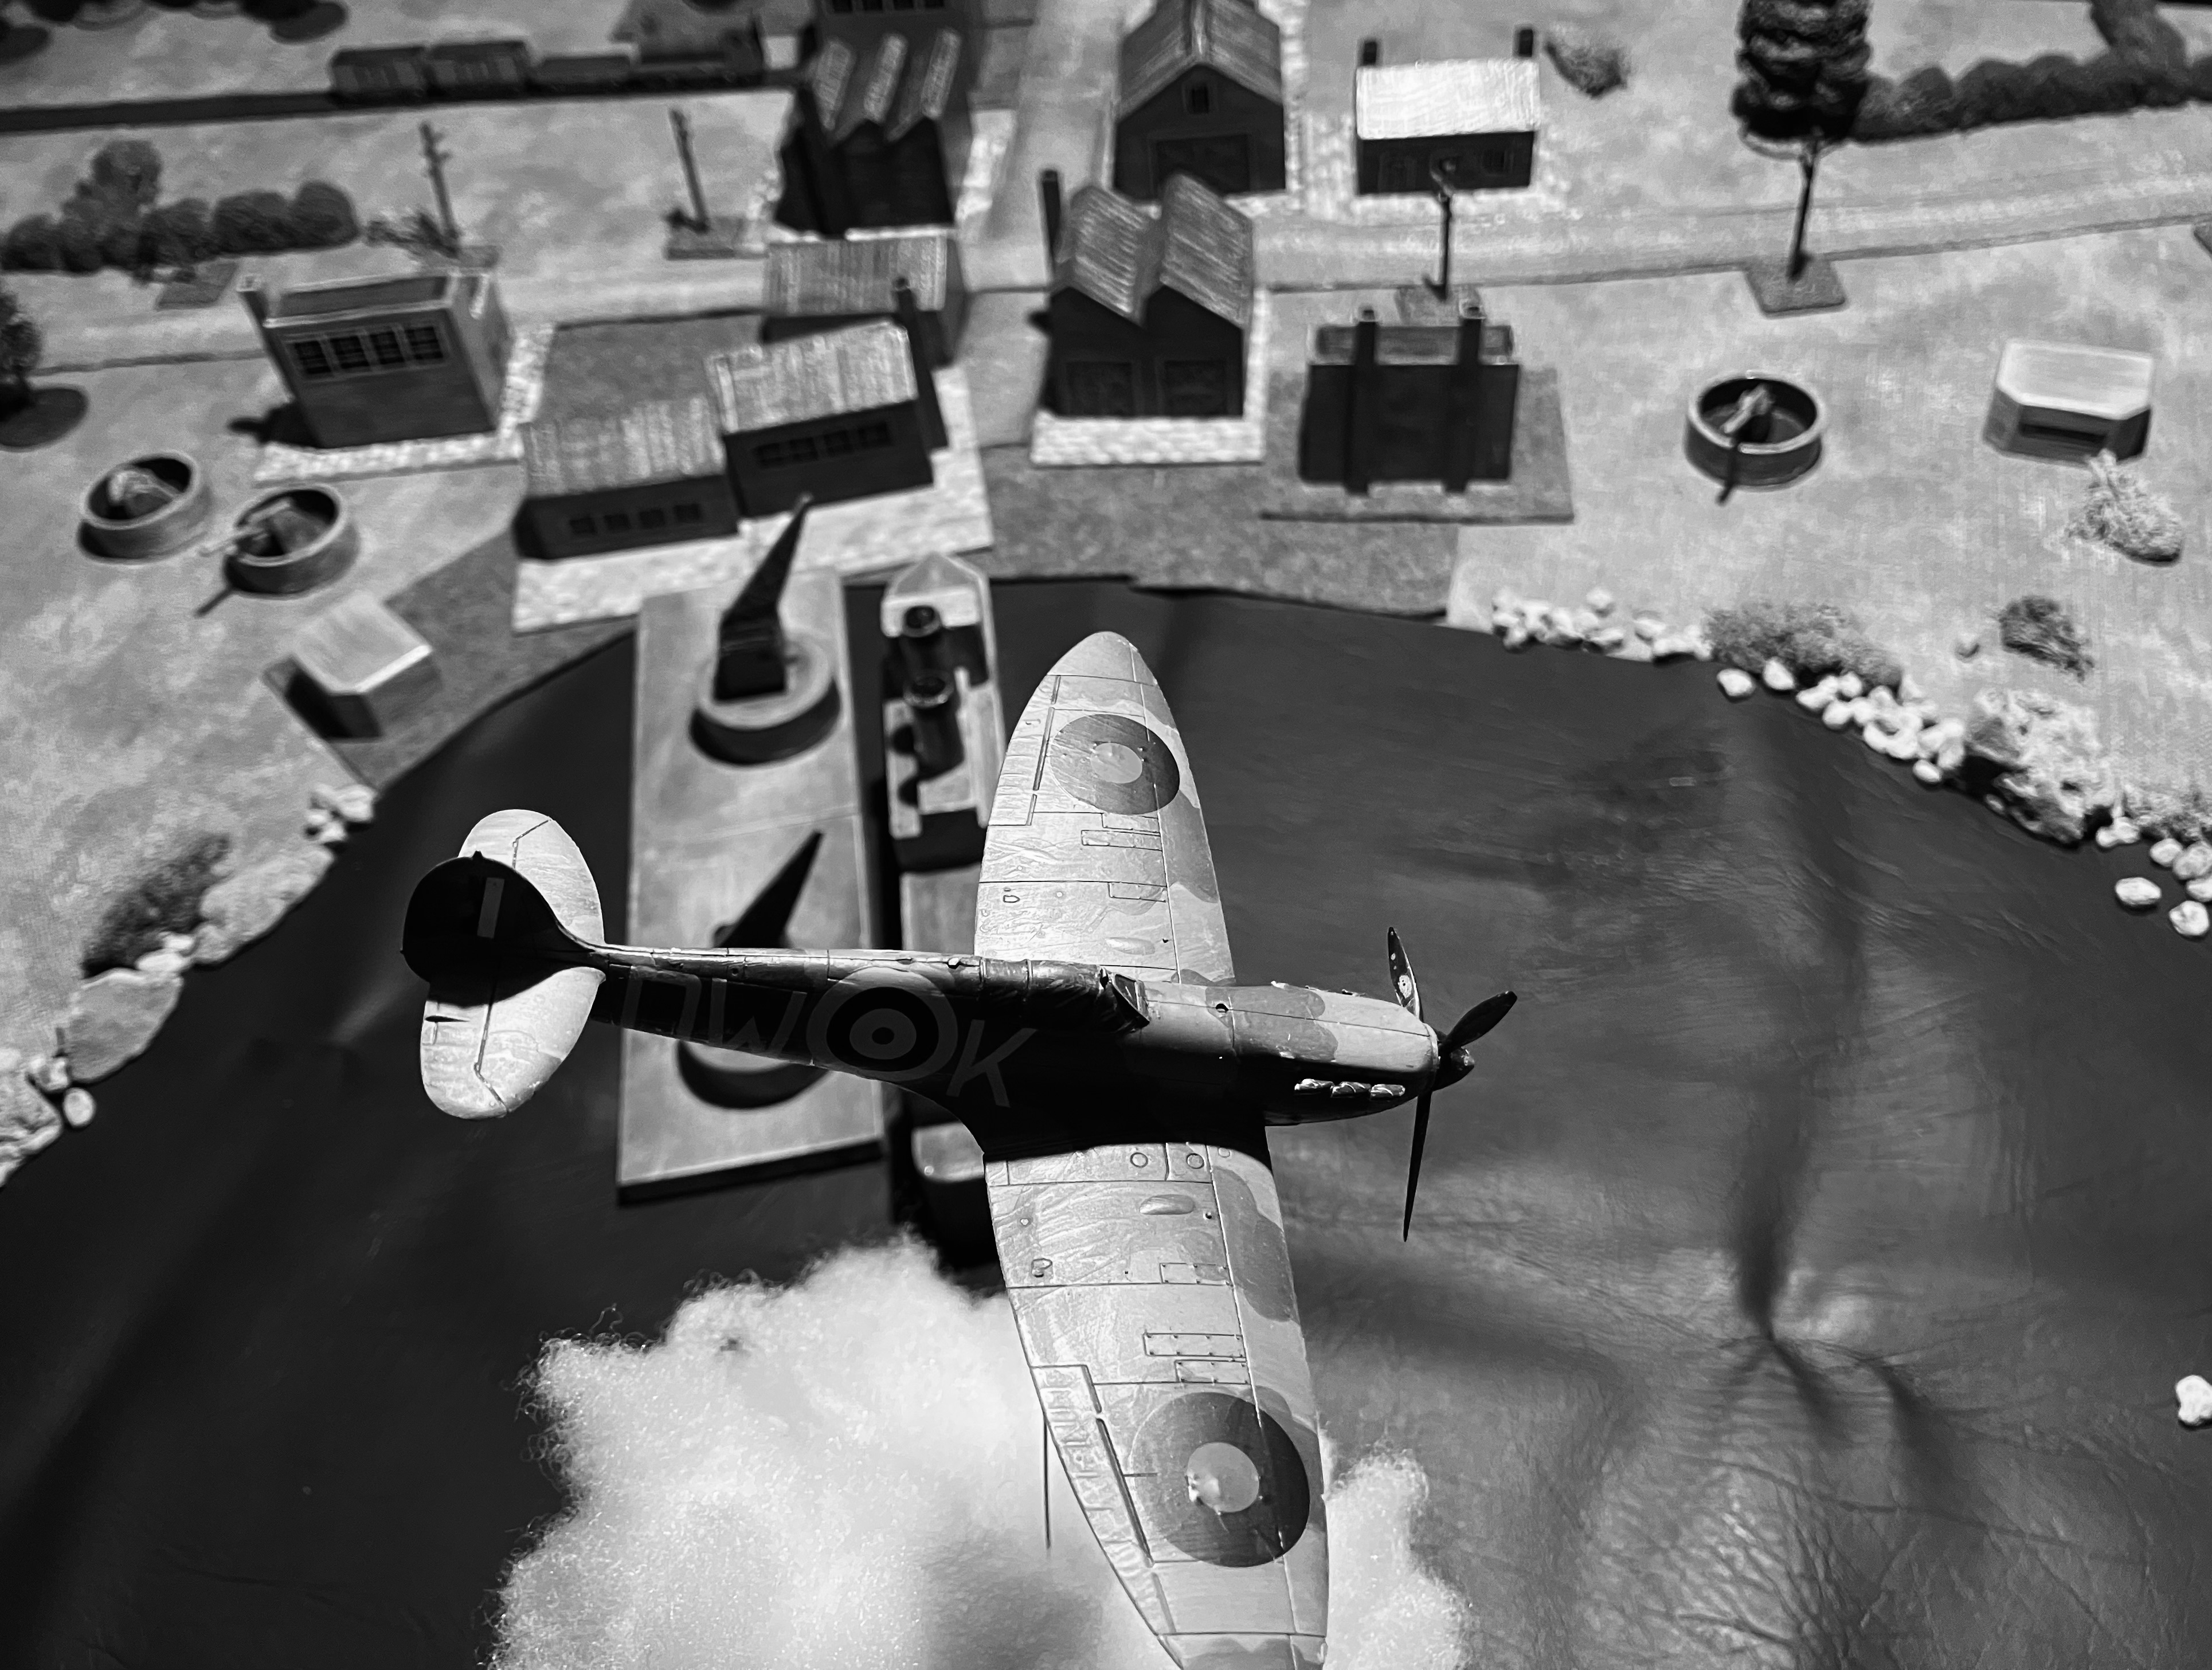
The Egyptian chariots were proving very effective on their right flank after an initial setback.

At one point, it seemed that the Hatti army would prevail. Their chariots had broken through the Egyptian lines, and their long speared infantry was closing in. But then, Jonses II himself rallied his troops. They fought like a possessed men under his gaze, inspiring their fellow soldiers to new heights of valour.

The battle had become somewhat chaotic with both looking for that elusive opportunity to capitalise on any opening.

The Egyptians turned the tide of the battle, and the Hatti were forced to retreat. The Hatti regrouped, sensing the battle slipping away. Their king knew that one last desperate throw of the dice was required. He and his chariots made a furious charge, scattering the Egyptian right flank like chaff before the wind. 

The Hatti king with his chariot begins his charge on the Egyptian right flank.

After multiple pursuits the Hatti king is slain by Egyptian spearmen.

King Peteratalli II pursued the fleeting Egyptians, his chariot like a scythe cutting through their ranks. But as he rode into their centre, an Egyptian spear pierced his heart. The Hatti king fell, his body lifeless in the dust. With their leader gone, the Hatti resolve evaporated. Jonses II, the pharaoh of Egypt, saw his opportunity and took it, leading his army in a relentless pursuit, driving the Hatti before him.

The Hatti fled in terror, their once-mighty army broken and routed. Jonses II stood upon the heights of Tel Nebi Mend, his sword raised in victory. He had defeated the Hatti, and secured Egypt's dominance in the region.

Summary…


The long lost battle report of Jonses II unearthed.

The game took about 3.5 hours to play and was very close. Both players tried to get the initiative throughout the game to capitalise on any advantage they had. The chariots were very great fun to play with, but they were also difficult to manage once they lost a melee and retreated often in the wrong direction. But that was all part of the fun. 

Congratulations and well played to Jon, or should that be Jonses II of the Palouse?

Tuesday 24 October 2023

A game involving a recently completed Churchill AVRE

In recent weeks I have been painting up some of those odd models which were brought to add to existing collections because they are interesting or useful for expanding an army, but for one reason or another have remained on the shelf. One of those kits was a Churchill AVRE with a box girder bridge. The kit was enjoyable to build, and I was relieved that the small track wheels were not separate, unlike the Airfix kit, which was so fiddly to make. I did have to make some adjustments to the girder bridge and attachments so it could be removed easily for wargaming purposes.

The recently completed Churchill AVRE.

The girder bridge can be removed for gaming purposes.

To continue with the WW2 theme of recent posts, I set up Bridgehead scenario 5 from One-Hour Wargames so I could use the recently completed Churchill AVRE bridge model. Another reason for continuing with gaming WW2 is to try out some quick rules loosely using the approach from the rules used in the commando raid game, but with the result being destroyed or suppressed. A suppressed unit has fewer actions, as it takes one action to reorganise itself before it can move or shoot.

A quick game report…

The bridge was in place, and the British infantry advanced across the river crossing. British Sherman tanks supported the bridgehead as German defending units arrived, taking position on the hill north of the crossing. A single British infantry unit held off German infantry moving through the woods from the west.

British infantry advance across the bridge.

A British armour support arrives to confront German defenders.

German infantry moving through the woods are held up by a single British infantry unit.

Accurate British shooting stymie the German attack

Accurate fire from the Sherman tanks dented the German attack, but fresh German defenders arrived in the form of Stug III self-propelled guns supported by infantry. The British units blunted the attack, but suffer casualties and destroyed tanks from a German tank positioned on the hill.

Stug III’s supported by infantry advance.

A German tank on the hilltop remains a threat.

With the self-propelled guns destroyed, the British focused their attention on attacking the last German tank positioned dangerously on the hill. After a fierce battle, the British finally destroyed the tank, allowing them to secure the bridgehead.

The bridgehead is held.

The British victory was a costly one, but with the bridgehead secure, British forces could now move across the river and continue their push into enemy territory.

Wednesday 18 October 2023

Planning a solo commando raid game - Part 4 and last in the series

This is the fourth and final post in a series about a commando raid game using 20mm plastic miniatures and solo rule mechanisms. This post covers the battle report, while the previous three posts covered preparing for the game.

A quick recap, there are a total of 5 objectives for the commandos to destroy with the primary objective being the radar installation. These are defended by 2 pillboxes and 5 guard units that are positioned near the objectives. Additionally, there are 10 German reserve units that arrive one on each turn after any contact is made with the commando units. The reserves will arrive at one of three locations each turn determined by a dice roll.

A view of the tabletop with the 5 objectives circled in red and a blue arrow showing the arrival point for the commandos on turns 1, 2, and 3.

The reserves have been lined up in a line and will start arriving in order, starting at the end chosen by dice roll.

In other words, the commandos must defeat, or avoid, the 2 pillboxes and 5 guard units, then destroy the radar installation. After contact is made with the enemy, 10 reserve units will start arriving one by one each turn. The commandos must complete their mission before the reinforcements overwhelm them.

The German defenders lined up. A dice is rolled to determine which end of the line to start drawing reserves from.

The raiding commando force consists of:

  • HQ - 1 squad with 2” mortar led by Major John "Houdini" Smith
  • Group A - 3 squads and 1 demolition squad led by Captain William Jones
  • Group B - 3 squads and 1 demolition squad led by Captain David Brown
  • Group C - 3 squads and 1 demolition squad led by Captain Michael Williams
HQ and Group A arrive on turn 1, Group B on turn 2, and finally Group C on turn 3.

This force will arrive from the north-east having landed further up the coast and having been guided through an area of marshland by the local resistance group.

All the figures are based on 3” by 3” bases in groups of 5 or 6. A German unit is one base and a commando squad is one base.

Battle Report

Major Smith and Captain Jones’s Group A cautiously advanced through the marshland with their guide, steering clear of the spotlight and pillbox. They had successfully navigated the treacherous terrain in good time, but their presence was discovered just as Group B arrived. German guard units moved forward and engaged in ranged fire with the lead commando units. Major Smith ordered the men to take cover and return fire.

Leading elements of the raiding force arrive.

Achtung! The commandos are spotted.

The commandos found themselves in a difficult situation. They were confined to a small area unable to fully deploy, but they knew that they had to press on and complete their mission. Major Smith and Captain Jones led two assaults on the German positions. The assaults were successful, but they came at a high cost. Major Smith was wounded, and Captain Jones was killed.

Despite the loss of their leaders, the commandos started to make ground. They crossed the road and began to flank the German defenders, whose numbers were increasing as reserve units arrived.

The situation is getting crowded as more commando units arrive and the defending units have them hemmed in.

More German reserves arrive.

A series of costly but successful assaults allow the commandos to cross the road and begin to flank the defenders.

The German reserves are bolstering the defence.

Finally some progress for the commandos as their flaming units engage the defenders.

The leading commando units advanced into the buildings, closely followed by the demolition teams carrying their explosives. The demolition teams quickly positioned themselves at two of their objectives: the coastal defence HQ building and the railway sheds.

Minutes later, two loud explosions rocked the air. The buildings were engulfed in flames and smoke. The demolition teams had done their job perfectly. The coastal defence HQ building was now a pile of rubble, and the railway sheds were in ruins. The harbour infrastructure had been weakened significantly.

Demolition teams arrive at the railway sheds and HQ building.

Bang!

The commando forces were starting to lose ground. The German defence was fierce as more reserves arrive, and the commandos were suffering heavy casualties. 

Captain Brown who was now in charge, knew that further attacking options were limited and decided to call off any attempt to break through the town to the radar installation. Instead he ordered all his remaining units to clear a path to the docked ship. The commandos successfully fought their way through the German positions and planted explosives on the ship. Moments later, the ship exploded in a massive fireball and gave the remaining commandos the opportunity they needed to try and slip away to escape in ones and twos.

The commando raiding force had suffered heavy casualties and were a spent force. Only a handful would make it back home with the assistance of the local resistance. They had destroyed the German ship and weakened the harbour infrastructure.

The raid destroyed 3 of the 5 objectives, but the primary objective, the radar installation, remained untouched.

Summary

So was the raid a success? A commando raid on a harbour and warehouse complex was successful in causing mayhem and destruction two three of the five objectives, but failed to destroy the primary target, a radar installation, and none of the commando squads made a successful escape.

I have been reading the book “Donald Featherstone’s Wargaming Commando Operations and Reflections on Wargaming” and in one of the chapters it discusses the outcomes and lessons learnt from the commando raids in World War II. The commando raids were a significant part of the Allied war effort with their intelligence gathering, disruption of enemy operations, and raising morale. However, some argued that these raids had limited strategic value and were costly in terms of resources and lives which could have been better used elsewhere.

Success or not? 

Whether or not the raid was a success depends on how you define success. If the goal of the raid was to cause mayhem and destruction, then it was a success. However, if the goal of the raid was to destroy the radar installation, then it was a failure. I think at best it was a partial success with three out of five objectives destroyed, but a costly one.

Sunday 15 October 2023

Planning a solo commando raid game - Part 3

This post the third of a series of posts on planning and gaming a commando raid where I need to decide how to decide the orders to the defending Germans in this solo game. I will be using the same mechanisms as I used in the St. Nazaire game, with one or two changes. But before getting into that, it may help to first  look at the tabletop and where the German defenders, including pillboxes, start the game.

Defender’s Starting Positions

The position of infantry units are circled in red and pillboxes in yellow.

At the beginning of the game, the German defenders are placed on the tabletop as follows:

  • Pillboxes are placed at key strategic points to defend against attack from the sea.
  • German 5 infantry units, one with an truck, are placed in cover key positions: the gun emplacement, radar installation, rail sheds, harbour, and costal defence HQ building.

Defender's Reaction Rules

These rules define how the defending Germans will operate during the game. They cover the tactical operation of individual units on the tabletop and the arrival of reinforcements. These rules are written to fit in with the simple UGO-IGO sequence of play used in the main rules. As with any predefined set of reaction rules, units can on occasion seem to make odd moves, which from a narrative point of view can be put down to the confusion of the raid and night time combat.

German Unit Activation

During the German turn, the following rules are applied to each unit on the tabletop:

  1. Any German unit must move towards the closest commando unit using only the roads until within shooting range. As soon as they are within shooting range, they must shoot.
  2. Any German unit which cannot shoot at a commando target and cannot move along a road due to other units blocking the way, will leave the road and move towards the closest commando unit until within shooting range.
  3. Once German units have left the road and there are no commando units to shoot at, they are no longer constrained with moving along the road and must move towards the closest commando unit until within shooting range. As soon as they are within shooting range, they must shoot.
  4. If German units begin a turn within shooting range, they must only shoot at the closest commando unit. Until all enemy units within range are eliminated, they cannot move.

Pillbox Fire

Pillboxes must shoot at the closest commando unit.

A pillbox positioned to defend the harbour.

Reinforcements

A single German infantry reinforcement unit arrives each turn after contact with a commando unit is made by the defenders. Roll a dice to determine which of the three reinforcements points a unit arrives:

  • 1-2 Arrive near the gun emplacement
  • 3-4 Arrive on the south road
  • 5-6 Arrive on the east road.

The photograph shows the entry points for reserves.

The next post will be the battle report.

Saturday 14 October 2023

Planning a solo commando raid game - Part 2

This post describes the rules to be used for the commando raid game. The defender's reaction rules will be in my next post. The rules for this game are different from the original St. Nazaire game I played 3 years ago in two main ways. First, instead of tracking hits, units are now eliminated after failing a saving throw which means the shooting rules were reworked. Second, officer rules have been introduced, allowing units with officers to improve another unit's activation by foregoing their own activation.

Raiding commando units creating havoc.

Turns

The game is played in turns with the commando player attempting to activate their commando units first. Followed by the German unit activations and reinforcements using the defined reaction rules (in the next post - part 3).

Unit Activation

Each unit in a player's force is activated once during the player's turn.  Assuming a successful activation a unit can move, shoot, attempt a demolition of a target, or engage in hand to hand combat.  

Note: German units don’t engage in hand to hand combat or demolition.

Activation Roll

For each activated unit roll a dice and adjust the score:

-1 for German forces to represent the confusion

+1 Officer direction (see Officer rule)

-2 if seen by searchlight (see Searchlight rule)

If the adjusted score is:

Less than 1 = no action allowed

1-2 = one action allowed

3-4 = two actions allowed

5+ = three actions allowed

Note: Pillboxes do not need to activate, they always have one shooting action until they are destroyed.

Units with officers and demolition units are labelled to avoid confusion. I use little tabs for marking books from the local stationary store.

Movement

A move costs one action and units must move in a straight line for each action. If a unit is moving it must perform all its move actions together.  A unit cannot split its move actions to move, shoot, and move again.

Commando units and German infantry units move 6 inches for each move action. There are no deductions for moving in built up areas, cover, or pivoting a stand during a move action.

Armoured cars, trucks, motor-cycles, and half-tracks move 12 inches for each move action.

Units may pass through friendly units without penalty.

Units must cease movement when within 6” of enemy units or pillboxes, unless the movement is to assault a unit or move directly away from the unit or pillbox.

Shooting

To shoot costs one action. As with the moving, all shooting actions must occur together. With each shooting action all units roll a dice. A unit with two shooting actions would roll two dice (one for each attack) with the following modifications:

-1 if the target unit in cover, is armoured car/half-track, or a pillbox

-1 if shooting more than 6”

If the modified score is 4+, then the target unit or pillbox must take a save test. Roll a dice, on a score of 1-3 the unit or pillbox is eliminated.

All units have a 360 degree firing arc and pillboxes a 180 degree firing arc.

To attack a pillbox the attacking unit must be within 3”. Otherwise all ranges are 12".

Gun emplacements cannot fire at ground units and for the purpose of the game they are targets to be put out of action.

A commando unit ambushes an armoured half-track unit. They roll a 5 (black dice) which allows 3 shooting attempts. The target is armoured and a 5+ is required, 2 hits are achieved (red dice). The half-track unit must get 4+ to save, 1 hit is saved and 1 failed (green dice) so the unit is eliminated.

A raiding party tries to close to within 3” of a pillbox to allow attacks.

2” Mortar

2” Mortar can be used and requires two actions to fire.  Roll one dice and on a 5 or 6 the target is eliminated with no save roll.

Hand to Hand (Assault) Combat

Hand to hand combat, or assaults, can only be initiated by commando assault units against all units except Pillboxes.  A unit must be able to move into contact with an enemy unit. To determine the outcome, commando units roll a 2 dice selecting the highest score. German units roll 1 dice. Compare scores, the highest score eliminates the opposing units. There are no saving rolls. Re-roll any draws with a single dice for each unit.

A commando unit decides to assault a German unit in cover that is holding up their advance. Assaults can be risky with one good dice roll by the defenders eliminating the attacking unit, but they are an effective way of dealing with units in cover. Above the commanders are successful with a score of 5 from their 2 dice. The German unit only rolled a 4 and will be eliminated.

Searchlights

The closest commando unit within 12” of an active searchlight, will always subtract 2 from their activation dice role. Searchlights can be eliminated just like any other unit.

The nearest unit to a searchlight still in action will deduct 2 from their activation dice roll.

Pillboxes

Pillboxes always have 1 activation to shoot. Their shooting arc is 180 degrees. They can only be attacked from within 3”.

Barbed Wire

Barbed wire cannot be crossed by units. Any unit can remove a section of barbed wire by touching it and using 2 actions.

A landing party in contact with a barbed wire section can remove it with two actions.

Demolition

A demolition attempt takes two actions and can only be carried out by a commando demolition unit.  The unit must be in contact with the demolition target.  Roll a dice, if a 4, 5 or 6 is scored the explosives were successfully set, and the unit moves 3 inches away. Yell bang! And place an explosive looking marker to show the target has been successfully destroyed. If the explosives were not successfully set and the unit remains in place (and you don't get to yell).

Officers

Units with an officer can choose not to activate for a turn and add 1 to the activation dice roll of a single friendly unit within 6” inches of their position. They cannot apply the activation benefit to themselves.

An officer can improve the activation dice roll of 1 unit within 6”. Above units with officers are labelled. 


Thursday 12 October 2023

Planning a solo commando raid game - Part 1

Back in January 2020, I played a solo wargame of the St. Nazaire raid using the scenario from Donald Featherstone's book "Battle Notes for Wargamers" as inspiration. In the game, all of the opposing force's actions were determined by the dice. I have added the post of the game report in the featured post section on the right bar of this blog.

Anyway, I was thinking it would be fun to play another solo commando raid game and rather than simply replay the same game, I have decided to create a fictitious raid scenario. In this blog post and a couple of follow-up posts, I will be writing about the background of the raid, introduce a few characters from the raiding party to add some interest to the battle report, and describe the scenario setup along with special rules for using dice when determining the defender's movement and shooting. Finally, I will post a battle report.

RAF reconnaissance run over the target.


The first step in preparing the game was to decide on the setting and background narrative for the raid and I came up with upon the following.

Background

The Germans have been using a small French harbor called Sol-le-Marin as a base and center of operations for their coastal defense units. Sol-le-Marin is responsible for defending an area of the French coast from Allied attacks. In addition, the local French Resistance has reported that a new advanced radar installation is being built on the cliffs above the town.


The purpose of the raid is to destroy the radar installation, damage the railway sheds, disable any coastal defence ships, destroy the gun emplacement on the cliff, and gather intelligence from the coastal defence HQ building.


Aerial reconnaissance photographs

The mission is planned.

Mission

The planned raid, code name “Thunderbolt”, has a small commando force, led by Major John "Houdini" Smith, landing on the coast half a mile north of Sol-le-Marin where there is an area of unguarded marshland. Local Resistance members will then guide them through the marshlands to the harbour, where they will launch their attacks:
  • Objective 1 - Damage the rail shed and search the costal defence HQ building for useful intelligence.
  • Objective 2 - Destroy the radar installation and gun emplacement.
  • Objective 3 - Raid the town and ships.
The commandos will be picked up from the harbour by motorboats, so removing the gun emplacement threat is essential for their safe recovery. Any commandos who are unable to be picked up will attempt to avoid capture and make their way south to Spain.

Commandos undergoing training for the mission.

Raiding Force and Characters

The raiding force is divided into three groups:
  • Group A - Led by Captain William Jones, Group A is responsible for destroying the radar installation and gun emplacement. The group has four units, including a demolition squad.
  • Group B - Led by Captain David Brown, Group B is responsible for raiding the town and ships and holding the road south of Sol-le-Marin. The group has four units, including a demolition squad.
  • Group C - Led by Captain Michael Williams, Group C is responsible for demolishing the rail sheds and searching the Coastal Command HQ, then holding the road to the north of Sol-le-Marin to prevent enemy advances. The group has four units.
  • Raid Commander - Major John "Houdini" Smith, the commander of the commando raid. Smith will also bring a 2-inch mortar. He will attach himself to Group B.
My commando force. The demolition squad in each group is represented by a base of Airfix commando figures.

The Tabletop

I had terrain for most of the features required for the game, but I didn't have a radar installation. I quickly made a scratch-built radar tower using thick card and added a couple of pump houses made for my St. Nazaire game.

Two pieces of 1mm card were used to make the installation and slotted together.

Painted a dark grey and a simple superstructure roughly painted.

A couple of buildings are added to the radar installation positioned near the gun emplacement.

A full view of the tabletop.


Saturday 7 October 2023

Battle of Lake Trasimene - scenarios and remote game report

This week, I hosted a remote Ancients game with Jon of Palouse Wargaming Journal blog. The Battle of Lake Trasimene was selected, and we would be using a variant of One-Hour Wargames that uses D3 dice instead of D6. These rules can be found at the top of the tab. I recently added a morale and an army resolve system to the rules, the resolve mechanism is based on Jon's approach in his Hex-Based Basic Impetus rules variant.

Early stages of the game.

When setting up the scenario, I searched the internet looking at various historical sites, wargaming sites, and some board game sites for ideas on both the terrain layout and composition of forces involved. I also ran a couple of quick solo play tests to ensure that the scenario was reasonably balanced a possible for an ambush scenario.

Here is the scenario detailed below followed by the battle report.

Scenario - Battle or Lake Trasimene

Background

On June 21, 217 BC, Hannibal and his Carthaginian army ambushed a Roman army led by Gaius Flaminius at Lake Trasimene. The battle resulted in a decisive victory for Hannibal, with the Romans suffering heavy casualties.

Hannibal had positioned his army on the hills overlooking the road that the Romans would be marching along. When the Romans arrived, they were attacked from all sides. The Romans were caught completely by surprise and were unable to form a proper battle line.

The battle raged for several hours, but the Carthaginians eventually overwhelmed the Romans. Flaminius was killed in the battle, and the majority of the Roman army was either killed or captured. Only a small number of Romans managed to escape.

Situation

The Roman army is marching along the southern edge of the tabletop while the ambushing Carthaginian army is positioned in and around the hills ready to spring the trap.

The layout on a 6x4 foot tabletop

Orders of Battle

Roman
6 x heavy infantry
1 x cavalry
2 x light infantry

Roman Army Resolve = 14

Carthaginian
3 x heavy infantry
2 x Gaul war bands
1 x light infantry
3 x cavalry

Carthaginian Army Resolve = 18

Deployment

Roman units must deploy along the road beside the lake's edge.

Carthaginian units cannot be within 12 inches of the Roman deployment.

Starting deployment positions

Reinforcements

There are no reinforcements in this game.

Special Rules

The Roman Army Resolve has been reduced by 4 to 14 to reflect the surprise element of the ambush. They can however increase their resolve by 4 if a unit exits from the eastern edge of the table.

Game Length

The game lasts for 15 turns or until one arm’s resolve is reduced to zero. The Carthaginian player goes first in each turn.

Victory Conditions

The player with the most army resolve is the victor.

Battle Report

I suggested that Jon play the Carthaginians, as the Roman tactics for the battle are relatively simple which is always helpful when you are hosting a game. They just needed to deploy their units and create space so that they are not forced to retreat into the lake, then try to force their way along the road.

From a Carthaginian perspective, the best strategy is to engage quickly and prevent the Romans from deploying fully. This will give the Carthaginians an advantage early on, as their cavalry and Gaul war bands are less resilient than the Roman heavy infantry. The challenge for the Carthaginian side is to us their units wisely and take advantage of any Roman retreats. The longer the game goes on the batter it is for the Romans.

Opening Game Turns

The Carthaginian cavalry and Gaul war bands descended rapidly from the hills, giving the Romans little time to deploy. Only about a third of the Roman army was effectively deployed before the Carthaginians attacked, forcing one Roman unit to retreat. This early retreat increased the difficulty for the Romans to manoeuvre.

The Carthaginian ambush is sprung.

Mid-Game Turns

At the front of the Roman column, the units were holding their own and getting organized, ready to counterattack. However, at the back of the column, things were going from bad to worse. Carthage's cavalry attacked two heavy infantry units, forcing them to retreat. In their retreat they pushed back two other units into the lake, eliminating them from the game, and costing the Romans a full 6 army resolve points.

Mid way through the game.

End Game Turns

Carthage's cavalry quickly exploited their success and began to encircle the rear of the Roman column. In the center, the little success the Romans had achieved under the leadership of Gaius Flaminius and his veteran heavy infantry evaporated with the arrival of the Carthaginian cavalry on their flank. The veteran infantry eventually succumbed to the cavalry onslaught, along with Gaius Flaminius himself. This broke the remaining resolve of the Roman army, and the battle was lost.

Gaius Flaminius in the thick of battle.

The Roman army resolve collapses as in the distance Carthage’s cavalry start to mop up the panicked Roman units.

After Game Thoughts

A historical result, and from a game point of view, the double retreat at the tail of the column turned out to be a real blow to the Romans. This was not just from the lost units, but it allowed the swift Carthaginian cavalry to quickly engage Roman units in the flank and capitalise upon their good fortune.

Well played Jon and a comprehensive victory!