Saturday 30 March 2024

A brief review of Arrowstorm rules and battle report

I recently purchase the Arrowstorm medieval rules written by Daniel Mersey, better known for his work on the Lion Rampant rules. These rules are available at a reasonable price ($9.47) on Wargame Vault under the publisher "Daniel’s Game Emporium". You just have to download and print. The design notes which are many, tabletop setup, rules, army lists, and quick reference take up 34 pages.

What caught my interest in these rules was the activation system which uses a tactics chart, and they are intended for a fast play game. Interestingly, the rules themselves were based upon some rules used for recreating the Battle of Evesham, 1265, and published previously in Military Wargames magazine (issue 387). These are also included in the 34 pages.

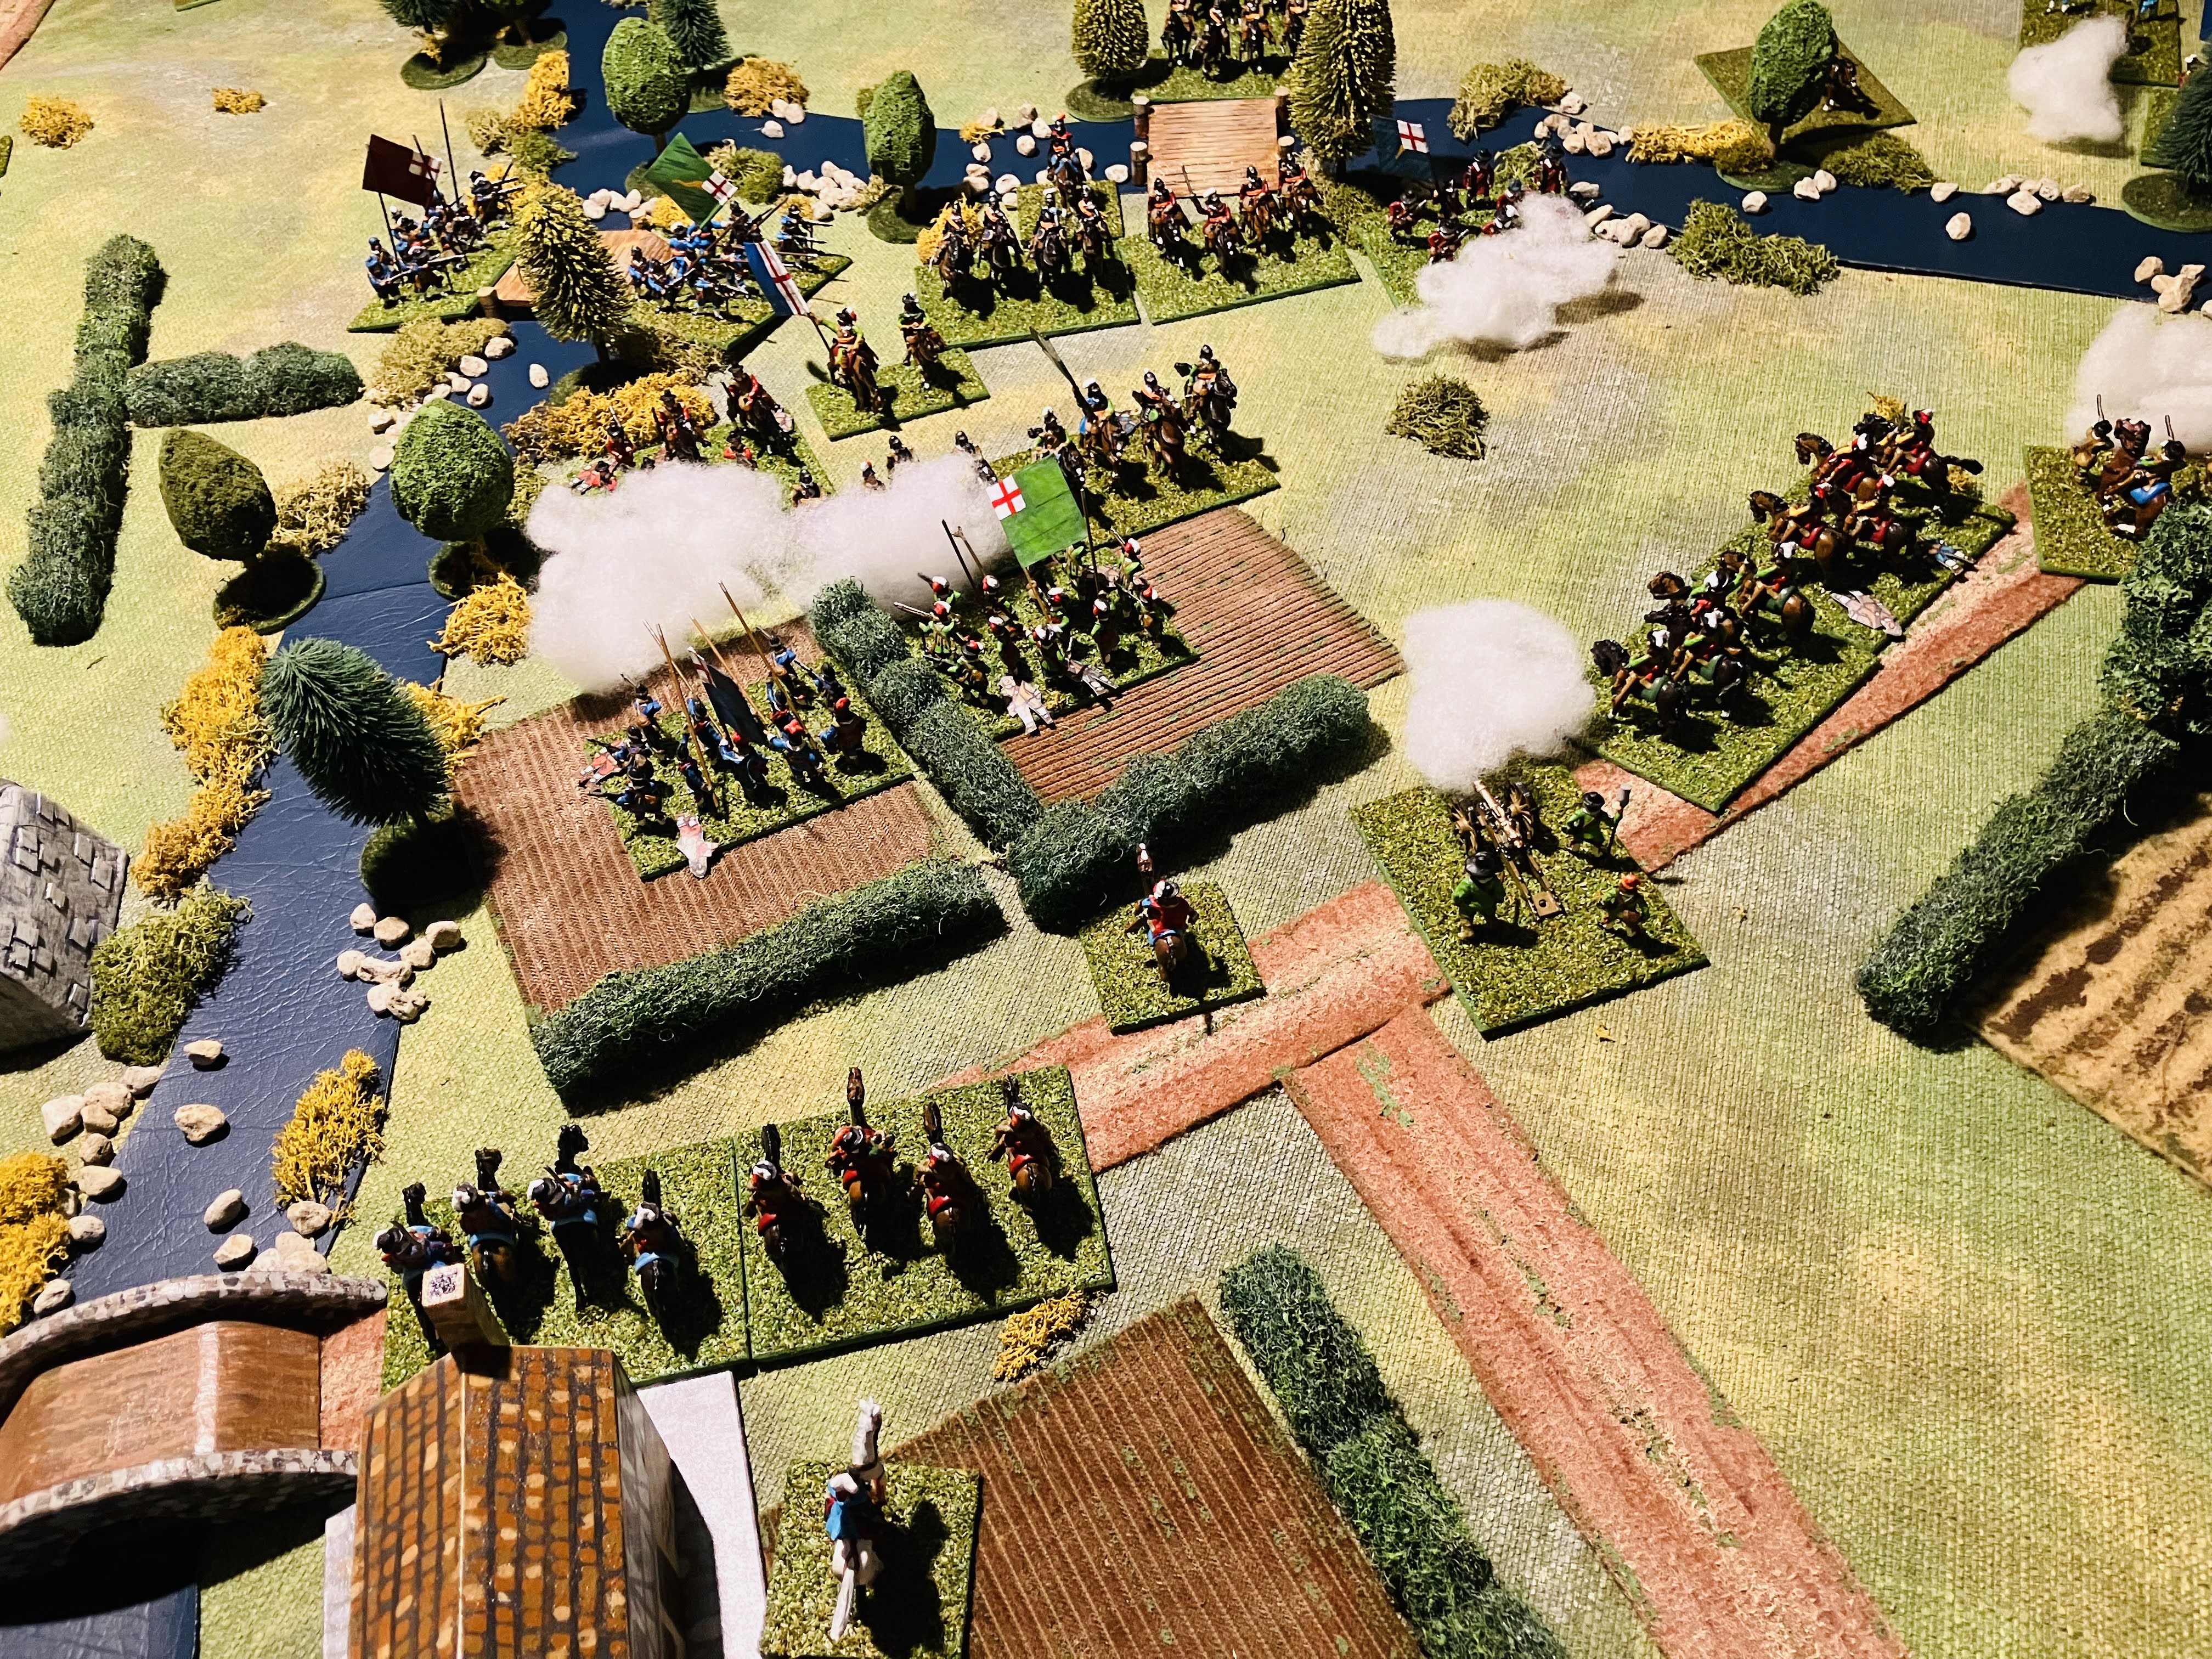
The tabletop prepared and the armies deployed.

The rules downloaded and printed. There was only one colour page, the rest being black and white and not heavy on the use of ink. 34 Pages in all.

The rules use an offset grid, with each square needing to accommodate up to 6 units (3 friendly and 3 enemy units). Initially, this posed a challenge for me as my units were based on two 4-inch by 3-inch stands and I play on a 6-foot by 4-foot tabletop. After experimenting with various approaches and square sizes, including halving my units to a single stand within the grid, I ultimately decided to adopt a free movement system. This meant that units needed to operate in a cohesive block with other units, so 3 units operating together were placed one behind each other. On the tabletop this gave the impression of the armies being organised into battles, provided a medieval look to the game.

The game uses an offset square grid. But I was able to adjust the rules to use free movement as my unit basing was too large to really accommodate up to 6 units in a square.

The deployed armies into blocks (or battles). Most of the blocks have 2 or 3 units.

The main reason behind my purchase of this Arrowstorm was its activation system, which revolves around a tactics chart. This chart comprises 12 tactical options, such as movement, battling, shooting, etc., with players taking turns to select their preferred tactic. Additionally, the inclusion of a couple of special tactics unique to each army list adds some characteristics to the armies; for instance, "arrowstorm" is a special tactic for the English Hundred Years War armies giving a bowmen unit extra benefits when shooting. 

Players are limited to choosing a maximum of 4 tactics in most cases. I found the whole tactical chart mechanism most enjoyable and intriguing, for example:

  • Selecting the “seize the initiative” tactic, allowing you to activate a unit or group of units first, but at the expense of an activation. 
  • Choose a tactic that might not directly benefit your army but by selecting it will hinder your opponent's choices.

The other feature of note are that activations apply to the square containing the units, not the individual unit, although you can just activate one unit if you choose to do so. For my game the activation is applied to groups of units. Units or groups of units can be activated more than once during a game turn, so units may end up shoot or moving twice.

Tactics being selected on the tactical chart. Generally 4 tactical are selected, but this can be reduced or increased in certain situations.

The combat mechanics are straight-forward, each unit type has an assigned a battle rating which dictates the number of combat dice rolled. Battle rates are reduced as units accrue hits. Typically, groups of units in a square engage in combat rather than individual units. In most cases players are allowed to allocate any hits among their units as they see fit. Moreover, special tactics and commanders have the ability to increase or decrease the number of dice rolled in combat. 

A Battle report…

Arrowstorm provides rules and army lists with a unit point system for a player to select their army and setup the tabletop. For this test game the following order of battle was used.

French:

  • 2 x Mounted Knights
  • 2 x Mounted Sergeants
  • 3 x Crossbows
  • 1 x Foot Knights
  • 2 x Spears

English:

  • 1 x Mounted Sergeants
  • 3 x Longbows
  • 3 x Foot Knights
  • 2 x Spears

The French were formed into 4 battles with cavalry positioned on each flank and the English into 3 main battles with a single units of mounted sergeants on their left flank.

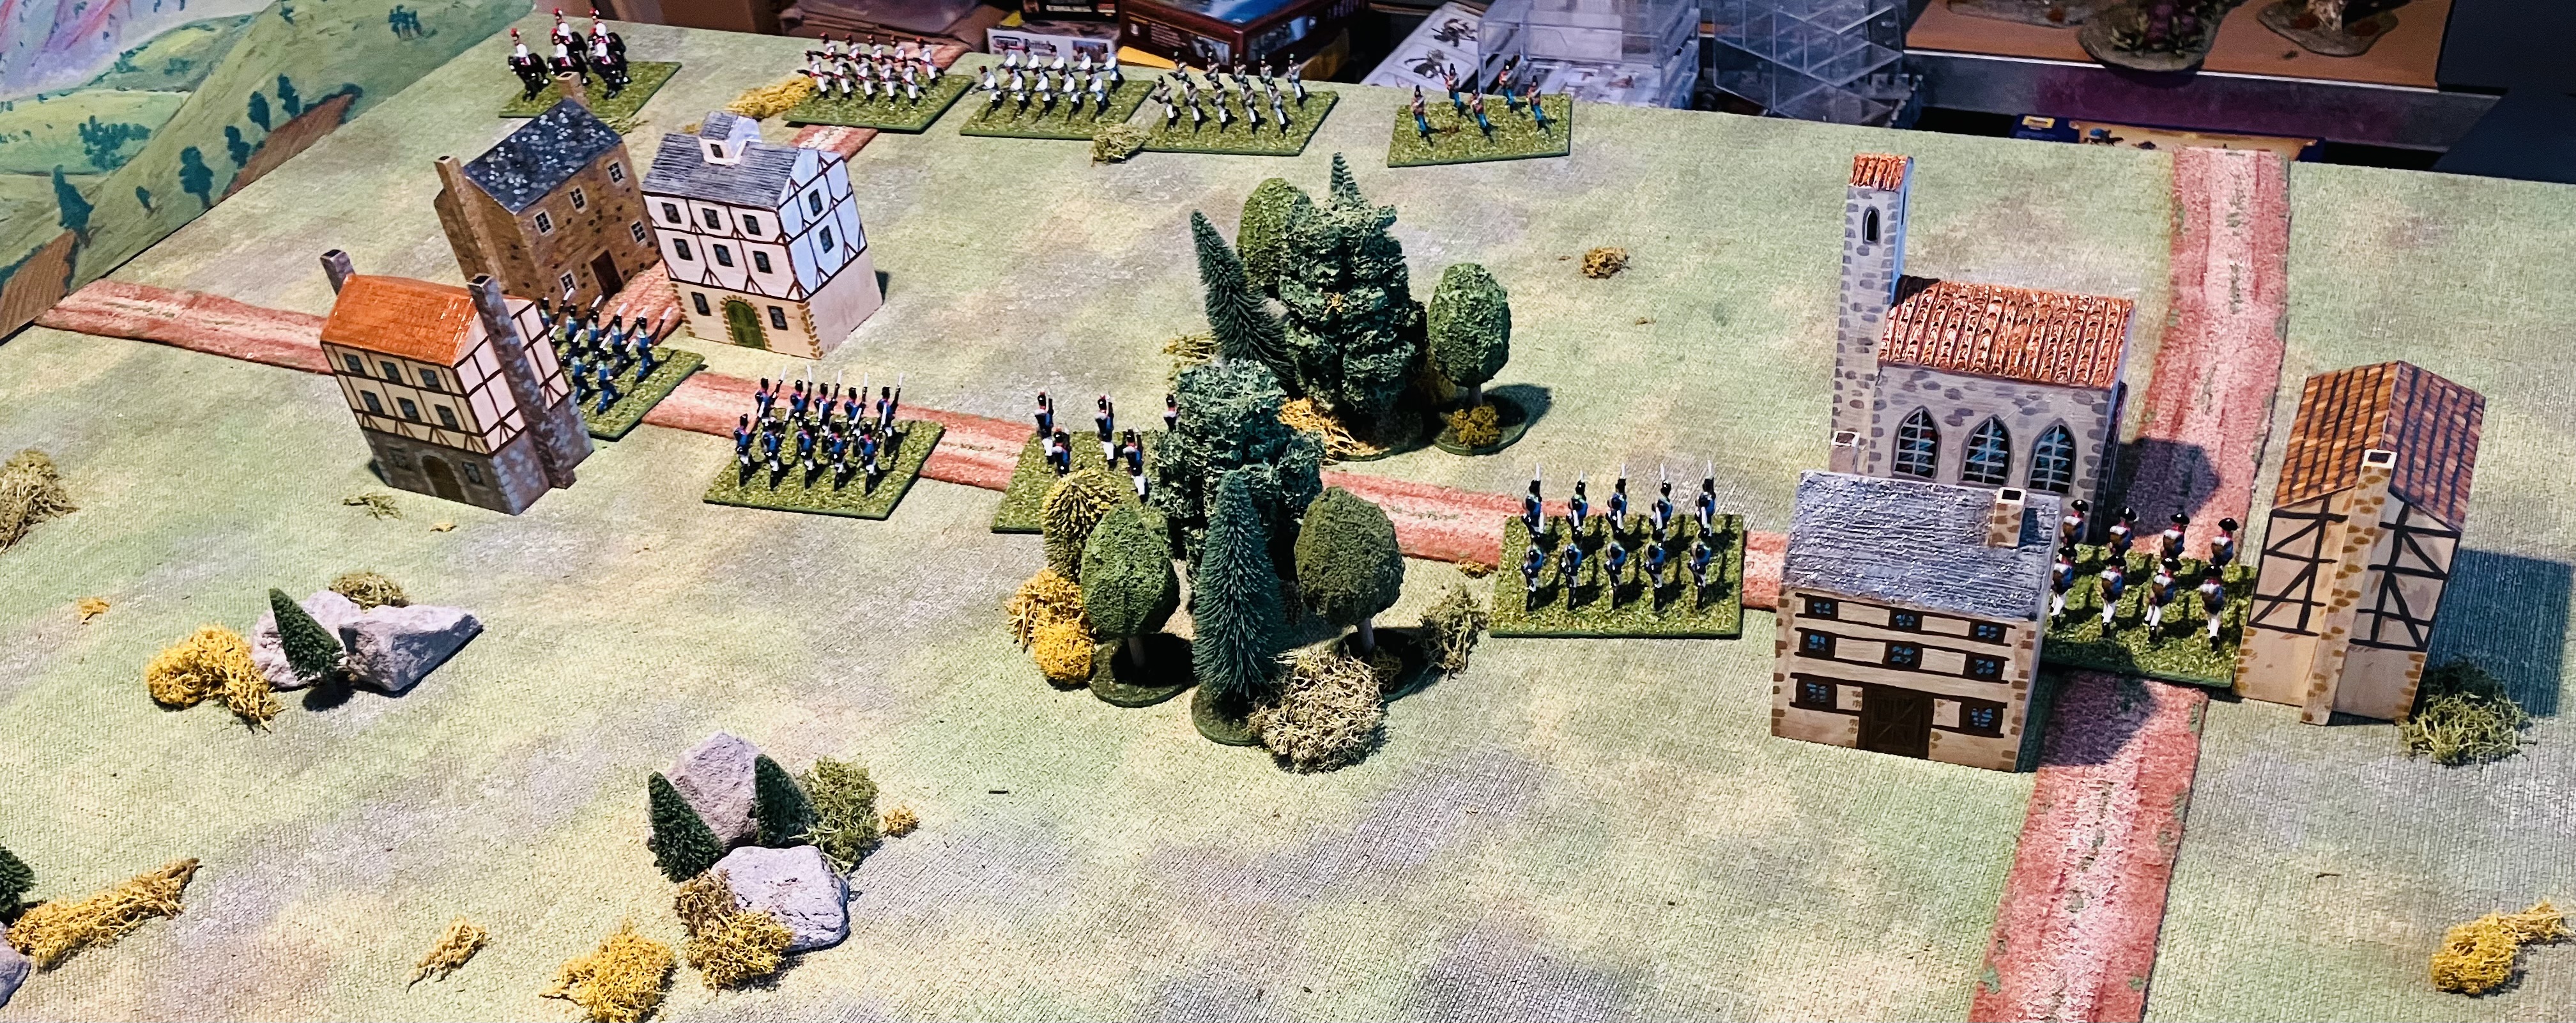
The initial deployment. The English army is deployed in front of a town.

Turn 1 - The French seize the initiative, pushing forward their mounted knights along with one of their central battles containing two crossbow units. Volleys of arrows are exchanged, resulting in a hits allocated across the units within each battle. (Note - the English seized the initiative for the next game turn.)

Turn 1 - both sides advance.

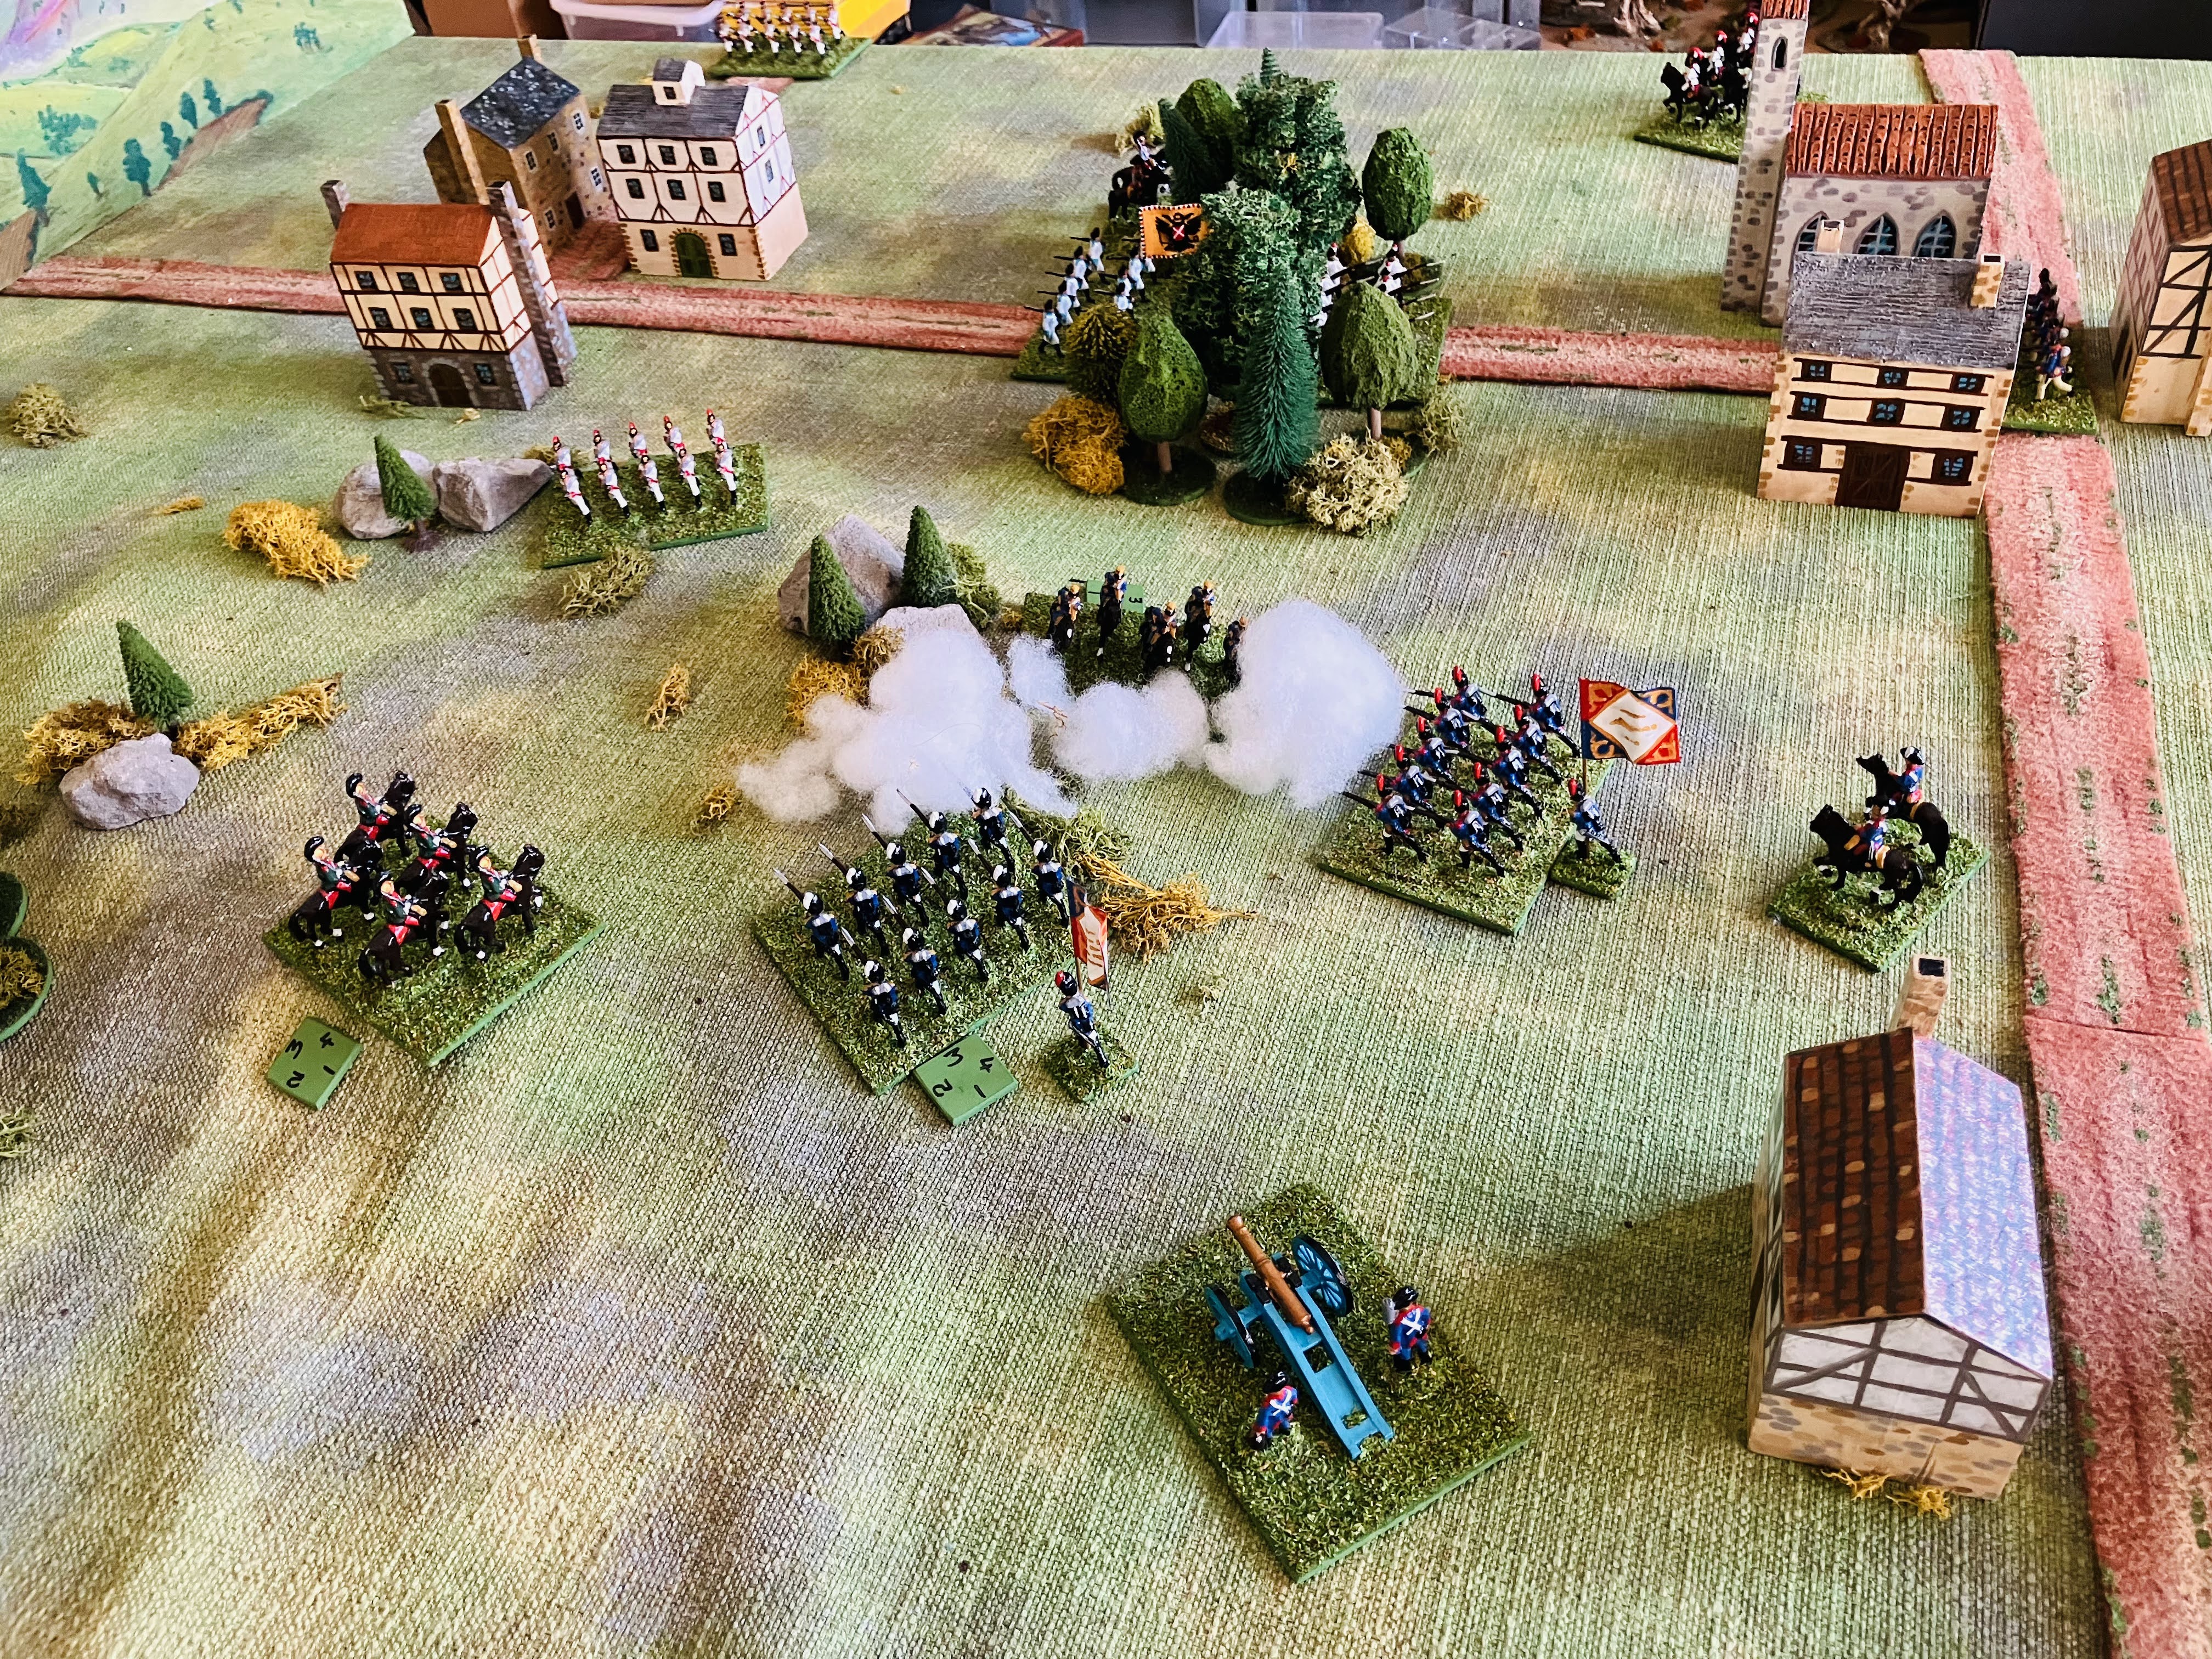
Turn 2 - After seizing the initiative, the English unleash an arrowstorm upon the French mounted knights, inflicting casualties, although the knights persist in their charge. Nevertheless, significantly weakened, they are eventually eliminated at some cost by the English battle comprising archers, spearmen, and foot knights. On the opposite flank, the French commander leads his troops forward, resulting in a swift clash with the opposing English battle, with casualties being sustained on both sides.

Turn 2 - The French mounted knights are eliminated while two battles engage in melee.

Turn 3 - The French commander leading his troops successfully eliminated the opposing English battle in melee, all the while both armies continuously showering their opposition with arrows. The English make no manoeuvres, opting instead to focus on rallying their troops.

Turn 3 - The French right battle eliminates an English battle.

Turn 4 - The English army was happy to persist in shooting with their remaining bowmen, while the French, somewhat belatedly, advanced their mounted sergeants and engage in some rallying efforts.

Turn 4 - The French try an reorganise and bring up their mounted sergeants while under constant shooting by the English bowmen.

Turn 5 - Observing the battle's momentum was favouring the English and their defensive strategy, the French commander initiates an assault with his significantly diminished battle. However, the opposing English battle, under the leadership of their commander, easily repels the impulsive attack. Witnessing their commander's downfall, the French forces withdraw, conceding victory to the English.

Turn 5 - A final assault by the French is not successful and the English triumph this day.

A most enjoyable first game and all completed after 30-40 minutes.

Thoughts on the first game…

I found the tactical system to be most enjoyable as it introduces a planning aspect to the start of each game turn.

Following a single play through, referring to the rules became minimal, aside from checking on the  special tactics.

The use of free movement and unit groups appeared to work. One restriction I implemented was that when a group of units is in contact with another group (similar to opposing units occupying the same square in the rules), you can only add to your group if it comprises fewer than 3 units, and flanking or rear attacks are not permitted. Similar to squares, this requires careful consideration of the unit composition within your groups (battles).

The combat mechanics, both shooting and melee, are straightforward and abstracted (as stated in the game’s design notes). However, they tend to result in rather bloody and decisive encounters with few prolonged engagements. This can give a significant advantage to units striking first. Although, if so desired, the rules could be easily be tweaked to provide less decisive outcomes.

The tactics chart, particularly its restriction of activations, compels players to maintain their units grouped into cohesive battles. Dividing units too thinly can result in a significant portion of the army remaining inactive in the game, and if attacked they would put up little resistance. 

I found these to be a very interesting set of rules, particularly the tactic chart rule mechanism, all in all very clever. The set of rules is part of the “You Command” series of rule by Daniel’s Game Emporium which offers other period Dark Ages and WW2 using similar tactical chart approaches.

It is very tempting to get some 6mm or 10mm medieval figures and create a small footprint game for the dining room table. Says me reaching for the credit card.

Friday 22 March 2024

Battle of Worcester 1651 Battle Report

Last night I finally got around to playing the Battle of Worcester, 3rd September 1651. The scenario was set up on the tabletop a couple of days ago (see previous post for details). For the game rules I opted to stick with the D3 rules I mostly use. These can be found here or via one of the tabs at the top of the blog. I made a couple of adjustments, granting all cavalry a combat value of D3+1, and removing the impetuous status from both cavalry units.

A closer view of the action during the game.

Order of Battle

The order of battle was as follows…

Royalist
3 x Infantry
2 x Cavalry
2 x Dragoons and Commanded Shot
2 x Artillery
4 x Commanders (led by Charles II)
2 x Ammunition Supplies

Parliament
4 x Infantry
4 x Cavalry
3 x Dragoons and Commanded Shot
2 x Artillery
4 x Commanders (led by Cromwell)
3 x Ammunition Supplies

I use a variety of carts to track ammunition provisions. With each instance of a unit running out of ammunition, a supply cart is withdrawn. Once all carts are removed, units that exhaust their ammunition will be unable to shoot. Using the ammunition supply rule removes the likelihood of infantry units running out of ammunition during the game's initial turns.

Deployments

The city of Worcester sits beside the River Severn running across the tabletop and is joined by a tributary, the River Teme, which can be crossed by Powick Bridge. The Parliamentary forces are positioned across the River Teme and overlooking Worcester from Red Hill, they have commandeered local boats to construct two platoon bridges over both rivers.

The defending Royalist forces are divided into two groups, one command occupying Worcester and the nearby Fort Royal; the second command is guarding against potential Parliamentarian attacks across the River Teme.

A top down view of the tabletop with the bridges in place where the Parliamentarian forces impounded boats to build bridges to cross the River Severn and River Teme.

I am expecting this to be a one sided game with a historic outcome. From a game perspective the objective of both armies is to destroy the enemy. The scenario from “With Pike and Musket” by C.F. Wesencraft, from which this scenario is taken, suggests the Royalists should hold their ground for six turns after which it may retire, but no victory points for a successful retirement.

The game report

As the battle commenced, Parliamentarian forces launched their initial assaults on Worcester from Red Hill and at Powick Bridge. Cannons roared from both sides, exchanging fire as thick clouds of gunpowder smoke billowed from Worcester's defensive emplacements. Meanwhile, the first pontoon bridge was swiftly constructed, enabling some dragoons to cross the River Severn and begin establishing a bridgehead. Soon after, a second pontoon bridge was completed, allowing for the crossing of forces across the River Teme. However, upstream at Powick Bridge, Royalist infantry staunchly resisted, repelling the attacking Parliamentarian units and inflicting heavy casualties upon them.

A view from Fort Royal at the Parliamentary forces attacking Worcester from Red Hill.

The first pontoon bridge can be seen constructed and allowing forces to cross the River Severn. In the distance the battle is raging at Powick bridge.

Royalist forces in the centre move to engage the bridgehead.

Although the Parliamentarian units encountered strong resistance in their attacks on Worcester, they started to secure a bridgehead to the north of the river Teme as their forces rapidly crossed the two pontoon bridges. Soon, clashes erupted between Parliamentarian and Royalist units and battle lines were deployed between the Severn and Teme rivers. Valiant commanders from both sides spurred their troops onward, rallying hesitant infantry and launching cavalry charges against the enemy. With the constrained space available, the Royalist forces initially maintained their ground, inflicting considerable damage upon their enemy. However, the numerical superiority of the Parliamentarian forces, who continued to cross the rivers, gradually wore down the Royalist defenders over time.

The fighting was fierce around the bridgehead north of the River Teme.

Casualties begin to mount for both sides as Parliamentarian forces try to breakout from their bridgehead.

As the Parliamentarian assaults intensified, the Royalist forces found themselves in a precarious position, compelled to withdraw, relinquishing control of Powick Bridge. With their battle lines weakened from casualties, this prompted the positioning of their reserve cavalry to counter any potential breakthroughs by the Parliamentarians. Soon, these reserves would be pressed into action as Royalist lines began to crumble under the numerical superiority of the enemy. With all their reserves fully engaged, the Royalist forces teetered on the brink of collapse, holding on by a mere thread.

The Royalist battle lines are looking rather thin as reserve cavalry prepare to plug any gaps.

The attacks continue on Worcester.

Royalist cavalry about to charge in an attempt to hold back the advancing forces.

In a simultaneous turn of events, the breaching of Worcester's defences and the routing of the Royalist forces guarding the River Teme occurred. The resolve of the Royalist army was shattered, leaving them with no prospect of victory. Charles II, accompanied by a small contingent of senior Royalist officers, managed to evade capture. they would evantually make their way to the southern coast to board a ship bound for France. Charles II remained on the Continent until the Restoration in 1660.

Parliamentarian forces breakthrough north of the River Teme.

A final Royalist stand in Worcester eventually fails and the defences are breached.

Victory to Parliament.

Summary of game

The chances of victory for the Royalist player in this scenario appear slim. At most, they might salvage a draw should the Parliamentarian player fail in establishing one or both pontoon bridges. Despite the scenario imbalance, playing the game was enjoyable, and it is one I am likely to replay this coming weekend. In the next game I will relook at the victory conditions, and whether the Royalists can gain victory if they manage to withdraw successfully after a specified number of turns. Trying to pick the exact number of turns is always challenging and is so dependent upon the decisiveness of the combat rules used.

Another area I am thinking of exploring, if I get to replay, is to have a go at simplifying the scenario to a One-Hour Wargaming (OHW) format. I always find comparing the OHW scenarios to the original ones they are referencing so fascinating, and seeing how the terrain and tabletop layout has been simplified or opposing forces reworked to fit the limited numbers of units used.

Tuesday 19 March 2024

Preparing for a game - Battle of Worcester 1651

The Battle of Worcester was fought on the 3rd September 1651 between the Parliamentary army of Oliver Cromwell (28,000 men) and a combined Royalist and Scottish army (16,000 men) under the command of King Charles II. It was to be final battle of the English Civil War and a victory to Cromwell.


The game setup.

I am using the scenario from “With Pike and Musket” by C.F. Wesencraft as a guide for setting up this game. The setup has the Royalist army positioned defensively around Worcester with the Parliamentarian army advancing and attempting to cross the River Severn and River Teme south of Worcester. These can be crossed by rolling a 4 or higher on a D6 to build a pontoon bridge. The Parliamentarians had gathered any available boats in the vicinity to construct a couple of bridges for river crossings.

Overhead photo of the tabletop

A view of the defences at Worcester

During the weekend, I made some English Civil War themed casualty markers to help track units hits during the game. I found some images online and printed them in black and white, then drew and painted over them to create the markers. After completing them they were scanned and colour printed.

The original drawn and painted markers which I did a few months back for another type of casualty marker.

Scanned and printed then glued to cardboard (from an old box of crackers by the looks of it). The printed version appears much duller compared to the original.

The markers are cut out. I did also shape and curve the markers to make them easier to pick up and give them some shape.

The printed markers were glued to cardboard and cut out. The casualties are of two colours: red for one hit and blue for two hits. They're positioned at the rear of a unit’s base to monitor hits. However, to minimise the number of casualty markers cluttering the base, they are doubled when a marker is placed on the side of the base. So, a blue casualty marker positioned on the base's side equates to four hits.

A unit with 3 hits (red casualty = 1 hit and blue = 2 hits).

A unit with 5 hits (red = 1 hits, blue = 2 hits doubled to 4 because it is position on the side).

So everything is set for a game one evening this week.

Friday 15 March 2024

Stomping robots and mech mayhem

One of the projects I wanted to do this year was paint up some robots and mechs for a small tabletop game I can easily setup on the dining room table and game in a 2 by 2 foot space. Now that I have finished painting various BattleTech and Warhammer Imperialis miniatures with a couple of kit-bashed flyers I will now turn my attention to creating a battle mat and some scenery for them.

Red army of robots and mechs.

To keep things simple I went for a Blue and Red army.

While I have yet to land on any rules yet, the two front running rulesets are: 

Looking at using one of these rulesets.

The setting for these games is quite naturally in the distant future, were humanity has colonised countless worlds across the galaxy, but one particular planet stands out as a hub of trade and industry: Corpnovia a sprawling world with vast megacities, towering skyscrapers, and advanced manufacturing facilities.

The planet is governed by a handful of powerful city-states, each ruling over its own territory with an iron grip. These city-states have risen to prominence through their control of key resources, strategic locations, and cutting-edge technology. However, rather than traditional armies, they rely on formidable armies of robotic machines, tracked mechs, and drones to ruthlessly enforce their control and protect their interests.

For the moment though I am back wargaming some English Civil War games with stomping pikemen and musket mayhem.

The tabletop set up for a game.


Monday 11 March 2024

Imaginary Napoleonic Scenario for a large battle (part 2) battle report

Here is the after action report of the fictional Napoleonic battle scenario. Additional background information available in the previous post and the game rules outlined here. In the game each unit base corresponds to an estimated force of 4,000 line infantry, 2,000 cavalry, and 30 guns.

A close up of some of the tabletop action with the Spencer-Smith Miniatures battling over some wooded block houses.

The commencement of the battle sees French forces deployed along the stretch of road from Durbach to Gotteral, with the initial Austrian units advancing to engage their line.

Initial deployment of units.

The tabletop and the 3 towns of Durbach, Gotteral, and Weller the French are defending.

Battle Report

Swiftly, the Austrian units advanced and encountered French defenders in the vicinity of Durbach, while simultaneously moving units to secure the high ground behind the French position. In response to the French promptly redeployed their light infantry, positioning them in a strong defensive position on the ridge and anxiously awaited the arrival of reinforcements.

The assault on Durbach begins and the French react to the advancing Austrians.

The French are doing well with their defence.

Reinforcements from the Austrian army joined the battle, launching an assault on the town of Gotteral. The French, had been exhibiting a resolute and robust defence on both the plateau and in Durbach, which allowed them the opportunity to mount a counterattack against the Austrian forces attacking Gotteral. 

Despite the determined efforts of the French, not every aspect of the battle unfolded in their favour. After three intense hours of combat, the Austrians finally managed to make headway on the high ground, pushing back the defending French and ultimately gained control of Durbach.

Arriving reserves are thrown into the assault of Gotteral.

The French counterattack from Gotteral town and throw the Austrians into disorder and nullify the initial threat.

Following their triumph in capturing the town of Durbach, the Austrian forces proceeded to advance across the high ground and their next target, the town of Gotteral. Reacting swiftly, the French hurridly moved their available reserves to the high ground and began fortifying the defences in and around Gotteral. Their earlier counterattack that had effectively repelled the advancing Austrian troops trying to assault the town.

The momentum of battle had shifted towards the French as the arrival of their Guard reinforcements effectively neutralised the Austrian push for the high ground. At this juncture, both armies had seen over half of their units being routed and thrown into disarray, placing constraints on their offensive capabilities. Only the Guard/Grenadier units or those units with fewer more than half their strength remaining were capable of initiating movement into contact with enemy units. This was a concern for the Austrian general who ordered his remaining fresh units to hurry up.

The French eliminate the threat from the high ground.

Fresh Austrian units can be seen rushing along the road to assault Gotteral and salvage something from the day’s battle.

New and fresh Austrian reserves launch an assault on Gotteral just as the French commander tactically shifts his Guard units and artillery to reinforce the valiant defenders of the town. As the evening darkness envelops the battlefield, the last remaining Austrian units mount a desperate final assault on the town, aiming to salvage something from the day's significant casualties. Eventually, the French are compelled to relinquish control of the town. Under the cover of darkness they regroup in the vicinity of Weller and wait to see what developments tomorrow will bring.

A desperate assault on Gotteral begins and the French guard units are repositioned to support the town’s defenders.

Gotteral is finally captured as evening arrives. A drawn game.

After game thoughts

A drawn game and definitely one I shall refight. While the Austrian general is hampered by reinforcements arriving randomly in different positions, did he err by attempting to capture the town of Durbach, instead of bypassing it and assigning the task to later arrivals? 

The defence of Durbach certainly delayed the assault on Gotteral and allowed the French to counterattack and gain momentum for a crucial period during the battle. Seeking to dominate the high ground undoubtedly diverted French reinforcements, and its central position is crucial for launching an assault on the small town of Weller. Getting more units on to the high ground earlier might have proven advantageous, potentially compelling the French to relinquish Durbach without engaging in an assault.

The home-brew rules inspired by SPI's Napoleon at Waterloo game provided an enjoyable and entertaining game. As I continue to use these rules in future games, I may review how light infantry operate, and may consider introducing horse artillery and distinguish between heavy and light cavalry.

Friday 8 March 2024

Imaginary Napoleonic Scenario for a large battle (part 1)

The planned game this weekend will feature a largish Napoleonic battle set in a imaginary scenario between a defending French army (25,000 infantry, 4,000 cavalry, and 30 guns) and the attacking Austrian army (31,000 infantry, 8,000 cavalry, and 60 guns). I'll be using my home-brew tabletop Napoleonic rules, which are inspired by SPI's "Napoleon at Waterloo" board game. These rules are aimed at wargaming battles with one or more corps, where each base typically represents a Brigade. 

The rules can be found here or on a tab at the top of the blog, and a thank you to those who flagged my typos, provided clarifications and asked questions.

Pretty much all the units are made up of the old plastic Spencer-Smith miniatures. The eagled-eyed of you may even spot some converted ACW miniatures.

The tabletop all set up ready for the game.

To come up with an imaginary scenario, I browsed through the battles outlined in Neil Thomas' "Wargaming: 19th Century Europe 1815-1878" and chose the "Battle of Nachod" as the basis for this wargame. While I made several adjustments to the troops and town names, the tabletop layout remains quite similar, with the exception of the river which does not appear in this scenario.

An overhead view of the tabletop showing the entry points for the Austrians reserves (Blue) and French reserves (Red). The hills are difficult to make out in the photo, but have rocks positioned on them.

The Austrian forces are hastily advancing to initiate an attack with the French. They are aiming to seize control of the three towns: Durbach, Gottertal, and Weller. At the beginning of the game, both armies have units deployed on the tabletop, while additional reserve forces will arrive along the roads during the game. Due to the hurried Austrian assault, their reserves will arrive on one of three roads, while all French reserves will arrive along the single road leading to Weller.

Austrian Order of Battle

8 units of Line Infantry

2 units of veteran infantry (Grenadiers)

1 unit of light infantry (Grenzers)

4 units of cavalry

2 units of guns


3 line infantry, 1 cavalry, and 1 light infantry start on the tabletop. The remaining units arrive 1 each turn randomly at one of their 3 entry points determined by the dice.

French Order of Battle

6 units of Line Infantry

2 units of veteran infantry (Guard)

1 unit of light infantry (Voltigeurs)

2 units of cavalry

1 unit of guns


4 line infantry and 1 light infantry start on the tabletop positioned between the towns of Durbach and Gottertal. Their remaining units arrive 1 each turn on the road to Weller.


The generals for both armies will arrive on turn 2 with the reserves.


The starting positions of the units.

Victory Conditions

For victory the Austrians must capture all 3 towns, if only two are captured the game is drawn.


Apart from the uncertainty surrounding the arrival locations of their reserves, the Austrians also confront the challenge of army resolve. In the game, once an army has suffered the loss of over half its units, only veteran units or those with fewer than 3 hits are allowed to initiate engagements with enemy units.


The next post will have the game report.