Showing posts with label Dark Ages. Show all posts

Monday, 27 December 2021

Saxon buildings and a couple of bridges

In preparation for a few Norman vs. Saxon games, which will most likely be using scenarios from One Hour Wargames, I needed to create some buildings and bridges. I use the pictures from paper soldiers "Wargame 1066" by Peter Dennis as a guide to the design of the terrain items.

A band of paper soldier Saxons (42mm) with the new terrain pieces.

As with my previous terrain, I tend to use blocks of wood cut then roughly painted. This allows me to pack away the terrain without having to worry about breakages, and it is cheap. I used to use just the blocks painted, but now I use a Gesso Paste to create the roofs which in most cases have the most texture. This helps speed up the painting process with washes and dry brushing.

The building process once cut moving left to right. The Gesso paste gets  textured with a toothpick.

A Saxon church and buildings suitable to represent a village. All the building features are painted on using various washes and dabbed on blobs of paint for stone buildings or stripes for timber buildings.

Saxons defend their village.

The bridges take a similar approach to the buildings. Normally I would not have applied the Gesso Paste, but decided to give it a try and see if it was effective.

The cut wood has some dowel added to the sides. Then Gesso paste added to give a rough texture. A strip of card cut the width of the bridge is used to give a ripple effect of logs or planks.

A close up photo of the finished bridge. As with the buildings, these are painted with washes and a few lines to emphasise the planks.

These terrain items were completed over two days. One day to cut up the wood, stick and apply the Gesso paste. Then a second day to paint.


Sunday, 26 December 2021

A couple of wargaming items for Christmas

A couple of Christmas presents were wargaming and modelling related this year. The Gallic troops by HaT will allow me to expand the number of Gaul units for my Punic War collection, while the Green Stuff was a timely present to replace my existing Green Stuff which is old and well past its used by date.

Christmas presents

On the tabletop at the moment is a Norman vs. Saxon game using the paper soldier armies. I am hoping to play a few quick games with them over the next week or so, but I will first need to make some dark age buildings and a suitable bridge or two.

A game underway

Norman spearmen cross the river while Saxon forces wait on the hilltop.

Wednesday, 18 September 2019

1066 Paper Soldier wargames and Books

It was time for a change of period after playing through quite a few WW2 games as part of a campaign. So out came the 1066 paper soldier armies for some quick games using Lion Rampant rules, while I try and decide what the next campaign will be.

Norman inafantry and Breton cavalry look across at the Saxon army in the distance
Start of the game
Game in progress
Last week a couple of secondhand book purchases arrived. The book I was after was "War-game Through the Ages Vol. 3 1792-1859" to get the series and "A Wargamer's Guide to The Desert War 1940-1943" was an impulse buy as it was at a reduced price.

Purchases
The series of books now complete
I have started reading The Desert War guide which has chapters covering:

  • The Desert War - 13 pages
  • Armies, Organisation, and Equipment - 19 pages
  • Wargaming the Campaign - 36 pages
  • Choosing Your Rules - 19 pages
  • Choosing Your Models - 11 pages
  • Scenarios - 11 pages
So far I have found it an easy ready with the chapters providing a good and straightforward summary of their topics.


Saturday, 27 July 2019

Norman Conquest 1066 Game Report

Having spent a few evenings this week playing some quick test games to refine the D3 Norman Conquest 1066 rules. It was time to play a full game and provide a battle report. The updated rules can be accessed through a link at the top of page. A thank you to those who commented on the draft rules posted previously, they all got me thinking about the changes, which are:

  • No diagonal movement on the square gridded tabletop.
  • Command actions simplified for movement, shooting and melee.
  • Melee uses options for dice re-rolls rather than rolling multiple dice and selecting the highest.
  • No differing unit elimination/routing numbers. All units rout at 7+ hits unless in defensive positions.

So on to the game which is based upon scenario 12 "an unfortunate oversight" from the book One Hour Wargames. We have what appears to be an advance party of Norman cavalry and archers blocked from crossing the bridge by a Saxon force consisting of: 2 Housecarl units (one with their commander) 3 Fyrd units, and 1 archer unit.

Game setup with Saxon and Norman forces deployed
Unbeknown to the Saxons the majority of the Norman force: 3 spearmen units and 1 cavalry unit (with commander) is fording the river out of sight behind the woods. The objective is to rout the opposing force or take the hill.

Turns 1 and 2

The first couple of turns see the Normans fording the river and pushing forward towards the hill. While the archers exchange volleys of arrows with their Saxon counterparts across the river. Other than one Fyrd unit left to defend the bridge, all other units rush to head off the Norman flanking force.

The command actions early in the game allowed for all units to move and archers to shoot.

The Norman flanking force ford the river.

Turns 3 and 4

As both sides rushed for the hilltop the leading units soon clashed. Up to this point commanders were still choosing to use command actions to move units and shoot with their archers. By turn 4 the Normans had the bulk of their forces across the river.

Norman forces almost across the river and are about to clash with advanced Saxon units
Normans attack

Turns 5 and 6

As units engaged in melee fewer command actions were used to move units. Instead they were  directed to galvanising units into second assaults and defensive efforts (re-rolling melee results).

An attacking Fyrd initially roll a 2, but with spare command actions a re-roll is attempted and another 2 is rolled. The Norman spearmen have an unused action and use it to re-roll a 1. Using their last available command action Saxons make a final effort and roll a 2. The result is reduced by 1 to cause 1 hit against the spearmen.
The Saxon commander with Housecarl unit reaches the hilltop.

Unfortunately I became somewhat absorbed in the game and forgot to take pictures of the turns 6 and 7. 

Turns 7 and 8

During turns 7 and 8 both siders were heavily engaged in melee just below the hilltop. The Saxon commander and Housecarls were successfully defending the hilltop against a unit of Norman spearmen. 

The Norman cavalry began to come into their own attacking weakened Saxon units and flanking the  hilltop defenders. On turn 8 the Saxon commander was lost and all remaining Saxon units took 2 additional hits immediately with many units routing at the news. A victory to the Normans was assured.
The victorious Norman cavalry.
I now need to cut out the Viking units to add to these paper armies.

Sunday, 21 July 2019

Saxons and Normans 1066 rules

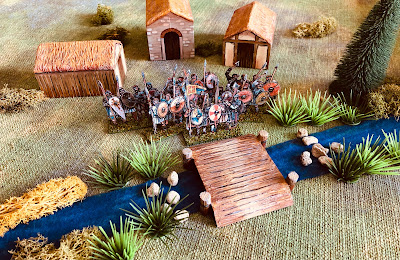
Other than messing around with some 1066 Saxon vs Norman rules I have not had much time for wargaming or painting. So this post is really an update as to where I have got to with some rule ideas. I did start this week using rules for D6 dice and free movement and by week's end I was using D3 dice and a gridded tabletop. Anyway here are the draft rules and any thinking I have behind the rules which are influenced and based around One Hour Wargames Dark Ages rules and Dux Bellorum rules.
Saxon Shieldwall

Introduction

These are low complexity rules based upon and influenced by the rulesets One-Hour Wargaming Dark Ages rules and Dux Bellorum.

The rules use a square grid to control movement and shooting.

Combat used a D3 dice (1,1,2,2,3,3). Alternatively, you can halve the value of a D6 dice rounding up fractions.

Units

The units represent the following:

  • Saxon Housecarl
  • Saxon Fyrd
  • Saxon Archers
  • Norman Spearmen
  • Norman Cavalry
  • Breton Cavalry
  • Norman Archers

All units exert a zone of control on all surrounding squares, including the diagonals.

Zones or control
Note: the zone of control is there to restrict movement in and around enemy units and make it difficult to flank units, which would extend their front is possible to avoid being flanked.

Sequence of Play

The game is played in a series of turns. During a player’s turn they follow the sequence listed below:

  1. Reorganise
  2. Command
  3. Movement
  4. Shooting
  5. Melee
  6. Eliminating

Reorganise


If a player has any carried over command actions they can reduce the number of hits on one or more of their units. No more than 1 hit can be removed from a single unit in a turn.

Note: this represents unit commanders reorganising their units, bolstering moral, filling any gaps in the shieldwall, etc.

Command

Commanders roll 2D6 and select the highest score to determine their available command actions for the turn.

Command actions are used by a player to move units and increase the ferocity of combat (see Melee for details).

Any command actions not used are carried over to the following turn and used to reorganise units.

If the commanders unit is lost only roll 1D6.

Note: I liked the leadership point rule in Dux Bellorum and adapted the concept of it for both movement and combat. It is more of a variable in these rules, in a way similar to PiPs in DBA.

A game in progress

Movement

It costs 1 command action to move a unit. Units can move up their Movement allowance in squares.

At the end of their movement units must be facing one of the square sides.

Units may move diagonally between squares providing neither of the stranding squares are occupied by blocking terrain, a friending unit, or enemy unit’s zone of control.

Movement constraints
Units may only exit an enemy unit’s zone of control, if the square to where they are moving is also an enemy’s zone of control.

Movement allowances:

  • Foot units move 1 square
  • Cavalry units move 2 squares

Only 1 unit can occupy a square (no stacking of units) and units may not move through other units.

Units are allowed to turn and the start and/or at the end of their move. They must always end their move facing one side of a square.

Terrain

Terrain has the following effects:

  • Woods - Only Archers can enter and terrain advantage in melee.
  • Towns - Only Infantry and Archers may end their moves in a town.
  • Marshland and Lakes - These are impassable to all units.
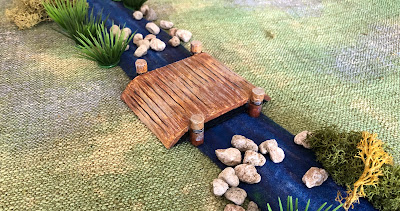
  • Rivers - These may only be crossed via bridges or fords.
  • Hills - Terrain advantage in melee.

Shooting

Only archers can shoot and they have a range of 3 squares.

It costs 1 command action for a unit to shoot.

Archers may only shoot at a single target within 45 degrees of their frontal facing side.

Archers roll a D3-1 when shooting. The result gives the number of hits the target acquires.

Note - there are no deductions for cover. Instead units can take additional hits before being eliminated. This way units holding defensive position tend to remain fast, as if they leave the position they lose the additional strength points.

Melee

Only attacking units inflict hits. Units automatically attack the unit directly in front of them when attacking. If they have more than 50% hits, then the attack is not automatic and they only attack at a cost of 1 command action.

Note: this represents unit exhaustion where unit leaders have to galvanise their men into attacking.

To determine hits the attacking unit rolls one or more D3 and selects the highest scoring D3. Units can roll an additional D3 for each of the following conditions:

  • They have a supporting unit on a flank
  • An archer unit directly behind them
  • A command action is spent.
Note: using lower quality units to support attacks rather than making attacks themselves keeps them out of harms way. While using command actions to add D3 represents a commander urging his unit on in an attack.
Unit D can attack unit A. It is supported by unit C so would roll 2xD3 selecting the highest score. Unit E attacks unit B and is supported by archers to the rear and would roll 2 x D3. If a command action is spent 3 x D3 would be rolled.

Terrain Advantage - defenders on a hill increase they strength by 2 providing all attacking units are downhill.
Saxon Fyrd's hilltop position increases their strength from 5 to 7
Note: At present there are no advantages for Flank or Rear Attacks.

Eliminating

Units are eliminated once the number of hits acquired are greater than their strength. Different unit types have different strengths which can be increased if the terrain offers a good defensive position or they are accompanied by their commander.

  • Saxon and Norman Archers strength = 3
  • Saxon Fyrd and Breton Cavalry strength = 5
  • Norman Cavalry and Saxon Housecarl strength = 7

A units strength is increased by 2:

  • if in cover or has terrain advantage against all attacking units
  • If the commander is attached to the unit. 

An attached commander remains with the unit throughout the game.

Note: hits can be removed during the reorganise phase.

Saturday, 13 July 2019

Saxons and Normans make it to the tabletop

Having finished the 1066 Saxon and Norman armies it was time to squeeze in a few quick games using One-Hour Wargame (OHW) and Dux Bellorum rules. Then finally trying a variation of the OHW rules using the leadership point ideas from Dux Bellorum. I like the approach with Dux Bellorum and will be going them another go soon.

The first trial game
Another test game using the same terrain
However, the 1066 gaming ended as we have family visiting for a few days. The table was cleared so some Necromunda style One-Hour Skirmish Wargaming games could be played. The rules are simple and fun to play, and the family don't mind indulging me with a game or two.

Necromunda style game
Gun fire is exchanged
The opposition

Saturday, 6 July 2019

A bit of WW2 and 1066 this week

This weekend's wargame will be a 19th Century imagination game to try out the smoke modification to the rules (see previous post). However, most of my free time so far this weekend has been directed to completing my Normans and Saxons paper armies so I can have a game next week. Both armies have cost less than $60 to complete and were done as part of a challenge. I may have got the challenge wrong as I think the $60 limit was for a single army.

The Norman paper army completed
A close up
A quick WW2 game based upon Tank on Tank rules during the week
During the week a secondhand book I had ordered arrived - "World War II Desert Tactics" by Paddy Griffith. I found this an interesting read providing a useful overview of the tactics applied by the various armies from the start of the Desert war through to its conclusion. It got me thinking about the composition of forces I put on the tabletop, particularly the number of Anti-Tank guns used by Commonwealth and German forces.

Recent book arrival


Sunday, 16 June 2019

1066 Saxon Paper Army Completed

I am now at the last stage of completing my paper 1066 Saxon army. The last two units are about to leave the painting (or should I say cutting table). The army consists of 10 units although likely or not only 6 will be deployed, seeing I am planning for a few games using One Hour Wargame's scenarios.
  • 4 x Housecarl units
  • 2 x Select Fyrd units
  • 2 x Archer units
  • 2 x Mounted Warrior units
  • 1 x Individual commander stand
The completed army
Whether or not I use the cavalry I have yet to determine, but having the mounted unit will allow for some variety within the games.

As I don't plan to remove stands during the games to track hits, paper soldiers look best when units have multiple rows. I decided I would make a test tracker as an alternative to using dice to track hits.

A clock face was found on-line and printed to find the best size.
The printed numbers were stuck to cardboard and the top also cut out.
A spare shield was cutout and glued to cardboard. This will be stuck on to a split pin paper fastener. 
All the pieces completed and ready to be put together.
The completed tracker
And now I need to start working on the Norman army, which will hopefully only take 3-4 weeks to complete. During this time I can think about what rules to use, or modify, and read "A Wargamer's Guide to 1066 and the Norman Conquest" by  Daniel Mersey.

Current reading