Showing posts with label Boardgames. Show all posts

Saturday, 8 August 2026

Counter-attack at Bir Kalifa - second remote game

This past Friday I played a couple of remote WW2 Western Desert games with Jon from the Palouse Wargaming Journal. The games moved along at a brisk pace, playing both games took just under two hours. We were using the Tank on Tank board game rules from Lock 'n Load Publishing, with a handful of house rules and some updated unit capabilities.

The rules are fast and decisive, if a unit is hit, it is eliminated. However, this cut-throat combat is balanced by the fact that a player is limited to between two and four activations each turn, with the third and fourth activations having to be diced for.

An activation allows a unit (or units) to fire at one enemy unit, move individually, or make a group move using an HQ. For a useful overview of the board game rules and how it plays, see the review posted by Norm of Battlefield and Warriors Blog (here).

Scenario

The scenario has a German counterattack following a successful Commonwealth advance. As the Commonwealth forces look to consolidate their gains near the settlement of Bir Kalifa, elements of the Afrika Korps launch an attack.

Map

The game is played on a hex grid.

Tabletop set up

Order of Battle

Commonwealth Forces

  • 2 × HQs
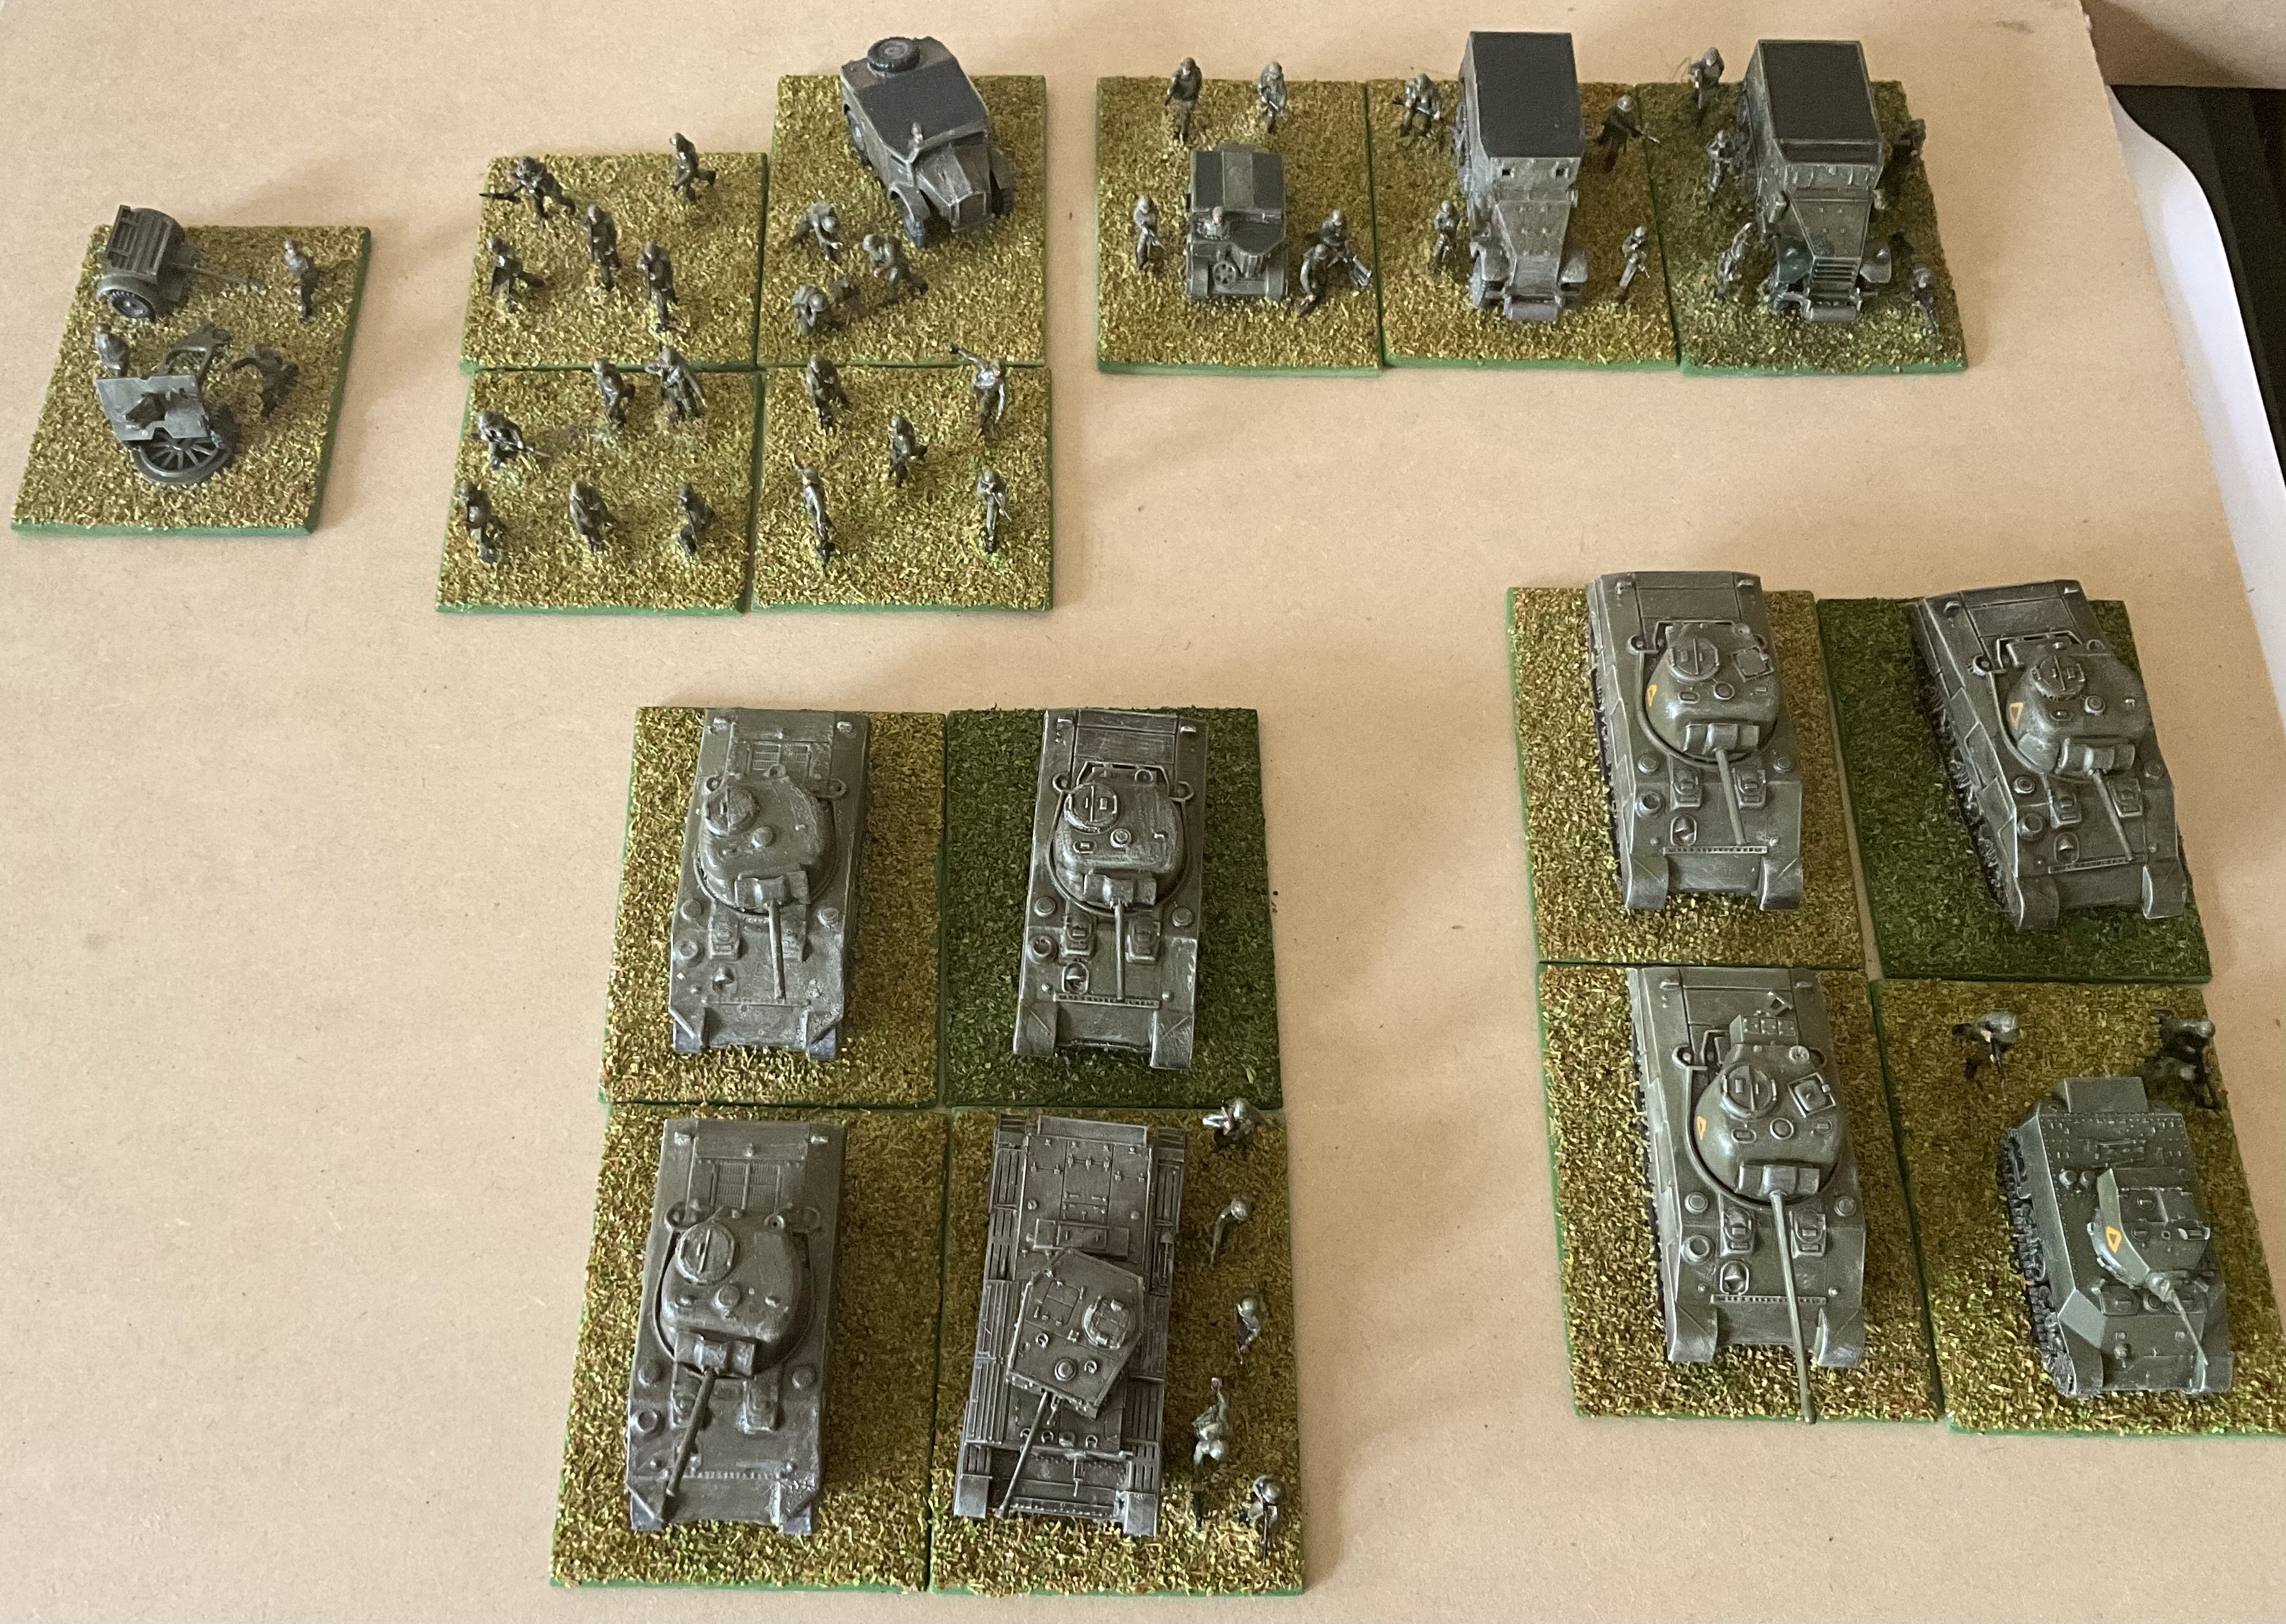
  • 4 × Grant tanks
  • 2 × A13 Cruiser tanks

These units begin the game deployed behind the red dotted line. The Commonwealth player deploys first and has the first turn.

Beginning on Turn 5, the following reinforcements may arrive:

  • 2 × A13 Cruiser tanks
  • 1 × Bishop self-propelled 25-pounder

Afrika Korps Forces

  • 2 × HQs
  • 2 × Panzer IV (75mm short)
  • 2 × Panzer IV (75mm long)
  • 5 × Panzer III
  • 1 × Wespe (105mm)

The German force begins the game deployed behind the blue dotted line. The Afrika Korps deploy second.

Victory Conditions

The Germans win if, by the end of Turn 9, they either:

  1. Destroy all Commonwealth units, or
  2. Successfully exit three units from the opposite tabletop edge.

If neither objective is achieved, the Commonwealth player is the winner.

House Rules

For those familiar with the Tank on Tank rules, the following house rules were used in the game:

  • Attached HQs – HQs are attached to combat units and may transfer to another unit by spending 1 Action Point.
  • Dust – Any unit that moves or pivots in open terrain raises dust. A marker is placed beside the unit to indicate this, and it adds 1 to its defence value unless it already benefits from cover.
  • Indirect Fire – Only HQs participating in the shooting action may call in indirect artillery fire.
  • Terrain – Hills and buildings are treated as described in the standard rules, while all areas of broken ground provide cover.
  • Use solo activation mechanism from the rules - Where the first two activations are free and a 3+ is required for the third activation and a 4+ for the fourth activation. This was because it was a remote game and the usual method requires a bowl and tokens and not suitable for a remote game.
The above unit values were used.

Battle Report #1

For the first game please read Jon's battle report on his blog here. (We decided to split the battle report writing effort.)

I used small sticky notes to attach labels to the back of each unit to help with unit identification for this remote game.

Dyed soft toy stuffing is used for dust markers where units have moved or pivoted, and black dyed stuffing attached to little wooden blocks to show brewed up vehicles where units have been destroyed. The dust did on occasion hide the unit labels - I did not think about that when setting up.

I had a few key takeaways from this first game:
  • As the attacker, the priority should always be forward movement, with shooting taking second place unless the odds are overwhelmingly in your favour. The nine turns go by very quickly, so there is little time (turns) to waste.
  • The tracks (roads) are important, they provide a useful boost to movement. A blocking unit positioned to on the track can create delays and need to be eliminated.
  • Attack with two groups in the beginning and the limited activations should be used with the group able to make the most progress.
It is always easier to be the defender. There is less to think about once the defensive line has been set. Jon was kind enough to take the attacking role first. This was appreciated as when hosting a remote game being the defender makes things a little easier. There plenty of things to be mindful of when running a game for the first time.

Battle Report #2

The second game opened with my Afrika Korps forces advancing towards the settlement of Bir Kalifa and along the left flank. Jon responded by moving a mix of A13 and Grant tanks into defensive positions in and around the broken ground near the settlement, while a second group pushed up around the opposite side of the town.

To keep the forward momentum, my left-flanking force pushed around the broken ground. Jon responded by withdrawing from the position and forming a new defensive line ready to block my advance, using his reserves to reinforce this new position. Meanwhile, around the settlement, I attacked one of the Grant units and successfully destroyed it. Outnumbered, Jon's left-flank group opted to retire back along the road.

Opening moves.

The Settlement of Bir Kalifa is occupied as Commonwealth forces retire to form a second defensive line with their recently arriving reserves.

Pressing forward with both groups, the Afrika Korps left flank engaged the larger Commonwealth defensive line, while on the right flank my forces moved out of the settlement and advanced along the road. The smaller Commonwealth defensive group defending the road was forced further back as it tried to contain the advance.

With the clock ticking, both sides were beginning to lose units in the fighting. However, the Afrika Korps was gradually working its way around the larger Commonwealth defensive line while, at the same time, continuing to inch further along the track.

The tow groups advance on the left flank and out of the settlement.

Nearing the last turn as the attackers are poised to exit the table.

By the final turn, the situation was on a knife-edge. I had four units in a positioned ready to exit the table, two on the left flank and two on the road. With two activations Jon managed to destroy one of them on my left flank. He then needed a third activation with a 3+ on the dice to move a unit into position to block the road and prevent a third unit from escaping using the track bonus to movement (one unit could already travel off road to exit the table).

Fortunately for me, luck was on my side. Jon rolled a 2, leaving the road open. I was able to exit three units from the table on Turn 9, securing a last gasp victory for the attacking Afrika Korps.

Wrap Up

Winning this scenario as the attacker is no easy task, and I certainly needed a little luck at the end to get a victory. These games played very quickly, with the first taking around an hour and the second just 40 minutes. Remote gaming does slow things down a bit at the start until you get into the swing of things.

One of the reasons for running these remote games was so I could to get back into playing Western Desert games using the Tank on Tank rules, keeping them as close as possible to the original rules while making a few small house rules to better reflect the desert environment, such as the use of dust markers.

I have now finally managed to get my own copy of the game, so the next step will be to work through the various scenarios and try to adapt them to the Western Desert. The scenarios are important as without them the game can descent into a shoot out. I am looking forward to seeing how they work on the tabletop.


The game arrived this past week.

What's Next?

I am also thinking about playing a larger campaign using Avalon Hill's old Afrika Korps board game board and may be the counters, with the battles being fought on the tabletop using the Tank on Tank rules and modified scenarios.

I have not yet worked out best to translate the situation on the campaign map on to a tabletop while keeping the overall number of games to a manageable level. I do not want the campaign to become so large that it stops being enjoyable.

This is not my first attempt at a Western Desert campaign. I previously ran a linear campaign starting in early 2020 that continued well into 2021. It was a lot of fun, but I was getting a bit tired of the games towards the end and was quite glad when it ended. You can read about that earlier campaign it starts here.

A second hand game I picked up a couple of years ago always with the idea of using it for a wargame campaign.


Friday, 3 July 2026

Remote game report and some board game fun

A few face-to-face board games and a remote wargame over the past week has meant I done very well on the gaming side of the hobby.

I will start with the remote game against Jon from Palouse Wargaming Journal. The scenario was the Battle of Domyoji, 1615, focusing on the fighting among the tombs between the Osaka and Tokugawa armies. I chose to command the Tokugawa army for no particular reason other than the tabletop photograph in Jon's briefing notes was taken from the Tokugawa side of the table, making it much easier to orient myself.

A photograph from Jon's briefing notes. The layout is based upon a scenario from Samurai Battles game.

For the game we used Jon's modified version of the Basic Impetus rules, which have been adapted for the Sengoku period and played on a hex grid. I had played these rules with Jon a couple of years ago and remembered two key things about the rules:

  1. Turning (or pivoting) units is a very slow business and also causes unit disruption.
  2. Charges can have dramatic consequences. A defeated unit that retires can be pursued, and if it is forced to retreat two hexes (representing a rout), it turns to face away from the victorious unit, leaving it in a very vulnerable position (especially with point 1).

Victory points would be awarded for controlling a tomb area without enemy units nearby, while each army also had an army break point—12 for Osaka and 15 for Tokugawa. Points were lost for any destroyed units, killed leaders, and successful enemy pursuits. In addition, after Turn 8 the Osaka army could score victory points by exiting units from its own table edge. This meant the Tokugawa army had little choice but to close with the enemy quickly and prevent Osaka from slipping away.

Battle Report

With the need to engage the Osaka army quickly, the Tokugawa line pushed forward on both flanks during the opening turn, advancing around both tombs in an attempt to bring the enemy to battle early before they could begin withdrawing.

Turn 1 - The Tokugawa army advances.

The second turn began exceptionally well for the Tokugawa army. On the left flank, Masamune led a determined assault that, with his cavalry, routed the opposing units through a series of successful combats and pursuits. In the process, the Osaka commander Kitigawa was killed. This all dealt a significant blow to the enemy resolve. Off the back of this success, the Tokugawa cavalry moved around the tombs and woodland to threaten the rear of the Osaka army.

Elsewhere, however, the battle proved far more problematic. The centre and right continued their advance but made little headway. The Osaka forces responded with a series of well-timed counter-attacks that left many of the Tokugawa centre and right flank units scattered as they were forced to retire.

Turn 2 - The Tokugawa centre and right flank are under pressure.

By the third turn, the victorious left flank was regrouping and manoeuvring into position for a flank attack. Meanwhile, the situation in the centre and on the right had become increasingly desperate as more units retired or fled. As the units attempted to rally, Tadamasa led his samurai cavalry in a charge to slow the Osaka advance. The attack inflicted some welcome damage on the enemy, but the cavalry were soon met and checked by the Osaka samurai cavalry.

Turn 3 - Cavalry to the rescue.

Turn four proved decisive. The Tokugawa left flank continued its advance, increasing the threat on the Osaka flank. When an Osaka cavalry charge was repulsed, Tadamasa immediately launched a successful pursuit. The cumulative losses finally pushed the Osaka army beyond its break point, shattering its resolve and bringing the battle to a close and a Tokugawa victory.

Turn 4 - A decisive pursuit cause the Osaka army to break.

Game Summary

The game took around two hours to finish and was most enjoyable to play. Even though the game only had four turns, the turns are broken up by drawing different coloured dice to randomly determine the order of activation of the battle groups (Sonae).

Victory points were awarded for controlling the tomb hexes. In the end, each side held one tomb, so these points effectively cancelled each other out, leaving the result to be decided by losses inflicted on the opposing army.

The cavalry proved to be the decisive throughout the battle. The Tokugawa horse dominated the left flank early on, creating the opportunity to threaten the Osaka rear. Later, Tadamasa's timely charges in the centre helped stabilise a collapsing centre and right flank. Without Tadamasa's successful attacks, Jon's counter-attack could easily have routed several more Tokugawa units and swung the battle in Osaka's favour.

Thank you to Jon for hosting a fun and exciting game. We hope to play this battle again, this time switching sides.

Board Games

A week earlier, my daughter visited for a day of gaming, and we managed to fit in three different board games. We started with the co-operative game Zombicide, where, despite being chased by the undead, our entire team managed to get all their objectives and escape alive.

Setting up Zombicide game.

I have painted up all the figures that come with the game.

Our second game was another co-operative game called The Captain is Dead. This is becoming one of our favourites. In the game you play as the crew of a spaceship under attack by aliens. The objective is to repair the ship's critical systems and get the ship's drive back online before being overwhelmed by aliens and failing systems. We played two games, with one victory and one defeat.

This game was a Christmas Present.

There is quite a lot to set up in the game.

We finished the day with a game of Space Hulk. I was commanding the Space Marines and I  unfortunately failed to complete the mission. I really should get around to painting the miniatures that come with the game.

Space Hulk game in progress.

A wonderful day spent with my daughter. My next post will cover my painting progress on the Zulu and British infantry units.

Monday, 23 March 2026

Boardgaming and test painting Zulus

No wargaming this weekend, but there was plenty of gaming all the same. With the kids and their partners over for a BBQ and games day. As a family we all enjoy gaming, and this weekend’s boardgames line-up included the co-operative games "Reign of Cthulhu" and "The Captain Is Dead!". The Captain Is Dead! proved to be popular and we played it twice, narrowly losing in the first game before managing to pull off a victory in the second game. In the evening we wrapped up with "Small World of Warcraft", which was won by my wife. Despite declaring at the start that she did not understand the rules and was going to give the game a miss!

A cooperative game of The Captain is Dead! in progress.

The games day began with hunting down the horrors of Cthulhu.

The day wrapped up with a game most of us had not played.

Planning and preparation for my Anglo-Zulu War project continues. On the rules side, I have been reviewing options following suggestions from "A Wargamer’s Guide to the Anglo-Zulu War" by Daniel Mersey. At the moment I am leaning towards using "Black Powder Second Edition" with its "Zulu" supplement. I need to settle on the ruleset soon as this will help to determine the basing approach I take.

A option to wargame the Anglo-Zulu War.

On the painting table, I have started work on the HaT 20mm plastic Zulu figures. A test group of four were painted. With 600 Zulu figures to get through, I am keeping the painting approach very simple. They are prepared with a wash in detergent and a coat of PVA glue, then block painted with a final PVA coat to give them a glossy finish that I like. 

The countdown is 594 Zulus to go...

Preparing the plastic figures with a wash in detergent.

A test group of 4 figures are painted.

I have also spent a little time on some remaining Star Wars Legion figures. If I am honest, that was probably a bit of procrastination on my part before I start tackling the mass of Zulu warriors in the plastics pile. Anyway, they are finished now, so no more excuses!

Some Droidekas completed. They were very fiddly to glue together.

Some more Rebel troopers. I chopped off some of their heads and replaced them with Kroot and Tau heads from my W40K bits box. I already have a couple of Rebel troop units and wanted this one to look a bit different.

Tuesday, 8 July 2025

A project finished, some ECW Painting, and two book games

I have now finished painting all of my Star Wars Legion miniatures. It is good to have the project essentially wrapped up from a painting perspective, especially having started back in March with the starter box set. I definitely ended up spending much more on the miniatures than I originally intended. There was always that one extra units I just needed to make the collection complete or add variety, and it was always on sale. How could I resist!

The Star Wars collection.

The one saving grace is that I spent little to nothing on terrain, having either scratch-built it or repurposed stuff I already had in my wargaming stash. With my son visiting for a day of painting, I needed to quickly find something else to work on and decided to return to my English Civil War collection. The unpainted pile is slowly dwindling, just enough remains to complete three more bases of infantry and four bases of cavalry. Once those are painted, that will likely mark the end of my ECW collecting and painting, though I may still pick up a few heavy artillery pieces in the future to allow for siege scenarios.

One more infantry unit to add to the ECW collection.

The remaining figures to be painted.

Two book games arrived yesterday from Worthington Games: “Waterloo Solitaire” and “Bismarck Solitaire”. Both look very interesting and have solo mechanics driven by dice to manage the opposition. I had originally planned to just purchase the Waterloo game after watching a YouTube review of the game, but then added the Bismarck game to the order to reach the free shipping threshold. You never know it may just tempt me to dust off my naval models and play some naval wargames on the tabletop.

Recent purchases.

I have had a chance to play the first scenario from the Waterloo book, which includes a total of 24 games (12 playing as the French and 12 as the Allies). The games have three levels of difficulty which gradually increase as you play through them. In my first game, I played as the French and was defeated. I managed to break the Allied right wing, but things quickly started to go wrong when the Prussians began arriving over three consecutive turns (3 sixes in a row for Allied orders). From that point on, I was in serious trouble.

Playing a game using pencil so I can erase and play again.

Monday, 4 November 2024

Battle of Sekigahara Boardgame

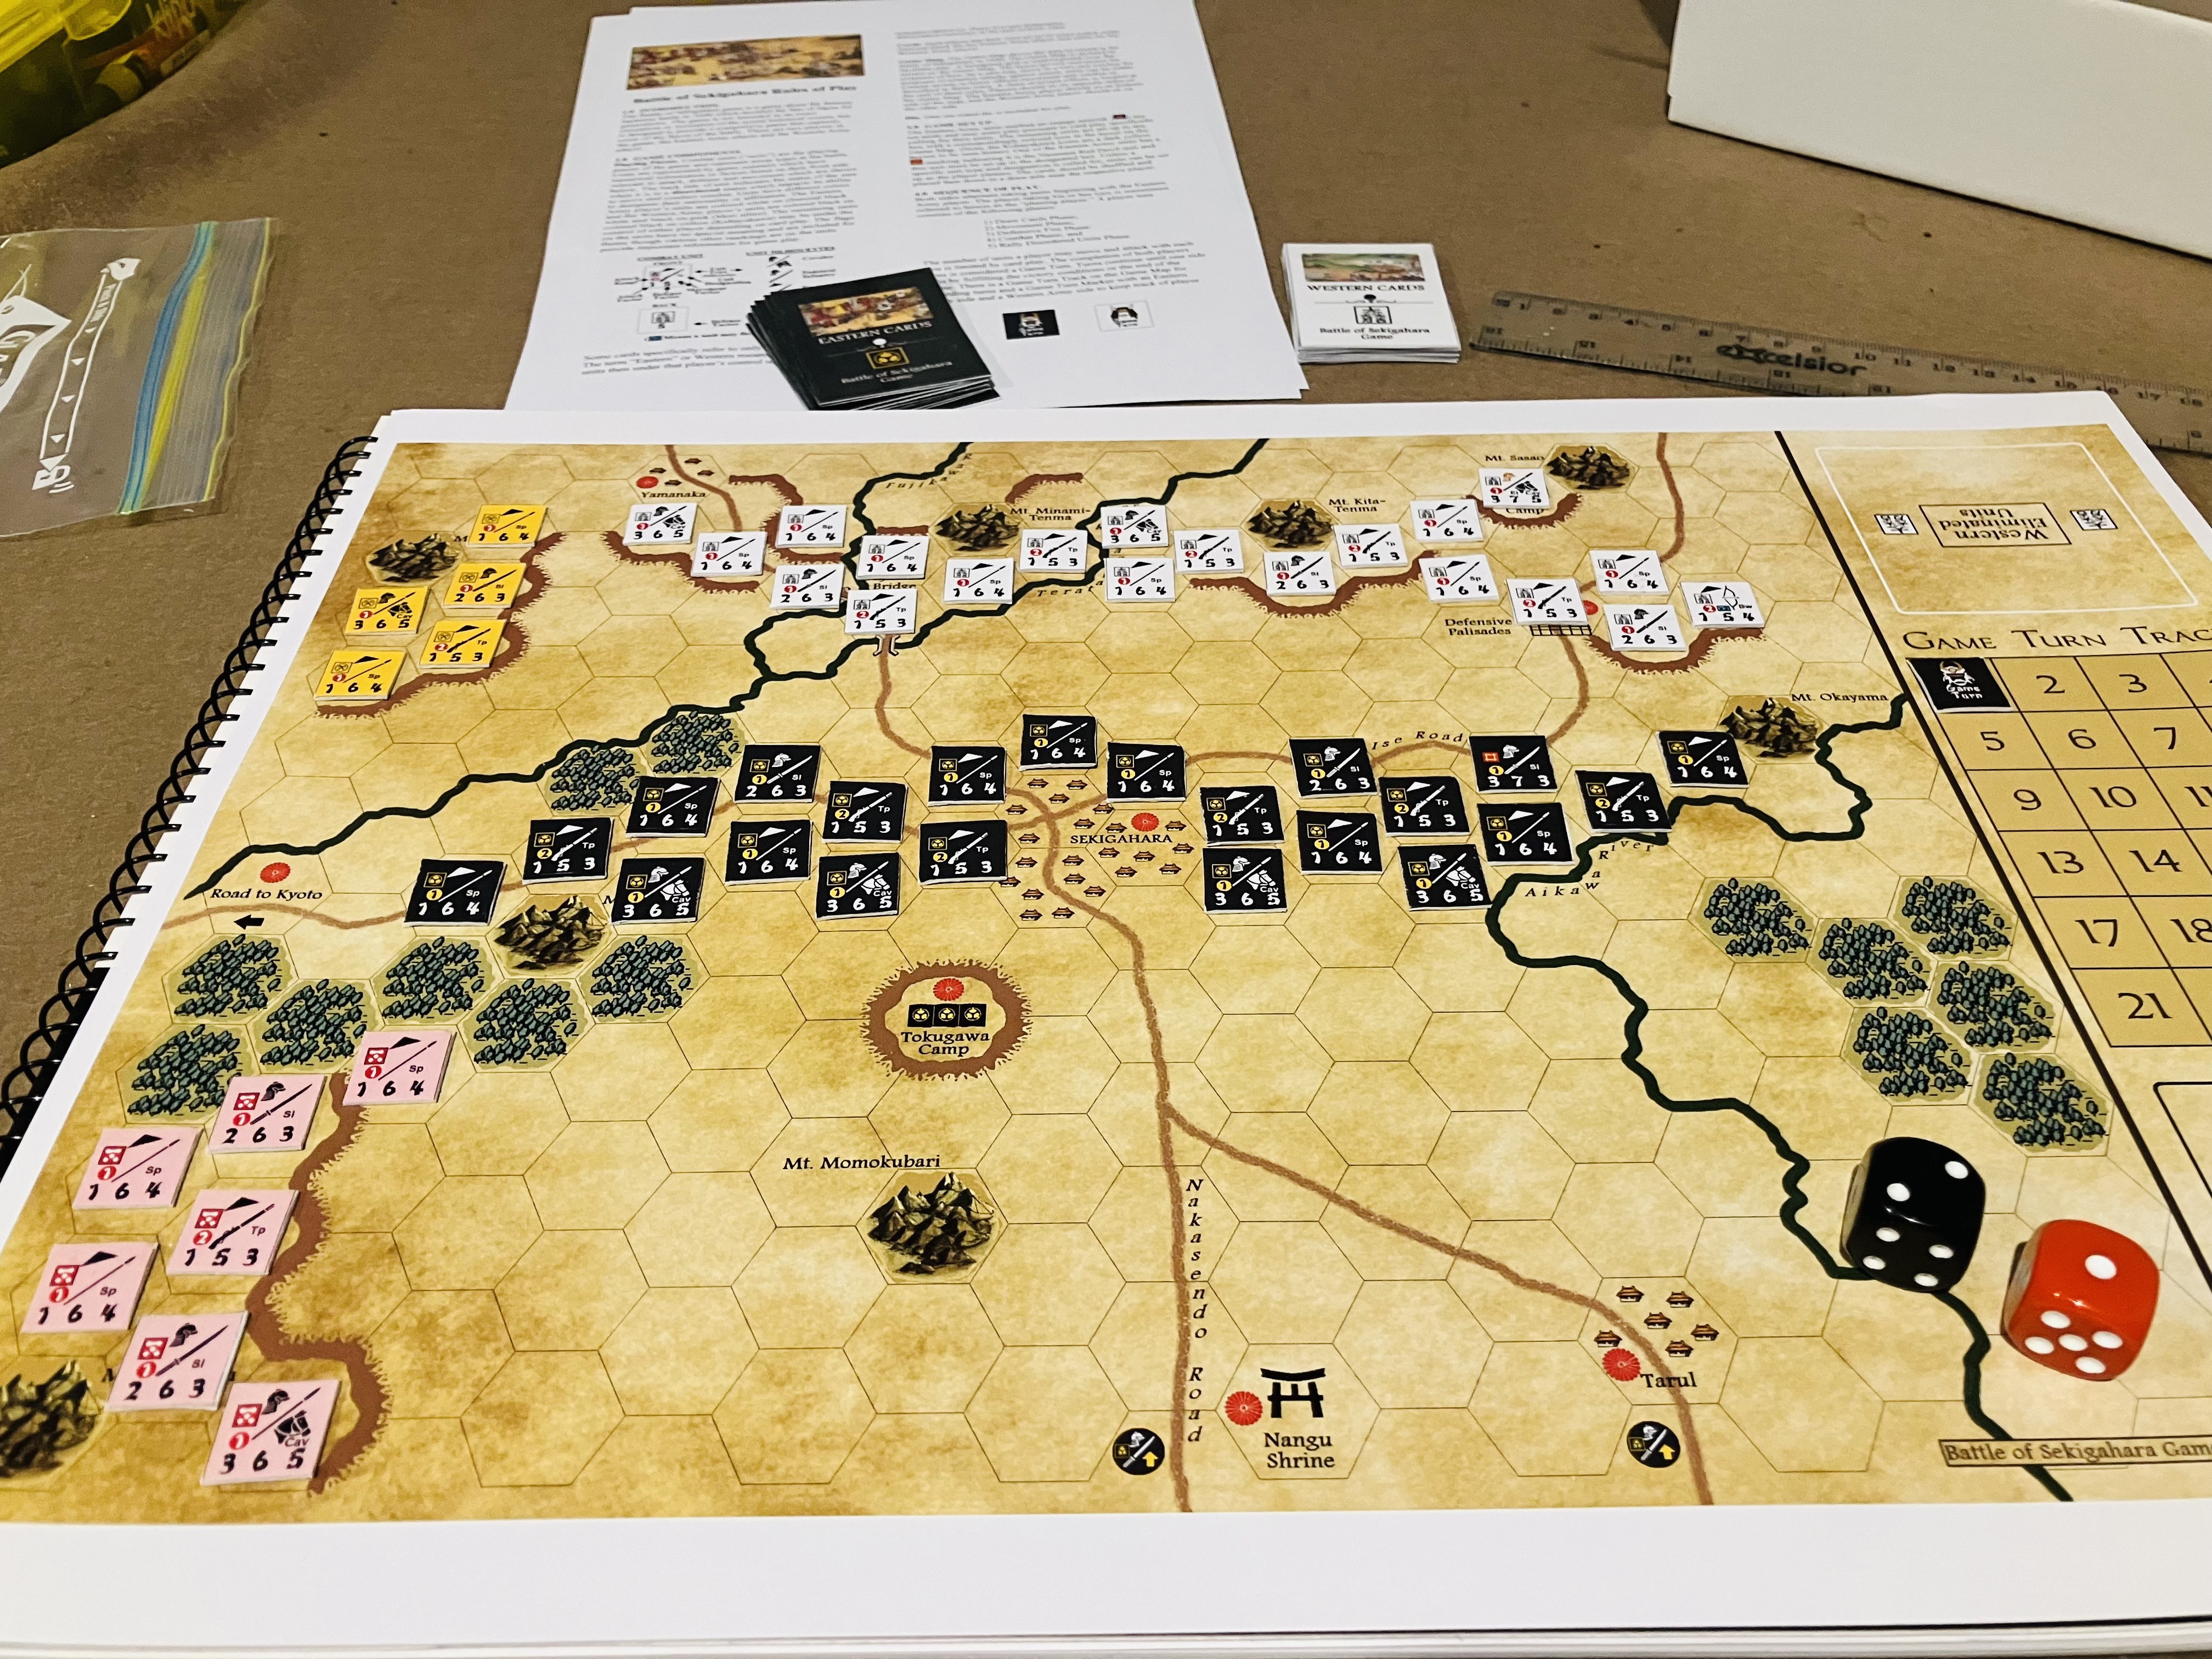
To take a break from my mech campaign, I decided to try something different and purchased a print-and-play game from Wargame Vault. This was my first time picking up one of these games, and with limited wargaming options on hand until we move into our house, I figured it was worth trying one out.


The game I chose was “Battle of Sekigahara Game” by The Historical Game Company and Blue Panther LLC. I was intrigued by this game because uses event cards to determine the number of moves and attacks each player can make during their turn, along with special events that affect play. The events can range from combat or movement benefits, to major shifts in the battle like an allied clan switching sides.


The rules are straightforward and fit easily onto four pages. The only thing that tripped me up in my first game was remembering the defensive fire phase, where the opponent can shoot with missile units (arquebus and bow) right after movement and before the combat phase. I found the card mechanics with their events work well when playing solo adding a level of uncertainty.


A recent print and play purchase

After purchasing and downloading the game, the next step was printing. Since I don’t have access to a printer and needing the map on A3 paper (approximately 11 x 17 inches) I decided to go with an online printing service. The process proved to be quite simple: I just uploaded the rules, counters, cards, and map, and for each selected the paper size and quality. For example I had the map printed on their highest quality paper so it will be more durable. The printing arrived two business days later, not long to wait.


Once the printouts arrived, I glued the counters onto card stock using a glue stick, then lined up and stuck on the counter backs. Finally once the glue was fully dry I cut them out. As for the cards, they came on one sheet of paper with the faces on one side and the backs on the other which all lined up nicely. These I covered with clear contact plastic, front and back, before cutting them out. This gave the cards some extra thickness along with durability. There are no pictures of this process as it is quite tricky putting the contact plastic on, one mistake and it all turns to custard.


The printed front and back of the counters are glued to a piece of card and cut out.

The completed cards. The printed cards came on one sheet of paper with the faces on one side and the backs on the other which all lined up nicely. These were covered with clear contact plastic, then cut out.

So far, I have managed to play one game, where the Eastern Army under Tokugawa Ieyasu quickly defeated the Western Army under Ishida Mitsunari. Although the game ended up being a one-sided affair, probably due to my erratic tactics, I will definitely be playing some more games in over the next few weeks as a change from my mech games. One feature of the game I liked is each army has two clans on their flanks that are unreliable and may switch allegiances during the game, as directed by the event cards.

The game setup ready to play.

End of the game with an Eastern Army win.

Looking ahead I am curious if parts of the game’s rules might be adapted for my samurai tabletop games. Something I would like to try once the house is finally set up. The ship with our goods has left Melbourne and with travel and customs it is looking like it we will be in around mid-December, which feels like it’s still a ways off. Although things are progressing, yesterday I was preparing and undercoating the room where I will be setting up my table and models.

Tuesday, 29 October 2024

Limited time

I've been busy house painting every day to get the house completed before all our belongings arrive via ship. This is not exactly the kind of painting I enjoy, but there is satisfaction in getting the rooms complete. All this painting has meant my wargaming and blogging time has been limited. I did manage to fit in a mech game, though I have not found time to write it up yet.

The start of a mech game which has to be written up.

Yesterday, I took a break from painting as it was a public holiday here in New Zealand, and we were able to organise a family games day. In between having food we played two board games, starting with “Heat - Pedal to the Metal”, a racing car game where you manage a hand of cards to push your engine to its limits to get to the finish line first without spinning out on the corners. It was a very enjoyable game with some clever mechanics that kept everyone in the contest. At some point we all held the lead at different times, and no one fell behind until the last corner, where we pushed our engines to the maximum in a sprint to the finish line.

The first game played

The first lap underway

The second game we played was “Betrayal at the House on the Hill”. A game where players explore a haunted house by placing tiles, gathering items and omens, and improving their characters’ abilities. At a certain point, the omens cause a shift in the game, transforming it from a game of exploration into one of survival. In our game, one player became an evil zombie lord tasked with hunting down the other characters using zombies. There are other survival scenarios in the game and the one selected is dependent upon the last omen found. 

The second game played.

The haunted house is explored.

It was a fun games day.


Saturday, 18 March 2023

WW2 scenario and game report

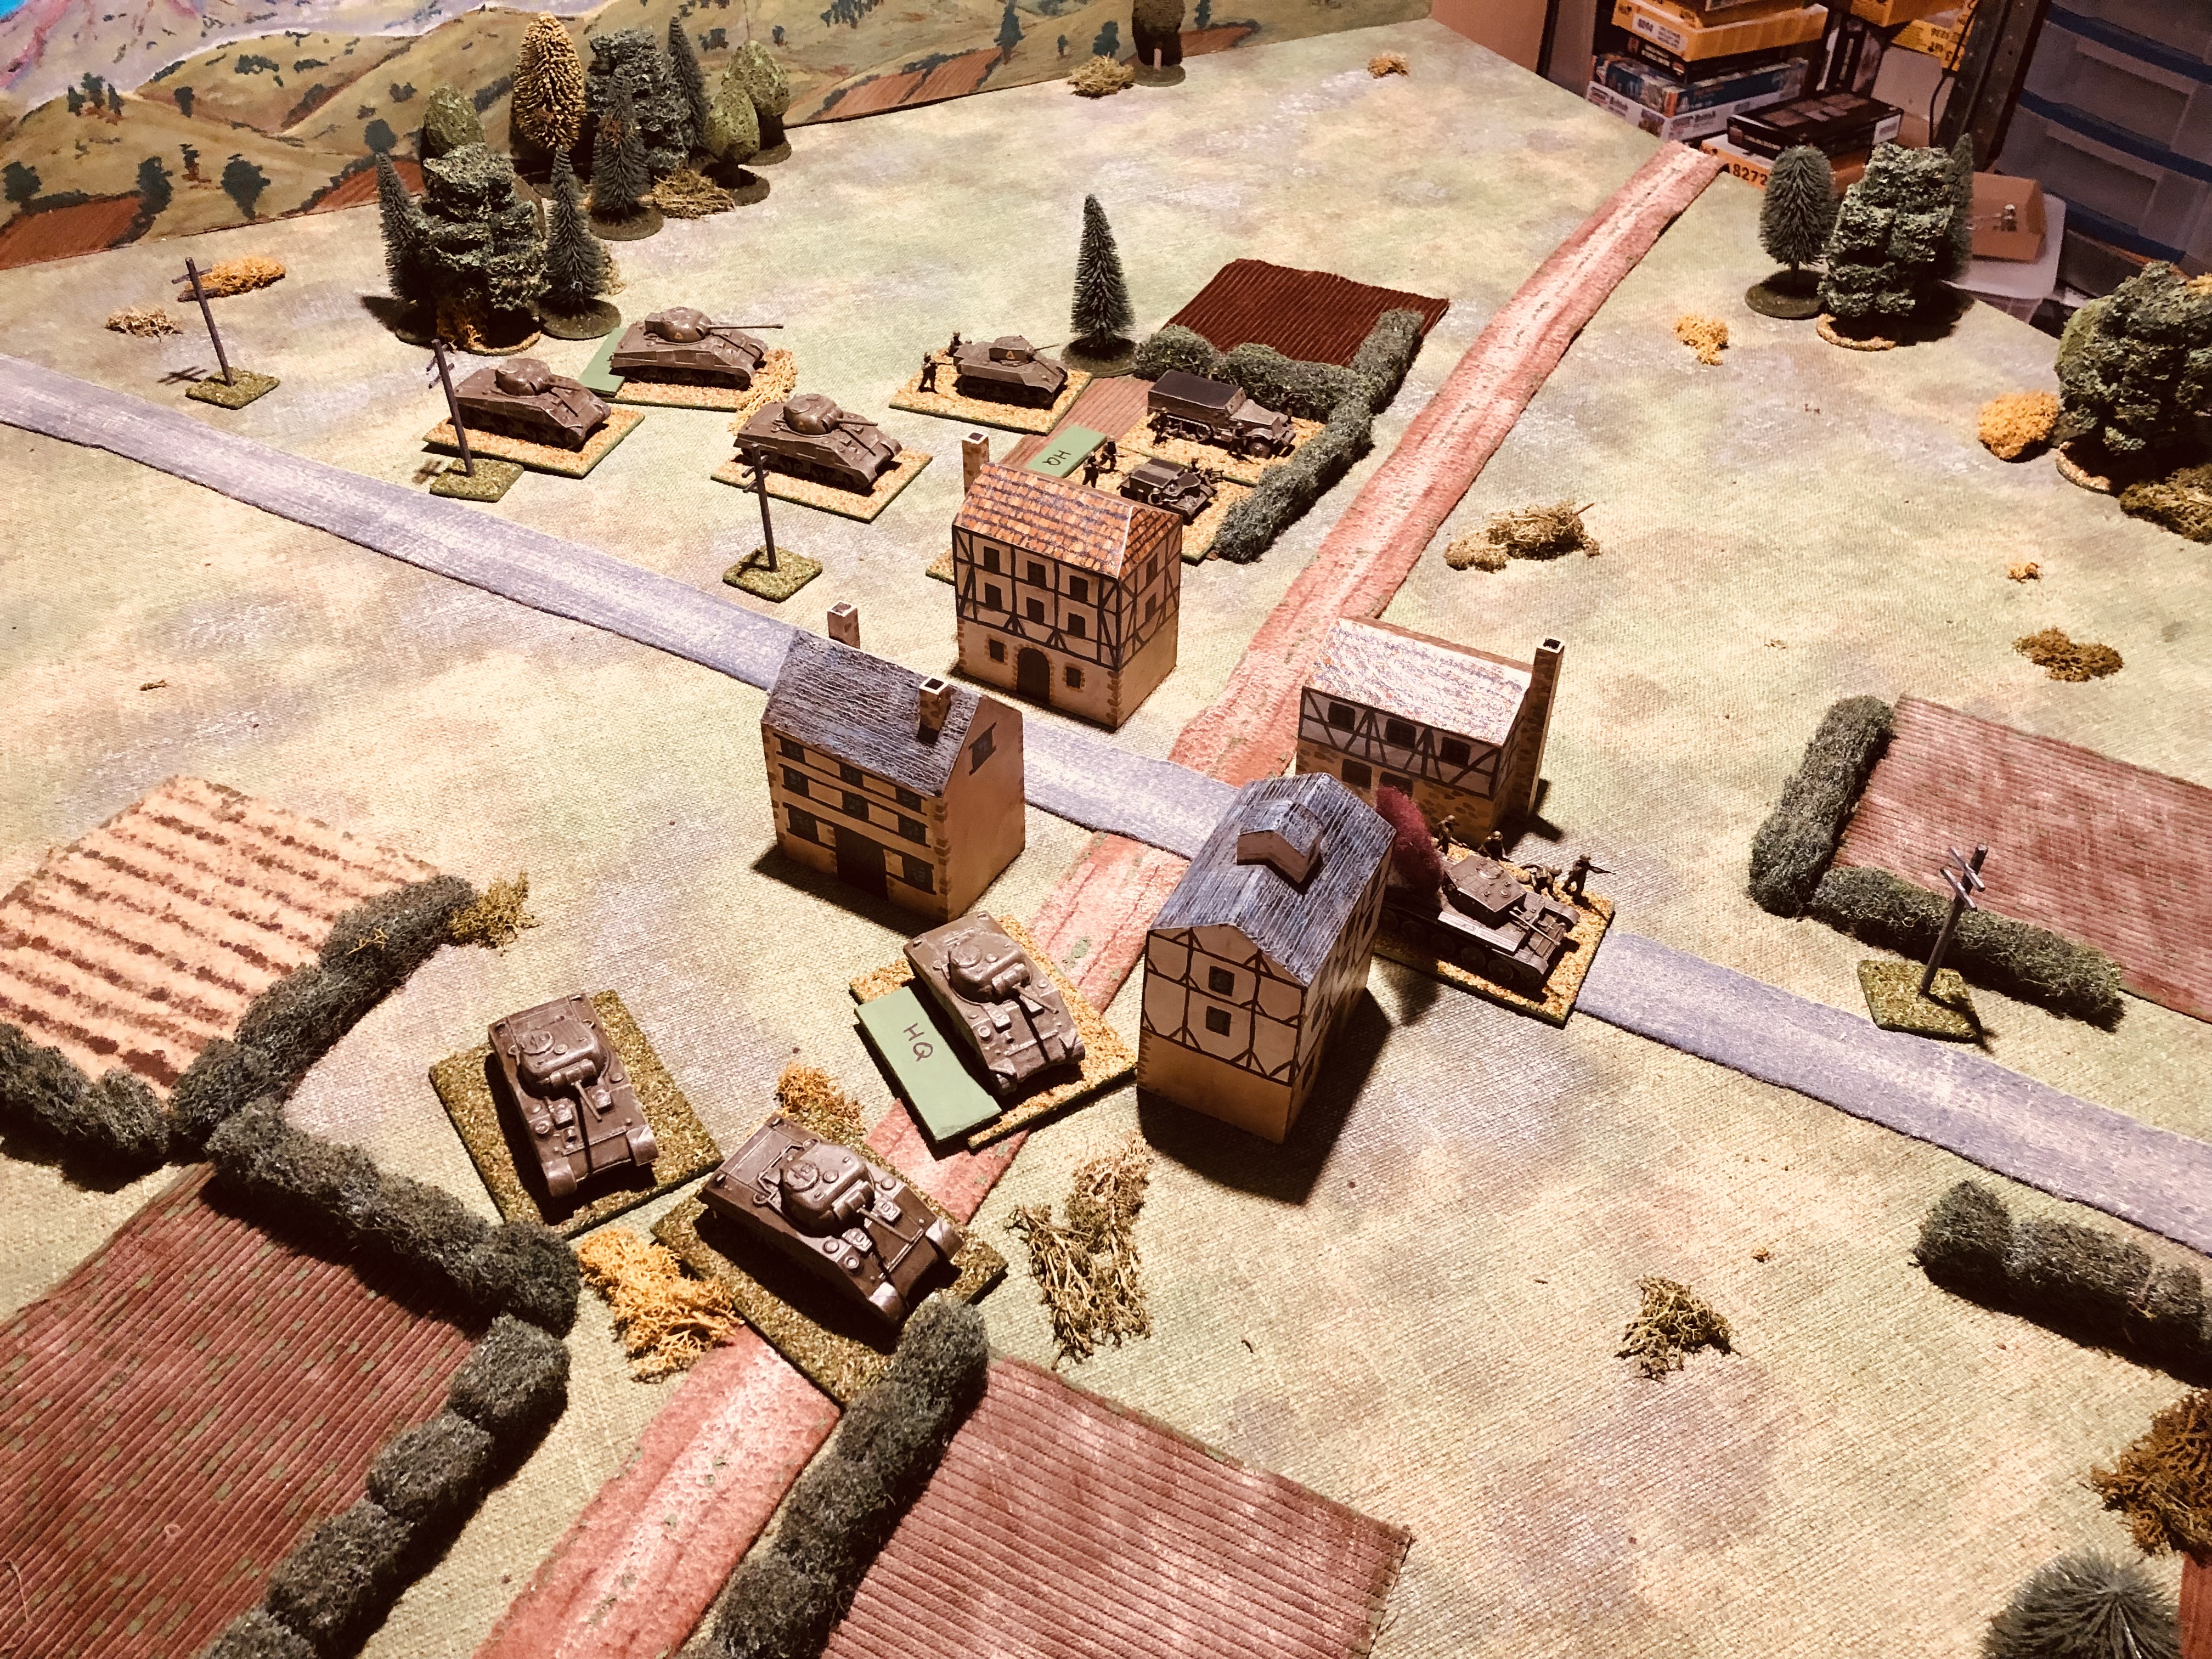
This scenario, set in North West Europe, draws inspiration from the events that took place in Villers Bocage during WW2 in 1944. It depicts an Allied effort to break out of the German encirclement, where a British armored group has spotted a weakness between two enemy divisions and is making an attempt to capture a crucial hilltop.

A close up of some of the engagement.

The wargame being played incorporates the "Tank on Tank" board game rules from Lock n Load, but with some adaptations that enable free movement on a tabletop. Additionally, a few new rules have been added for tank destroyers and infantry to enhance the combined arms feel of the game. There are a few more notes on the changes and adaptations at the end of this post.

Scenario

The scenario titled "Action at Birscote - Somewhere in France 1944" depicts a situation where a British armoured group is moving forward through the town of Birscote to capture the hilltop. To counter this advance, the Germans have mobilised a force that will converge on the town from three directions - north, east, and south - denoted as points A, B, and C on the map below.

Map of the scenario. The British are advancing towards the hill and the Germans will converge on the town from points A, B, And C.

The game was played on a 6x4 foot tabletop.

Armies

The British force has:

  • Two Sherman troops (both have reconnaissance tanks a Cromwell and Stuart, and one troop has a Firefly 17 Pdr).
  • An armoured infantry company
  • A infantry company with mortar support
  • A 25 pdr. Artillery section

British Force

The German force has:

  • A troop of two Tiger tanks with two armoured infantry - these will arrive at point A on the map.
  • A armoured company of two armoured infantry, armoured car, Stug III, and Wespe - these will arrive at point B on the map.
  • A troop of three PzIV tanks - these will arrive at point C on the map.

German force converging on the town of Birscote from three directions

Deployment

The British troops start the pre-game actions by deploying as many units as they desire along the road leading into the town of Birscote. Any additional forces that cannot be accommodated at the outset can arrive as reserves at any point in the game, along the same road.

On the other hand, the German forces will commence the game off-table and appear at designated points A, B, and C on the map. They are required to first deploy all their units at point A before beginning to have units arrive at point B. Only after all point B units have arrived can the units begin to arrive a point C. This restriction will require the German player to strike a balance between the arrival of units and attacking the enemy.

Game length and turn order

There is no set game length. The German player goes first arriving along the road at point A on the map.

Victory Conditions

British forces must capture and maintain control over the hilltop, while the German forces must seize and hold the town of Birscote.


The Game Report

At the beginning of the game, a solitary Tiger tank arrived and shortly after, the first British tank was destroyed. In response, the British forces quickly left the road and stationed their armored infantry in the town while their tanks moved to either side of it. Soon after, another Tiger tank arrived, along with supporting armored infantry. At this point, the British tanks had adjusted their aim and were lucky enough to disable one of the Tigers, but at the cost of losing another of their own tanks.

From a deployment perspective, by turn three all German units had arrived on the tabletop at point A. This would allow their other forces to start arriving at point B.

Opening moves as the British respond to the arrival of a couple of Tiger tanks on the hill.

The first British tank brews up.

The British leave the road and reposition their armour, while armoured infantry occupy the town.

A Tiger tank is disabled as after three turns all the German units that were to deploy at point A have arrived.

Flank attack from the south

The attack by the Germans, approaching from the southern direction, caught the British forces off guard. Although a fortunate hit managed to take out the Stug.III tank destroyer early on, the German armoured infantry successfully made their way into Birscote and were only forced out after some intense house-to-house fighting. Realising that any further attempts to attack Birscote directly would likely end in failure, the Germans shifted their focus towards targeting the flank of the British tanks that were still engaged in battle with the solitary Tiger tank situated on the hill.

The Germans launch an attack from the south in an attempt to take Birscote.

Initial units of the southern attacking force arrive. Unfortunately for the Germans a luck shot (double sixes) had destroyed the Stug III.

German armoured infantry press on with the attack in Birscote.

German units briefly enter Birscote.

Having been ejected from Birscote, the attack is directed at the flank of the lead British tanks engaging the lone Tiger tank on the hill.

Attack from the north road

The British forces were not granted any respite after just repelling an assault on the town, when German tanks approached from the northern direction. Fortunately, the British tanks were anticipating a possible attack from that direction and were able to quickly engage the enemy in a tank-to-tank battle, with the Sherman Firefly joining the fray as soon as possible. Through their gunnery, the British gradually gained the upper hand and were able to destroy the German tanks one by one with only few losses themselves.

The tank attack from the north arrives.

An early success by the British give them the upper hand in the tank-on-tank battle.

The tank battle was over quickly allowing the British to regroup for a counter attack.

Counter attack along the south road

The swift elimination of the northern tank attack provided the British forces with the opportunity to reorganise themselves and mount a counterattack against the remaining German units located south of Birscote. Lead by the Sherman Firefly, the British launched an attack that ultimately resulted in the destruction of both the German armoured car and the Wespe mobile artillery.

The removal of the northern threat allows the British to regroup and counterattack in the south.

German forces south of Birscote come under fire as the British launch a counterattack. 

The counterattack is successful.

A last ditch attempt to take the town

The German forces that remained on the hill began to descend with the aim of capturing the town. A single Tiger tank, accompanied by two armored infantry units, slowly advanced towards Birscote. Sensing a chance, the Sherman Firefly involved in the counterattack was able to position itself on the flank of the Tiger and successfully fired, causing the tank to explode in flames. This decisive blow shattered any hopes the Germans had of capturing Birscote and they were forced to retreat. The British units, thereafter, were able to seize control of the hill with the aid of their remaining tanks and reserve foot infantry.

A victory to the British, coming at the cost of half their forces.

Germans make a final attack on Birscote.

A Tiger tank and armoured infantry advance.

The Firefly takes it shot.

This was the third time I have played the scenario and so far it is 2:1 in favour of the British. The outcome of the northern attach appears to be the key to any success or failure.

Modifications to the Tank on Tank rules

To adapt the board game, which uses a hex-grid, to the tabletop rules I used the following adjustments:
  • One hex equated to 8 inches on the tabletop.
  • Any unit located within 1 inch of a terrain feature, such as a hedge, building, or tree, was considered to be in cover.
  • Buildings and trees were obstacles that blocked line of sight, with measurements taken from the center of the unit's base to the entirety of the target base. Hedges did not obstruct line of sight.
  • Units had to move in a straight line unless they were on roads, in which case they could move along the road for their entire movement. Units had to navigate around clumps of trees and buildings. Movement allowances were not reduced when moving into terrain or cover.
  • Destroyed armor units remained on the tabletop and were marked with smoke. Other units could move through them without hindrance, but they blocked line of sight.

Further modifications were implemented in the rules to improve the game's combined arms aspect rather than just focusing on tanks. These changes included:

  • Infantry units, whether on foot or armoured, had a 360-degree firing arc.
  • Tank destroyers (e.g., Stug.III) were treated similarly to tanks, with the exception that they couldn't fire after moving.
  • Foot infantry could move through other units without impediment, whereas other units could not move through one another.

End note

This post contains more text than I typically write, and I generally try to avoid lengthy posts because I find it time-consuming to check my spelling and grammar. English was not my strongest subject in school, and while I received the usual feedback of "tries hard, but could do better" for most subjects, in English, I only received "tries hard" without the "could do better" part. For much of this post I quickly typed what I was trying to say then used ChatGPT, an AI tool to format for me. Copying and pasting my text into the tool and adding "reword -" at the beginning, ChatGPT generated some readable text for me. A little bit of modification was required afterwards, but it was surprisingly effective.