Saturday 29 January 2022

A Napoleonic Battle Campaign Game (Part 1 - The Preparation)

My tabletop is 6x4 foot and suits me fine for pretty much most of my wargaming with armies of between 6 to 10 units. If find these games perfectly enjoyable, but do not necessarily give you the feel of a big battle. This is particularly true of the Horse and Musket period. Having no desire to make a bigger tabletop or purchase and paint the necessary figures, I decided to try and run a big battle like a campaign. I remembered a chapter called "A Corps Campaign (Napoleonic)" in "War Game Campaigns" by Donald Featherstone. The chapter is a short 6 pages and are the inspiration for these Battle Campaign rules.

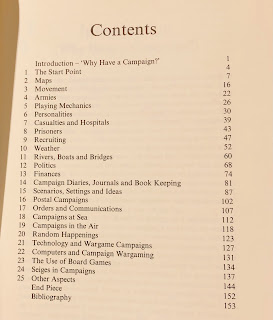
The drafted map of the battlefield

This and following posts will detail the campaign rules, the games representing actions in the battle, and any amendments I find necessary as the battle campaign progresses.

Drawing the map

The first step is to draw up the map. The map is divided up into four lanes which are assigned to one of the army corps which can move up and down the lanes, but never side to side. Each army has three Corps and an Army Reserve which never appears on the map. The three Corps start the game in the deployment zones row 2 or 4 and must depending which side of the map they are defending. All Corps must be all adjacent so one lane, lane 1 or lane 4, will remain unoccupied.

Deployment zones and map lanes.

An example of two forces deployed, both with unopposed flanks.

After deployment there is a good chance that each side will have an unopposed flanking force. More on how the unopposed Corps are used later on. During the campaign turn players take turns to move one Corps up or down a lane or take a pass on moving. When two opposing forces are next to each other in a lane the map features transferred to the tabletop and an action is fought.

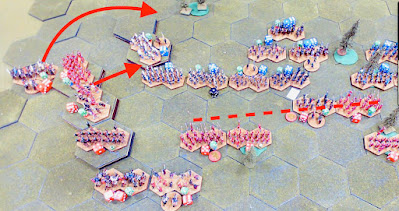
During Red Army's turn they choose to advance Corps I who make contact with Blue's Corps II. This now has to be transferred to the tabletop.

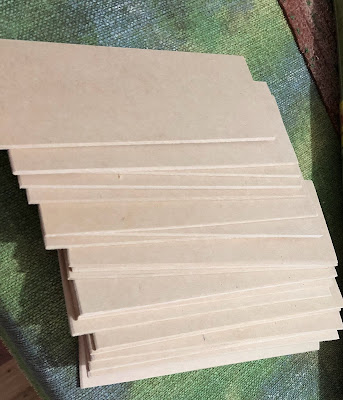
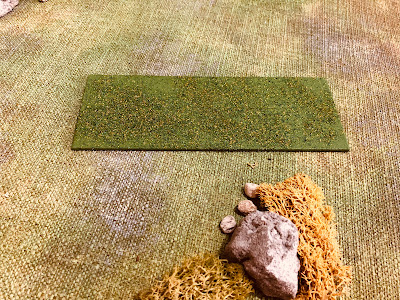
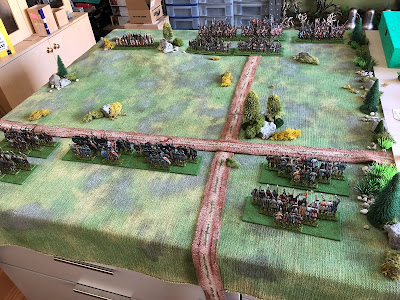
Moving the counters reveals the terrain to be fought over. Each square represents 2x2 foot on a 6x4 foot tabletop.

The area covered by the counters is transferred to the wargaming table. To assist this the map has dotted lines added which help define a 2x2 foot square on the tabletop.

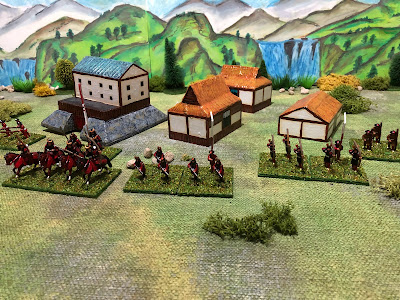
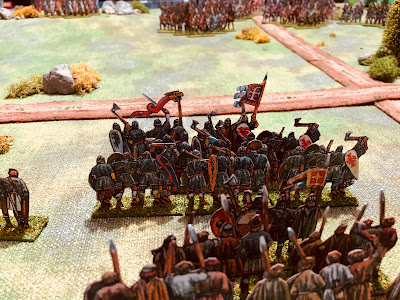
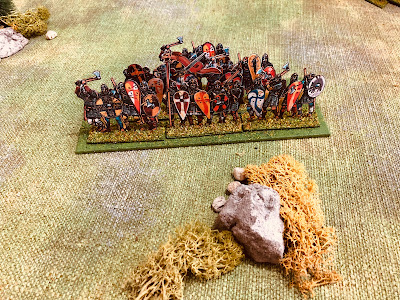
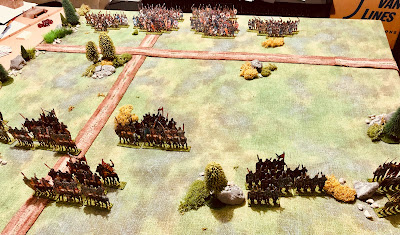
An example of the above map section transferred to the tabletop.

The action will then be fought using the units available to the Corps involved. As the game progresses additional units can be brought into the game to replace loses from reserves arriving on the base edge or on the flank if there is an unopposed Corps. The over-arching rules are:
  1. A player can never be more than 8 units on the table
  2. Units that arrive to replace eliminated units are never returned and remain with the corps for the remainder of the campaign.
  3. Eliminated units are also lost to the campaign.
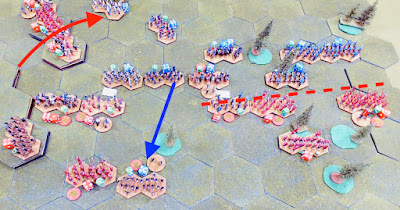
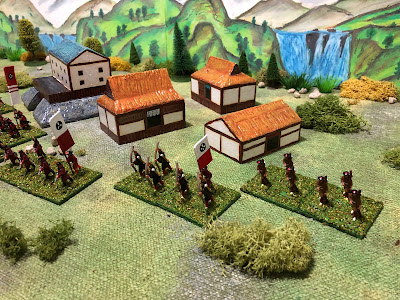
Red Corps I can receive reserves and Blue Corps II can receive reserves or flanking units from Corps I. Flanking units can arrive anywhere on the tabletop side and Army Reserves on the base edge. 

The actions on the tabletop are played using One Hour Wargames Horse and Musket rules over 15 turns. The winner of the action remains in position on the campaign map and the loser must retire one step.

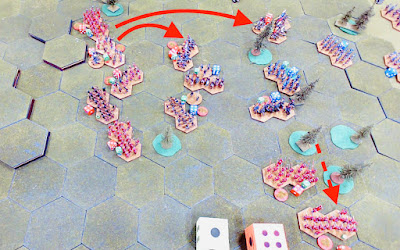
In this example action, Red Corps I won the action and remain in place and the losing Blue Corps II retires one step.

The battle campaign is won by forcing one of the opposing Corps off the map. Conserving units in the tabletop games and timely use of reserves will be important to obtaining victory.


Deciding the units for each Corps and Army Reserve

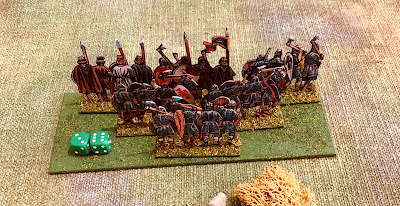
Having drawn the map the next step is to decide the unit make up of each corps and the reserves. This can be decided using dice or creating three lists and randomly assigning them to each corps. The army reserve also needs to be decided and I have opted for an even split of infantry and cavalry units. The constraint I have to apply is the number of units of a certain type I can field on the tabletop.

As with most campaigns there is a level of bookkeeping to track of units eliminated on the tabletop and where units are moved to a corps with from reserves or from an unopposed flanking corps. I am using a table below the map with a square for each unit. When eliminated it is crossed out, and when moved in is also crossed out and a new square drawn on the corps it has joined.

Bookkeeping is done below the map so no loose pieces of paper to worry about.


Campaign Rules
To start the campaign both players write down which three lines they will deploy their corps. The corps must be adjacent to each other. They then place the counters in the deployment rows.

Dice to decide which player moves one unit first. Players then take turns to move one unit as a time. 

Whenever two opposing units in a line are adjacent then the action is taken to the tabletop.

During the game whenever a player has a unit eliminated they have the option of moving up a reserve unit to join the tabletop game. If they arrive from reserves then they are placed on the base edge and if from an unopposed corps they arrive the flank edge.

Any units eliminated on the tabletop are lost to the action and battle campaign.

The loser of the action must retire one step in their map lane. If this pushes them off the map, then the battle is lost. If the action is inconclusive, then the attacking corps retires one step.


In the next post I will cover off what determines whether actions are won or lost on the tabletop.


Friday 28 January 2022

The Second Battle of Azukizawa - A second remote game

This week I was fortunate to play a second remote wargame with Jon of Palouse Wargaming Journal. We replayed the Second Battle of Azukizawa, except this time we switched sides with Jon taking the Oda army and myself the Imagawa army. 

The remote game in progress using Jon's fine collection of 15mm Samurai.

The Oda clan start the game in a difficult position with the Imagawa army starting the game springing an ambush on their flank. The plan was to hold the centre and right flank and sweep around on the left flank.

The opening games moves.

The Imagawa centre gave way to the pressure, but the right flank proved stubborn and bought the time necessary for left flank to move around and threaten the rear of the Oda battle line.

The cavalry charge into the rear of the Oda army and their resolve fails. The large dice show the armies resolve.

This was a most enjoyable game which used Basic Impetus rules modified by Jon for a hex-grid. The game flowed quickly as Jon has an excellent remote setup with cameras positioned on both base edges. I am going to give the Basic Impetus rules a try with my own Samurai games and see if they work as well on a square grid as they do on a hex-grid.

Sunday 23 January 2022

Buildings and Castle for Samurai Games

I have been very slowly paint my remaining Samurai figures and needed a change. To do something different, but still for the Samurai project, I made and painted a few wooden buildings and a small castle. I generally scale down the buildings so these are scaled for 15mm for my troops are 25mm.

Most of my buildings nowadays are now made from wood with the application of some Gesso Paste to give the roofs some texture. The Gesso Paste also helps to hide my rough and ready woodwork skills. The buildings are very sturdy and can be easily packed away with no fear of breakages.

Wood buildings cut out with the Gesso Paste being applied to one of the  houses.

A toothpick is used to create the texture to help with paint washes and dry brushing.

I won't detail how I do the painting as I have done so a couple of times before. To help me with the design and painting of the buildings I was guided by some images found on the internet after a brief Google search.

The buildings with a few troops for scale in front of the backboard I made a few weeks ago. 

Another photograph showing the wooden buildings which are very much created for wargaming.

A close up showing the simple painting which works well with my block painted Samurai figures.

Next up for terrain will be a couple of Japanese style bridges. Then I should be ready for a couple of games using one of the One Hour Wargames scenarios. From a rules perspective I recently bought Basic Impetus after a remote game with Jon from Palouse Wargaming Journal where Jon used a hex-grid. I am templed to see if I can apply the rules to a square grid.

Saturday 15 January 2022

Movement trays for paper soldiers

Most of my miniatures are based on 4x3 inch bases in groups of 9 to 12 figures all fixed to the base. This works fine for me as I don't really like moving around units with too many bases, especially individually based figures. The exceptions to this are my three paper soldier armies (1066 Norman/Saxon, Jacobite Revolution, and War of the Spanish Succession) where each unit is made up of 6 to 9 bases. The reason for this number of bases is so I can lay them down in their storage boxes when not in use. Some of the figures are just too tall for easy storage.

Saxon paper soldier units with 6 bases per unit

Up until now I have moved the multiple stand units while doing my best not to misjudge depth and catch some of the spears, causing them to get bent over. Anyway, this weekend I thought I would try and address the situation and make some movement trays using some MDF sheet.

About 20 movement trays were cut out sized 8x3 inches.

The trays were painted green, then once dry painted with PVA glue and the scatter/flock lightly sprinkled over. I was not going for a full coverage, just enough to help break up the painted flat green look.

A completed movement tray.

My test of an unpainted movement tray showed there was little movement of paper soldiers when lifting and moving them around the tabletop. This is due to their very light weight. Adding the scatter/flock adds some more friction to the tray's surface and the figures only start to shift about a bit if held at an angle of more than 30 degrees.

A 6 base Saxon Housecarl unit on a movement tray.

A 9 base WSS unit on a tray in line.

A 9 base WSS unit in column,

WSS artillery limbered.

WSS artillery unlimbered.

One advantage of the 6 base units is there is room on the movement tray for counters or dice to mark hits or other unit statuses. 

Unit with hit counter (2 hits taken so far)

Unit with dice as hit markers. Although the dice are more likely to slip off the tray than the figures.

All set up for a One Hour Wargames game using the movement trays. Hopefully with no more spears getting bent over.


Friday 14 January 2022

A couple of secondhand books arrive in the post

A couple of secondhand book purchases arrived this past week in the post. The first was "Stuart Asquith and Terry Wise's Wargaming 17th Century Battles" edited by John Armatys and John Curry. This book covers some 20 battles of the period, mainly English Civil War and a couple of rule sets at the end. Each battle has a brief background and description of the battle, order of battle, maps and tips for wargaming the battle. It is not going to be one of those books I read from cover to cover, but rather I will pick up read about a battle and setup on the tabletop.

Wargaming 17th Century Battles

Wargaming 17th Century Battles - Contents

The second book "War-game Campaigns" by C.S. Grant I was lucky enough to pickup on eBay from an Australian supplier of secondhand books, which meant no eye-watering postage costs. It describes itself as a book that provides basic DIY (Do It Yourself) ideas and suggestions for using various campaign rules and playing mechanisms, which are covered in about 150 pages. This is one book I will probably read from cover to cover. As I do like running my own solo campaigns and enjoy the writing style of the author.

Wargame Campaign

War-game Campaigns - Contents

On the tabletop this week has been some 1066 Saxons and Norman games as I try out some rule modifications.

1066 Saxon vs Norman game about to start

Wednesday 12 January 2022

Remote wargaming the Second Battle of Azukizawa, 1548

Last weekend I was fortunate enough to enjoy a remote samurai period game with Jon of Palouse Wargaming Journal. Jon suggested a samurai game which was perfect for me as I am getting closer to finishing the painting of my Samurai armies and I am begin thinking about rules to use. This was my second remote game with Jon who has an excellent setup with cameras on each side of the table and a mobile camera for close ups of the action as required.

A close up view of Jon's armies in action. I believe they are 10mm figures and look splendid with all their bright colours and banners.

The game took a bit over 3 hours which seem to go by in no time what so ever. We used Basic Impetus rules with one of two adjustments by Jon which included an Army Breakpoint Clock. An army's clock was reduced with unit losses and also unit retreats. There was an option of sacrificing leaders as a means to offset a reduction in the clock.

I was playing the Oda army which has just realised it has been ambushed by the Imagawa army.

A full briefing pack was supplied by Jon and having chosen the Oda army I formulated a plan which was to push forward in the centre while try and break through on my left flank. The right flank was to give ground and hold off any attacks as long as possible

The plan - what could possibly go wrong?

What actually happened was my centre fought a good fight and was pretty well matched. My cavalry did well, breaking through and created a few problems for Jon. However, my flank attack stalled in the woods and could provide no assistance to my centre, so I was increasingly on the back foot. The right flank put up a brief and valiant defence but was eventually swept away.

The game was most enjoyable and appeared pretty close for quite awhile. I always thought I was in with a chance. This optimism did reduce a tad with the poor showing on my left flank and once Jon's left flank got rolling the game was up (as they say).

This was the first time I have played Basic Impetus and they seemed straightforward enough, so I purchased a PDF copy.
Purchased after the game.

Anyway, another game is being scheduled for later in January where we will swap sides and refight the Battle again. Congratulations and many thanks to Jon for hosting this game.

Monday 10 January 2022

Ancient Campaign turn 4 game 2 - Battle of Caieta 211 BC

The game report has been waiting from before Christmas to be written up and covers the second game being fought out in turn 4 of the Ancients campaign. The battle of Caieta, 211 BC, takes place in Southern Italy and has a force lead by Hannibal trying to reverse the recent trend of Roman victories.

The Roman general's view.

Elephants prepare to advance.

Each side has 7 units which are randomly selected using dice from 6 options on a table. This time Carthage has some elephants which they have been missing in the last few games, and are always a joy to see as miniatures on the tabletop. 

Chance cards are being used through out the campaign and are adjusted when generals are present or there are additional forces in the region. In this case both armies gain a rally card (replacing a no effect card) for having a second army present in the Southern Italy region. While the Carthaginians will also benefit from an additional initiative chance card because of the presence of Hannibal.

The campaign map for game 2 in turn 4.

In the last few games Rome has been successful using the tactics of pushing forward their heavy infantry as quickly as possible and getting to grips with Carthaginian centre troops. In this game the Carthaginian elephants in the centre will frustrate the same tactics.

On to the game...

The battle opened with Carthage's pushing forward with their elephants and Gauls in the centre, and on their right flank cavalry moved forward.

In previous games the Romans had been particularly successful pushing forward with their heavy infantry in the centre, but with elephants heading their way they tried to shift the attack to the right while holding off the elephants.

The game at the mid-point with Roman heavy infantry moving forward to attack while holding off the elephants as Carthaginian cavalry close in on their flank.

The game is in the balance as the elephants are eliminated and the final line of Carthaginians engage the advancing Romans while flanking harass the Roman centre.

The Roman infantry rush forward hoping to break the Carthaginian centre.

Cartage's centre holds and with flank units closing in Rome is defeated.

The Carthaginians return to their winning ways under the command of Hannibal. The campaign will move into turn 5 and will see the arrival of Scipio the Younger.

The campaign position after the second game and Carthage's victory.