Thursday 25 February 2016

WW2 Grid-Based Wargaming and Miniatures

While I am still looking for an Airfix Tiger Tank, I happened across these Airfix kits and snapped them up. The Jeep from the Buffalo kit will provide a useful reconnaissance unit and the Buffalo will be used to represent an Engineer unit. The Bedford trucks will be used to represent mobile infantry units which I'm lacking. More to paint!
Recent purchase
Last week I was feeling reasonable comfortable with where my house rules were, using One Hour Wargame rules the a starting point, and had even started to write them up. However, as the week progressed a few more changes have been cropping up as I try out the rules, and I am now reassessing my command and supply rule mechanisms. Trying out different rule options and playing small test scenarios, while enjoyable, has meant painting has slowed down and I am yet to get back to my Sci-Fi campaign.
A game in progress testing out house rule changes

Sunday 21 February 2016

WW2 Grid-Based Wargaming

I managed to get in a couple of small games this week to test out the house rules based on One-Hour Wargame style games. Originally I was not planning to use a square grid for this period. However, after reading through Simulating War (by Philip Sabin) I decided to have-a-go with a grid and persevere. I have now pretty much settled on the basic rules and have written up my notes this weekend.
Towards the closing stages of a test game
As a change to trying to condense all the rules on to a single page or sheet of double sided paper. I plan to spend a bit more time and include rule examples to help with explaining how they work.


I am using WWII Army Organisation and Equipment (by Ian Shaw) to help me organise my forces. It was produced by Tabletop Games in the early eighties, and bought from Games Centre by sending a letter with an enclosed cheque for the princely sum of one pound eighty.

British Infantry Battalion

In terms of painting I still have 4 units to complete, and I am on the lookout for an Airfix Tiger Tank at my local hobby shops. I could order it online, but part of the fun of this WW2 project for me has been the nostalgia of the kits (particularly Airfix) and going to the local hobby store and finding that kit you were after.

Friday 19 February 2016

Sci-Fi Mini Campaign - Battle #5

This was the last chance for the Tyranids to progress to the next campaign phase having suffered two defeats. The scenario from One Hour Wargame was number 10 "Late Arrivals" which had a third of imperial forces defending an industrial complex and waiting for the rest of their force to arrive as reinforcements on turns 5 and 10.

The Imperial force selection lacked some solid Tactical squads and appeared to be cobbled together. Whereas, the Tyranid force had a nice balance of large creatures, Hormagaunts and deep-striking units. The tactics were simple for the Warrior Prime and his Tyranid hordes, advance as quickly as possible and take the industrial complex before reinforcements arrive.

Tyranid Unit Selection
Imperial Selection (Space Marines and Planetary Defence Force)
A small delaying Imperial force was quickly in retreat before the advancing Tyranids and their outflanking Genestealers. The Devastator squad in the Industrial Complex was able to provide valuable fire support to cover their retreat.

Genestealers use their stealth ability to enter behind the delaying force
A Devastator Squad provides cover fire to the retreating units
The very depleted delaying force just made it back to the Industrial Complex and held on with the Devastator Squad until the first of the Imperial reinforcement arrived. Deep-striking Tyranid units quickly appeared to attack the newly arrived reinforcements and Commander Bariel.

Desperately needed reinforcements arrive
Deep-striking Raveners and Gargoyles beset the reinforcements
Larger Tyranid creatures continued their advance down the road hot on the tails of the delaying force,  running into the reinforcements. The the flank waves of Hormaguants attack the hard-pressed defenders of the Industrial Complex.

Advancing Tyranid units engage with Space Marine reinforcements
Fierce fighting in the Industrial Complex
The final reinforcements of Planetary Defence Force units arrive as the Warrior Prime and Commander Bariel are engaged in combat. They quickly moved to make a last stand in the Industrial Complex just before Commander Bariel was defeated.

Final reinforcements arrive as Commander Bariel and the Prime battle it out
The last stand inside the complex
A victory to the Tyranids...

Summary

This proved to be a most enjoyable game which could have gone either way. The battle between force commanders and final brave, but futile, last stand providing an exciting end to the game.

The changes to the combat mechanism had worked out well. 

Unit of the game goes to the Warrior Prime for leading the attack and final combat showdown with the Space Marine Commander.

Warrior Prime (and pet) - Unit of the game

Tuesday 16 February 2016

WW2 One Hour Wargaming

As I have completed 90% or more of my WW2 miniatures I though I'd try out a game. At the same time I was trying out some rules based on the WW2 rules from One-Hour Wargames (Neil Thomas). No surprise here if you have read this blog previously. However, in the rules I have chosen a combat mechanism "more chaos" from John's Wargame Page post titled "A modification…or two…of 1 Hour Wargames". With this mechanism units are eliminated after 3 hits and between 1 and 3 dice are rolled depending on the combat situation.

Here are a couple of pictures of a test game in progress. The scenery is for 15mm miniatures as I am yet to produce any scenery for 20mm.
Early Stages of a WW2 Game
The rules cater for the following unit types: Infantry, Motorised Infantry, Armoured Infantry, Light Reconnaissance, Armoured Reconnaissance, Tanks, Anti-Tank Guns, Self-Propelled Anti-Tank Guns, Mortars, Artillery and Self-Propelled Artillery.


Movement uses movement sticks
British forces advance


Saturday 13 February 2016

Mini Sci-Fi Campaign - Battle 4 Part Two

The battle was fought using scenario 6 from One Hour Wargames by Neil Thomas. The layout was modified for a 6' x 4' table with a 12" grid for use with my Sci-Fi Grid-Based rules, a variant on rules from One Hour Wargames.

The Tyranid battle plan was quite simple. Leave a couple of Hormagaunt units to defend the Habitat and the rest to be used in an all out assault on the road crossing of the lava flow. The combined Space Marine and Planetary Defence Force (PDF) of the Imperium had plans to hold the crossing and counterattack on the flanks, using gaps in the flow that only they knew about and could use in the game by Imperial forces.

Battle Report

The Tyranids threw themselves against the barricaded crossing, which was treated as broken ground from a rules perspective. They lack of distance shooting capability meant the quicker they engaged the better.
The Tyranid in full swing and supported by sep-striking gargoyles
Deep-striking Raveners quickly eliminated the Basilisk within a turn of its arrival. A good start for the Tyranid hordes.

A surprised Basilisk assaulted by Raveners
A second wave of Imperial support arrived on the flank using a gap in the lava flow. Far away at the road crossing the beleaguered Imperial forces were standing firm and starting to take a toll on the attacking Tyranid units.

Imperial Support arrives on the flank (the Sergeant on top of a vehicle indicates the Tactical Squad are passengers) 
The counterattacking forces arrive with the fast Motorcycle unit attacking with all support guns blazing, thinning out the Tyranid attackers.

Space Marine units head for the Tyranid flank and Habitat objective
As the Tyranid assault was faltering under a hail of fire, the Assault Marines swooped in using their deep-strike ability to engage and eventually dispatch a Carnifex. The threat of the assault was gone.

Assault Marines put the final nail in the Tyranid's coffin
The Space Marines attempt to achieve the game's second objective of the ruined habitat. While the Warrior Prime was left trying to extract itself from the assault on the road crossing. Only to be run to ground and eliminated by Terminators and Assault Marines.

A Tactical Squad attempt to take the Habitat

Space Maine units hunt down the Warrior Prime
The Habitat was eventually taken as additional weapons were bought up to support the assault. The game ended with both objectives, the road crossing and habitat, occupied by the Imperial forces.

The final moments before taking the Habitat

Unit of the Game

The Space marine Motorcycle squad was for me the unit of the game, arriving just in time and with effective flanking fire to end any opportunity of a Tyranid victory. I almost went "Brroooom! Brroooom!" as I moved them across the table ;-)

Brooom! Brroooom!

Summary

While not the most exciting game once it became apparent the Tyranid assault was going to fail. There was interest as to whether the Tyranid Prime could extract itself and escape. However, this game prompted me to look at the attack rules and the pinning of units. As a result I updated the rules (see link on top left) to:

  • use half the number of dice for cover rather than having to roll a higher dice score; 
  • modified the to hit scores for full and heavily armoured troops; and
  • the removal of unit pinning so a double 6 on hits now stops a unit immediately counterattacking as a reaction to the attack.
This changes worked ok in the next battle which I now need to write up. It takes longer to write up the battle report than it does to play a game.

Thursday 11 February 2016

Mini Sci-Fi Campaign - Battle 4 Preparations

Following on from a successful counterattack by Space Marine Commander Bariel, which halted the advancing Tyranids led by a Warrior Prime. Imperial reconnaissance drones have spotted another large Tyranid force led by a Hive Tyrant advancing out of the bridgehead. A combined Space Marine and Planetary Defence Force (PDF) is quickly assembled under the command of Master Scout Sergeant Tobias to counter the treat.
Master Scout Sergeant Tobias (a four point character)

Imperial Forces

A nicely balanced Space Marine force was assembled with support from a PDF Basilisk and Sentinel. The Sentinel interestingly is the only unit with an observation ability for indirect fire from the Basilisk, and will have to be used wisely.
Imperial Forces (Space Marines and Planetary Defence Forces)

The selection of Tyranid units was heavily weighted towards assaulting units (4 x Hormagaunt units!) and only a few shooting units. The deep-striking Gargoyles and Raveners will provide some nasty surprises for the Imperial defenders.

Tyranid Force

The Battle

A quick dice roll of the two remaining battles in the current campaign phase identified scenario 18 (counterattack) from the trusty One-Hour Wargames book as the next battle to be fought. Until the Tyranids gain a victory they cannot proceed to the next campaign phase. See a previous post for campaign set up and phases.


All Tyranids units with the exception of deep-striking Ravener and Gargoyle units start on the board around the ruined habitat blocks. Only two Imperial units begin on the table. The remaining units, with the exception of deep-striking Assault Marines, must arrive on turn 2.

Only Imperial Forces with their local knowledge can use the two side gaps in the lava flow to cross. Both sides can use the road to cross the lava flow.

Victory goes to the side holding both the lava road crossing and habitat square with road access (not the whole town).


Saturday 6 February 2016

Reading and painting, but no games

This week we have had guests staying and my hobby time has been limited. As a consequence I have not been able to get on to the next battle in my mini Sci-Fi  campaign.  However, I did find some time slots to complete some WW2 models which were in a half completed state.
Late WW2 British Force - each unit represents a company
Late WW2 German forces completed so far
I am now so close to completing all the units I need to start gaming, but I added two more models to the list being able to pick up two Achilles Tank Destroyers by ArmourFast during the week. I am really impressed by ArmourFast models. As a wargamer rather tham modeller, I find their models quick and easy to make and they are my first pick if given a choice of manufacturers.

Current Reading
I have just started reading Simulating War by Philip Sabin. I have just completed part one - The Theory - and am just about to start on part two - The Mechanics. It will be interesting to see this book   influences the WW2 rules I use, modify or come up with.

Wednesday 3 February 2016

WW2 One Hour Wargaming

I am now in sight of finishing my WW2 forces and I have started jotting down some rules. As I mentioned a few blogs back, I am looking at some rules which will be a mash up of PanzerBlitz and One Hour Wargames (If such a thing is possible). There are also some interesting ideas from John's Wargaming Page which takes the Captain Kobold approach for hits in a One Hour Wargame format and expands upon them with some additional options for determining hits.
German Motorised Infantry, Armoured Infantry and Reconnaissance units
One aspect of One Hour Wargaming I have come to appreciate is the basing. It removes the need to move multiple individual miniatures speeding up the game. All my WW2 units are based with a 3" frontage and represent a company of infantry, armoured infantry, reconnaissance, tanks, artillery, etc.  The models are 20mm scale, vehicles fit nicely on a 3" x 4" base and 5-6 figures fit on a 3" x 3" base without looking crowded.

I have taken a very rough and ready approach to painting these miniatures as I didn't want to take too long to complete them, and secondly, I'm finding as I get older my eye-sight does not pick up detail unless they are 28mm miniatures. This approach uses a base colour, a dark brown wash, a light brush over with the base colour slightly lightened, any details are painted (guns, boots, hands and faces) and a final dry brush in light sand colour.
British units advance supported by 25 pounders and Sexton (Airfix Sherman conversion)
My jottings on the rules so far have...

Sequence of play - a series of turns with control passed between players as they roll for the initiative & activate units. This continues until all units have been activated. Ties are rerolled.

Reactive attacks - units not yet activated can attack any enemy unit moving into range. They are treated as activate for the remainder of the game turn.

Attacks and Hits - Yet to be decided.

Supply - For each unit requiring supply roll a D6, if the resulting score is greater than the calculated supply difficulty the unit is successfully resupplied. Supply difficulty is calculated by measuring the distance of the unit from the player’s deployment table edge and divide by 10 rounding up. For example: an out of supply unit 28” from its deployment table edge has a supply difficulty of 2.8 rounded up to 3. A roll of 4 or more is required to resupply. Problem - I am yet to determine what trigger will cause a unit to be out of supply.

Varible Movement - a unit will have a set move allowance to which the score of an average dice (2,3,3,4,4,5) is added.

Overruns - some mobile units will be able to move and attack an enemy unit within their movement range (e.g. Tanks and Armoured Infantry units).

Artillery/Mortars - same approach as One Hour Wargames for observation and indirect fire. In addition units can use up all their ammunition with intensive fire allowing them treble their attacks for an attack before being removed from play.


Monday 1 February 2016

Mini SciFi Campaign - Counterattack

This is the third battle report of a mini Sci-Fi campaign using secarios from the book One Hour Wargames, and a Sci-Fi rule variant of the rules from the same book (link top left of page).

For this phase of the campaign, we have a Tyranid force led a warrior prime pushing along a road leading from the established bridgehead. In their way is a small contingent of the Planetary Defence Force (PDF) supported by Space Marines led by Commander Bariel, who has taken over overall command and is launching a counterattack to thwart the Tyranid advance.

The scenario selected with a dice roll is #6 from One Hour Wargames.

Imperial Force (Planetary Defence Force and Space Marines)

1 x PDF squad found manning the barricades
1 x Tactical squad plus Rhino
1 x Tactical squad
1 x Razorback with high impact weapons (lasgun)
Commander Bariel (5 character points) with tactical weapons
Chaplin Tolecius (5 character points) with power assault weapons
Librarian Cashrel (4 character points) with tactical weapons or psychic weapons

6 units were laid out as described in the scenario. The seventh unit was then diced for to determine area if positioned on the flank or with the barricade.

Tyranid Force

Warrior Prime (5 character points) plus Tyrant Guard (droid ability)
Carnifex (3 points) with power assault weapons and Hormagaunt Brood
Carnifex (3 points) with support weapons and Hormagaunt Brood
1 x Genestealers Brood
1 x Gaunt Brood (cloaking ability)
1 x Raveners
1 x Hormagaunt Brood

The selection went well for the Tyranids with picking up two Carnifex units with supporting Hormagaunt Broods.

The Game

The game starts with most of the Tyranid forces moving down the road towards a road block of manned by PDF, Space Marine Tactical squad and Commander Bariel. The remaining Space Marine units are spread out down the right hand side of the board. The Tyranids have two units, Genestealers and Ravener Brood, still to arrive by deep-striking into any open square and stealth to arrive on any table edge.
Game setup
There was one rule change I made for this game which was to do with roads. When starting and ending a move on the road a ground unit can attack as part of the same action. So they are treated like a fast unit and could perform a move/attack action when moving down a road.

Imperial forces rat the barricade readied themselves for the coming assault
The Space marines moved on the flank of the advancing Tyranids, who responded by charging in with Hormagaunt Broods and Carnifex. The first decisive blow was struck by the Librarian who's bolt of warp lightening struck down the Carnifex with a roll of three 6's. In the process he over extended himself and as a consequence suffered a wound. This attack continued and saw Chaplain Tolecius join the fray to help snuff out the attack, but not before succumbing to the slashing Hormagaunt talons.

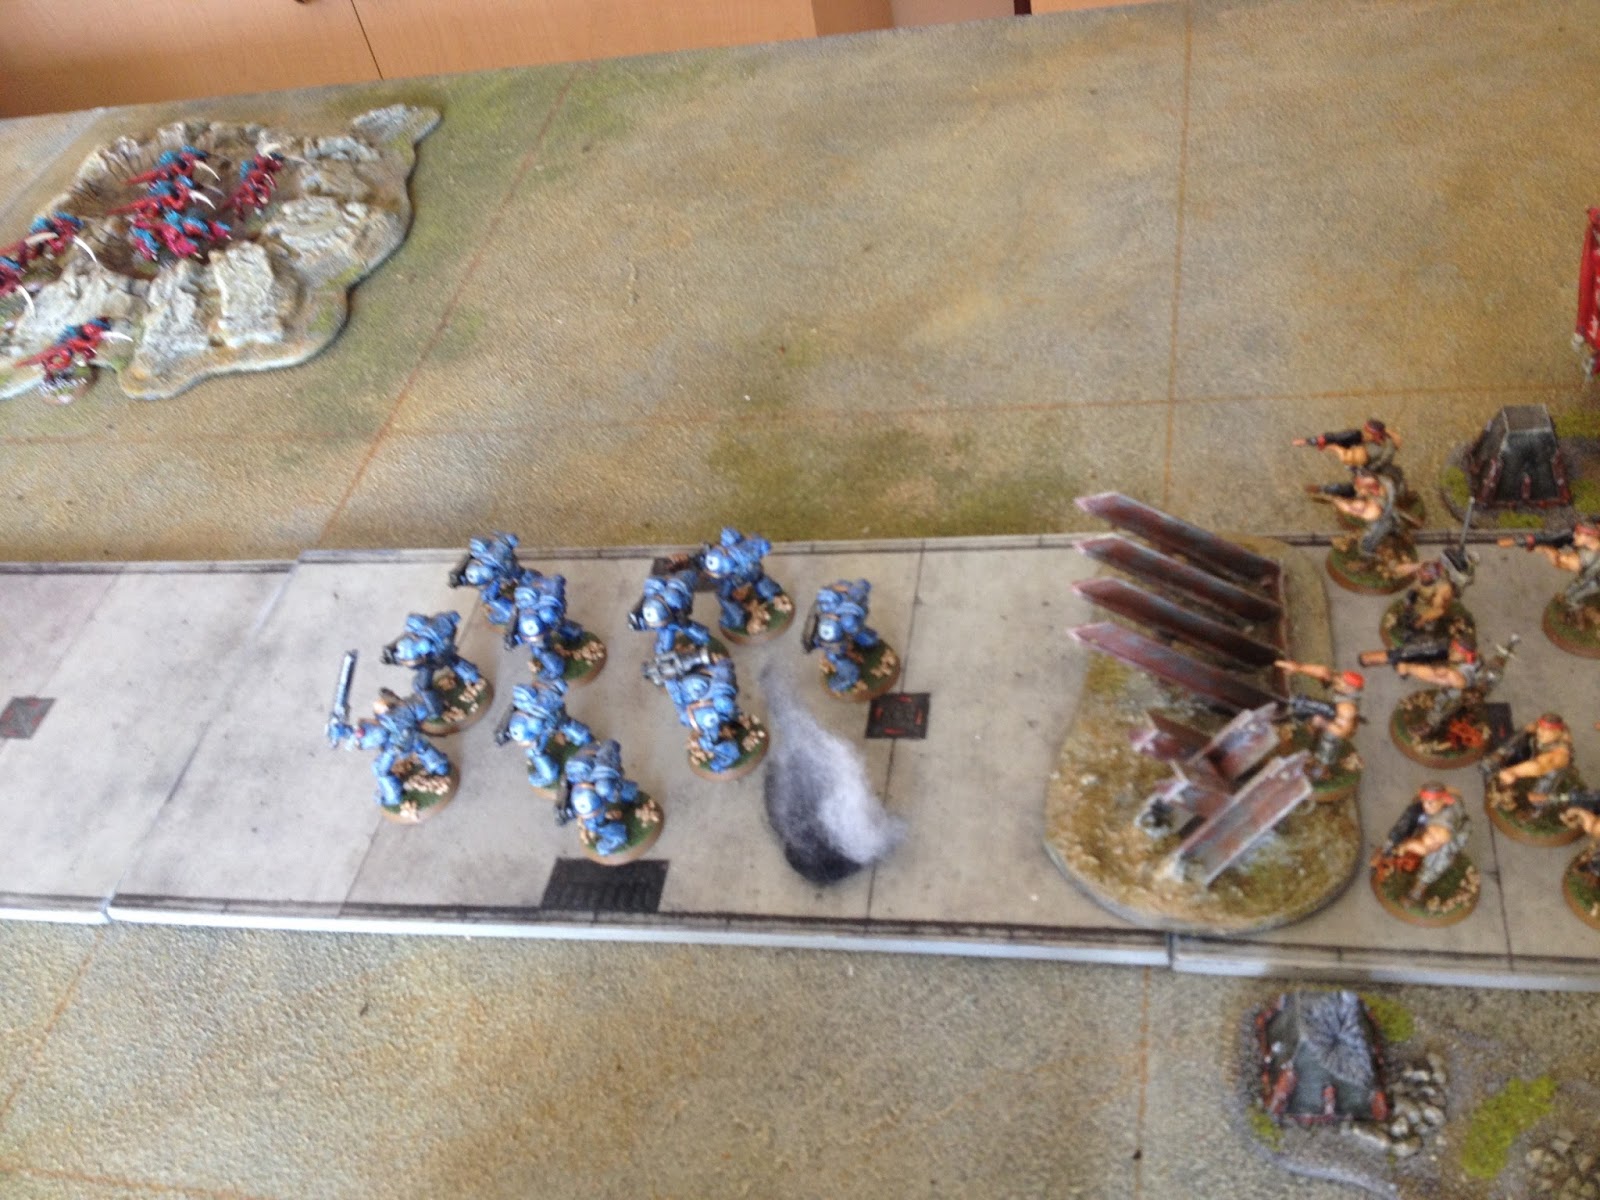
Space Marine flank attack draws off Tyranid units
A sortie from the barricades by Space Marines engaged with the advancing Tyranid units. Using the rule for roads which allow ground units to move and attack as one action.


Deep-striking Ravener Brood appeared and attacked the Razorback which survived the attack and quickly retired towards the barricade before any damage was done. Support fire from the Librarian and from the barricade started to whittle down the Ravener Brood before Commander Bariel led an attack to finish off the Ravener threat.

Space Marines getting the better of their opponents
Finally, the Genestealer Brood arrived and quickly assaulted the barricade defenders. The remaining Space Marine units all started to consolidate around the barricade as the few remaining Tyranid units tried to force their way down the road in a final effort.


Genestealers arrive probably 2 turns too late to turn the battle
Generally things were not going the Tyranid's way and once the Genestealer Brood was eliminated that was the end of any treat and the Warrior Prime retired from the field.

Game end with the elimination of the Genestealers

Summary

Tyranid deep-striking and stealth units arrived too far apart, turn-wise, allowing Imperial units to gang up on them and deal with the treats one at a time.

Commander Bariel after this victory will continue in overall command and is looking for the next counterattack opportunity to bottle up the Tyranids.

Unit of the Game

The unit of the game was Librarian Cashrel who's psychic powers eliminated a Carnifex and helped in dealing with the Ravener Brood. 
Librarian and body guard (used to represent character points)