Sunday 29 July 2018

French Indian War Campaign - Game 19

The Battle of Fort Oswego, September 1758, has French forces commanded by Contrecoeur attacking a similar sized, but less experienced, British force commanded by Amherst. This is a major battle and its outcome will have a level of importance for the on-going campaign being run by Jonathon at Palouse Wargaming Journal.

The quality of the commanders, Contrecoeur and Amherst, means they can improve the quality of their units. From a rules perspective this increases the number of hits a unit can absorb before being eliminated. For example, a Militia unit of 6 hits will increase to 8 hits the equivalent of a Regular unit. The French improve the quality of two Regular regiments and the British one of their Militia regiments.

Each regiment is represented by 2 units on the tabletop and the following order or battle was used:

  • French = 3 x Regular units (10 hits), 1 x Grenadier unit (12 hits), 2 x Regular unit (8 hits), 2 x Irregular unit (6 hits) and Artillery unit.
  • British = 2 x Regular unit (8 hits), 2 x Militia units (8 hits), 2 x Militia units (6 hits), 2 x Cayugu warband (6 hits), and Artillery unit.

The French arrive on either end of the tabletop and must split their force evenly.

Initial setup with British in the centre and French forces on either end of the tabletop.
British force wait for the impending battle.
British have some defensive earthworks manned by Militia
The early moves has the French advance on either flank and engage the British outside the fort.

French advance and the fort artillery open fire.
French Irregulars move swiftly through the woods.
The force commanded by Contrecoeur is harassed by the Cayugu warband which has moved into the wood. 
French Irregulars occupy the woods.
On the other flank British Regulars come under fire from the French Irregulars positioned in the woods. 
The middle game has the direction of attach shift towards the fort.

The Cayugu warband is putting up a stout defence against the French advance.
The attack on the fort begins from both sides.
The Militia unit and Warband is putting up a strong defensive effort. So much so only one French unit is available to attack the fort.
All units are engaged in combat.
The French attacks were suffering for some very effective British shooting and they may have over-stretched themselves.
As the game moves into the end stage it is in the balance with neither side having a clear advantage.

French Regulars retire out of range from the fort defenders to avoid units being eliminated and reducing the army resolve.
The Irregulars positioned in the woods are suffering and taking losses from Regulars.
French Grenadiers finally clear the woods of Cayugu units, while the Militia hang on behind their earthworks. This Militia unit was proving very effective having eliminated the unit with Contrecoeur assigned. The French commander retiring wounded from the battle. 
British Regulars retire where they can to avoid further losses. At this point the French attack had stalled on both flanks.
The only effective French unit remaining was their Grenadiers who having cleared the wood, now launched themselves on the stubborn Militia and started rolling up the line. 
French success was in the hands of their Grenadiers as the British Regular unit will turn to support the Militia. 
The Grenadiers delivered victory for the French.
A marginal victory for the French thanks to their Grenadiers and careful management of their units. Retiring any unit which where close to elimination. It did look at one point they had over stretched themselves with attacking fort on two fronts.

Losses on the tabletop were:

  • British - 2 Militia units, 2 Warbands, and artillery unit
  • French - 2 Regular units and 2 Irregular units.

All in all a very engrossing game which went down to the wire.

Saturday 28 July 2018

French Indian War campaign game setup and some rules

My plans for this weekend's wargaming is to get around to play the next game in the French Indian War campaign. Jonathan posted the campaign moves leading up to this game earlier in the week (see Palouse Wargaming Journal) but I have been busy playing some Napoleonic games during the week and shrinking my rules (see later).

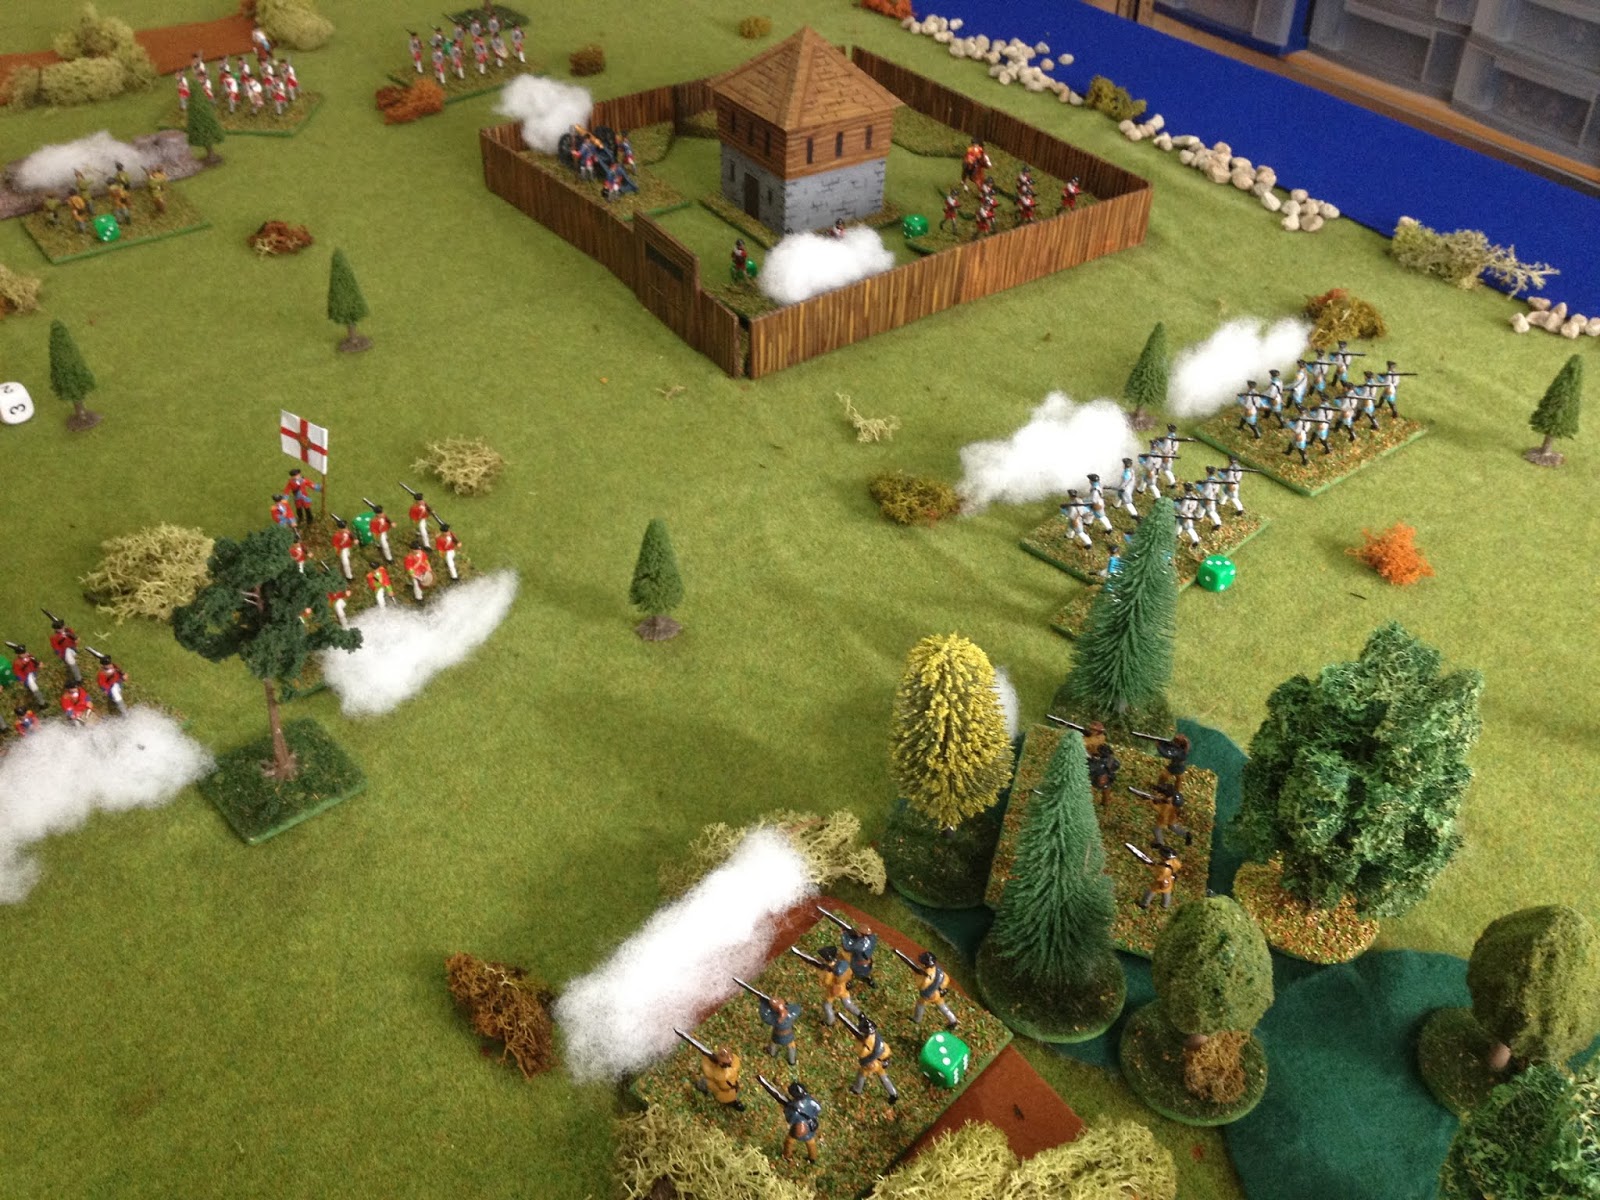
Fort Oswego has been fought over a couple of times already in this campaign. However, there is a slight twist this time. Jonathan has noted that the French start out as a split force are arriving from the West and the South. This has been translated to their units arriving on opposite ends of the tabletop.

Notes and sketch for the next campaign game
The British forces commanded by Amherst cannot be positioned within 4 squares of either flank, where the French are expected to arrive. On my 6x4 foot gridded tabletop this translates to 24 inches. Amherst also benefits by having one artillery piece which must be located in the fort and can have two prepared positions of earthworks.

The French, commanded by Contrecoeur, must split their force evenly. They also benefit from having one artillery piece. Looking at the orders or battle I expect to represent each regiment with two units on the tabletop.

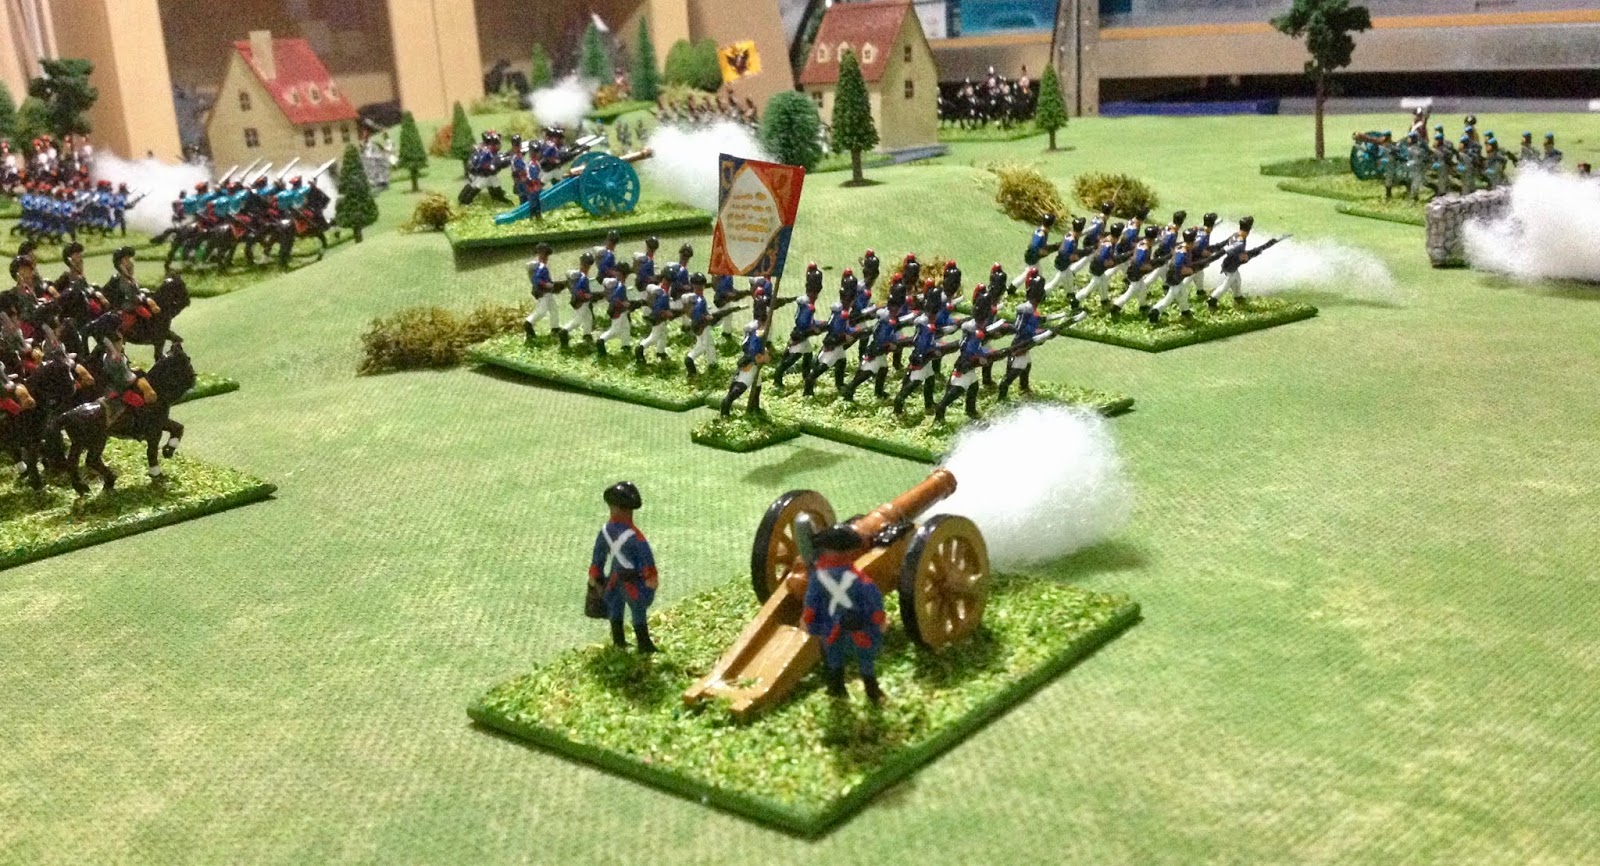
During the week I finally go to write up my D3 napoleonic rules based on One Hour Wargaming Horse and Musket rules with a few modifications particularly on how cover is dealt with and the more oblivious use of D3 dice (1,1,2,2,3,3) where combat results are either below average, average or above average. As my current interest I shrink the rules into a booklet (ezine) form, which is fun but also means transferring them from a document to a presentation format.

The booklet (3x4 inches) - There is already a crossing out which reflects my poor proof-reading abilities.
The booklet has 8 pages which fit onto one side of a sheet of A4 paper.
These rules do not presently use a grid, something I may change later on. If you are interested in the changes here are the rules as they currently stand. The modifications are mainly around:

  • Units disengaging from combat
  • Cover is treated through hits and elimination
  • Veteran units
  • Use of commanders
  • Army resolve

D3 Napoleonic Wargaming Rules

These rules are a variant of One-Hour Wargame Horse & Musket rules by Neil Thomas. They use a D3 dice (1,1,2,2,3,3) instead of a D6 dice (1,2,3,4,5,6).

They are geared towards games with 12 to 24 units per side.

Units

All units are singly based and represent the following unit types:

  • Infantry (Line Infantry)
  • Veteran Infantry (eg, Guard or Grenadiers)
  • Skirmishers (Light Infantry)
  • Cavalry
  • Artillery
  • Commander (only one per army)

Sequence of play

Players take alternating turns to move or shoot their units. A turn has the following phases:

  1. Movement
  2. Shooting
  3. Charges
  4. Elimination and Army Resolve

Movement

Unit movement allowances are:

  • Cavalry - 12”
  • Skirmishers and Commanders - 9”
  • Infantry and Artillery - 6”

Unit may move up to their movement allowance, but never exceed it.

All movement must be in a straight-line.

Units may pivot on the centre at the start & end of their movement.

Movement must cease once a unit comes within 6” of an enemy unit. Unless the units is moving directly towards an enemy with the intent to charge them.

Infantry & artillery units engaged in combat or within 6” of an enemy unit cannot move, but may pivot to face an enemy. This counts as a move.

Cavalry & skirmish units are allowed to disengage from enemy units.

Interpenetration

Skirmishers & artillery may move through other units.

Disengaging

Once a unit is within 6” of an enemy unit they are considered to be engaged in combat & cannot disengage until the enemy is removed.

Cavalry & skirmishers are the only units which can disengage providing they move away & do not move within 6” of another enemy unit.

Terrain Effects


  • Woods - Provide cover & only Skirmisher units can enter
  • Towns - Provide cover & only Infantry & skirmishers may end their move in a town. Only one unit may occupy a town.
  • Marsh/Lakes - impassable to all units.
  • Rivers - impassable except at bridge/ford.
  • Hills - Artillery line of sight is not blocked by units.
  • Entrenchments - Provide cover for infantry, skirmishers & artillery units. When shooting units roll 2D3 picking the highest score.

Shooting

Only units that did not move can shoot.

Units have a 45 degree field of fire, unless they are in a town when they have a 360 degree field of fire.

Units must have a clear line of sight.

Muskets have a range of 6” & artillery 24”.

Roll the dice to determine the number of hits:

  • Infantry units roll D3
  • Veteran units roll D3+1
  • Skirmishers roll D3-1
  • Artillery units roll D3-1

Any target cavalry or skirmish unit can retire their full move to reduce the number of hits they take by 1.

As soon as a unit shoots place a marker (eg cotton wool) to show it has been engaged in combat. The unit may not move unless it can disengage or the enemy are eliminated.

Note - See elimination section for how cover is dealt with.

Charges

Only cavalry can engage other units by charging. This occurs whenever cavalry moves into contact with another unit.

Cavalry cannot engage units in cover.

The attacking cavalry unit rolls D3+1 for the number of hits which are modified by the following:

  • If a target occupies a hill -1 from number of hits.
  • If a target is cavalry -1 from number of hits.
  • If a target unit is attacked on its flank or rear, double the number of hits.
  • If the target is a skirmish unit, double the number of hits.

Artillery units are eliminated if charged & are not within 3” of any infantry unit. If within 3” then they are treated as unmanned until the cavalry move away.

Eliminating Units

A hit represents a combination of casualties, exhaustion & disorder caused to a unit by combat. Units are eliminated when they exceed 6 hits.

Units in cover can take 12 hits before being eliminated. However, once a unit in cover has taken 6 hits they are not allowed to move.

Veterans

Both armies can have up to 2-4 veteran infantry units. A veteran infantry unit rolls D3+1 when shooting.

The loss of a veteran unit deducts 2 from the army resolve.

Squares

Units can form into a square during their move. When in a square they cannot shoot & cavalry cannot attack them.

Army Resolve

An army's resolve is equal to half the number of units & plus 1 for the General, rounding up any fractions.

Each unit is eliminated reduces the resolve by 1, or 2 if a veteran unit.

Once an army’s resolve is zero, the game ends & the army retires from the field of battle.

Army Commander

All armies have a commander.

Commanders which do not move during a turn can issue move orders to all units within 6”. These units are allowed to move an additional 6”.

Commanders cannot be engaged in combat. If an approaching enemy unit comes within 6” they must move away during their turn.


Wednesday 25 July 2018

A couple of books on the English Civil War

Painting of my English Civil War units has stalled this week. All due to me straining my back doing some gardening at the weekend. Sitting for any length of time at the painting table is proving problematic. However, a couple of second hand books on the English Civil War arrived sooner than expected to add some cheer to the week.


I have only had a chance to browse through the Battlefield Atlas. It has some very nice maps of the movement of forces prior to battle along with detailed maps of the battles themselves. These will provide inspiration for some mini campaigns and wargames, once I get back to the painting table to complete a few more units for a One Hour Wargame style game.

Sunday 22 July 2018

Napoleonic Game

Having messed around during the week tweaking some Sci-Fi skirmish rules. I wanted to play a different period. My choice was between a WW2 and Napoleonic game. In the end it came down to a napoleonic game and I hopped on to the Command and Colours website to view their battle maps for ideas.

A ground shot of the game in progress
After a quick browse through the options I settled on playing a game based upon the Battle of Jena (18 October 1806 - early morning). I say based upon, as the Prussian forces will be represented by a combination of Spencer Smiths miniatures looking vaguely like Austrians and Prussians.

A print of the battle

The Orders of Battle are slightly different to those from the Command and Colours site. Due my armies to not having quite sufficient numbers of cavalry units.

Prussian:
7 x Line Infantry
1 x Grenadier
3 x Cavalry
2 x Light Infantry
2 x Artillery

French:
7 x Line Infantry
1 x Grenadier
4 x Cavalry
2 x Light Infantry
2 x Artillery

The planned tabletop layout was sketched out based upon the command and colours map. The Prussian forces can deploy up to the halfway point of the tabletop. While the French within 12 inches of their base edge.

Intended tabletop

The deployed Prussian forces were split into two as they occupied Closewitz and Lutzeroda. The French were deployed more to the centre.

The opening turns has the French move upon the towns of Closewitz and Cospeda (which was quickly occupied by Prussian light infantry)
French units move forward in the centre.
The attack on Cospeda intensifies.
The Prussian forces defend the towns, but their centre is exposed and the French push their cavalry forward. 
The French assault on Cospeda is struggling.
The Prussians have to reenforce Cospeda.
Midway through the battle and the French have given up on trying to take Cospeda and are concentrating on the Prussian centre and the town of Closewitz. 
The Prussians reposition their units in an attempt to reenforce their centre.
The French pressure is starting to tell and the Prussians move the remaining reserves to hold Closewitz. 
The French appear to have the upper hand holding the centre, but their losses on the flanks means their army resolve is low.
The French army's resolve fails with the Prussians still holding the three towns.
An enjoyable game to play this Sunday morning prior to heading out to the garden. The command and colours maps provide a useful source of ideas for battles which can be quickly set up.


Thursday 19 July 2018

French Indian War Campaign - Game 18

For the next campaign game we have a French force under commanded by Drucour attacking Fort Stanwix. As ever the operational moves and campaign background are to be found on Jonathan's Palouse Wargaming Journal.

August 1758, The Battle of Fort Stanwix

Order of Battle:

British:

  • 1 x Regular regiment represented by 3 units on the tabletop.
  • 1 x artillery unit

French:

  • Commander Drucour (A0D1)
  • 1 x Regular regiment represented by 3 units
  • 1 x Irregular regiment represented by 3 units
  • 1 x artillery unit

For the tabletop setup I was able to reference photos from campaign Game 8 where Fort Stanwix was previously fought over.

Game setup
Drucour places his Militia and artillery on the left flank.
The Militia and artillery move forward under fire from the fort.
The artillery supported by Militia manage to take up position on the hill and start harassing the fort defenders.
Artillery positioned on the hill become a distraction and annoyance to the fort. A few casualties were suffered by the Militia in the process.
Within the fort the artillery is repositioned to attack the hill and the main French line takes this opportunity to advance.
The advance on the fort goes without a hitch.
As the main French line comes within musket range of the fort their Militia also join in the attack.
While the British are taking hits in the fort the French suffer the first unit eliminations with the loss of their artillery and a Militia unit.
Success for the French, the loss of a British units allows a unit scales the fort walls and get inside.
Inside the fort the British rally and attempt to repulse the lone French unit inside the fort who lack any support.
The attackers are finally repulsed.
The attack continues
A second British unit is lost and the walls are scaled again. This time the weakened defenders surrender

A useful victory to the French who were able to coordinate their attacks on the fort.