Sunday 29 May 2022

WW1 Palestine campaign trucks and figures

I am slow continuing to add to my WW1 Palestine campaign armies with the addition of some more Turkish units and a machine gun. My intention with adding units is to give myself the option to expand the forces involved on the tabletop to 8 units rather than just the 6 unit One-Hour Wargaming style games. 

In addition to units I want to represent a few trucks on the tabletop regardless of whether the rules require them. They can be there just as scenery. This is because supplies were a major feature of the Palestine campaign with the inhospitable terrain.

A scratch built truck makes an appearance on the tabletop.

The trucks are made from wood and cardboard. They are not trying to represent a particular type of truck and are very generic. Here is a brief overview of the steps involved...

The basic shape is cut out used. My schoolboy woodworking skills are proving to be useful again some 50 years later.

A piece of MDF is used for the cabin area.


Balsa wood is used for the front arches. I first cut out the shape in card, glue the card to the balsa wood and trim/sand to shape. Card is also used for the rear arches and tray area.

Surplus figures are trimmed and added to the cabin area. The wheels are made from thicker card and stuck on.

A number of trucks at different stages in the process. Green stuff is used for the head light and can be seen on the unfinished truck with wheels. The prototype gets a couple of coats of PVA before painting.

With most of my scratch build models I rely on roughly painting on areas of detail.

Another view of the finished truck. These photos are probably a tad to close, but they show the detail painted on which looks fine for me when wargaming.

A couple of Turkish units completed this week. They are Strelet's figures in tropical uniform, a change from HAT Industrie figures I have previously used.


Sunday 22 May 2022

More units for the WW1 Palestine campaign

My first few WW1 Palestine campaign games have been using forces made up of six units. While this is working well I would like the option to increase number of units in a game to eight units per side.

One unit I wanted to add was the Australian Light Cavalry. HAT Industrie do produce these figures, but these seem to be out of stock at all my usual sources. So I opted to try and convert some WW1 British cavalry figures.

A WW1 Australian Light Cavalry unit

I trimmed the WW1 British cavalry hats and slid over a cardboard brim with the centre punched out. The punched out centre being the same size as the head so I could slid it over and glue in place. I also trimmed these models with a lance to be a rifle or bayonet.

A cardboard brim has the centre punched out. The centre is the size of the head are slips over to be super-glued in place.

A view from the side.

Other units completed this week were some more ANZAC infantry and a machine gun. The reason for the camel in the background on the machine gun base is so I can add the base to a mounted infantry unit. After the initial stages of the Sinai and Palestine campaign, mounted infantry increasingly had additional support weapons attached to them.

ANZAC infantry

A machine gun base to be added to mounted infantry units

On the tabletop I am having a quick break from the recent WW1 Palestine campaign and returning to some Samurai games.

A Samurai game about to get underway.


Tuesday 17 May 2022

Battle of Beersheba 1917 game report

This post is a game report on the Battle of Beersheba. Details of the scenario setup can be found here on the previous post.

Troops deployed and objectives shown

The plan and orders for the Commonwealth forces were:

  1. Use two infantry units to take Tel El Saba which would be supported by artillery.
  2. Advance the mounted infantry and cavalry quickly across the plain and capture the guns. They would be followed by infantry supported by machine guns.

How did it all turn out...

The attack on Tel El Saba begins

Mounted infantry and cavalry move forward towards the Turkish lines around the town of Beersheba

First attacking casualties in the assault on Tel El Saba where the defending infantry units has supporting machine guns

The remaining mounted infantry close with Turkish artillery. One unit was lost closing with the Turkish trenches.

The attack on the Turkish trenches is aided by air support (event card)

The Turks counter attack

Tel El Saba is occupied. The first objective is taken and needs to be occupied, so the remaining unit cannot join the attack on the town.

The trenches are hotly contested and the cavalry having eliminated the artillery come under fire from the town.

Turkish aircraft make an appearance (event card again)

Both sides are taking casualties

With the trenches cleared. Commonwealth artillery support the attack on the town

The attack on the town is called off as the supporting infantry unit is eliminated

This is a hard game to win for the attacking Commonwealth forces. Of the four games I played using the scenario, the Turks successfully defended the town on three occasions and lost one time. Most of the games were close, coming down to the last few turns. 

The challenge for the attacking forces are:

  • They lose two units to take and also occupy Tel El Saba to meet victory conditions.
  • They will most of the time lose one cavalry unit to artillery fire as they advance across the plain towards the town. Then they are down to two attacking units to assault the trenches hopefully supported by their artillery.

On the one occasion the attacker won was when the artillery immediately focus on shelling Turkish trenches and Tel El Saba is assaulted by two infantry units, one of which has supporting machine guns.

A most enjoyable scenario to play.


Saturday 14 May 2022

Setting up a scenario for the attack on Beersheba 1917

Weekends that are rather miserable weather-wise, especially one's involving rain, always provide opportunities to get on with some wargaming. This Saturday was one of those days and gave me the opportunity to setup a scenario for the attack on Beersheba, Palestine, 31st October 1917. 

The attack on Beersheba was part of an overall plan to outflank the Turkish line and eventually take Gaza. The attack was made by the ANZAC Mounded Corps and is known for the charge by the Australian 4th Light Horse Brigade. They galloped across the plain to attack the entrenched Turks, and were successful in taking the town and importantly its wells.

The starting point for this scenario was from the "last crusade" rules (the scenario was kindly sent by Duc de Gobin - https://warfareintheageofcynicsandamateurs.blogspot.com). The scenario used a greater number of units than my current forces, which are based around One-Hour Wargames (OHW) games with 4 to 6 units per side.

The scenario had two objectives, the town of Beersheba and its water wells and a defended hill called Tel El Saba. I remembered OHW had a scenario with two objectives (scenario 21) and was able to use that to get an idea for setting up a game with balanced forces. So with some reposition of the town (Beersheba) I was able to rework the OHW scenario into a version for the attack on Beersheba.

The tabletop setup for the game

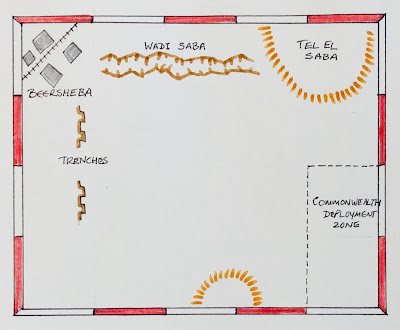
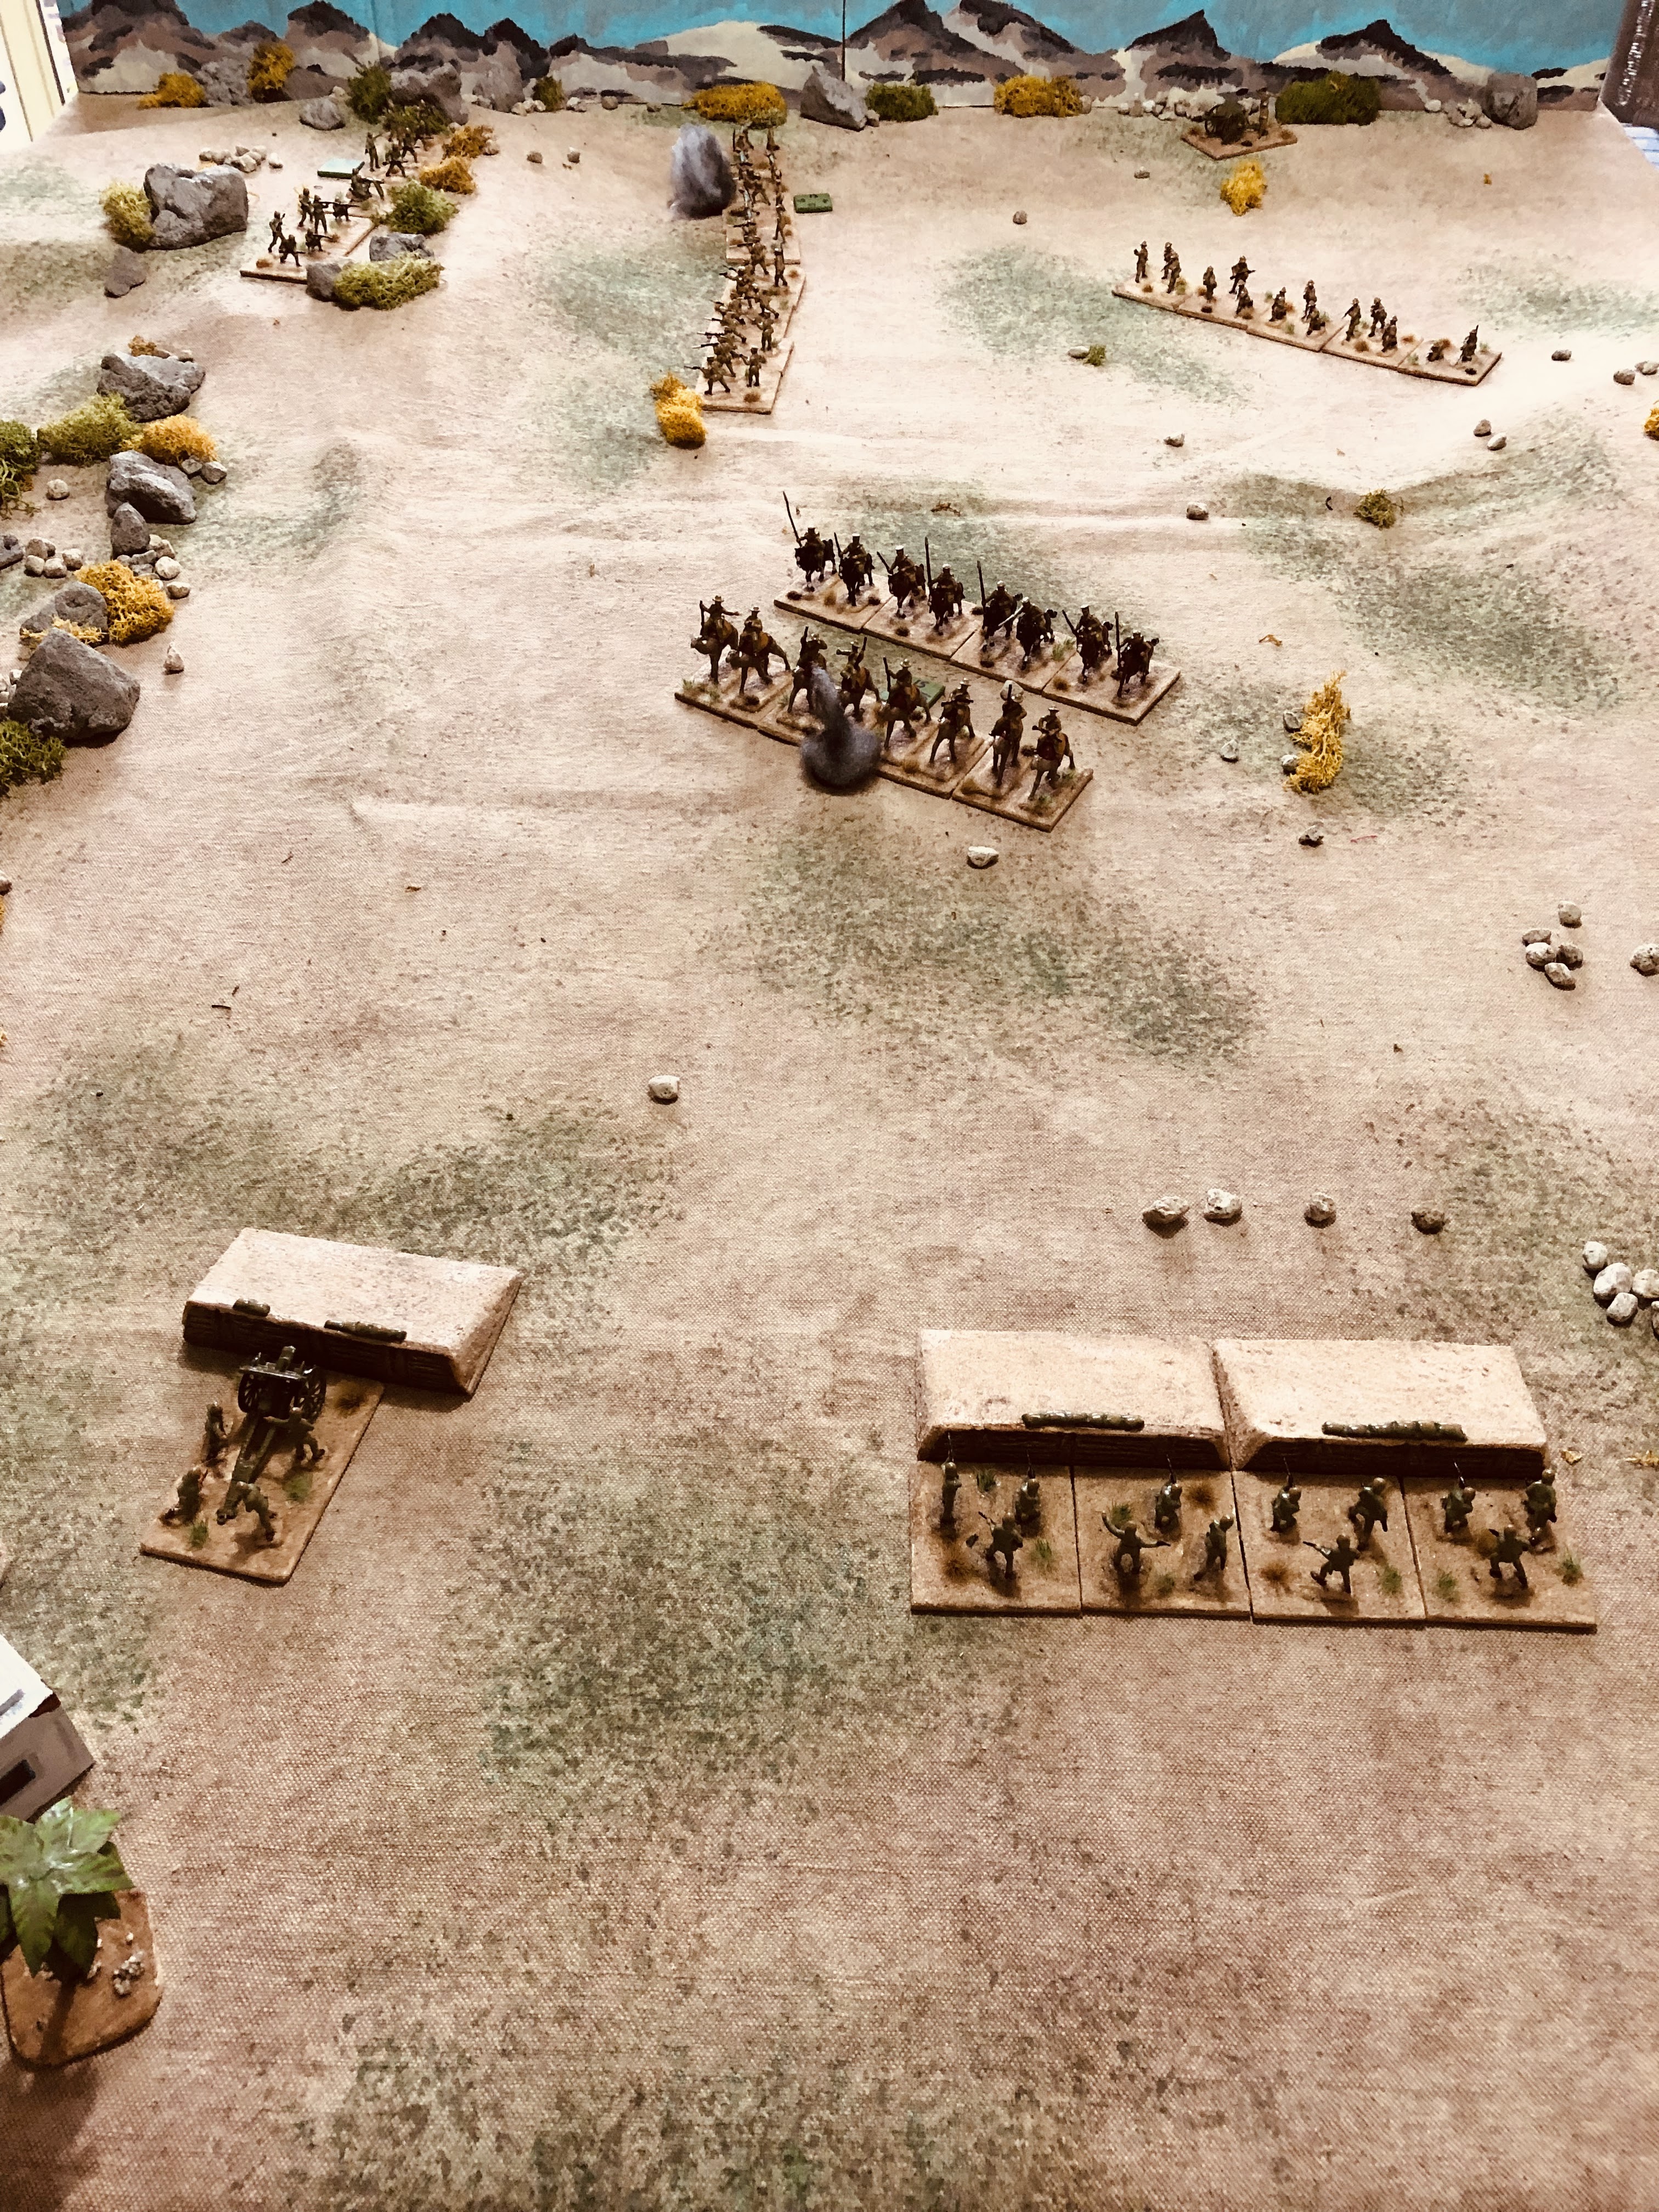
The tabletop is 5x4 foot. Wadi Saba is impassible and Tel El Saba is  difficult terrain where units can claim cover when positioned on it.

Turkish Order of Battle:

  • 2 Infantry
  • 1 Artillery
  • 1 Infantry with machine gun support
The infantry with supporting machine guns must occupy Tel El Saba. All remaining units occupy the town and trenches.

Units occupying Tel El Saba are treated as being in rough terrain (cover) and cannot be charged.

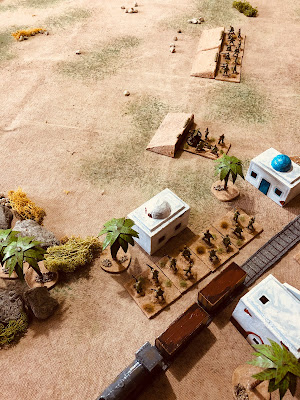
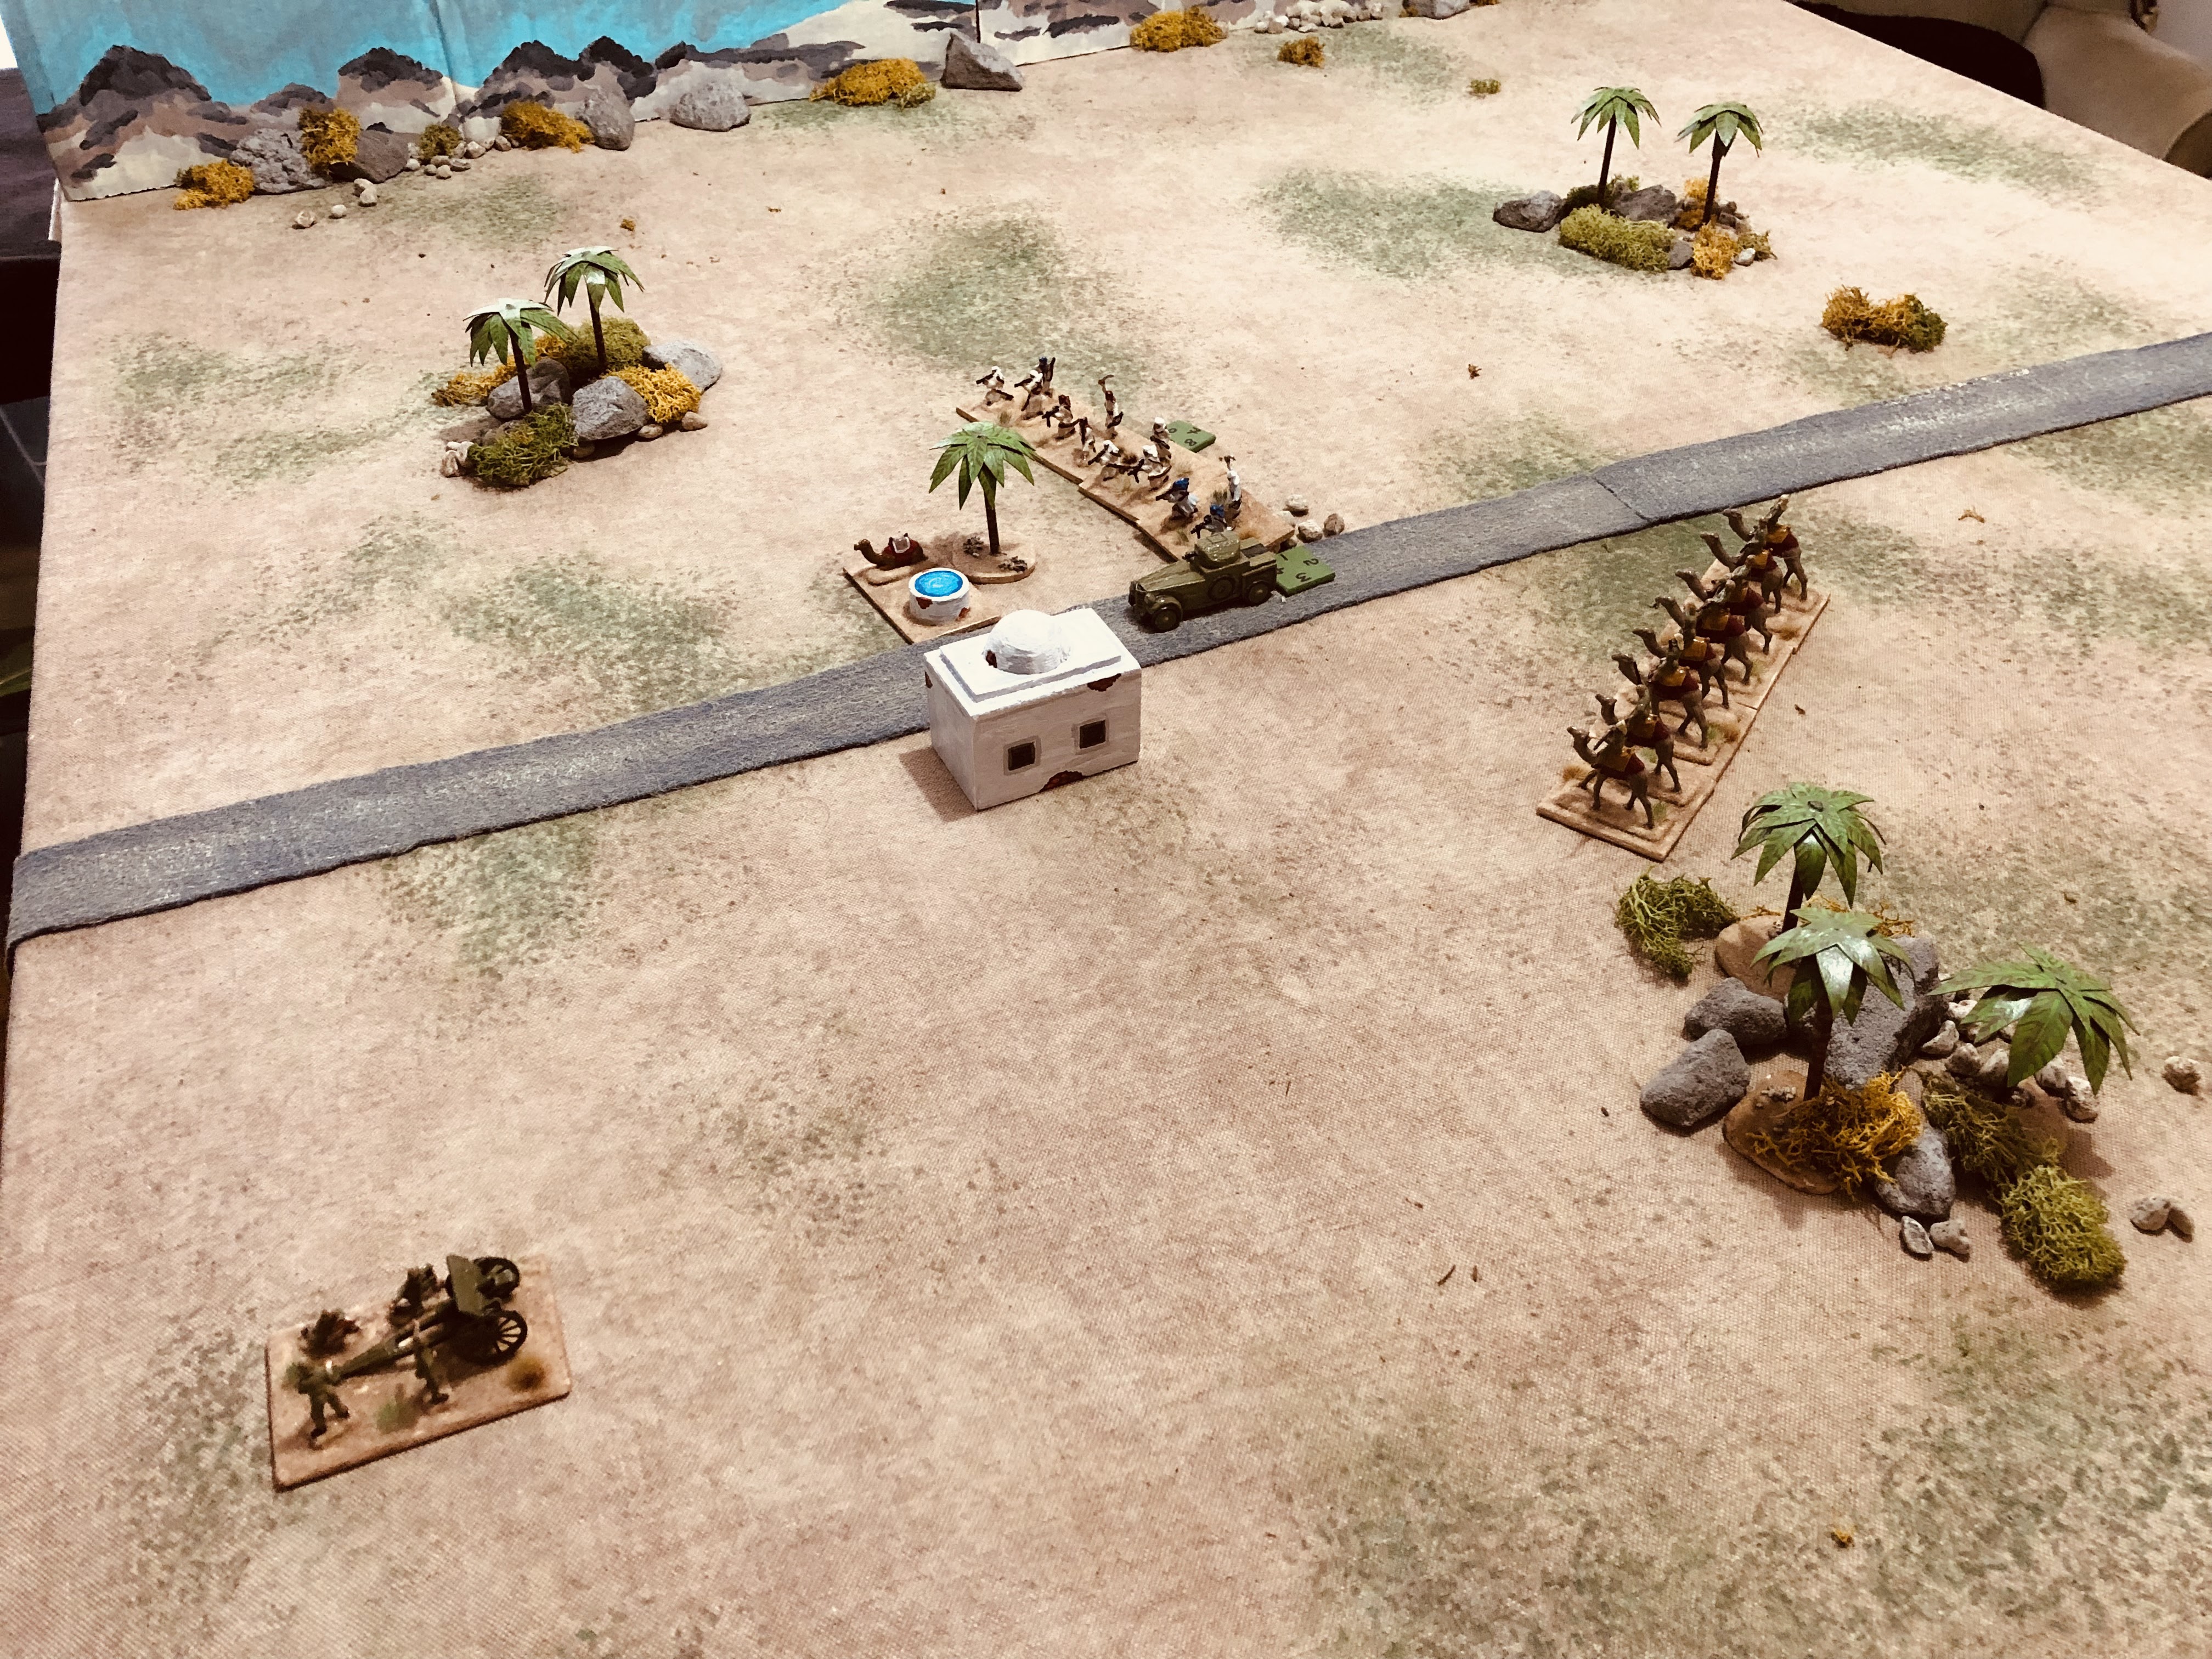
Turkish troops occupy the town and trenches

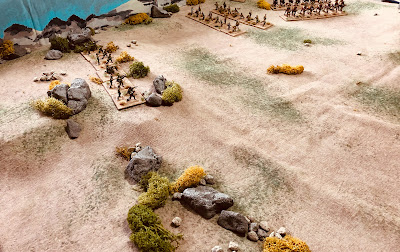
The Turks occupying Tel El Saba

Commonwealth order of battle:
  • 2 Infantry
  • 1 Artillery
  • 1 Infantry with machine gun support
  • 2 Cavalry/Mounted Infantry
They must deploy in Zone 1.

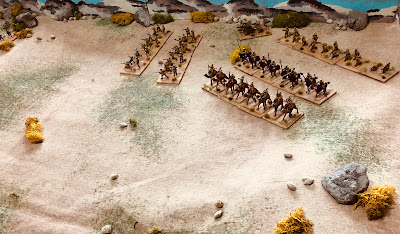
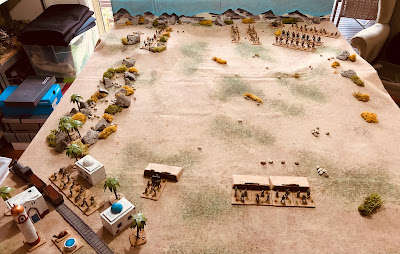
Commonwealth troops deployed

Commonwealth forces win by taking and occupying the town Beersheba and the hill Tel El Saba. Otherwise it is a Turkish victory.

The game will use Machine Age rules from OHW with the following changes:
  • Cavalry/mounted infantry can charge providing they have 8 or less hits. Over 8 hits and they cannot charge. Roll D6+2 when attacking and retire 6" if enemy unit not eliminated.
  • Units are eliminated after taking 17 or more hits.
  • Units which take hits are tested for disorder. Roll a D6 and multiply the score by 4. If the total is less than or equal to the hits, the unit becomes suppresses. Suppressed units reduce movement by half and shooting by half. (I use an explosion marker to remember when a unit is suppressed.)
  • Suppressed markers are removed at the end of a player's turns.
I also use event cards as described in the book. The enemy panic card is an air attack.

Thursday 12 May 2022

WW1 Palestine project continues with a scratch built train

In the WW1 Palestine campaign supply lines were important to both sides due to harsh terrain and distances involved.

For Commonwealth forces the speed of their advances was determined by how quickly they could construct the supply lines. This supply infrastructure included water-pipes, a narrow guide railway, and chicken-wire roads (where the wire was laid down to stabilise the ground).

While the Turks had extensive railway network established. Large numbers of troops were tied up defending the railways against raids from Arab Rebellion forces and the activities of T.E. Lawrence.

As a break from painting figures and given the importance of railways throughout the Sinai and Palestine campaigns. I thought I should make a train and rolling stock so they could be represented on the tabletop and be objectives to be fought over. I opted to continue my scratch building approach and made some track from felt and a simple train. As with my recent scratch built models I rely upon painting the details rather than modelling them.

Supplies are on their way on the latest scratch built model

I used wooden dowel and beading to create the shapes of the train and its running stock. Cardboard is used on the sides to create a smooth finish and wheels.

Wood dowel and beading is cut to create the models

Cardboard is used for the wheels and sides

Additional circles are cut for the wheels to help highlight them and make them easier to paint

The same approach is taken with the running stock

Circles are cut for wheels

The tracks are made from some cut felt material which was lightly brushed with a sand colour. Once dry, I used a dark brown permanent marker to draw the sleepers and rails.

The train with figures to show the scale

A view from the top

I now need to find a suitable scenario to get the train in use on the tabletop.

Tuesday 10 May 2022

WW1 Arab Rebellion cavalry and another book to read

I am slowly edging towards the completion of the Arab Rebellion forces. The latest unit leaving the painting table is the first of two Arab Rebellion cavalry units. The figures are from a box of Strelets Mounted Rif Rebels which the very useful www.plasticsoldierreview.com site suggests are better suited as Arab cavalry.

Recent purchase to be used as Arab cavalry.

The painted unit on the tabletop.

The unit on the march.

At the weekend I happened by the local library and spotted another WW1 Sinai and Palestine campaign book called "Allenby's Gunners". As the title suggests it focuses on how artillery were used throughout the campaign and in some of the key battles.

The latest library book borrowed.


Sunday 8 May 2022

WW1 Palestine campaign - A OHW game report

I have yet to finish painting the WW1 Arabs Rebellion figures, having only completed three units. However, by adding the recently scratch-built Rolls-Royce armoured car to support the Arab units I have a reasonable raiding force.

The game is using One-Hour Wargames (OHW) Scenario 27 - Disordered Defence - reworking the narrative for an Arab raid on a well. Throughout the Sinai and Palestine campaigns water, or access to water, was important for the attacking armies. Often they had to rely upon existing roads and tracks and the wells along those routes. The game begins with the Turks having three dispersed infantry units deployed on the tabletop. There is a nearby relief force which will arrive on game turn 8.

The initial deployments. The building and palm trees are too sparse to provide any cover.

The Arab raiding force arrive on the right. They have:
  • Mounted unit on camels
  • Infantry unit
  • Infantry unit plus supporting machine gun
  • Roll-Royce armoured car
All units arrive on game turn 1. 

The objective of the raid is the well and the force that holds the well on game turn 15 wins.

The well and the game's objective

Th game used the Machine Age rules from OHW with the following changes:
  • Units are eliminated after taking 17 or more hits.
  • Units which take hits are tested for disorder. Roll a D6 and multiply the score by 4. If the total is less than or equal to the hits, the unit becomes suppresses.
  • Suppressed unit reduce movement by half and shooting by half. (I use an explosion marker to remember when a unit is suppressed.)
  • Suppressed markers are removed at the end of a player's turns.
  • I also use event cards as described in the book. The enemy panic card is an air attack.
  • Armoured cars move 12", shoot D6-2 with a 360 shooting arc, all hits are halved unless shot at by artillery, and if suppressed are considered broken down and out of the game.

Opening game moves...

The Arabs target one of the forward positioned Turkish infantry.  A camel mounted unit arrives on the flank and the armoured car unit on the other flank along the road. The bulk of Arab infantry arrive but remain out of range.

Turkish forces react to the arrival and try and consolidate their units around the well.

The first Turkish unit is eliminated on their right flank.

Turkish forces have almost stabilised their position, but are suffering casualties.

The middle game...

An Allied aircraft arrives to strafe the last unit of initial Turkish force.

The Arab units reorganise in readiness for the Turkish relief force.

The Relief Force Arrives...

The relief force arrives just as Arab forces are preparing to secure and defend the well.

Arab units take-up position around the well. Turkish mounted troops have successfully defeated their counterparts and take up a flanking position.

Both sides are taking casualties in the fighting around the well.

Arab forces, infantry and armoured car, hold their position and the attacking Turks are reduced to an artillery unit and mounted unit.

At turn 15 Arab forces still hold the well (objective) and win the game.

This was an enjoyable scenario to play and one I cannot remember playing before. I played this a further couple of times and the defenders won on both occasions.