Friday 30 September 2022

WW1 Palestine Campaign - Turn 3 Game 4 setup

It is time this weekend to turn to the WW1 Palestine Campaign which has the Egyptian Expeditionary Force (EEF) making a fourth attempt to breach the Gaza defensive line. As each of the three scenarios for this stage of the campaign had previously been played, they were all available for random selection and One Hour-Wargame scenario #15 - Fortified Defence - was selected. The solo campaign rules can be found here they detail how the scenarios are chosen and the event cards which provide additions to the forces in the battles.

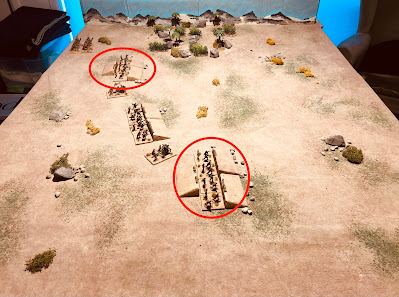
Turkish forces positioned in trenches

The Turkish order of battle:

  • 3x infantry units
  • 2 x artillery units
  • 1 x mounted infantry
  • 1 x cavalry unit (which is in reserve and will be available after turn eight).
The Turks also benefit from being able to have an additional unit entrenched during campaign stage 3.

The EEF order of battle:
  • 4 x infantry units
  • 1 x artillery unit
  • 1 x mounted infantry unit
  • 1 x aircraft
  • 1 x armoured car unit
The EEF used another months preparation time to draw two event cards which gained them an aircraft and armoured car.

EEF forces

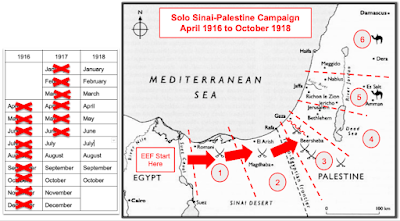
The campaign is almost at the halfway point. Another victory to the Turks would be a blow to the EEF who still have to progress another three stages on the campaign map.

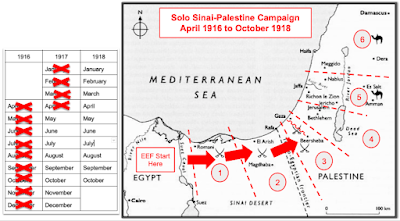
Campaign map

The Turks have two fortified positions which provide additional fire power, the EEF need to take for victory. The EEF are able to launch two assaults, at the start of any game turn the EEF can call off the assault (removing all units) and start the second assault with their full complement of unit.

The two fortified position are circled.

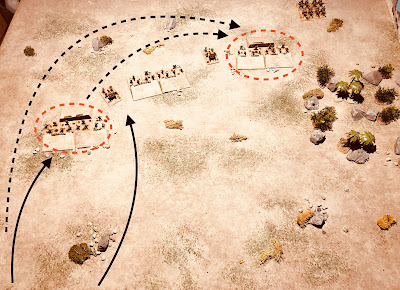
The EEF plan is for the initial assault to take the first fortified position, then the second assault will then push on and try and rollup the Turkish line and take the second fortified position.

The planned assaults.

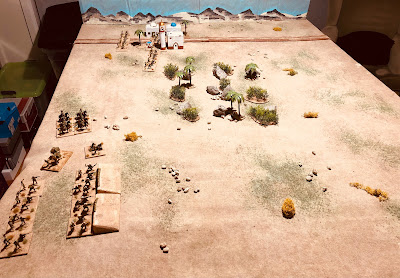
The tabletop is now all setup for a game during the weekend.

Saturday 24 September 2022

An ECW game report with some modified rules

An English Civil War game report for this weekend's post. The game setup is loosely based upon the scenario "The Battle of Fiddler's Bottom" from Charles Grant's book "Wargame Tactics". Regular readers may remember a few weeks back I was messing around with the D3 ECW rules looking at the activation of units and order of activation by troop type. In the end I found two types of activation seemed a bit too much after playing the game. After reading the posted comments and ideas (thank you to those people) and a bit more reading I have opted for one activation approach based upon organisation of an ECW army into commands (eg centre, flanks, reserve, etc.)

The tabletop all prepared, armies organised and deployed.

The activation mechanism on along with deployment approach was influenced by the book “With Pike and Musket” by C.F.Wesencraft, and in particular one paragraph where an English Civil War battle is rather nicely summarised.

“In battle, the infantry usually were formed in the centre, opposite the enemy infantry, the cavalry forming the two wings. The guns were run out in front of the infantry. Thus four distinct actions were fought. First, the guns bombarded each other, then the two wings would clash, and finally the infantry met. Often each action was unaided by any other supporting one, even victorious troops often preferring to chase their own particular foe from the field instead of going to the assistance of another section.”

With that in mind, there are a couple of pre-battle steps:

  1. Organise the forces into commands
  2. Deployment of the commands

Organising Armies into Commands

The units available to Parliament and Royalists are selected:
  • Parliament: 5 Foot units, 1 Dragoon unit, 1 Artillery unit, 1 Commanded Shot unit, and 6 Horse units
  • Royalist: 4 Foot units, 2 Dragoon unit, 1 Artillery unit, 1 Commanded Shot unit, and 6 Horse units
These selected units need to be organised into command groups which represent part of the army organisation on the battlefield. Commands group together one or more units which must be in most cases the same unit type (the exception being independent units, such as: artillery, commanded shot and dragoon units. 

There are a maximum of five commands, but not all need to be used by a player:
  • Centre - can only be made up of Foot units.
  • Right Flank - can be made up of either all Foot or all Horse units.
  • Left Flank - can be made up of either all Foot or all Horse units.
  • Reserve - can be made up of either all Foot or all Horse units.
  • Independent Units - are any Dragoon and Artillery units and is the only command these units can belong to.
Where there are multiple units in a command a unit must always remain within 6” of at least one unit from that command. This rule forces a command to operate as a block of units. This rule does not apply to independent units who do not need to remain in contact with other units within the command. 

All commands get the opportunity to be activated once during a game turn, and all units within a command can move, shoot, or melee when their command is activated. More about the sequence of play used later.

The Royalists organised themselves so:
  • Centre Command - 4 Foot units.
  • Right Flank Command - 1 Horse unit.
  • Left Flank Command - 4 Horse units.
  • Reserve Command - 1 Horse unit.
  • Independent Units - 2 Dragoon, 1 Artillery and 1 Commanded Shot units.

Royalist Centre Command

Royalist Independent Units

Royalist Left Flank, Right Flank, and Reserve Commands

The Parliament organisation decided upon was:

  • Centre Command - 5 Foot units.
  • Right Flank Command - 4 Horse units.
  • Left Flank Command - not used.
  • Reserve Command - 2 Horse units.
  • Independent Units - 1 Dragoon, 1 Artillery and 1 Commanded Shot units.
Parliament's Centre Command

Parliament's Right Flank and Reserve Command

Parliament's independent units

I made up a card for each command as the cards will get used during the game. They help with determining the sequence of events. Set aside any command card which is not used.

Deployment of the Armies

Deploying the armies on the tabletop takes an step by step approach which is intended to constrain what the players can do with their commands and independent units:

  1. Players roll a D6 (re-rolling ties), the highest scoring player deploying first in all the steps.
  2. Deploy all centre command units (if there is a centre command).
  3. Deploy all right flank command units to the right of the centre if there is one.
  4. Deploy all left flank command units to the left of the centre or left of the right flank if there is no centre command.
  5. Deploy all reserve command units behind any of the deployed commands (remember to leave room when deploying the other commands).
  6. Deploy all independent units. Artillery are deployed either in front of the centre or on hills for artillery. Dragoons and Commanded Shot can be deployed in front of the flanks or beside a flank unit.
  7. Deploy Commanders, preferably in a safe position.

Here are the commands getting deployed for the game. Parliament won the dice-off and will start in each deployment step.

The centre commands are deployed first.

The right flank commands are next to deploy.

The left flank commands are deployed. Parliament does not have a left flank command so passes for this deployment step.

Reserve commands are deployed, they must be positioned behind the other commands.

Independent units are deployed and do not have to adhere to being within 6" of another unit.

Other independent units are deployed around the table. Artillery in front of the centre command, and dragoons and commanded shot either in front or beside the flanks.

Note - I forgot to take a photograph of the deployed commanders.

Sequence of Play

The armies are now all deployed and ready to begin the battle. 

Ready for battle

At the start of each game turn each player takes their command cards and places them in the order they want their commands to be activated. Only the player knows the order, so place the cards face down with the first command to be activated on top. 

Then both players roll a D6 with the highest scoring player activating their command first (re-rolling any ties). Players then alternate activating their commands in the order of their command card decks by taking the top card from their deck of command cards.

Constructing a command card deck. In this case the order of activation is: 1) independent units, 2) right flank, 3) left flank, 4) centre, and 5) reserve. The cards remain unknown from the other player are placed face down to be drawn one at a time.

When a player’s command is activated all units in the command can: move, shoot, and melee. Once both players have activated all their commands, start the sequence again with players ordering their command cards and dicing to see which player activates first.

This approach of a player having commands activated is trying to reflect the difficulty of commanders trying to coordinate the various parts of an ECW army.

If playing a solo game, try just shuffling the opposing army’s command cards and always give them the initiative. This is the approach I took with the game below.

And Finally the Battle Report...

The Horse on the nearest flank move forward to engage around the woods. Meanwhile independent units engage.

The Horse engage and Parliament's centre advance after their artillery run out of ammunition and retire. They also shoot at the Royalist right flank Horse which had advanced.

The reserve Horse from both sides clash (just seen behind the wood) and Parliaments centre continues to advance.

The Royalist commander's view

The Royalist Horse are gaining the upper hand, but are impetuous and charge off after each routed Parliamentarian Horse unit.

The Royalist centre are holding the hilltop, but are under pressure. meanwhile the Royalist Horse (the near flank) definitely have the upper hand.

Dire straights in the centre for Royalists.

The Royalist Horse are blocked by Parliament's reserve Horse who had fallen back as a precaution. They fail to stop the charging Royalist Horse who charge off after them rather than attacking Parliament's commander (Doh!)

Time for the Royalist's to cede the field. A victory to Parliament!

Having played a few games using this activation and deployment approach I am finding they are giving me the type of ECW I am expecting. Having to plan and organise your command groups before the battle, deploying them in an ordered fashion, and activating units in blocks with their command. 

I have updated the rules (found at the top of the blog or here) and included a couple of deployment examples, including a Horse heavy army with minimal Foot units.

Thursday 22 September 2022

Another fantasy model painted and a purchases arrives

Painting of fantasy models, or model, continued this week. It has been quite a while since I have painted any model this detailed, and it was enjoyable to spend time using both washes and dry brushing. Quite a change from the recent block painting I have been doing, which works well for me when I am painting quite a few figures.

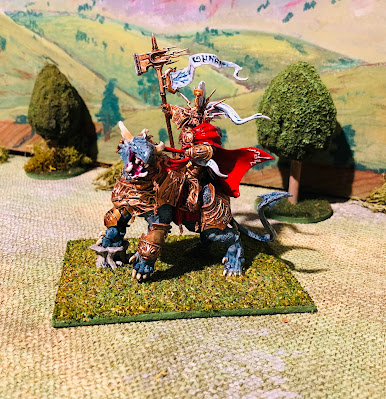
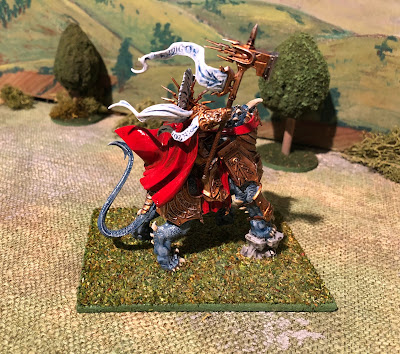
An Eternal commander painted up this week.

A view from the other side.

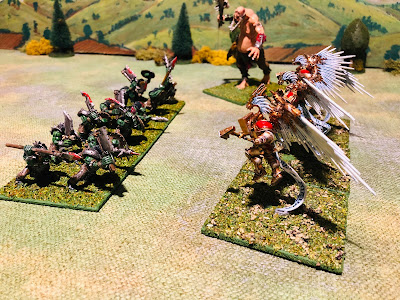
From the storage box of painted Orcs and Goblins I selected some Goblins on spiders and rebased them.

Goblin spider cavalry.

A recent purchase arrived of Mantic Kings or War figures, some Elves and Centaurs. I hope to get around to these in the next couple of weeks, but first I will be gluing together and painting the Eternals from the starter set.

The recent purchase.


Monday 19 September 2022

Newly painted fantasy figures and rebasing an old model

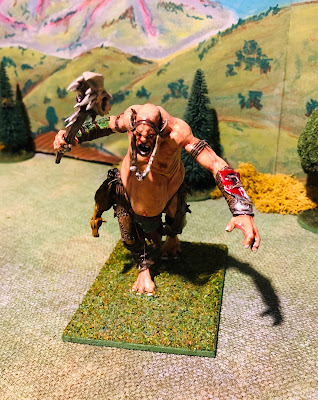
Work on the fantasy armies is progressing. As I paint up some of my unpainted fantasy models I also dip into the storage container of painted Orcs and Goblins and re-base them into new units. This time, rather than an Orc or Goblin, I found a giant which can be used with different armies.

The giant was painted a decade ago and has been sitting a storage since and has never seen the tabletop. It just required a rebasing.

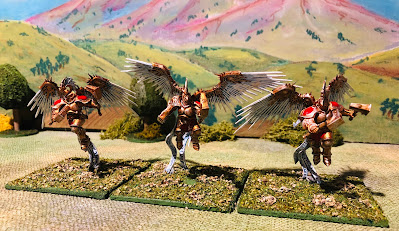
The recently painted Eternal Retributor figures are from the Games Workshop Age of Sigmar starter set purchased a few years back. In all there are 18 Eternal figures which will be painted as opposition for the Orcs. These will soon be added to with some Elves. I was hoping to get some Wood Elves second hand, but they seem rather in demand and expensive. As an alternative I have purchased some Elves and Centaurs by Mantic Games. They are yet to arrive, and I will am interested to see what they are like to paint.

Painted this weekend from the starter pack

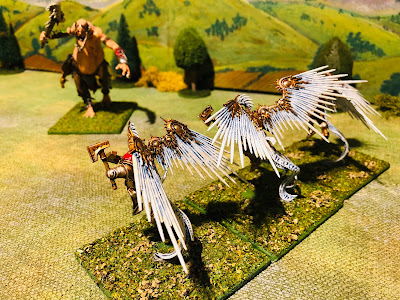
Another view of the unit. The wings were quite fun to do with lots of over brushing.

With this project I am hoping to eventually make up three smallish forces:

  • Hordes - Orcs and Goblins
  • Alliance - Eternals, Elves, Dwarves, and Men (Wars or the Roses figures)
  • Neutrals - Giants, skeletons, dragons and vampires (These can be used to supplement other forces).
A size comparison with the orcs

Saturday 17 September 2022

WW1 Palestine Campaign Turn 3 - Game 3 Report

This is the battle report for game 3 of turn 3 of the WW1 Palestine campaign.

Background

The Egyptian Expeditionary Force (EEF) are making their third attempt to breach the Gaza defensive line. An additional month was spent in preparing for this assault on the defences in April 1917. London has raised concerns about the delays and what they will mean to their plans to release much needed troops back to the Western Front. EEF Headquarters have selected what they believe to be a weak spot in the Turkish line, where defending forces are split between defending a hilltop and town, both are the objective of the attack and must be taken for a successful breakthrough.

EEF plan of attack

Plan

Knowing that all bar two of the Turkish units are committed to defending the town and hill, the EEF plan is to advance and take the centre rough terrain consisting of cactus groves and rocks. The artillery will bombard the town while the infantry will push up along the road towards the town and supporting attacks will be launched from the centre rough terrain on both objectives.

Order of Battle

Turkish defending forces:

  • 4 infantry units
  • 1 infantry unit with supporting machine gun
  • 1 cavalry unit
  • 1 mountain artillery unit

The EEF attacking forces:

  • 3 infantry units
  • 2 infantry units with supporting machine guns
  • 1 artillery unit
  • 1 mountain artillery unit

Battle Report

The planned swift advance by EEF forces was stalled on a couple of occasions due to supply issues, resulting in units moving rather slower than planned. The artillery was able to start the bombardment of the town on schedule. The slow advance provided the opportunity for Turkish infantry to occupy the rough terrain and have they cavalry swing round on their righthand side.

The attacking EEF forces appear

Turkish forces push into and around the centre rough terrain

As the EEF infantry advanced they found the Turks had it occupied and were then surprised by a Turkish cavalry attack. This turn of events stalled the advance for a while. Time was always going to be the EEF's enemy based on previous scenarios. Fortunately an air sortie arrived to attack the Turkish infantry and the EEF advance resumed.

Turks occupy the rough terrain and launch as cavalry attack

Some much needed air support

The attack on the town was moving ahead, but without the expected support from the rough terrain. Again the boys in their flying machines were on hand to support the attack, but it was eventually to be called off due to lack of numbers. It was not until late in the day EEF infantry were able to clear the rough centre terrain of Turkish defenders, by which time it was too late to mount any meaningful attacks on the town or hilltop. Both objectives were still in Turkish hands.

The attack on the town

The rough terrain is finally taken.

The EEF occupy the rough terrain, but are left to rue their slow advance.

This was a disaster for the EEF. They had not come close to taking either objective and the morale of the troops after three successive failed attacks would suffer. London is rapidly losing confidence and there is talk of replacing some of the EEF Headquarter staff.

This set back has certainly livened up the campaign. The next game will be a replay of one of the 3 scenarios played for the Gaza campaign stage. They all have two objectives which are challenging my multi tasking skills (or lack of).

Thursday 15 September 2022

WW1 Palestine Campaign Turn 3 Game 3 setup

I am setting up is the third game of the WW1 Palestine campaign turn 3 for this weekend. It follows on from the Egyptian Expeditionary Force's (EEF) failure to break the Gaza defensive line on two previous attempts. This game uses One-Hour Wargames scenario #14 Static Defence, it being the final remaining choice for this stage of the campaign (rules here) the other two options having already been fought.
Campaign map and timeline

The Turks are defending both the town and hilltop with the following forces:

  • 4 infantry units
  • 1 infantry unit with supporting machine gun
  • 1 cavalry unit
  • 1 mountain artillery unit
They also benefit from some trenches for this campaign stage and the mountain gun was their event chance.

The EEF will have to capture both the hill and town to be successful. Their attacking force:

  • 3 infantry units
  • 2 infantry units with supporting machine guns
  • 1 artillery unit
  • 1 mountain artillery unit

They have opted to use two months of their campaign timeline, rather than 1, to get two campaign events. One event was the mountain artillery and the other was air support.
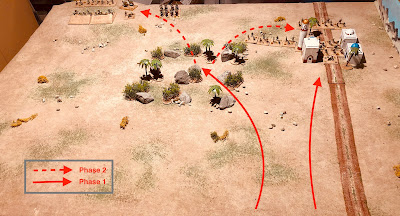
Tabletop set up for scenario 14 - static defence. The objectives are the hill in the foreground and town.

The EEF plan is to take the centre rough ground of rocks and cactus while bombarding the town in phase 1. Then in phase 2 assault the town and hill from the rough ground.

EEF plan of attack

Next up the battle report...

Wednesday 14 September 2022

A Medieval Parade

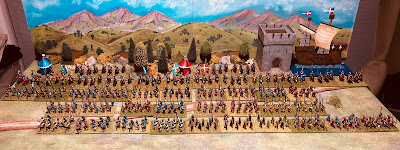
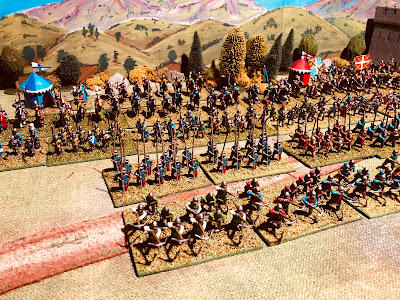
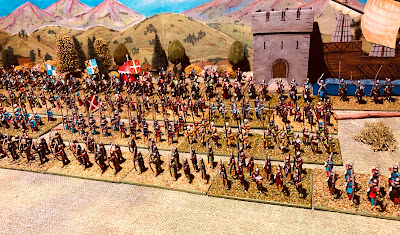
Having just recently cleared the tabletop in readiness for setting up the next WW1 Palestine campaign game, there was an opportunity to get all the medieval units onto the table for a parade. 

A unit is represented by two bases.

Pretty much all the miniatures, bar a few exceptions, are by MiniFigs. Half were purchased some 40 years ago and the remainder second-hand figures which were stripped and painted added over the last couple of years.


All the figures are block painted and their dress, livery and colour choices are all generic, picked at the time of painting.


A couple of tents were added to represent camps or objectives.

The castle keep and ship were used in a campaign a few years back in 2017 which was based upon a chapter in "War Game Campaigns" by Donald Featherstone (see here).