Friday 27 April 2018

WW2 Air Support

Last week I was messing around with a quick WW2 game based upon One Hour Wargaming scenario 26 - Triple Line. When selecting some units for the game I came across a couple of planes I had not used on a tabletop for quite awhile, probably not since my last WW2 campaign.

The question was what rules to use for air support with the OHW WW2 rules variant using a D3 dice (see tab at top of blog for rules).

A stalled Allied attack gets some air support
The aim was to have some simple generic air support rules:

  • Aircraft can move a minimum of 18 inches and a maximum or 24 inches in any direction from their current position. After each move add 1 hit, as hits for aircraft also represent their available time over the battlefield.
  • They can move and shoot, attacking any unit within 6 inches with a combat of D3-1 hits.
  • AA guns can attack any aircraft within 24 inches with a combat of D3+1 hits. Other ground units cannot attack aircraft.
  • Other aircraft within 6 inches attack with a combat value of D3 hits.


Monday 23 April 2018

Another ECW unit from the painting table

Before heading off to the airport, during that frustrating time when at a loose end waiting to go to the airport, I was able to finish basing another English Civil War (ECW) foot unit. This brings the number of units completed to 5 (3 foot and 2 mounted) of the intended total of 32 units. It keeps me at my self imposed target of completing 1 unit per week.

ECW unit of foot
My interim aim is to get 3 foot, 1 artillery, 1 dragoon, and 3 mounted painted per army as soon as I can. A combined total of 16 units. This size force will allow me to start playing a few small scale games using One-Hour Wargaming rules (or variant).  For me painting units always seems to get easier once an army is in use and I am just adding to an armies size.

Saturday 21 April 2018

French Indian War - Game 10

The battle for Fort Oswego (July 1757) is the tenth game in the French Indian War campaign. Having lost their last game the French needed a victory urgently. The campaign background can be found on Jonathan's Palouse Wargaming Journal. Where he plans and plays the operational moves solo, and I play out the battles solo. An interesting combination suggested by Jonathan which is working out well.

Order of Battle:

British
3 (1) Militia units
1 Artillery unit with fort
Army resolve = 4

French
6 (2) Regular units
Commander Drucour (A0D1)
Army resolve = 7

At first glance is appears to be the French have a certain victory. They are double the number of infantry and of better quality being regulars. They also have a solid army resolve of 7 (1 for each unit plus 1 for their commander's D1 quality).

So how did the game go...

The French move forward as quickly as possible. No subtlety here, it is a straight forward storm Fort Oswego walls.
A couple of French units (including Grenadiers) are moving faster than the other lines which are trying to catch up. The delay provides the fort gun with more opportunities to target the reach line.
The first line of French begin the assault, while commander Drucour is having difficulties coordinating the second line.
The attack is in full swing with casualties mounting as the second French line arrives.
The first French unit is eliminated and the Grenadiers are suffering badly.
In a last gasp attack French grenadiers eliminate the artillery unit and storm the defensive wall making it into the fort. Adjacent infantry units are able to occupy the vacated square when the target unit is destroyed.
The militia within the fort are conducting themselves well. They counterattack to repulse and eliminate the grenadier unit.
Units from the French second line fill the gaps left by eliminated units.
The battle rages fiercely as the militia give good account of themselves and the French press forward their assault.

Everything seems lost as two militia units are lost and the French make it across the walls.
As more French units get inside the fort the remaining militia unit gallantly fights on (due to some low rolling against their army resolve).

I didn't get a photo of the last turns, but the militia eliminate another ranch unit and it was down to a roll on the French army resolve. A 3 scored on a D3 dice and French army resolve fails. A 2 is rolled, the French hold their nerve, and in the next and final turn the last militia unit succumbs.

When I setup this game I thought easy French win. But, it turned out to be a close run thing. Both sides lose a regiment. The British lose a regiment of militia and French a regiment of regulars. Success to the French, but at a price was paid.

Friday 20 April 2018

Second hand books arrive

In the post today three recently purchased second-hand books arrived. Their delivery is well timed as I will be on a plane next week for a quick visit back to Wellington NZ, and will be needing something to read.
Recent additions to the wargaming library
I have always wanted a copy of Solo-Wargaming, by Donald Featherston, and finally decided to buy an original copy. While I do have a ebook version of this, I find it so much more enjoyable to browse and re-read sections of an actual book.

Discovering English Civil Wargaming, edited byJohn Tunstill with many chapters by George Gush, was purchased for my in-progress ECW project. This one will be in my carry on luggage next week. It is small and light.

Naval Wargames, by Barry J Carter, is a book I remember from the library when it first came out in 1975 as the rules within use a grid. Last year I played a few naval wargames as part of a 6x6 gaming challenge and enjoyed them. So when I saw this book I thought I would give it a try.

Wednesday 18 April 2018

Progress on ECW project and additional WW2

Over the last couple of weeks I have been making steady progress on my English Civil War (ECW) project. 4 of the 32 units I need to paint have now been completed. In addition a few WW2 tanks made it on to the painting desk. They were some second hand models picked up from Hinds Figures Ltd when ordering a few additional Hinchliffe figures for my ECW units.

ECW units
Additional WW2 German units

Sunday 15 April 2018

French Indian War - Game 9

I finally found some time to play through the Battle of Carillon. Game 9 of the French Indian War being fought out with Jonathan conducting the campaign moves (see Palouse Wargaming Journal). The battle is considered a key game and the victorious side will benefit politically in the campaign.

The previous post has the order of battle. However, looking at the setup it appears the French were not benefiting enough from their defensive position, and based upon a comment by Ross, I decided the French would have some more defences. So they were able to add some defences to provide additional cover.

Game setup with the French behind their defences
Having allowed the French some defences, I allowed the British to reposition their lines, which they did to avoid Fort Carillon as much as possible.
The British line advances en masse while light infantry and grenadiers move to out flank the French defence
Both side's artillery were creating a few hits on opposing forces.
French forces move to counter the flanking move
A view from Fort Carillon
Grenadiers and light infantry take up their positions on the flank
British suffer their first lost and prepare to move their second line into battle.
French defenders suffer a losses.
The contest was fierce with both sides taking hits.
The French army resolve ended with the loss of their commander who retired from the field wounded.

A victory to the British commanded by Monckton. Dieskau the French commander was wounded but survived. Both sides lost a regiment of regulars a piece.

Thursday 12 April 2018

French Indian War - Game 9 setup

The next game to be played in the French Indian War campaign is the battle of Fort Carillon. See Palouse Wargaming Journal for Jonathan's narrative and campaign moves leading the this battle. The tabletop terrain is loosely based on a few images I found from a Google search.

A view of the tabletop setup
The French cannot accommodate all of their units into the fort, and have opted to place their weaker militia unit in the fort and line up the remaining forces, all regulars, using the fort to secure their left flank.
French lines prepare for battle
Meanwhile the British have arrived and lined up in two lines. The French now wait to see their move.

British units arrive

Order of battle:

French - Commander Dieskau (A2D2)
4 (3) Regular Units
2 (1) Militia Units
1 Artillery within fort
Army resolve = 9 (7 units + 2)

British - Commander Monckton (A2D1)
7 (5) Regular Units
1 Light Infantry Unit
1 Artillery Unit
Army resolve = 10 (9 units + 1)

Both commanders have A2 qualities which allow them on 2 occasions to double the shooting score of any unit adjacent to them. The defence quality of Dieskau (D2) almost levels out the army resolve between the two forces.

This is quite a large battle and I have a limited number of units, so campaign forces have been loosely factored up by 50% and artillery added for both sides.

This game will be played over the weekend as time is running out tonight.

The painting table has seen a couple of additions for a future siege game...

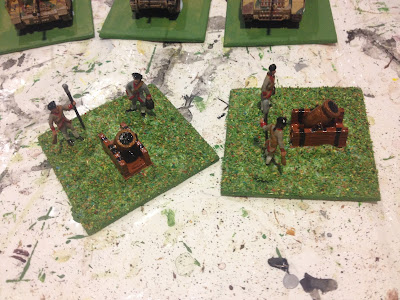
A couple of balsa wood mortars
Cheval de Frise - round wooden dowel and toothpicks
Additional defences thrown up to help defend the breach
The Cheval de Frise fits quite nicely to show repairs
Mortars painted

Tuesday 10 April 2018

Thinking about siege wargaming rules

Having decided to play a few siege games and having built much of the necessary terrain: a fortress, gabions and trenches for the besiegers. (An opportunity to take some photos for this post.) The next step was to start thinking about some rules, which will be in a similar vein to One Hour Wargames rules.

Some reading to help with ideas and they have some rules in the appendix.
To help get some ideas of how formal sieges were conducted around the 1700-1750 period. I re-read a few chapters from Fire and Stone by Christopher Duffy to remind myself about the stages sieges typically went through.

Supplies are important in a siege for both sides, besieger and fortress garrison, but I am aiming to minimise paperwork in the rules. Players will each have one pool of supply points which represent a range of resources, such as: ammunition, food, and money. In the case of the besiger these are expended during the formal siege stage to: dig parallels, extend zig-zag sap trenches, maintaining units in the field, conduct bombardments, mine, and repair damaged artillery. Whilst the garrison player will use their supplies to:  repair defences, keep units on the defences, counter-mine, and counter-battery fire. Careful management of these resources by players will be key to their success. Historically, there were many discussions and theories put forward as to the best way to assault and defend a fortress, and a balanced approach across the various stages of a siege seemed common.

The game will have three stages:

  • Investment
  • Counter-vallation
  • Formal Siege
  • Terms of surrender
Initial entreatments as besiegers begin the counter-vallation and seal off the fortress from the  outside world

1) Investment

The first phase of the siege game is investment. Where leading elements of the besieging force converge on the fortress to mop up any stragglers and supplies trying to reach the fortress. A game will be played with small and mainly mobile forces. If the defender wins the game additional supply points are added to the defenders pool. If the attacker wins the defender is denied and the supplies are redirected to the besiegers supply points.

2) Counter-vallation

The besieging player builds entrenched positions out of range of the guns to protect from sorties and to begin the process of isolating the fortress from the outside world. The defenders may still be in communication with the commander of a relief force. Who may try breaking through with a hand-picked force. To represent this stage a small battle will be fought. If the relief force breaks through  the fortress gains additional supply points are added to the defenders pool.

Second parallel starts to take shape.
A sortie strikes out from the fortress in an attempt to disrupt the siege works and spike artillery.

3) Formal Siege

Each turn in the siege has two phases:

  1. An operational phase representing a day’s activities digging trenches and conducting bombardments
  2. A tactical phase representing a bust of activity in the siege such: as a sortie by the defenders to destroy the encroaching siege works or a surprise attack with scaling ladders.

Sieges were carefully planned and with often a mathematical and structured approach. As the siege turns progress the besieging play must first construct their 1st parallel of trenches. Following by the 2nd parallel of trenches from where most of the artillery bombardment tries to breakdown the fortress walls and make breaches. Then finally the 3rd parallel from which attacking units try and storm breaches.

From the 2nd parallel artillery pound the walls to create breaches.
Bombardment of fortress walls can also include the use of mortars to launch bombs into the fortress upon the garrison to: deflate their moral and attempt to destroy their ammunition stocks. While the garrison artillery would attempt to delay the building of trenches and disrupt the attackers artillery galleries.

The 3rd parallel provides cover for troops and artillery as they try and  clear the fortress galleries and defences.
Other siege works can be undertaken such as mining the walls. These will be invisible on the tabletop and will consume the supply points until exploded, unless successfully countermined by the garrison.

During the formal siege phase each operational phase activity (bombardment, digging trenches, mining, etc) will consume supply points. So both sides will have to ration their use. If an attacker runs out of supply points they may find their parallel trenches and saps are short of the fortress walls and their troops will have little cover from which to storm the fortress. While for the defender not being able to repair breaches or artillery will hamper their defence and may force them to unfavourable terms of surrender.

A mine creates a breach
A breach appears in the walls.

4) Discuss terms of surrender

When the defenders supply points are reduced to zero the besieging side can offer negotiated terms by which the garrison will cede the fortress with honour. These terms can be offered a set number of times, and if refused they will have no option but to storm the fortress. Historically, once the fortress defences were no longer tenable discussing terms of surrender, often with some honour afforded to the garrison, avoided costing losses during the storming of a fortress.

Next steps...

While I get on writing the rules and playing some test games. I do still have a few remaining items to build including some mortars and a few Cheval de Frise (big spiking obstructions) to indicate where defenders have repaired defences.

cheval de frise


Sunday 8 April 2018

French Indian War - Game 8

This weekend I was able to play the 8th game in the French Indian War campaign, which sees a British force under the command of Loudoun trying to retake Fort Stanwix. For the background campaign narrative leading up to this game go to Palouse Wargaming Journal.

French defenders of Fort Stanwix prepare for an attack
Order of battle:

British
Commander Loudoun (A0D1)
6 (4) Regular Units
1 Artillery Unit
Army resolve = 8

French
Commander Drucour (A0D1)
3 (2) Regular Units of which 1 can be a Grenadier unit
1 Artillery Unit with fort
Army resolve = 5

In previous games I have been able to field 3 or 2 units for each campaign regiment (shown above in brackets). However, I lack sufficient British regular units to do this, I only have 7, and so for this game I am using a factor of 1.5.

British units take up position ready to launch an attack on the fort with no French units outside the fort.
Fort artillery open fire as units move into range.
British units start to take more casualties as they come into musket range.
Commander Loudoun and attached unit gets held up at a critical point allowing a regular unit to be eliminated with 6 hits. In the rules regular units adjacent to the commander can sustain 12 hits. Not a good start and to compound the loss a 3 is rolled against the army resolve.
British forces quickly recover and the attack pushes ahead with their grenadiers pushing around the side. While the grenadiers were proving good shots their counter parts were rolling successive 1's.
The British assault finally fails after poor musketry made little impact upon the defending French.

A series of poor shooting D3 dice scores over a few turns were the downfall for the British attack. Maybe it was raining and units in the for were able to keep their powder dry?

This game also saw the second use of amended rules for units defending a fort. Previously defenders of a fort could re-roll the shooting D3 dice, but now get a +1 to their score if the range is 1 square (a target is adjacent).

From a campaign perspective the British left the field of battle with only 3 regiments of regulars. The assault proving quite costly with the loss of 1 regiment.