Showing posts with label Dux Bellorum. Show all posts

Saturday, 2 December 2017

Necromunda and Dark Ages

This week I completed five models from the Necromunda game I purchased last week. Just could not resist getting a few completed so I could have a small game soonish. It was quite a change in painting style from painting Spencer-Smith models, which I have been doing for a good six or more months now.

First few Necromunda figures painted
I was going to get back into my French Indian War campaign, but as I was packing away my Warhammer 40k models I happened upon my Dark Age flats (Saxon, Normans and Vikings) and thought it would be fun to have a game with those. A thought reinforced as I re-read the dark ages chapter of One Hour Wargames while waiting to pick up some takeaway fish and chips.

The rules used are from One Hour Wargames with modified activation rules mechanisms drawn from Dux Bellorum.
The game is setup
Saxons wait for the attack 
Normans prepare to advance


Sunday, 29 January 2017

Last 3 Dark Age (Saxon vs Norman) games for 6x6 challenge

Three more Dark Ages games using Dux Bellorum were played out this week. This completes all six games of the 6x6 challenge for this period.  A reminder of my 6x6 selection and progress:

  • One Hour Wargames (Tank on Tank) SciFi Variant - this will force me to work through the rules in a series of games. 3 Played
  • Dark Ages with Dux Bellorum (Osprey) - my new project and with the rule book ordered and in the post. 6 Played - Complete
  • WW2 Naval (Pz8 rules) - a good quick game I can use if struggling with the challenge.
  • WW1 OHW - it has been a fair while since I played this period and a good excuse to get the old Peter Laing figures out again.
  • Galleys and Galleons (Ganesha Games) - I purchased these rules a while back and have not got around to making the model ships, which should not take too long to build the 5-6 models required for a game.
  • Hundred Years War using Lion Rampant (Osprey) - Recently completed the painting of these armies. Mini campaign mapped out ready to start.
The first three Dux Bellorum games I played used the rules without modification. During the games I was finding the use of leadership points to cancel hits was too powerful, even when reducing this to the cancellation of 1 hit (particularly when two shield walls going at it toe to teo). So for the last three games I tried reducing unit protection by one. So to hit a shieldwall was 5+ and a bowman unit 3+. All missile fire remained at 5+ as per the rules. To partly compensate for the increased likelihood of hits the cohesion factor  (number of hits before unit routs) was bumped up by one. I also stuck with the original approach to leaderships points with no restrictions.

The other area of consideration is where the combat loser is pushed back three inches. Not straight forward when using a 6 inch gridded tabletop to play on. During the games I tried a one square push back, ignoring the rule, and the losing unit taking a bravery test with a failure resulting in a push back. I ended sticking with the pushback rule as I had started allowing two units to occupy a 6 inch square.

After playing through the three games I was quite happy with these modifications and the last two games were most enjoyable.

Game 4 - was a quite a large game of 52 points a piece. The Normans were the aggressor and the Saxons as the repeller where positioned on the hill. The Norman cavalry moved around on both the Saxon flanks, while their bowmen attempted to soften up the centre before their spearmen units (Noble Shieldwall class of troops) pushed onto the hill.

Both sides lined up for battle
The Saxon second line of Housecarls prepares to enter the battle
The Norman attack loses momentum and is eventually thrown back by the Housecarls.
A Saxon victory! The game had been played ignoring the loser of combat being pushed back. It was after this game the decision was made to reintroduce the loser gets pushed back.

Game 5 - this game tried out a smaller Saxon force with additional leadership points. The Norman's pushed their cavalry around the Saxon left flank while their centre quickly ground down the first Saxon line of bowmen and Fyrd. The Housecarls were partially drawn into the centre battle and those remaining on the hill were eventually overpowered by the Norman cavalry. Additional leadership points are possibly better used for more mobile armies.

Normans see off the first Saxon line of defence
Norman cavalry attack the hill
Housecarls in their final defence just before the Norman centre joint the battle for the hill.
Game 6 - saw the surprising inclusion of some Saxon cavalry as I wanted to play a game with both sides having some mobility. The game was quite straight forward with cavalry attacks on opposite flanks. The Saxon shieldwall dealt better with the cavalry attack and soon after in the centre holes started to appear in the Norman shieldwall, which were exploited by the Saxons to win the game.

Saxon cavalry quickly move up while bowmen engage in missile fire.
Norman's counterattack on the Saxon left flank.
Saxons get the upper hand and Norman forces are whittled down

That's one 6x6 challenge successfully completed. The last few games have convinced me to stick with Dux Bellorum rules. I will be soon adding a Viking army to the Normans and Saxons - paper armies are quick to produce. I will be sticking with these paper armies and not buying any replacement Dark Age miniatures. I like them and am looking around for another opportunity to use some paper armies.


Thursday, 26 January 2017

Third Dark Age game for 6x6 challenge

I managed to fit in another Dark Age game between the Norman and Saxon paper armies. Again using Dux Bellorum for game rules as I come to grips with the rule mechanisms and begin to commit them to memory.

My battle reports continue to be rather brief (apologies) as the games are a rather stop start affair as I am referencing rules. So I have not been making any turn by turn notes - only taking photos to remind me.

For this game I went with 29 point forces and thought I would try one side with some additional leadership points. I also tried out limiting the use of leadership points to offset a hit to one hit per unit (an option suggestion in the rules).

Saxon army:

  • 2 x Noble Shieldwall units (10pts)
  • 3 x Ordinary Shieldwall units (9pts)
  • 2 x Bowmen (6pts)
  • 8 x leadership points (+2pts)


Saxon forces rolled as the repeller in this game a setup for the defence of a hill
 Norman army:

  • 1 x Noble Cavalry (5pts)
  • 2 x Noble Shieldwall units (15pts)
  • 3 x Bowmen (9pts)
  • 6 x leadership points (0pts)


Norman forces prepare to assault as the aggressor
Saxons wait for the advancing Normans while bowmen exchanged missile file
Mixed results for both sides as their shieldwalls came to blows
Norman bowmen after eliminating their Saxon counterparts move in to support their shieldwall
Saxons lose half their units and survive the bravery tests, but the writing was on the wall.
I ended the game just after the Saxons had to take a bravery test when they had lost 50% of their units. While they did pass their bravery test, they were out numbered 2 to 1 with little opportunity to comeback from their predicament.

I have 3 more games to play as part of this particular 6 x 6 challenge. For the next game I am thinking of tailoring or modifying the rules in a couple of areas:

  1. The use of leadership points (LP) to reduce hits is overly effective when compared to adding 1D6 to an attack with a 6+ hit chance on a shield wall. Even when allowing on one LP to be used for defence you tend to spread single LP across more units. One thought is to do the reverse of attacking LP which adds 1D6. Instead of reducing a rolled hit, a defencive LP reduces the attacker's D6 by 1D6.
  2. The grid works well for most movement except for retreats from combat which in the rules are 3 inches. The move of one 6 inch square is too bigger step back. Not sure how to deal with this one - possibly there are no retreats. Anyway more pondering to do.

I find it interesting how some rule mechanisms seem to suit me as a solo player. For example, the allocation of LP in Dux Bellorum is great where there is an opponent and you are trying to out guess them. The rule creates a tension, but less so for a solo gamer. Generally I would say I prefer in most cases fast moving rules so when you are playing a solo game you get become more absorbed by the game.

Tuesday, 24 January 2017

Dark Ages game number 2 for 6x6 challenge

I have finished my second game using Dux Bellorum as part of the 6x6 challenge. I believe I now have a reasonable grasp of the rules in terms of not forgetting or overlooking a rule mechanism.

In this game the Normans were the aggressor again and the Saxons were defending a river crossing. I don't have a lot of photos of the game as I was rereading rules and the game was played of a few sessions. I did quite a bit of rereading of rules, not because the rules are overly complicated, but they are quite intricate.

The game was won by the Normans after a bit of a slug fest in the centre between Norman Spearmen and defending Saxon Fyrd. It was the flanking cavalry which were the difference drawing away and eventually defeating the Saxon second line.

In the next game I will only be allowing 1 leadership point per unit be used to reduce a casualty. It is one of the suggestions in the rules to make a quicker game. I must confess I did lose a bit of interest towards the end of the game, as most of the forces were engaged in combat. For a number of turns I was just rolling for combat between the same units with hits being cancelled out with leadership points.

A view from the Saxon side shows Norman spearmen advancing to engage Saxons defending the river
A view from the Norman side with their cavalry crossing the river on their right flank
A Norman view as the Saxon defence collapses and they flee the battlefield

Also, my preparation for my Hundred Years War mini-campaign is done with the completion of some scenery. A model ship and the goal for the English in the campaign as they try and escape across the Channel from the pursuing French.

Medieval Ship - Flat model made from MDF, balsa wood and cardboard

The campaign will be played out using Lion Rampant rules on a tabletop with a 6 inch square grid. I first plan another Dux Bellorum game.


Saturday, 21 January 2017

Saxon vs Norman Paper Soldiers Game

This weekend I was able to play a game of Dux Bellorum using my recently completed Saxon and Norman paper armies. While the rules are technically for the period AD367-793, I thought I would still give them a go.
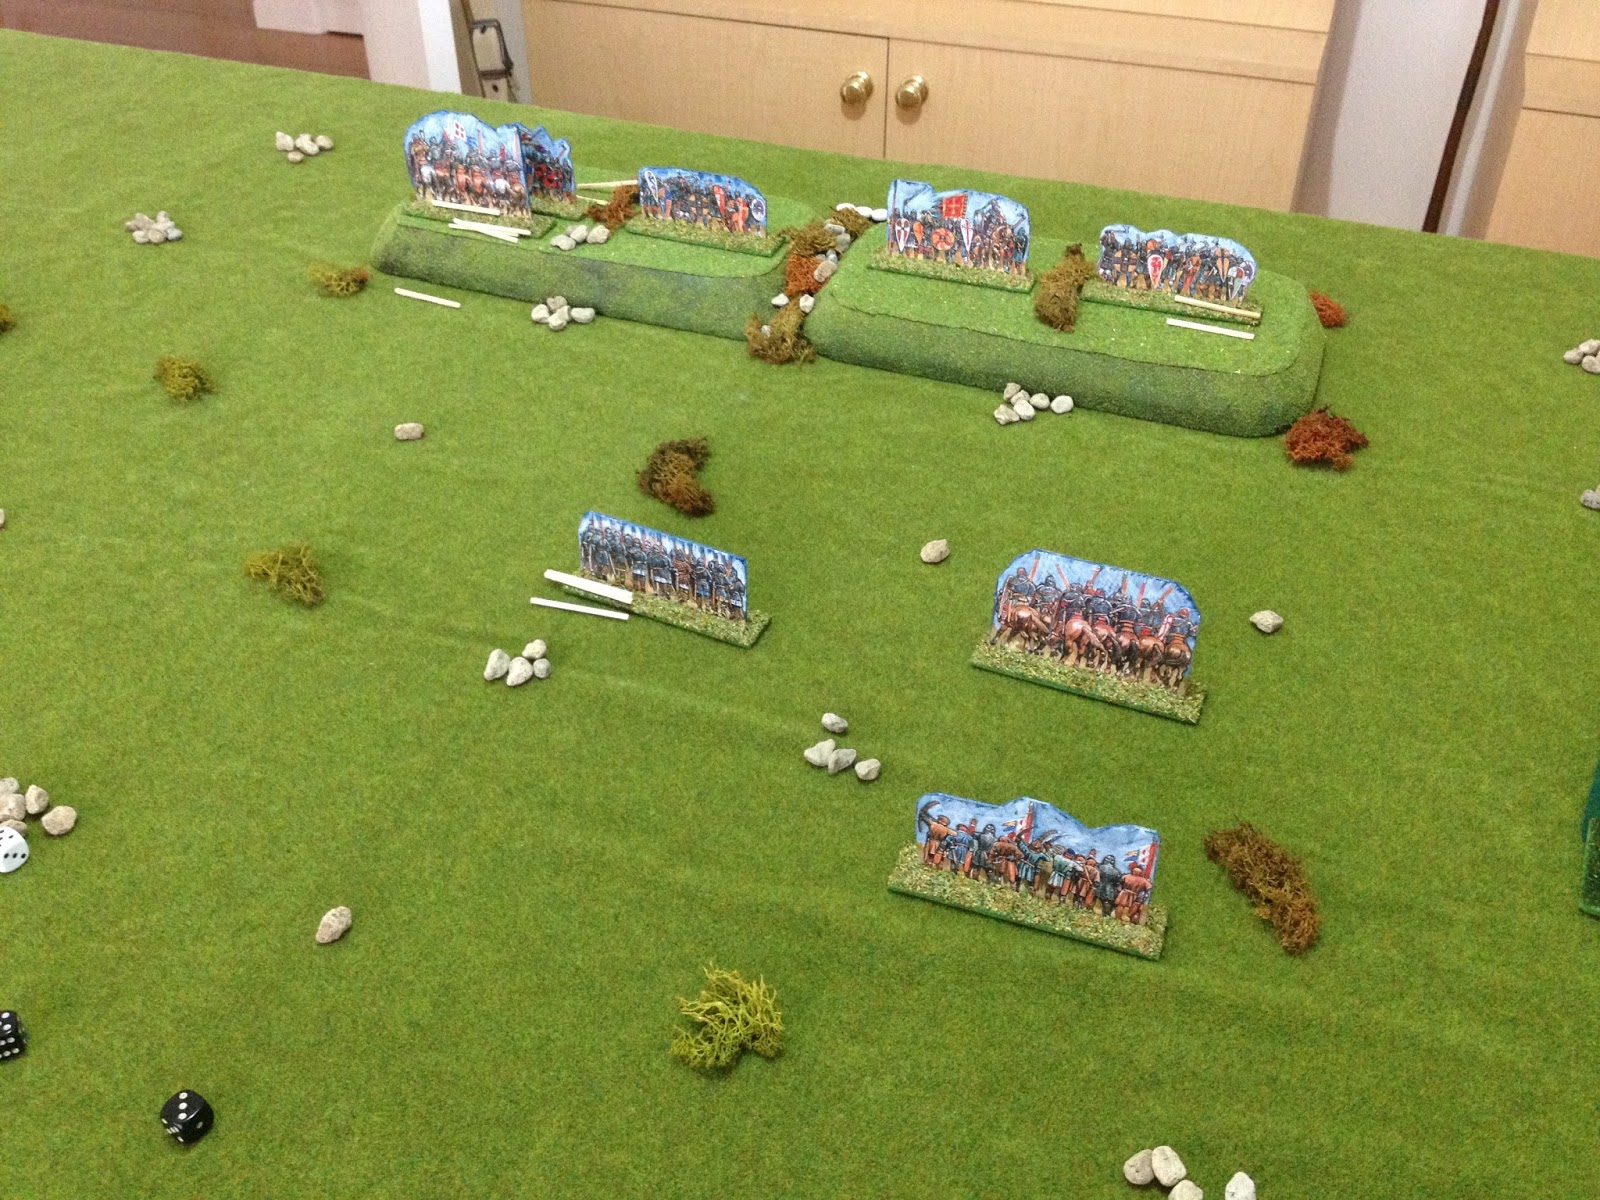
I was trying out the rules on a gridded wargame table. Having read the rules through they seemed to fit quite well to a 6 inch square grid. Foot units move 1 square and cavalry 2 squares.

Armies lined up
For my first game the Normans had...

3 x Foot bowmen
3 x Noble Shieldwall
1 x Mounted Companions
2 x Ordinary Riders

And Saxons...

1 x Foot Companions
3 x Noble Shieldwall
3 x Ordinary Shieldwall
2 x Foot bowmen

The Normans were the aggressor and the Saxons the repeller force defending the hill.

After initially exchanging a few volleys of arrows the Normans advanced
The Saxon Ordinary Shieldwall proved remarkably effective
The Saxon Noble Shieldwall waiting for the Norman assault on the hill
The first Saxon line had done its job and a weakened Norman attack was soon routed

I found the rules worked well for me. The decisions a player has to make with their leadership points to weigh up whether to assist units (or groups of units) with their movement, attack and defence made for an enjoyable game. Even for the first game which can be a bit stop-start as one gets used to the rules and have to look up rules.

This will be counting as my first game of Dux Bellorum 6x6 challenge.