Sunday 28 February 2021

WW2 Western Desert Campaign Turn 10 - Game 3 Set Up

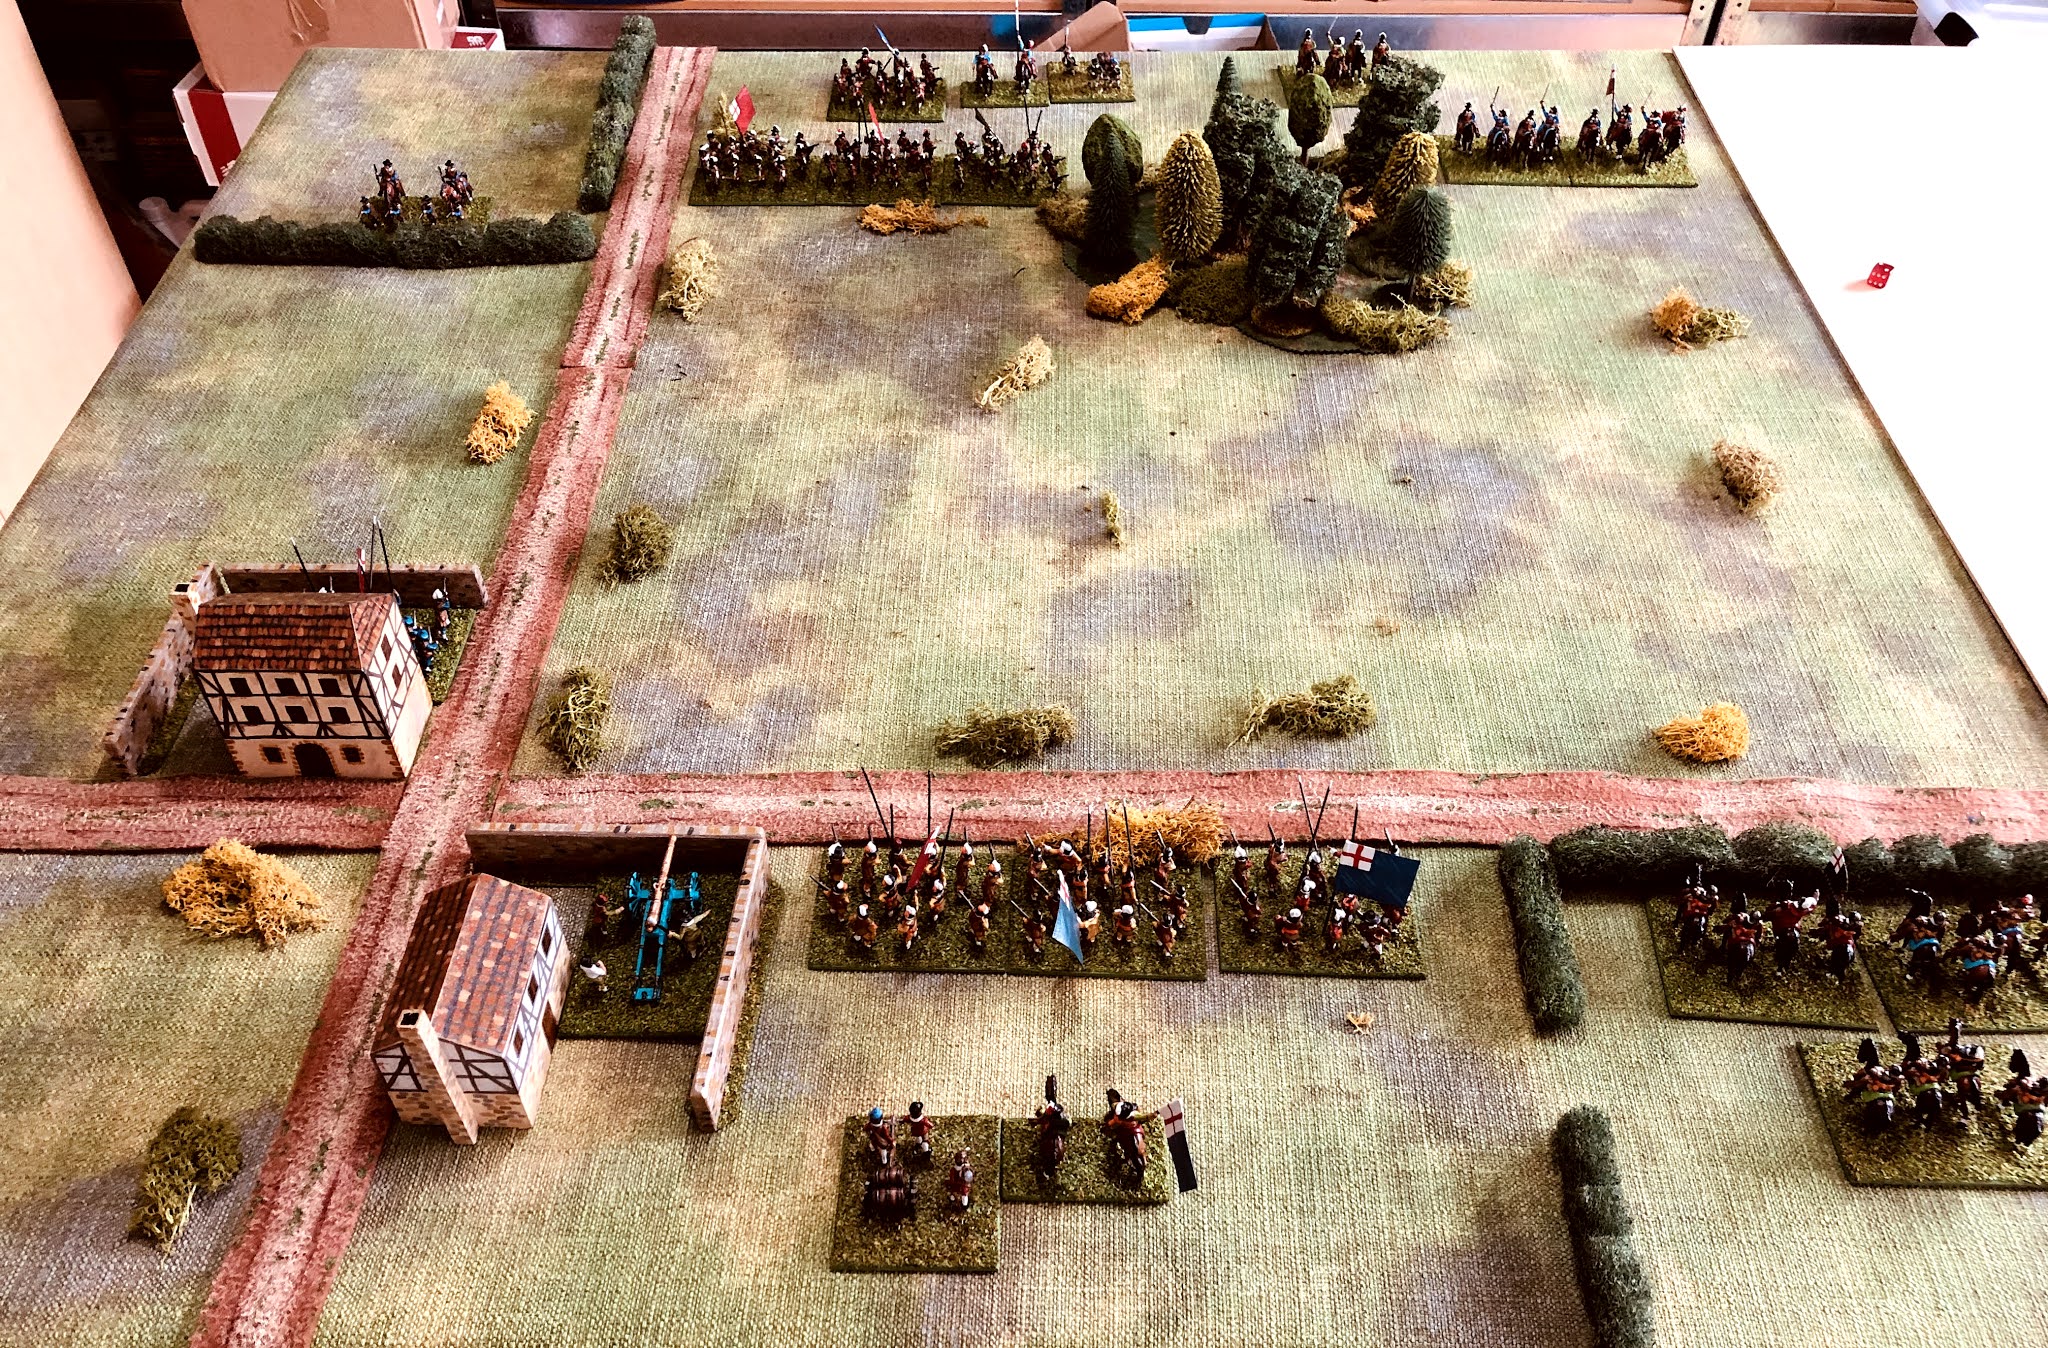
After a couple of weeks playing a number of English Civil War games and working through some rule changes, it was time to put aside the ECW rules for a couple of weeks and return to them later with a fresh set of eyes. This break gives me an opportunity to return to the WW2 Western Desert campaign. 

The campaign is currently at turn 10 with a third and deciding game to be played. Earlier in turn 10 the initial 21st Panzer division's attack had failed to make a breakthrough against the 7th Armoured division, but the 15th Panzer were, after a hard fought engagement, were able to defeat the South African Infantry division. This third attack has the Ariete Armoured division launching an attack on the 1st Armoured division.

The campaign map

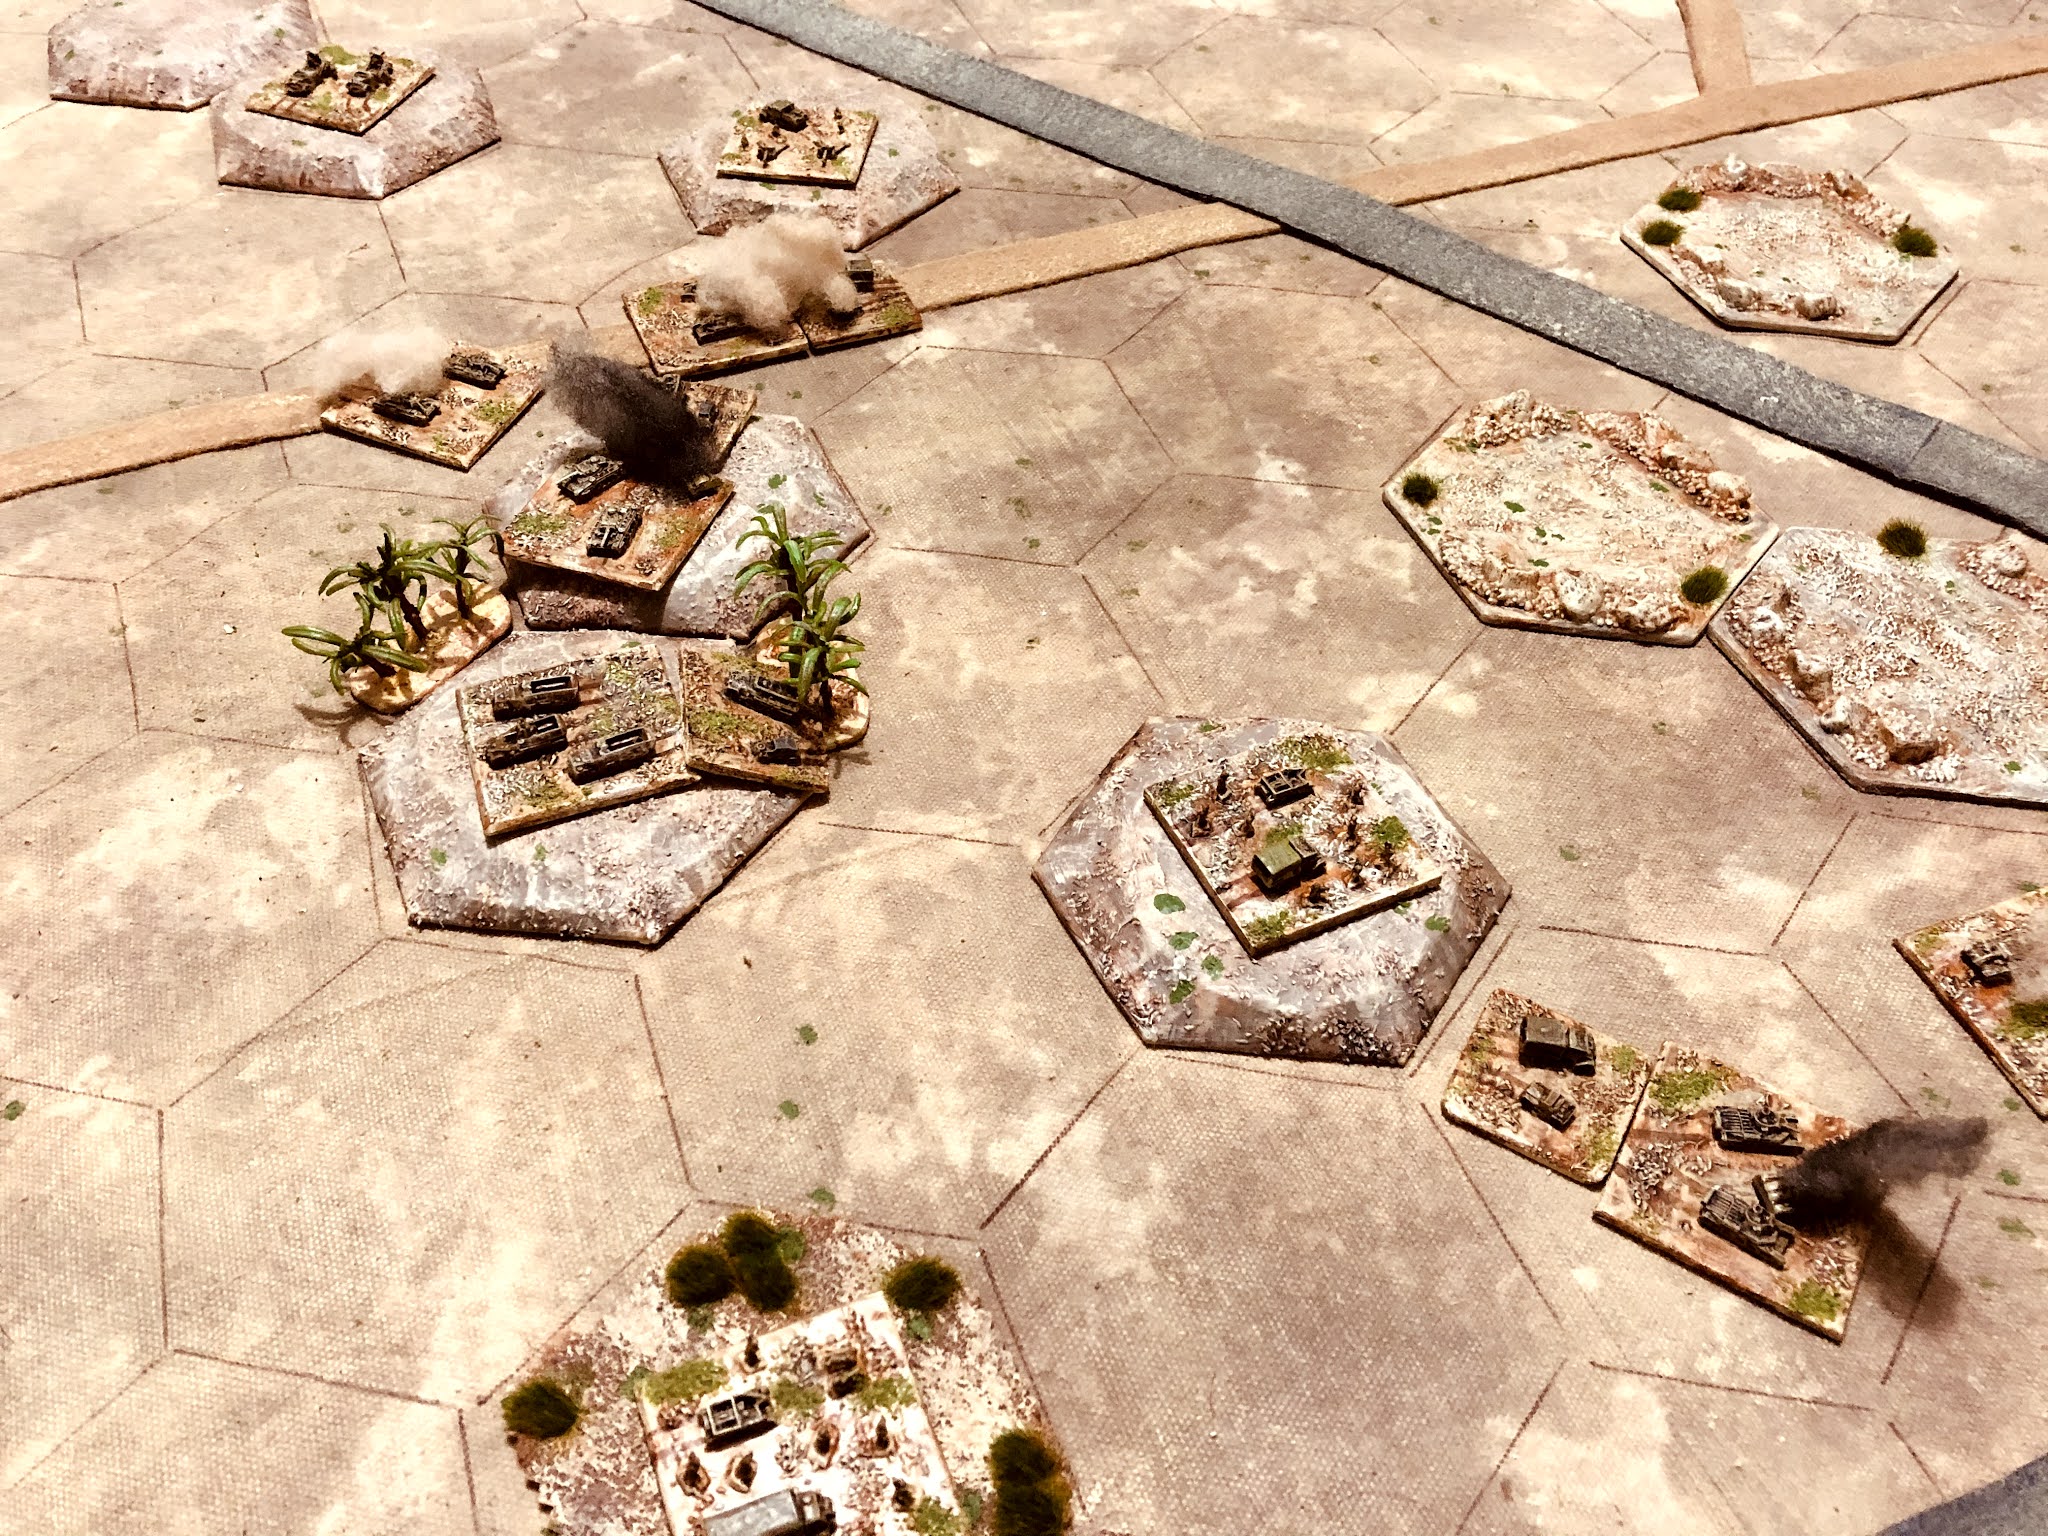
Dice and terrain cards decided the type of engagement and terrain the using the approach written up here. The Ariete division are making at frontal assault on the 1st Armoured division who are defending the  town and ridge North-East of town (South is top in the photographs). A third of the Allied forces are held in reserve and can arrive one unit at a time on any turn.

Objectives and attack plans

The Italian armour is planning to push around on their right flank while attacking the town from the front with their Semovente self propelled 75mm guns using their longer range. A small force of infantry and guns will push up on the left flank to provide support, particularly artillery support for attacks on the town.

Allied units in their defensive positions on the ridge and around the town.

Italian forces move forward.

The orders of battle are:

Elements of the 1st Armour division...

  • 1 x Honey tank
  • 2 x Crusader tanks
  • 3 x Grant tanks
  • 2 x Infantry units
  • 2 x AT units (2 pounder and 6 pounder)
  • 2 x Artillery units (25 pounder and Bishop)

Elements of the Ariete Armoured division...

  • 2 x Semovente 75mm
  • 5 x M13/40 tanks
  • 2 x Autoblinda armoured car units
  • 1 x Artillery unit
  • 1 x AT unit
  • 2 x Infantry units

The game report to follow soon.

Wednesday 24 February 2021

Having a go at writing a wargame article

In 2020 I finally decided to subscribe to Lone Warrior, the journal of the Solo Wargamers Association, and I have found the articles in the magazine both interesting and wonderfully varied. The articles are mostly, if not all, written by their members and they convey a real enjoyment of wargaming. While there are regular contributors to the magazine, there is always a gentle encouragement to readers to have a go at writing an article. So guess what? I decided to have a go at writing an article and it appears in Lone Warrior number 214.

After a bit of thought I decided to write about a fictitious commando raid and the steps I took from set up, creating the defender's order rules, and game report. There were some eleven steps in all which expanded upon the approach I had taken with a St. Nazaire solo wargame played a year or so ago. Where the defenders operated to a defined set of simple order rules (details of the St. Nazaire raid game are here). 

It was an interesting process writing the article. There was a lot more planning and structure required  compared with my approach to blogging. My blog posts are diary like with mostly point in time ideas that get written about and sometimes contradicted or changed in later posts. This has raised the question as to whether I should spend a bit more time thinking through and structuring my blog posts before hitting the keyboard and the publish button.

Will I be doing another article? Yes, possibly later in the year as I have another topic which is very solo wargaming related but still needs some more thought and planning first.

Anyway, below are a couple of pictures of the game which did not get included in the article...

German reserves arriving across a bridge as there are explosions in the darkness

Will reserves arrive in time?


Sunday 21 February 2021

More ECW games to test out rule modifications

This weekend I spent time playing a few English Civil War games trying out some commander resolve rule mechanisms used to decide when one side of the other calls it a day and retires from the field of battle. The rules uses the straightforward number of lost units to reduce a commander's resolve with a couple of additions which also reduce resolve.

A game setup 8 units per side on a 4x4 tabletop

Commander's Resolve Rule

Each army has a single Commander representing their position on the battlefield. Commanders cannot be shot at or charged. However, when an enemy unit approaches within 6 inches, they must move up to 12 inches to be out of the way and avoid the enemy.

What is the Commander’s resolve? The resolve of a Commander is decided before the battle begins, and is tracked throughout the game. Once the limit of a commander’s resolve is reduced to zero they will order a general withdrawal of their army.

How to calculate a commanders resolve? Simply multiply the number of units in the army by 3.

How is resolve tracked? During the game reduce a commander’s resolve by:

  • Subtracting 1 every time enemy units roll a natural 3 when shooting or engaging in hand to hand combat. I use D3 and 3 represents a better than expected response from the enemy.
  • Subtracting 3 when a unit is eliminated. Note impetuous cavalry pursuing an elimination unit off the table do not count as eliminated.
  • Subtracting 3 when a commander has to move because enemy units approach to within 6 inches.

Once all a commander’s resolve is reduced to zero, they leave the field of battle and their army retires.


Royalist forces line up for battle

To track a Commander's resolve I used an old cribbage board

While I seem to have settled upon these Commander's Resolve rules. A couple of questions are yet to be answered. The first is calculating the resolve, where 3 looks to be the right multiplier, but a few more games are required to confirm that. The second questions is whether to allow the commander to move once placed at the start of the game, other than to avoid enemy units. I am tempted to allow a 6 inch move whenever the Foot units are activated.

A game about to finish.

Next weekend I am planning to get back to my Western Desert campaign for a change.

Wednesday 17 February 2021

A few ECW games and Ancients painting

This past weekend I continued to tinker with some English Civil War rule mechanisms. Having settled on the sequence of play using cards as discussed two posts previous, other rules were added for unit disorder, and impetuous Horse units. These were tested in a few quick games using a 4 x 4 foot tabletop setup with 8 units per side.

A small game underway

Mid-game on a 4x4 tabletop setup

The rules changes appear to add the effects on the game that I wanted, and I now have to write up these changes. The gist of the changes are:

Units are tested for disorder after taking hits. On a 5 or 6 they become disordered and cannot move the following turn. All units entering into hand to hand combat become disordered and cannot move in the turn after hand to hand combat has come to a conclusion with one side eliminated. 

I have yet to try introducing unit quality, where inexperienced unit are disordered on 4, 5, or 6 and veteran units only on a 6.

All Horse units after winning a hand to hand combat engagement must dice to see if they are impulsive and charge off. On a 4+ they are removed from play, but are not considered eliminated for victory conditions, otherwise they remain disordered. Unit quality can also come into play here with well disciplined units only charging off after a 5+.

Roman units completed so far.

On the painting side of the hobby, I am still getting a couple of Roman units painted each week for my venture into the Ancients period. Eleven units have been completed to date with a further two on the painting table at various stages of completion. The Carthaginian army is all but complete and I may get my first game in late March or April.

Wednesday 10 February 2021

ECW gaming and 3 influential armies

I am playing a few more English Civil War games testing out the use of activation cards to determine the sequence of play (see previous post). I want to say a thankyou to all those that commented and provided additional ideas and thoughts. I am still processing them and I am sure they will improve the end result.

A test game about to begin on a 4x4 foot table and 8 units per side plus artillery piece.

A last month I posted about three wargaming books which were influential on my wargaming (here) which was an idea from Nundanket's blog. This got me thinking about what are the three most influential armies in my collection and why? Well, here they are in no set order:

English Civil War (Mostly Hinchliffe)

English Civil War - Hinchliffe

The first that came to mind were my ECW armies, possibly because they were my first metal figures. I collected a few Hinchliffe miniatures at a time with pocket money and savings over the years, slowly building up Royalist and Parliamentary armies from the ages of 12 to15 years old.

I made two failed attempts at painting these armies. Eventually they were boxed up for decades travelling with me from the UK to Australia, then New Zealand, and back again to Australia. I finally cleaned them up and painted them in my late 50's. Getting these armies on the tabletop for a game always gives me a great deal of pleasure.

Warhammer 40K Tyranid Army (Games Workshop)

A selection from my Tyranid army

After doing no wargaming for some 15 plus years, I started again with a Warhammer 40K entry level box with my Son. I got the Tyranids and he got the Space Marines to paint. Not that I did much gaming, the rules were not for me. However, I did enjoy making, converting and painting the units and overtime have build up quite a few units and collection of armies. While rarely playing a game there was always the fascination of building units with their various armour and weapon combinations.

Of all the 40K armies, I must say those Tyranids remain a favourite and largest army, and are partially the reason for me getting me back into wargaming.

War of the Spanish Succession (Paper Soldiers)


When asked "what is your favourite army?" A perfectly acceptable response could well be "my last one." As is the case with me with my WSS armies, but not because they are the most recent addition. It is the opportunity these paper armies from Peter Dennis offer to go off and explore other periods you may well have never considered doing because of the cost.

I have 3 paper armies: WSS, Jacobite, and 1066. Periods I would not have normally explored were it not for these paper figures. I increase the size of the figures from 28mm to 40mm when making them.

So there you have it my top three influential armies, though not necessarily favourite armies as one of them could be replaced by one of my armies by Peter Laing Miniatures.

Sunday 7 February 2021

ECW games and sequence of play

This week I have been trying out a different sequence of play rule mechanism for my English Civil War (ECW) games. The current rules use a IGO-UGO approach with a limit on the number of units that can take actions, determined by the number of units within 12 inches of the commander's position.

ECW game and horse attack underway amongst the fields

It is a rule mechanism I am ok with, but was not really satisfied with, and I thought I would see if I could come up with a variation using the sequence approach used for the War of the Spanish Succession (WSS) rules. Where the order in which player’s perform their turn phases is determined by taking cards off the top of a card deck with 5 read and 5 black cards. Each time their colour card is revealed a player performs their next phase in the following order:

  1. Artillery Shooting - a player resolves all artillery shooting.
  2. Musketry Shooting - player resolves all musket shooting.
  3. Cavalry and Dragoon moves - a player can move all cavalry or dragoon units within a command range. This includes resoling charges where a unit moves into contact.
  4. Infantry and artillery moves - a player can move all infantry units within a command range.
  5. Commander moves and rallying - a player can move any commander and use them to rally a unit.

Once a player has performed their phase, take the next card from the top of the pack and a player performs another phase. This continues until both players have performed all their phases in order, then shuffle the card deck and start the next turn.

This sequencing approach is using ideas from the ruleset “The War of the Spanish Succession - Paperboys Rules”, and I really like the way it gives a clunky feel to the way a turn progresses. Very fitting for the WSS period where armies were organised but still ponderous in their movements. 

I was tempted to just adopt the same approach, but after a bit a reading to refresh my memory the ECW armies and their organisation, where ECW armies are ponderous and lacked the same level of coordination  between unit types. I can up with the following sequence of play which has no set order, rather order is driven by the cards drawn.

Some of my reading to refresh my memory

After a bit of messing around with some card options, including separating out movement and shooting, but ended up with the four cards to represent the four major types of units involved in the ECW. 

Sequence of play cards. I originally used playing cards, jacks for foot, queens for horse, etc, but found it easier to make my own cards.

The order in which player’s activates their units is determined by taking cards off the top of a card deck. The deck has the following cards representing the key unit types in an ECW army and are shuffled together in one deck of cards:

  • 4 Red cards: Horse Activation, Foot Activation, Artillery Bombardment, and Dragoon/Commanded Shot Activation.
  • 4 Blue cards: Horse Activation, Foot Activation, Artillery Bombardment, and Dragoon/Commanded Shot Activation.

Each time a players colour (blue or red) card is revealed that army's player activates the unit types on the card. Once complete, take the next card from the top of the pack and a the army's player activates the specified unit types. This continues until both players have had the opportunity to activate all their unit types, then shuffle the card deck and start the next turn.

A few more games need to be played before I update my rules, but so far I am enjoying using cards to determine the sequence of play. I find the cards not only give a clunky feel to the game, they also make coordination between unit types quite unpredictable. 

Monday 1 February 2021

WW2 Western Desert Campaign Turn 10 Game 2

Following the failure of the 21st Panzer Division to make any headway against the 7th Armoured Division in game 1 or the 10th campaign turn. The 15th Panzer Division advances to find it may have found a weak spot in the Allied defences. They are attacking a weakened South African Infantry Division who are yet to be reequipped after their previous engagement.


Terrain cards are selected and the Allies choose their defensive edge. Because this was the second game of the campaign turn, neither side can make any card switches. The dice decided the attacker is making a surprise flanking attack. Elements of the South African Division are able to occupy their half of the tabletop and the attacking 15th Panzer Division elements start with half their units on their base edge and the other half in reserve ready to arrive on a chosen table edge.


Order of battle

Elements of the 15th Panzer division

  • 2 x armoured car units
  • 1 x PzII tank unit
  • 1 x PzIV tank unit
  • 4 x Pz III tank units
  • 1 x Stug III unit
  • 2 x Armoured Infantry units
  • 1 x 88mm gun unit
  • 1 x Wespe mobile artillery unit
  • 1 x 50mm AT gun unit

Elements of the South African Infantry division

  • 1 x armoured car unit
  • 3 x infantry units
  • 1 x 2pdr AT gun Portee unit
  • 1 x 6pdr AT gun unit
  • 1 x Valentine tank unit
  • 2 x Matilda tank units
  • 1 x 25pdr artillery unit

The 15th Panzer plan was plan was to have two strong flank attacks, one along the road and a flanking attack on their right from off table. The Allies were taking up a defensive position around the hills and a single objective.

Planned attacking moves and defensive positions.

The opening moves went pretty much as planned for the 15th Panzer's attacks and they were soon engaged by the defenders. However, on each flank Matilda tank units were proving to be very frustrating adversaries and the attacking momentum was lost on both flanks.

German flanking forces arrive

The German left flank attack is frustrated by Matilda tanks

Having lost the attacking momentum on the flanks the German centre was pushed forward along the track. A Matilda tank unit was pushed forward to counter this move and soon had them in retreat. At the same time a second wave of units arrived on the right flank. They were able to push along the road to where it crosses the track getting behind the Matilda unit and isolating it from the defensive line.

The German centre is forced to retire as the Matilda tank pushes forward.

The Matilda tank unit becomes isolated and Panzer units manoeuvre to take advantage of the gap in the defensive line.

As the remaining German flanking units arrived on the right, they were able to exploit the gap left by the Matilda tank unit and push up quickly on the objective. A 25 Pounder artillery unit was standing between them and victory. Time was running out (with only two turns of the game left) and the first attack on objective hill would need to be decisive.

Panzer forces race towards the objective which is guarded by a 25 pounder unit.

The Germans were able to dislodge the defenders on their first assault and take the hill objective. On the last turn all Allied hopes rested with a counterattack to make the hill contested and the game a draw. The final chance card was drawn to reveal they have an ammunition shortage and all Allied hopes faded as they failed to make a third action.

Not what you want on last move when mounting a counterattack

A German victory as they seize control of the objective.

At one point it looked like a weakened Allied force was going to produce a surprise win as the clock ticked away for the attackers. Only to have it snatched away at the end as a gap opened up in the defensive line.