Wednesday 28 October 2020

Ancients painting progress and how to eat an elephant

I am still painting a reasonable number of Carthaginian figures with another three units completed this past week. I am now up to 10 units painted and based of an expected 20 Carthaginian units, before I turn my attention to the Roman units.

Recently painted units

Some books arrived to help with my foray into wargaming with Ancients. I am currently enjoying reading the "Armies of the Carthaginian Wars" by Terrance Wise, and eagerly look forward to reading "Lost Battles" by Philip Sabin.


Recent book arrivals

Now for the question on "how to eat an elephant?" We live in Melbourne and have been in a Covid-19 lockdown for some 100 plus days until earlier this week when restrictions started to be lifted. However, they were not lifted in time for my birthday and with no ability to visit restaurants my wife got creative and arranged through friends to have a wargame themed cake made of a Carthaginian elephant.


Birthday cake

So my answer to the question is - one slice at a time.

The next game setup on the tabletop

In the meantime my tabletop is now setup for a few WW2 Western Desert campaign games.


Friday 23 October 2020

ACW game report and rules

This game report is of an attempt to recreate the American Civil War "Action in the Plattville Valley" from Donald Featherston's book "War Games" on a hex grid. A couple of months back I added an 8 inch hex grid to my gaming cloth (click here for more information). To go with the hexed tabletop I have updated a variation of the ACW One Hour Wargaming rules by Neil Thomas. A link to these "D3 ACW" rules can be found at the top of the blog page.

Scenario map (Google Slides was used to create the map)

The first challenge I had setting up the game was with the number of hills required. I have a number of existing hills, these are more suited to a square grid and as such they do not fit nicely to a hex grid. Fortunately, I still have some insulating foam board in the shed and I was able to quickly create the necessary hills which get placed under the cloth.

Insulating foam board from the hardware store is easily cut to shape and sanded.

The second terrain issue was to get the river to weave its way through the terrain along the edges of the hexes. To overcome this some blue felt was cut up into small lengths so it could, for the most part, follow the hex edges.

The tabletop all setup and ready for a game with hills and river.

The game objective is for both Union and Confederate forces is to control Plattville valley, consisting of the bridge and Plattville township.

For the first 3 turns both sides have only an infantry unit on the tabletop marching along Pike Road. The figures I am using are my old 15mm MiniFig ACW figures which have been with me now for some 35 years. For most of that time they were packed away and only in the last few years have reemerged and appeared on the tabletop.

Opening moves as units move along the Pike Road.

On turn 3 the remaining units arrived and both forces had their full complement of units on the tabletop:

  • 4 infantry units
  • 1 cavalry unit
  • 1 artillery unit

The union commander has an interesting decision as to where on their base edge to bring on their troops on. The river divides their base edge, but they do have an advantage that their artillery can move forward with minimal risk and hold a good central hilltop position. 

One thing I do notice about using the hex grid is the units are well spaced out and not crowded together. I have a tendency to bunch units when using a free movement approach.

Looking from the Union left flank.

Looking from the Union right flank.

Both sides decided to hold and defend their left flanks, while attacking on their right flanks. The artillery on both sides took up positions on the available hills to support their own attacks.

Union forces advance upon Church Hill. I lack a church so a standard building is a substitute.

Looking at the Confederate right flank. This picture shows how the hills fit under the hexed cloth quite nicely. The cloth is curtain material and had a good weight and thickness to it.

The Confederate attack progressed well with a successful assault across the bridge. Their artillery had done a good job softening up the defenders.

The first attacks begin with a Confederate assault on the bridge.

Confederate forces make it across the bridge, but a single Union infantry unit holds them at bay.

The Union attack on the other flank was a slightly larger affair and there was no immediate result as both sides closed and engaged. The Confederate commander held one infantry unit back in reserve.

Union pressure on Plattville township and church mounts.

The Union attack successfully stormed the Church Hill. The attack was costly for both sides with Confederate reserves quickly being thrown into the action. They also moved their artillery unit from supporting their attack across the bridge and repositioned the unit to help support the defenders of Plattville town.

Church Hill is taken by Union forces.

Union forces maintained their momentum and after some heavy fighting surged forward to occupy both Church Hill and Plattville town. Confederate forces took the prudent step to retire and regroup. Union cavalry took the opportunity to push forward to support the very weak forces holding the town and church.

Union forces try and shore up their positions around Plattville.

A couple of good solid volleys, helped by an event card, routed the Union cavalry and the Confederate left flank was stabilised. Union units still held the township but were in no fit state to continue any attack, and with no artillery support themselves tenuously held on to the position. Confederate artillery on the hill overlooking the town began to bombard Union positions in and around the town.

Union forces are forced to retire from Plattville.

Finally Confederate forces were able to secure the bridge, the objective of their right flank attack, and continued to bombard Union positions. Late in the afternoon Union forces retired from Plattville leaving Confederate forces to control the valley.

After the game there were a few more modifications to the D3 ACW rules. These were mainly changes to the event cards used which provide uncertainty to a solo game and to introduce a level of period feel. Since this game a couple more games have been played using slightly less busy tabletops.

Sunday 18 October 2020

Ancient models painting and ACW

Work is progressing with the painting of the Carthaginian army. I seem to be averaging about three units per week. As my aim is to have between 10 and 15 units per army and with the current rate of painting I am hoping to get the armies close to complete by Christmas. Then I will have to make another mat for the tabletop. For this I will most likely use a painters drop cloth and colour with various watered down acrylic paints in a similar fashion to the WW2 Western Desert wargaming cloth (see here) but with a tad more green.

Simple block painted HAT plastic figures

I decided to see how skirmisher units would look on the 3x4 inch bases. I opted to reduce the 12 figures per base for other infantry down to 9 figures for these units. The painting style I have settled on is simple block painting and a shinny finish.

Sand coloured bases get a brown wash and patches of flock

On the gaming side I managed to squeeze in an ACW game using a hex grid. I am currently converting the One-Hour Wargaming style rules to be hex based and also have been introducing chance cards to the rules to create some period feel and uncertainty for a solo player. 

The early stage of the ACW game

For the game scenario I opted to use "Action in the Plattville Valley" from the book "War Games" by Donald Featherstone. I was able to adjust the map into a 6x9 hex grid.

The game report and more on the rules will be the next post.

Tuesday 13 October 2020

Ancient project progress update

A quick update on progress with the Ancients project. This past weekend I was able to paint three Carthaginian units, all HAT figures. I am trying to keep things as simple as possible with block painting and a glossy finish. Likewise the bases are simple, a sand colour with a brown wash and clumps of flock. When I finished I am expecting the Carthaginians and Romans will have 15 to 20 bases per army.

Three Carthaginian units painted and based

Medium Infantry

Elephants and Heavy Infantry

Finally, a couple of books arrived.


Saturday 10 October 2020

WW2 Western Desert campaign turn 8

This post covers three games from turn 8 of the WW2 Western Desert campaign. All these games were played using the updated rules mentioned in last weeks post (see here). Where I have moved to using a combat resolution table for determining outcomes and included a disordered status for units, rather than just no effect and elimination.

The campaign turn started well for both sides, each scoring 3 with their supplies on a D3 dice. This meant all units sustaining losses in the pervious turn were able to resupply and are back to operational strength. The Allies were rather hoping for Axis supply problems as they started their counterattack after halting the Axis advance in the previous campaign turn. In terms of Allied supplies they had surplus after resupplying one unit, so I allowed them to use their supply points for intelligence gathering. Allowing them to reveal one Axis unit prior to deploying their units (the idea came from some comments on the campaign from a while ago). This intelligence gathering revealed the 15th Panzer in the centre of the Axis lines, and would be avoided in the attacks.

The first phase of the turn has two games, in the south the Allied 1st Armoured division launching attacks against the Italian Pavia infantry division and further north, along the coast, an armoured force attacking the 21st Panzer division positions.

1st Game Report

The first game report is the southern attack with the 1st Armoured division attacking the Pavia infantry division. The Italians have taken up defensive positions along a series of hills and escarpments. The Allied plan was to send the bulk of its armour towards the hills on its left flank in the first phase of the attack. The second phase would attempt to push onwards from the hills, while on the right the light armour, mainly Honeys, would move along the road. The Allied objectives are the road exit, escarpment, and hills.

Allies planned attacks, the palm trees indicate objectives.

The first objective, the hills, are easily taken by the main Allied attack.

The second phase of the Allied attack was successful pushing along the road, but the left flank attack was unable to push on to the escarpment and had to retire back to the hills.

An Allied victory with the capture two of the three objectives.

2nd Game Report

Elements if the 21st Panzer have taken up positions on hills around a small town, and left a small reconnaissance force out by the escarpment. The Allied plan is to sweep around the right towards the hills to the left of the town, while a second force pushs down the road.

Allied attacking plans. The objectives are the two sets of hills and town (all objectives are marked with palm trees)

An early and unwelcomed arrival of German air support greeted the first Allied moves along the road.

The attack progresses along the road.

A timely air attack for the Allies causes disorder in the defending German units.

In the centre German tanks counterattack and stymie the right-hand Allied attack. 

Allied forces fail to make any headway in the centre and retire.

The assault down the road after good progress fails to dislodge the defenders.

A victory to Axis forces with the Allies failing to capture any objectives.

Final Campaign Turn 8 Move

After the setback to the north the final Allied attack follows up on the success in the south.


The 3rd Game Report

The third game turned out to be an encounter battle between a blocking force of the Ariete armoured division and the Allied 7th Armoured division. Both forces start the game with a third of their units in reserve. The plan of both forces are to take and hold the line of central hills which contain the three game objectives.

Allied and Italian plans to seize and hold the central hills.

Allied air support delays the Italian advance

Both sides gain foot holds at various positions along the hills. The Italians on the right of the road and the Allies hold the centre. At this stage of the battle the Allies held the better position.

Both sides rush up their reserves.

A tense series of actions saw both sides gain and lose positions. The Italians were in a better attacking position as Allied reserves were delayed by Italian air support.

As the day ended Italian forces were able to secure two hill areas and two objectives.

With this Axis victory, the second in this campaign turn, the Allied counter offensive is halted and the next campaign turn will see the Axis resume their attacks.

Saturday 3 October 2020

Parcel arrives and WW2 Western Desert rules

This post was going to be focused on the WW2 Western Desert rules update and games, as I have two game reports still to be write up for the latest campaign turn. However, a parcel arrived during the week containing a few boxes of Ancient figures, and when you get new toys you have to post the news. Well, I think those are the rules. 

The parcel from Hannants arrived a lot quicker than I expected, a very swift service indeed.

Contents of the parcel

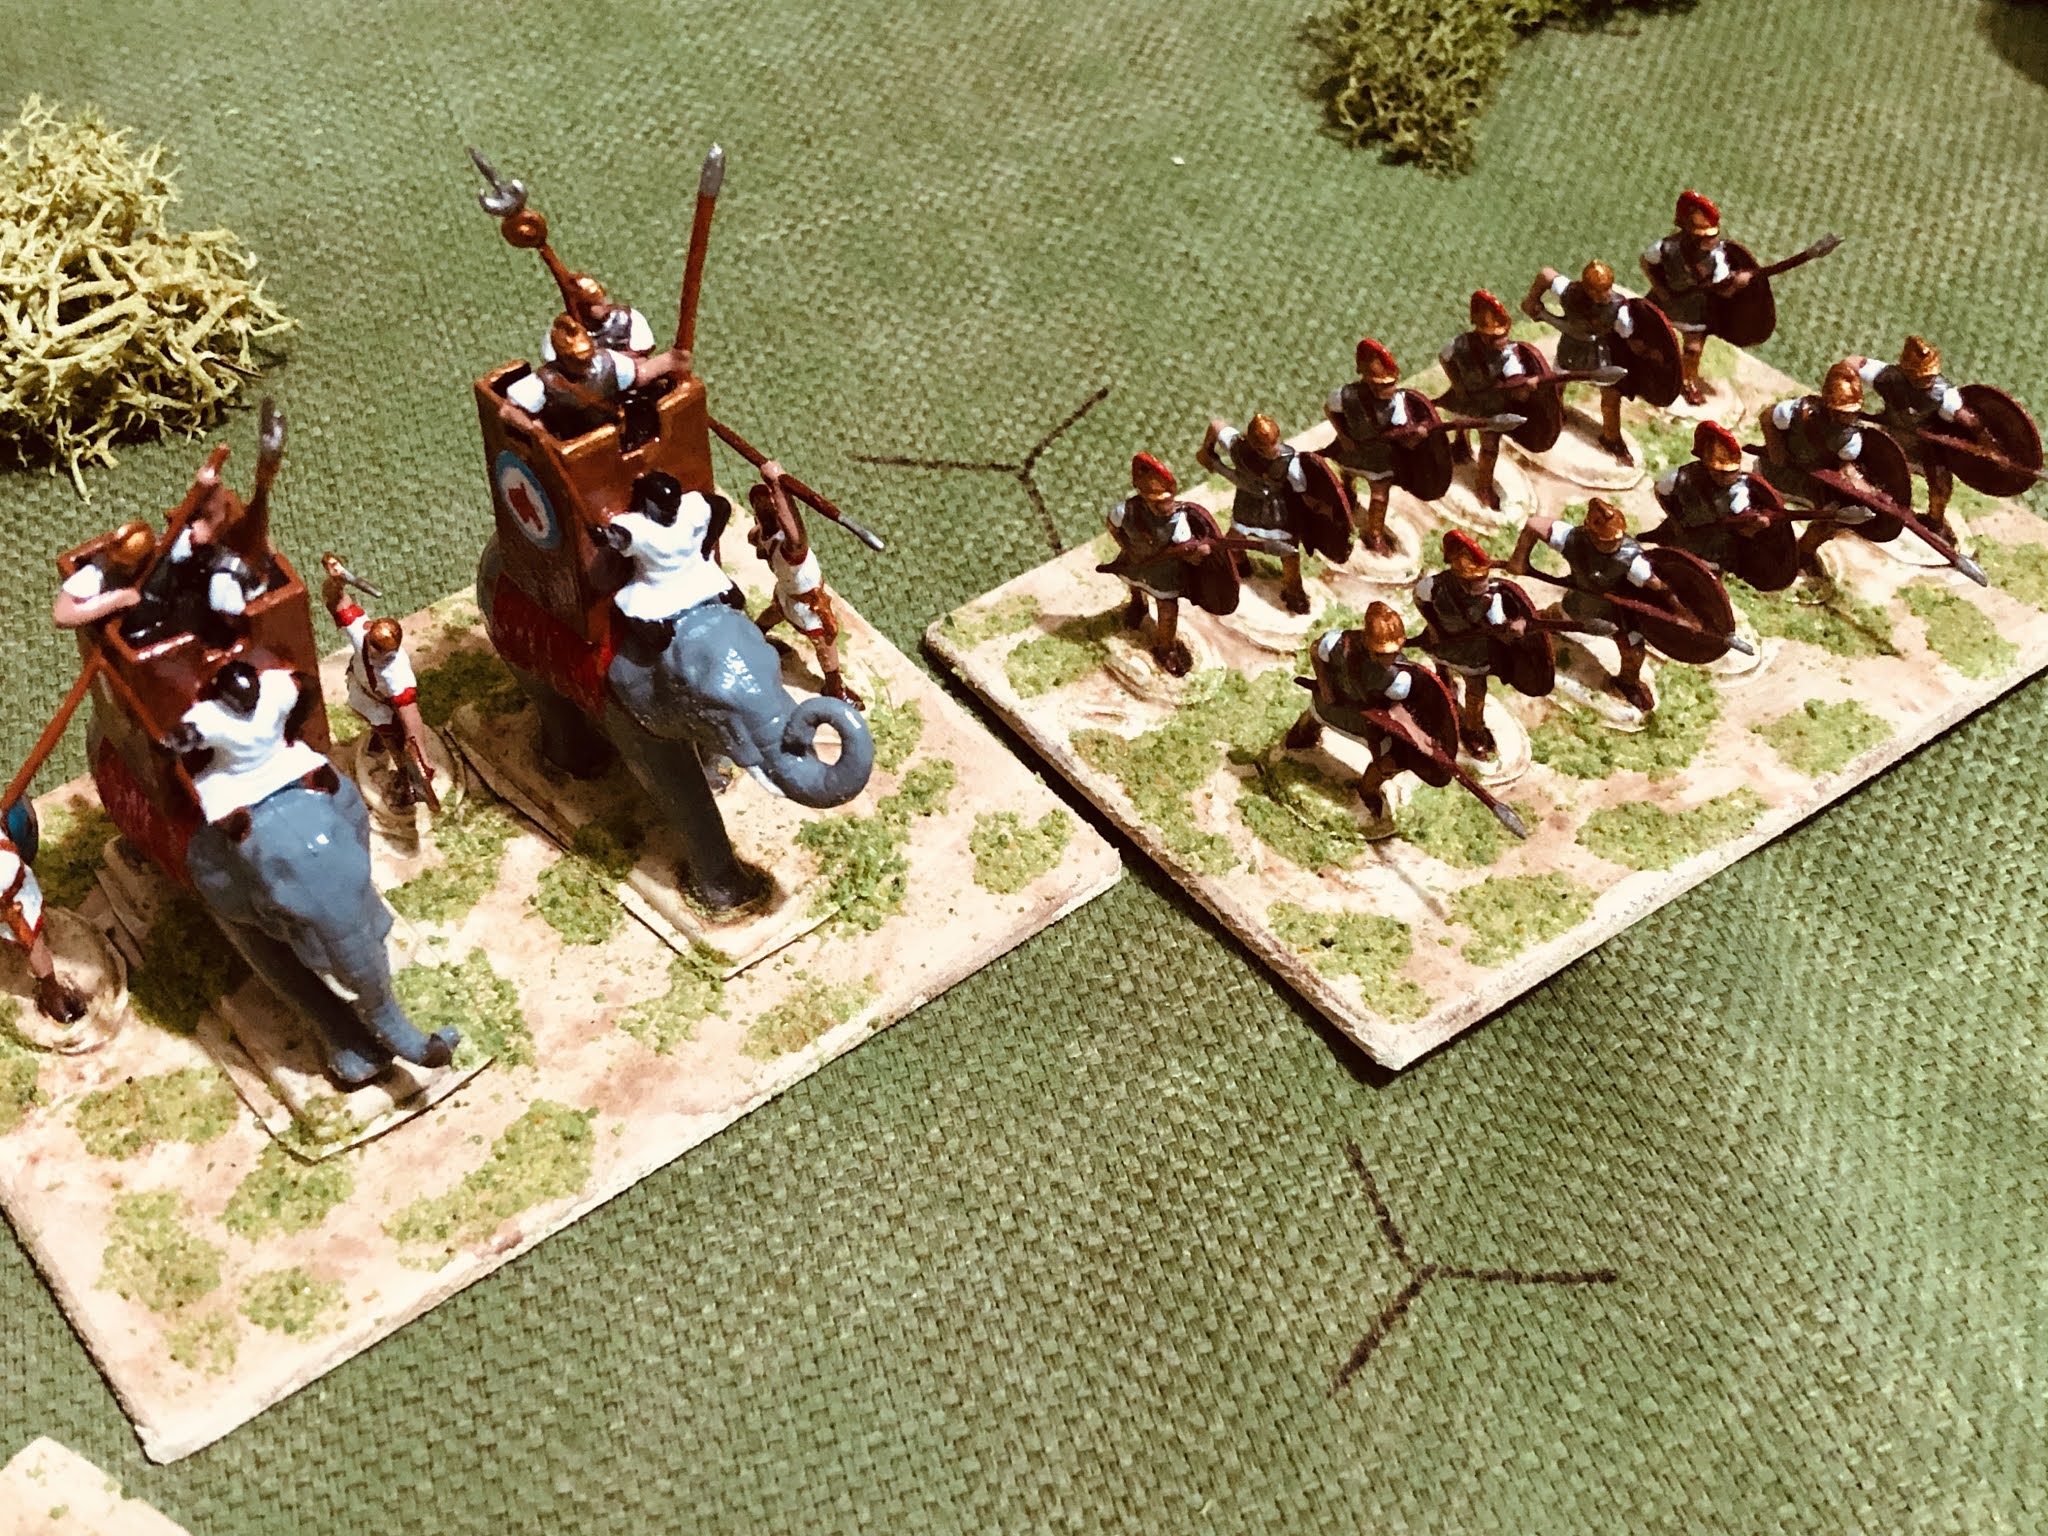
Carthaginian Soldiers box contents

These new arrivals, a few starter sets of plastic Carthaginians Soldiers and Roman Soldiers should help me field on the tabletop two armies approximately 200 figures apiece. The next steps for me are to determine how I want them based and painted. From a basing point of view most of my other armies have units with a 4 inch frontage and 3 inch depth. This size base fits nicely into a 6 inch square grid without crowding out any terrain features. My thinking right now is to stick with this size and go for units of between 15 to 20 figures depending on unit type. This hopefully will give the impression of a large block of troops.

This is the first time I have purchased HaT figures and they are well posed. I hope to be able to utilise most, if not all, of the figures. As for painting them, I am going to simply paint them with no washes or dry brushing, and complete them with a glossy finish. A test group will be on the painting table this weekend.


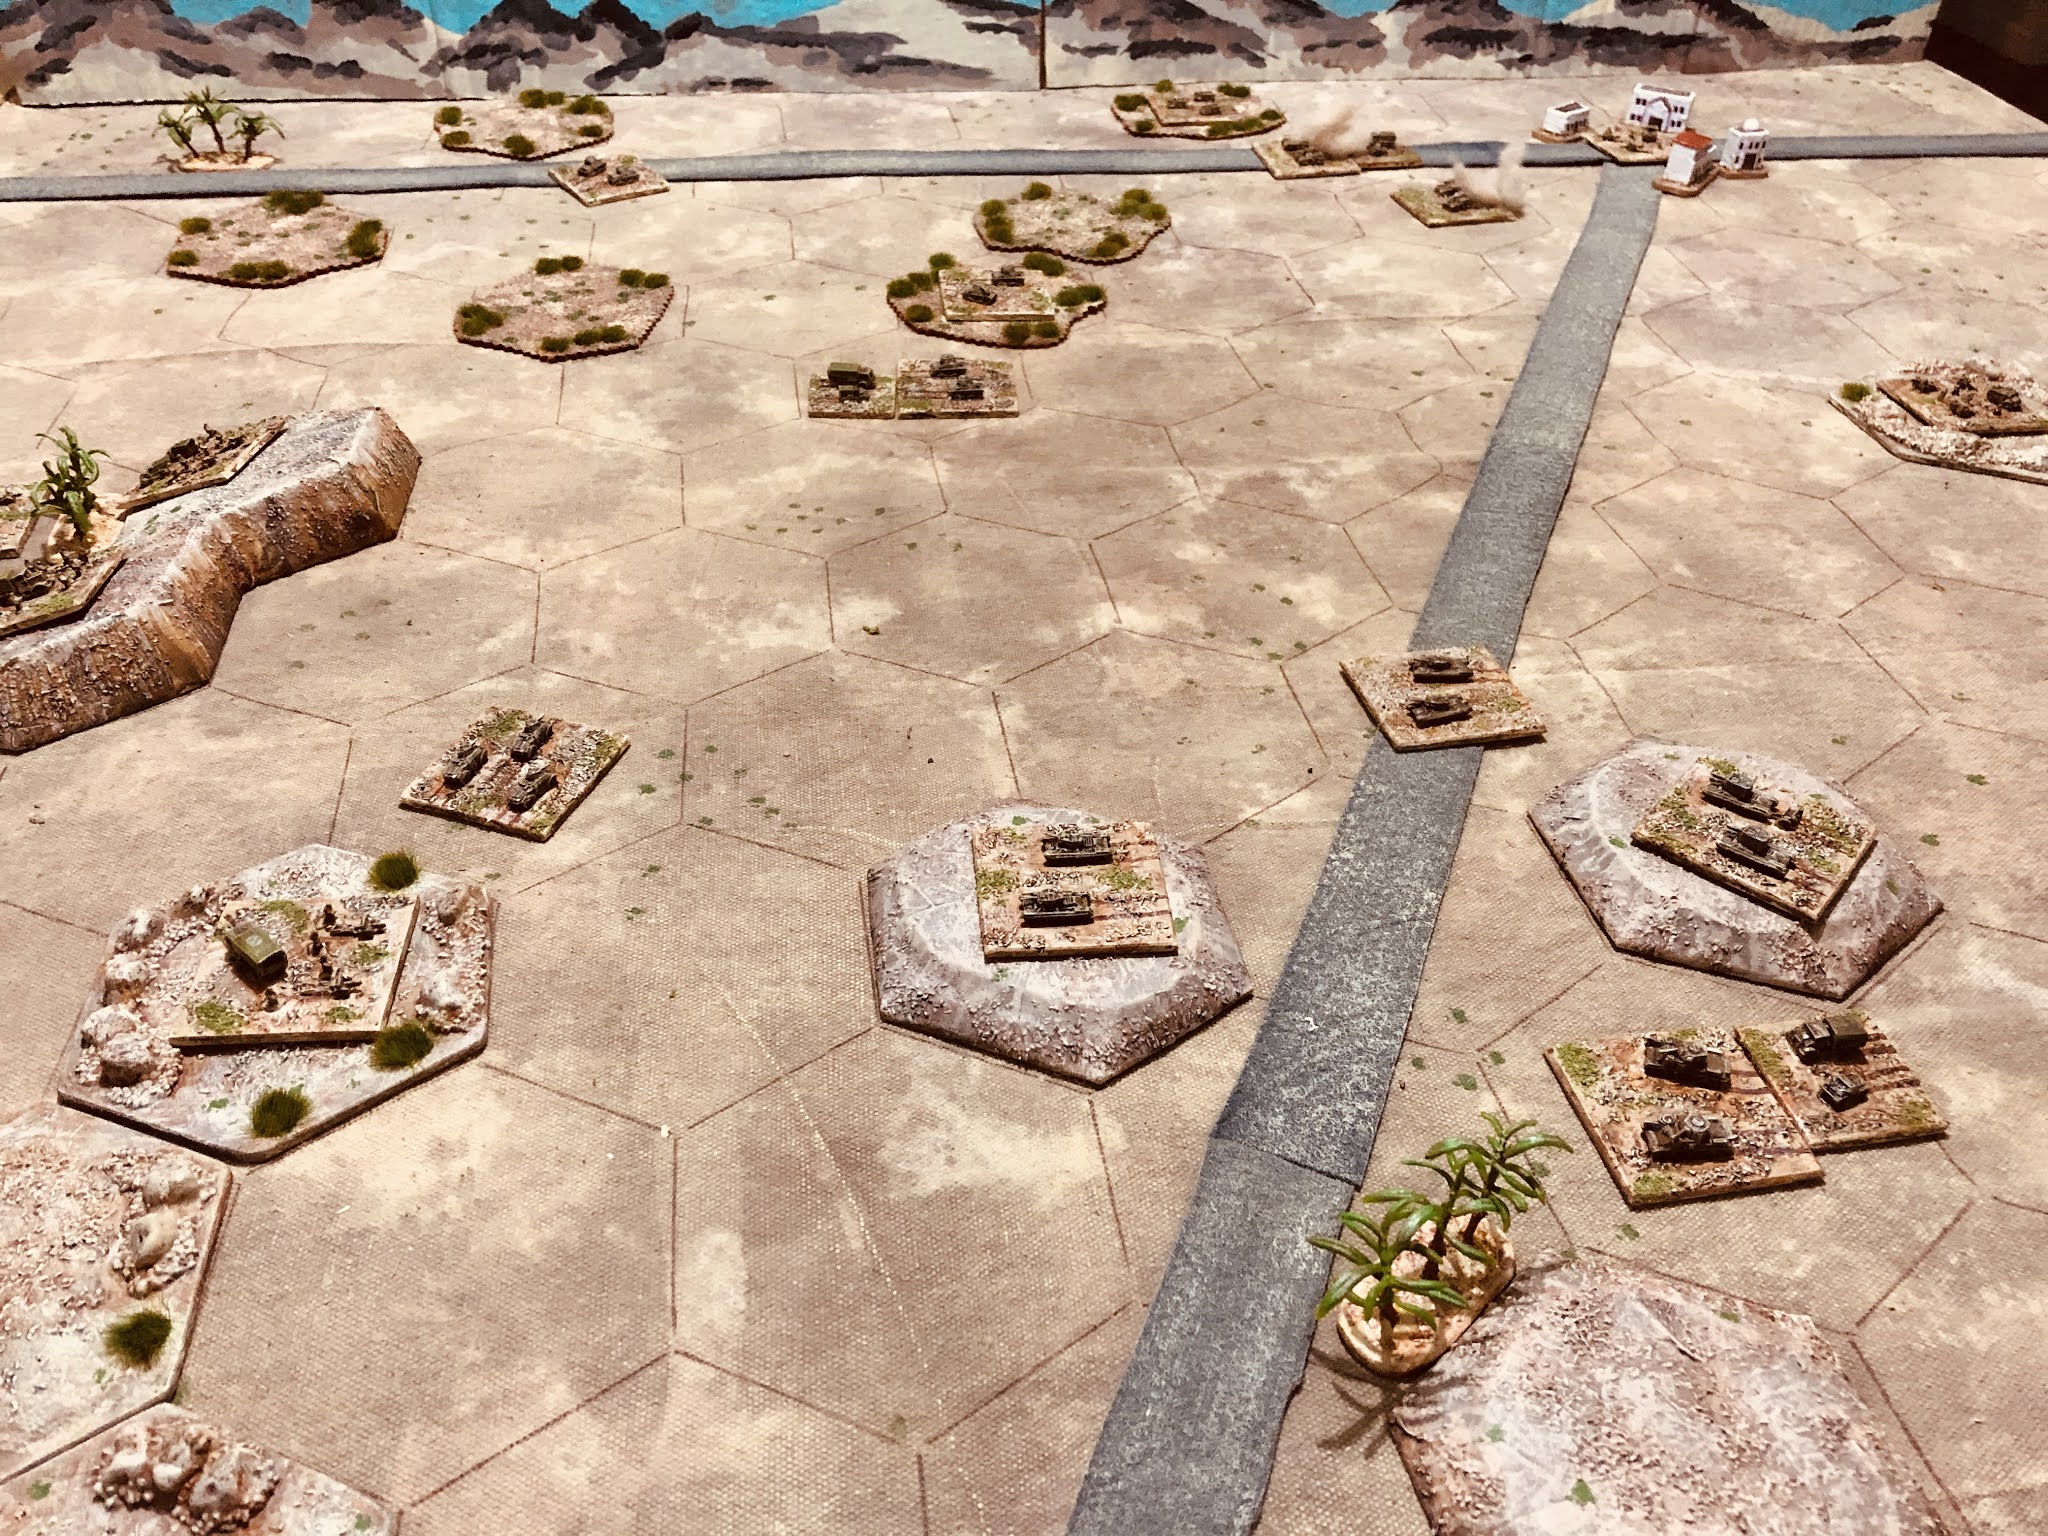
Returning to the WW2 Western Desert campaign which is taking up most of my available wargaming time. After a bit more work on the rules during the week, or more specifically the combat rules, I moved from the idea of opposing combat dice to a simple combat resolution table with the outcomes of:

  • No effect
  • Disordered
  • Eliminated

Previously the outcome had been no effect or eliminated. Having played a few small games with these rule changes, I have updated the rules (see here) and will continue with the campaign games. Below are the combat section changes:

=============================

COMBAT

To shoot at an enemy unit, a player must satisfy these conditions, they must:

  1. Be in their firing front arc unless turreted
  2. In range
  3. Have a line of sight (LOS) to the target
  4. The target has not been fired at already this turn

Any number of units can fire at the designated target, providing each unit satisfies these conditions and has not already fired this phase.

RANGE

To determine if an enemy unit is in range, count the hexes between them and add one for the target’s hex. If the total is equal to or less than the unit’s range value, it can fire.

LINE OF SIGHT (LOS)

To determine if there is line of sight to the target, trace a line from the centre of the firing unit’s hex to the centre of the target’s hex. If the line does not cross blocking terrain, there is a valid LOS. Blocking obstacles are any unit (friendly or enemy), Hill, Rough Ground and Town hexes.

Units on Hill hexes can see (and be seen) over units on clear-terrain hexes.

LOS down a hex spine: If the line travels exactly between two hexes, it is only blocked if there is blocking terrain on both sides.

A unit does not have line of sight when a target is more than 4 hexes away, or 5 hexes if on a hill or escarpment.

ARTILLRTY SUPPORT

An artillery unit does not require LOS to the target if at least one other firing unit has a valid LOS. Artillery must still be within range of the target.

Artillery support cannot be used against moving units, unless the artillery unit has a LOS to the target.

HQs can call in artillery strike even if they are not firing so long as they have LOS.

COMBAT RESOLUTION

Use the following procedure:

  1. The attacking player determines the attacking value by adding up the number of attacking units and subtracts the target’s defensive value. When adding attacking units unsuppressed units count as 1 and suppressed units as 0. Essentially this means suppressed units can attack on their own at a reduced effectiveness, but are ineffective in combined attacks.
  2. Roll the dice and consults the combat results table using the attacking value column.
  3. Apply the results. If the target unit is disordered place a marker with the unit (I use burning wrecks). If the attack is successful and the target unit is destroyed, remove the unit.
  4. Any attacking unit in an adjacent hex to the destroyed target has the option to move into the vacated hex at no AP cost.

Note:

  • Remember to use the second defence value if the target is in cover.
  • Add 1 to the attacker’s score if any of the attacking units occupy a hex flanking the target and are not artillery support.


Disordered Units and Reorganising

Disordered units can still attack as an individual unit, but are less effective counting as zero when adding up the attacking units. This represents a level of disorder in the unit due to casualties and stops them being effectively involved in coordinated attacks.

Units can recover and reorganise from disorder at a cost of 1AP, but a player cannot use either of their first two free APs in a turn to recover a unit. This means a unit can be reorganised with the 3rd or 4th AP. Representing the time to reorganise and participate in an attack. For example, a unit can be unsuppressed on the 3rd AP and involved in an attack on the 4th AP, but the chances of that happening are reduced.


=====================

I have two game reports to write up next, and play through a 3rd deciding game for the current campaign turn. The reports may be a tad brief as I have limited photos of the games, too wrapped up in the new rules to pause and take photos.