Monday 31 December 2018

Western Desert Battle Report

I have been trying out a few WW2 Western Desert games with the rule modifications to Lock 'n' Load's Tank on Tank boardgame, and here is a game report on one of those games.

The rule variations can be found in a previous post. The only change to the variations made were to allow AT and Artillery units to move 1 hex rather than be static.

If you are not familiar with the Tank on Tank rules. An overview and review of the boardgame can be found on Battlefields and Warriors. It is an excellent read. The rules themselves are free to download from Lock 'n' loads website. I think they are very nicely written rules too. They provide a simple and fast game which fits with my preferred style of wargaming rules.


Some of the photos in this post are not great, I am getting used to photographing 6mm models. The models I completed this month (December) certainly provide the look and feel I wanted for my WW2 Western Desert games. I am now planning phase two of the project in the New Year, which will add some Italian units and one or two extra tanks so I can extend to gaming into the Tunisian campaign.


Anyway, back to the game which starts with the leading elements of the British 4th Armoured and 22nd Guards having recently captured the town of Sidi Balsa. They now need to prepare quickly for the expected counterattack from the 15th Panzer division.


British forces are all setup within 2 hexes of the road and a reserve near the Eastern wadi. They plan to push their armoured units into the Northern hills, while their armoured reserve moves up to fill the vacated space in the centre.


German plans are to grab control of the Northern hills, hold the centre and probe the defences around Sidi Balsa.

British manœuvre their forces to take up their defensive positions as the 15th Panzer units push forward.
A tank battle develops in and around the Northern hills. The British had the better of the battle until the Panzer IVs joined the engagement. 
In the centre a motorcycle reconnaissance unit holds the rough terrain in the centre.  Personnel units in the game perform very well when in cover, with a defence value equivalent to the best armoured tanks.
A view from the German position. The arrival of British reserve tanks has halted their first armoured assault to capture the Northern hills. 
A view of the thinning British defences as the 15th Panzer group starts to reorganise for an assault more in the centre and lower Northern hills.
The probing attacks in the South have secured the Southern wadi. Further to the North, the reorganised German attack moves more towards the centre and the fragmenting British line of defence.
The last British defences collapse in the centre. Only isolated units in the hills and around Sidi Balsa remain.
German air-support arrives and eliminates a troublesome 25 pounder artillery unit.  The combination of forward positioned infantry spotting for artillery is very effective against any opposing personnel units and light armour in the open.
The final positions
The end result was a successful counterattack which forced a hurried British withdrawal. 

In terms of the rules they worked well for me and provided an enjoyable game. While at first glance it seems to be too easy to eliminate units, a player is limited to only a few actions each turn, and any attacks need to be balanced with manoeuvring the rest of your force to gain tactical advantages.

Having AT and artillery units to move 1 hex worked. So I am removing that rule variation and going back to the core rules which does allow movement.

Saturday 29 December 2018

WW2 Western Desert project - rules approach

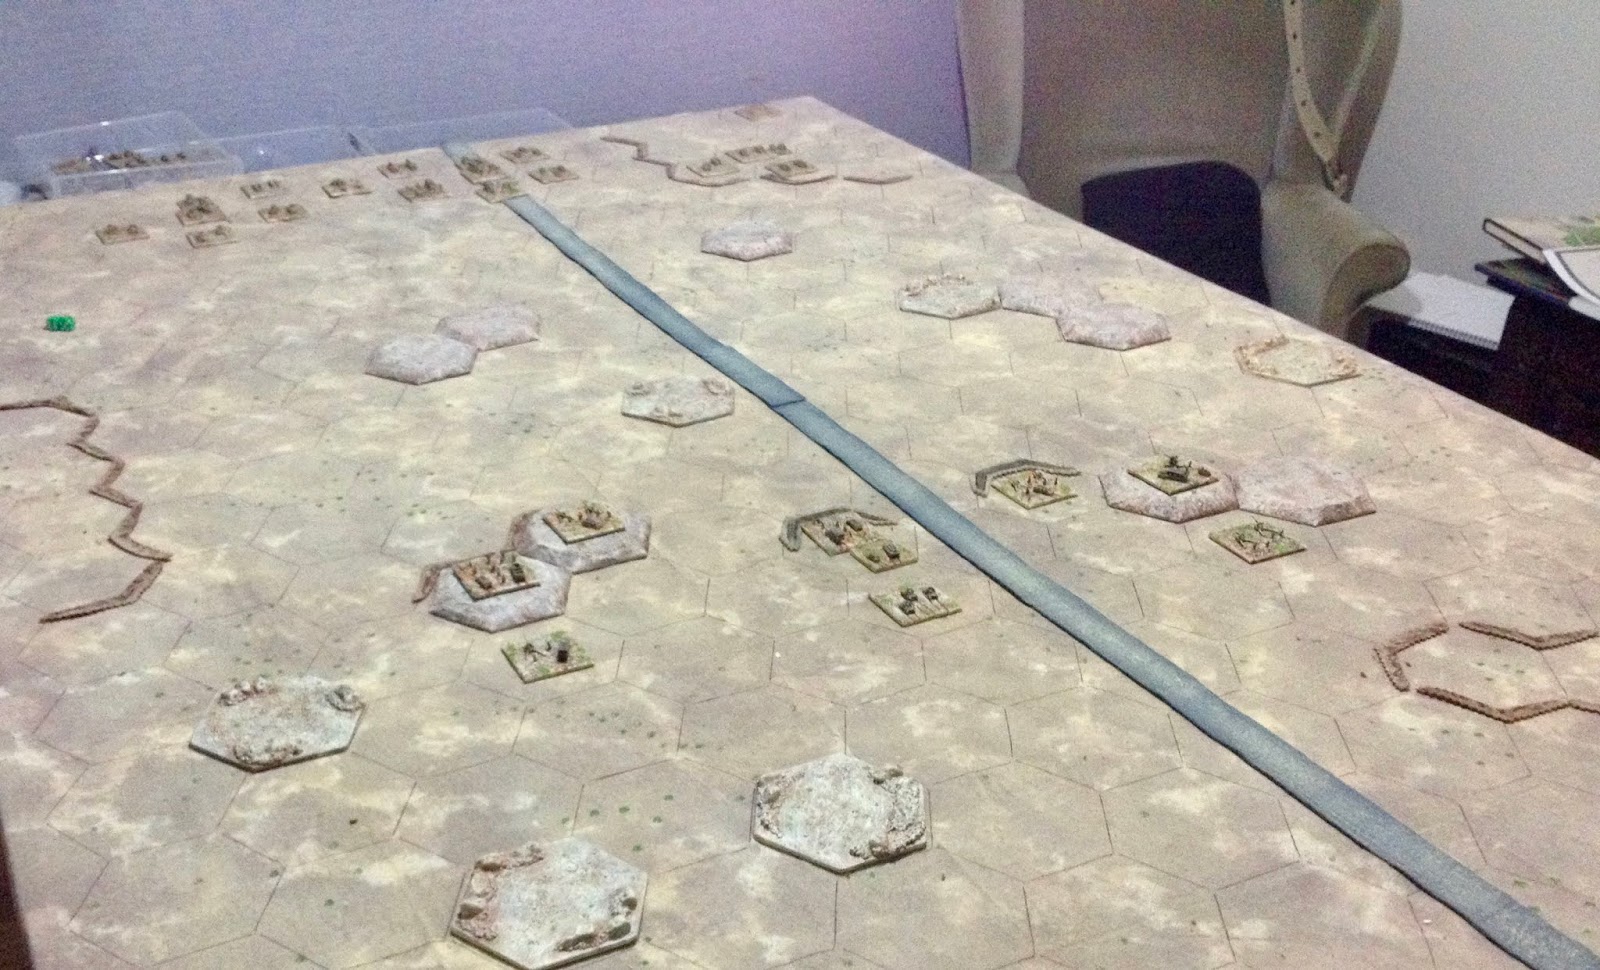
With my current batch of WW2 Western Desert models painted I have started to test out the modified rules with a couple of games. The core rules I am using are Lock n Load's "Tank on Tank" boardgame rules which are available as a free download from their website. These rule are geared towards the later part of WW2 for both the East Front and West Front games.

A German armoured infantry attack upon a village is costly
In adapting the core rules for the earlier period in North Africa I have adjusted the unit's defence values along with their weapon ranges. In the rules each unit comes with three values:

  • a range value representing the range in hexes, 
  • a defence factor, 
  • and movement points. 

For example, in the boardgame a Panzer IV with 75mm (long) has a range of 2 hexes, a defence value of 9, and 2 movement points.

The range presented a problem as 50mm and 2 pounder guns were common and would have a range of 1 hex. This was not the feel or look I wanted on the tabletop, so I have increased the caliber ranges by 1 hex.

  • Small caliber (47mm, 50mm, and 2 pounder) = 2 hexes
  • Medium caliber (6 pounder and 75mm) = 3 hexes
  • Heavy caliber (88mm) = 4 hexes

To compensate for the increased ranges I have, for the most part, increased the defence values for tanks (or combat units as they are termed in the rules) by one.

  • Light tanks and Armoured Cars (Honey, Sdkfz 222, and Sdkfz 231) defence = 8
  • Medium light tanks (Panzer III and Crusader) defence = 9
  • Medium tanks (Panzer IV, Grant, and Sherman) defence = 10
  • Medium heavy tanks (Matilda) defence = 11

Other rules changes are...

HQ
As with the rules, but if lost can be promoted to any type of unit. My tabletop contains more hexes than the board game, so attaching HQs to fast mobile units is useful.

Aces (Experienced commander)
As with the original rules but can be used as an HQ, but cannot be promoted once lost.

Self-Propelled Guns
Are treated as personnel units (so they are not allowed to move and shoot).

AT Guns and Artillery
Any AT gun or artillery unit which is not self propelled (eg, a 2 pounder Portee style unit) must remain static.

Minefields
Units must stop movement upon entering a minefield zone and may only move 1 zone when leaving a minefield hex. When attacked in minefield attacker can adds 1 to the result.

Rough Ground
All units must stop upon entering and may only move 1 zone when leaving.
Treat as cover for personnel units (use second value). Don’t add the +1.

Prepared Positions
As per the rules.

Escarpment
Impassible to motorised units (combat units) personnel can move. Treat as hill for combat.

Ridge/sand dune
Treat as a hill.

Buildings
Provide cover for personnel units only and they get 360 degree shooting.

Wadi
Treat as depression

Sighting units
When using artillery indirect fire or air support. The target must be within 4 bounds and LoS by friendly unit. This can be increased by 1 bound if on ridge.

Salt-marsh
Impassible

Optional - Hidden Units
Units in cover can start the game as hidden. Hidden units cannot be eliminated until they are known to the enemy. Units cease being hidden when:
  • They shoot or move
  • An enemy unit moves into an adjacent hex
  • An enemy unit shoots at the hidden unit. The hidden unit takes no damage, but is no longer hidden.
Optional Sand Storm Rule
If weather occurs in a scenario, in this case sand storms. At the beginning of a new turn and before players have made a move. Roll 1D6, on a score of 1-3 units not on a road can only move 1 bound and sighting of enemy is restricted to 1 hex. A result of 4-6 move and units move normally.

The following photos are of my recently completed units with example range, defence and movement values. The brackets around the two defence values is for personnel units and follows the core rule convention.

Marder II    3-(9/9)-2
Panzerjeager 1    2-(8/8)-2
Armoured Infantry   1-(9/9)-2
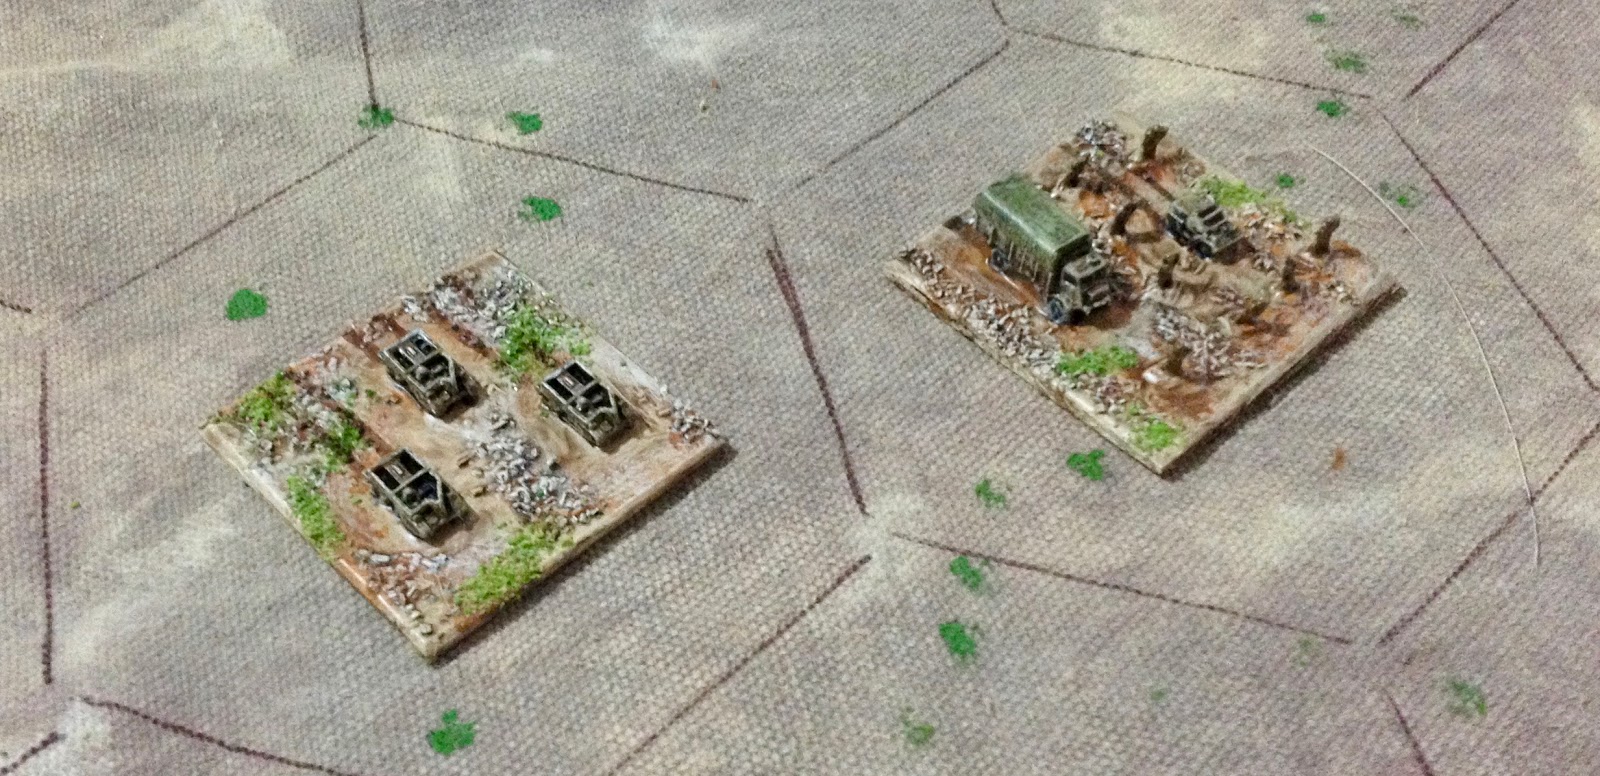
50mm AT unit   2-(7/9)-0
88mm AT unit   4-(7/8)-0
88mm mounted on half-track   4-(7/8)-2
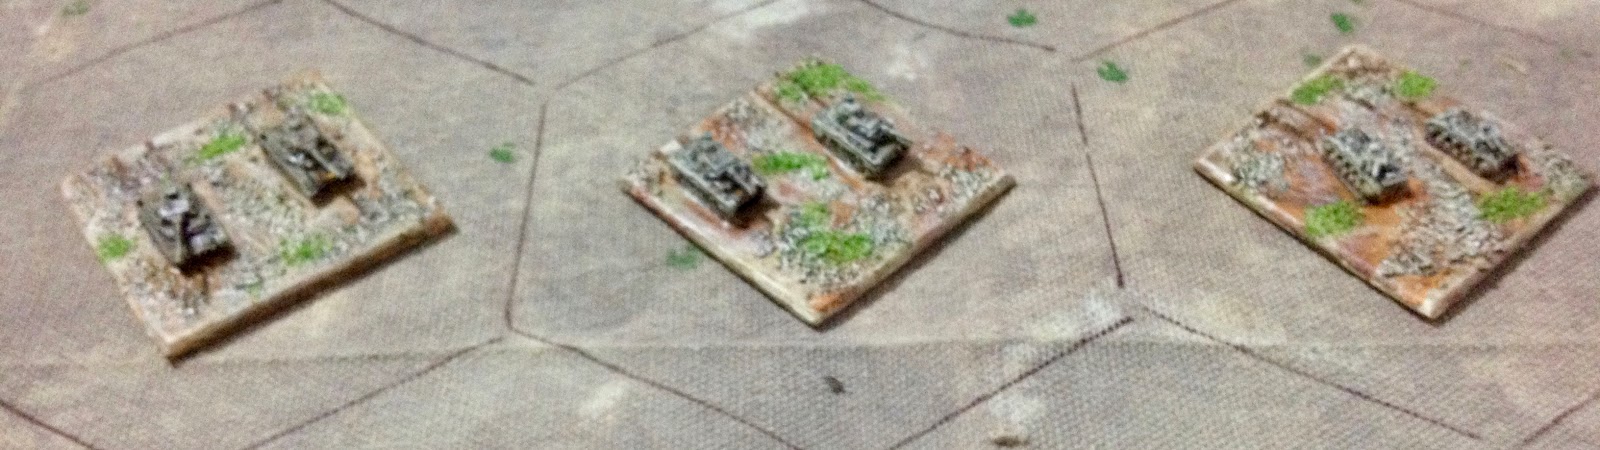
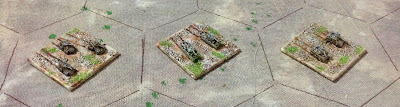
Panzer IV   3-10-2 (range-defence-movement)
Panzer III   2-9-2
Panzer II    1-8-2
Sdkfz 231   1-8-3
Sdkfz 222   1-8-3
Wespe   6-8/8-2
50mm AT units    2-(7/9)-0
Infantry*   1-(7/10)-1
Armoured Infantry   1-(9/9)-2
Motorcycle Unit   1-(7/9)-3
* I add trucks and vehicles to the infantry units stand to help recognise them as infantry and I think they look batter for it.

Matilda   2-11-1
Grant**    2-10-2
Valantine II   2-10-2
** The Grant tank has a range of 2 hexes due to its sponson mounted gun.

Humber A/C   1-8-3
Crusader II   2-9-3
Honey   1-8-3
25 Pounder unit   6-(7/9)-0
Sexton   6-(8/8)-2
2 pounder Portee    2-(7/8)-2
6 pounders    3-(7/9)-0
Armoured infantry (Bren Gun Carriers)   1-(9/9)-3
Infantry   1-(7/10)-1
I use additional models to indicate an HQ (left) and experienced commander (right)


Thursday 27 December 2018

ECW Campaign Cards and Terrain Cards

Today I mainly stayed inside and avoided the heat outside. This time has allowed me to complete the campaign chance cards I will be using for the next stage of the English Civil War campaign. When a  battle occurs both sides will draw one card. Some cards are specific to Parliament or Royalist. If they are picked by the opposing side they are ignored and treated as a blank card.

Campaign Chance Cards all prepared
As the campaign progresses I will most likely add more cards when they get shuffled for a new campaign year.

When a battle is to occur I will be using terrain cards to determine the tabletop terrain features. I have shown these in past posts, but have not explained how they are applied when laying out terrain on the tabletop. I was also recently asked a question as to whether the orientation of the cards matter.

All the terrain cards
To start off I have 18 cards made up which reflect my available terrain: 2 large hills, 2 smaller hills, 5 woods, 1 town, 2 farms, 1 river, 1 fordable river, along with and 1 open terrain card. I do remove cards to reflect the area being fought over. For example, I would remove one of the large hills if doing battle in East Anglia. That way the terrain will more likely reflect the terrain an area would have.

My tabletop is 6x4 foot so each of the cards represent a 2x2 foot segment of the tabletop. After shuffling and turning the cards during the shuffle, 6 cards are selected and placed to reflect the tabletop. The orientation of the terrain feature will be reflected in the placement on the tabletop. The exception is for rivers, which I will come to later.
The two wood features will merge into a large wood based upon their orientation. There will be an open terrain (top right corner)
After I placed the features on the tabletop I then add roads that make sense (to me anyway). With ECW games one road must go across the between the long sides, it is assumed the armies are marching on the road before deploying. Roads will always be placed to pass next to buildings and through open terrain.

How the above cards will appear on the tabletop
Things get a bit more messy when a river card is selected, because the river will run either across the tabletop or top to bottom depending on the card orientation, and will have two crossings, bridges or fords. The card with the river will be treated as open terrain while the river position is calculated using dice.


Depending on the river direction roll a D10 for the long edge or D6 for a short edge. For the above cards a 5 is scored and the river is placed. Any blocking terrain, in this case fields, are split or moved to one or the other side using the dice to decide.

The positioning of the river is determined with a D10 dice score - in this case a 5 is rolled. Should the river have been across the board a D6 dice would be used.

Occasionally anomalies do occur, particularly with the larger hills which if moved to one side will clash with some other terrain. Then I use to smaller hills on either side of the river.

Monday 24 December 2018

Western Desert Project - Phase one mostly completed

In-between the necessary Christmas shopping I have been able to get more units and terrain completed for my Western Desert project. This will hopefully mean I will be able to get a few games played over this coming week as we are planning for a quiet Christmas.

Tabletop setup for a game
In terms of painting I have completed a good 90 percent of the units for phase 1 of the project. Phase 2 will involve the purchase of some Italian units and a few additional models for a few Tunisian games.

As for terrain I have added some rough ground, minefields, prepared positions, town and road.

Minefields are represented by barbed wire
A scenic rocks and railway ballast are used to create rough terrain
Cut felt painted to match battle mat colour and with trenches drawn to represent prepared positions. I am not sure on this  and may try something different later on. The road is grey felt rushed over to give a sandy look.
Building made from balsa wood.
As for the rules I plan to use a Lock n Load's Tank on Tank rules (free to download) with a few modifications for minefields and terrain. More on that to come, but right now I am needed at the BBQ. Happy Christmas!

Wednesday 19 December 2018

ECW Campaign rules for 1643

It has been a few weeks since I have done anything with my English Civil War campaign. The WW2 Western Desert project has been consuming my time of late. So it is time to revisit the ECW campaign which is moving into 1643. The first year, 1642, had both sides battling to control as many regions as possible.

The campaign map ready for the start of 1643

The campaign rules for the remaining years now change in an attempt to reflect the marching armies fighting out battles between the months of March to November. The number of battles fought will vary and will also be influenced by chance cards which are draw by each side before a battle commences.

The first stage of a campaign year is to decide which side will strike the first blow. This is done by both sides rolling a D6 and adding to it the number of regions they control. The side with the highest score will make the first campaign move (re-roll any draws). From then on campaign moves alternate between sides.

The next step is to determine which month the battle is to be fought. Roll a D3 and add to the current month starting the year in February. For example, a D3 score of 2 will have the first battle fought in April. This continues for each campaign move until the month selected is December, when the campaigning for the year stops. This approach means the number of battles will vary between years and the month will influence the available daylight hours and weather for the battle to be fought.

The side making a campaign move may strike at any enemy held region adjacent to two friendly controlled regions. (If for whatever reason this situation does not exist, they must pass on the opportunity to strike.)

When preparing for a battle, each side draws one or two chance cards. I have yet to decide if it is one of two, I am quite tempted to have two cards drawn if a battle is in the months May through to September. These cards will result in:

  • A re-roll when recruiting for the current battle
  • An extra unit being selected (normally a specified unit type) for the current battle
  • A re-roll when recruiting for all battles in the remaining campaign year
  • A loss of a unit or a delay in arrival of a unit(s)
  • Or have an impact on the game (e.g. commanders ability, ammunition, etc)
Each side, Parliament and Royalist, has their own pack of chance cards.

A quickly created example of a chance card

Finally, sides determine the order of battle of their marching army in a similar way to the previous campaign year. However, rather than being influenced by the number of adjacent controlled regions, it is the chance cards that assist (or not) in calculating unit numbers.

  • Cavalry = 2 + D3 score (re-rolls allowed for chance cards)
  • Infantry = 2 + D3 score (re-rolls allowed for chance cards)
  • Dragoons/Commanded Shot = D3 score (re-rolls allowed for chance cards)
  • Artillery/Special units = D3-1 score (re-rolls allowed for chance cards)

After the numbers are determined remove any units specified by change cards. Then let the game begin!


Sunday 16 December 2018

Western Desert terrain

No games played this weekend with most of my free time taken up with painting some desert terrain and a few more WW2 units. The first challenge was to create some hills to fit into the hex grid. I decided to make all the hills at once so when painting I would get a consistent look.

Newly painted units
British tanks
To begin a hill I cut out the MDF base and two cardboard circles to make the hill. These were stuck together and covered in masking tape. After which the hill was covered in PVA glue and flock sprinkled over to create texture for the later painting.

Cardboard used to give form to the hill and a base of MDF cut to fit the hex grid.
The hill is constructed.
Beginning to cover the hill with masking tape.
Fully covered in masking tape
Glue to seal the hill and flock is added for texture
Once the glue was dry the hills were painted using stippling effects and washes to match as best possible the battle mat colours.

The finished hill
All the hills completed
In addition to the hills I wanted to create some terrain to represent a wadi or depression. These are always problematic to show on a tabletop. In the end I opted to use brown felt which I painted to represent the sides of a wadi. Taking inspiration from how terrain is represented on boardgames.
A unit taking cover in a wadi. 
Close up of the wadi.