Sunday, 29 December 2024

Finally some painting time to end 2024

I finally found the time to break out the paints and work on some models. This was a refreshing change from the past couple of months where my time was focused on painting the house, which is thankfully almost done. For Christmas, I received some models and kits to expand my Mechs project from the kids. Mechs and space troops—what a treat!

Recently painted mechs and one test troop unit.

The little troops are from the Imperialis range. I am converting them into troops with support weapons using my bits box, filled with surplus parts from various W40K kits, to make the support weapons. The support weapons are meant to look like they are mounted on hover platforms.

Useful for providing troop units for my mech game.

Some support weapons kit bashed from a variety of spare bits from old W40K kits.

Once I finish making all the space troops and their support weapons, I plan to play a few games using my Western Desert terrain. Its rugged, arid look is perfect for representing a futuristic mining world. As a bonus, the terrain is already set up with a hex grid, which will work well with the rules I plan to use. I will post more about the rules and progress in a future post once I get all the units fully painted. 

Below are some pictures showing the type of game I want to play. Each side will have about 10-15 units, a combination of towering mechs to stride across the battlefield and troops dependent upon terrain for their survival.

The type of game I am planning with my mech forces.

Mechs Advance!

With these small models the hex-gridded tabletop will be useful with no fiddly measuring.

Currently on the tabletop there is another French and Indian War game in progress. I'm thoroughly enjoying using these classic Spencer Smith figures again after so many years, and I am thinking about creating a mini-campaign for them to give me a reason to use them in a few more games.

FIW game underway.

An attempted storming if a defensive position.

That is it now until 2025. Thank you to all of you who took the time look and to comment in 2024.

Saturday, 21 December 2024

First game in the new wargames room

After setting up the wargame room, finishing the unpacking, and reorganizing everything, I was finally ready for a game. The question was: which period to choose? In the end, I decided on a French and Indian War game using some old plastic Spencer Smith figures. When I unpacked them, I realised it had been many years since they last saw action on the tabletop. The tabletop was prepared for the Battle of the Monongahela River, fought on July 9, 1755, using a scenario from C.F. Wesencraft’s book "Seven Steps to Freedom".

Old Spencer-Smith miniatures finally in the tabletop again after many years.

Background

The battle was an early encounter in the French and Indian War (1754–1763). General Braddock commanded a British force of around 1,300 regulars and militia and led an expedition to seize Fort Duquesne from the French. However, his troops were about to be ambush by a smaller force of approximately 900 French and allied Native American warriors led by Captain de Beaujeu.

Tabletop Setup

The Monongahela River borders one side of the battlefield, with British units beginning to arrive on Turn 2, crossing at the ford. The French, however, have the advantage of arriving first, entering from the opposite end of the tabletop on Turn 1 and without the obstacle of a river crossing. The majority of the battlefield is covered in woods, with a road (or track) cutting diagonally across the terrain. 

The British must move along the road until attacked or they spot an enemy unit.

The French arrive on turn 1 (blue arrow) while the British force arrives on turn 2 (red arrow)

Order of Battle

French

  • 2 Line Infantry units
  • 4 Warrior units

British

  • 5 Line Infantry units
  • 3 Militia units
  • 2 Gun units

The Game

The French swiftly advance along the road and across the open ground before moving into the woods on either side of the road. Meanwhile, the British progress is delayed by the challenge of crossing the river. As the British units move along the road, their leading unit comes under fire and is soon routed by a charge from one of the warrior units.

French units advance quickly along the road and the open ground before positioning themselves either side of the road ready for an ambush. 

Led British units come under fire and one unit is routed by a charging warrior unit.

As additional British units arrived, rough battle lines began to take shape, with British artillery positioned in the centre to provide supporting fire. On the right flank, the British line infantry managed to repel the Warrior units threatening their position with a series of well-aimed volleys. Meanwhile, on the left flank, British militia units started advancing along the river.

French line infantry join the battle.

General Braddock is lost as the British try to regroup.

Along the road, the British struggled to maintain their line as both French line infantry units moved into position, adding their weight to the battle. The situation worsened when General Braddock was lost, caught in the rout of a unit he was leading. Despite this setback, the remaining British forces, supported by their artillery, managed to retire in good order and form a defensive line. While the French had yet to lose any units, several were significantly weakened by the engagement and unable to continue their attacks. Nevertheless, their smaller force had successfully ambushed and halted the advance of the larger British force.

French line infantry advance and threaten the British centre.

A ground level view of the battle.

The British finally form a defensive line and avoid a full rout.

Summary

The game was undoubtedly a French victory, with support from their allied Native American warriors. The British force was left incapable of advancing and additionally had lost their commander. 

Historically, the British suffered heavy losses, with nearly 1,000 men, including many officers, killed or wounded, and their artillery abandoned. During the battle, Captain de Beaujeu was killed, while General Braddock was mortally wounded and succumbed to his injuries a few days later. 

Sunday, 15 December 2024

Unpacking the models and terrain

The wargaming room is finally coming together now that our household goods have arrived after two and a half months in transit from Melbourne, Australia to Waikanae, New Zealand. One good thing of moving is the chance to reorganise all the wargaming models, terrain, and unpainted projects. How long it stays organised, though, is anyone's guess!

Positioning the shelving and old kitchen cabinets to see how they fit in the space.

All setup and ready for the unpacking of models and terrain.

I have been unpacking my miniatures, and thankfully the damage has been minimal. One old plastic Spencer Smith figure from my FIW collection broke at the ankles, but a little super glue appears to have fixed it. This older collection might be getting a bit brittle with age. My ECW figures on the other hand took more of a beating. Several cavalry units were bent sideways with horses lying down. I have since been able to straightened them out without any noticeable harm. A few minor pant touch ups will be required. I had carefully wrapped each base in bubble wrap, added cardboard between layers, and used supports to prevent crushing. However, I did not consider anticipate sideways movement, which caused some models to shift and cause the damage. I will be very relieved once everything is finally unpacked.

I made a quick trip to the hardware store to pick up some additional containers. The shelving units I am using now have fewer but larger shelves compared to the old cabinets at our previous house, so some nice stackable containers will come in handy. This setup is an improvement. Rather than removing models one unit at a time from the shelf, I can now grab an entire container of models and bring it to the tabletop for deployment.

Unpacking underway.

This process has been really helpful for taking stock of all my painted and unpainted models, as well as the periods I need to revisit. For example, my French Indian War (FIW) collection, which was used for a campaign way back in 2018 and has rarely seen the light of day since.

We are still waiting to get the internet connected, which means I have significantly reduced online time. This is not necessarily a bad thing. It has given me more time for reading instead of slipping into endless scrolling. One book I am in the middle of reading is “Tactics and the Experience of Battle in the Age of Napoleon” by Rory Muir. I am hoping it will prompt me to update my Napoleonic rules For larger battles to include horse artillery and light cavalry. 

So the question for me very soon will be - which period shall I wargame?

Sunday, 8 December 2024

Matchbox Challenge - Finishing up (Part 5)

The final step of the matchbox challenge was for me to write up the rules (click here for post on rules). Since I do not have access to a printer yet (our household goods are sitting on Wellington docks waiting for customs inspection) I had to handwrite everything. I realised it has been half a century since I have handwritten any rules, aside from brief reminder notes. The last time was in my early teens when I copied rules from the book “Practical Wargaming” borrowed from the library. 

In a previous post I mentioned that the best way to save space seemed to be by unfolding the outer matchbox cover and using it to write the rules on. This idea needed a slight adjustment, as the rules did not fit. To solve this problem, I extended the paper covering the matchbox so it still wraps about the “drawer” and, with my neatest and smallest handwriting, I managed to fit all the rules. There was sufficient space to add a couple of tables. The finished matchbox is held together with a paper band.

The finished wargame in a matchbox. The matchbox is held together by a paper band.

With the paper band slid off, the rules and contents are revealed.

The rules are all written on the outside of the outer part of the matchbox which has been covered in paper and extended so all the rules fit. 

The flip side.

The contents

Some final notes…

I am considering adding an elastic band to the contents to represent river sandbanks. It would just fit inside the box or could be used to hold the box together, offering a more robust alternative to the paper band I made.

This has been an amazing challenge posted by The Duchy of Tradgardland and came at the perfect time for me, as my wargaming supplies have yet to arrive. Most of the challenge was completed using readily available materials: paper, colouring pens, card, a matchbox (of course), scissors, and string. I did have to purchase a glue stick and some Milliput epoxy putty used for making the ironclad models.

There is the option of using the upturned drawer of the matchbox to make a fort and to add a fort status card to the game (see photo below). Forts played important roles in the riverine battles of the ACW.

The damage rules from this game will work their way in my Mech game rules, as they are much more interesting and narrative-driven than my current system. Once that is done, I can return to my Mech campaign, which has been on hold while I worked on this challenge.

A rubber band is used to represent a sandbank in a game.

The rubber band fits snuggly inside.

A flotilla of ironclads try to pass a fort.


Thursday, 5 December 2024

Matchbox Challenge - Battle Report (Part 4)

If you have been reading the past few posts on the development of a matchbox wargame, you maybe wondering how does it play with the rules. This post is a game report on an encounter between a couple of opposing ironclads as they patrol a tributary of the Mississippi River.

(For details behind the wargame in a matchbox challenge see the blogs Man of Tin and Duchy of Tradgardland.)

Ironclads steaming down the river.

Background

Two ironclads are patrolling the winding waters of Silverbend Creek, a serpentine tributary feeding into the Mississippi River. The Confederate ironclad, CSS Thunderforge, is working its way upstream under the command of newly promoted Captain Calder. Heading downstream is the Union ironclad, USS Resolve, commanded by the battle-hardened Captain Barrett.


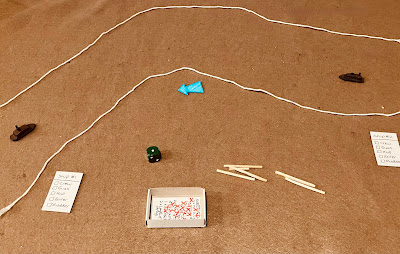
The game setup CSS Thunderforge on the left and USS Resolve on the right heading down river.

Game Report

As the two ironclads round one of the many bends of Silverbend Creek, they come into view of each other. Both ships open fire with their forward cannons, but at long range, neither manages to land a hit. Undeterred, they both press forward, closing the distance to improve their shooting and to inflict damage.

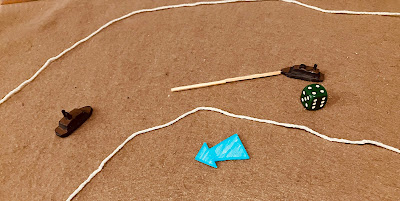
USS Resolve shoots. A D6-1 and subtracts a further 1 for firing forward. A score of 2 means a range of 2 matchsticks as their gunnery falls short.

CSS Thunderforge’s shooting is just as poor as both ships close.

Eventually USS resolve scores a hit which causes crew casualties on CSS Thunderforge. They will no longer be able to affect repairs to their ship.

As the ironclads closed, the USS Resolve managed to ram the CSS Thunderforge, but the impact failed to inflict any further damage. The two ships pass each other and began turning around for another engagement. During the exchange, the USS Resolve sustained a well-aimed shot that damaged her rudder. However, her crew quickly sprang into action and successfully made repairs.

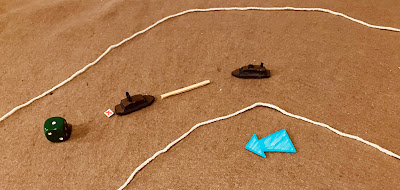
USS Resolve rams, but there is no damage.

On the damage table a second hit to the crew is ignored as the various ship areas can only be damaged once, unless they are repaired. However, crew casualties and hull damage cannot be undone in the repair phase.

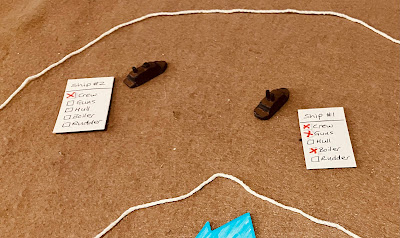
USS Resolve has its rudder damaged. But with a full crew was able to later repair the damage.

As the battle continued, the USS Resolve landed several direct hits, damaging the CSS Thunderforge’s guns and boiler. Both crews by this time had suffered significant casualties, leaving them unable to carry out repairs.

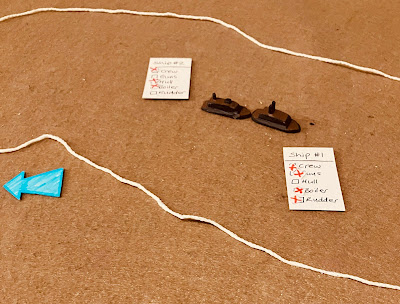
Both ships turn to engage in battle again. USS resolve is now on the left and CSS Thunderforge is on the right.

CSS Thunderforge is suffering a number of hits and damage.

Leveraging her speed advantage, Captain Barrett on the USS Resolve orders another ramming attempt, which is successful, inflicting damage to the enemy’s rudder. Captain Calder, realising the severity of the situation, ordered his crew to abandoned ship as it slowly begins to sink.

A second ram by USS Resolve sees the enemy ship sink.

Wrap Up

The damage rules assign hits to various areas of the ship, such as the boiler, rudder, and hull, creating a more narrative approach to the game, rather than simply tracking damage until a limit is reached and the ship is eliminated. The rules allow the effects of damage to influence play, such as limiting movement if the rudder is hit or reducing speed when the boiler is damaged. While damage can be repaired providing there is a full crew, but crew casualties will stop repairs from being made. This approach helps with the storytelling aspect of the game, which helps create interest when there are only a small number of ships involved in a game.

Sunday, 1 December 2024

Matchbox Challenge - Drafting the Rules (Part 3)

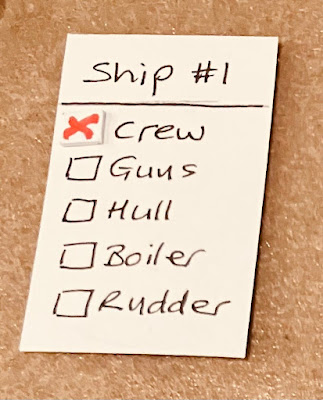
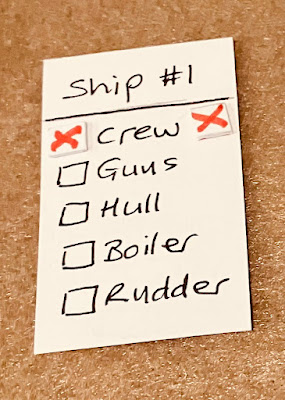
This weekend, I have been drafting the rules for my wargame in a matchbox. I now face the challenge of somehow fitting them inside the matchbox without shrinking the text too much. However, before getting to the rules my first task was to create some hit markers to use with the ship status cards. They are small card squares 5x5mm with a Red Cross drawn on them, front and back so no need to worry about turning the fiddly things the right way up.

(For details behind the wargame in a matchbox challenge see the blogs Man of Tin and Duchy of Tradgardland.)

Matchbox contents. The rules are yet to be added.

Hit markers for use on the ship status cards to track damage.

A box contents list has now been added and stuck to the inside of the drawer. 

For the question of how to best to fit the rules into a somewhat full matchbox I may have an answer. The current solution (still a work in progress) is to see if I can make full use of the matchbox itself. By unfolding the box, I can write on both the inside and outside surfaces. To keep everything intact, I’m using some paper tape I made which slides over the outside to hold the box together.

The paper tape holding the matchbox together.

With the drawer removed the outer matchbox can be opened up and used to write the rules.

Draft Rules…

Since this game fits within a matchbox, it felt fitting to use matchsticks for the measurement of movement and shooting distances. I have now included five and a half matchsticks for this purpose. Below are the draft rules. I plan to use the inside of the matchbox drawer to sketch out how movement works, replacing the current photos I am using below.

ACW Ironclad Wargame

This is a matchbox wargame for playing riverine battles of the American Civil War on a flat surface of 2 by 1 foot. 


Game Setup

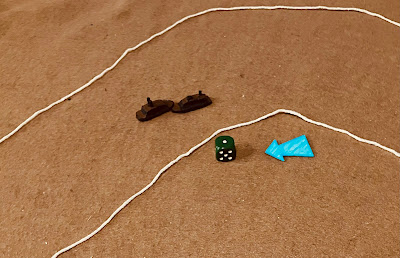
Lay the two lengths of string on the tabletop to represent the riverbanks, ensuring they are spaced between 4 to 5 matchstick lengths apart. Decide the direction of the river's flow and position the flow marker.


Sequence of Play

Each game turn is divided into the following phases:

  1. Movement and Ramming 
  2. Shooting
  3. Damage Resolution
  4. Repairs

Movement and Ramming

Ships move one at a time, starting with the one furthest upstream and proceed downstream moving ships.


On their movement turn, a ship has 3 choices:

  1. Stay stationary,
  2. Move half a matchstick length, or
  3. Move a full matchstick length.  

To move, place a matchstick touching the bow of the ship and facing straight ahead. Then slide the model forward so the stern aligns with the other end of the matchstick.


At the start of the move.

At the end of the move.


Turning - Ships moving half or a full matchstick length may turn up to 45 degrees at both the start and the end of their movement, pivoting at their centre. Stationary ships cannot turn.


Effects of Damage -  A ship with a damaged boiler can only move half a matchstick. A ship with a damaged rudder can only turn once, either at the start or the end of its movement.


Riverbanks and Sunken Ships - Any ships that make contact with a riverbank or sunken ship becomes stranded and immobile for the rest of the game.


Ramming - To ram, a ship can only turn at the start of its movement. If the ship makes contact with an enemy vessel, roll a die, consult the damage table, applying damage immediately. 


Shooting

Shooting is simultaneous and all ships get to shoot (even those engaged in ramming). The procedure is as follows:  

  1. Select Target - A ship may target only one enemy ship with a clear line of sight.  
  2. Range Calculation - Roll a die and subtract 1 to determine the shooting range in matchstick lengths. Apply the following modifiers to the score: -1 if shooting forward of the bow or rearward of the stern, and -1 if the ship has sustained gun damage.  
  3. Damage Resolution - If the target ship is within range place a hit marker next to the ship as a reminder they have taken a hit and need to resolve damage in the next phase.

Damage Resolution


When a ship is struck by shooting or ramming, roll a die and consult the damage table below:  


1 = Glancing Blow - No damage.  

2 = Crew Casualties - The ship cannot make repairs.  

3 = Hull Damage - Permanent; cannot be repaired.  

4 = Damaged Guns - Reduce all shooting rolls by 1.  

5 = Boiler Damage - Movement is reduced to half a matchstick.  

6 = Rudder Damage - The ship can only make one turn during movement.  


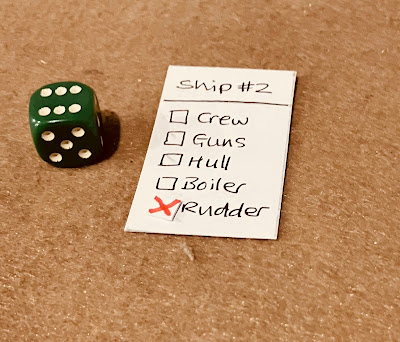
Record all damage on the ship's status card using the hit markers.


If a ship has already sustained damage to a specific area, no additional damage is applied to that area. For instance, if a ship with existing hull damage is struck again in the hull, the result is ignored. 


A ship with four hits begins to sink and can take no further actions for the remainder of the game. It remains in place as an obstacle to other ships.


Repairs


After all damage has been applied ships that are not sunk and have not taken crew casualties can attempt a repair. Roll the die and compare the score to the repair list:


1-3 = Repairs fail.

4 = Remove gun damage

5 = Remove boiler damage

6 = Remove rudder damage


A game setup and ready to play.