I have finally got around to writing up a game report on one of my games using my Star Wars Legion miniatures. The game used the Squad Hammer Core rules from Nordic Weasel Games. For the scenario, I used “Destroying a Supply Depot” from Scenarios For All Ages by C.S. Grant and S.A. Asquith, making a few modifications to suit the Sci-Fi setting. It also gave me an opportunity to use some of my newly scratch-built buildings and hills.
 |
| Rebel speeder seeks out a target. |
Background
Varnis is a semi-arid world located on the edge of the Outer Rim. Most of the time it bakes under the glare of its twin suns. Despite these harsh conditions, pockets of resilient flora and fauna do manage to survive across the landscape. The Empire maintains a strong presence on the planet due to its valuable deposits of Tibanna crystals, which are refined and used to boost the output of energy weapons. The mining operations are typically protected by garrisons of troops.
The Rebel Alliance is supporting a local insurgency aimed at disrupting and hopefully halting the Empire's mining efforts. In this particular raid, the rebels are launching a early dawn assault on a remote storage facility housing Tibanna crystals.
The facility is defended by two squads of troops, a detachment of two speeder bikes, and a heavy blaster emplacement mounted on the garrison building’s roof. A garrison officer (villain) is commanding the site.
 |
| The tabletop setup. The garrison building is in the centre and storage facility to its left. |
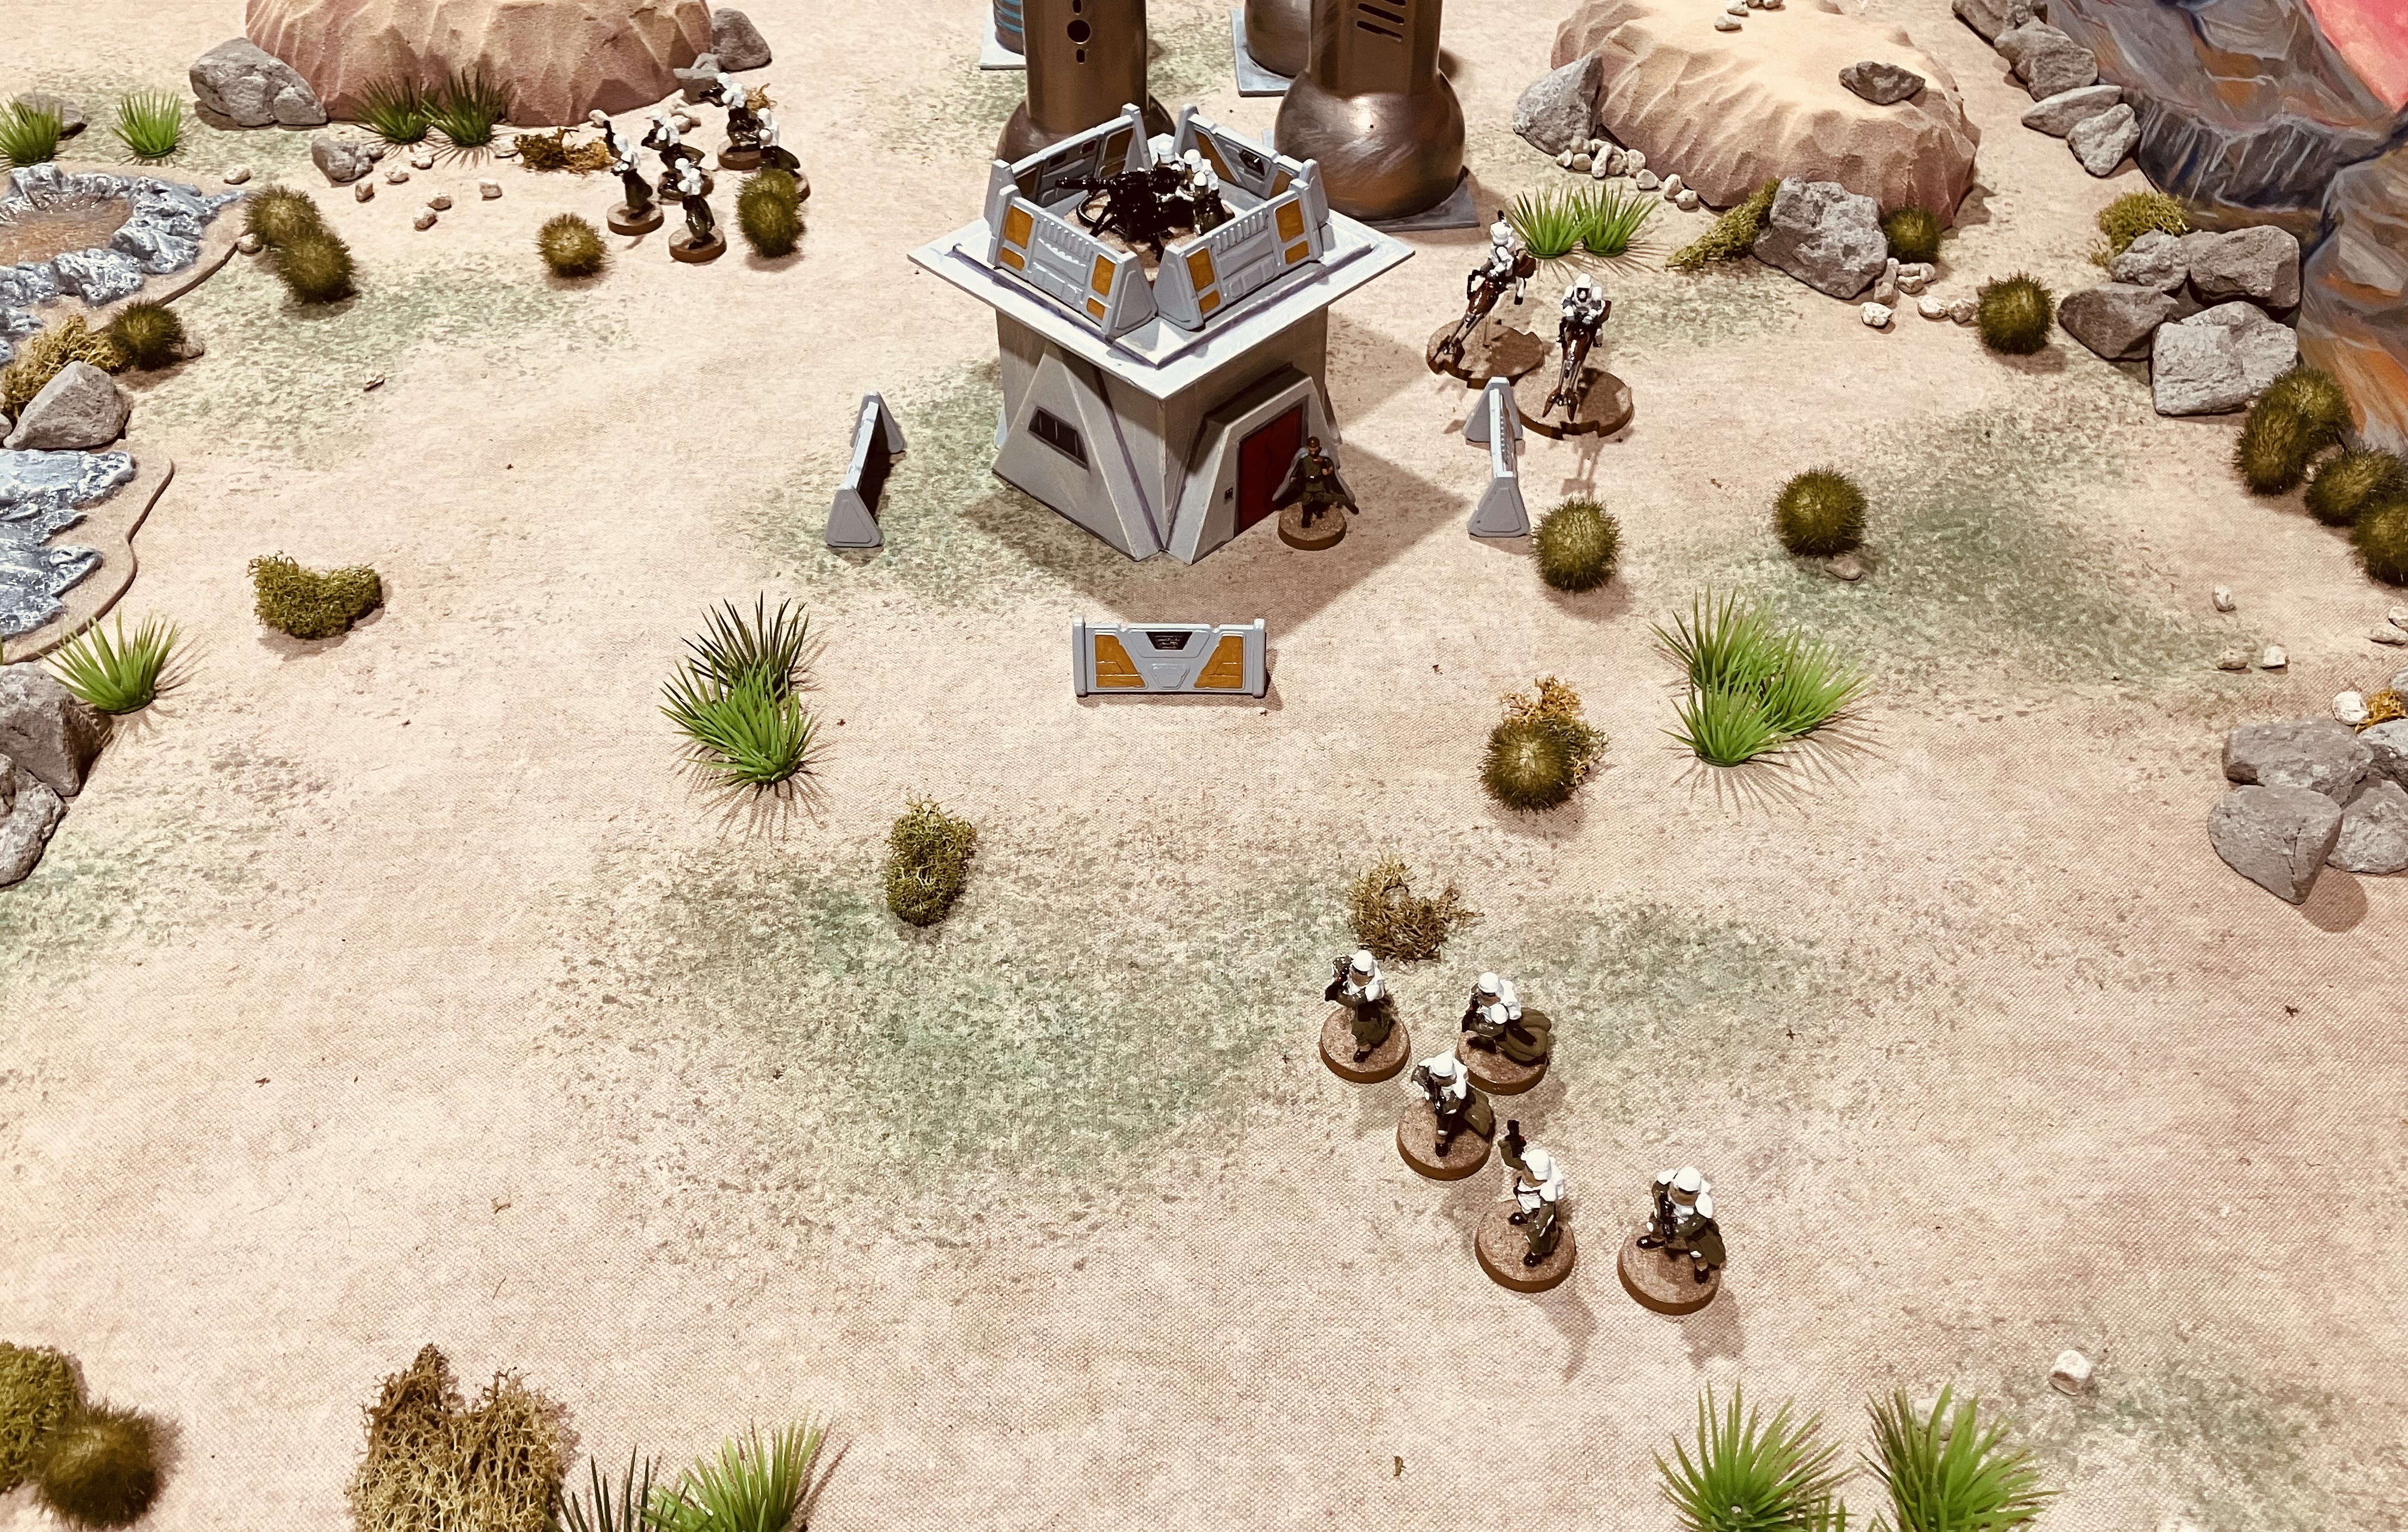 |
| The two troops are on patrol. The officer and speed bikes are at the garrison and the heavy blaster is on the roof. |
Under the cover of darkness...
During the first three turns of the game, the Rebels advanced under cover of darkness with all their units except the skimmer which arrives on Turn 3, marking the beginning of the main assault. The Rebel units cannot move within 12 inches of the enemy and, each turn roll a D6 to determine how many units they could activate.
The Rebel order of battle...
- Leia Organa with droid carrying explosives
- Han Solo and Chewbacca with droid carrying explosives
- Rebel Troopers with rapid fire weapon
- Rebel Troopers with medium blaster.
- Local Insurgents
- Skimmer with medium blaster and rapid fire weapon
 |
| The Rebel attack begins at dawn. |
 |
| Han Solo and Chewbacca creep up behind a hill. |
The Rebel attack begins...
As dawn broke, blaster fire shattered the morning silence as the Rebel assault erupted without warning. Their first volleys caught the garrison patrol near the storage facility completely off guard. Within moments, the squad was cut down in a hail of red blaster bolts.
But other garrison troops were quick to respond. Speeder bikes roared into action, engines screaming as they weaved their way towards the Rebel positions. The Rebel skimmer surged forward to intercept, its blaster cannon lighting up the gloom, but both units flashed past each other in a blur of motion, neither being able to land a decisive shot.
 |
| Early Rebel success as the garrison patrol near the storage facility is eliminated. The speeder bikes and skimmer can be seen kicking up dust in their wake. |
The sound of the speeder bikes grew louder as they sped toward the storage facilities kicking up dust in their wake. The garrison officer was also running towards the storage area while shouting orders into his comlink desperately trying to organise his forces.
Meanwhile, a firefight was underway on the far side of the garrison. A second garrison patrol had come under fire from Rebel troopers who had circled around the flank and now held the high ground on a nearby hill. From their elevated position they had pinned down the patrol.
 |
| Speeder bikes run the gauntlet of Rebel fire as the heavy blaster on top of the garrison building provides covering fire. |
Han Solo and Chewbacca had barely made it to the cover of the storage facility when blaster bolts sizzled overhead. The garrison officer, supported by a pair of speeder bikes, had run the gauntlet of Rebel fire pinning the heroic duo down.
Han and Chewbacca soon found they were on their own and isolated. The remaining Rebel squads were fully engaged, trading fire with the heavy blaster cannon entrenched atop the garrison roof, and were not in position to lend support. As more blaster bolts flew in their direction, Han muttered through gritted teeth, “Great. Just the two of us again.” Chewbacca growled in agreement and raised his Bowcaster to return fire.
 |
| Han and Chewbacca dive for cover. |
 |
| Rebel forces run towards the storage facility as the garrison officer makes his last stand. |
Superb stuff. I must look at Squad Hammer again for Star Wars. It has been a while. Your game really looks great, and the narrative and excitement really jumps out of your in the writeup. I had similar problems with the firefight rule. I think your house rule definitely addresses it.
ReplyDeleteThe rules seem to suit the star wars 'vibe'...I always thought of the Rogue One movie whilst playing...and all of the buttons that needed to be pushed LOL to get stuff done in the plot
I am still refining the unit profiles as I play more and more games. Nothing too fancy, just to provide some differentiation between units.
DeleteGreat report Peter and a nice scenario that could be used for other periods.
ReplyDeleteI think the original scenario is geared towards an 18th century skirmish style of game.
DeleteSuperb battle tale, Peter! These rules looking interesting and your table magnificent. Nice! I downloaded the rules and will give them a scan.
ReplyDeleteThanks. The rules lend themselves to a narrative approach to wargaming along with the Star Wars theme.
DeleteWhat a cracking game to behold there Peter:). Whilst not my sort of thing, I can appreciate the wonderful scratch built terrain etc!
ReplyDeleteI find there is something very satisfying about the scratch building side of the wargaming hobby.
DeleteSuper looking set up Peter and a grand read too, very enjoyable.
ReplyDeleteI a glad it was a good read. I find battle reports to be quite time consuming.
DeleteNice after-action-report ⚔️⚔️ It’s not especially my thing, but I would have perhaps expected the Empire to have some sort of tech (infra-red, night vision, motion sensors etc) to assist the defence. Still, I suppose when you have the Force maybe you don’t need anything else.
ReplyDeleteCheers,
Geoff
Thank you. Those sneaky Rebels must have had counter-measures.
DeleteWith two suns it might be that night only rarely falls so night vision devices are not required. Of course, it would ruin your sleep patterns 😁
DeleteGreat table as always Peter and a fun looking game. It sounds like the rules are specific to Star Wars, is that correct? Do you think they could be adapted to other periods or generic Sci Fi?
ReplyDeleteThe rules are generic and open to amendment, in fact it’s encouraged in the introductions. So I have made up the unit attributes to suit the Star Wars themed units.
DeleteAwesome terrain and setup. I really like your battle report. It seems like a screenplay for a future Disney SW spin-off. Thanks for sharing!
ReplyDeleteIt is good to get use out of the recently completed terrain. The reports take a little while to write so I am glad you like the narrative.
Delete