Last night I finally got around to playing the Battle of Worcester, 3rd September 1651. The scenario was set up on the tabletop a couple of days ago (see previous post for details). For the game rules I opted to stick with the D3 rules I mostly use. These can be found here or via one of the tabs at the top of the blog. I made a couple of adjustments, granting all cavalry a combat value of D3+1, and removing the impetuous status from both cavalry units.
 |
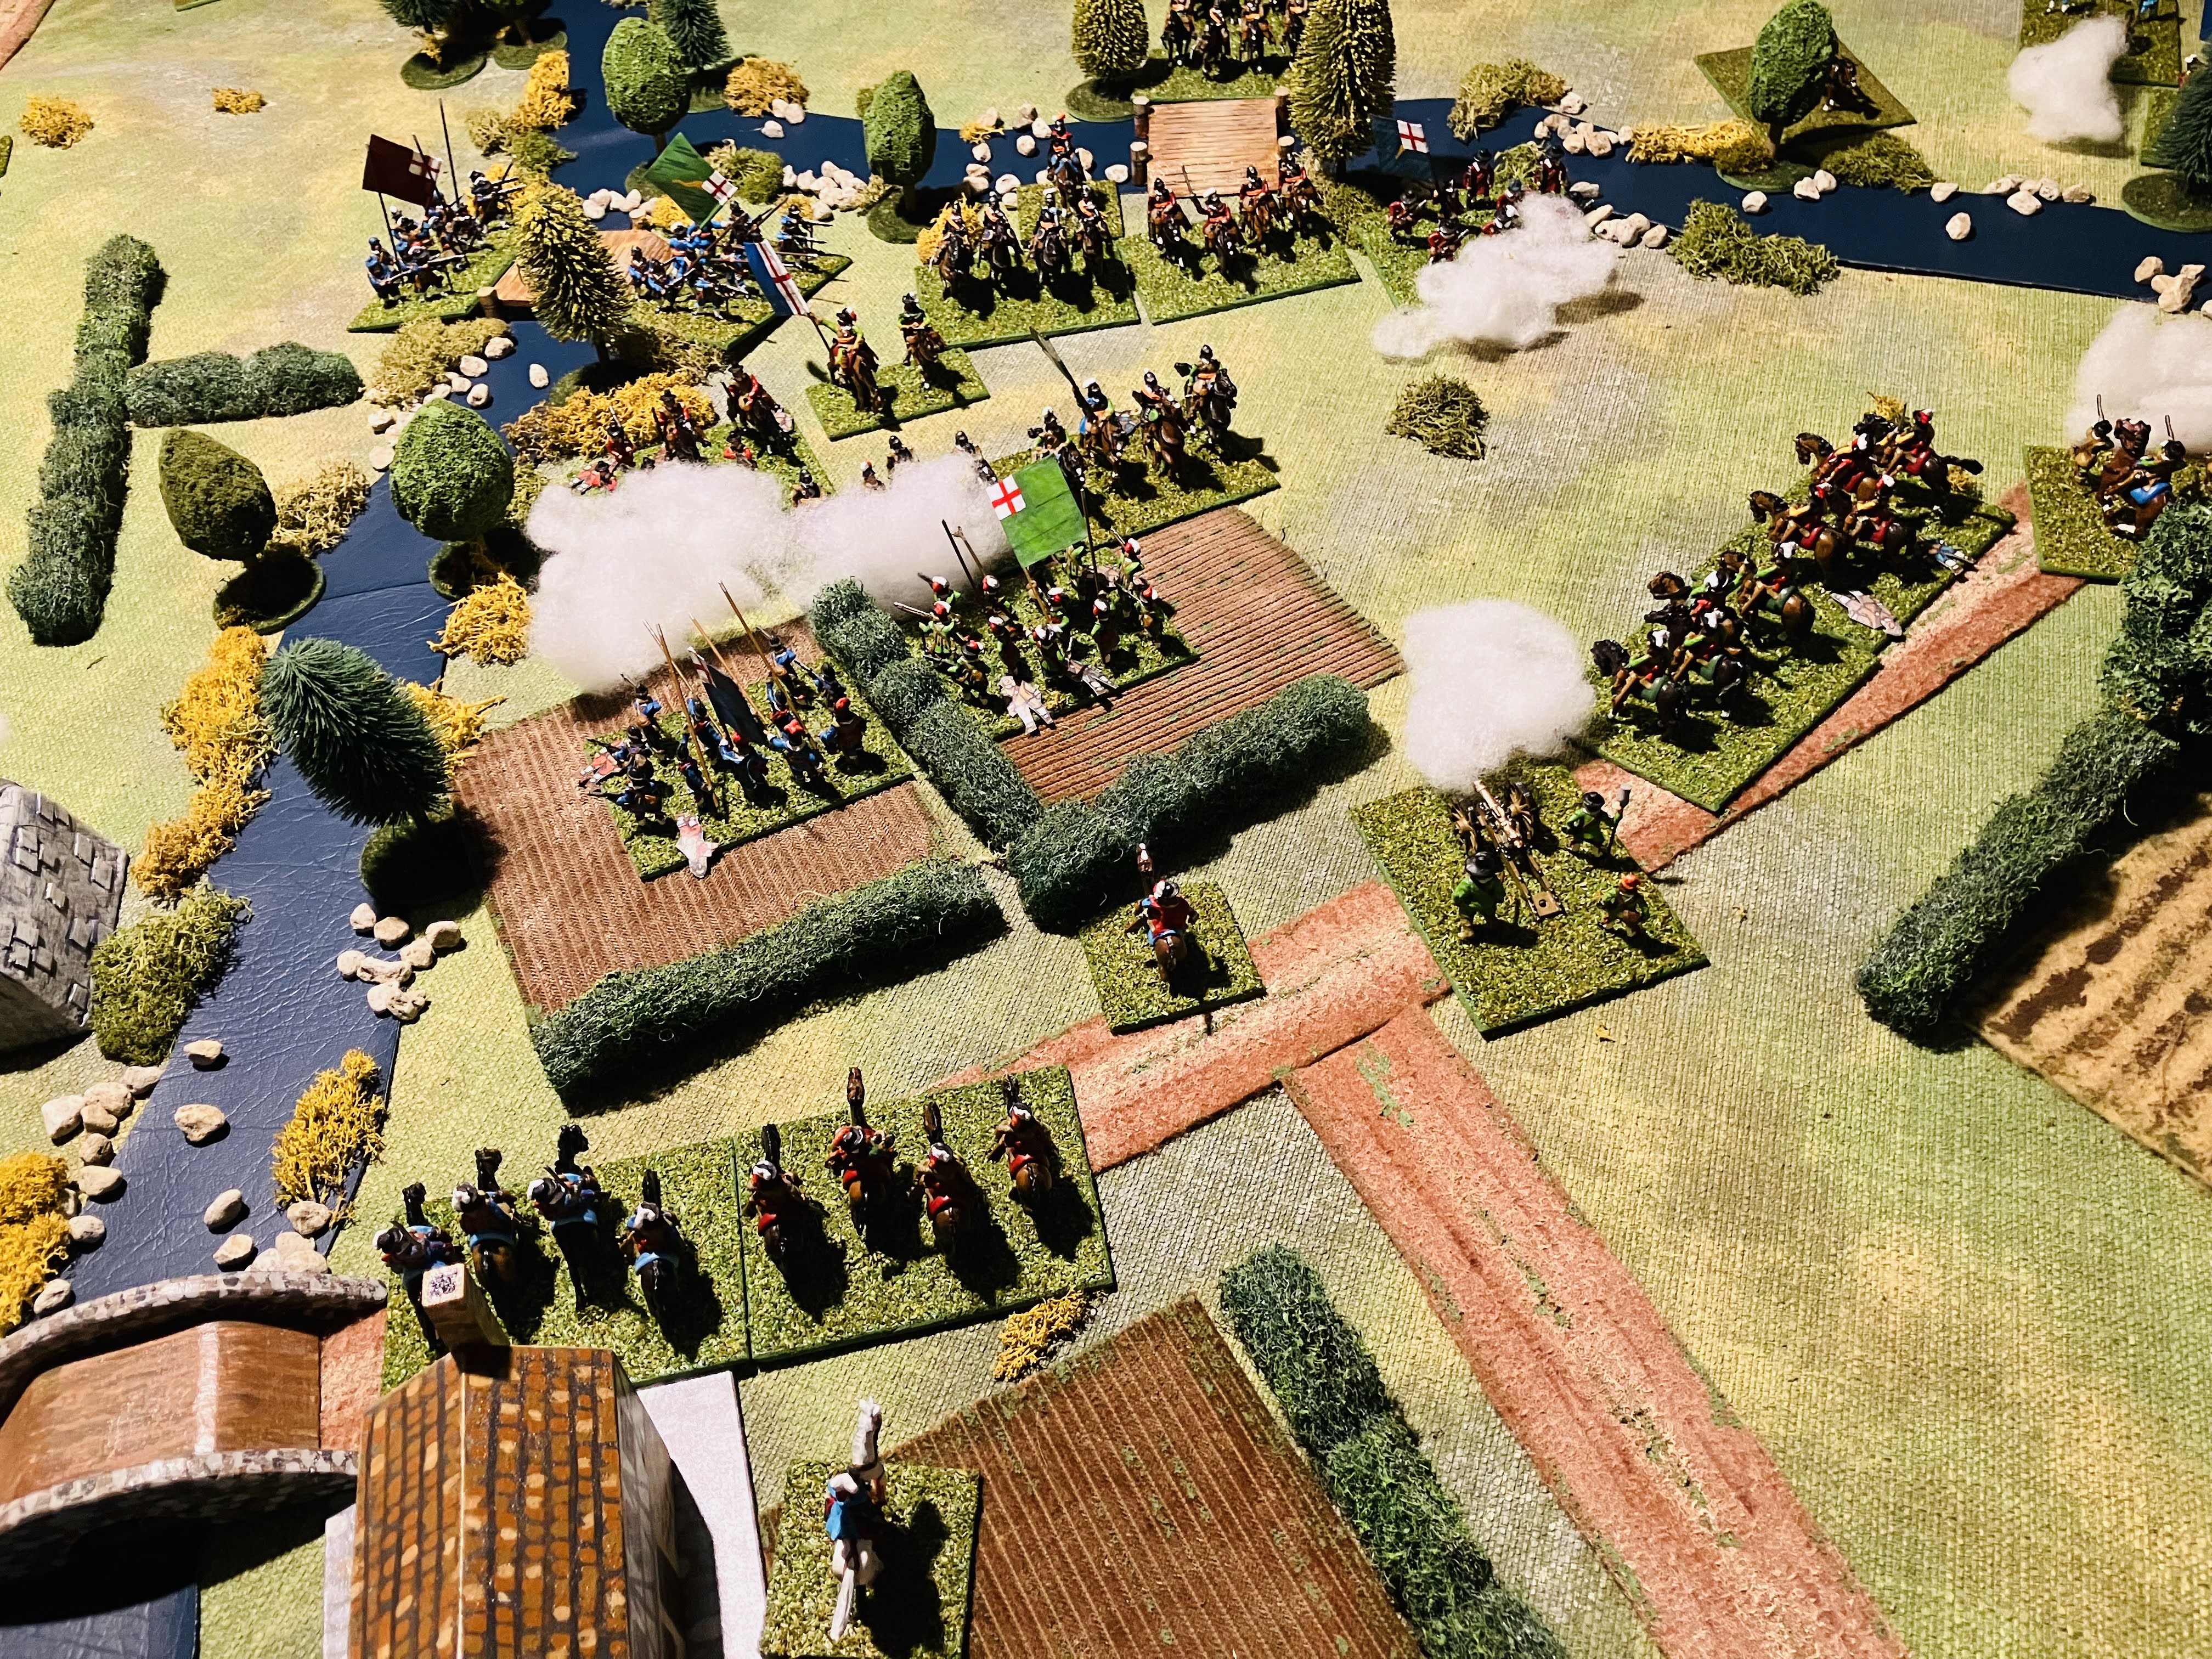
| A closer view of the action during the game. |
Order of Battle
The order of battle was as follows…
Royalist
3 x Infantry
2 x Cavalry
2 x Dragoons and Commanded Shot
2 x Artillery
4 x Commanders (led by Charles II)
2 x Ammunition Supplies
Parliament
4 x Infantry
4 x Cavalry
3 x Dragoons and Commanded Shot
2 x Artillery
4 x Commanders (led by Cromwell)
3 x Ammunition Supplies
 |
| I use a variety of carts to track ammunition provisions. With each instance of a unit running out of ammunition, a supply cart is withdrawn. Once all carts are removed, units that exhaust their ammunition will be unable to shoot. Using the ammunition supply rule removes the likelihood of infantry units running out of ammunition during the game's initial turns. |
Deployments
The city of Worcester sits beside the River Severn running across the tabletop and is joined by a tributary, the River Teme, which can be crossed by Powick Bridge. The Parliamentary forces are positioned across the River Teme and overlooking Worcester from Red Hill, they have commandeered local boats to construct two platoon bridges over both rivers.
The defending Royalist forces are divided into two groups, one command occupying Worcester and the nearby Fort Royal; the second command is guarding against potential Parliamentarian attacks across the River Teme.
 |
| A top down view of the tabletop with the bridges in place where the Parliamentarian forces impounded boats to build bridges to cross the River Severn and River Teme. |
I am expecting this to be a one sided game with a historic outcome. From a game perspective the objective of both armies is to destroy the enemy. The scenario from “With Pike and Musket” by C.F. Wesencraft, from which this scenario is taken, suggests the Royalists should hold their ground for six turns after which it may retire, but no victory points for a successful retirement.
The game report
As the battle commenced, Parliamentarian forces launched their initial assaults on Worcester from Red Hill and at Powick Bridge. Cannons roared from both sides, exchanging fire as thick clouds of gunpowder smoke billowed from Worcester's defensive emplacements. Meanwhile, the first pontoon bridge was swiftly constructed, enabling some dragoons to cross the River Severn and begin establishing a bridgehead. Soon after, a second pontoon bridge was completed, allowing for the crossing of forces across the River Teme. However, upstream at Powick Bridge, Royalist infantry staunchly resisted, repelling the attacking Parliamentarian units and inflicting heavy casualties upon them.
 |
| A view from Fort Royal at the Parliamentary forces attacking Worcester from Red Hill. |
 |
| The first pontoon bridge can be seen constructed and allowing forces to cross the River Severn. In the distance the battle is raging at Powick bridge. |
 |
| Royalist forces in the centre move to engage the bridgehead. |
Although the Parliamentarian units encountered strong resistance in their attacks on Worcester, they started to secure a bridgehead to the north of the river Teme as their forces rapidly crossed the two pontoon bridges. Soon, clashes erupted between Parliamentarian and Royalist units and battle lines were deployed between the Severn and Teme rivers. Valiant commanders from both sides spurred their troops onward, rallying hesitant infantry and launching cavalry charges against the enemy. With the constrained space available, the Royalist forces initially maintained their ground, inflicting considerable damage upon their enemy. However, the numerical superiority of the Parliamentarian forces, who continued to cross the rivers, gradually wore down the Royalist defenders over time.
 |
| The fighting was fierce around the bridgehead north of the River Teme. |
 |
| Casualties begin to mount for both sides as Parliamentarian forces try to breakout from their bridgehead. |
As the Parliamentarian assaults intensified, the Royalist forces found themselves in a precarious position, compelled to withdraw, relinquishing control of Powick Bridge. With their battle lines weakened from casualties, this prompted the positioning of their reserve cavalry to counter any potential breakthroughs by the Parliamentarians. Soon, these reserves would be pressed into action as Royalist lines began to crumble under the numerical superiority of the enemy. With all their reserves fully engaged, the Royalist forces teetered on the brink of collapse, holding on by a mere thread.
 |
| The Royalist battle lines are looking rather thin as reserve cavalry prepare to plug any gaps. |
 |
| The attacks continue on Worcester. |
 |
| Royalist cavalry about to charge in an attempt to hold back the advancing forces. |
In a simultaneous turn of events, the breaching of Worcester's defences and the routing of the Royalist forces guarding the River Teme occurred. The resolve of the Royalist army was shattered, leaving them with no prospect of victory. Charles II, accompanied by a small contingent of senior Royalist officers, managed to evade capture. they would evantually make their way to the southern coast to board a ship bound for France. Charles II remained on the Continent until the Restoration in 1660.
 |
| Parliamentarian forces breakthrough north of the River Teme. |
 |
| A final Royalist stand in Worcester eventually fails and the defences are breached. |
 |
| Victory to Parliament. |
Summary of game
The chances of victory for the Royalist player in this scenario appear slim. At most, they might salvage a draw should the Parliamentarian player fail in establishing one or both pontoon bridges. Despite the scenario imbalance, playing the game was enjoyable, and it is one I am likely to replay this coming weekend. In the next game I will relook at the victory conditions, and whether the Royalists can gain victory if they manage to withdraw successfully after a specified number of turns. Trying to pick the exact number of turns is always challenging and is so dependent upon the decisiveness of the combat rules used.
Another area I am thinking of exploring, if I get to replay, is to have a go at simplifying the scenario to a One-Hour Wargaming (OHW) format. I always find comparing the OHW scenarios to the original ones they are referencing so fascinating, and seeing how the terrain and tabletop layout has been simplified or opposing forces reworked to fit the limited numbers of units used.


Great AAR there Peter and some great in game shots, that are lovely to behold:). The King's route he took fleeing the battle passes along the river Avon, near where I live, less than 1/2 a mile away in fact, on route to Bristol and from there to Europe.
ReplyDeleteThanks, I try and pick the better photos for the blog and edit them if the lighting is problematic.
DeleteAn excellent account of your refight Peter! I found it particularly interesting my auntie lived in Malvern for many years, and we visited the area many times, so all the names are quite familiar to me.
ReplyDeleteIt is always interesting when pace names trigger past memories. Thanks.
Delete11:7 (Horse, Foot & Dragoons / Commanded Shot) is far off the usual 3:1 often mooted as required for a succesful attack. So nice to see your elegant D3 rules don't make defending to easy, many have to add factors for every advantage and end up making attacking suicidal.
ReplyDeleteI like using D3 dice as the limited numbers get you thinking about combat situations as being advantageous, average, or disadvantageous. I am beginning to total up the advantages and disadvantages of a situation and compare. If they are even then its average combat, else it is one or the other.
DeleteThe ratio is pretty much what is in the scenario, which aligns with historically numbers, so it is interesting to compare to the 3:1 view when attacking.
Cracking looking game and a good read as well.
ReplyDeleteIt certainly was an enjoyable game to play through.
DeleteA cracking game report.
ReplyDeleteThank you. The writing of the report probably took about the same time, if not longer, to write as to play the game.
DeleteI know exactly what you mean, Peter!
DeleteExcellent battle report, Peter! I really enjoyed your narrative and game photos. I look forward to your battle replay with either different victory conditions or a simplification to a OHW format. Are you still using AI in helping to generate the narrative?
ReplyDeleteI did consider using the AI system for this game, but it is better suited towards set piece battles, the infantry in the centre and cavalry on the wings type of deployment. Although I did consider modifying the system and probably could have used it if I had more time available.
DeleteNo need to invoke AI, I enjoy and prefer YOUR prose.
DeleteThat was a thoroughly engaging report of a good looking battle James.
ReplyDeleteI think a fighting withdrawal would be interesting, but as you say the devil is determining the victory conditions.
Thank you. I think there is a fighting withdrawal scenario in one of the OHW scenarios I will have to have a look at for ideas to help with the game victory conditions.
DeleteNice looking game Peter. I like the use of the ammunition carts.
ReplyDeleteDid it take long to play?
In all it took just over an hour to play through.
DeleteSuperb looking game, and the short playing time surely invites a replay!
ReplyDeleteThat certainly is one of the advantages of one-hour style games. Thanks.
DeleteWhat a good report, and the table looks really great! I think I will have to give your 'D3 OHW' rules a go - most impressed that you could actually complete the game in about one hour!
ReplyDeleteThank you. With 8-12 units per side most games are completed within the hour.
DeleteI'll take a look at your rules, for sure. Peter Dennis is finishing a series of Monmouth Rebellion figures, so I've been reading up on it and several of the major figures participated at Worcester. The organization and tactics were a bit different 30 years later, but not so much, I think, that ECW rules couldn't work as a starting point?
ReplyDeleteYou may need to drop some of the rules, eg out of ammunition and impetuous cavalry, for the Monmouth Rebellion. I have been looking at the paper boys facebook page with this new series, most interesting as I have 3 paper armies.
DeleteVery nice. I was hoping for a better outcome with King Charles having Cromwell hung in the town square but your outcome was more realistic, I spent a night many years ago at the foot of Fort Royal's hill.
ReplyDeleteThank you. Alas, no turn around of history in the game.
Delete