This is an English Civil War battle report following on from the previous post where some pre-game actions were tested to influence an army's deployment, composition, and also its readiness. While also helping develop the game’s narrative.
 |
| Infantry engage in the centre. |
The tabletop layout was decided by terrain cards drawn from deck. A little bit more on using terrain cards can be found here. The Royalists had to deploy first followed by the Parliamentarians. I should have allowed Parliament to select the tabletop side, and only realised later in the game that I had forgotten.
 |
| Terrain cards are used to determine the tabletop layout. |
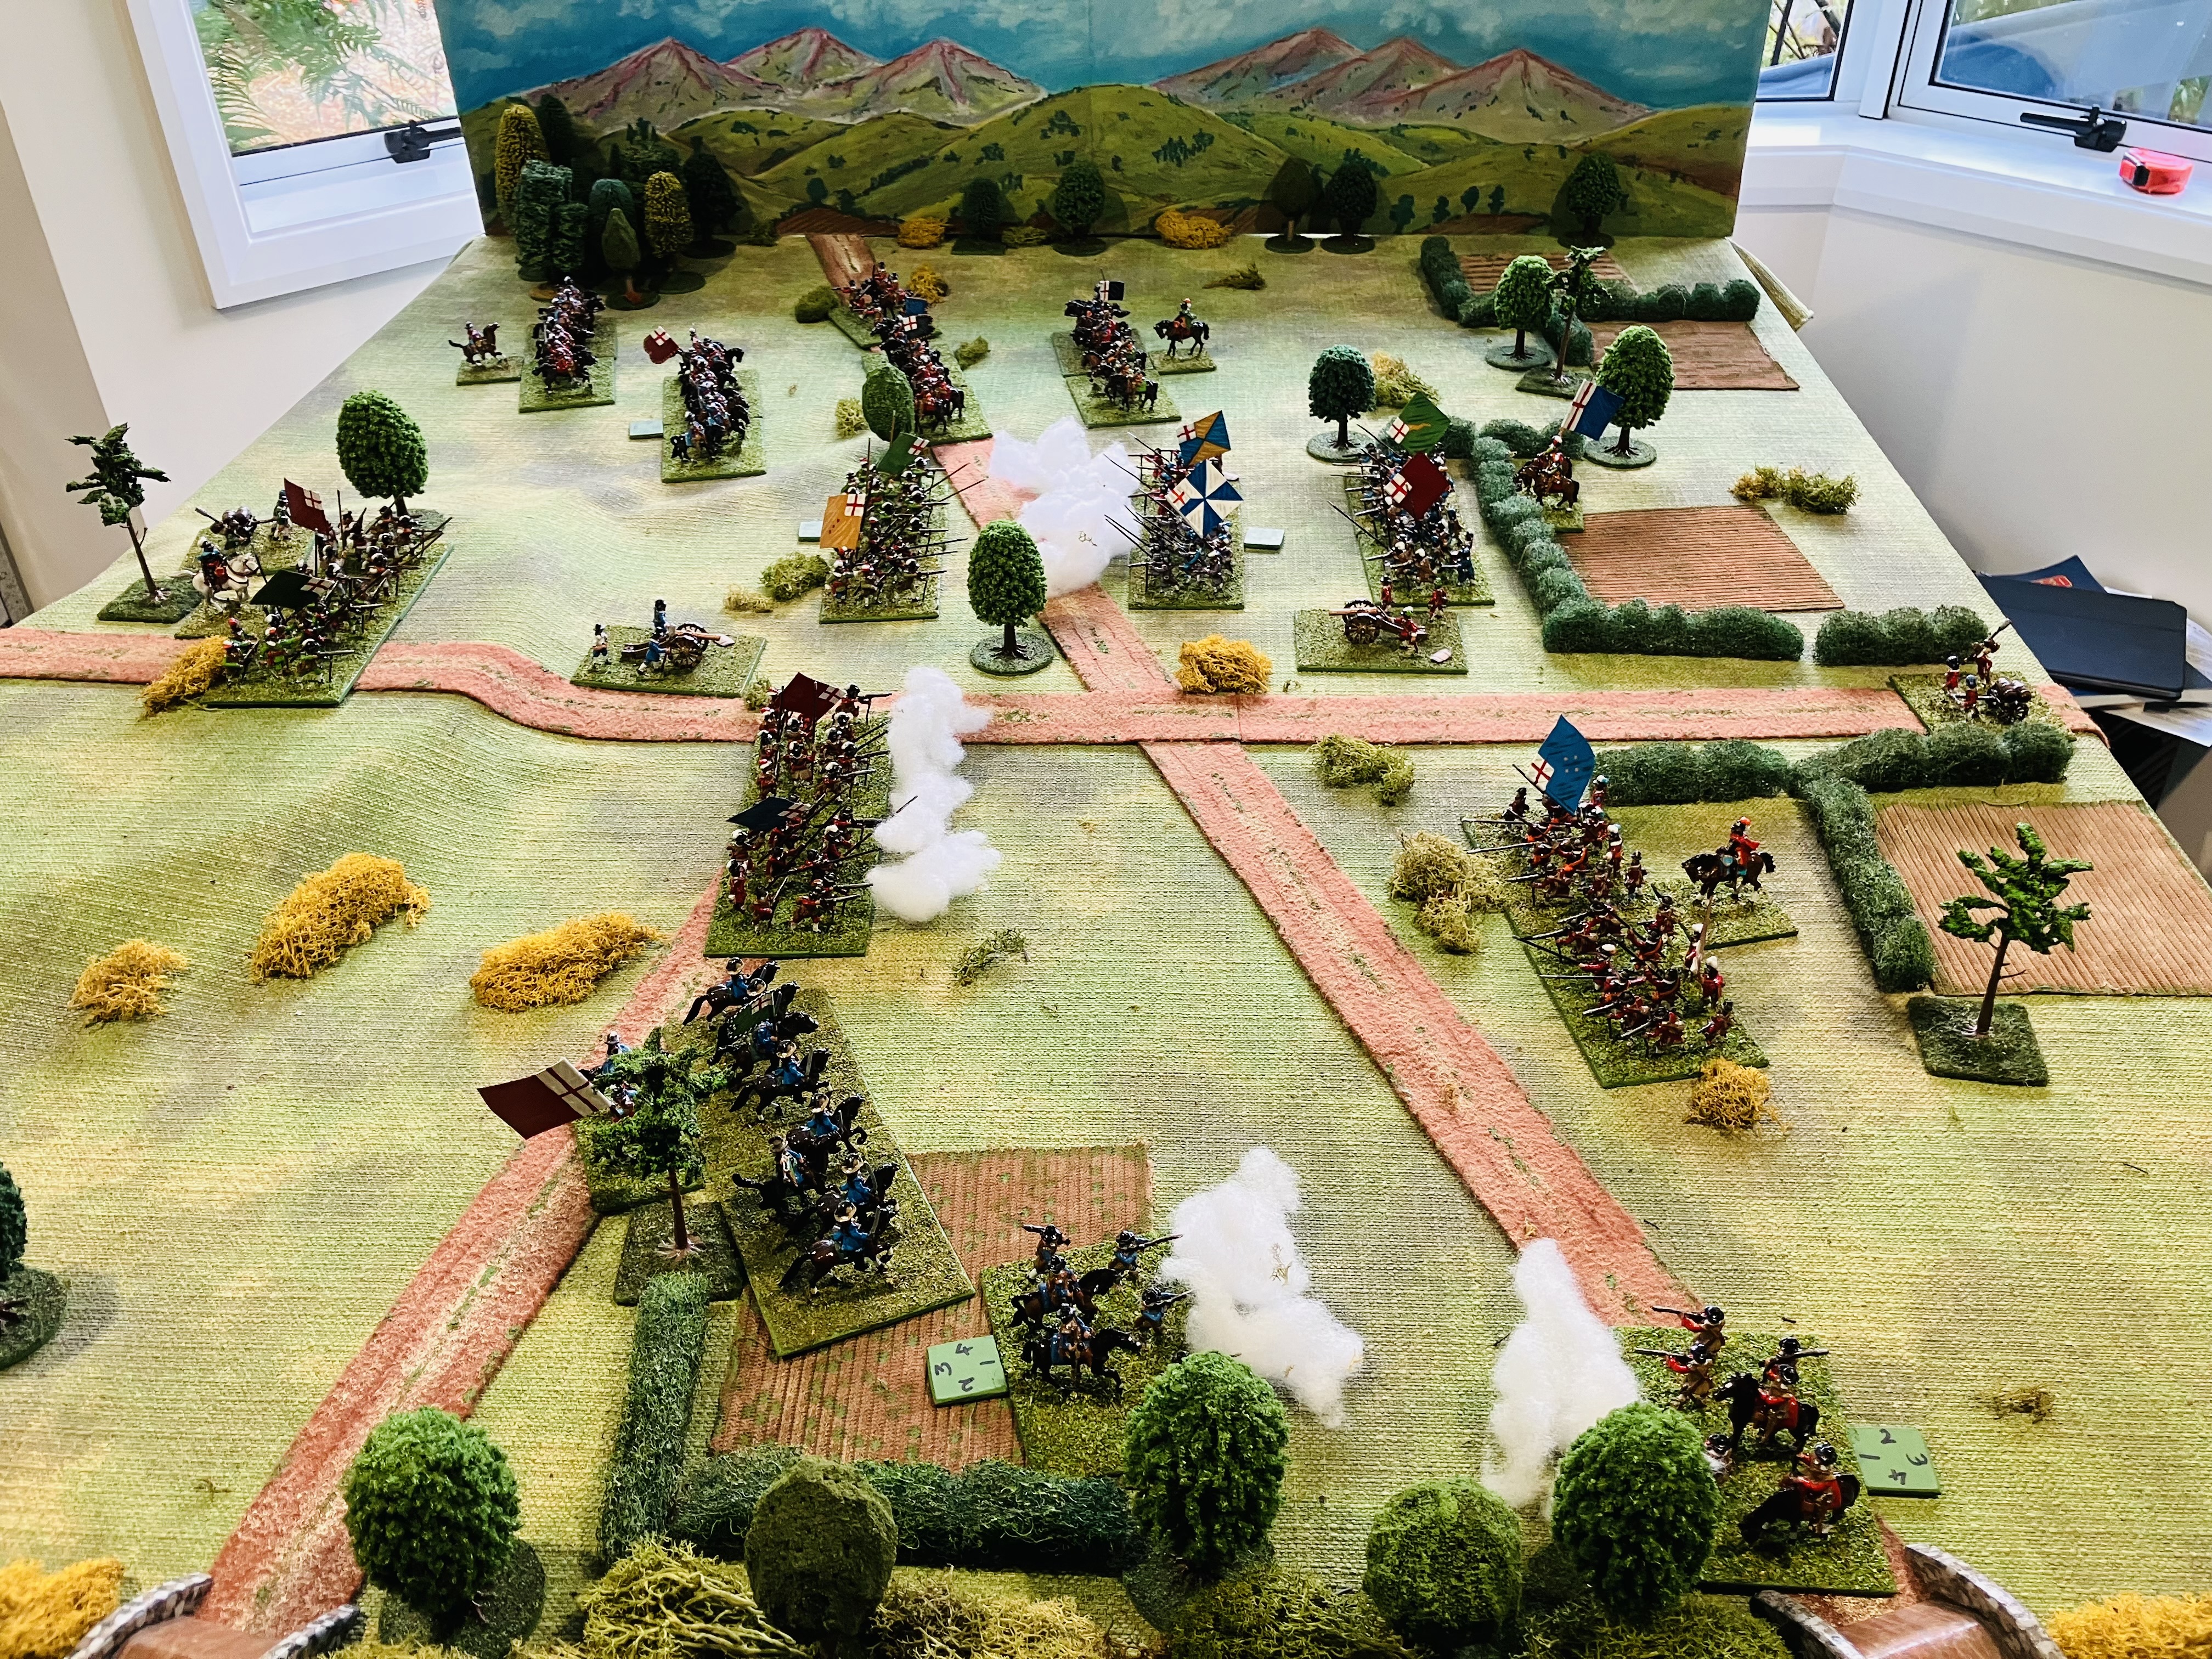
 |
| The tabletop is setup and armies deployed. |
The pre-battle actions had influenced the make up of the chance cards for each army. The Royalists having one extra rally card, while the Parliamentarians force had replaced a confusion card with a panic card. See the previous post for details about the cards.
 |
| Chance cards for the Royalists. One card is drawn and actioned at the start of the Royalist player’s turn. |
 |
| Parliament’s chance cards. The cards are just cut out from a sheet of cardboard from the local craft store. |
Order of Battle
- 4 x Cavalry
- 3 x Infantry
- 1 x Artillery
- 2 x Dragoons
- 3 x Cavalry
- 4 x Infantry
- 1 x Artillery
- 2 x Dragoons
Opening moves along the river
The Royalist forces, led by Sir Charles Blackthorne, began by advancing on their right flank beside the river, committing both their cavalry and dragoons to the attack. In response, Sir Nathaniel Cleve, commanding the Parliamentarian army, countered by pushing forward his left flank cavalry and advancing his infantry in the centre where he had an advantage in numbers.
After an intense struggle, the Parliamentarian cavalry gained the upper hand, routing their Royalist counterparts. However, their success was short-lived as they were caught in a withering volley from the nearby Royalist dragoons and scattered in disorder.
 |
| The opening action was along river. |
 |
| Parliament’s first success with their cavalry was short-lived as their cavalry, disorganised after the clash with Royalist cavalry, were scattered by accurate musketry from dragoons. |
The centres clash
Sir Nathaniel Cleve continued to advance his centre, pushing the leading infantry line forward while repositioning his second line to cover the gap left by the routed cavalry near the river. Both centres engaged in a short exchange of musketry before running out of ammunition. Meanwhile, Parliament’s right-wing cavalry began a cautious advance.
Fortune favoured the Royalists. Their centre-right successfully broke the opposing Parliamentarian infantry after a panic in the ranks, leaving Cleve’s left flank dangerously exposed. Sensing an opportunity, the Royalists committed their reserve cavalry, moving them up on the right to exploit the situation.
Meanwhile, on the opposite flank, the cavalry of both sides were locked in a fierce struggle with neither side able to gain the upper hand.
 |
| The infantry centres advance. |
 |
| Royalist reserve cavalry move along the river as Parliament reposition their second line of infantry. |
The flanks
 |
| A hard fought cavalry action on the other flank sees the Royalists about to prevail. |
 |
| Cavalry threaten both flanks of Parliaments centre, forcing them to retire. |
Wrap up…
OHW Rules Variations
I used a variation of the One-Hour Wargames (OHW) rules for this game. Some of the changes include:
Dragoons and artillery are represented by single bases and are eliminated after taking 8 or more hits, half the threshold of the two base infantry and cavalry units, which are removed after 15 hits.
Dragoons and artillery musket fire uses a D6-2 and must test for running out of ammunition.
All shooting units test for Out of Ammunition. Instead of rolling a separate D6 to test for out of ammunition, I check their shooting roll. If a 5 or 6 is rolled, the unit is considered out of ammunition. (Trotter cavalry cannot be resupplied with ammunition if the resupply chance cards is drawn.)
Movement is subject to friction. At the start of the movement phase, a die is rolled. On a result of 1, the movement phase ends immediately for that side. Units can still shoot.
Armies have 1 to 3 commanders assigned to the centre and wings, as well as a general. Each is attached to an infantry or cavalry unit and they have benefits in hand-to-hand combat.
In hand-to-hand combat, a unit with an attached commander rolls two dice and selects the higher result. If a double is rolled, the commander is wounded or killed and removed from play; the unit then reverts to rolling a single die in future combat.
All musketry and charge moves are limited to a range/distance of 6 inches.
Next up
 |
| Preparing for a sci-fi game. |
Lovely table and splendid looking glossy armies. A decisive Royalist victory from the looks of it. Star Wars up next!
ReplyDeleteThank you. I enjoy pushing the glossy ECW armies around the tabletop. Looking forward to a Star Wars game, just writing up the scenario.
DeleteA decisive result, with some nice twists provided by the chance cards. I really liked your variation of the cards, as per previous post. The change has added some minor benefits which the side still cannot rely on to turn up ‘when needed’. Great aid to solo play, and driving the narrative 👍🏼.
ReplyDeleteThanks Martin. I pretty much use chance cards all the time with my OHW games. They just always seem to add a twist or surprise to the game.
DeleteYour table looks very good and the cards appear to have helped create an entertaining scenario. I enjoyed reading the battle report. The amendments to the OHW rules are very helpful - thank you.
ReplyDeleteGlad you enjoyed the report. It was an interesting game to play, even though the cards ended up favouring the Royalists.
DeleteGreat looking game Peter.
ReplyDeleteThanks. The ECW armies always look colourful on the tabletop.
DeleteThe battle went well (especially if you are a Royalist) ⚔️
ReplyDeleteYour pre-battle work was good and certainly better than just “line ‘em up opposite each other”. I do enjoy a decent narrative to a battle 👏👏
Cheers,
Geoff
Hi Geoff, I find the narrative helps provide a more interesting game and make writing the battle report a bit easier.
DeleteGreat report and a beautiful looking table Peter
ReplyDeleteThank you. The reports always take a bit or time to write.
DeleteSuper looking game, table and miniatures are really lovely, Interesting read as well, very enjoyable.
ReplyDeleteThanks Donnie. It is always enjoyable getting the ECW armies out on the tabletop.
DeleteA fantastic looking game. I like the pregame card effects and look forward to seeing how you further develop this.
ReplyDeleteI am trying to find a way of introducing objectives into the pre-game activity. Thanks.
DeleteExcellent report. Great looking game Peter. The Royalists certainly had it going for them.
ReplyDeleteI have to confess your sci-fi set up reminds me of 50s and 60s sci-fi movies and certain TV series.
I went with the 50/60s sci-fi look a bit by accident, liked it and continued with the theme. Thanks.
DeleteThat was a lovely looking game Peter and excellent report...just a shame the wrong cause prevailed!
ReplyDeleteThanks. Early on I thought Parliament had the edge, but it was not to be.
DeleteGreat looking layout.
ReplyDeleteThank you.
DeleteGreat game report. I like the use of cards for that extra touch.
ReplyDeleteI often use chance cards in my games, mixing up or changing the cards to suit the situation.
DeleteThis all seems to be progressing nicely Peter, even if you need the odd tweak here and there, which is to be expected. Visually superb as always:).
ReplyDeleteA need to play through the pre-battle actions a few more times and try and incorporate some objectives.
DeleteAn enjoyable battle report. I really liked the way you randomized the battlefield set up. It make me wanna try something similar.
ReplyDeleteClever way to use turfs for marking the grid on your Sci-fi setup.
The orange turfs do stand out. I hope they work for the planned remote game I have.
DeleteThat battle was very convincing narrative, very like many of the real ones. Also looked good too, I really must do something about getting a backdrop for my games.
ReplyDeleteNot sure about adding objectives, it doesn't seem to fit with my recall of ECW battles - can't think of a suitable objective from one that's not essential anyway for progressing the battle e.g. the bridges at Cropredy.
As for ammunition, why not track usage, I reckon you must already be recording hits, you could charge a units 2 shots on a 5 or 6 because they obviously fired a lot to achive all those hits?
The only tricky bit about backdrops is finding a way to attack them to your tabletop setup. I could track ammunition as I currently put a barrel on the base when out of ammunition. Something to thing to consider.
DeleteLooks superb Peter. You had woods on the table, but none where the action was, so no chance to use your new approach to woods!
ReplyDeleteBest wishes, James
The woods were well out of the way and no opportunity for dragoons to take cover or to use the new approach.
Delete