This is the second game report from the ACW mini-campaign (turn 3) which took place in the afternoon of 24th June 1863 at Redmonds River. This game has Tanner's Confederate division attacking Cope's Union division which has been weakened by combat earlier in the day. Urgent messages were sent by Major General Cope to Union Headquarters and he was relieved to have infantry support from Brown's division (position to the south of him).
 |
| Campaign Map of the battle area. The action is being fought at coordinate E3. |
Terrain cards were used to determine the 4x4 foot tabletop layout. As the campaign map showed the area to be wooded, two wood cards were set aside from my pack of terrain cards. The remaining cards were shuffled and two more selected off the top. Finally, the two wooded and two selected cards were shuffled (including rotating of individual cards) then laid out.
 |
| Terrain cards decided the tabletop terrain. |
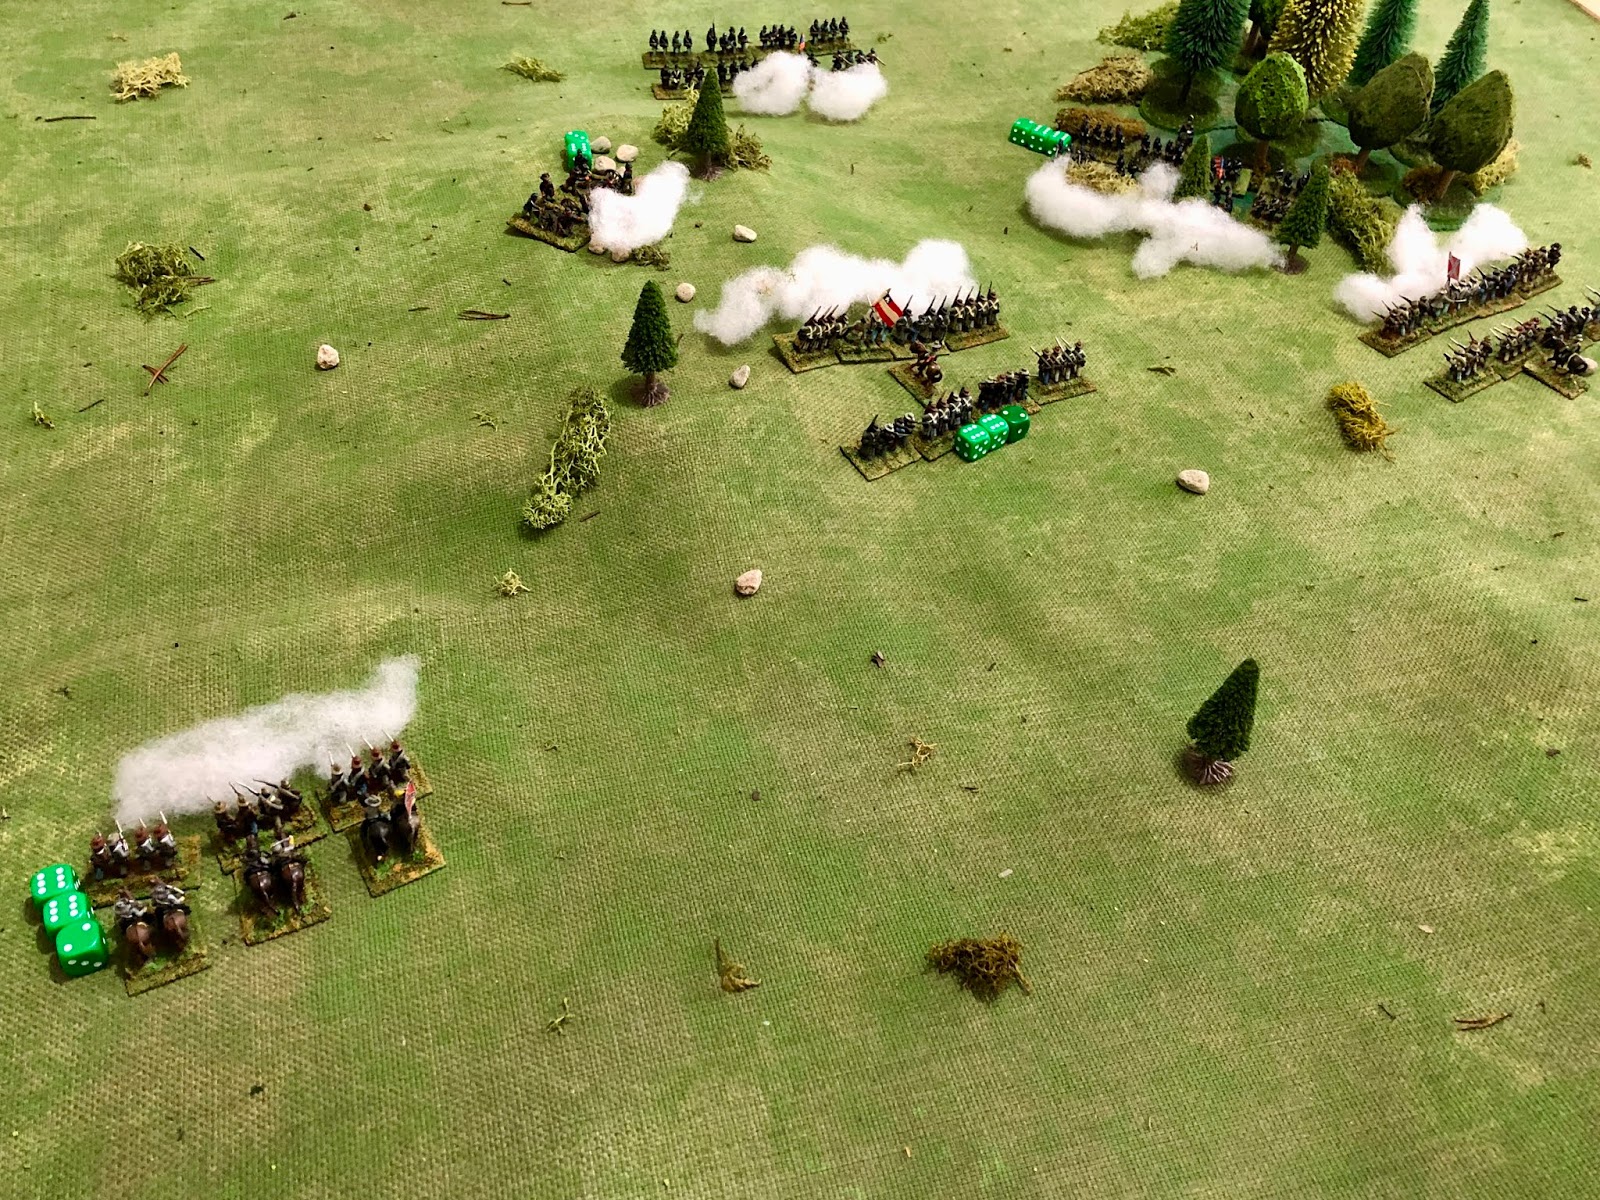
 |
| Tabletop with both forces deployed. |
Order of battle:
Cope's Union Division
- 1 x Infantry
- 1 x Cavalry
- 2 x Artillery
- 1 x Infantry re-enforcements due turn 6.
Tanner's Confederate Division
- 3 x Infantry
- 1 x Cavalry
- 1 x Artillery
The plans for both sides were quite straight forward. Union forces wanted to occupy the hill and woods as defensive positions. Then hang on until promised re-enforcements infantry arrived. The Confederate plan was to launch a frontal assault and use their slight edge in numbers (particularly infantry) to decide the action before any Union re-enforcements arrived.
On to the action...
The initial phase of the action had both sides quickly engaged in combat with Confederate forces trying to dislodge the Union's artillery batteries position on the hill. The artillery were proving very effective with firing rounds or canister into the advancing units.
 |
| Union artillery batteries secure the hill in the centre as the Confederate assault begins. |
 |
| Taking the hill is going to be costly to the Confederates. |
Neither side was getting the upper hand on the flanks, although the Union cavalry appeared to be teetering on the edge of routing on then a couple of occasions. While in the centre it looked like the Confederate assault would be successful at some cost. The promised re-enforcements arrived, but would they be enough to turn the tide of battle in the centre?
 |
| The Union centre is in trouble as Confederate infantry get a foothold on the hill. |
 |
| Union re-enforcements arrive. |
In the final phase of this action re-enforcements proved to be sufficient to stabilise the centre. However, both Union flanks gave way and the centre Union position became untenable and their forces withdrew.
 |
| The Union's right flank is open after Confederate cavalry finally overcome their opposition. |
 |
| While the centre is stabilised the woods are lost to Confederate infantry and Union forces make a withdrawal. |
Confederate forces suffered greatly in achieving this marginal victory.
 |
| Campaign map after the action. |
As early evening arrives on the first day of this battle. The Union attempt to gain a crossing has not gone to plan and they have a real threat on the left flank with Lyon's fresh Confederate division. Both sides have some key decisions to make for the evening campaign turn. Do they:
- Have their divisions avoid any action and reorganise those units that routed earlier in the day (achieved by 3+ score in a D6)?
- Launch an evening attack and miss the opportunity to reorganise and regain some of their routed unit for the next day's action (this would apply to the defending force as well)?
A few decisions to make.


I am enjoying everything that is falling out of this campaign. I also like the terrain selection system and the way it is weighted towards the terrain in the campaign square, it is giving good tables.
ReplyDeleteI took my lead from the book Wargame Campaigns which suggests maps of the period were inaccurate and should only provide an indication of the terrain. This works well with terrain cards. Thanks.
DeleteWell I think the Union troops did well to hold out against the Confederates in this action, but the artillery advantage seemed to help them. Like Norm I'm loving the way this campaign is going and the terrain cards are working a treat.
ReplyDeleteAn interesting choice for Brown as to whether to aid an attack on Tanner or try and support Rawlin, whose flank looks somewhat exposed. Can't wait to see the next map moves.
Thanks. The artillery did work out well for them. Brown's division was positioned in reserve to support either Cope or Rawlin. In the campaign no stacking is allowed, but one unit from an adjacent square can be used as re-enforcements. So in this case Brown could supply a unit to both if necessary.
DeleteThis is already a really tense Campaign Peter and very enjoyable reading.
ReplyDeleteThank you. It is working out well as a mini-campaign.
DeleteRemind me, who is supposed to be forcing a crossing of the river?
ReplyDeleteDon't remind me. The Union forces played by me are meant to be forcing a crossing and its all not going well.
DeleteThe boys in Blue need to win one of these if they are to have much future in this campaign!
ReplyDeleteYes, things are looking pretty dire. Hopefully they can reorganise during the evening and overnight for day two.
DeletePeter
ReplyDeleteMuch enjoying this (and your last WWII one). Both are very inspiring.
After your WWII one finished I immediately set about creating a version for a much larger scale Battle of Brody, 1941. Before a single game was played I had bogged the entire thing down with thought experiments on how to handle attrition, terrain generation, supply lines etc.
Then you present the idea of a much shorter timespan and battle area in this ACW version. I am immediately reinspired. Surely if I limit the geographical area and confine myself to a couple of days with a German Pz Division trying to cross a river...? Within a few days, I am bogged down again thinking of logistics, hidden movement and force/space ratios. I seem to be hard wired to screw it up through overcomplication. I must return to the elegant simplicity of your approach.
Anyway, out of curiosity, although I understand/applaud the random nature of the terrain, it does seem to be a little arbitrary? For example how does the battle in this update take place? The Confederate Division attacks east across an impassable(?) river. Furthermore, although the battle square does contain forest (and this is represented in the terrain card selection), it also clearly contains a river, which is not represented?
Did you consider making the river crossings wholly within one square or clearly linking just two squares? The bridge at E4 seems to be particularly awkwardly positioned for battlefield practicality and campaign movement (crossing at the corner of four squares).
Thanks for posting. I look forward to the next part.
Cheers
Andrew
Hi Andrew, It is easy to add complications I often limit myself to one complication (or rule mechanism per campaign). Good luck with your WW2 campaigns. The reason a river did not feature in this game's terrain was because while there is a river in the square, it did not need to be crossed as Tanner's division had crossed the river in square D3. So generally I will include a river where a force can use it as a defence. The map generally is there to give an indication of the terrain as maps of the time were often inaccurate. I agree coordinate E4 does look a little awkward. I hope this helps. Thanks for the questions, Peter
ReplyDelete