This game report, game 3 of the campaign, has an Italian armoured division launching an attack on a South African infantry division. Having decided upon the terrain the next step was deciding the type of engagement and battle events using dice (see the previous post for details). The Italian force (with a dice score of 2) was impacted by Allied interdiction coming into this engagement and as a result their force is reduced by 20 percent. However, they will benefit from an air sortie during the game.
Allied forces (with a dice score of 5) are taking an aggressive defensive stance, This will allow them to reposition 30 percent of their forces on the tabletop so long as they are not within 3 hexes of any Italian unit. However, an aggressive stance allows the Italians to allocate 30 percent of their available force to arrive on a flank.
There are 3 objectives the winner will be the side holding the most objectives.
 |
| Map of terrain showing the 3 objectives |
Tabletop is setup and both forces deployed. The attacking Italians are restricted to the first 2 hex rows. While the Allied force are deployed on half the tabletop. After initial deployment the Allied force can move 30% of their units anywhere on teh tabletop, but 3 hex away from enemy units.
 |
| Initial deployments. |
 |
| Allies units reposition themselves forward on the Italian left flank. |
The battle began with Italian armour advancing along the road and engaging with Allied armour. An advance group of tanks, 2 Per. Portees and carriers engaged the Italian left flank units.
 |
| Opening moves. |
 |
| Italians fight off an aggressive defence on their left. |
 |
| Armour clashes on the road and an early loss of Matilda tanks. |
A flanking force of Italian armour arrives and threatens to capture an objective. Allied armoured cars race to support infantry holding on to the hill.
 |
| An armoured flanking force arrives. |
 |
| Fierce fighting takes place on the flank over the hill objective. |
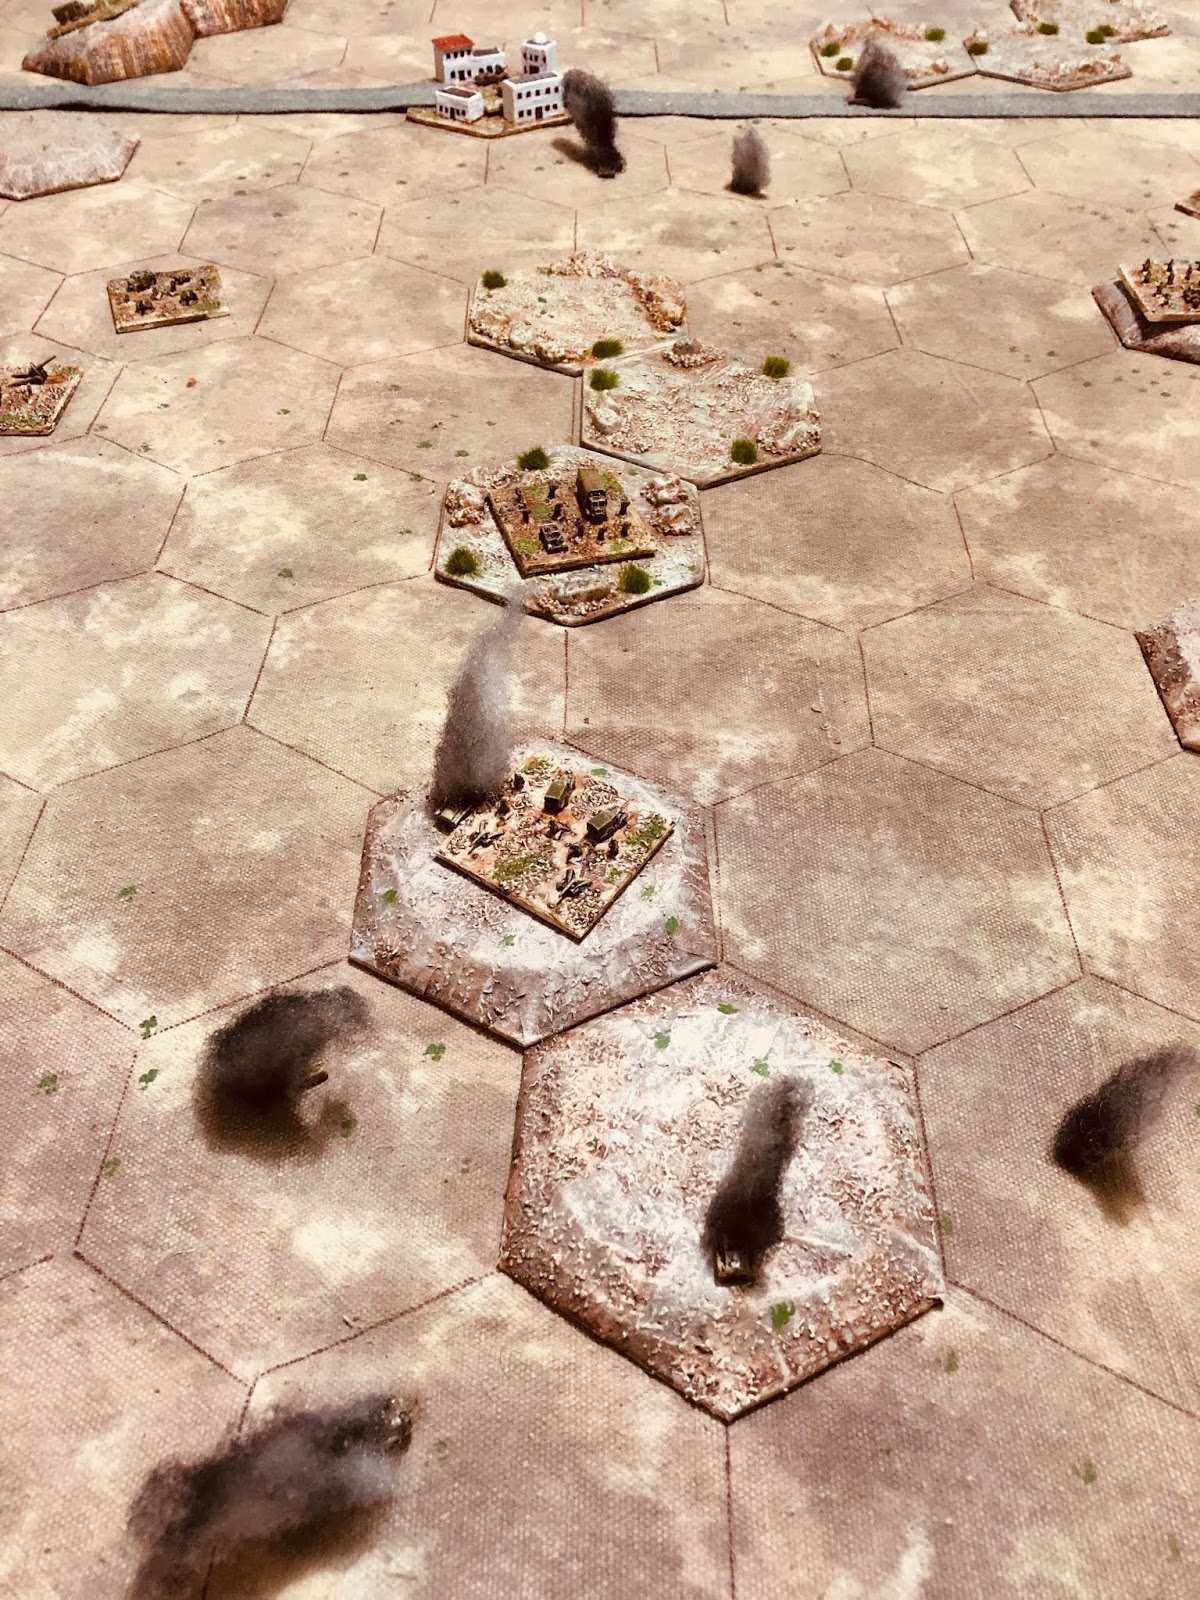
After some fierce fighting Allied units were able to fight off the flanking armour. On the opposite flank Allied armour was advancing down the road and threaten Italian rear elements as a combined Italian force including some armour made a final attempt to take the objective.
 |
| Allied armour advances down the road |
 |
| Allied tanks threaten Italian rear units. |
Allied defences were able to withstand the last Italian attack and their remaining tank unit forces the Italian rear units to retire.
 |
| Final positions |
 |
| Allied units hold on to the hill. |
A hard fought victory to the Allied defenders. There was a point when the Italian flanking force arrived I thought the Allied defenders were going to get swept away, but infantry units were able to just hang on long enough for supporting units to arrive. The Matilda tanks after an initial setback were able to push back the lighter armoured M13/40 tanks back down the road.


Great action again - and love the option at the start re. the defensive stance, in that the S.Africans can reposition up to 30%. Little details make the game.
ReplyDeleteSo - they're 1/300 scale on large bases yes?
And you're using a variant on tank on tank? Seems to give some great results.
Thank you. You are correct. The units are 1/300 scale Heroics and Ros miniatures on 2 inch bases and 1 inch bases for commanders. The rules are a variant of tank on tank rules.
DeleteExciting stuff. I look forward to the next chapter. Perhaps something on the tabletop rules?
ReplyDeleteCheers
Simon
I most likely will post the rules after I have played a few more games. One of the reasons I like campaigns is I use them to test out rules, or rule variations as in this case. Thanks.
DeleteGood game report. Nice to see it all in the context of a campaign.
ReplyDeleteIt will be interesting to see how the campaign progresses and good to see an Allied victory in the mix at this early stage.
DeleteAtense game but I think the Italians were taking on too much - especially with M13/40 vs Matildas and did their air support ever show up?
ReplyDeleteI see you've changed your map drawing as the symbols now have 'shadows' and are not on the next picture so either you're drawing lots of maps of are doing it in an app?
It was a good engagement between the outnumbered Matildas and M13/40 and helped secure a victory. As for the Italian air support, it did arrive and failed to do any damage. Hence it was forgotten in the battle report. Good pick up.
DeleteThe map once drawn is photographed and popped into a presentation app and I add and move the symbols. Taking screen-shots along the way.
What's the App, PowerPoint?
DeleteI am using Apple's Keynote and Screenshot, but PowerPoint and Snip-it would work just as well. I also tried Google's slides which was just as effective.
DeleteThanks for posting, Peter, another great fight, with great action. I, too, thought the Italians were going to break through. A great overall 'product,' from the map to the campaign aspects to the table-top rules, you've got it all covered!
ReplyDeleteV/R,
Jack
Thank you kindly. There is still a bit of tweaking happening. For example, I am trying to add smoke screens.
DeleteI see. And forgive me if I've missed it, but how are you handling minefields.
DeleteV/R,
Jack
I have not covered the added minefield rules yet. Currently I am going with, units must stop movement when entering and can move away the next turn. Add 2 to score when in combat with target unit in minefield hex.
DeleteSounds reasonable for the scale of action, thank you!
DeleteV/R,
Jack
The way the random maps, adjustments to the maps, and pregame process shape the battle is very clever!
ReplyDeleteThank you. I have taken this mapping approach as it is difficult to show a game's progress with 1/300 scale models. I make need to work at how I photograph the action.
DeleteI love the new maps! Interesting battle , sounds like a nail biter to play.
ReplyDeleteIt was a close game. Glad you like the maps they are the best way I have to show the action. 1/300 scale is not very easy to photograph, something I need to work at.
DeleteHave you published these rules (or at least your variant thereof) anywhere please?
ReplyDeleteNot yet, they are almost the point of being posted.
DeleteThey are now posted - see link at top of page.
Delete