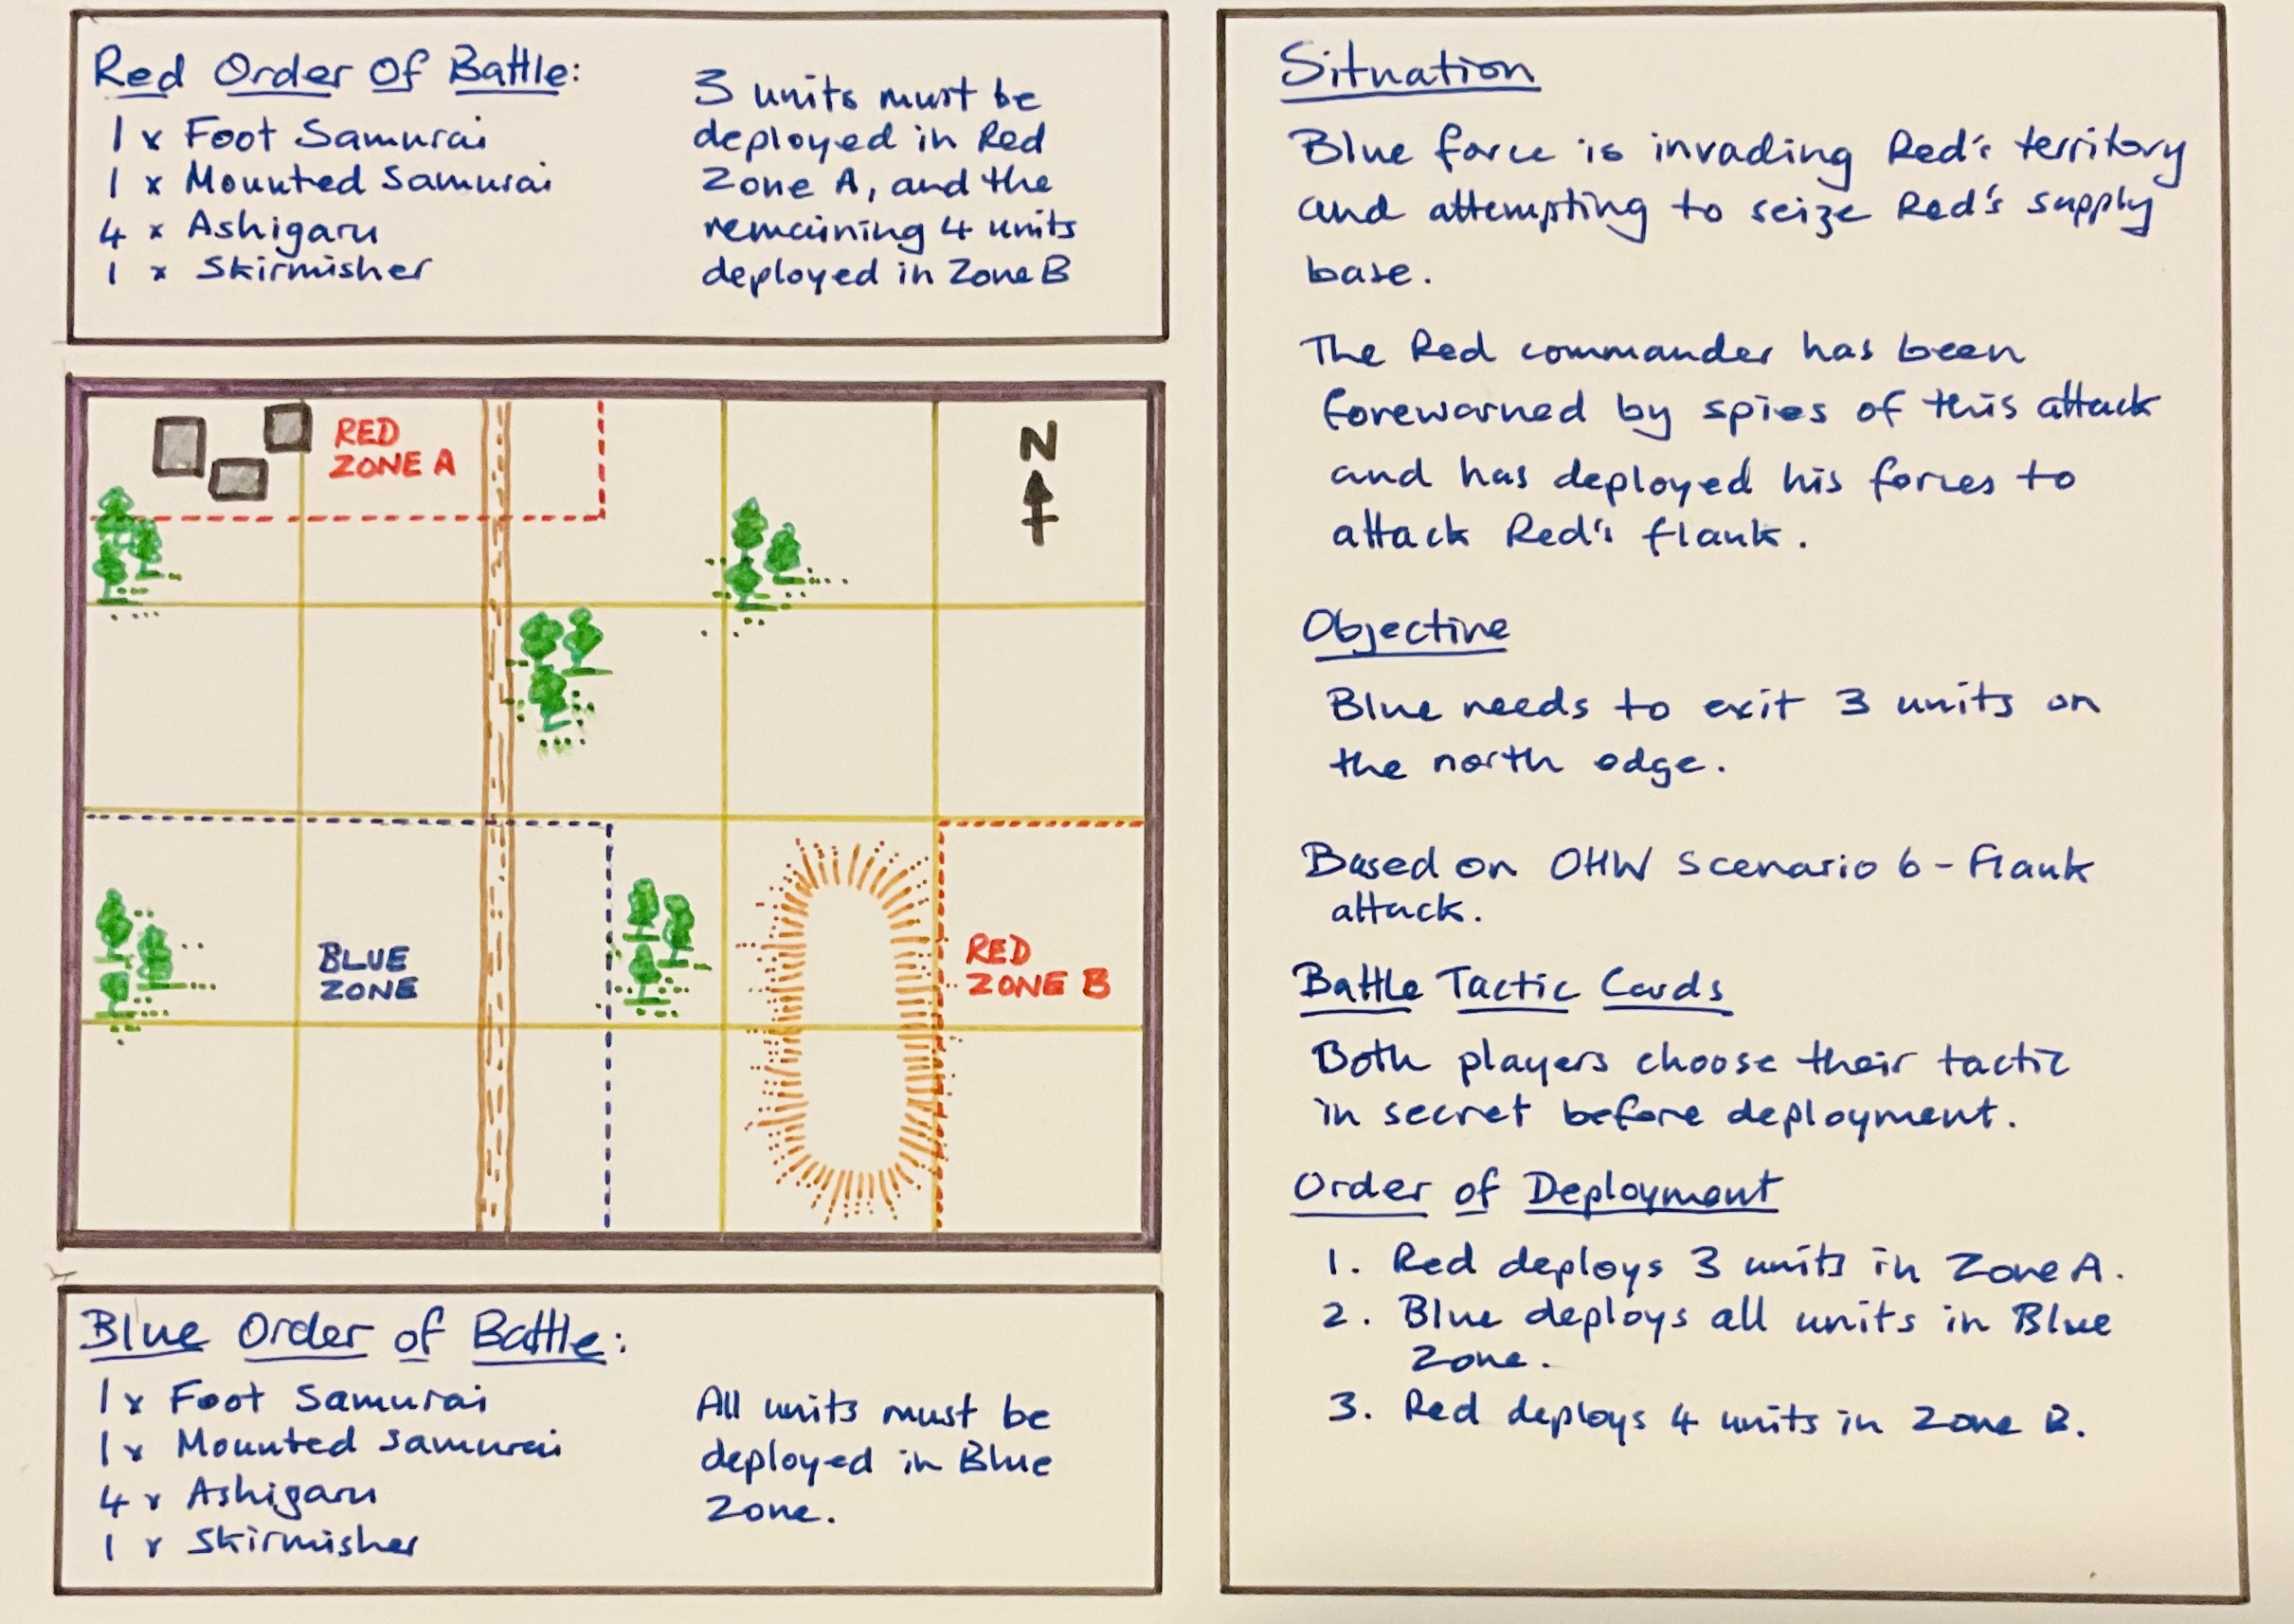
Although this battle report may appear to be a replica of the previous remote game played two weeks ago, it is essentially the same scenario except for a role reversal between Jon (Palouse Wargaming Journal blog) and myself - I took on the attacker's role and Jon became the defender. I opted to adopt a similar strategy as Jon did while attacking, deploying a screening units while the rest of my force charged forward and engaged with the defending units on the road as quickly as possible. The ultimate goal was for the player caught in the ambush, me, to successfully exit three units off the table.
 |
| The replayed game - Scenario #6 - Ambush (1) a slight variation from One Hour Wargames Book. |
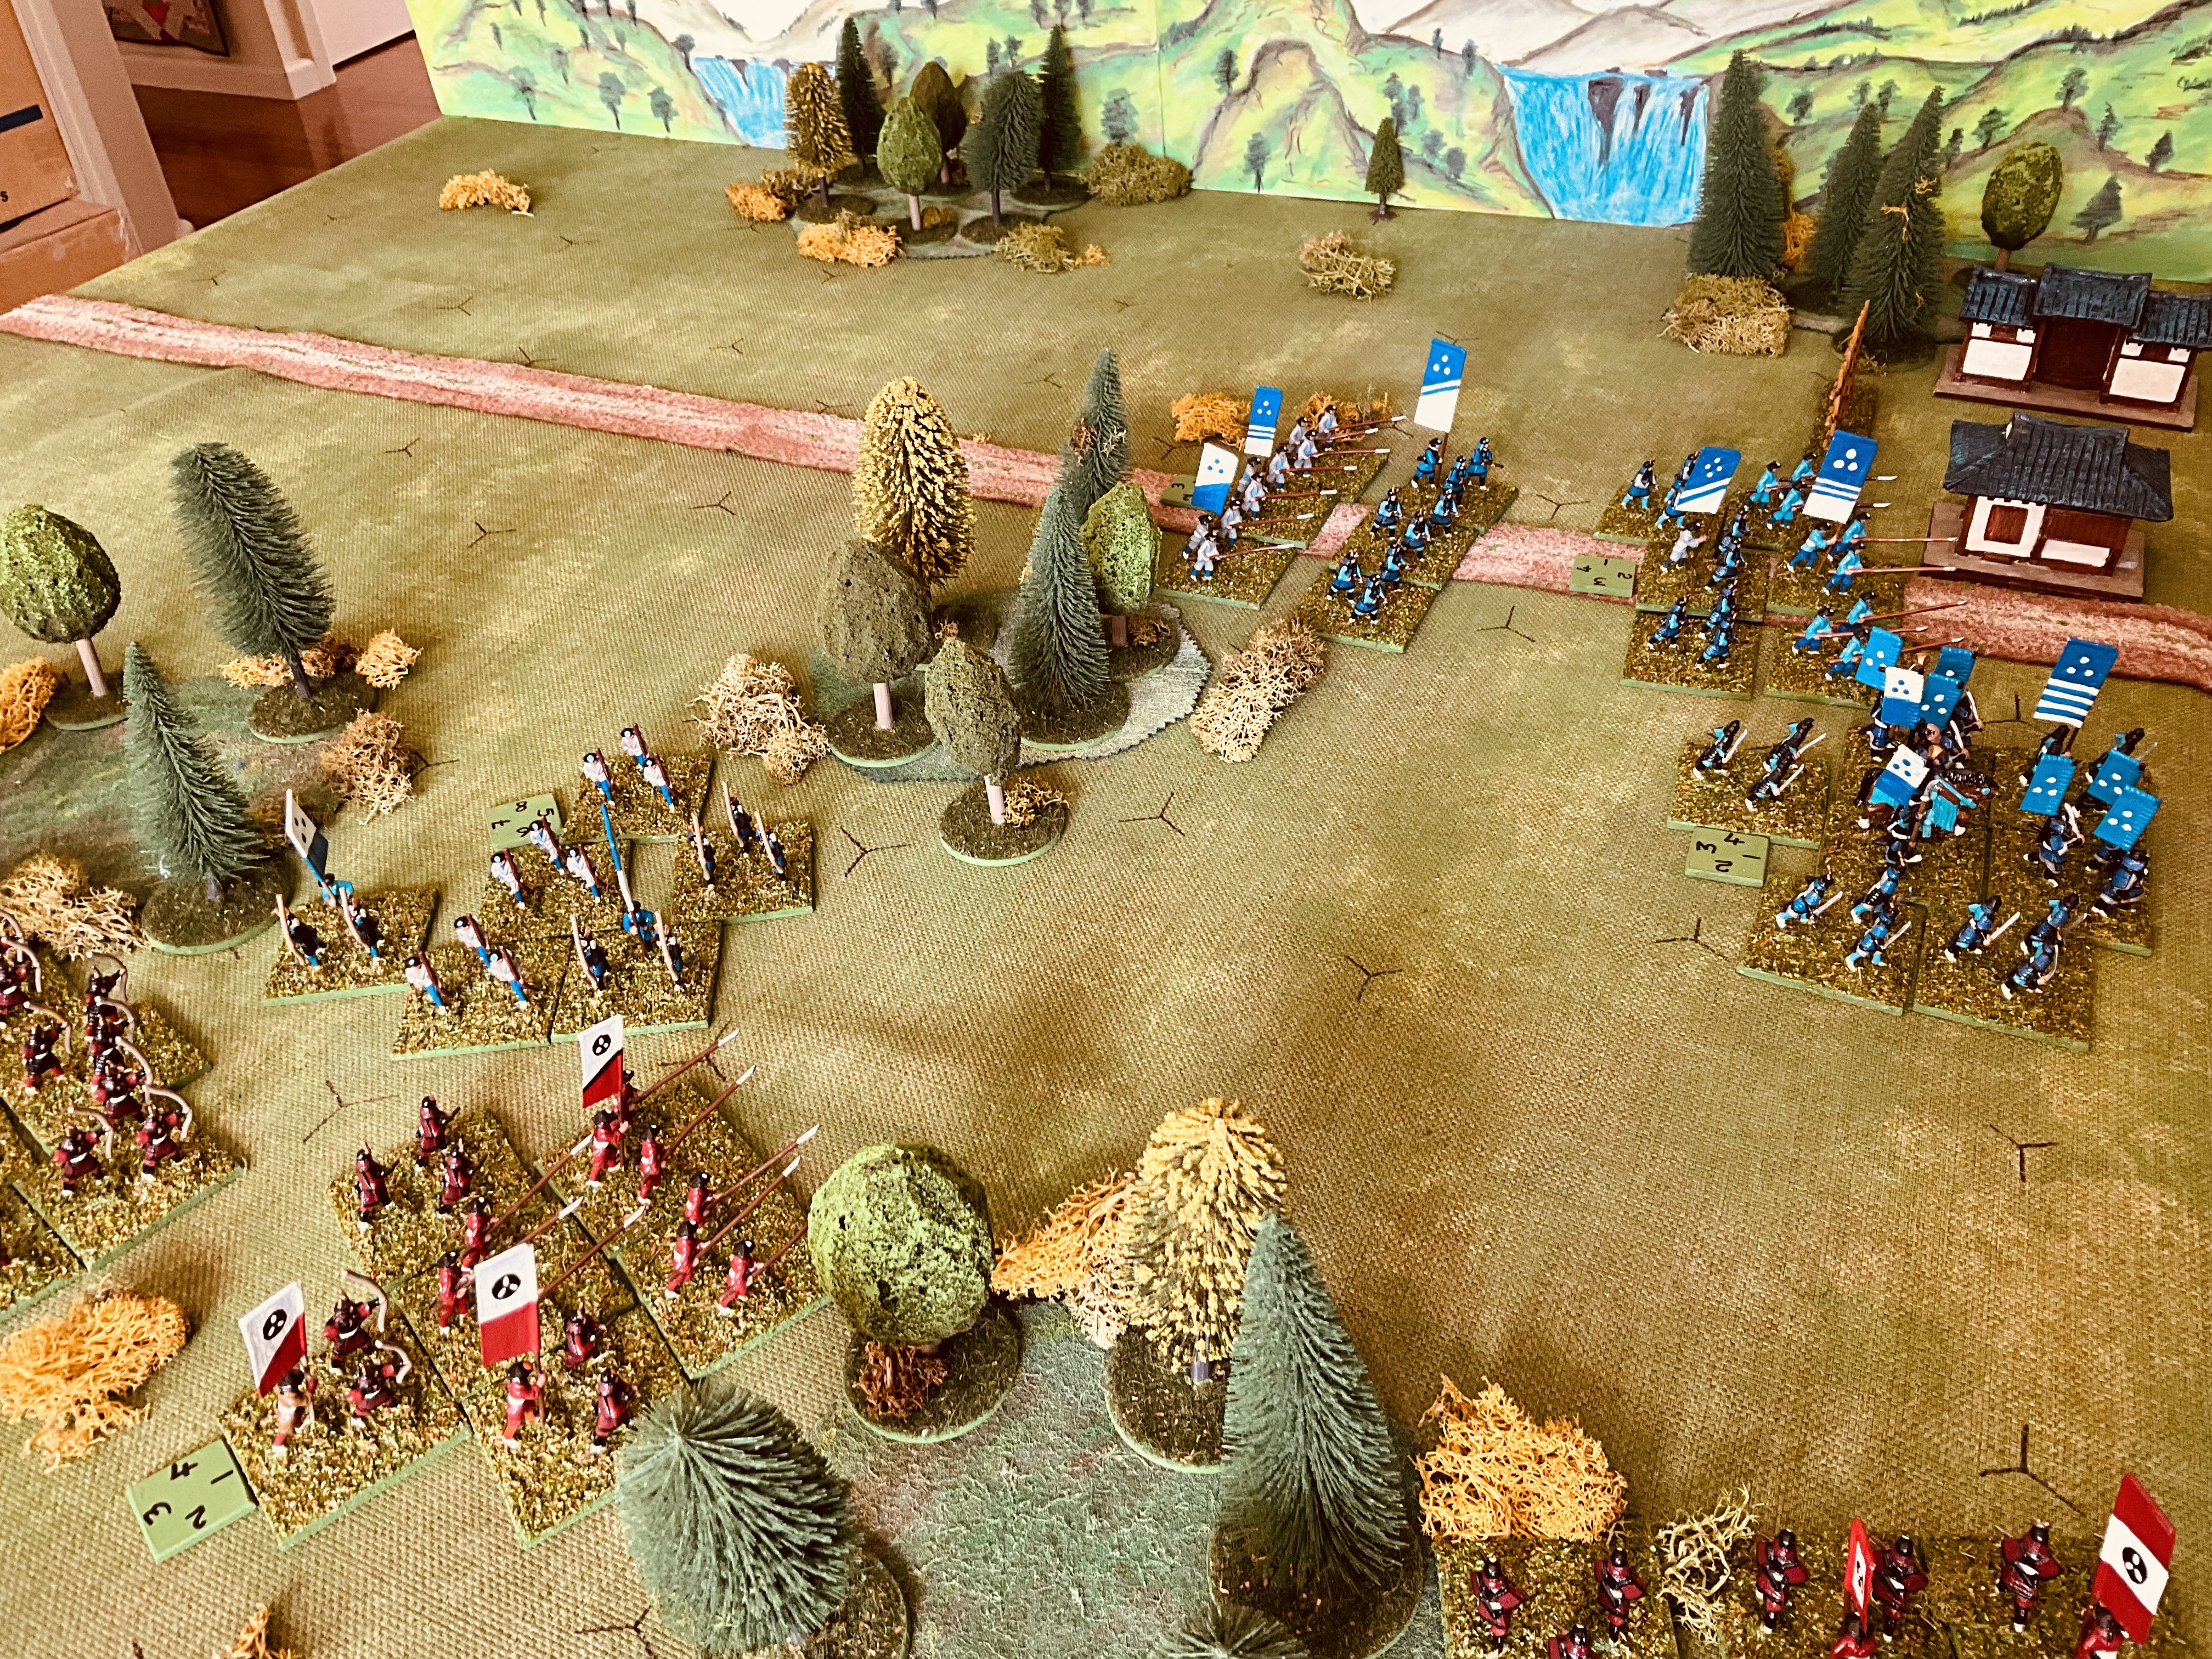
At the start of the game, I only managed to take a single photo and I forgot to document the rest of the action that ensued. Therefore, here is a brief overview of what happened during the game.
The majority of my troops advanced down the road to confront the defending force stationed near the buildings. My aim was to quickly engage the enemy and I utilised all of my available "Initiative" tactic cards. Meanwhile, Jon attempted to maneuver his flanking force into action as swiftly as possible, while also using his "Rally" tactic cards to help his blocking force withstand the attacks. However, my troops were able to deal significant damage early on as I was rolling high with my combat dice. This put Jon's troops under immense pressure.
 |
| The opening moves of the game. |
As the game progressed to its mid-point, it became clear that the defending force positioned near the buildings would not be able to hold out for much longer, rendering the flanking force's attack less effective. However, there was one noteworthy moment when Jon's samurai unit, led by their commander, managed to eliminate two of my units in a single turn. Nonetheless, shortly after that, we decided to call the game.
After the game, Jon and I had a discussion regarding the tactic cards that we had selected beforehand. As per the game rules, only one card per turn may be played, and we both had chosen the Hoshi "Arrowhead" tactic, which is an attacking set of cards that includes three "Initiative" cards allowing a free action by a unit when played. We deliberated whether having six cards was excessive, and if the rally and resupply cards should be more potent.
 |
| An excerpt from the rules on tactic cards. |
Apart from discussing the game itself, we also talked about the rules as I was attempting to modify them to make them compatible with a grid-based tabletop. Given my blog is called "Grid-Based Wargames," I sometimes wonder whether I should be trying to get a few more grid-based games happening. As a result, over this weekend, I have spent more time experimenting with these rules on a gridded tabletop. Initially, I tried using squares, but ultimately, I decided to use hexes instead, primarily because they allowed for units to fit neatly within an eight-inch hex, which was already marked up on one of my home-made battle mats.
Below are some pictures from a game played using the same scenario, in which hopefully you can see the hex grid, I only mark the corners.
 |
| The start of the game. The tabletop is 6x9 hexes and quite suitable for OHW scenarios. |
 |
| As blue advances Reds flanking forces start to engage their flank. |
 |
| Blue’s skirmishes and mounted samurai provide a screen. |
 |
| Blue’s foot samurai can be seen breaking through the blocking defenders. |
 |
| With the defenders eliminated and with only 4 units, Blue hastily makes tracks down the road. |
 |
| A stubborn defence by Blue’s skirmishes allows time for Blue’s remaining forces to exit the table. |
Now I have to try a few more games and update the rules.


Another interesting game there and good to read your thoughts and compare them with Jon's. I think the Defender would have been better with maybe the Keyhole or Flexible Defence cards, which might have helped on the Rallying front. I think it's one of those occasions where you might need to quickly run the same scenario and plans but with different tactics cards to see what happens.
ReplyDeleteA few more games will certainly help with determining the best mix of tactic cards to choose. Also, I think the cards are still a bit unbalanced.
DeleteSteve, I might agree if the Initiative card was not more powerful. An Initiative card allows a unit to attack twice while a Rally only allows, at best, negating hits suffered from one of those attacks. I played a Rally card before an Initiative card only to keep my powerful foot Samurai in the game long enough for that unit to play an Initiative card the next turn and launch a double assault. When I did this, I knocked out two enemy units.
DeleteAll those banners make for really good looking game but a few aliies straying from the Red/Blue scheme would be nice.
ReplyDeleteThanks. It looks like there will be a few figures left over which I can use for another colour scheme.
DeleteAnother challenging contest, Peter. After three games, Blue is still 3-0. Do you think the scenario is inherently unbalanced or is something else at play? I wonder if having Blue start back a little more deeply into its Deployment Zone would allow Red's flanking force a better chance to engage?
ReplyDeleteYour armies and table look terrific. Well done!
Yes, move them back about another 6 inches, or the other option is to have the flanking force deployed closer. The original scenario is on a square tabletop and this one is on a rectangle and causes the flanking force to be positioned further away.
DeleteThe two games have been most enjoyable.
Playing the scenario three times surely means it was interesting regardless!
ReplyDeleteBoth interesting and enjoyable, and a reasonably close game by the end as I was down to my last 3 units. I suspect the scenario will get played again as I adjust the rules for a hex grid.
DeleteAnd if you are in want of an opponent, you know where to find me…
DeleteSure do! Many thanks.
DeleteGreat looking game Peter and good to see the same scenario played giving different insights. Thanks for posting.
ReplyDeleteIt is always interesting getting the different view with Jon detailing his views of the game on his blog.
DeleteIt’s great that you’re getting multiple play throughs of the same scenario. It’ll really smooth it out and test out the rules.
ReplyDeleteAnd OF COURSE I was rooting for you the whole time. 😀
Of course Stew! The after game discussions certainly help, one thing you don’t get with solo wargaming.
DeleteStew, you are a fickle friend…
DeleteI am NOT! I'm just a friend to everyone....
DeleteReally interesting read. Is the scenario unbalanced or the do the rules need a tweak?
ReplyDeleteThanks. The ambushing force on the flank is probably positioned too far away and needs to be one movement closer. This would force the other force to consider more screening units and focus less on the blocking units.
Delete