This is the fourth and final post in a series about a commando raid game using 20mm plastic miniatures and solo rule mechanisms. This post covers the battle report, while the previous three posts covered preparing for the game.
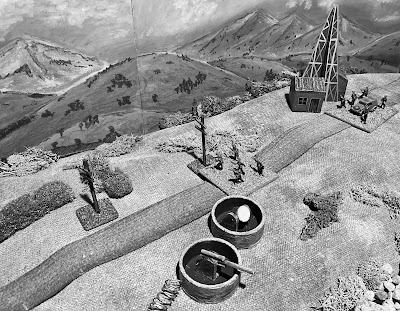
A quick recap, there are a total of 5 objectives for the commandos to destroy with the primary objective being the radar installation. These are defended by 2 pillboxes and 5 guard units that are positioned near the objectives. Additionally, there are 10 German reserve units that arrive one on each turn after any contact is made with the commando units. The reserves will arrive at one of three locations each turn determined by a dice roll.
 |
| A view of the tabletop with the 5 objectives circled in red and a blue arrow showing the arrival point for the commandos on turns 1, 2, and 3. |
The reserves have been lined up in a line and will start arriving in order, starting at the end chosen by dice roll.
In other words, the commandos must defeat, or avoid, the 2 pillboxes and 5 guard units, then destroy the radar installation. After contact is made with the enemy, 10 reserve units will start arriving one by one each turn. The commandos must complete their mission before the reinforcements overwhelm them.
 |
| The German defenders lined up. A dice is rolled to determine which end of the line to start drawing reserves from. |
The raiding commando force consists of:
- HQ - 1 squad with 2” mortar led by Major John "Houdini" Smith
- Group A - 3 squads and 1 demolition squad led by Captain William Jones
- Group B - 3 squads and 1 demolition squad led by Captain David Brown
- Group C - 3 squads and 1 demolition squad led by Captain Michael Williams
This force will arrive from the north-east having landed further up the coast and having been guided through an area of marshland by the local resistance group.
All the figures are based on 3” by 3” bases in groups of 5 or 6. A German unit is one base and a commando squad is one base.
Battle Report
 |
| Leading elements of the raiding force arrive. |
 |
| Achtung! The commandos are spotted. |
The commandos found themselves in a difficult situation. They were confined to a small area unable to fully deploy, but they knew that they had to press on and complete their mission. Major Smith and Captain Jones led two assaults on the German positions. The assaults were successful, but they came at a high cost. Major Smith was wounded, and Captain Jones was killed.
Despite the loss of their leaders, the commandos started to make ground. They crossed the road and began to flank the German defenders, whose numbers were increasing as reserve units arrived.
 |
| The situation is getting crowded as more commando units arrive and the defending units have them hemmed in. |
 |
| A series of costly but successful assaults allow the commandos to cross the road and begin to flank the defenders. |


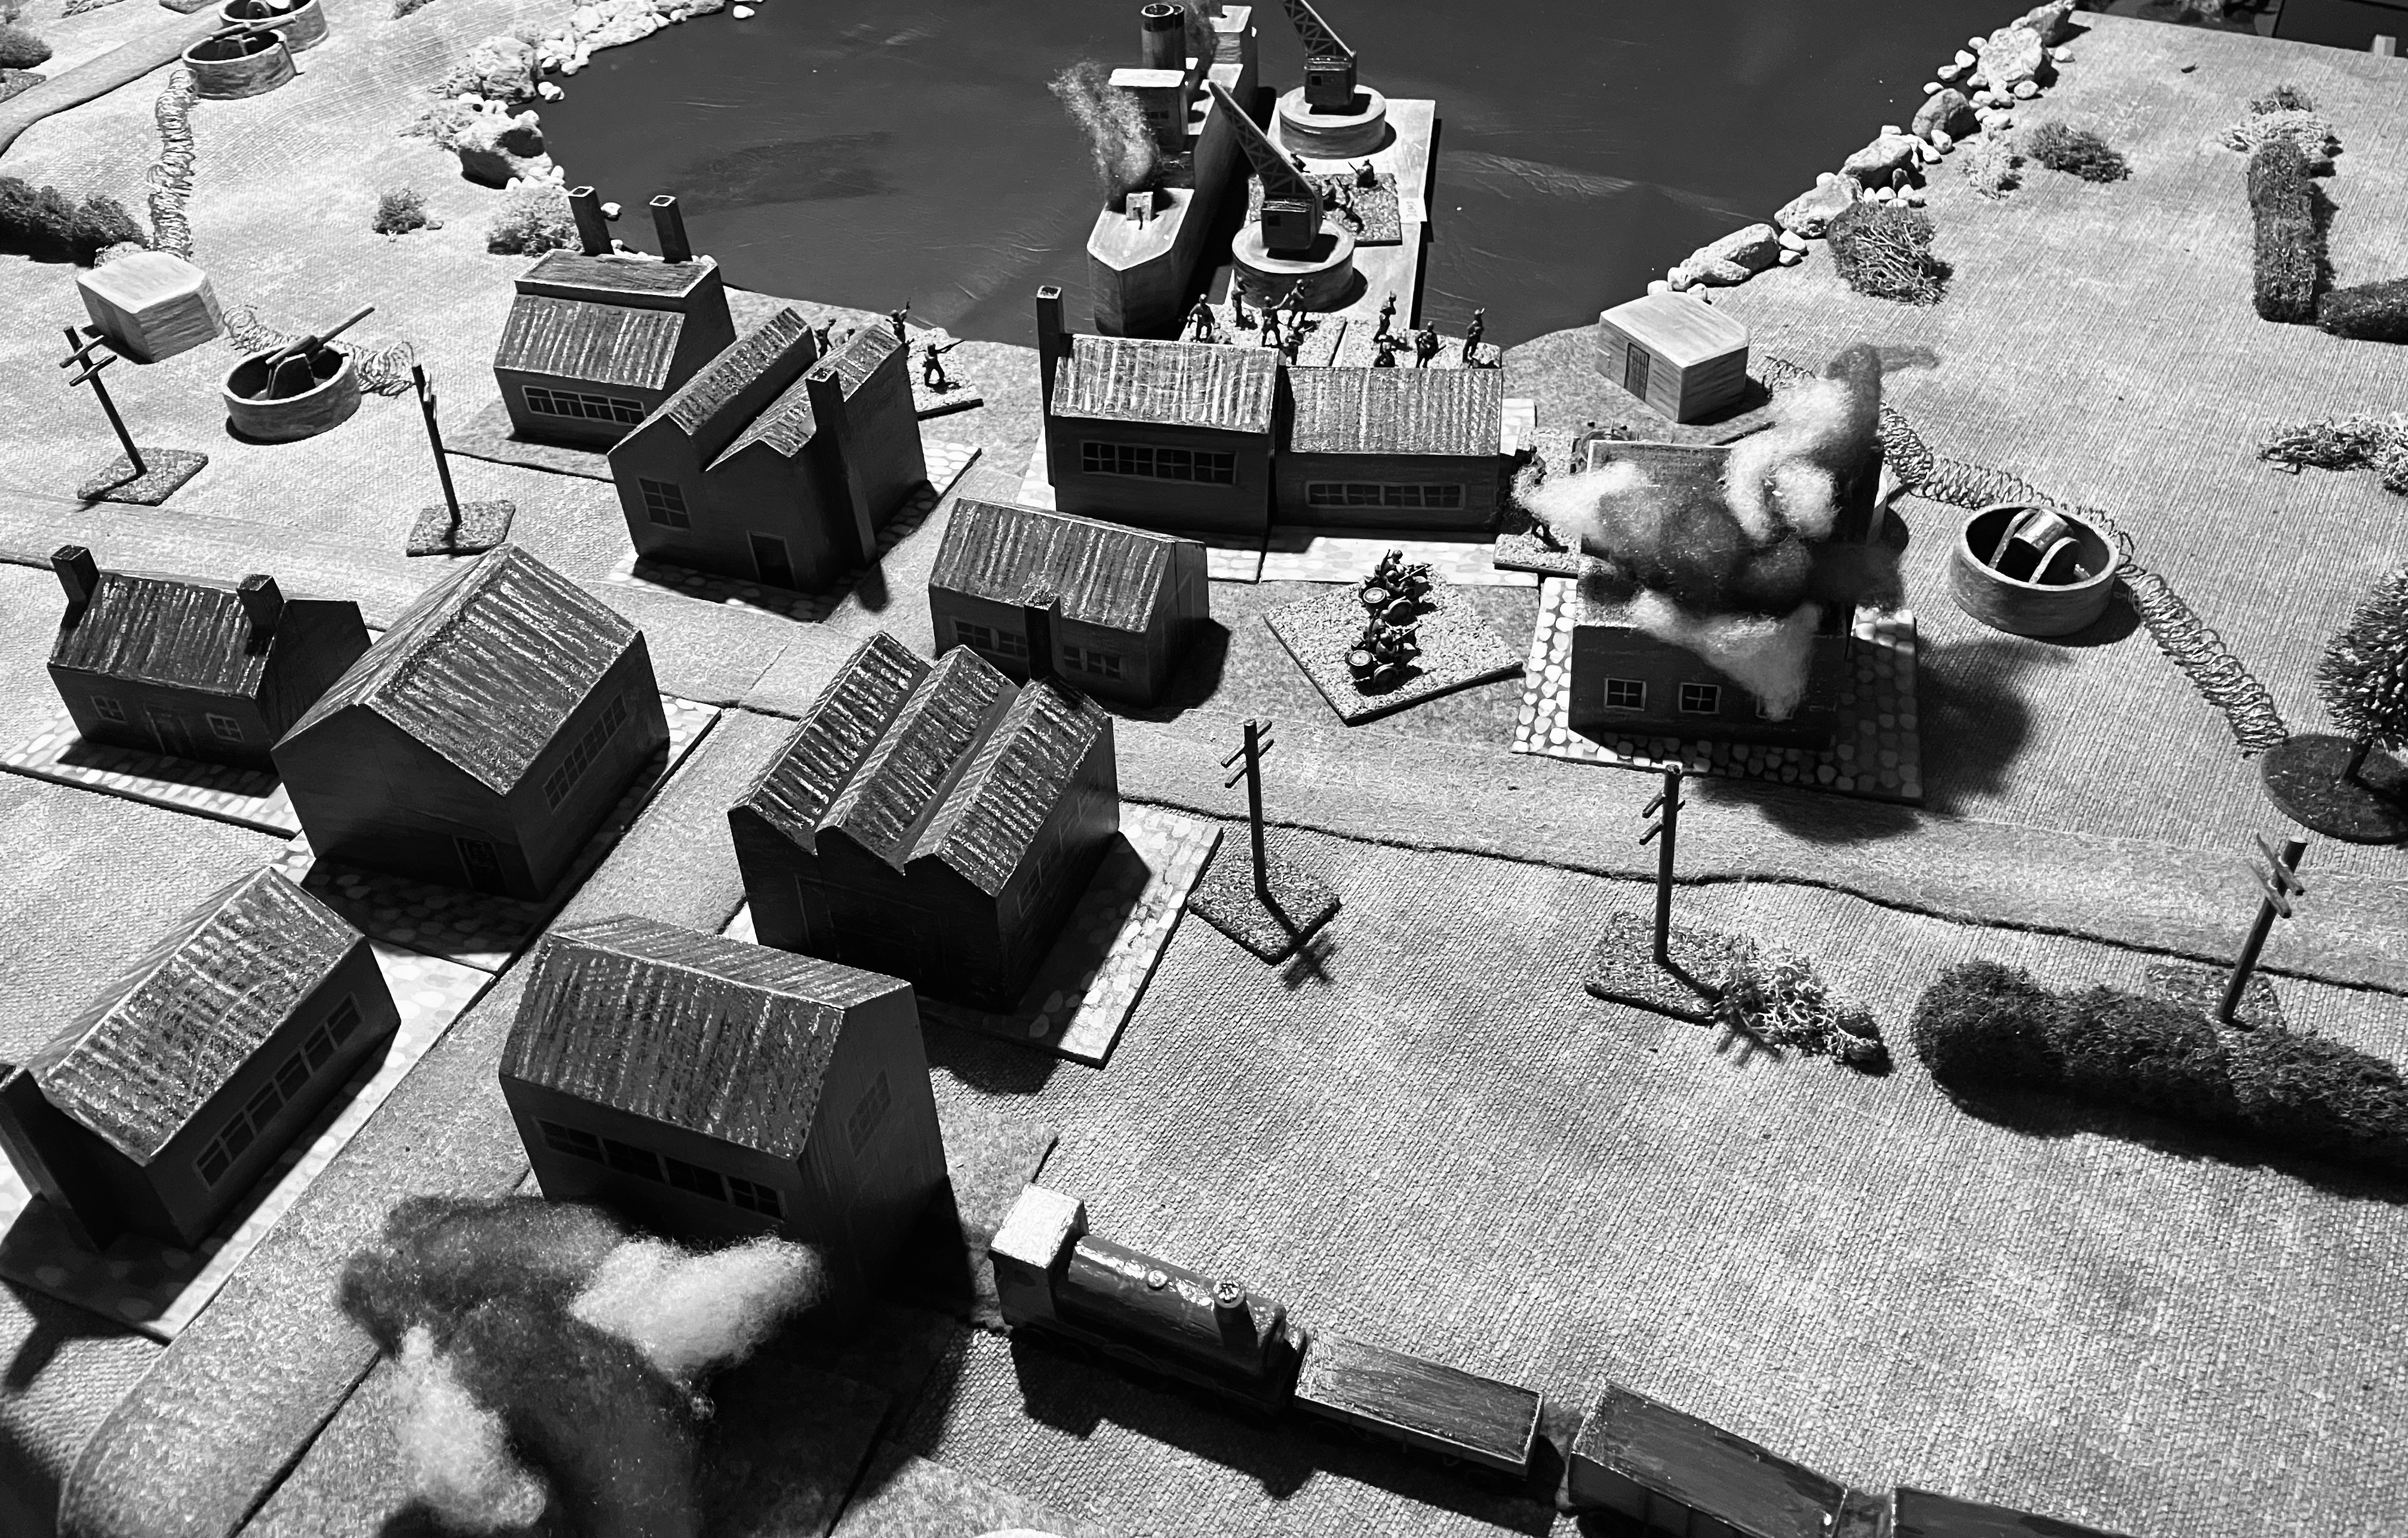
The leading commando units advanced into the buildings, closely followed by the demolition teams carrying their explosives. The demolition teams quickly positioned themselves at two of their objectives: the coastal defence HQ building and the railway sheds.
Minutes later, two loud explosions rocked the air. The buildings were engulfed in flames and smoke. The demolition teams had done their job perfectly. The coastal defence HQ building was now a pile of rubble, and the railway sheds were in ruins. The harbour infrastructure had been weakened significantly.
 |
| Demolition teams arrive at the railway sheds and HQ building. |
 |
| Bang! |
The commando raiding force had suffered heavy casualties and were a spent force. Only a handful would make it back home with the assistance of the local resistance. They had destroyed the German ship and weakened the harbour infrastructure.
 |
| The raid destroyed 3 of the 5 objectives, but the primary objective, the radar installation, remained untouched. |
Summary
So was the raid a success? A commando raid on a harbour and warehouse complex was successful in causing mayhem and destruction two three of the five objectives, but failed to destroy the primary target, a radar installation, and none of the commando squads made a successful escape.
I have been reading the book “Donald Featherstone’s Wargaming Commando Operations and Reflections on Wargaming” and in one of the chapters it discusses the outcomes and lessons learnt from the commando raids in World War II. The commando raids were a significant part of the Allied war effort with their intelligence gathering, disruption of enemy operations, and raising morale. However, some argued that these raids had limited strategic value and were costly in terms of resources and lives which could have been better used elsewhere.
Success or not?
Whether or not the raid was a success depends on how you define success. If the goal of the raid was to cause mayhem and destruction, then it was a success. However, if the goal of the raid was to destroy the radar installation, then it was a failure. I think at best it was a partial success with three out of five objectives destroyed, but a costly one.
Excellent battle report, Peter, and I absolutely approve of the use of B&W game photos. Their use really sets the stage and period ambiance.
ReplyDeleteThe B&W photos do help with the impression of a night game and as you say fit the period.
DeleteGreat game and report Peter - the b&w photos are very atmospheric.
ReplyDeleteThe partial success of the raid seems like an accurate representation of WW2 Commando raids to me so the mechanics of the game work well.
Thanks. Getting hemmed in early on was a setback for the commandos and difficult for them to recover from. The B&W photos are fun and remind me of the early wargaming books I used to read (and still do).
DeleteBrilliant game and love the B&W photos, that give it a wonderful old school look. Nice post game reflections too.
ReplyDeleteDefinitely old school feel with the B&W photos.
DeleteA thoroughly enjoyable battle report … and the result felt right. The raid might not have achieved all its objectives, but it would certainly have given the Germans a nasty shock.
ReplyDeleteAll the best,
Bob
Thanks Bob, it was interesting reading about the effects of these types of raids not just on infrastructure, but also on morale and how they tied up enemy troops to defend installations.
DeleteGreat report and excellent imagery. It seems to catch the flavour nicely. Do you have anything in the rules that might send the guards heading in the wrong direction, eg responding to an explosion instead of following the gunfire?
ReplyDeleteI kept the defenders' rules simple: stick to the roads and head for the nearest commandos once contact is made. I considered following the loudest noise, like in the board game Zombicide, but I decided against it since I wasn't planning any diversionary attacks in the game.
DeleteThey were unlucky to get engaged so early by the defenders, and the reserves came up really quick and it all became too much too soon. But, an eminently convincing narrative, could've been copied straight ot of a history book.
ReplyDeleteGlad you enjoyed the narrative. Writing the is the most time consuming part of doing the blog post.
DeleteGreat game report. The black and white photos really add to the period atmosphere. The success of the raid seems qualified, more like Henry Fox's comment "Breaking windows with guineas" after a raid on the French coast during the SYW. Looking forward to the next game report.
ReplyDeleteThank you. I am glad I did not assign victory points to the objectives in this game for a definitive win or loss, as success was not clear cut.
DeleteA fine project, Peter. It is likely that the most important effect of these commando raids was the need to allocate resources to coastal defence. To be sure, the German troops would have been third raters not really fit for the main battle fronts, or even the secondary. But they may have been considered enough to deal to pin-prick raids with some likelihood of success. I daresay both sides in the war had to judge what resources they were prepared to commit to 'der kleiner krieg'.
ReplyDeleteCheers,
Ion
Thanks. These are interesting games to prepare for and play with the differing troop qualities, limited resources, and set objectives. Most suitable for solo gaming due to their one sided nature.
DeleteAs other have said, a great report and game Peter.
ReplyDeleteI wonder if the greatest effect of these raids was to raise French morale. So they know that the Allies are still fighting.
I think It was one of the reasons listed under raising morale. Thanks.
DeleteThat has been a very successful exercise - with the previous planning posts culminating in a very realistic sounding game - excellent stuff Peter!
ReplyDeleteI have found it most enjoyable working through the preparation to the game itself. Glad you enjoyed the posts.
DeleteLove the black and white photos
ReplyDeletePete
Thanks. They do give the impression of a night time raid.
DeleteGreat batrep Peter, most beautiful and impressive B&W pictures...
ReplyDeleteThank you. The B&W pictures do help set the scene.
Delete