Following the recent setback at Fort Robert, General Colchester has rallied his defeated troops and pushed inland with the aim of securing a vital river crossing located downstream from Fort Orleans. Securing this crossing would provide a crucial bridgehead for future operations. For more background on the campaign and the scenario setup, check out my previous posts.
This battle uses Scenario 5 (Bridgehead) from One-Hour Wargames book by Neil Thomas. During the game, units from both sides will be gradually arriving on different turns. The British objective is to establish and hold a bridgehead. By the end of Turn 15, they must control the crossing with no French units within 12 inches of the ford crossing to claim victory.
 |
| British troops crossing the ford and advancing towards French troops in the distance. |
Game Report…
The British advance guard fords the river at an unguarded crossing, pressing on without resistance. Their presence has become known as they spot a band of Indian warriors in the distance. They move to secure the nearby woods as elements of the main British force began to arrive in support. Messages of this incursion has been sent to a nearby French camp. Realising the gravity of the threat, the French began mustering all available forces, marching them with urgency toward the crossing to deny the British from establishing a bridgehead.
 |
The British advance guard at the unguarded river crossing.
|
 |
The British advance guard take up position in the nearby woods as Indian warriors arrive in the distance.
|
 |
| The main British column cross the ford as more French reserves arrive. |
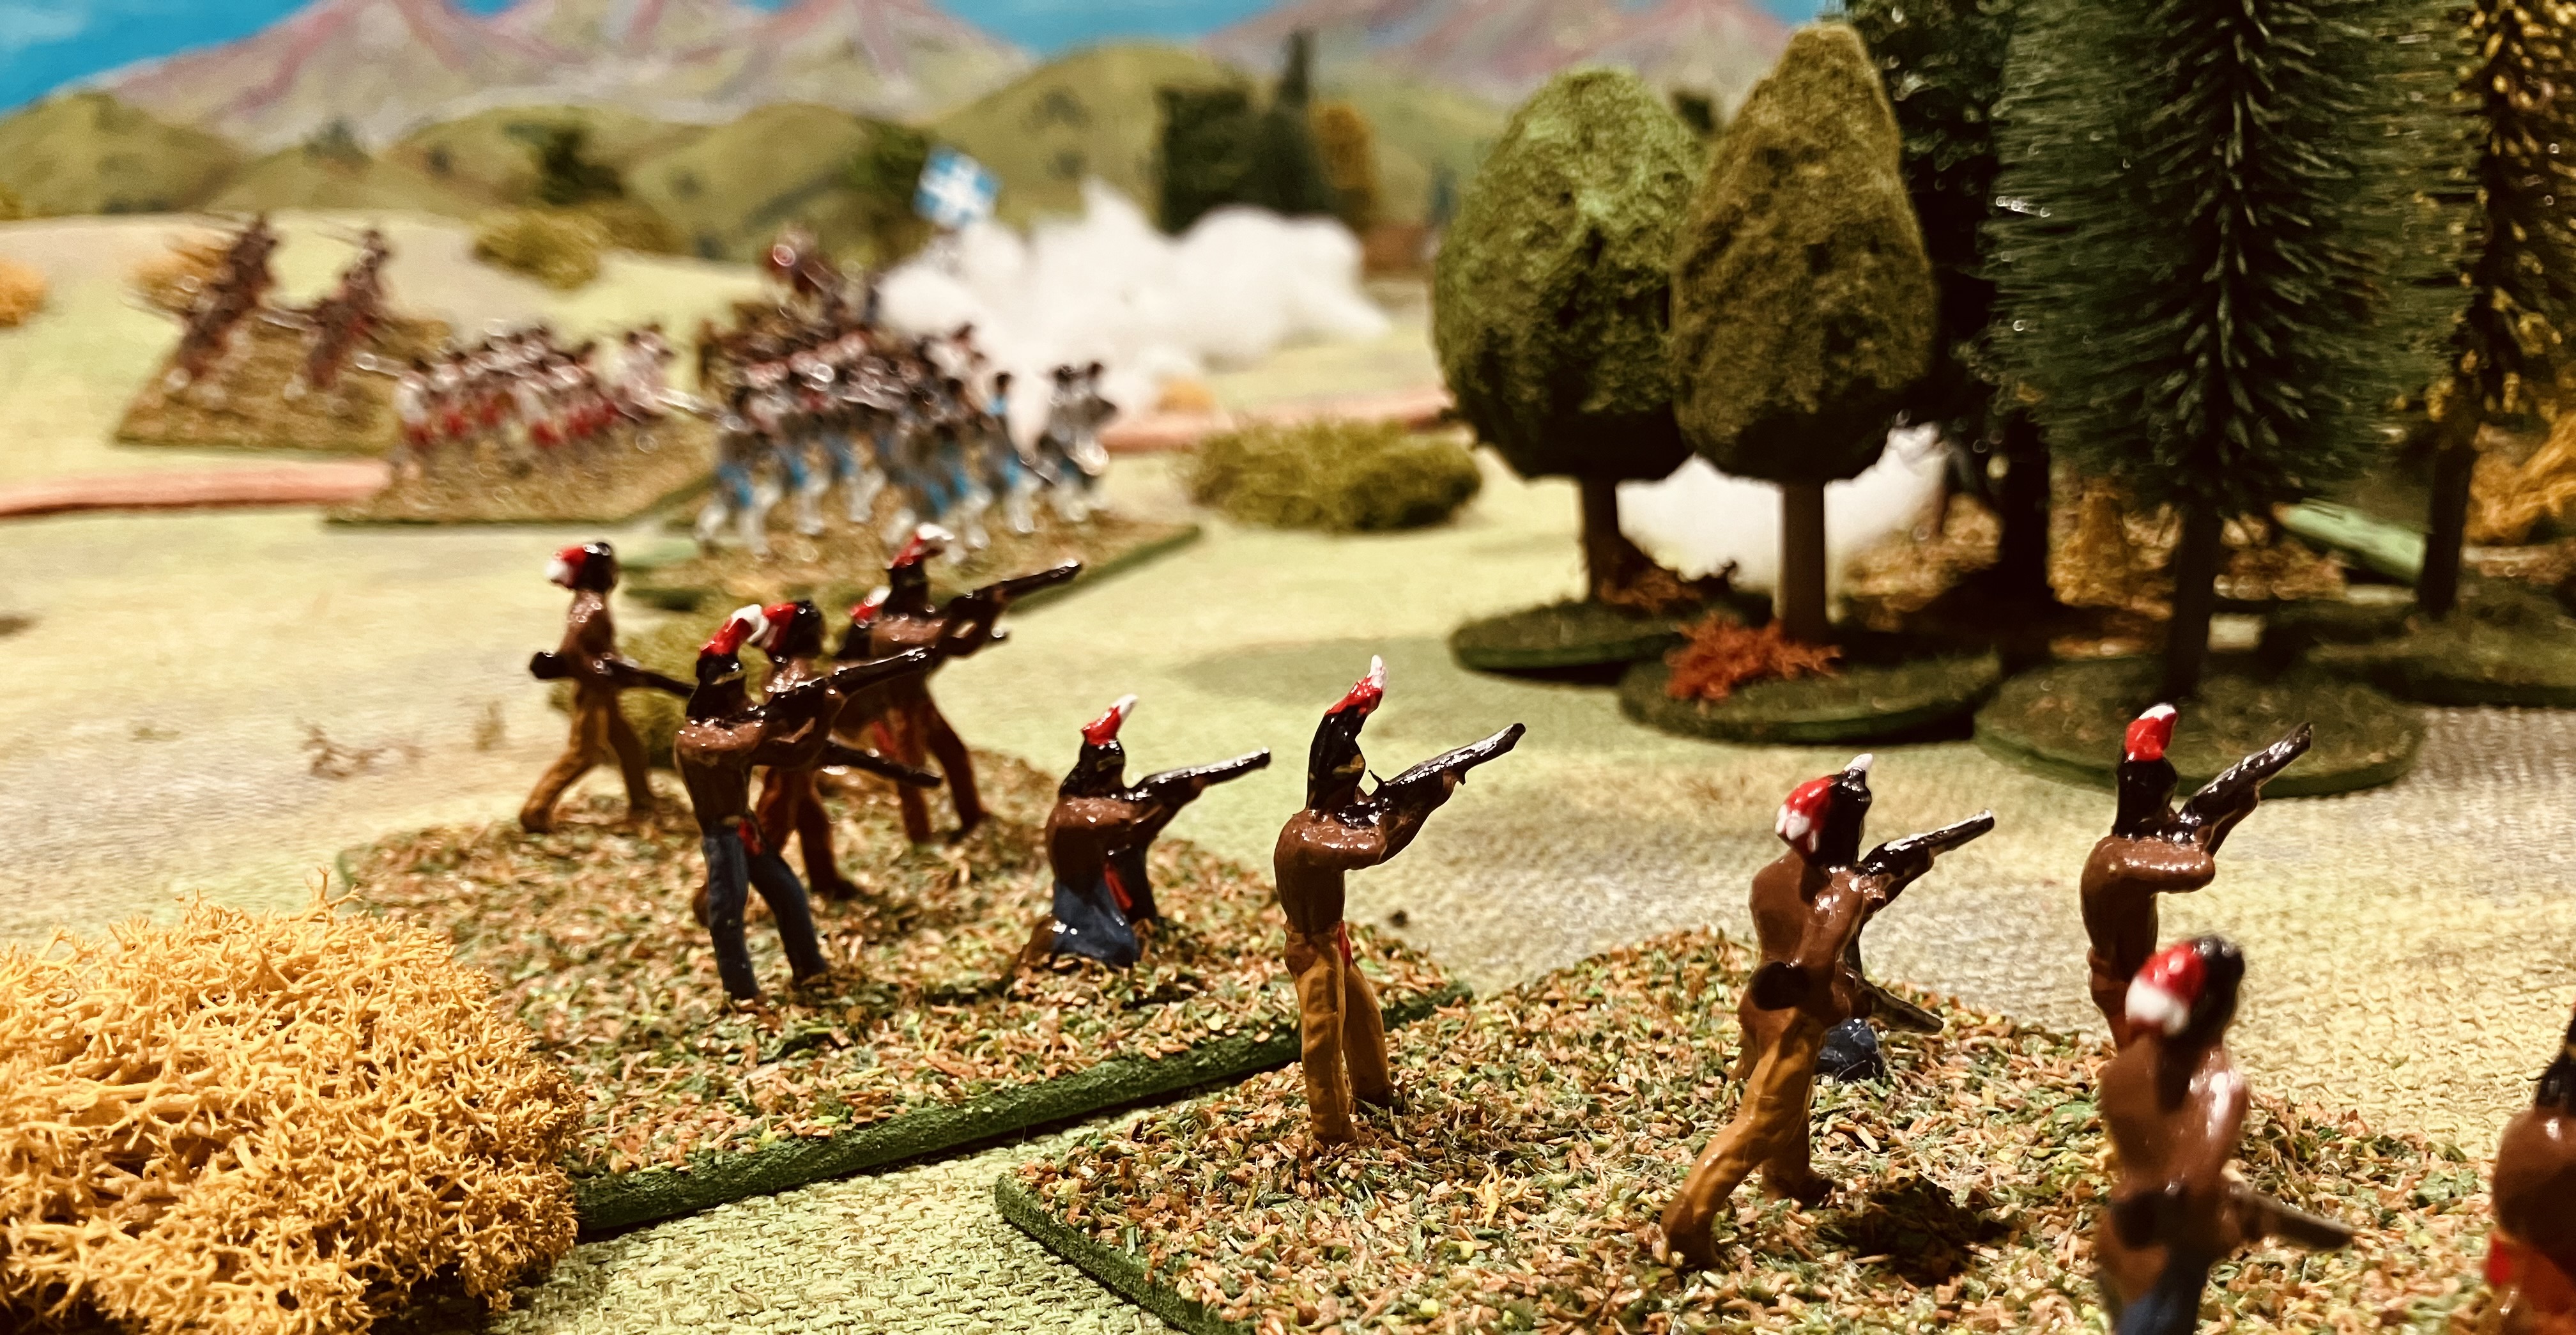
The Indian warriors keep their distance as they move towards the woods, whilst fresh reserves of French regulars advance directly towards the newly arrived British troops. As the French infantry draw near and open fire upon the enemy, several bands of Indian warrriors continue to skirt around the edge of the woods, seeking to turn the British flank.
 |
The British hurry across the ford and begin to deploy.
|
 |
| The British guns arrive. |
All the remaining French reserves had taken the field and deployed in a line facing the bridge, ready for the advancing British. Meanwhile, the Indian allies had pressed into the wood, where they were skirmishing fiercely with British militia. At last, the final elements of the British force appeared, their artillery, which was brought up and positioned on the right flank, across the river, to lend their fire in support of the attack.
 |
Indian warriors and militia skirmish in the woods.
|
 |
All units deployed and the fighting is fierce.
|
 |
| British artillery deployed across the river. |
A fierce exchange of musketry ensued between the opposing lines, each side striving to gain the advantage. Over time, the French line began to prevail, whilst the British artillery proved to be rather poor shots. Seeking to gain the initiative, a British unit made a bold charge from the woods, crashing into the French line. For a fleeting moment, it seemed the French might falter, but the French were able to rally and hold fast.
It was within the tangled woods that the fate of the battle was sealed. There, the British militia, sorely pressed, finally gave way before a series of Indian warrior charges. Routed and in disarray, they fled, leaving the British flank exposed. The warriors, seizing the moment, surged forward, threatening to sever the British force from the river crossing. Stricken with panic and fearing encirclement, the British were compelled to make a hasty and disordered withdrawal.
 |
The British make a bold charge from the woods.
|
 |
The Indians take the woods, threatening to cut off the British retreat.
|
 |
| The Indian attack on the woods was to be key to French success. |
A French victory! And with this final battle, the mini-campaign draws to a close. The French achieve a marginal campaign victory having two victories against the one British victory.
 |
| A map of the campaign. The circles show the battles, blue for French victories and red for British victories. |
The campaign ends…
The British plan had been bold from the outset, General William Colchester was to march his forces along the coast and seize Fort Orleans. The campaign started favourably, with the British securing the river crossing and the settlement of St. Paul, aided greatly by the Royal Navy, who landed troops behind the French lines.
With momentum on his side, General Colchester pressed onward toward Fort Robert. The French, under the able command of General Lucien Duvall, had not been idle. The intervening time had been well spent repairing the fortifications and reinforcing the garrison. When the British arrived, they were met with staunch resistance. Fort Robert held firm, delivering the first setback to the British advance.
Thwarted on the coast, Colchester turned inland, seeking to secure an upriver crossing that might open a new path toward Fort Orleans. Had he succeeded, it would have been judged a marginal British victory. But fortune did not favour the British and the French triumphed forcing the retirement of General Colchester and his British force.
Details of the mini-campaign setup can be found here.


When you can "hear an image". In photo no. 8 it's almost like you can hear the fierce fighting. Those cotton dots are very effective. It's been most interesting to follow this campaign. Will St. Paul be the starting point for another?
ReplyDeleteThanks. For the smoke I use soft-toy filling bought at a craft shop and pull off pieces to show gun fire. As for creating another campaign from this, I am not sure, but it is something to think about.
DeleteGreat report, Peter, and I particularly liked the summing up of the campaign at the end - sort of a ‘wargames reports becomes history book’ ending,
ReplyDeleteI must confess the summary was a bit of an after thought. Having written up the game report and as it was the last game of the campaign, I thought it needs something to wrap up the post and the campaign summary seemed to work.
DeleteI think I'd call that a substantial French victory, the British attempted a coup and it was defeated and driven back. The British clearly let boldness get the better of them as they lacked superiority and seemed to rely on a slow French response to make up for their lack of numbers.
ReplyDeleteRe-reading the summary It certainly could be viewed as a substantial victory. From a best of 3 campaign setup, 2 wins out of 3 counts a marginal win. However, for future campaigns I will consider whether winning 2 games in a row should count for more?
DeleteIt was more that the British tried to achieve a goal and the French defence thwarted it - that to me is a win for the defence. A major victory would see the Brirtish losses so high they are now vulnerable to a French offensive, or even just give up on the war.
DeleteSome things to consider when setting up the next campaign.
DeleteThe British were thwarted by the attack of the savages/Indians/Native Americans/First Nation warriors through the woods. “D*mn them and the Frenchies” was heard as the British forces withdrew…
ReplyDeleteCheers,
Geoff
The campaign started so well for the British, then it all just went downhill from there.
DeleteVery exciting battle account, Peter! Vive La France!
ReplyDeleteThe game did turn into quite a tense affair. Having played this scenario previously in other periods, the attacker has always won. So it was a surprise to see a French victory.
DeleteGreat battle report and an exciting little campaign. Your table as always is a joy to see.
ReplyDeleteThank you. I did enjoy playing the campaign and I am thinking about what period to setup as a campaign next.
DeleteAnother great instalment, a good looking game and a grand read. I have enjoyed following your campaign and in the end a resounding French victory over the poor Brits, just wasn't to be for them.
ReplyDeleteI am glad you enjoyed reading about the campaign. It was good to get the French and Indian War armies onto the tabletop after being on the shelves for a good many years.
DeleteOh well, maybe better luck next time for our plucky chaps! Another fine game and a nice mini-campaign Peter:).
ReplyDeleteThank you. The campaign started so well for the British and I thought they would at least get a marginal win, but it was not to be.
DeleteA great little campaign Peter although a disappointing outcome from my pro British perspective! Your table and figures look fantastic, as always.
ReplyDeleteI did enjoy the campaign, even though the end result was a surprise given the early British success. Either way it is always fun setting up the tabletop for a game.
DeleteGreat game Peter and nice wrap up.
ReplyDeleteI can see that three or four games seem to be a good number for a mini campaign. Enough to provide interest but not be too daunting.
I have tried longer open ended campaigns and they always seem to fade away after a few games as my interest wanes or is caught up by another project. This is a great way to get some structure without too much overhead.
I will borrow your campaign ideas. Thank you.
Agree 3 to 4, or even 5 games seems to be a good and manageable number from a practical point of view and also a narrative view point.
DeleteNice wrap up to the campaign. 😀
ReplyDeleteThanks. I now need to now think of another mini-campaign.
DeleteA wonderful report and a really enjoyable campaign to follow. I always feel that I learn something about wargaming from your posts and this campaign has been no exception. Well done Peter.
ReplyDeleteI am glad you enjoyed following the mini-campaign. Thank you.
DeleteBrilliant stuff Peter. A top looking game to finish off the campaign.
ReplyDeleteThe only critique I'd make, if I may be so bold—and delivered in a friendly and encouraging manner—is that you had far too much clear area and not enough trees. I'd go for at least 1/3-2/3, if not 1/8-7/8!
Best wishes, James
I threw some additional trees on hoping not to mess up the OHW scenario too much, but with hindsight I could have tried throwing on more trees and used the scenarios wooded area as impassible.
Delete