Monday, 13 March 2017

19th Century Imagi-Nations Armies

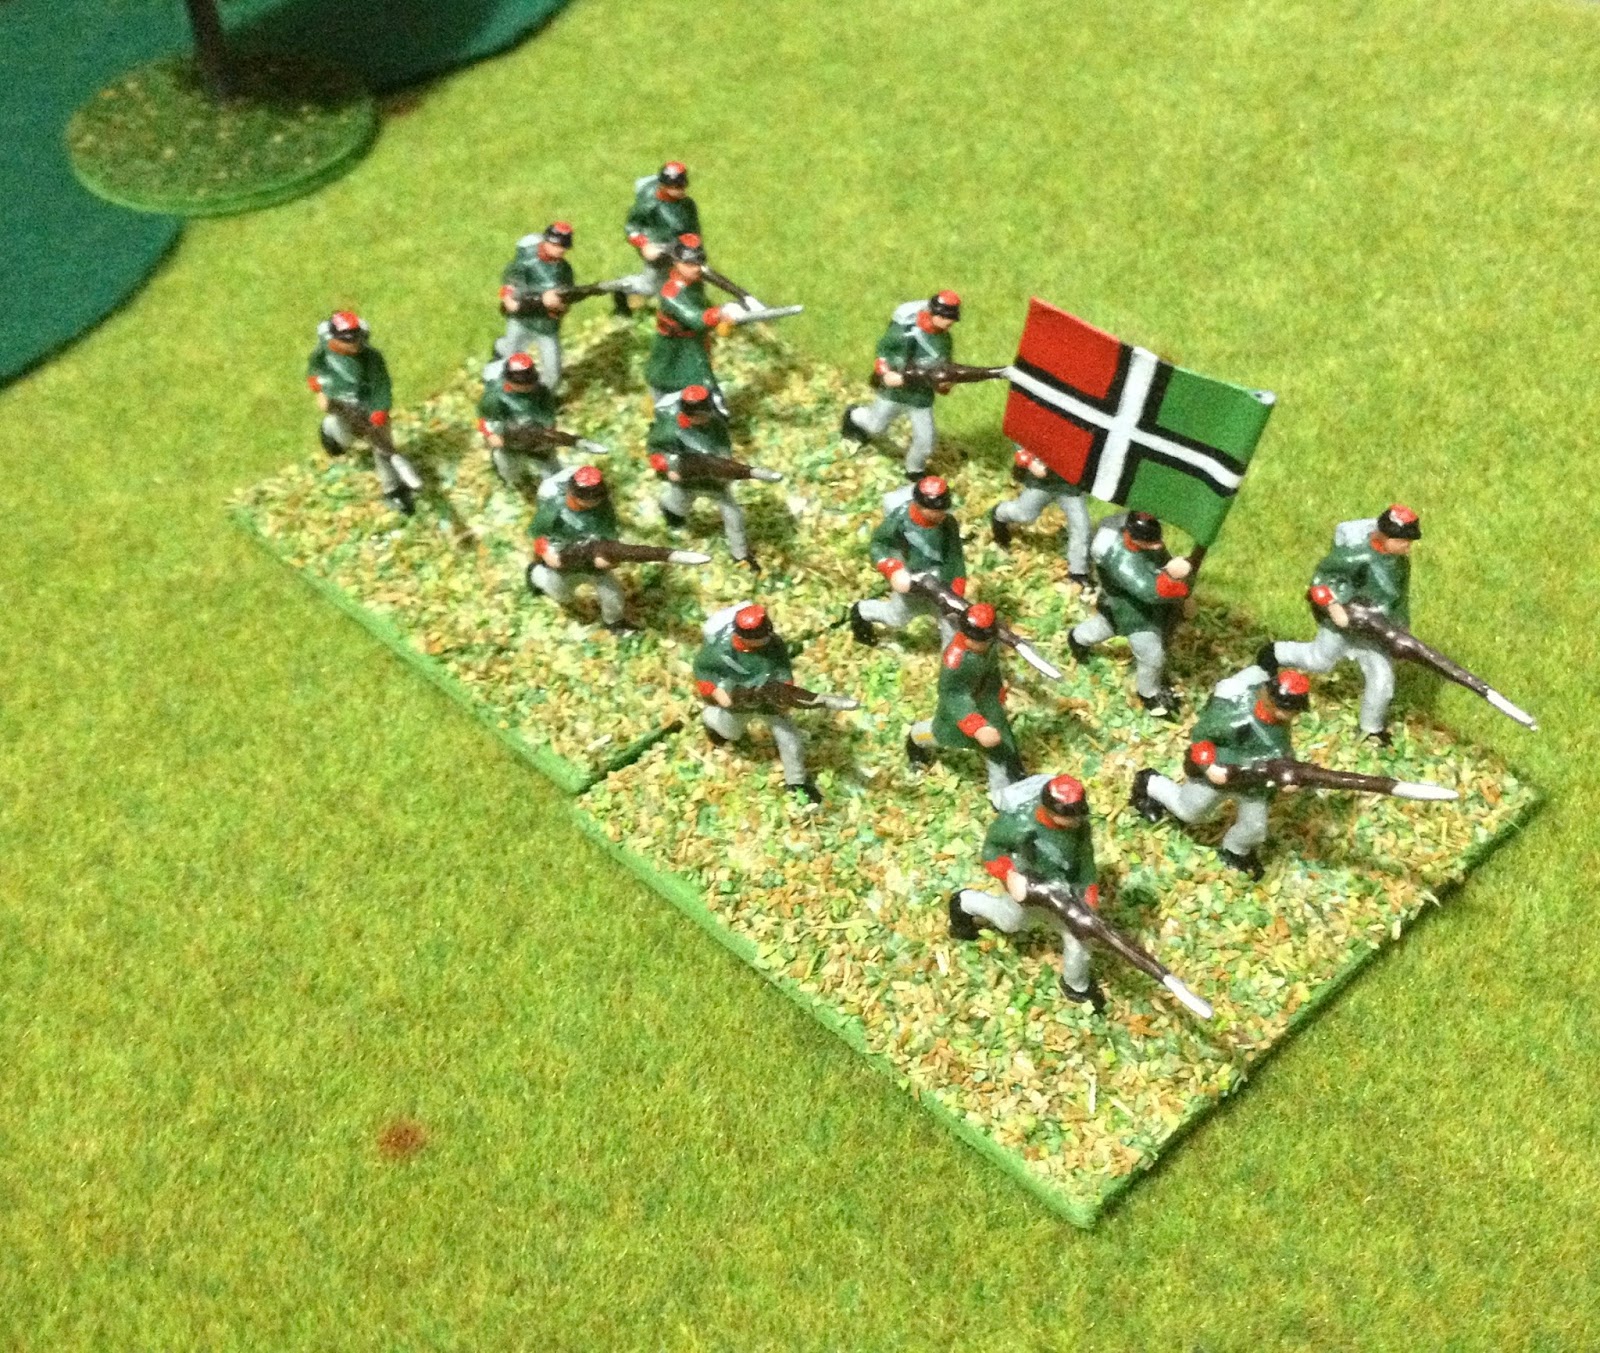
Having worked out the base sizes I have started the painting in earnest with a goal of two units every week. The painting is very simplistic with no washes or dry brushing, so I am reasonable hopeful of being able to maintain this target. In fact I am quite enjoying the painting aspect because there are few fiddly bits to pain and I am not looking for painting perfection. Far from it as the aim is to paint them quickly and with a toy soldier feel to them.

The aim is to have the following for each of the imagi-nation armies:

  • 6 x Infantry units
  • 2 x Skirmish units
  • 2 x Dragoon units
  • 2 x Cavalry
  • 2 x Artillery

That will me 150 or so figures per army needs to be painted or 300 all up. Tally so far 45. I suspect I will increase these numbers once I have achieved my initial target, more in increase variety and use the figures than increase the number of units on the tabletop.

Units on 3x3 inch bases
These units are the most complex I will get paining with different coloured trousers to tunic.

Sunday, 12 March 2017

Basing Spencer Smith figures

Having printed my second unit for my imagi-nations armies I have been playing around with how best to base units and the base sizes themselves. I am not yet decided as to whether I will use a grid for these armies or not.

The armies themselves will be a combination of ACW and Napoleonic Spencer Smith figures.

My memories of Spencer Smith figures are all in black and white from those early wargaming books borrowed from the library on multiple occasions.
My basing constraints are:

  • A unit must fit into a 6 inch square. (I have no desire to rebase if I choose later to use a grid.)
  • Must be big bases. (My recent basing has been one unit all on a big base as I don't like moving fiddly units.) 
  • I want to be able to show units to be in line or column without the need for a marker to indicate this.
  • A want as many figures as possible on a base. (Spencer Smith figures have similar poses and grouped together look wonderful.)
Infantry Column
Infantry Line

So after a few basing trials I have decided upon two bases for all units and two different base sizes.

  • 3x3 inches for infantry and cavalry.
  • 3x2 inches for skirmishers and artillery.

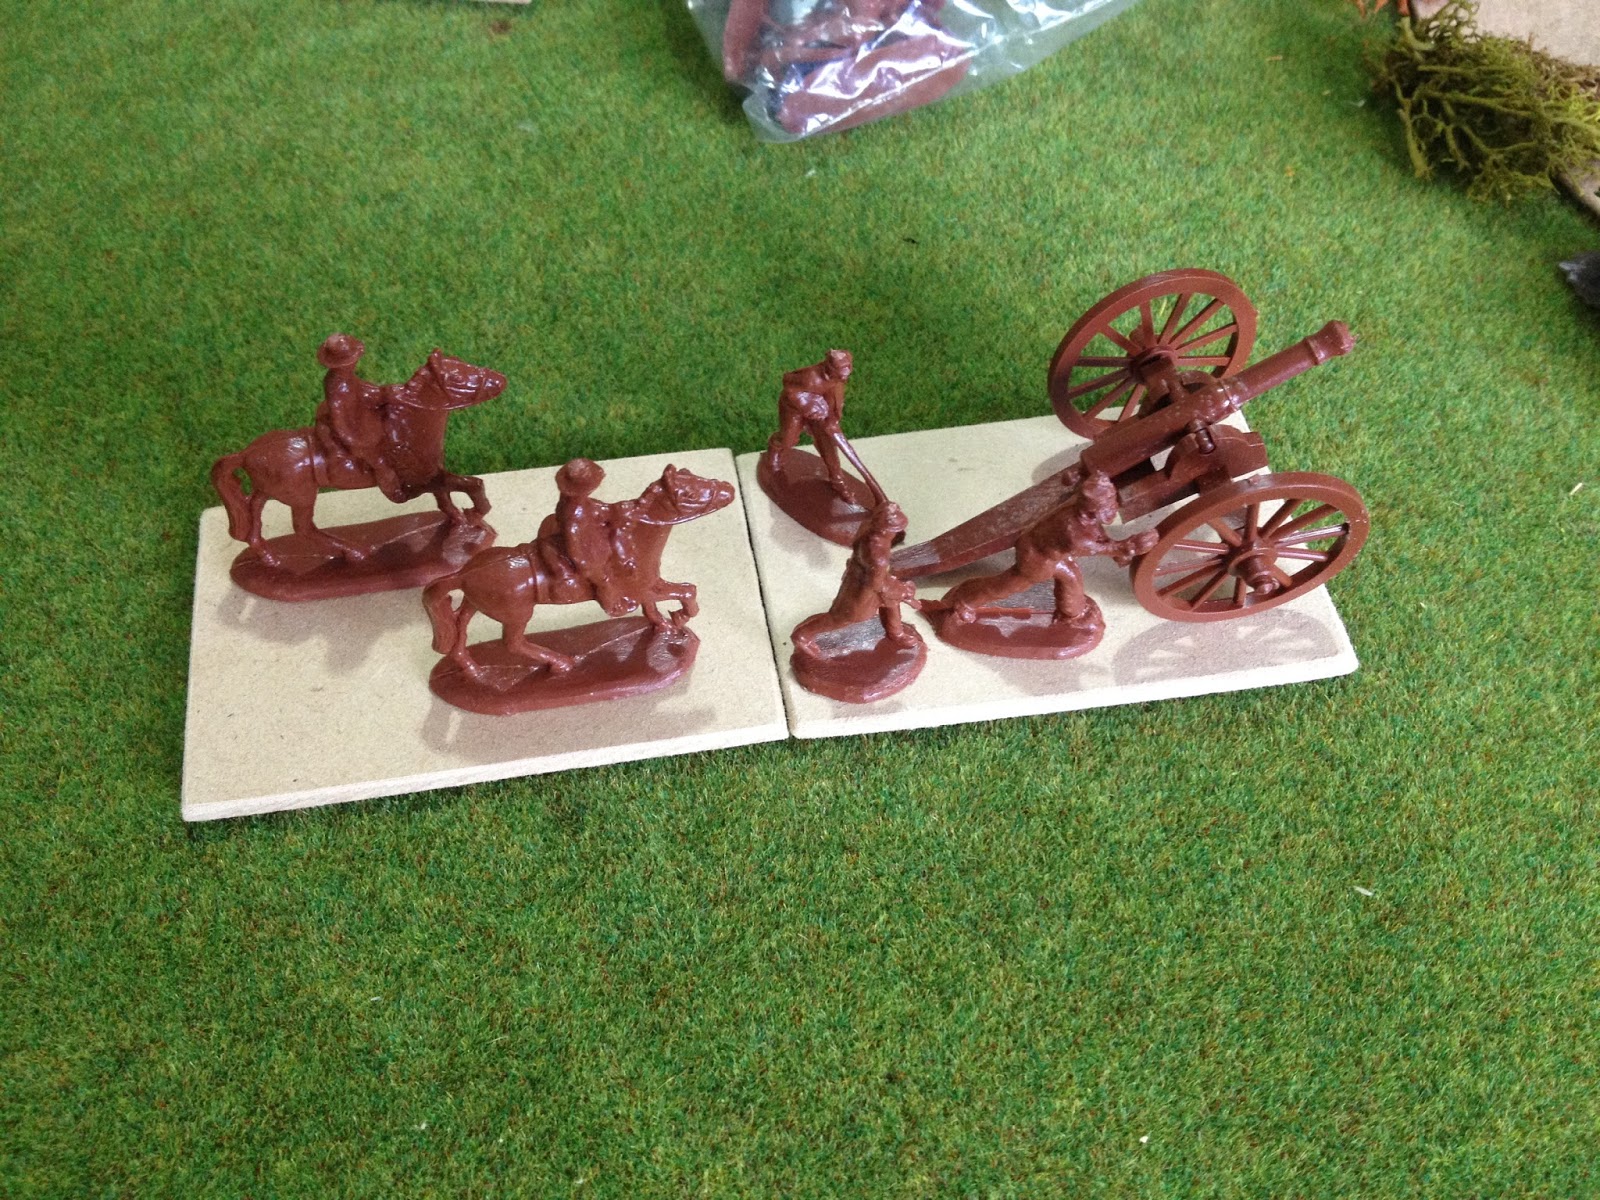
I was unsure on the artillery basing. Should it be one stand big based or two smaller bases. After a bit more playing about I went for the two smaller bases. All bases are made for good old 3mm MDF at a couple of dollars a sheet.

Infantry and cavalry use 3x3 inch bases and skirmisher and artillery units 2x3 inches. This photo shows artillery options - I went for the smaller base size.
Artillery on a smaller base size.
Artillery unit
Artillery unit limbered
Cavalry unit in line ready to charge onto the painting table!
I started this project with the idea of using my remaining ACW units which had not become brittle. Thanks to a swap of figures I have now some Spencer Smith Napoleonic figures. A lot more than expected which will add to the variety of units. The cavalry show in the above photos are lancers.


Thursday, 9 March 2017

Hundred Years Wars - Game 5 of 6x6 challenge

With the dice deciding, the first battle to be played involved the chasing French forces lead by Duc Duclos against the bulk of the English army. The second battle just north with a single (red) English army element would be played second. Breakdown of forces here for the first battle.

A question was posed to me via comments about whether with two simultaneous battles occurring -  would the outcome of one battle affect the other? A really interesting question and not one I had considered when I merrily launched into this Hundred Years War campaign.

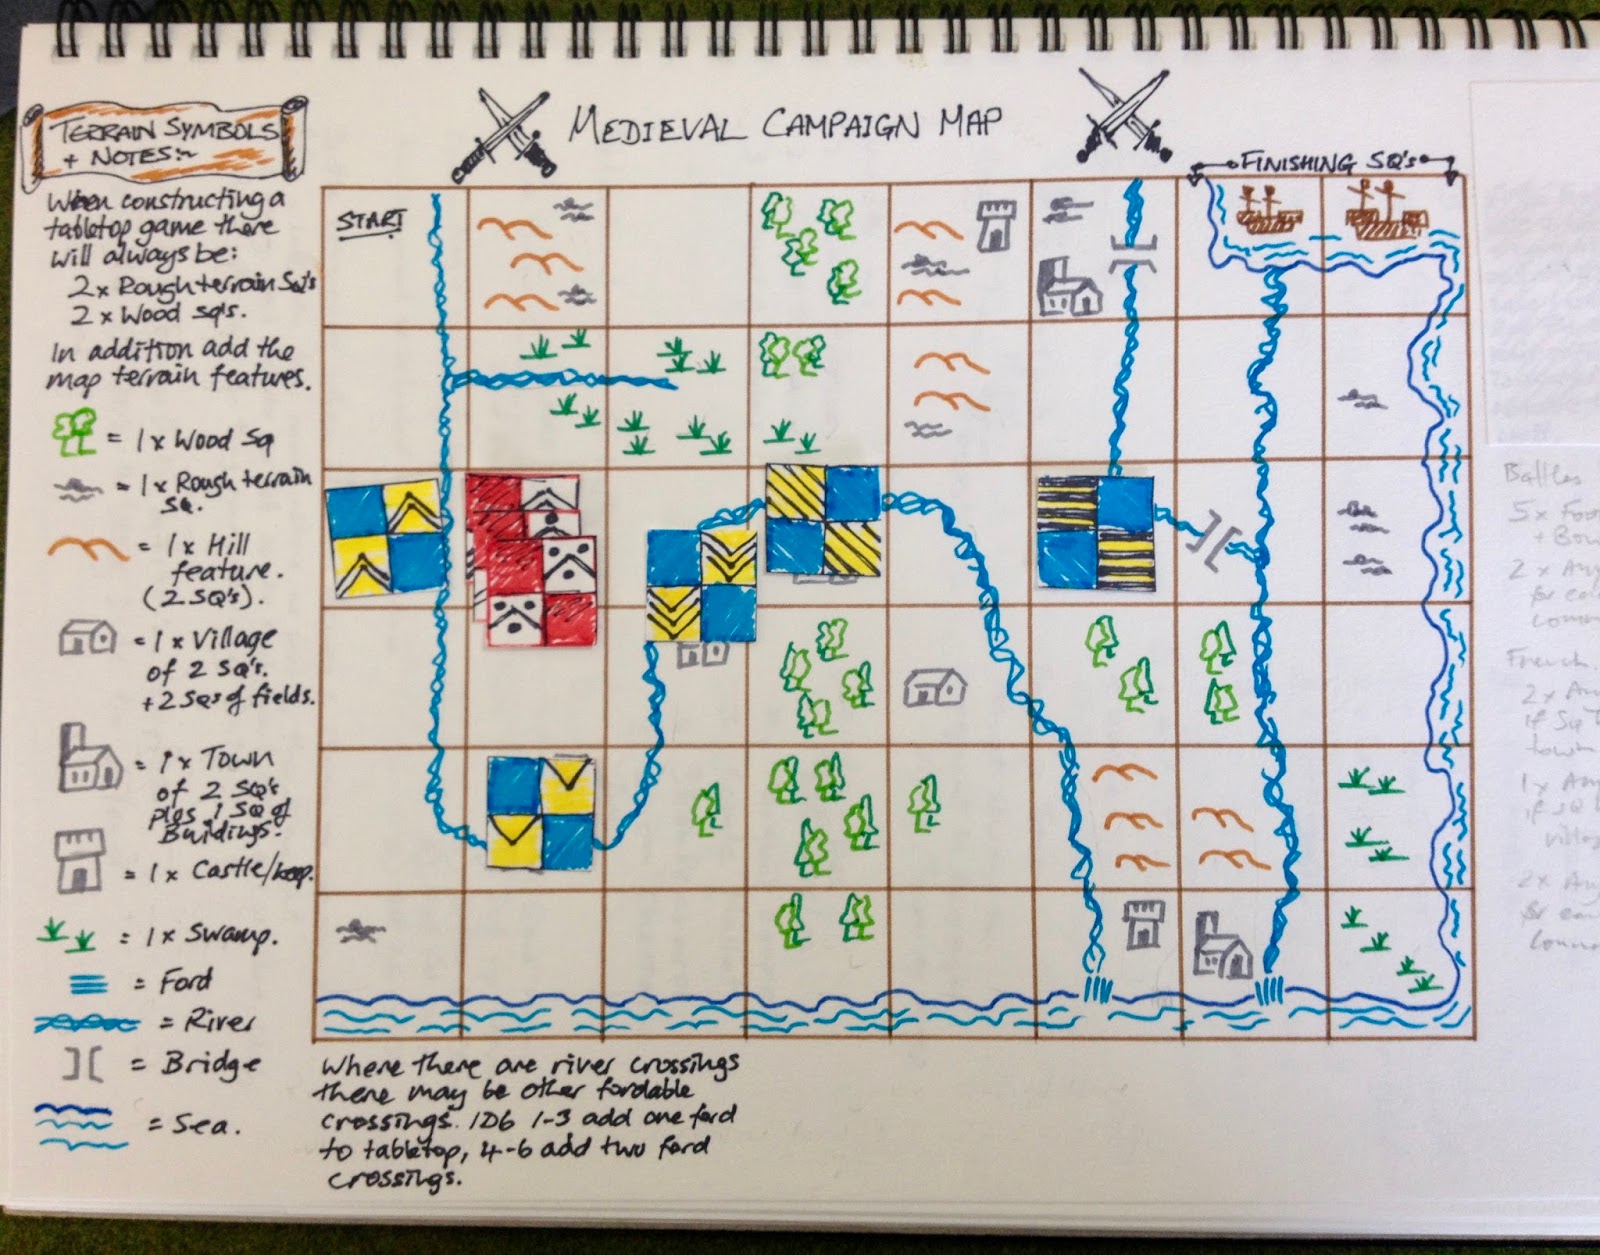
A reminder of the campaign situation where there are two close battles.
In previous battles the loser has generally been able to choose their path of retreat. Unless a there was a major victory, then the winner chooses the path of retreat.

Looking at the campaign map a minor victory to the French could be to the English advantage due to the close proximately of the battles. While this does not seem fair, the loser gaining an advantage from a loss. It does add to the vagaries of campaigning in the medieval world. I have decided not to add any new rules and let the vagaries apply. From a campaign point of view the English could be fighting a delaying action to allow for a hasty retreat to catch up with their leader to the north of them.

The game began with the English defenders positioning most of their foot units on their left flank to take advantage of the woods and difficult terrain. Their mounted units were placed on the right flank where there was open ground. This was pretty much mirrored by the French army who had one extra unit.

The French commanders view
The French were the attackers in this game and they quickly moved up on the English left flank. After a few exchanges of volleys by the bowmen, the French rushed forward very reminiscent of the last game where they had successfully disrupted the English defenders. However this time they were not as effective and the fighting became a bit of a slog with bowmen (mainly English) taking shots at any French unit not engaged in combat.

On the other flank the cavalry prepared to engage each other.

Both sides engage in and around the difficult terrain.
Cavalry line up before charging

The cavalry fight was close with a slight advantage to the French. This brought the reserves from both sides into the game lead by their respective commanders to help sway the cavalry fight. While on the other flank the English archers were providing effective support to their units helping them wear down the attacking French.

The French attack starts to stall as English bowmen were proving effective shots
English Men at Arms start to counter attack on their left flank
In the centre both commanders lead Men at Arm units against each other. In the melee Duc Duclos was injured and had to retire from the battlefield. This combined with the French losing fifty percent of their units meant a major victory to the English.

A double one and the French commander is a casualty
The game was starting to go the way of the English when the Duc was injured. Their commander Sir John Lockdew effectively using his bowmen to support his units firing in volleys of arrows at every opportunity. The English victory will allow them to determine the path of the French retreat.

Tuesday, 7 March 2017

Painting 19th Century Imagi-nation figures

After very little painting activity this year I have finally started work on painting up some imagi-nations figures. I had a few attempts at painting the unit trying to find the best way to paint them. They are 30 year old Spencer-Smith plastic figures which have not succumbing to brittle plastic syndrome. They passed the bend and break test.

Spencer Smith plastic figures
With the first painting test I tried painting them all grey then applying a two colours. First a dark then lighten version of the colour. This approach had worked out well for me with my Hundred Years War Minifigs armies. However, this approach did not look quite right and also takes a bit of time to do and I wanted to paint them quicker.

the trumpeter easily converts to a flag bearer.
After a couple of tries I ended with a very simple approach of painting the basic tunic colour all over, then applying trouser colour, facings, hat, etc. I kept the colour palette to only 5 colours.


The uniform colours are based upon European uniforms from the 1860-1870 period. Google search providing the images to help create colour scheme used.

The next stage is to decide upon suitable basing for units so they can represent infantry in a line and column.

Sunday, 5 March 2017

Hundred Years War campaign moves for games 5 and 6

Following on from the French victory over the tail of the English army commanded by Sir John Chewford. Sir John's was able to retire to the safety of the main English camp, but there was going to be little respite with French blocking and chasing forces closing in.

On the campaign map units may not move diagonally. So after some deliberation Prince Riddick decided his army should up march north and try and move around the bulk of the blocking French and also put more distance between the chasing forces.

After the last battle the tail of the English army was able to escape and meet up with other elements of the English army.
The English advance guard commanded by the Prince himself move north only to move headlong into elements of the French army (commanded by Baron Bechad) who were trying to bottle up the English army.

Meanwhile, before the remaining elements of the English army could follow the Prince north. Duc Duclos had followed up quickly after his victory to attack the English camped on the river bend. Fortune was on his side and his messengers has successfully reached Baron Chastain who moved to join forces with his liege lord. An opportunity for the Baron to seek revenge for some recent losses at the hand of the English.

Prince Riddick moves north while remaining elements of his army caught between elements of the chasing and blocking French forces.
A quick dice roll determined which battle would be fought first. So we move to game 5 where Sir John and the Duc pit there wits against each other in another battle. When playing games there is only one leader per army determined by rank, and Sir John out ranks the Sheriff of Lockdew.

English forces led by Sir John Chewford
 English Units
3 x Bowmen
1 x Foot Sergeants
2 x Foot Men at Arms
1 x Mounted Sergeants
1 x Mounted Men at Arms

French forces led by Duc Duclos
French Units
3 x Crossbow
2 x Foot Sergeants
2 x Foot Men at Arms
2 x Mounted Men at Arms

French line up for battle
English wait for the French onslaught
English right flank take advantage of woods and difficult terrain


Saturday, 4 March 2017

Hundred Years War - Game 4 of 6x6 Challenge

Game 4 of the Hundred Years War has the tail of the escaping English army defending against chasing French forces.

French forces line up. The tent represents their baggage.
The English under the command of Sir John Chewford take up defensive positions.

The French are able to muster a large force under the overall command of Duc Duclos. The English army struggling to escape to their ships was beginning to suffer casualties from the few battles and could only field a small force.

The amended campaign rules reduce the available forces by one unit for both sides after every 3 battles. This is to represent casualties on the field of battle and the campaign conditions of a medieval army the march. The rule does not apply the overall commanders who are moving with the army's baggage. The French get the option to boost the units they field whenever the battle is near a town or village.

From a campaign view point this puts pressure for the English to get to their ships as quickly as possible. While the French want to engage in battle (win or lose) as frequently as they can to wear down the English forces. As they always can draw upon town based forces to bolster their numbers, which will become more telling as the campaign progresses.

French Force
1 x Mounted Men at Arms units
3 x Foot Men at Arms units
2 x Foot Sergeants units
3 x Crossbow units

English Force
2 x Foot Men at Arms
2 x Foot Sergeants units
2 x Bowmen units

The French under command of Duc Duclos start with a two pronged attack on the church in the centre of the English line and towards the nearby town.

A view from the French position
French forces move up and bowmen start shooting at each other on the flanks. The brown felt with lichen represent difficult terrain.
The fighting around the church was a to and fro affair with the defending English units holding off the French attempts to cease control. The flank attack towards the town by a unit of Men at Arms was looking much more promising as they moved forward supported by a unit of Crossbows.

On their left flank French Men at Arms push forwards while their centre attempts to take the church.
The attacking French Men at Arms were proving to be very successful and disruptive to the English defence.

While fighting continued around the town and church French forces were able to move up in an orderly line and prepare for the second assault upon the English line, once their reserves started to be committed.

While fighting was taking place around the church and town, the remaining French forces move up in an orderly line ready for the second phase of attacks.

Constant pressure by the larger French force was beginning to tell. While unit losses were even, the English line had taken quite a few hits.

The taking of the church was not going to be easy as defenders were putting up stiff resistance
Sir John Chewford brings his last reserves into the line to see off the French Men at Arms who had proved their worth on the flank.

With all English reserves committed the French line moved forward to use their numerical strength to their advantage.

All English reserves had been committed into the battle and while unit losses were even at this stage of the battle. The English line of defence was looking tired once the church was captured

The English right flank under pressure.
Once the church was lost the English forces because fragmented and the mounted French reserve was brought into the fighting to help pick off areas of resistance.

French reserves move in and the English fate is sealed
Out numbered by 2:1 and with forces reduced to less than fifty percent. The English opt to retire and not let the French get a major victory. 
The game may well have been a foregone conclusion, but the English were fighting for either a draw  or a minor loss. A major victory to the French would have allowed them to dictate the line of retreat of Sir John's forces which needed to fallback to the main force. So it was an important result for both sides, as it saw the French reverse their previous losses and the English army remain consolidated on the campaign map.

Wednesday, 1 March 2017

Hundred Years War campaign moves for next game

Having secured a hard won victory the English forces under command of Prince Riddick and his trusted lieutenants Sir John of Chewford and the Sheriff of Lockdew. Attempt to progress their march towards the waiting ships and avoid the French forces which are both blocking their progress and at the same time nipping at their heals.

The English having consolidated their forces won the last battle forcing the French to retire
The English are slow to reorganise (no 3+ rolled by any of their army elements). Meanwhile some elements of the French army are able to close in (with 4+ rolls). 
The English army starts to move, but elements under the command of Sir John Chewford are held up.
Prince Riddick decides to wait and not risk further splitting his forces with the French nearby.
The French, led by non other than their leader Duc Duclos, catch up with the delayed English.
The French will have a real advantage here with access to two additional units of their choice because the battle is near a town. The town will help provide much needed additional units.

The game is played on a 4 x 5 foot area of randomly generated terrain features determined by the type of features on the campaign map.
A view from the other end of the table. The stick at the end marks the end of the playing area.
When I started this campaign it was mainly to provide a narrative for hopefully 6 games as part of the 6x6 challenge. So while not everything was considered and I am happy making odd rule additions and changes to keep the campaign interesting (which are often decided by a "will I do it or not" dice roll).

Anyway, where this is leading to - an interesting question was posted in the comments about casualties and was I reducing the strength of units during the campaign. (Thanks Norm!) So there is a new rule where after every 3 games the base number of units selected is reduced by 1 for both sides. The exception is for those commanders assigned with moving the army's baggage. In this campaign that's Prince Riddick and Duc Duclos. They will not be effected by this rule.

Normally in a game each side gets to choose 5 units made up of bowmen and foot sergeants. Plus 2 mounted or foot men at arms for each commander in the game. French get extra units when the battle is fought near a village or town. So if neither Prince Riddick for the English or Duc Duclos for the French is at the battle their forces will only select 4 bowmen or foot sergeants. The approach for deciding forces is described here.

So in the next game things look pretty dire for Sir John of Chewford commanding 6 units. Against him will be Duc Duclos (and baggage) commanding 7 units that are bolstered by 2 units from the town, a total of 9 units.