Game 15 of the French India War campaign has delivered a full on siege game, the siege of Quebec - June 1758. For details of campaign narrative and the context to this game, read Jonathon's
Palouse Wargaming Journal.
My rules for siege warfare when starting this game were at best a series of notes. So before beginning the game I ran a quick test game which helped out with a couple of areas I was unsure about. These were:
Limiting Parallel Trenches
There is a limit to how many parallel tranches can be built. This stops the besieging side over fortifying their parallels and making it next to impossible for a defender launching sorties. Should a defender choose to fortify their 1st parallel too much, they will struggle to have a solid 3rd parallel platform from which to launch their assault.
Siege Turns and Tactical Turns
At the end of each siege turn either side can launch a sortie (if defenders) or a surprise assault (if besieging). The jump off points are either the fortress walls or a parallel gallery. Up to 3 units can participate in a sortie or assault.
To effect surprise a single D6-1 is rolled for each unit participating to determine the number of squares they can advance before being detected. Then a small engagement occurs using my standard tactical rules. At any point on the start of turn the attacker can choose to call off their attack and both side's units return to their defences.
Artillery and Mortars
During siege turns artillery can only attack other guns or mortars. Only after the opposing artillery are eliminated, only then can fortress walls or galleries can be attacked. Taking 6 hits to breach a fortress or destroy a parallel gallery.
Also, artillery during a siege turn have a range of 6 squares and mortars 3 squares.
I will be writing up these siege rule mechanisms and others used in later posts, but in the game report I have included notes on the effect of some of the rule mechanisms.
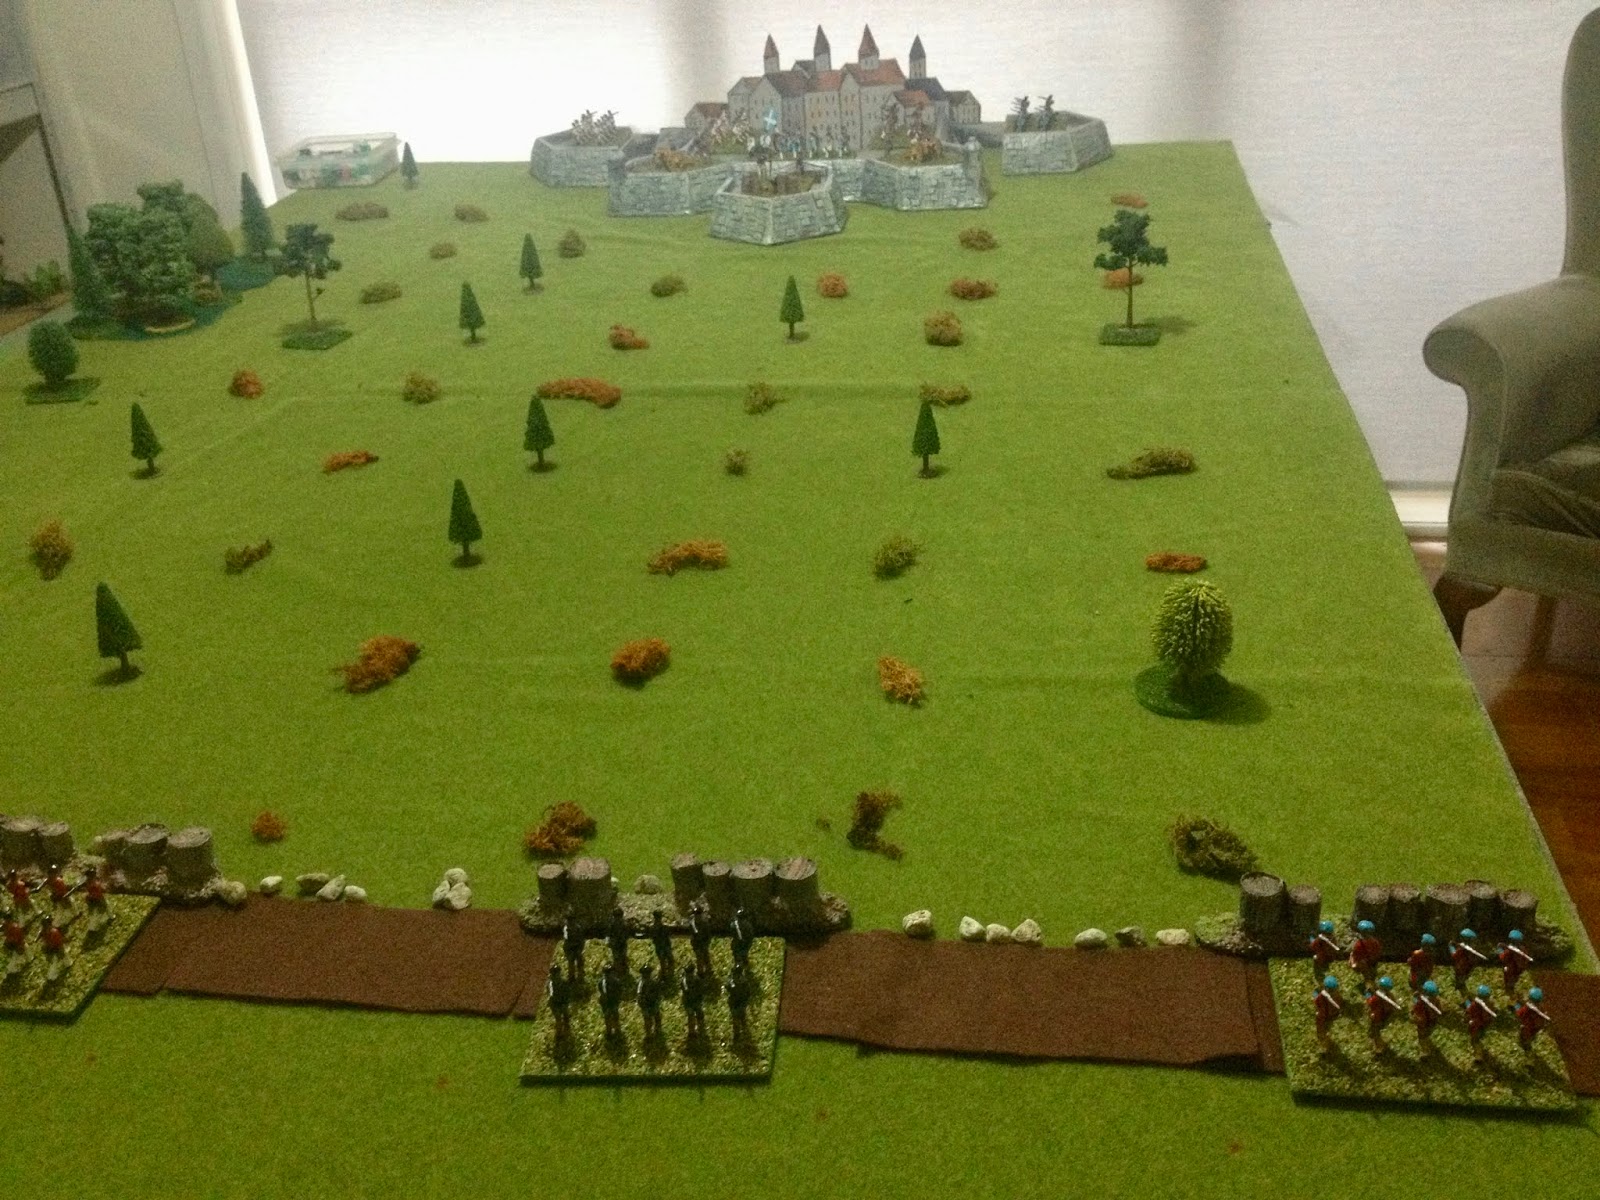
 |
| The tabletop is laid out with Counter-Vallation trenches. I use a gridded tabletop and have placed lichen and small trees to show the grid as my dots indicating the corners of squares don't show up on the photos. Note - The besieger may only place units in galleries. Until these galleries are build units must remain off table. |
1st Parallel
With the counter-vallation in place the besieging British begin digging their 1st Parallel. The British must complete their 1st parallel before starting the 2nd parallel.
 |
| After a couple of siege turns the 1st parallel is developed and a gallery is build allowing a unit to be placed in the parallel. |
 |
| A single unit manning the 1st parallel is a tempting target for a sortie. Montcalm sends out two units at dusk. One unit gets lost while the other almost surprises the defenders and a small engagement occurs. Other British units can be seen moving from their galleries to provide support and drive off the sortie. |
 |
| With support arriving the sortie is called off by the French and both sides reposition their units back in the fortress or galleries. |
 |
| Additional galleries are built and artillery positioned in them. The first stage of the artillery duel begins as besieging British try and eliminate French artillery units. Note - in each siege turn a D3 is rolled and the score indicates how earthworks can be created. It takes 1 point to create 1 square of: sap (zig-zag) trench, parallel trench, or add a gallery to an existing parallel trench. In the photo above 8 points have been expended on the 1st parallel. |
 |
| Things are progressing well for the British with the elimination of a French artillery unit and the 1st parallel is now well established. |
2nd Parallel
Having developed the 1st parallel and fought off a sortie it was time for the British to develop their 2nd parallel in which they can place their mortars and infantry to try and clear the fortress walls of defenders.
 |
| British sap trenches snake forward under the gaze of the defenders. Note - 1 sap trench can maintain 3 parallel trenches. In the above photo a second sap trench was required to support the first 1st parallel of 4 parallel squares. This rule slows down the besiegers which may be important if there is a relief force on the way. |
 |
| Montcalm launches his second sortie with the maximum 3 units. Being closer to the walls more units were able to engage effectively in the attack. |
 |
| Other British units move to provide support, but are slow to react to the surprise sortie. |
 |
| The French eliminate the unit defending the gallery and by occupying the gallery are able to destroy it. |
 |
| After a short delay the British begin to develop the 2nd parallel, while maintaining the artillery dual with their French counterparts. A view from the French positions. |
 |
| With the second parallel now well developed and mortars deployed the British begin inflicting hits on the infantry units. |
 |
| Another sortie is launched to destroy the deadly mortars which are effective at clearing ramparts of defending units. |
 |
| Another successful French sortie and a mortar is destroyed before they retire back to the safety of their fortress walls. |
 |
| The British finally destroy the last French artillery. They can now concentrate their artillery to breach the fortress walls. It takes 6 hits to breach a wall. |
 |
| Nearing the final stage of the siege as a sap moves forward to develop the 3rd parallel from which the walls may be assaulted. |
3rd Parallel
 |
| The British decide to develop the 3rd parallel on either side of the fortress, forcing the French to split their remaining units to defend two sides of the fortress. |
 |
| A view from the British camp. |
 |
| The French reposition their units. Note - During a siege turn after earthworks are built, both sides are allowed to reposition all their units providing they occupy the fort or a gallery. |
 |
| The British spring a surprise assault. Those scaling ladders, a painted strip of balsa wood, are just off the paining table. |
 |
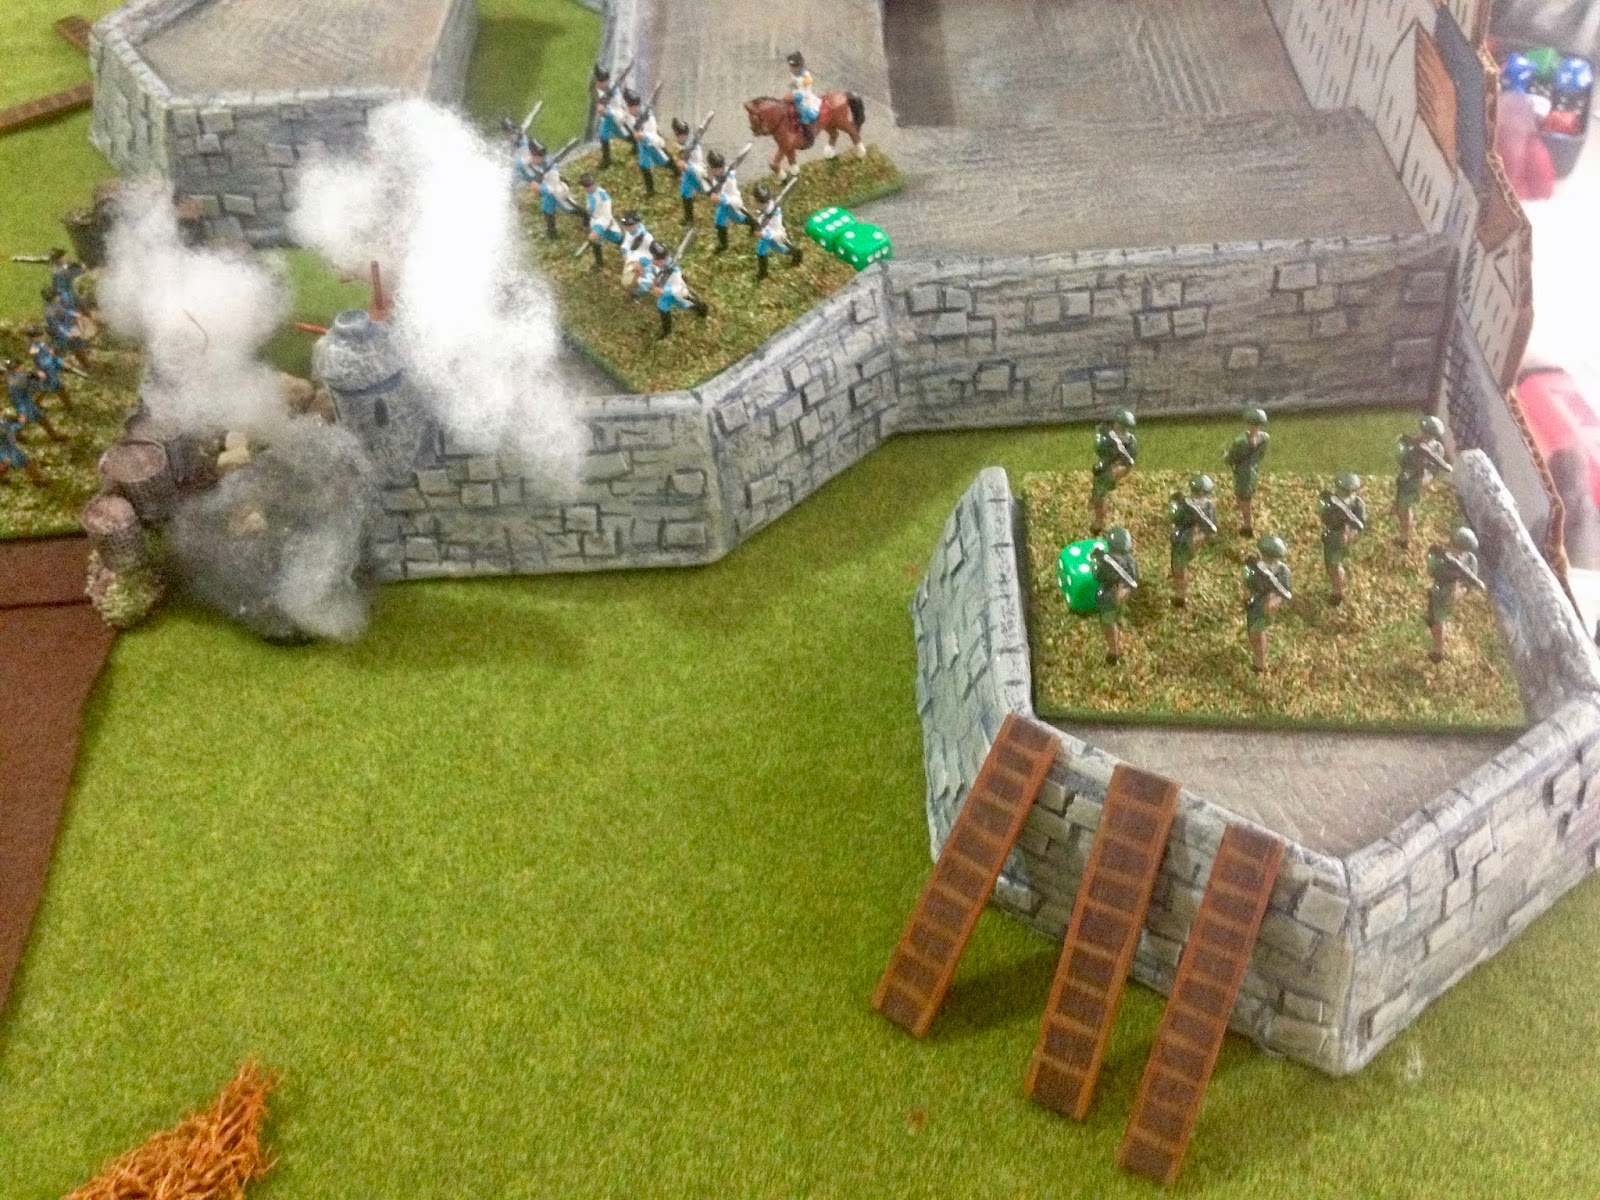
| The light infantry quickly scale the unoccupied bastion with the intent of planing explosives, but French fire drive them away and they are eliminated. |
 |
| The 3rd Parallel is developed and a second assault attempt is launched with light infantry. |
 |
| The bastion is successfully stormed and the French fail to eliminate the light infantry who are able to plant explosives. |
 |
| The assault party retires after setting the fuses to the explosives. The bastion is destroyed and will be treated as difficult terrain. |
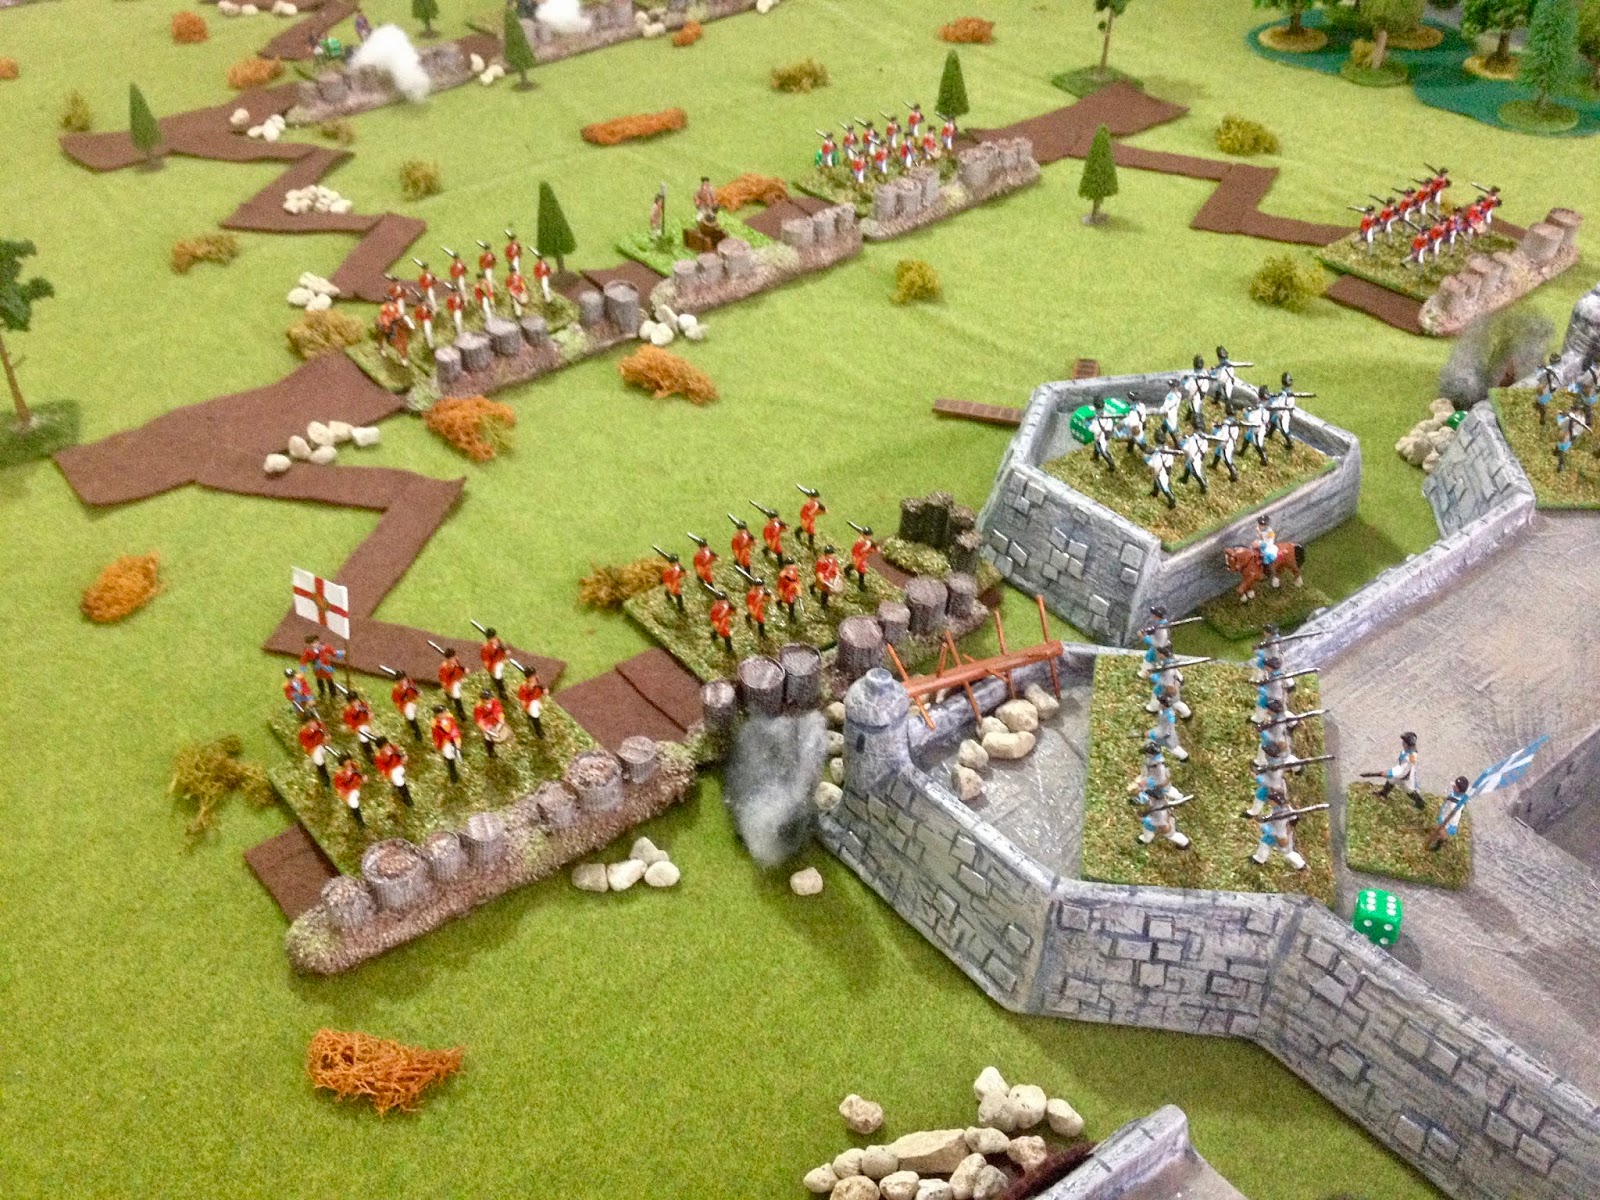
Storming the Fortress
With the 3rd parallel completed the British bring forward all their troops and the French prepare themselves for the coming assault and storming of the fortress.
 |
| French try to position their meagre forces to cover the coming assault. |
 |
| The British begin their assault. |
 |
| After losing another unit two units the situation is hopeless for the besieged French, who after a gallant defence offer terms before the fortress itself is stormed. |
A victory to the British and the remaining French units march out. Both sides lost a regiment a piece in the siege.
Thoughts on rules and future ideas to consider...
The ability of besiegers to reposition units and pull them out of the forward parallels gives them a definite edge over the besieged who have limited ability to rotate their units. To offset this future rules will have attrition of D3-1 per siege turn to represent depleted attacking units due to a combination of desertion and foraging.
Mortars cannot target individual units. They target the fortress and the besieged apportion hits how they like across units.
Anyway, I will be doing more work on these rules over the next week while I remember the reasons behind my notes on rule mechanisms.


The sorties were a nifty addition although Wolfe seemed to hardly break a sweat in overpowering the garrison and defenses. Really enjoyed the manner in which you played this out. Very noble of Wolfe to allow Montcalm and garrison to march away. This is a tough loss for the fate of New France.
ReplyDeleteWhile it did not seem an easy win when playing, the British did work their way through the developing siege very effectively to a victory. Introducing the attrition rule would have helped even up things. In future games this rule will force besiegers to push ahead with their earthworks quickly.
DeleteAn interesting process of rule development, good to have some insight.
ReplyDeleteIt was a most enjoyable game to play. I will definitely be playing another game soon, once I have typed up the rules.
ReplyDeleteI am very impressed with your whole concept and its manner of realisation. It seems to me to have been a very realistic siege encounter, at least in terms of the programme and its progress. Quite how the time scale played out is unclear from your narrative, but perhaps each roll of the D3 die might represent a day, or perhaps a fixed number of days.
ReplyDeleteMay I suggest that you retain pretty much what you have already developed? Tyhe thing with sieges is that became a very predictable operation, down to the time taken to sap forward, lay out the parallels, complete the galleries and bring up the siege train, timing of the sorties, effecting the breeches, summoning the garrison and (if refused) flinging in the assault.
What you have shown here could be a model for war gaming siege operations. Now, could General Montcalm hope for relief from outside, things could get much more ... erm ... exciting. The British would have had to maintain an overwatch army to see off the relief or else, as napoleon had to do at least twice at Mantua, to raise the siege altogether.
I found a site in which a student of the sieges in Spain and Portugal during the War of the Spanish Succession lists them by date, type, result and duration. The average length of siege was 22 days, the median, 9. Clearly some garrisons surrendered at the first summons.
Looking at your table I count 30 'points' of siege works, which would take an average of 15 rolls of a D3. A fortnight may be too short a time frame. On the other hand, Wellington's siege of Badajoz took just 3 weeks to the day.
Fascinating topic, and I do like your city backdrop to the Vauban style fortifications.
Thank you for your advice and suggestions. I did originally think of one turn equals one day, but two days may be a better reflection of the time. As for the relief force I am thinking of some attrition of the besiegers and may extend that for fending off any attempts of relief.
DeleteSomething like this could also be the backdrop or background for an 'Olmutz Convoy' type of operation, in which a huge supply column is sent to reinforce and sustain the besiegers. A force allied to the besieged intercept the convoy. Although the escort is numerically stronger than the attackers, they have several miles of wagons and carts to defend. Not easy through wooded and hilly country...
DeleteAn interesting option having a relief force for a stand alone siege game. I had considered a few skirmishes with the investment stage, but as this was my first go with the rules I opted to just focus on the main siege. Thank you for your ideas.
DeleteSuperb effort Peter to set up this whole siege in miniature and play through with it to the end- great photos and commentary. You will certainly be pleased with the results. Well done. Cheers. KEV.
ReplyDeleteHi KEV. It was a fun game to play and it terms of rule changes, I just need to add some level of attrition for the attackers.
DeleteA very enjoyable read.
ReplyDeleteVery interesting way to reproduce a siege. I agree with many of the comments - in the 18th century siege engineers like Vauban could look at a fortified town and predict to the day how long a successful siege would take - it was simple (or not so simple) mathematics. Its also pleasing to me personally to see the British succeed in taking Quebec - when a friend and I played the Canadian wargames Group Habitants and Highlanders version of the FIW, I got to this stage with the British, but the Plains of Abraham resembled the Western Front in 1916 and I could not force a way through - won virtually every battle but lost the war!
ReplyDeleteThank you. The structure of sieges in many ways lend themselves to a wargaming table and rules quite nicely. I still have to consider including rules to either include or factor in the treat of a relief force.
DeleteI echo others in applauding your fantastic representation of a siege on the tabletop! Love that impressive Vauban fortress and representation of la veille ville de Quebec!
ReplyDeleteThank you kindly. It was a fun game to not only play, but also prepare and setup. The simple siege rules worked for me, but need a small adjustment to help favour the besieged side.
DeleteEpic...and bloody! What a wonderul looking table, this fort is so impressive! A great looking siege game with spectacular pictures and entertaining write up!
ReplyDeleteThank you.
Delete