Game 1 of campaign turn 3 has an Italian infantry force supported by limited armour under attack from an Allied armoured force. There is only one objective in this game, a set of hills in the top left. I use my recently made
palm trees to mark objectives. So with one objective I took the opportunity to use all 3 palm tree objective markers to create an oasis.
 |
| Map of terrain and objective |
 |
| Tabletop setup |
The units for each side were selected and laid out. Each unit was diced for to determine whether it would be available for battle. As neither force has been involved in a loss, units are only excluded in a score of 1. If they had lost a battle and not been re-equiped with supplies, then a score of 1 or 2 would exclude them .
 |
| Italians reduce their units by 4 units. |
 |
| Allies are rather more fortunate and only reduce their force by 1 unit. |
The next step in setting up the game was to dice for battle events. The Italian's diced for flank attack and aggressive defence. This will mean they can advance 30 percent of their units and attack first. However, the Allies will have 30 percent of their forces off-table and able to arrive on a flank, which is diced for.
The Allies have a delayed arrival with 30 percent of their forces starting the game off table. This means they will have limited forces available on table due to the delay and flanking units. They will take time to build up their forces for an all out assault.
Both sides will have air support.
 |
| Initial position of forces |
 |
| Initial force deployment |
The opening phase of the battle had an Italian armoured car force quickly strike at the deployed Allies, successfully inflict damage on their artillery units.
 |
| An initial strike by armoured car units. |
 |
| Opening action. |
Having done their damage the armoured cars quickly retired to avoid the advancing tanks and were supported by armoured elements. Delayed Allied units started to arrive and both forces started to organise their units for the upcoming battle. Air support arrived early on and attacks for both sides produced no results.
 |
| Allied forces start to arrive in greater numbers. |
 |
| Allied air support arrives. |
 |
| Italian air support. |
 |
| Italian armour moves forward hand has initial success. |
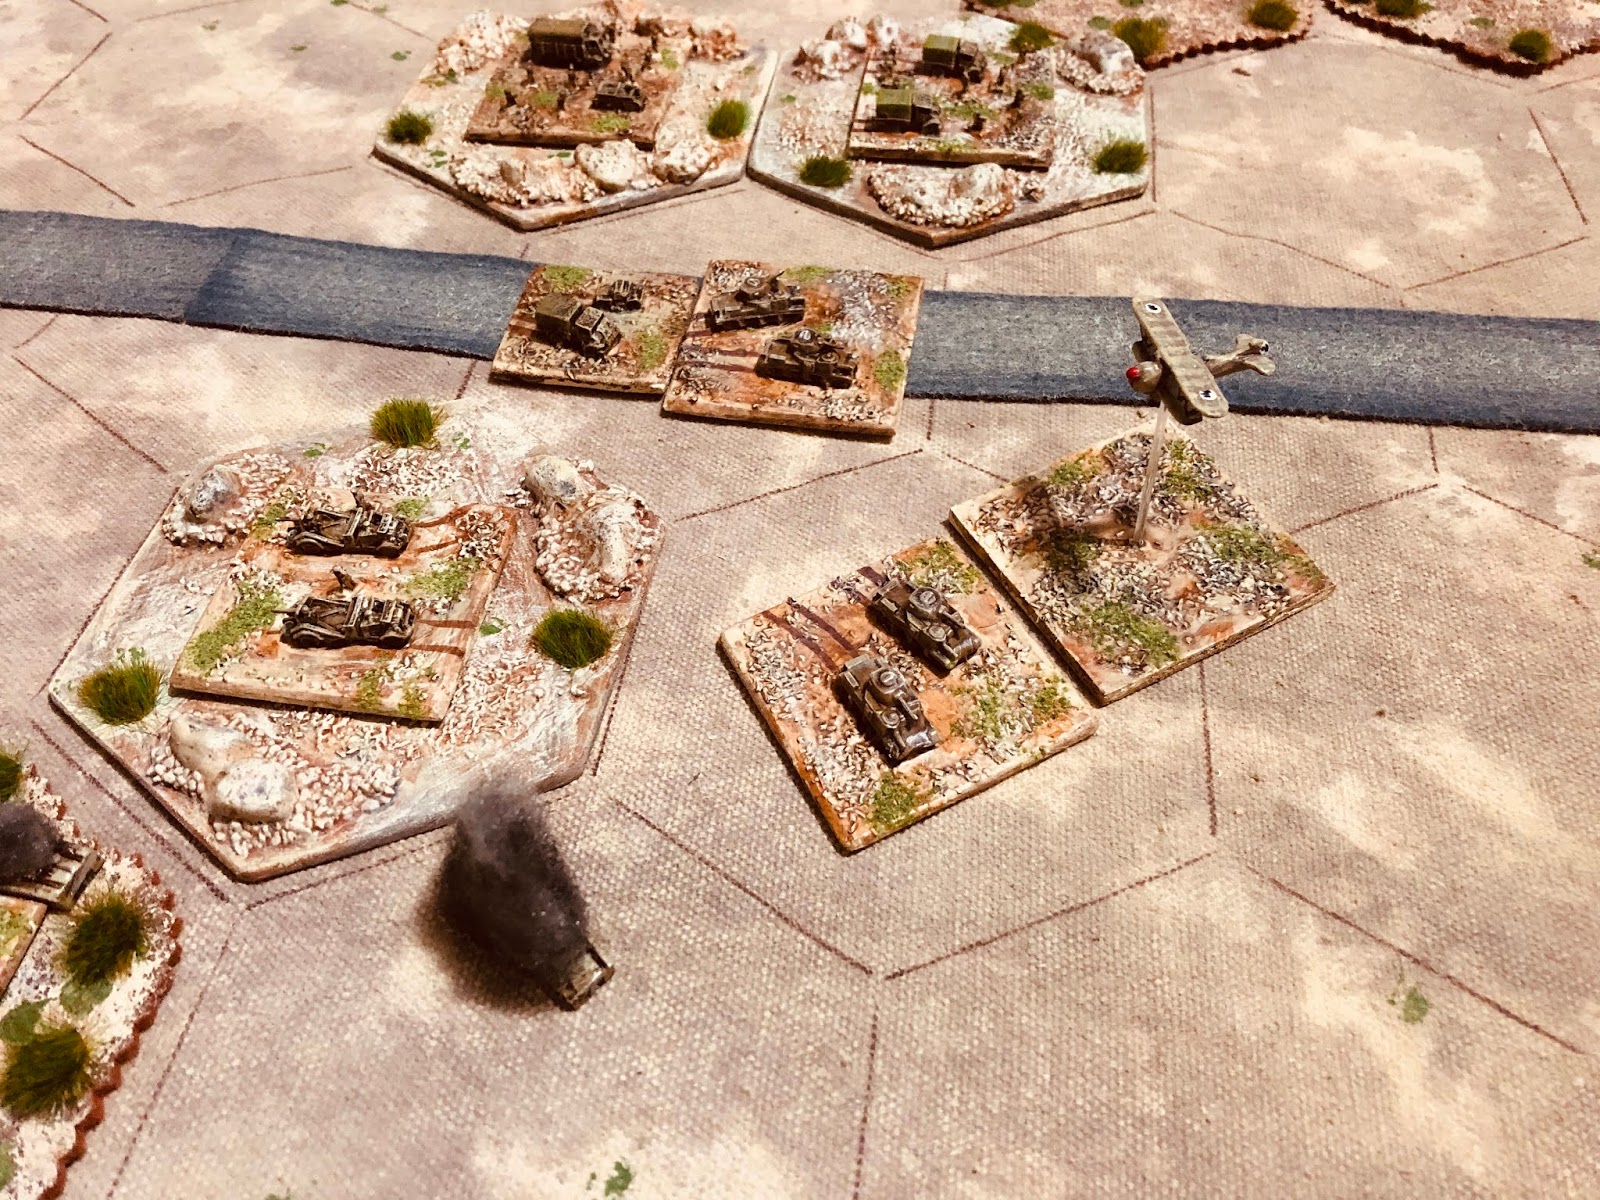
The battle started to take shape with the arrival of the Allied flanking units on the left. While in the centre tanks from both sides were engaged.
 |
| Allied flanking units arrive on the left and threaten forces defending the objective. |
 |
| Flanking forces. |
Allied Grant tanks were able to overcome the M13/40 tanks in the centre. On the flank the defending Italian forces were putting up a good defence and wearing down the attacking units.
 |
| Allied forces close in on the objective. |
 |
| The assault on the objective is underway. |
Taking of the objective proved to be very problematic. The Allies had to pause the assault to rush up more units as attacking units were whittled away.
 |
| Supporting units are moved up. |
 |
| Attack on the objective. |
The objecive was finally taken after some very stubborn defence.
 |
| A victory to the Allies. |
 |
| 25 Pounders support the attack on the objective. |
A good start to the campaign turn and Allied counterattack.


Another nice little AAR with the maps, as always, really helping in following the action. I thought that the Italians might have done enough to hold on with their initial successes, but 'twas not to be. Interesting to see what the next game will bring.
ReplyDeleteIt was a close game. A few dice rolls at the end could have gone either way. On the whole the dice seemed to favour the defenders.
DeleteI find with 1/300 units it is difficult to show the game through photos and the maps definitely help with describing the game. Thanks.
I agree with Steve. The maps aid greatly in my understand of the flow of battle.
DeleteThe Italians put up a good fight alright. Another interesting report.
ReplyDeleteOne question: How do you decide how many objectives there are per game? I've seen some games with 3 but now this one only had 1.
Thanks!
Thank you. When determining the number of objectives, this is driven by objective type and position. Details can be found here - https://gridbasedwargaming.blogspot.com/2020/04/ww2-campaign-game-scenario-setup.html
DeleteThanks!
DeletePeter, your campaign continues to provide great pleasure. The Allies are, indeed, off to a very good start for this campaign turn.
ReplyDeleteThanks, glad to know the campaign is enjoyable. It will be interesting to see if the Allies can build some momentum on that back of this win.
DeleteGreat game report. Yes, I agree the use of maps helps me follow the action better with the smaller scales.
ReplyDeleteMany thanks. I am still trying to figure out the best way to photograph this smaller scale.
DeleteGreat stuff, Peter, another very enjoyable fight. I'm glad to see the Allies making progress, with two more shots to advance in the campaign, so things are looking up! I really liked seeing both sides with close air support, too.
ReplyDeleteV/R,
Jack
Thanks. I am looking forward to see how this campaign turn unfolds with Axis forces unable to refit and re-equip any units which have been in battles.
DeleteNice to see the Italians, despite their bad luck losing units to en-route, still being used with a degree of dash in attempt to steal the initiative. It didn't work in the end but it was a valiant try - would I be right in assuming everyone's morale is the same?
ReplyDeleteThey almost pulled off a win even with their lighter tanks.
DeleteLovely game Peter, beautiful and immersive terrain, and interesting maps...
ReplyDeleteThank you kindly.
DeleteExcellent stuff, as always, Peter!
ReplyDeleteThank you. Hopefully the campaign progresses smoothly without too many tweaks to the rules.
Delete