This game report is for the first land battle of two battles to be fought in the second campaign turn. The turn represents the period 216-215 BC and the battle of Egara 216 BC is being fought in Spain where Carthage has an advantage with two armies in the region against a single Roman army. The name of the battle, Egara, was picked out from a quick Google search for Latin names of Spanish towns and rivers. From a narrative perspective sounds much better than campaign turn 2 game 1.
 |
| Campaign Map Turn 2 - Game 1 |
This game report will step through the setup, army deployment, and chance card selection. Areas where I am still testing the rule mechanisms.
 |
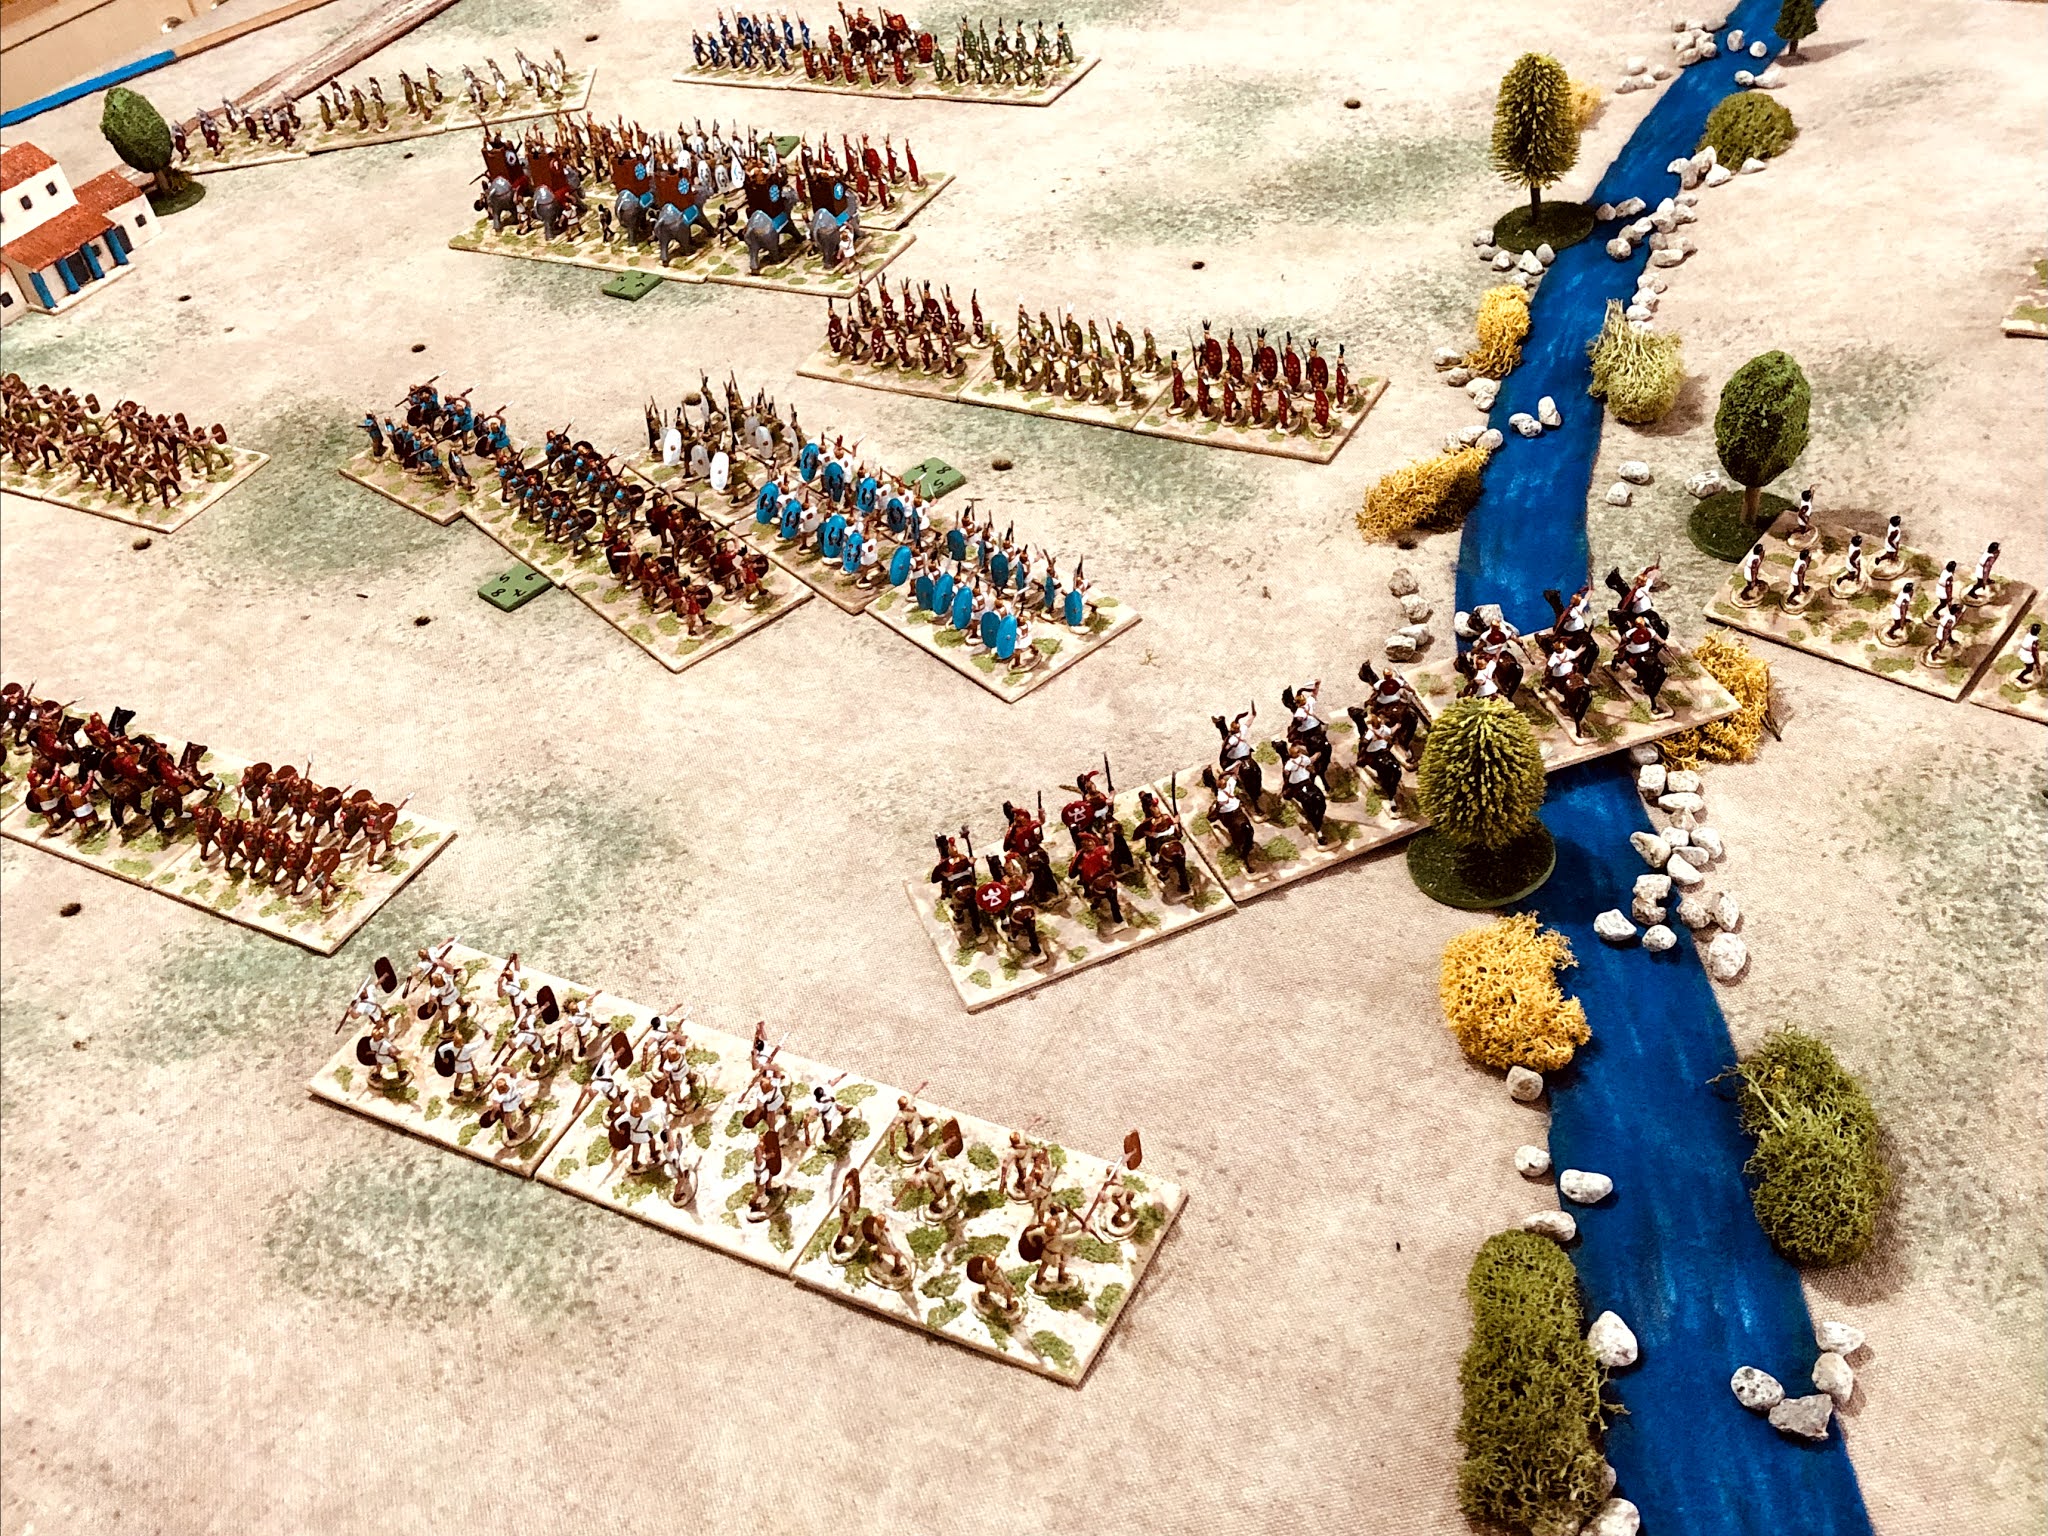
| The Roman commanders view of his troops. |
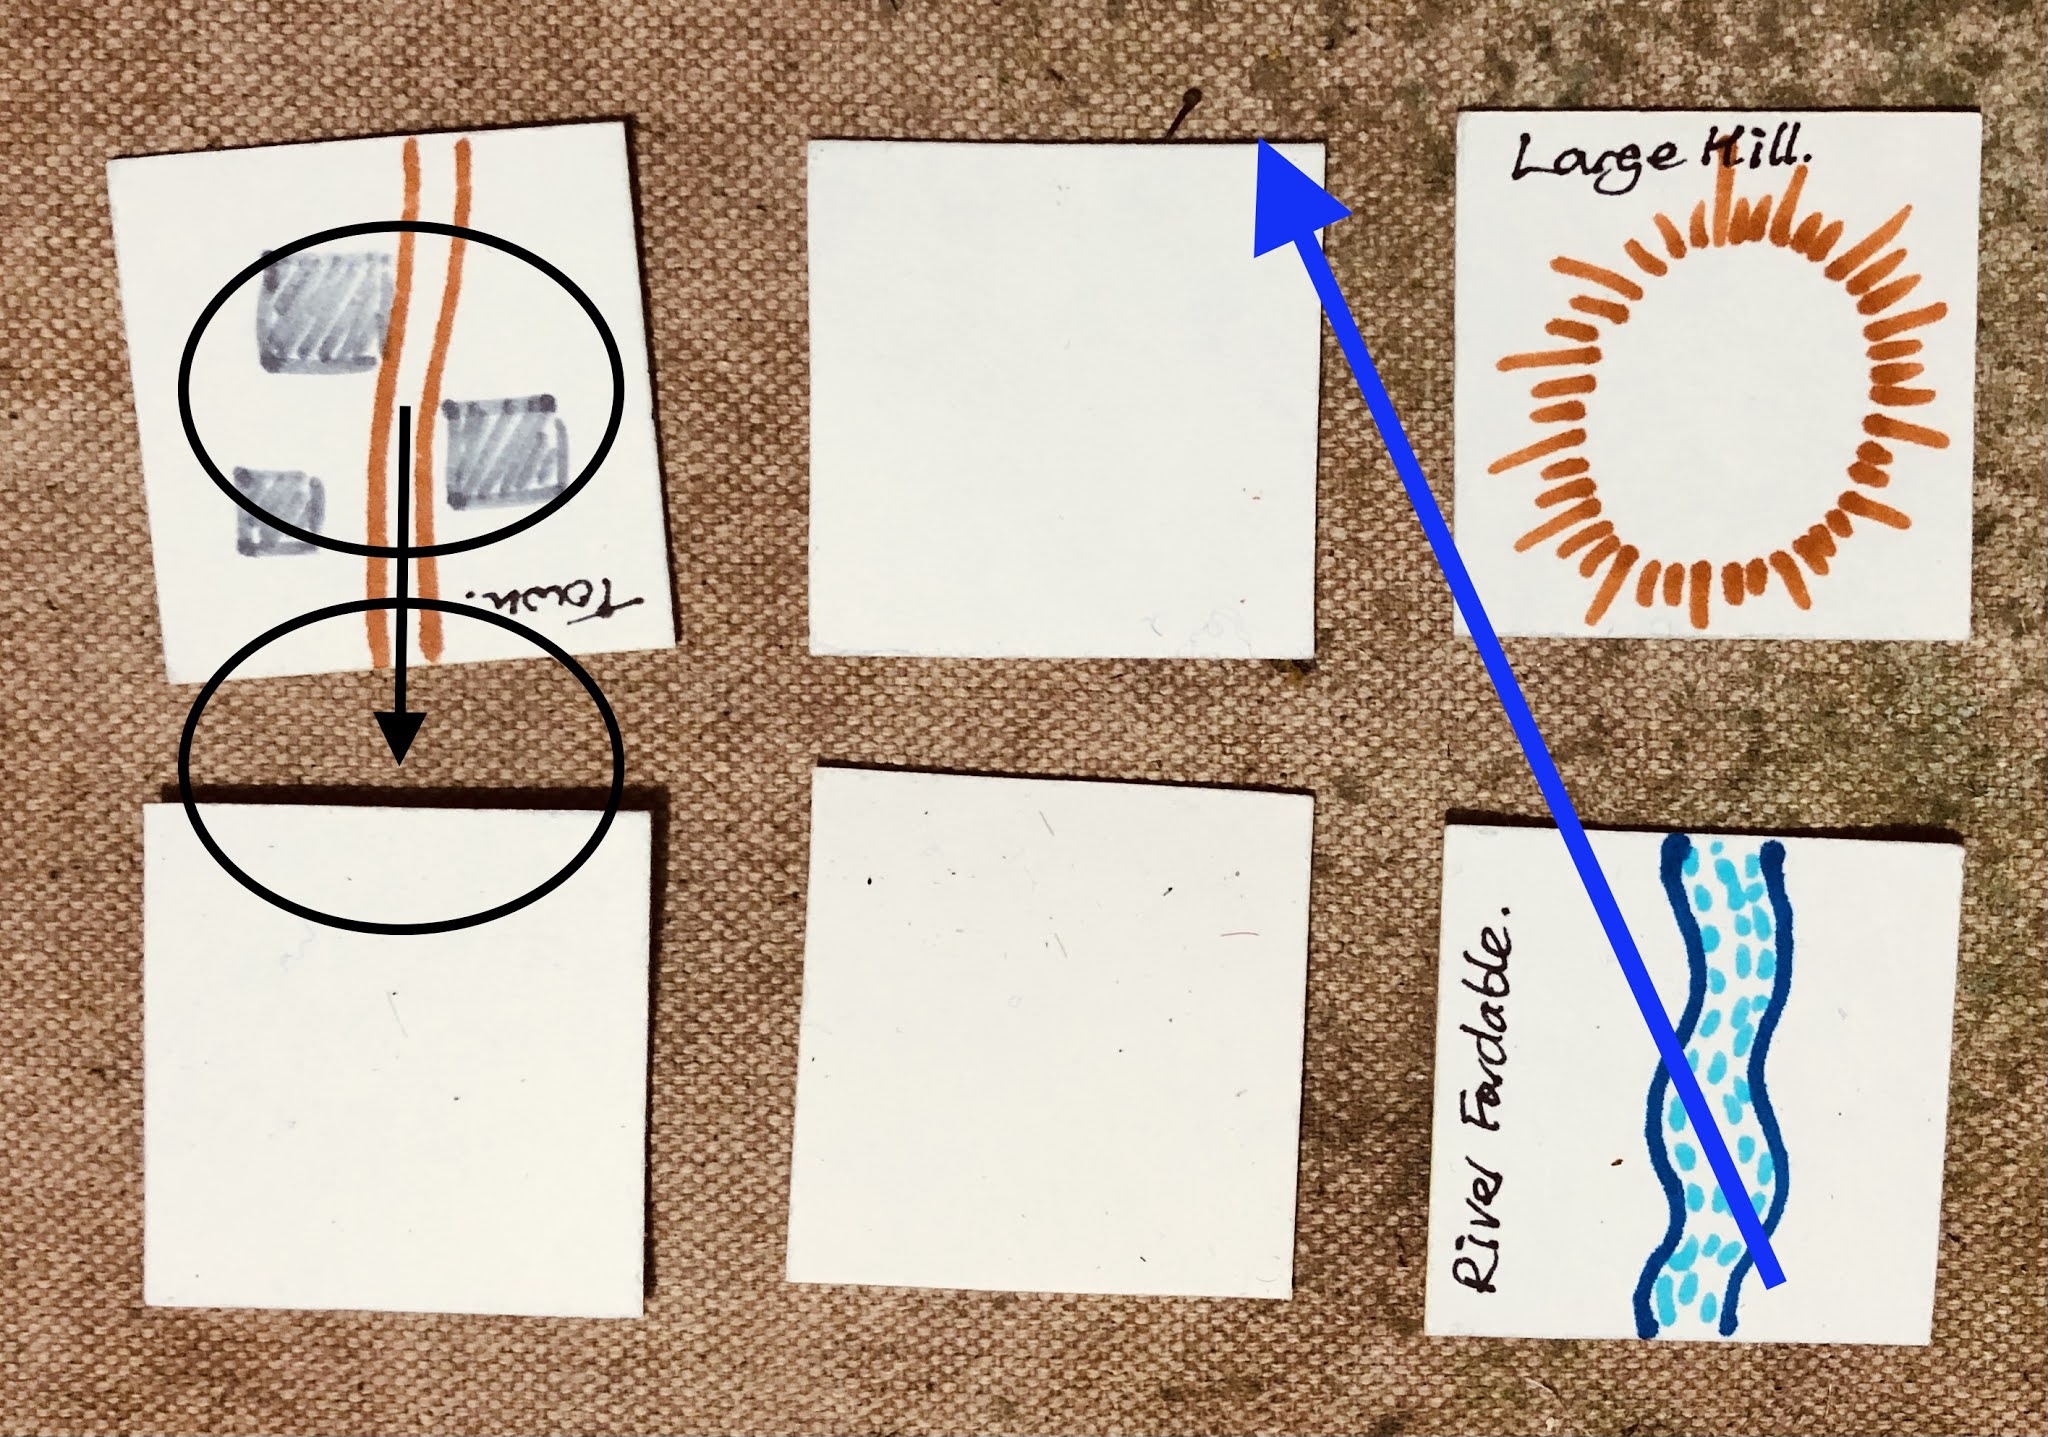
Terrain cards are used to determine the tabletop layout. One rule I am trying out is when a terrain feature appears on one of the sides and there is no feature opposite, then the feature gets moved into the centre. The example here is the town which will be placed equal distance between the base edges. This approach does not apply to the centre which I want to keep as clear as possible as armies of the period generally tried to select suitable terrain to fight on. On the other edge the fordable river will be adjusted to avoid the hill feature.
Since the last game, I now treat towns as impassable terrain for the deployed units, even for light infantry. Should towns appear they will be useful to help protect a flank.
 |
| Terrain cards drawn from a deck of cards decide the tabletop layout. |
Rome won the dice-off to decide which army begins deployment. While there is always an advantage to seeing the opposition deploy first, the trade-off is the army that deploys first gets to move first in the game. I used the same approach as last time, no tweaking of these deployment rules:
- Armies deploy their first line of units up to 18” from their baseline. Only cavalry, light infantry, and warbands (which move greater than 6” normally) can be placed on flanks. There are no restrictions on units deployed in the centre.
- Armies deploy their next line of units up to 12” from their base edge. The same unit restrictions apply for the flanks.
- Armies deploy their final line of units up to 6” from their base edge. Heavy infantry can be rushed into position and placed on the flanks, but must sustain 25% hits if used on the flank.
 |
| A cheat-sheet to remember the deployment rules |
Deploying 1st Line
Carthage deploys elephants and light infantry across the centre and a bit into the flank areas. This is allowed as all these unit have a movement allowance for more than 6 inches. In response Rome positions two heavy infantry in the centre and extend the line into the flank area with light infantry. They position their light cavalry on the hill.
 |
| First line deployments. |
Deploying 2nd LineCarthage position their heavy infantry in the centre and their Gauls partially in the centre and flank areas (they move greater than 6 inches). Rome continues to position two heavy infantry units in their centre and second line which is 12 inches from their base edge.
 |
| Second line deployments. |
Deployment 3rd LineThe last of Carthage's two heavy infantry is placed in the third line along with their heavy cavalry on the flank, but close to the centre area. Rome's last of their five heavy infantry are placed in the third line 6 inches from the base edge.
 |
| Third and final line deployments. |
With the tabletop ready for action the one remaining step is to prepare the chance cards. There are no exceptional leaders involved, Hannibal or Scipio (who arrives in campaign turn 5) to influence the card choice. But the Carthaginian army benefit from fielding more armies in the Spanish region and will replace one
No Event card with a
Rally card.
 |
| Chance cards used in the game. |
A closer look at the cards shows there are differences between the cards used for Carthaginian and Roman armies. These differences are to reflect the experienced mercenaries used by Carthage versus Rome with their well discipline legions and army organisation. Unfortunately Roman armies are yet to be well led in this campaign.
 |
| The Carthaginian General's view before battle begins. |
On to the game...
The battle opened up with both sides advancing in the centre with neither side gaining any immediate advantage. Gradually the Roman heavy infantry were gaining an advantage until a couple of Carthaginian initiative cards (allowing extra attacks or moves) reversed the Roman infantry's advantage.
 |
Both centres advance into contact.
|
 |
| Carthaginian cavalry quickly swing round on the advancing Roman flank. |
After a brief pause where the centres for both armies to reorganised themselves they closed again for battle. The centre was being won by the well disciplined Roman heavy infantry, while on the river flank Carthage light infantry secured the hill from Rome's light cavalry.
 |
| The centres reorganise. |
 |
| Carthage send in their last heavy infantry unit and general to shore up the centre. |
In the final couple of game turns the weakened Carthaginian centre is supported with heavy cavalry and light infantry.
 |
| As the day closes in there is a stand off between the opposing armies. |
The game turns ran out before Carthage could make any final attacks. I opted to call the game a draw even though Carthage has four units to Rome's two units. This was mainly because Carthage's heavy infantry were all but shot and in no fit state to lead an attack, while Rome's was still in a good state. Both sides will be able to reorganise their troops as neither army had been routed and as a consequence will not forfeit an army in the campaign.


Love the set up phase. Very inspirational, and like most great ideas, uniquely simple with the card structure. The figures look superb.
ReplyDeleteI am really enjoying the deployment aspects of the game and the planning which goes into it. As for the individual sets of chance cards, they do add some more depth to the games.
DeletePeter, your setup and game prep are always interesting and inspiring (to many, I bet). Watching these game systems evolve is fascinating. Actually playing the game is secondary.
ReplyDeleteHi Jonathan, I find posting about how the system evolve through a series of campaign games to be a useful and fun way of tracking the changes. I am glad you enjoy reading about this process too. Many thanks Peter.
DeleteThe deployment does work well as does the limited number of units - keeps narrative simple. A draw eh? I think that equates to a 'moral win' for Rome facing, as they were, two armies. So has the tide turned? We'll have to wait and see but with Hannibal present at hte next battle it seems unlikley.
ReplyDeleteLooking at the state of the armies in this game a draw seemed reasonable, and with a series previous wins for Carthage it was good to see a Roman win. I am still considering some rules for defining what is a marginal win, major win, or draw.
DeletePeter, some really nice ideas there in getting set-up. Love the campaign map and execution, it reminds me of a boardgame that I played a couple of years ago, which became like ‘Wack-a-Mole’, every time the Romans sorted a major theatre out and moved on, an enemy threat would suddenly pop up in a place that you ‘thought’ you had sorted two turns before! :-). Very good.
ReplyDeleteHi Norm, the map is created in Google Slides with an image of Europe cut to size as a background image and a few shapes added. It is a little bit different to my previous hand drawn maps. Thanks, Peter
DeleteThis is great wargaming, proper campaigning in a practical way. I look forward to the next battle.
ReplyDeleteRegards,
Paul.
Hi Paul, thanks. I too am looking forward to the next game. It will be an interesting contest with Rome having the numbers advantage against Carthage with an exceptional leader (Hannibal). Cheers, Peter
DeleteOooh I like the 3-line deployment system! Will have to try that next time!
ReplyDeleteThanks. I hope the deployment approach works for your next game.
DeletePeter, I'm really keen to see how this campaign plays out. My first Ancients army was Carthaginian, so Punic Wars has always been a big interest for me. And an area of disappointment for wargaming rules ... none have dealt with deployment in multiple lines. So I'm watching with interest.
ReplyDeleteThe campaign so far has gone the way of Carthage and it will be interesting to see if it starts to balance out. The simple rules I use don't specifically deal with multiple lines, but the deployment rules do force multiple lines and the unit widths (12 inch.) deter units moving out of their line other than to replace eliminated units.
DeleteCatching up. That was a great game. Could even have been a Roman victory, given that the all important legions were still battle-ready?
ReplyDeleteI really like the look of these games. The figures and beaut, but so is the terrain? Is that villa scratch built? It looks great. The extras on the river really add to the aesthetics.
Regards, James
Thanks, the villa is scratch built using off cuts of wood and some dowel.
ReplyDelete