Weekends that are rather miserable weather-wise, especially one's involving rain, always provide opportunities to get on with some wargaming. This Saturday was one of those days and gave me the opportunity to setup a scenario for the attack on Beersheba, Palestine, 31st October 1917.
The attack on Beersheba was part of an overall plan to outflank the Turkish line and eventually take Gaza. The attack was made by the ANZAC Mounded Corps and is known for the charge by the Australian 4th Light Horse Brigade. They galloped across the plain to attack the entrenched Turks, and were successful in taking the town and importantly its wells.
The starting point for this scenario was from the "last crusade" rules (the scenario was kindly sent by Duc de Gobin - https://warfareintheageofcynicsandamateurs.blogspot.com). The scenario used a greater number of units than my current forces, which are based around One-Hour Wargames (OHW) games with 4 to 6 units per side.
The scenario had two objectives, the town of Beersheba and its water wells and a defended hill called Tel El Saba. I remembered OHW had a scenario with two objectives (scenario 21) and was able to use that to get an idea for setting up a game with balanced forces. So with some reposition of the town (Beersheba) I was able to rework the OHW scenario into a version for the attack on Beersheba.
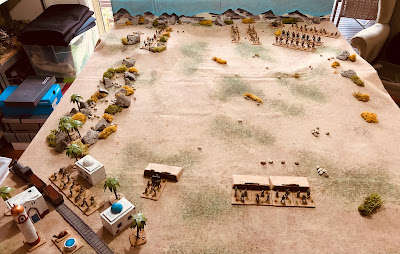 |
| The tabletop setup for the game |
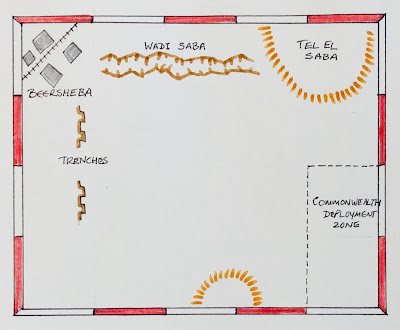 |
| The tabletop is 5x4 foot. Wadi Saba is impassible and Tel El Saba is difficult terrain where units can claim cover when positioned on it. |
Turkish Order of Battle:
- 2 Infantry
- 1 Artillery
- 1 Infantry with machine gun support
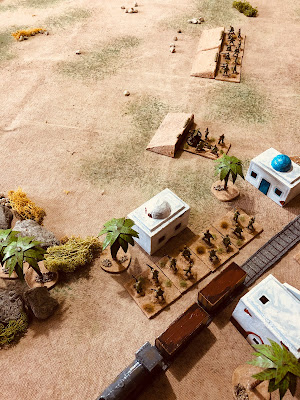 |
| Turkish troops occupy the town and trenches |
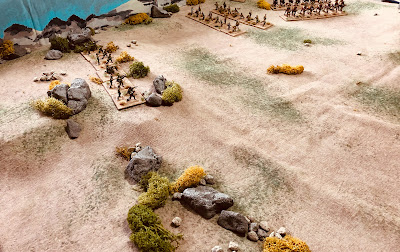 |
| The Turks occupying Tel El Saba |
- 2 Infantry
- 1 Artillery
- 1 Infantry with machine gun support
- 2 Cavalry/Mounted Infantry
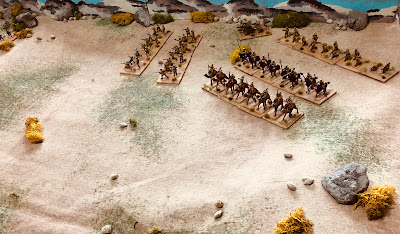 |
| Commonwealth troops deployed |
- Cavalry/mounted infantry can charge providing they have 8 or less hits. Over 8 hits and they cannot charge. Roll D6+2 when attacking and retire 6" if enemy unit not eliminated.
- Units are eliminated after taking 17 or more hits.
- Units which take hits are tested for disorder. Roll a D6 and multiply the score by 4. If the total is less than or equal to the hits, the unit becomes suppresses. Suppressed units reduce movement by half and shooting by half. (I use an explosion marker to remember when a unit is suppressed.)
- Suppressed markers are removed at the end of a player's turns.
Looks like a great set up Peter, the rail lines look particularly effective.
ReplyDeleteThank you, I could not resist having recently making a train, adding them to the town (Beersheba did have a rail line).
DeleteSuperb terrain!
ReplyDeleteThank you kindly. It is all scratch built.
DeleteGreat game
DeleteWhat are the base sizes 40 × 40 ?
Pete
Bases are 2x2 inches (50mm) or 2x3 inches for artillery.
DeleteThank
DeleteAnother game - I'm going to copy!
Interesting, the only edge the Commonwealth has are the two mounted units. Surely this isn't enough to overcome an entrenched position? We'll have to wait and see...
ReplyDeleteIt is a tight game and I do need to paint another mounted unit.
DeleteGreat work there Peter and I really do love the whole aesthetic of your games:).
ReplyDeleteThanks. It can take a bit of trial and error to get the look you are seeking with scratch building terrain.
DeleteSuperb Peter. You are making this period come alive - your campaign rules will work wonderfully for these scenarios I think.
ReplyDeleteThank you kindly. It is a really interesting campaign and certainly one I am enjoying reading about and painting the various forces.
Delete