Monday, 13 April 2020

WW2 western desert campaign turn 2 - game 2 report

This battle report is the second game of the current campaign turn. This is a must-win game for the Axis forces who having previously seen their earlier attack by forces from the Ariete armoured division fail to make a breakthrough.

Campaign turn 2 continues.
Elements of the 21st Panzer division moved forward and soon found themselves attacking the positions of a refitted 7th Armour division (when the hidden marker was revealed on the campaign map).

The usual selection of terrain cards determined the tabletop and 3 game objectives. Elements of the 21st Panzer division will arrive at the top of the map. They will have few forces to deploy on the tabletop as: 1) their battle event has them surprised so 30% of their forces will arrive late, and 2) they also have another 30% of their unit involved in a flanking attack.

Game map and objectives.
The Allies battle event was advanced defence which was the reason Axis forces have a flanking force. The 7th Armoured division units are positioned well forward on the tabletop.

The tabletop layout and deployment shows how weak the initial Panzer force is.
The opening stage of the battle had German forces quickly take up defensive positions on the escarpment and hills. The Allies quickly launched an attack with all their armoured elements before other German units arrive.

Initial moves has the 7th Armour quickly engage the advance elements of the 21st Panzer.
Advance German elements are quickly placed under pressure and any thoughts of attack were quashed as they take up defensive position. An 88mm is positioned on the escarpment.
The German commander started to drip feed in his delayed forces as they arrived into the defensive line, and flanking forces were diverted to attack the Allied flank of their armoured attack.

The Allied attack while making good progress have to divert units to block German units arriving on the flank.
Germans rush all available forces, including flanking units, to help fend off the Allied armoured attack.
At the height of the Allied attack they get a foothold on the hill, one of their objectives.
The arriving German flank and reserve units were eventually able to turn back the Allied armoured attack. The Allies then pushed forward a few units from the town in an attempt to hamper and disrupt the German units as they attempt to push forward to take the Allied occupied hills.

The final stages of the battle as momentum changes in favour of the German forces.
German units regroup and prepare to attack the Allied defended hill and objective.
Having regrouped and brought forward artillery and AT guns to support the attack on the hill. German units began their attack after seeing off a minor attack from the town.

German forces are able to take the hills and a second game objective.
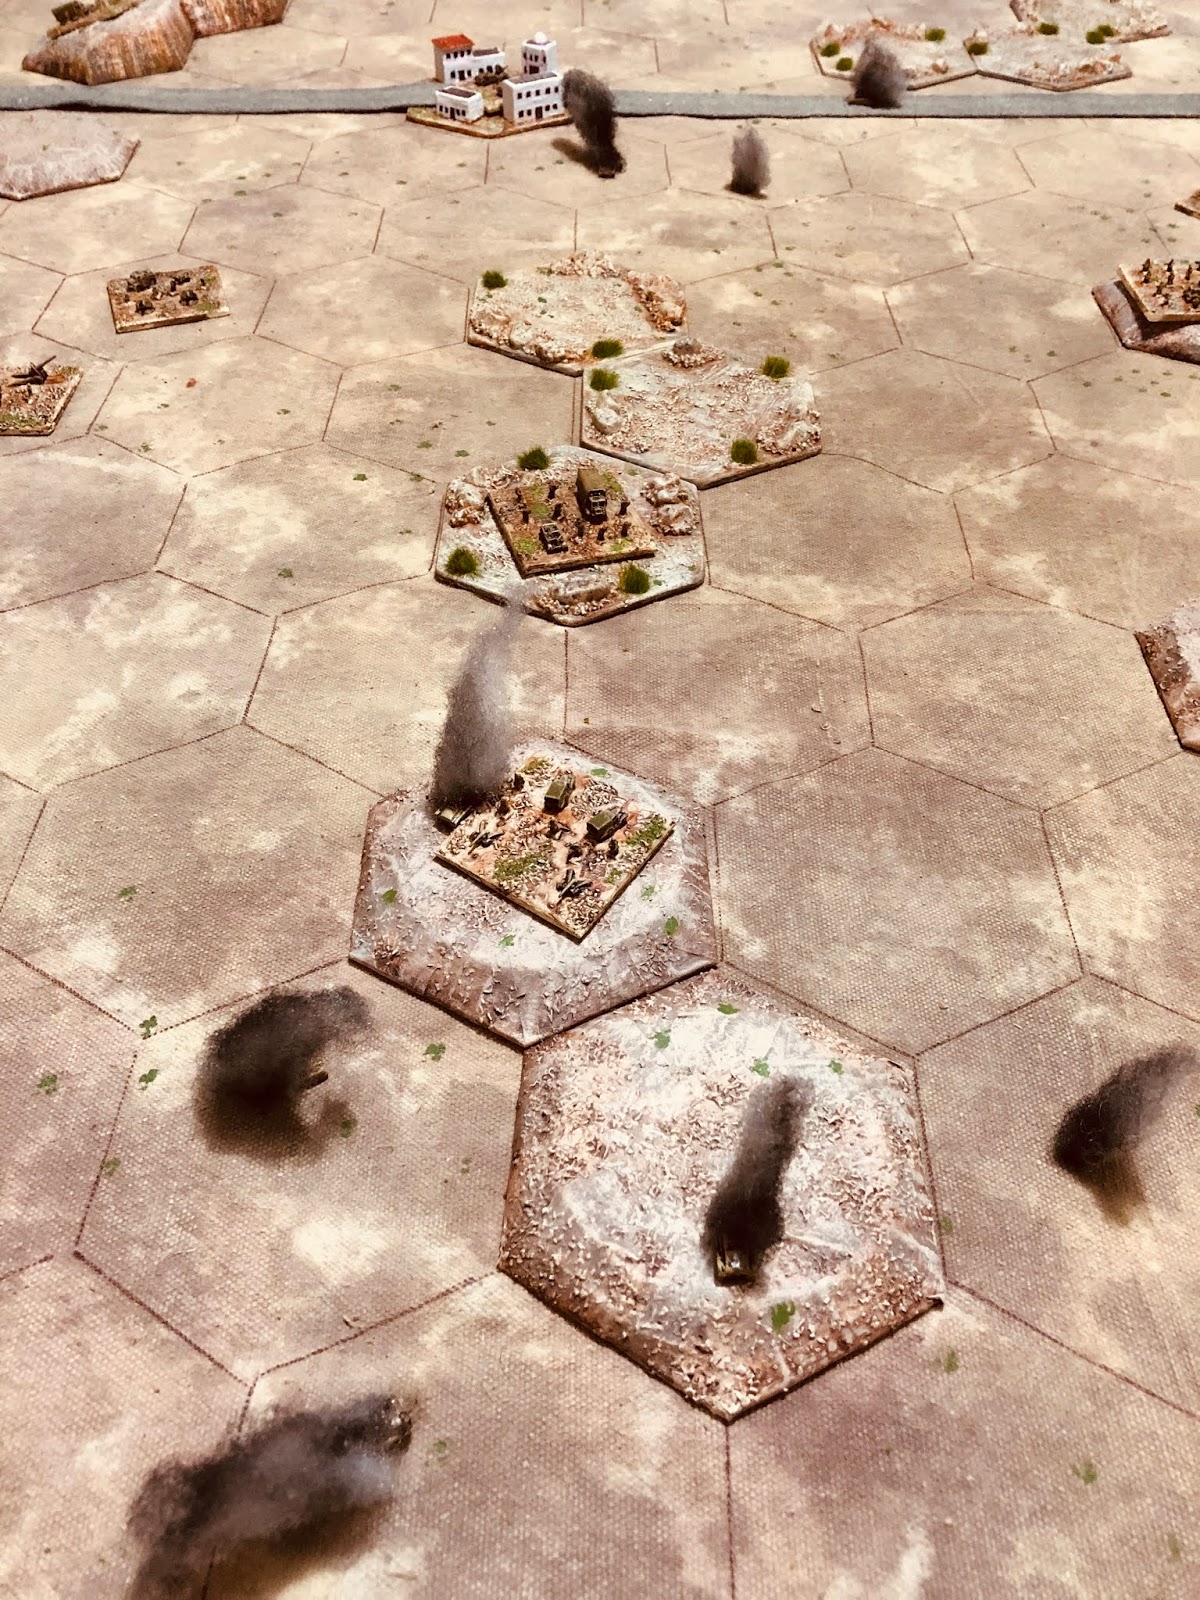
The longer shooting ranges of German guns puts pressure on Allied defenders. Who unable to just sit back were forced into making a series of attacks to disrupt the German assault. Smoke screens were used with some of the counter attacks.
So a narrow Axis success and the campaign turn will now go down to a third and deciding game.

I have played the next game and am trying to decided whether to post the report or the draft rules (a variant of Lock 'n' Load's Tanks on Tank game rules).

Saturday, 11 April 2020

WW2 Western Desert terrain additions

This weekend I have taken the opportunity to tidy up my town, create some dunes which tanks can hide behind and suddenly appear, and create some palm trees which have no bearing on the game other than as an aesthetic.
Something resembling palm trees
I had been trying to figure out how to create a few 1/300 scale palm trees for a while without success. So this weekend I went through a container of stuff I had squirrel away for possible future use and found some plastic foliage. By cutting off the tips of the plastic foliage and trimming them up I found I had something that resembled a palm tree.
Before painting the trimmed trees are stuck into a MDF base.
An oasis perhaps? Or mirage?
I had a town hex, but positioning the units so they faced a hex side was proving problematic, so I cut away the buildings to make them free standing.

As much as I liked my hex based town it was not practical.
The building were cut away to be free standing.
The final terrain feature I wanted was some sand dunes to block line of sight and be terrain features tanks could lay in wait to surprise units getting too close.

A couple of Grants lay in wait.
On the campaign side I have played another game and hope to post it soon along with the rules as they stand.

Thursday, 9 April 2020

WW2 Western Desert Campaign - Game 3

This game report, game 3 of the campaign, has an Italian armoured division launching an attack on a South African infantry division. Having decided upon the terrain the next step was deciding the type of engagement and battle events using dice (see the previous post for details). The Italian force (with a dice score of 2) was impacted by Allied interdiction coming into this engagement and as a result their force is reduced by 20 percent. However, they will benefit from an air sortie during the game.

Allied forces (with a dice score of 5) are taking an aggressive defensive stance, This will allow them to reposition 30 percent of their forces on the tabletop so long as they are not within 3 hexes of any Italian unit. However, an aggressive stance allows the Italians to allocate 30 percent of their available force to arrive on a flank.

There are 3 objectives the winner will be the side holding the most objectives.

Map of terrain showing the 3 objectives
Tabletop is setup and both forces deployed. The attacking Italians are restricted to the first 2 hex rows. While the Allied force are deployed on half the tabletop. After initial deployment the Allied force can move 30% of their units anywhere on teh tabletop, but 3 hex away from enemy units.

Initial deployments.
Allies units reposition themselves forward on the Italian left flank.
The battle began with Italian armour advancing along the road and engaging with Allied armour. An advance group of tanks, 2 Per. Portees and carriers engaged the Italian left flank units.

Opening moves.
Italians fight off an aggressive defence on their left.
Armour clashes on the road and an early loss of Matilda tanks.
A flanking force of Italian armour arrives and threatens to capture an objective. Allied armoured cars race to support infantry holding on to the hill.

An armoured flanking force arrives.
Fierce fighting takes place on the flank over the hill objective.
After some fierce fighting Allied units were able to fight off the flanking armour. On the opposite flank Allied armour was advancing down the road and threaten Italian rear elements as a combined Italian force including some armour made a final attempt to take the objective.

Allied armour advances down the road
Allied tanks threaten Italian rear units.
Allied defences were able to withstand the last Italian attack and their remaining tank unit forces the Italian rear units to retire.

Final positions
Allied units hold on to the hill.
A hard fought victory to the Allied defenders. There was a point when the Italian flanking force arrived I thought the Allied defenders were going to get swept away, but infantry units were able to just hang on long enough for supporting units to arrive. The Matilda tanks after an initial setback were able to push back the lighter armoured M13/40 tanks back down the road.

Sunday, 5 April 2020

WW2 campaign game scenario setup

To avoid having too much text in this post as I quickly run through the rules for setting up a game having already determining terrain. I have included a few photographs from the most recently played game which is yet to be written up.

A game in progress
These scenario rules are heavily influenced by the "Wargaming Scenarios" chapter in "Wargaming Nineteenth Century Europe 1815-1878" by Neil Thomas.

Air support
Having decided upon the terrain and identified the order of battle from the available units (see here for an example) it is then time to figure out the scenario which done in two steps:

  1. Pre-battle events impacting the force deployment and unit availability
  2. Deciding scenario objectives

Pre-Battle Events

When deciding upon the pre-battle events roll a dice for both players and on a score of:

1-2 Interdiction
Enemy air support has attacked and delayed important supplies and the arrival of reserves. 20% of the force (rounding down any fractions) must be removed. The units removed cannot be of all one unit type and must include a variety of types. For example: tank, armoured cars, infantry, AT guns, Artillery.

The opposing force will not have any air support available during the game as it was directed to interdiction activities. However, air support is available to the side impacted by interdiction.

3-4 Defence in Depth
The defence has held back part of its force in reserve ready to be deployed to bolster a defensive line or form part of a counterattack. 30% of forces (rounding fractions down) are to kept in reserve, They cannot include artillery units.

The reserves can be deployed any time after turn 4 on a successful dice score of 4+. They arrive on the players base edge or rear flanks (see photo below).
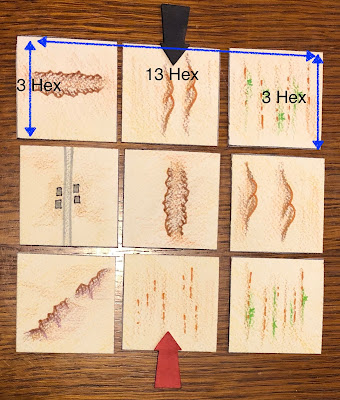
Reserves can arrive on a players based edge (13 hexes) or rear flank (3 hexes). The tabletop is 13 hex wide and 10 he deep.
5-6 Flank Attack and Aggressive Defence
The attacking force is able to make a flanking attack. 30% of the forces (rounding up fractions) are involved in the flank attack. The flanking force cannot contain any artillery units.

The flanking force can be deployed any time after turn 5 on a successful dice score of 4+. They arrive on either flank but not on the last 2 rows on the defenders base edge (see photo below).

A flanking force can arrive on either flank, but not close to the defenders base edge. The side edges on my tabletop measure 10 hexes.
The defending force once all units are deployed (bar the flanking force) can reposition 30% of its units (rounding down) anywhere on table top providing they are move than 3 hex from any enemy units.

Deciding Scenario Objective

Between 1 to 3 scenario objectives are now assigned to key terrain features. The tabletop is divided into 3 rows from one side to the other aligned to the terrain cards. In each row 1 objective can be placed using the following rules:

  1. Place objective on hill (when placing the 3 hills in a zone 2 are always placed adjacent)
  2. Place objective on Escarpment
  3. Place objective on town
  4. Hills take priority over escarpments, which in turn take priority over towns
  5. If none of there above are terrain features in a row, then no objective is placed
  6. If 2 hill features are in a row dice to see which is the objective

See example below...

A tabletop showing the zones and 3 objectives
Note - This approach to assigning objectives allows the defence when switching objectives to deprive the attackers of having an objective in their deployment zone. Making it difficult to gain a victory with 2 objectives. While the attacker can switch terrain cards to move objective apart to spread defensive efforts.

Saturday, 4 April 2020

Campaign and setting up tabletop terrain

This post covers the campaign rules for setting up the tabletop terrain and how the campaign map has an influence. There are some aspects of the terrain cards I have covered off in previous posts, but have repeated them briefly for completeness.

Terrain cards containing: road, road/village, 2 marsh,  2 escarpment, 4 hill, 2 scrub, 3 wadi/rough terrain, 3 open.
The first step is to shuffle and start drawing cards until a square of 9 cards is completed. Some cards which are drawn are discarded based upon terrain features on the campaign map using the following guidelines:

  • Marsh cards are ignored if there is no marsh feature in the campaign zone being battled over.
  • Cards with roads/tracks are ignored if there is already a card containing a road already drawn.
  • Escarpment cards are ignored if there is no escarpment feature in the campaign zone being battled over.
  • Open cards are ignored. If there is already an open card selected when there are mountain features in the campaign zone being battled over.

Campaign map
Once the 9 cards are selected:

  • The defending player selects their base edge
  • The defending player can switch two adjacent terrain cards backwards and forwards (vertically as pictured)
  • The attacking player uses the opposite table edge and can switch two adjacent terrain cards sideways (horizontally as pictured)

Here are the cards for the first battle of campaign turn 2.

9 cards are selected. When drawing the cards a 2nd road and a marsh card were ignored.
Allied forces select the base edge.
Allied forces switch any two adjacent cards (vertically)
Axis forces switch any two adjacent cards (horizontally)
Terrain determined and ready to be transferred to the tabletop.
The tabletop I am currently using for this campaign is hex based and is 13 hexes wide by 10 hexes deep.
Tabletop with a battered cardboard backdrop 13 hexes wide by 10 hexes deep
All the terrain fits nicely into 4 plastic draws.
When transferring the cards to the tabletop the following dimension of hexes is used to reflect the cards.
The tabletop is divided into areas
I use the following as a guide for laying features on the tabletop:

  • Place roads first and they run from one base edge to the other. All other terrain will fit around the road.
  • 3 terrain features per area
  • If a feature cannot fit, eg escapements due to a road, I use a short 2 hex escarpment and hill.
  • Wadi/Rough terrain must be one feature of 2-3 hexes
  • Marsh terrain must be one feature of 2-3 hexes

A completed tabletop
The next post will cover the rules for setting up the forces involved in the game.

During this week I managed to have a Jacobite game using my Paper Soldiers. They are all from the Peter Dennis book and are photocopied to increase their size to 42mm.
Rules written up in zine format.
Scenario 18 from One Hours Wargames is well underway
The Highlander counter attack is well underway


Thursday, 2 April 2020

WW2 Western Desert Campaign - Turn 2

The first campaign turn saw Axis forces successfully take the offensive and after two successful battles forced an Allied retirement of one zone on the campaign map.

Previous campaign turn
Turn two of the campaign begins with the flow of supplies. These can be interrupted and must be diced for each campaign turn. Axis forces get supplies 80% of the time and Allied forces 90% of the time. A couple of rolls of a D10 determines Axis forces have their supplies interrupted and Allied supplies delivered.

The next step (for forces which received supplies) is to determine where to direct supplies. There are three options:
  1. Prepare defences - The defending player’s units will have prepared positions and minefields.
  2. Reequip units - Players attempt to recover lost units for all their divisions. On a 4+ the units are returned to service.
  3. Launch attacks - When both players decide to attack roll the dice to decide which player attacks, if drawn the Axis player is the attacker. The losing player’s supplies will instead be directed to reequipping units.
In this turn the Allies decide to direct their supply effort towards reequipping units, while Axis forces decide to continue the offensive and launch attacks.

Current positions
The Allied units are turned over and shuffled then placed down face first. Axis forces reorganise their forces and decide the offensive will begin with an assault by the Ariete division. This division did not see action in the previous campaign turn so is carrying no losses into this turn. The opposing Allied division is then revealed as the 1st South African division.

As attackers the Axis divisions are lined up and the opposing Allied divisions shuffled the placed face down.
The first attack is decided and the opposition is revealed.

Next couple of posts will cover how terrain cards are transferred to the tabletop, and how the type of game is determined.

Finally, I have had to turn on comment moderation. An unfortunate but necessary measure at the moment due a a series of nonsensical advertising comments.